Dust Collection. ![]()
1 Like
I was wrong. My 2" system is really 2.5" but i had to go into my old orders to find that out.

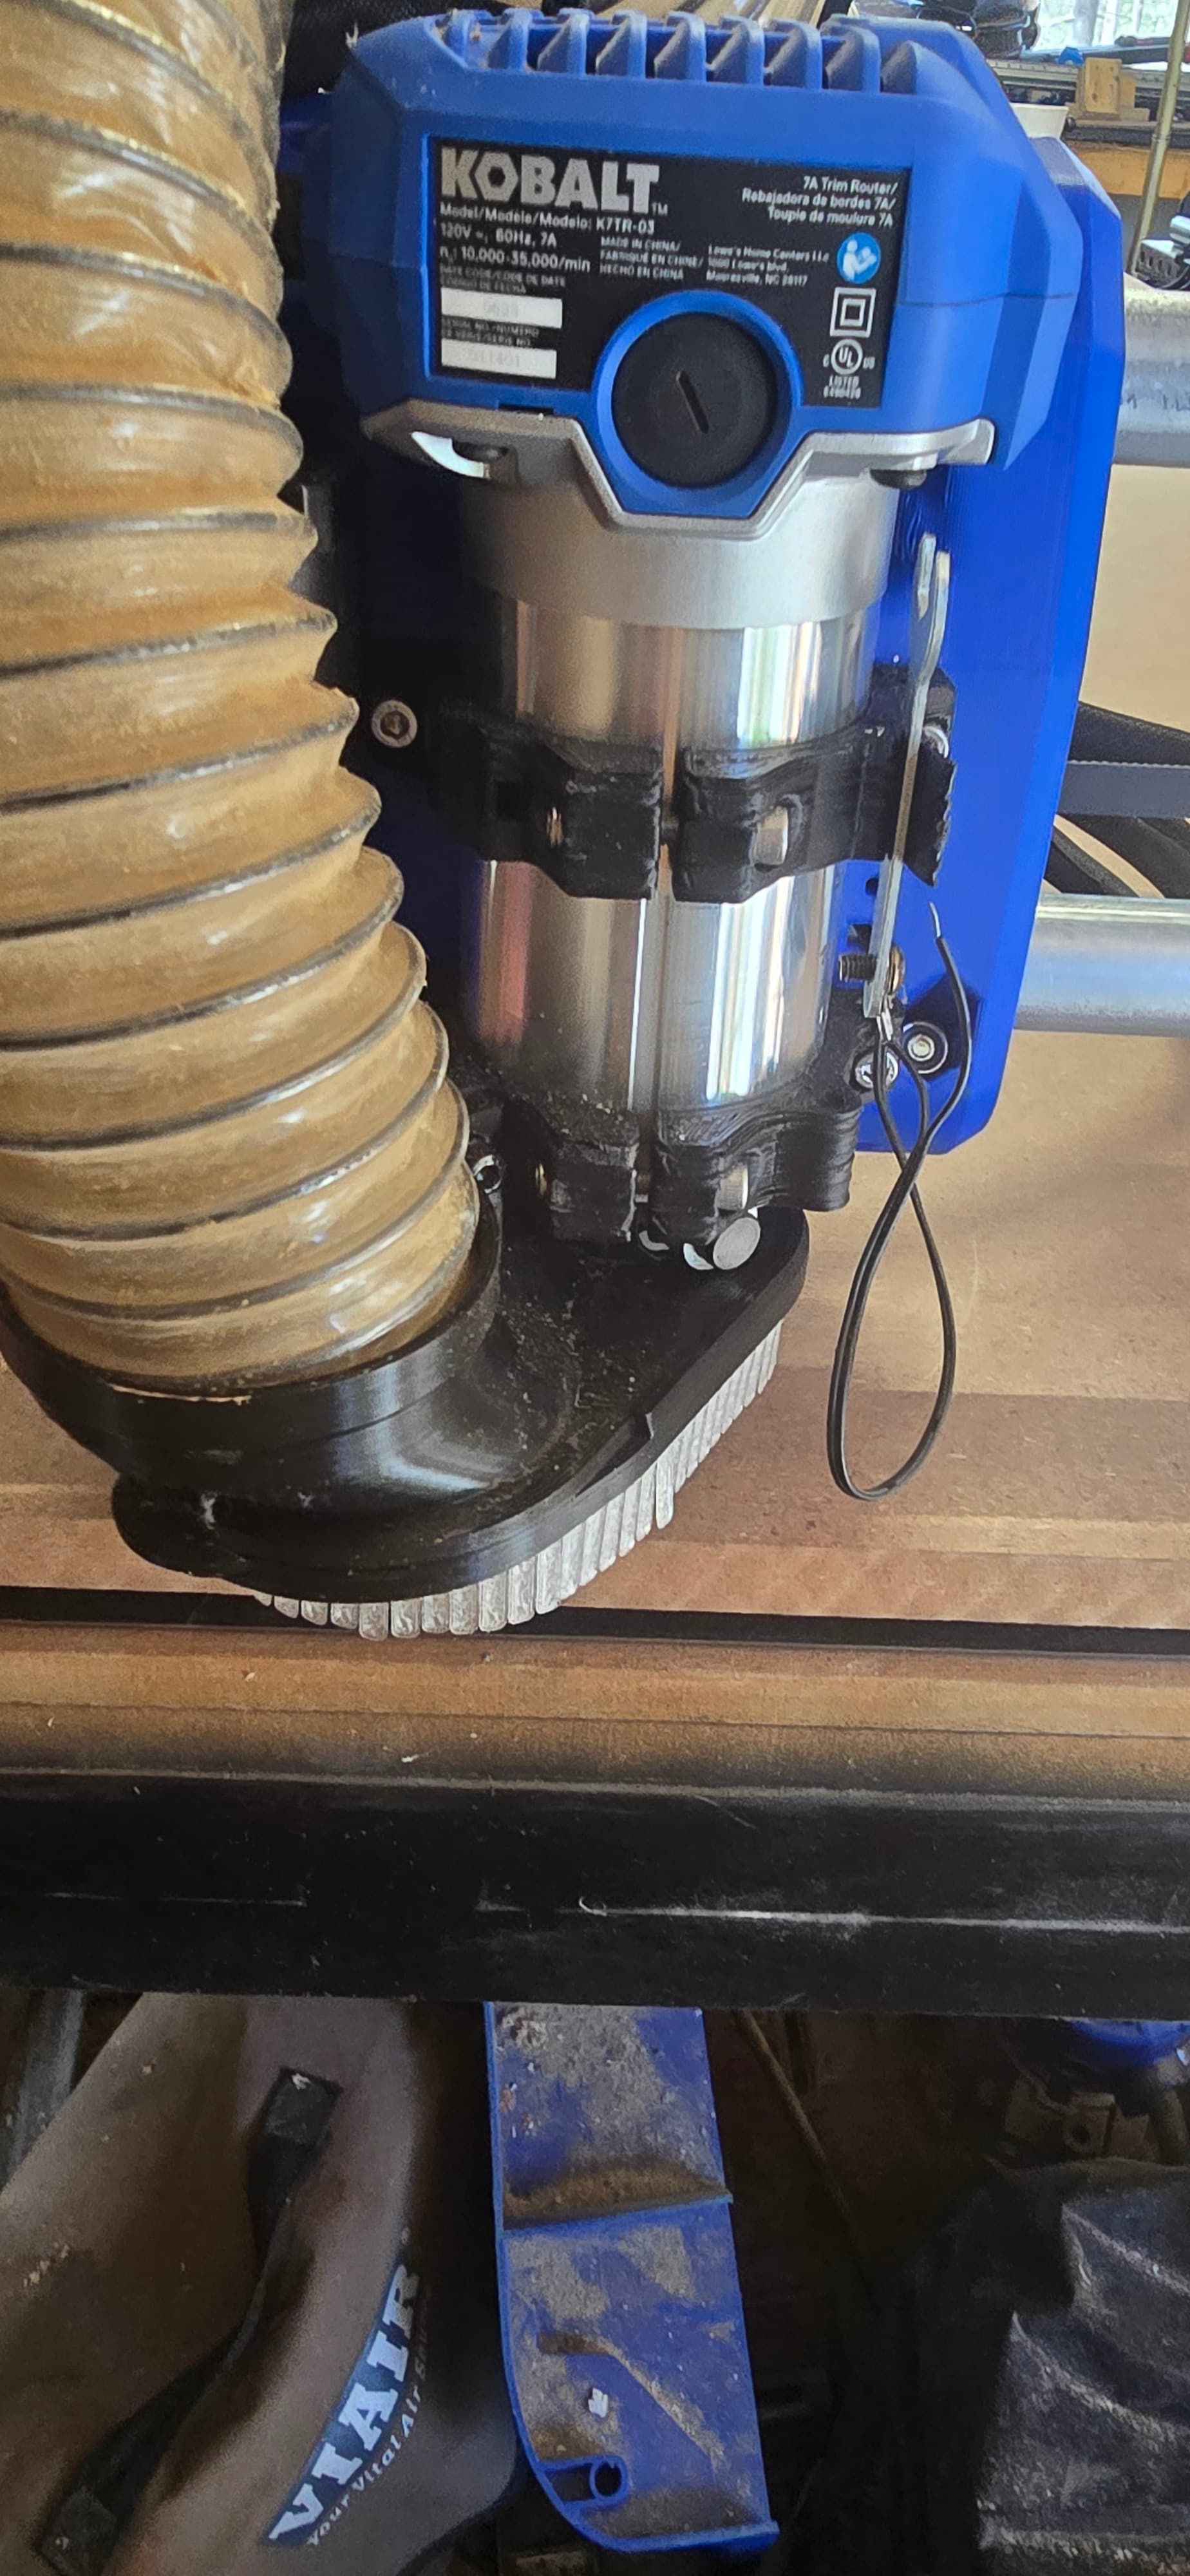
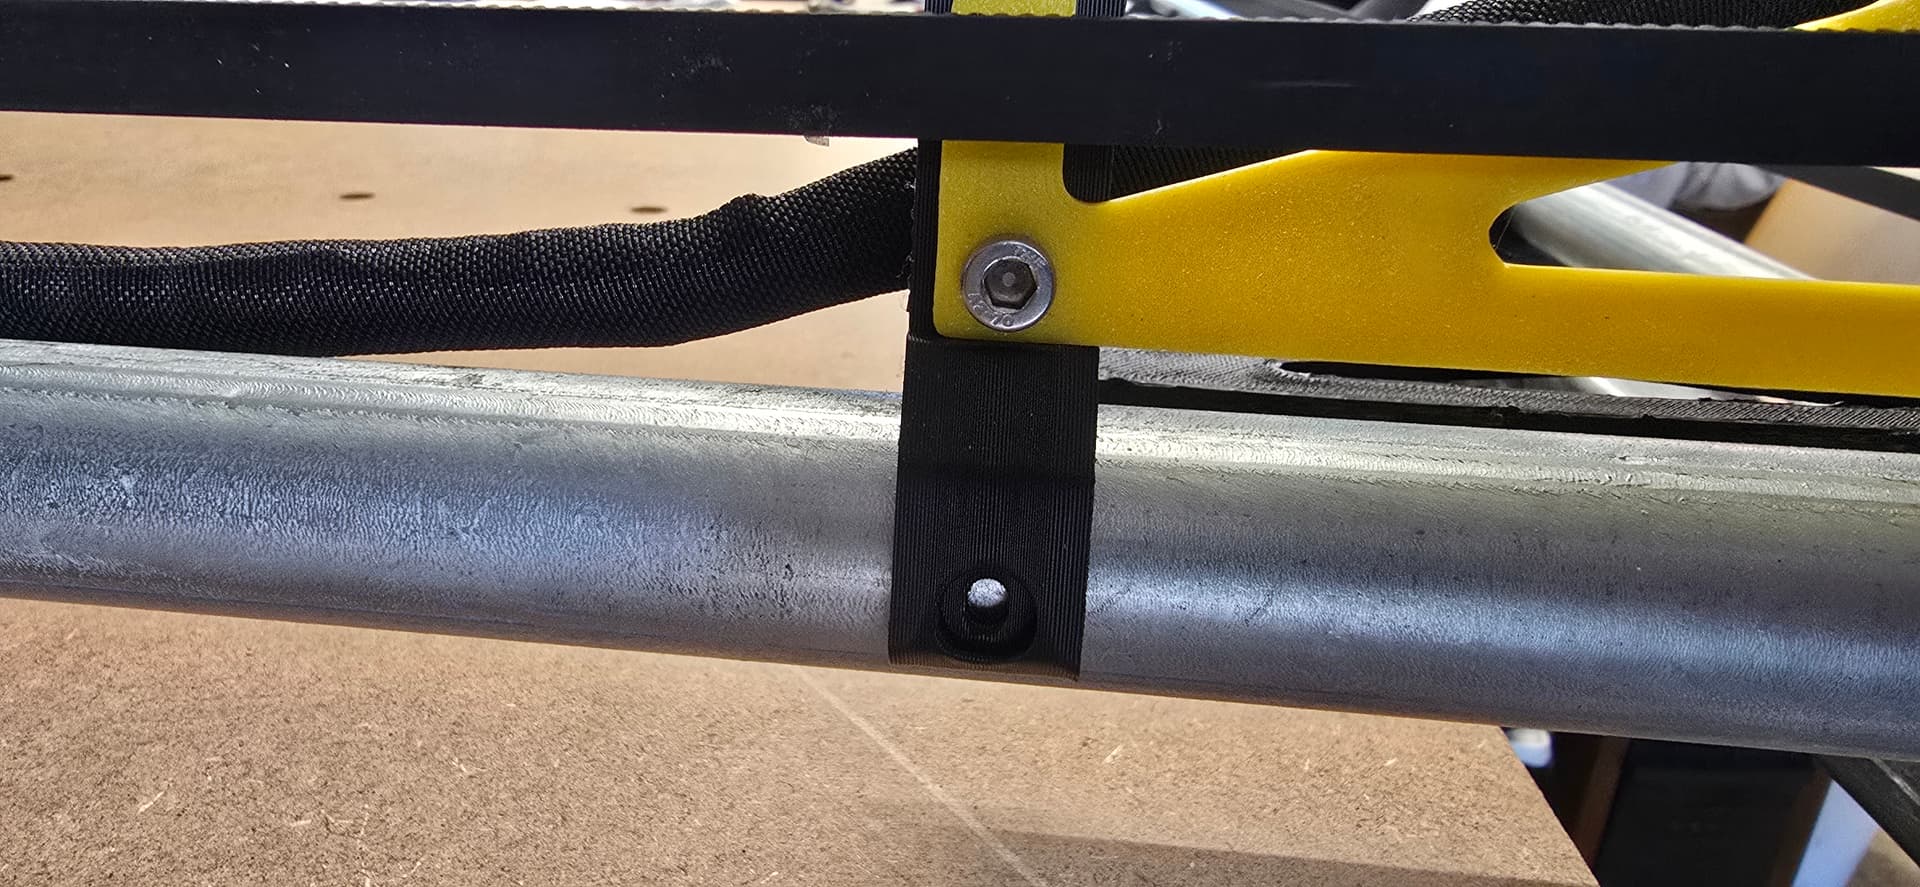
What i figured out though is that the hose fits INSIDE the dust shoe not outside like I’m used to. Normally it would be attached to the outside and hose clamps would hold it in place. I might make an adapter but it seems like it wants to stay
1 Like
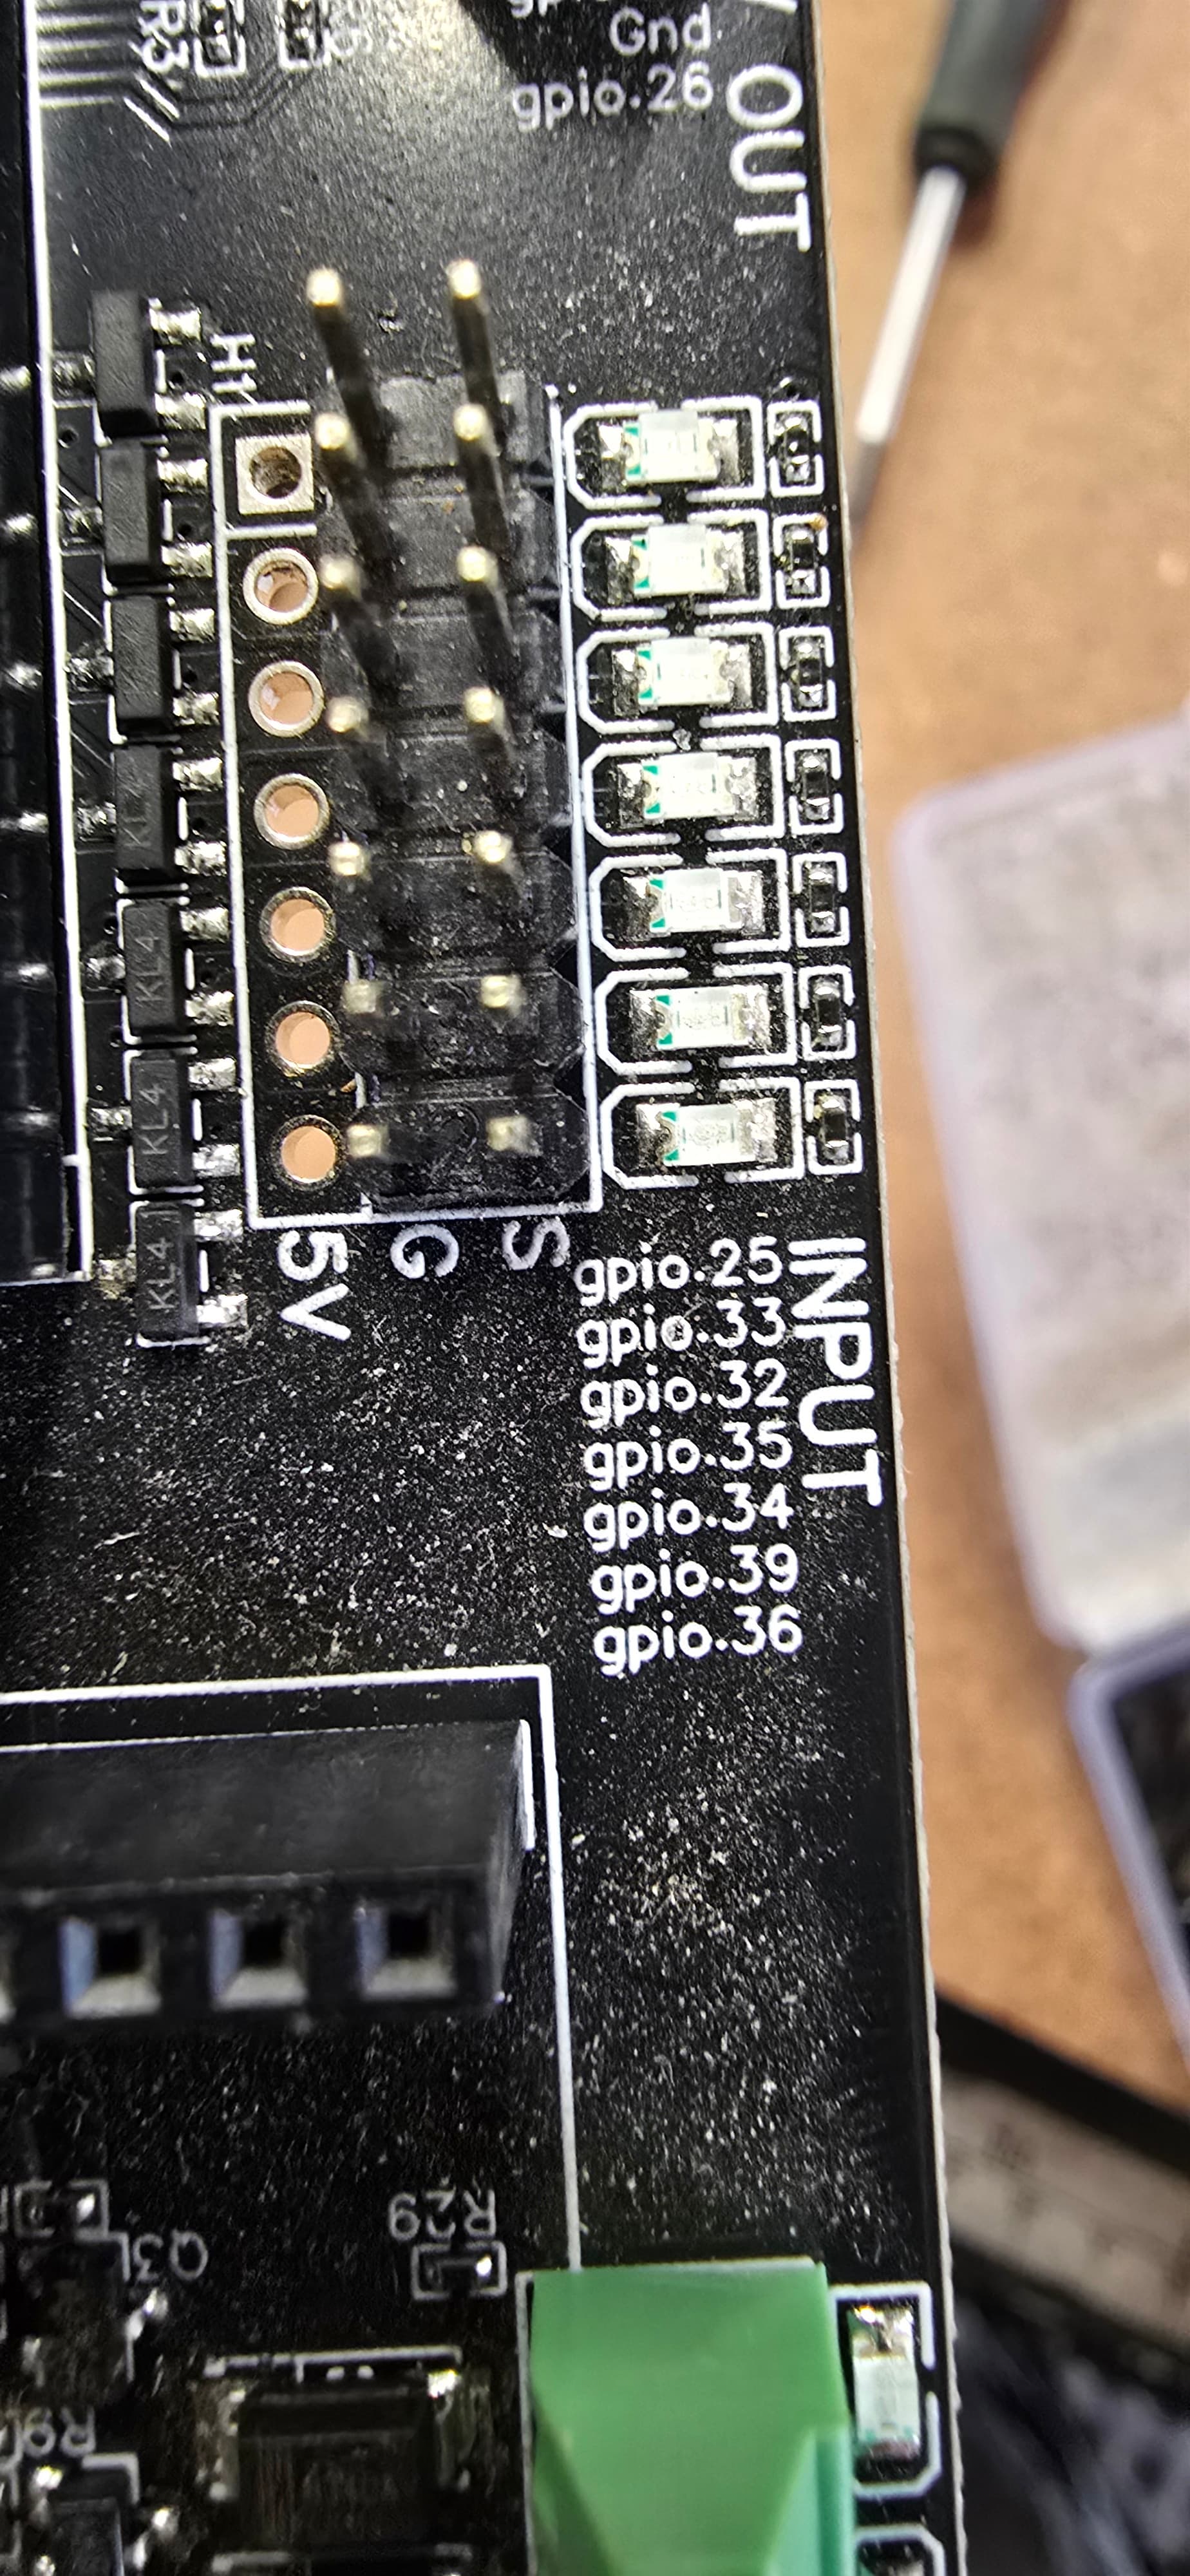
I wired everything up to the board. All the endstop switches light up and go out as expected.
X axis homes like it should.
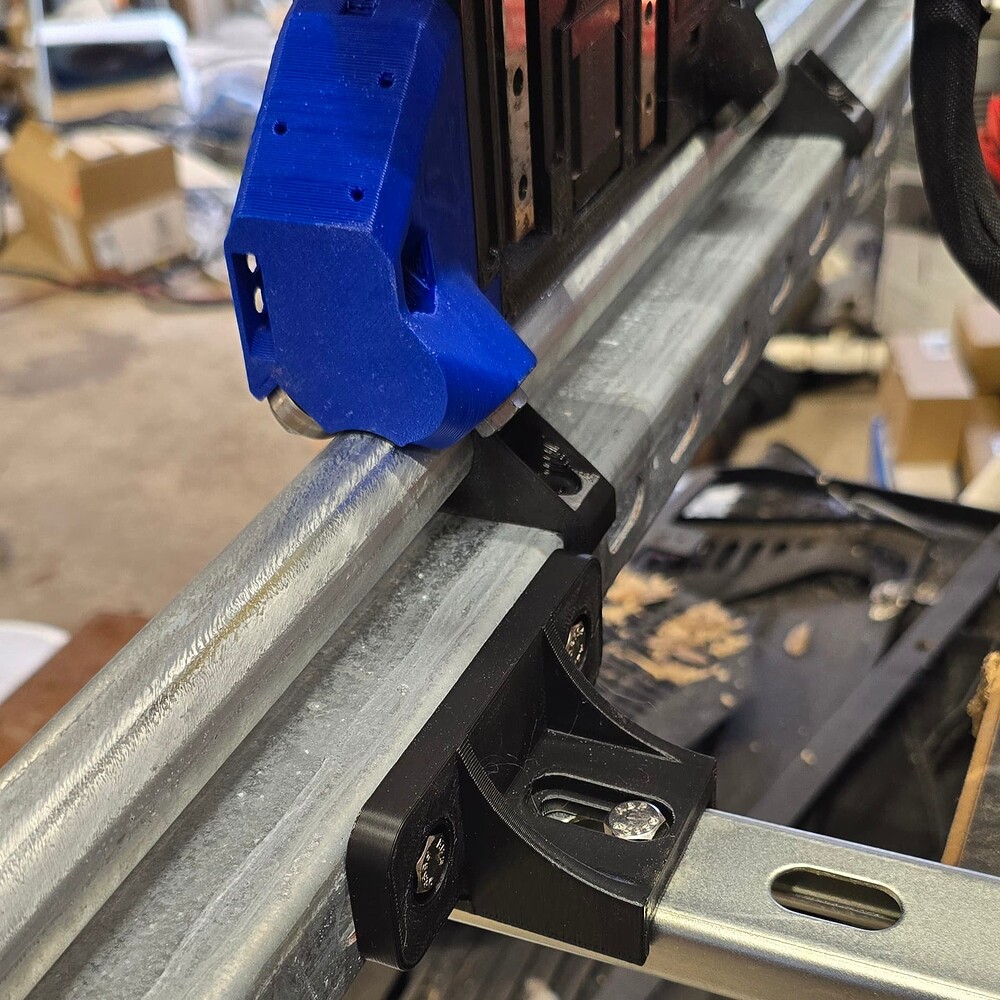
Y axis is having an issue where it tries to drive itself off the table. I think i figured out that it might be an alignment issue with the y belt parts from the unistrut design by @DougJoseph. The printables listing mentions the trailer mounts twisting under belt load and it seems like that’s what happening so the rail side doesn’t trip and the wheel side turns away enough that the switch doesn’t reach correctly.
Z axis is causing me a headache. It will go up and down perfectly for about 90mm from bottom. But towards the top, one side can no longer spin and it clicks like it’s tapping out. I have lubed, re lubed, extra lubed no change. I have gently run a rat tail file through the threading trying to find a snag point and still no change. My flex coupling looks accordioned out a little, so im thinking that is part of the issue. It could also be caused by the issue, so there’s that
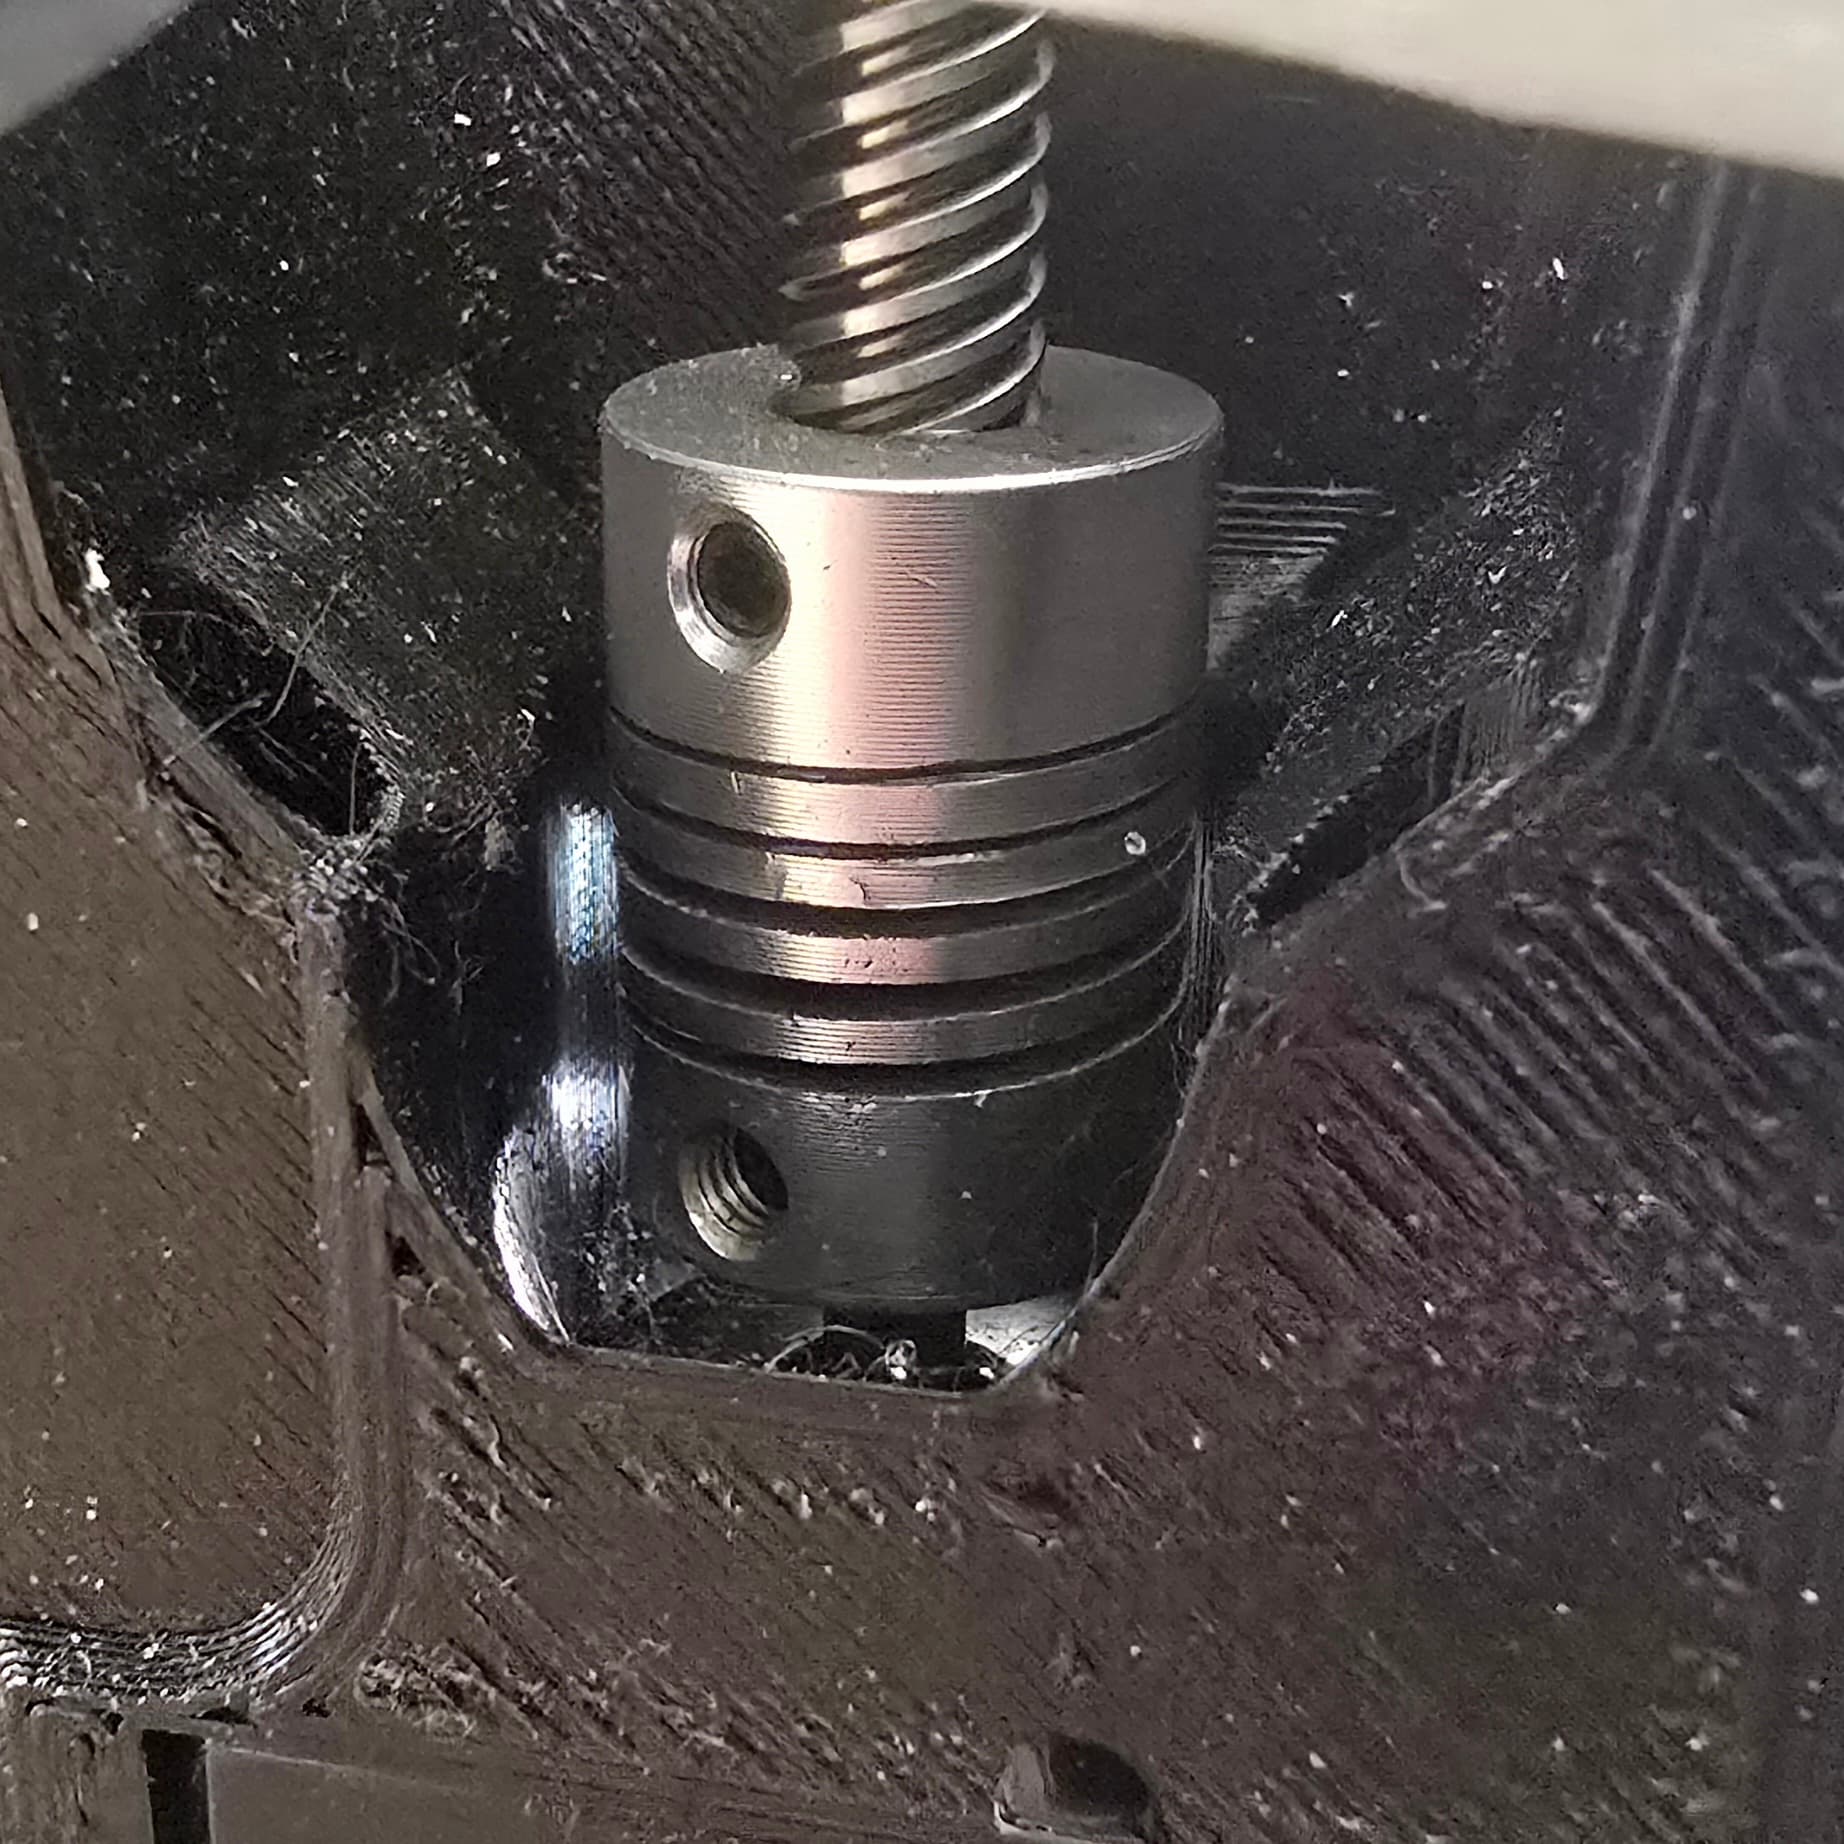
I have a new section of rod, but i don’t think that’s it based off my visual inspection while filing and lubricating. I have a another coupler i could try but it’s much less flex and if the rest of parts aren’t almost perfect it will run into new problems.

I try to keep most of the technical stuff on here, but i have shared videos in the FB group if anyone wants to see. Not sure if i can link them to this site, haven’t tried.
Touché
1 Like
I actually used some CA glue to weld mine in place once I verified the correct position after installation.
There is a slot for a zip tie in the upper router mount that you can use to attach the dust hose if you’re worried about it coming loose.
1 Like
I read that. Also thought about the heat gun method you mentioned. I want to do some more testing first but i think that’s the cause of Y issues.
Yeah I’m having the same issue when homing Y.
My understanding is that is normally a pack of lubrication. I think mine is somehow based on the threaded rod itself.
Sorry for troubles. I did get it working reliably, but the potential for issues is one reason I’m trying to steer new makers toward Ryan’s version that does not use unistrut and adheres to the yellow brick road approach. I’m offering what I’m doing as it allowed me to continue using my existing setup, knowing others have the same setup.
1 Like
Hey no dramas Doug, none of this stuff comes with a guarantee and I appreciate all you do.
I’ve got my machine in a spot where it’s working well enough for me to have some fun. I need to get so,e full sheets for a spoil board, and flatten them, and think about legs, and how to store it when it’s not in use.
But I can cut, laser and draw with it so all that other stuff is for tomorrow.
1 Like
Please no. You have paved the way for chimps like me to evolve closer to your level without asking for anything in return. Your willingness to share your knowledge, ideas, and files makes all of us better. Thank you for that generosity. I only hope i can pay it back down the road.
I do admit that I’m contemplating front wheel end stops using my initial strut bracket as giant stoppers for the machine to home off of. But that is partly the table, partly my work space allowances, and yes partly the alignment of the belt tensioning blocks. I could absolutely get it to work with your design. Very slight pressure tweaks then back into position. No question that CA glue would that light pressure. I just think that going with a big flat surface leaves so much more room for error and creates a physical stop to keep the machine from driving itself off the table.
6 Likes
Thanks for the understanding and kind words!
1 Like
currently trying to figure out a homing issue.
here is the separate thread if you are interested or have some insite.
finally got around to uploading them
3 Likes
Uploaded a video to the tube. It shows the process of my troubleshooting the homing issue. Its in the other thread, but if you are following this and just want ti see what all I’ve done to find the problem… here you go.

I think my fix is going to be changing the config to use gpio39 which is the spare instead of gpio32 which seems to not be communicating with the esp32.
It homed!!! Squaring and initial set up next but that can wait until tomorrow.
6 Likes
Made my 4 dots. Y pull off distance adjusted. Made 4 new dots and measurements match. I need to find some ¼" mdf. Might be tricky because when i got the ¾ stuff i didn’t even see ½".
I still need to run Z leveling, but it will be easier with a flat sheet on the spoil. My table is set up to have a removable second layer of mdf because some of my bits are longer and i will need that extra z.
What are these holes for? Seems like I’ve the real strut plates are on, the holes would be great spots for something like a self tapper to hold off twist.
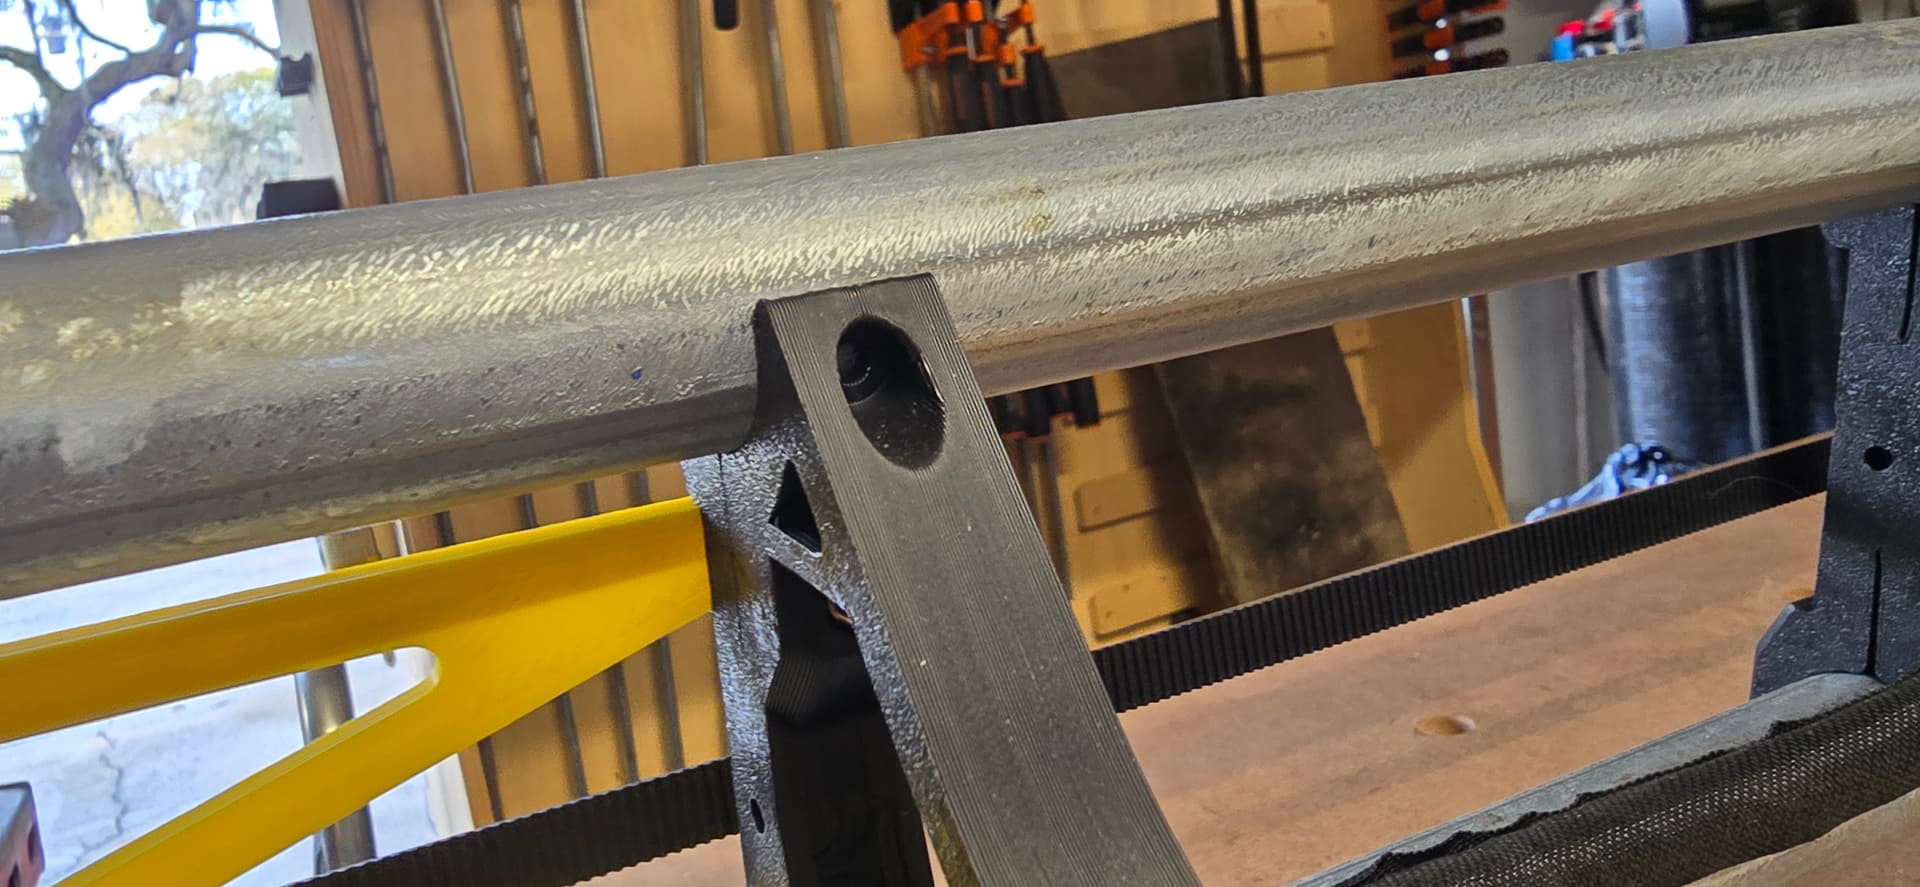
Yes, you can do this but if you mess it up even slightly it’d be better without. ![]()