perfect, thanks
thanks doug!
thanks Cesar!
1 Like
As i went the Premium filament choice for my new builds, i just wanted to do the calilantern skew corrections just in case.
Other than that, it is the same flavor of firmware (klipper) you just wont get the same webui (already used to with my old printer)
1 Like
when do you sleep bro? I just went over to your printables account, and you have a bunch of flashforge mods.
the hexagon side mount spool holder is totally on theme, lol.
looking forward to the enclosure files dropping.
thanks for your amazing contributions
edit: because I intimated that the regular enclosure files that were linked to were Dougs improved housing files, because im exhausted and watching 3 rambunctious kids while posting.
3 Likes
The non-pro version can use the camera sold for the pro version. When I have the Klipper Mod’s web based UI I can view the camera feed from a non-pro version. I don’t know if the feed can be viewed in the Flashforge ecosystem of software, but maybe if you tried to tell it you have a pro?
The DIY enclosure is from Flashforge and works regardless of whether your interface is in the Flashforge garden or the Klipper UI garden.
The main things you get from the Klipper mod are:
- option to do Calilantern and add the skew correction code to the printer’s config.
- Choice of Klipper based UI options — two options in browser (Fluidd or Mainsail) and two options on touchscreen (Klipperscreen or Guppyscreen)
- standardized interface and config adjustment across any Klipperized printers you own, which if you have only one, is not a big thing.
On my third AD5M, I thought, hey they’ve made improvements since I first got in, and now you can send print jobs via WIFI with the network services in Orcaslicer, so maybe on this third one I’ll put off the Klipper mod and see how it goes. I boot it up and connect to WIFI. It automatically checks for new firmware, and I approve updating to a newer version. On my other two AD5Ms, the factory firmware was version 2.4.5. Apparently the new factory firmware out is version 2.7.8. [EDITED TO UPDATE: as of 2025-01-06 the factory firmware is up to 2.7.9.]
Then for some reason (perhaps a glitch in the user interface coming with the new firmware?), the new printer, with the updated factory firmware and stock (updated?) user interface, was doing a continual reprint loop on every job, trying to print it over and over, even when it was successful, and this kept going unless I rebooted to clear it out. It was definitely an interface issue. At that point I went ahead and dropped Klipper interface onto it. [EDITED TO UPDATE: perhaps the above glitch is why they so quickly iterated from v2.7.8 to v2.7.9?]
For touchscreen, I like Klipperscreen better, but it presses the resource limits and sometimes would hang, so I use Guppyscreen instead, and it’s not hung up yet.
I really like the Klipper world. The only thing I think needs reworked is that if you don’t know that the bed mesh process is the only thing that pays attention to the Z_offset value that gets captured by the Z-probe process, and you thus did a mesh first and a probe after, then your mesh was based on the old Z offset, and your new one is ignored until you do another bed mesh. That has nothing to do with this mod, and is just a fact of Klipper. So, do the “probe_calibrate” command first, then press the button for the bed leveling macro second.
Also, the probe_calibrate process is easier with the Klipperscreen UI on the touchscreen. Without that, you just need your laptop or phone or tablet nearby to complete the manual last bit of the calibration.
1 Like
Thanks Doug
How long does it take to do the conversion?
My first install of octoprint with a brand new pi3b took something like 9 hours, when it was supposed to be 20 minutes. I’d like to avoid getting way over my head in something unless there’s a clearly delineated path.
Thanks
1 Like
The conversion itself is quick and simple: download the compressed file for your choice of interface, place the compressed file on a USB stick, insert it in the printer, and power it on. After updated, remove USB stick, and reboot the printer.
Setting up the printer is pretty straightforward after that. I recommend starting with the Klipperscreen variant on the touch screen. Mainsail and Fluidd seem very similar, but I think I prefer Mainsail. Once you get a printer config file to your liking if you ever have a hangup on the touchscreen, you could make sure you have downloaded/saved a backup copy of your printer.cfg file, and then switch which compressed file is on the USB drive, and switch to Guppyscreen variant.
The calibration process can be:
- Enter
PROBE_CALIBRATEinto the console. At the end of the process, manually nudge down until the nozzle scrapes on a slip of paper between it and the bed. Accept the result, and - Enter the
SAVE_CONFIGcommand into the console to save the new Z offset to the config file. - Press the macro button for Bed Leveling to create a mesh for the bed.
- Press the macro button to run the resonance compensation macro.
- Click to the tab labelled “Machine” to view / edit your printer.cfg file, and make sure the bed mesh is named “default”
- While you are there, download and save a copy of the printer.cfg file to your computer.
- In your slicer, edit your Machine GCode start and end blocks with the code from the Github.
- Run a test print.
- If you wish, print Calilatern
- If you ran Calilatern, then execute in console the commands given, to add the results into the printer.cfg
- If you ran Calilatern, in your slicer, edit the Machine GCode blocks as instructed.
- If you wish to set static IP address for your printer on your home wifi network, lookup how your router’s admin process works for adding a static IP.
I may be forgetting something, but I think that’s the process.
Anyone else who knows, did I miss anything?
Also … re. the DIY enclosure:
I don’t have it posted to Printables yet, but will try to get that done.
1 Like
New version update today
1 Like
For me it works in stock, job uploads to the printer from orca doesn’t for me ( after the klipper mod)
I’ve fixed/rebuilt dozens of these clones. They can be great with some knowledge, but when they’re off they frustrate users beyond belief.
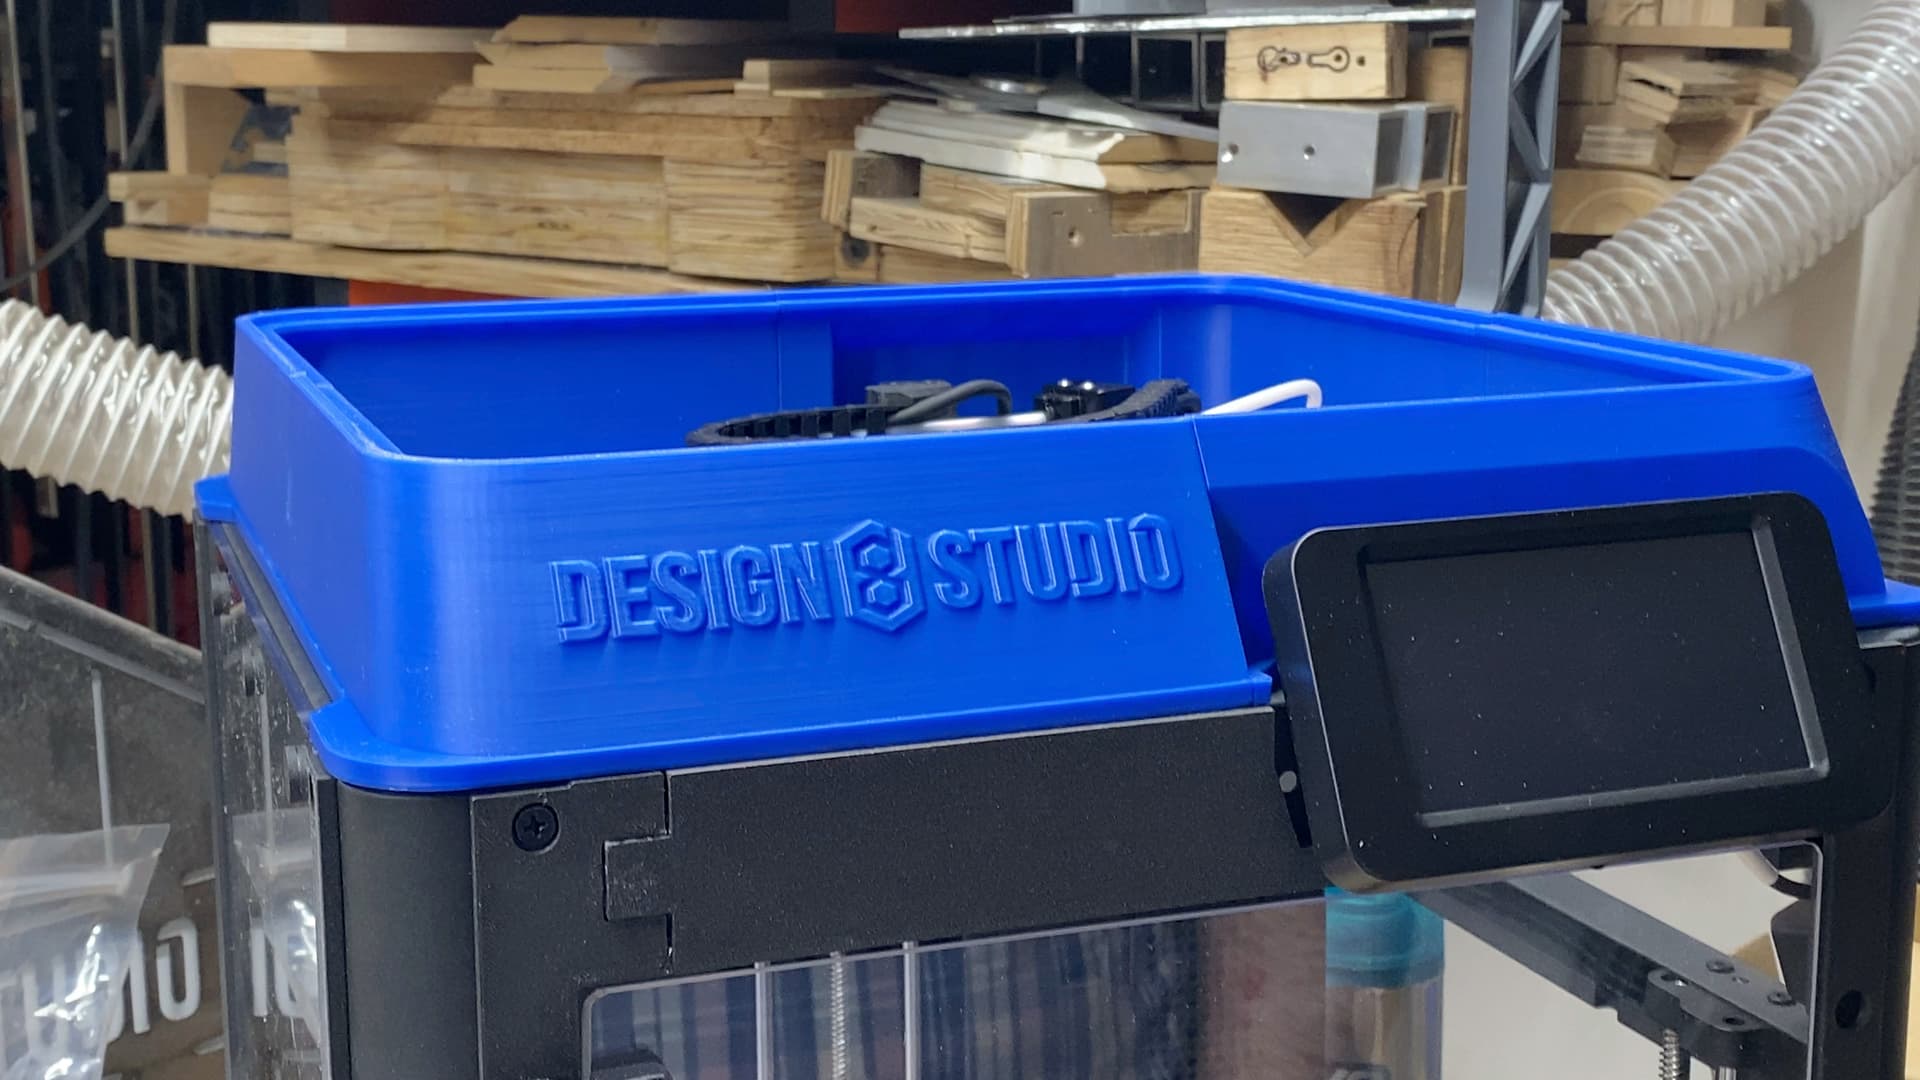
OK, I got the new minimal enclosure for the AD5M posted on Printables:

In OrcaSlicer, the wifi settings need inputted a URL that is the IP address of the printer plus the correct port number. See screen shot.
For my host name, I have this (replace the IP with your own):
http://192.168.1.14:7125
For Device UI, I have this (replace the IP with your own):
http://192.168.1.14:4000
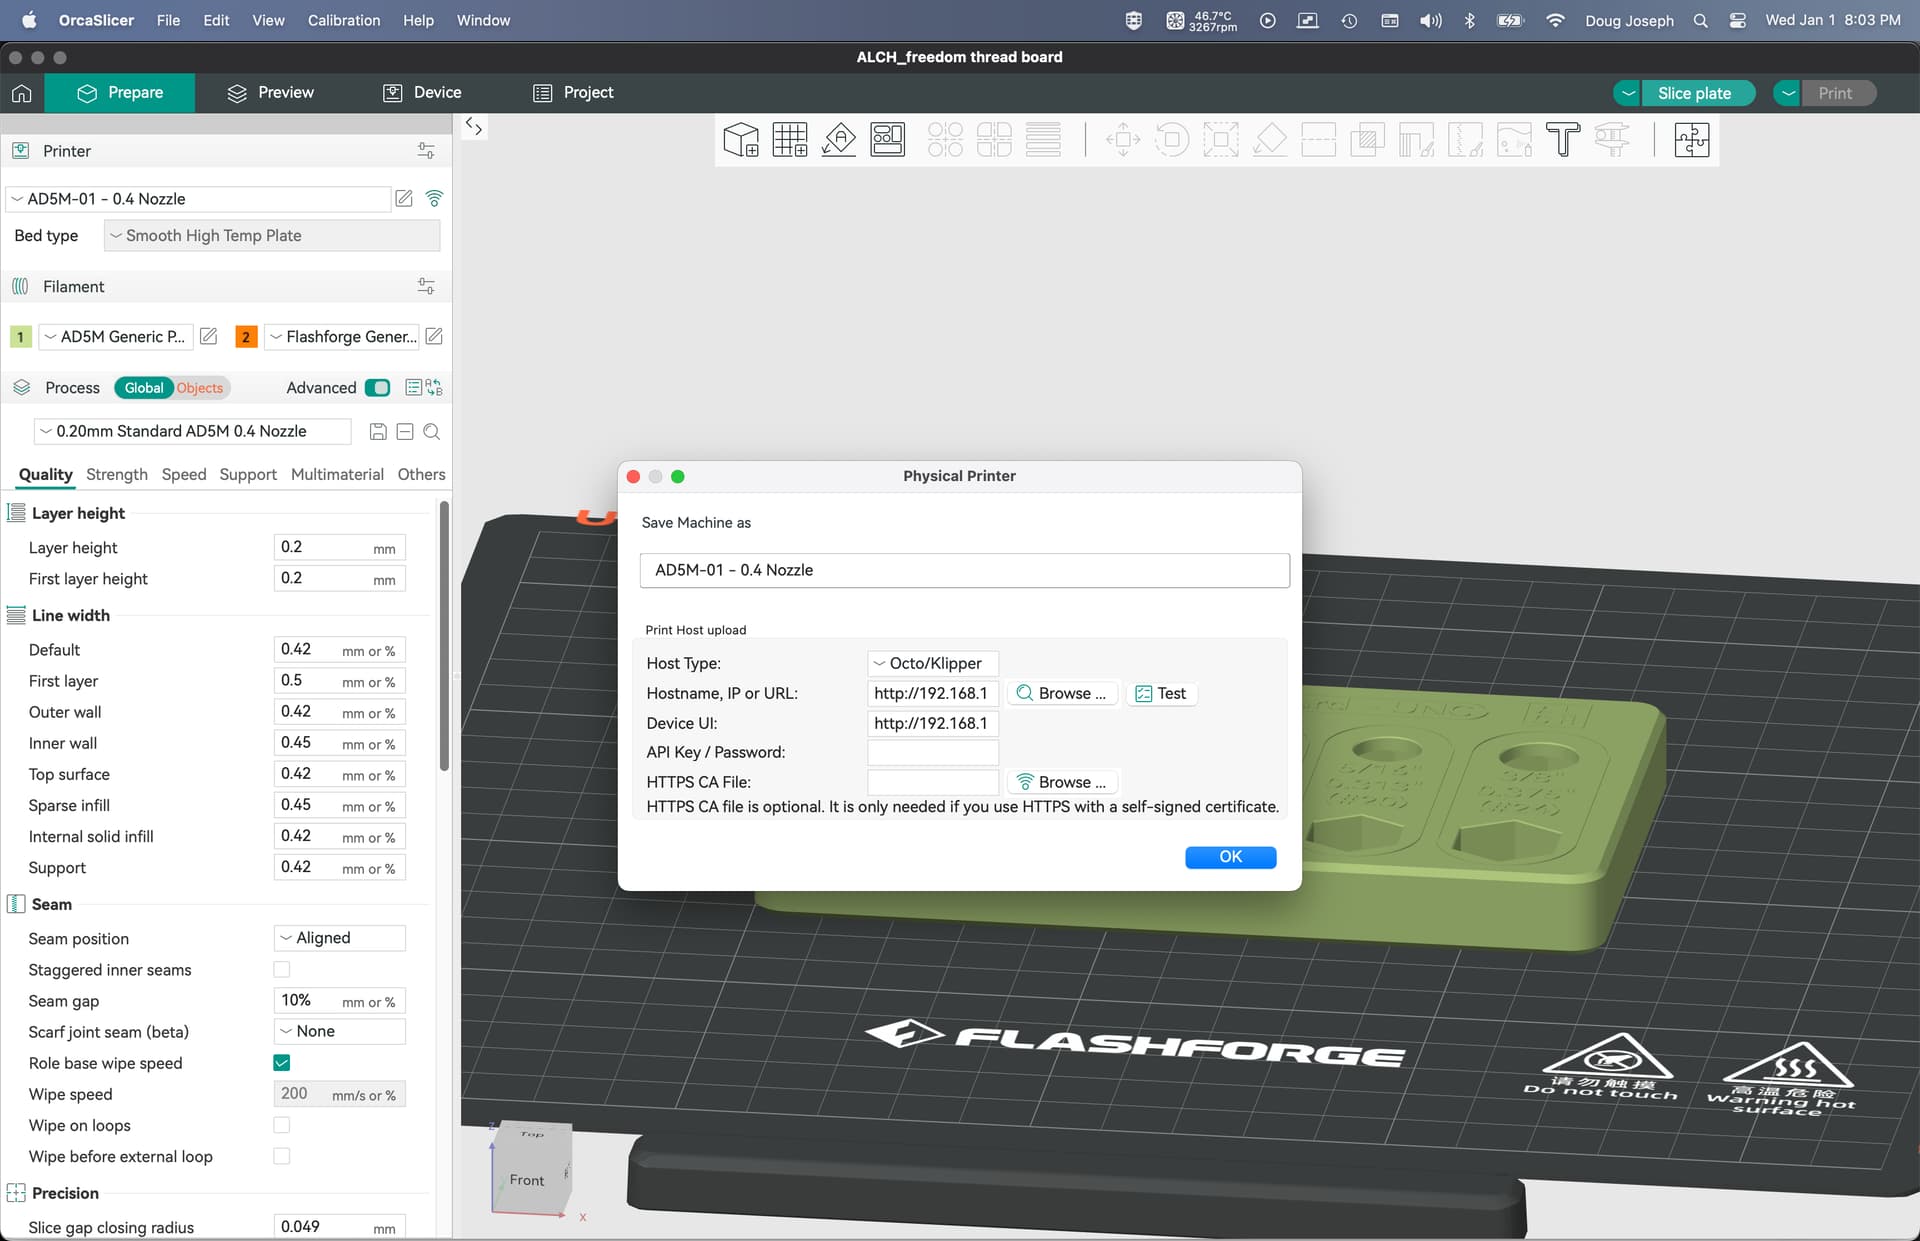
To get here, you would click the wifi icon to the right of the selected printer.
the device tab works perfectly for me, when i hit slice/print or just upload to the printer, it thwosme some errors, and the blessd things that upload, stops printing like if there is something missing or bad with the file ( im in the process of printing my Lr4 parts so wont deal with that any time soon)
your minimal enclosure looks so much gooooood!!
1 Like
It works right when you carry the file on an SD card to the printer? Only has issues during wifi upload?
Thanks!
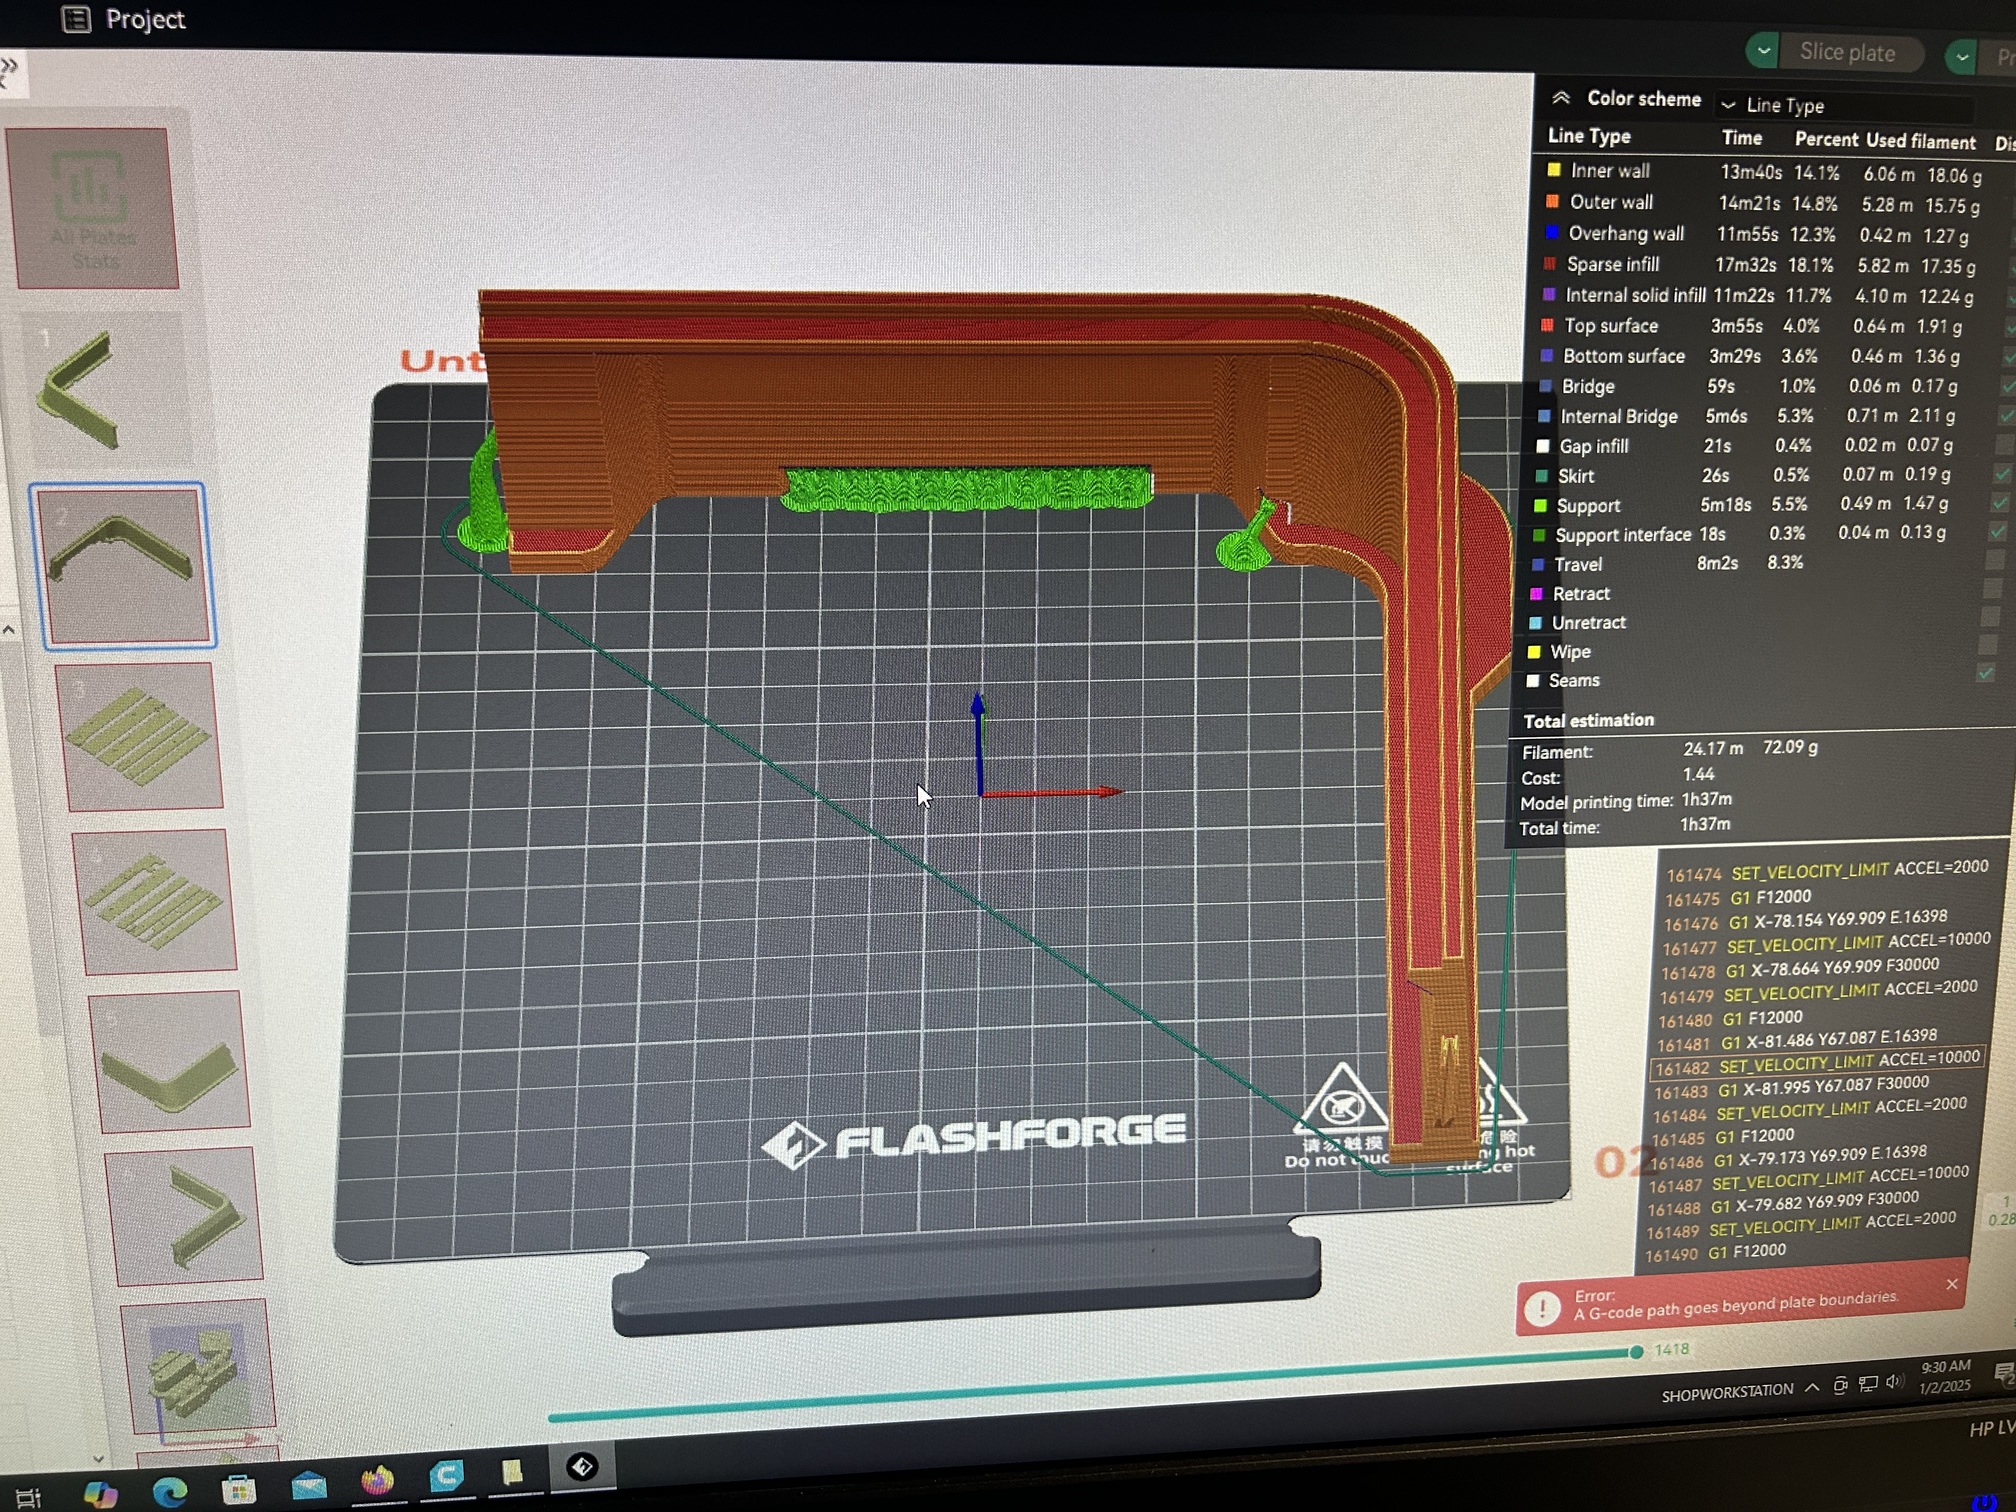
Tried the 3mf file for the enclosure, but it’s throwing a boundary issue at me for all plates except the first one. Probably user error, but when I download the single file for the hexagon spool holder, it does the same (but gives an additional “support required” warning. Thoughts?
Maybe you can disable that line it draws around it?
Thats the one that works. But I tried disabling the brim, to no effect. The parts aren’t crossing the plate boundary though, so I dont know whats really going on with it
1 Like
If i use a 0.2mm layer height, with my own profile (not the 0.28mm included as a preset inside the project) it works just fine. All plates can slice. weird glitch i guess.
1 Like
I had this problem using FlashForge OrcaSlicer, I am presently re-laying out the plates manually to match Doug’s versions. FF Orca complained about the source 3mf being from a newer version of orca- not surprising to have some errors.
2 Likes