I found that Robert… finally. That was the issue. For some reason, the version I opened in PlatformIO had that line still commented out.
So the Z max is now working, and I have kinda dialed in the laser focus point (26mm from the bottom of the laser housing).
But… I still need to walk away (at least for now). I have lost best part of 4 days on this thing and that is 4 days not making progress on anything else that might get me a job or make me money!
I have the free version of Lightburn, but that doesn’t connect to the MPCNC at all. The console just throws up:
Waiting for connection… echo:Unknown command: “” ok
and no G-code commands are recognised. No idea why. I think all the settings are correct, but I had to do them manually as it could not ‘auto-find’ the Rambo board.
So I am guessing this is another pile of work to get it to work. Not sure why it can’t see the Rambo board and I have not found an online solution.
I’m not trying to pressure you to spend more time with your CNC by posting a reply, but I’m going to make some comments while your post is fresh for your future use.
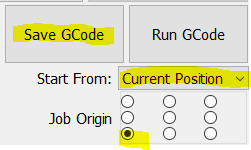
I don’t connect Lightburn to my CNC. I save the output to a file and deliver it like my CAM files. Cutting is always relative to the current position:
I give up a couple of (obscure) Lightburn features by running from a file, but I want the process that I use for my Primo to be the same between tools (I make less mistakes that way).
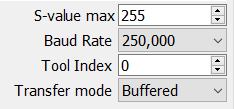
As for your connection, based on the limited information, I expect the baud rate is wrong in Lightburn. It needs to be set to 250000:
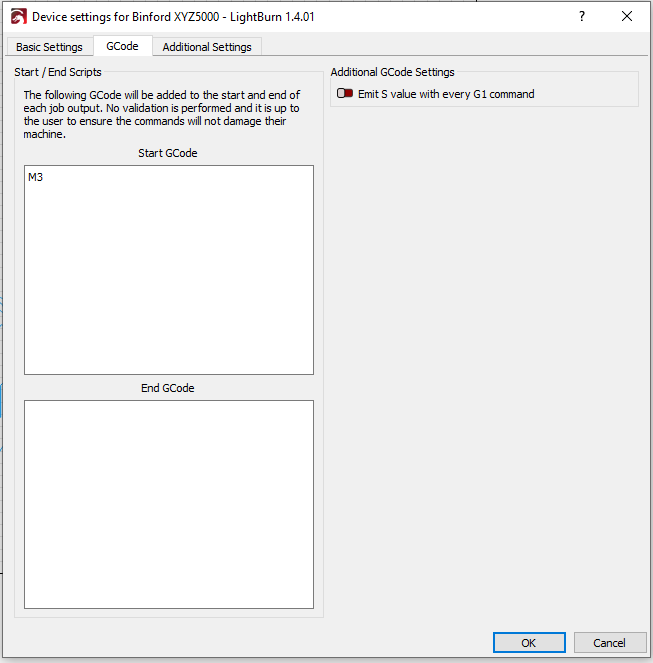
I know I’ve mentioned it before, but you want inline commands:
And you need the M3 I to be at the top of the file. I put mine in Device Settings/GCode/Start Code so that it is automatically added to each file.
Note that the “Free version” of Lightburn is really a fully functional “Trial version” that is good for about a month.
I’ve been using my MPCNC for a bit under four years. In that time, I don’t remember that feature (max Z endstops all the time) ever being enabled in the V1 maintained version of the firmware. Is it possible you enabled this feature when you added the max Z limit switch? Putting a limit switch on Z is not a standard MPCNC design.
Yes… I must have enabled it ages ago when I built the MPCNC. Just not sure why the version I opened with the date of when the MPCNC was built has it uncommented. Hey ho.
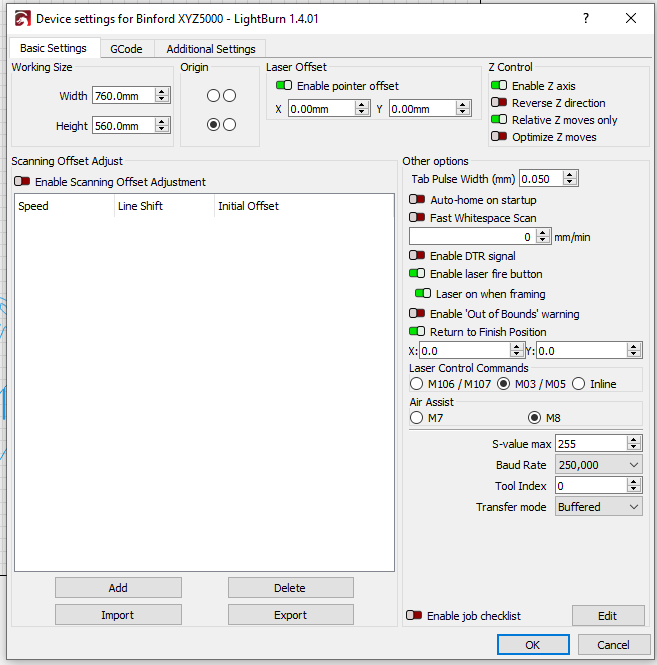
All your suggestions for Lightburn are as I have them set.
It can’t find the board when you ask it to find your laser either, which you would think it would.
Baud rate is correct, as are the other settings (I have literally tried them all).
I don’t want to have to add other processes/software into the mix to get the laser working. It’s already too damn complicated.
I won’t purchase Lightburn if it’s not going to work or be temperamental.
I am trying to simplify my workshop area. Got tired of constantly messing around/fixing my Rostock Max v2 delta 3d printer and my Flashforge 3d printer.
They got binned and I just bought a new Prusa (because I used them at work and seemed pretty reliable).
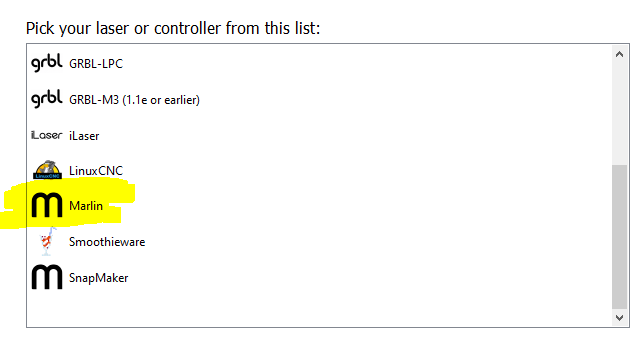
I don’t want a computer in my shop, so I’ve always run my jobs using SD card, so the processing of saving the g-code file is identical to how I deal with Fusion-360-created g-code. But I just took my laptop out to the shop, and Lightburn connected and controlled my Primo without an issue. If you haven’t done so, in Lightburn you need to create and use a Marlin device and select the right COM port. I don’t imagine the default GRBL device will connect.
It can’t see the Rambo board/MPCNC (I have set it up).
If you load an image, and press Play… the MPCNC starts up and seems to move correctly.
I did a quick test cutting out a square in some 3mm plywood and it worked fine.
But the comms window doesn’t report back correctly or allow me to enter any direct G code commands… unless I am missing something I need to put in the comms window first.
The best I could focus was at 26mm. According to the spec, that should cut 3mm ply at 120mm/m.
It didn’t. I cut through, but it took multiple passes. The cut however was pretty nice with no burning and nice and thin.
So, I am guessing either their specs are a little optimistic, or I am still not entirely dialled in correctly.
I suspect the first one.
I’m looking at a spreadsheet I created with cutting parameters just after I purchased my laser. I purchased, from Amazon, some 3mm plywood pieces billed as “Baltic Birch plywood.” I did not do an extensive test with these (I was just starting out and did not know what I was doing), but my laser successfully cut that plywood at 210mm/min at 100% power, so, with your laser that at roughly 1/2 the power of mine, it is not out of the realm of possibility that the “right” plywood with the right focus distance could be cut in a single pass at 120mm/min.
Later I purchased a sheet of 1/8" (3.175mm) plywood from Home Depot and did some projects. This plywood was substantially harder to cut than the “Baltic Birch plywood.” Looking at the cut settings for one project using the Home Depot plywood, I had to use two passes at 144mm/min.
Note that for real projects I slow things down to be sure I cut all the way through everywhere, plus I tend to use 90% power rather than 100% power to extend the lifespan of the laser module.
Focus also makes a big difference. Setting the focus to the middle of the plywood, and/or using an active Z (multiple passes with the laser descending each pass), notably improves performance.
My suggestion is to figure out how to author cut tests in Lightburn and test, test, test. Even the weather (i.e. the humidity in the wood) will make a difference. The same wood might cut differently in another season. I wish I’d been more methodical in the beginning by archiving photos of each test and doing a better job of my spreadsheet.
But the comms window doesn’t report back correctly or allow me to enter any direct G code commands… unless I am missing something I need to put in the comms window first.
I don’t have a clear idea of the issues you are facing. Maybe screenshots would help. In my test this morning, I was able to directly send both movement commands and direct g-code commands using the Lightburn interface. But if you are setting up your job in Lightburn as “Current Position,” you don’t need to enter any commands. You just position the laser by hand and click “Run GCode.”
If you cannot tell, I love making projects with my laser. I wish you joy with your laser projects.
Well the laser is all setup, and things appear to mechanically work correctly.
However, no luck setting up Lightburn to work.
Just have to continue tinkering. Not going to purchase an air pump or Lightburn until I get this sorted out.
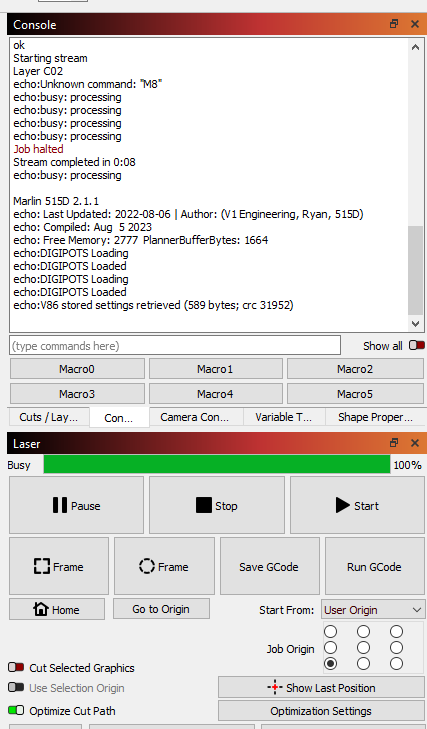
The console doesn’t allow me to talk to the MPCNC at all. Surely I should be able to type G code in here and the MPCNC responds?
I read that maybe change the baud rate to 115200? But then I need to update the Rambo to the same baud rate.
She’s working. But something keeps stopping the G-code during a routine.
It will runs for like 3 seconds, then the MPCNC LCD shows ‘Click to resume’ on the screen, yet I have not told it to pause.
You un-pause the print in Lightburn and it re-pauses again seconds later.
It seems to be a glitch with the comms between Lightburn and the Rambo board.
If you press ‘Stop’ on the Lightburn control panel, the system seems to get stuck in some kind of weird loop and the next print does this odd 3 second stuttering thing.
I have found the best way is to simply choose a different comms port, then go back to my original comms port to reset the connection. Not ideal, but it works.
The STOP and PAUSE buttons just don’t seem to talk to the RAMBO correctly. Not sure what that is.
Like I mentioned, the Lightburn software only accepts commands related to laser cutting.
For instance, you can’t send M300 for ‘Tone’. That doesn’t work.
But, it does all work. I have set up Macros for:
Set origin
Laser Off
Laser @ 1% (alignment assistance)
Laser @ 100% (Don’t really need this, but useful for testing)
I have also activated the pin 44 for my air assist pump (which should be here asap). Wired an extra relay (via Mosfet) under the CNC board (pic attached) with a single socket.
I was using my big compressor, but it was firing moisture down the pipe which would explain why the cuts started great, and then tapered off in quality.
It did cut some 3mm ply quite well at 26mm focal length. It did take 2 passes at 90% power, 120mm/m, whereas the supplied specs say 1 pass at 100%… but hey ho.
Well until my air assist pump arrives, I think I am as far as I can go.
Added a pair of exhaust fans above the CNC deck vented outside. Will add a flexible pipe I think down near the laser head.
Only thing I don’t like is STOP doesn’t stop the laser. It sits there and thinks about it for 20 seconds.
Some horrible delay in the comms there somewhere.
Seems to be a thing…
I have a master ON/OFF for head Laser/Router power on my LCD unit. I can kill the laser immediately with that until I work out why the STOP function in Lightburn doesn’t work/sucks.
I updated my own STOP macro in Lightburn. I added M42, P45 S0 before the stop command. This at least seems to instantly turn off the laser (even though it continues to finish it’s current moves).
Not sure if it’s really needed, but maybe it helps someone in the future with connections.
My updated (rather complicated) MPCNC wiring, now the laser is installed.
I have no idea if this will help, but you might try turning on the Emergency Parser in Marlin. Unless it is turned on, the pause and stop commands get added to the same queue as other commands. In configurtion_adv.h:
/**
 * Emergency Command Parser
 *
 * Add a low-level parser to intercept certain commands as they
 * enter the serial receive buffer, so they cannot be blocked.
 * Currently handles M108, M112, M410, M876
 * NOTE: Not yet implemented for all platforms.
 */
//#define EMERGENCY_PARSER