Starting my R2-LR3

So, a long time ago, in a galaxy far far away…

I have been a long time lurker (joined in Nov 2021) here in the forum (and have spoken up a bit in some topics that I do have a little bit of knowledge on). I have a MaslowCNC, a BobsCNC Evo5, an Ender 3, and an Ender 3MAX. Because of this forum, I also have one of the $79 Cenoz JL1 Laser engravers. SO needless to say, I have plenty of “toys” um…tools to keep me busy. I started here with looking at the MPCNC. The Primo was just being released (IIRC) and was just looking and reading (and trying to scrounge up the $$) to go all in. I had also looked at the LR2, but at the time, I was really looking at the MPCNC. Since then, the LR3 came out, and ultimately looking at what I was going to be using it for, I decided the LR3 was more suited for what I would be doing: larger epoxy inlays, flattening slabs, and other things of that nature.

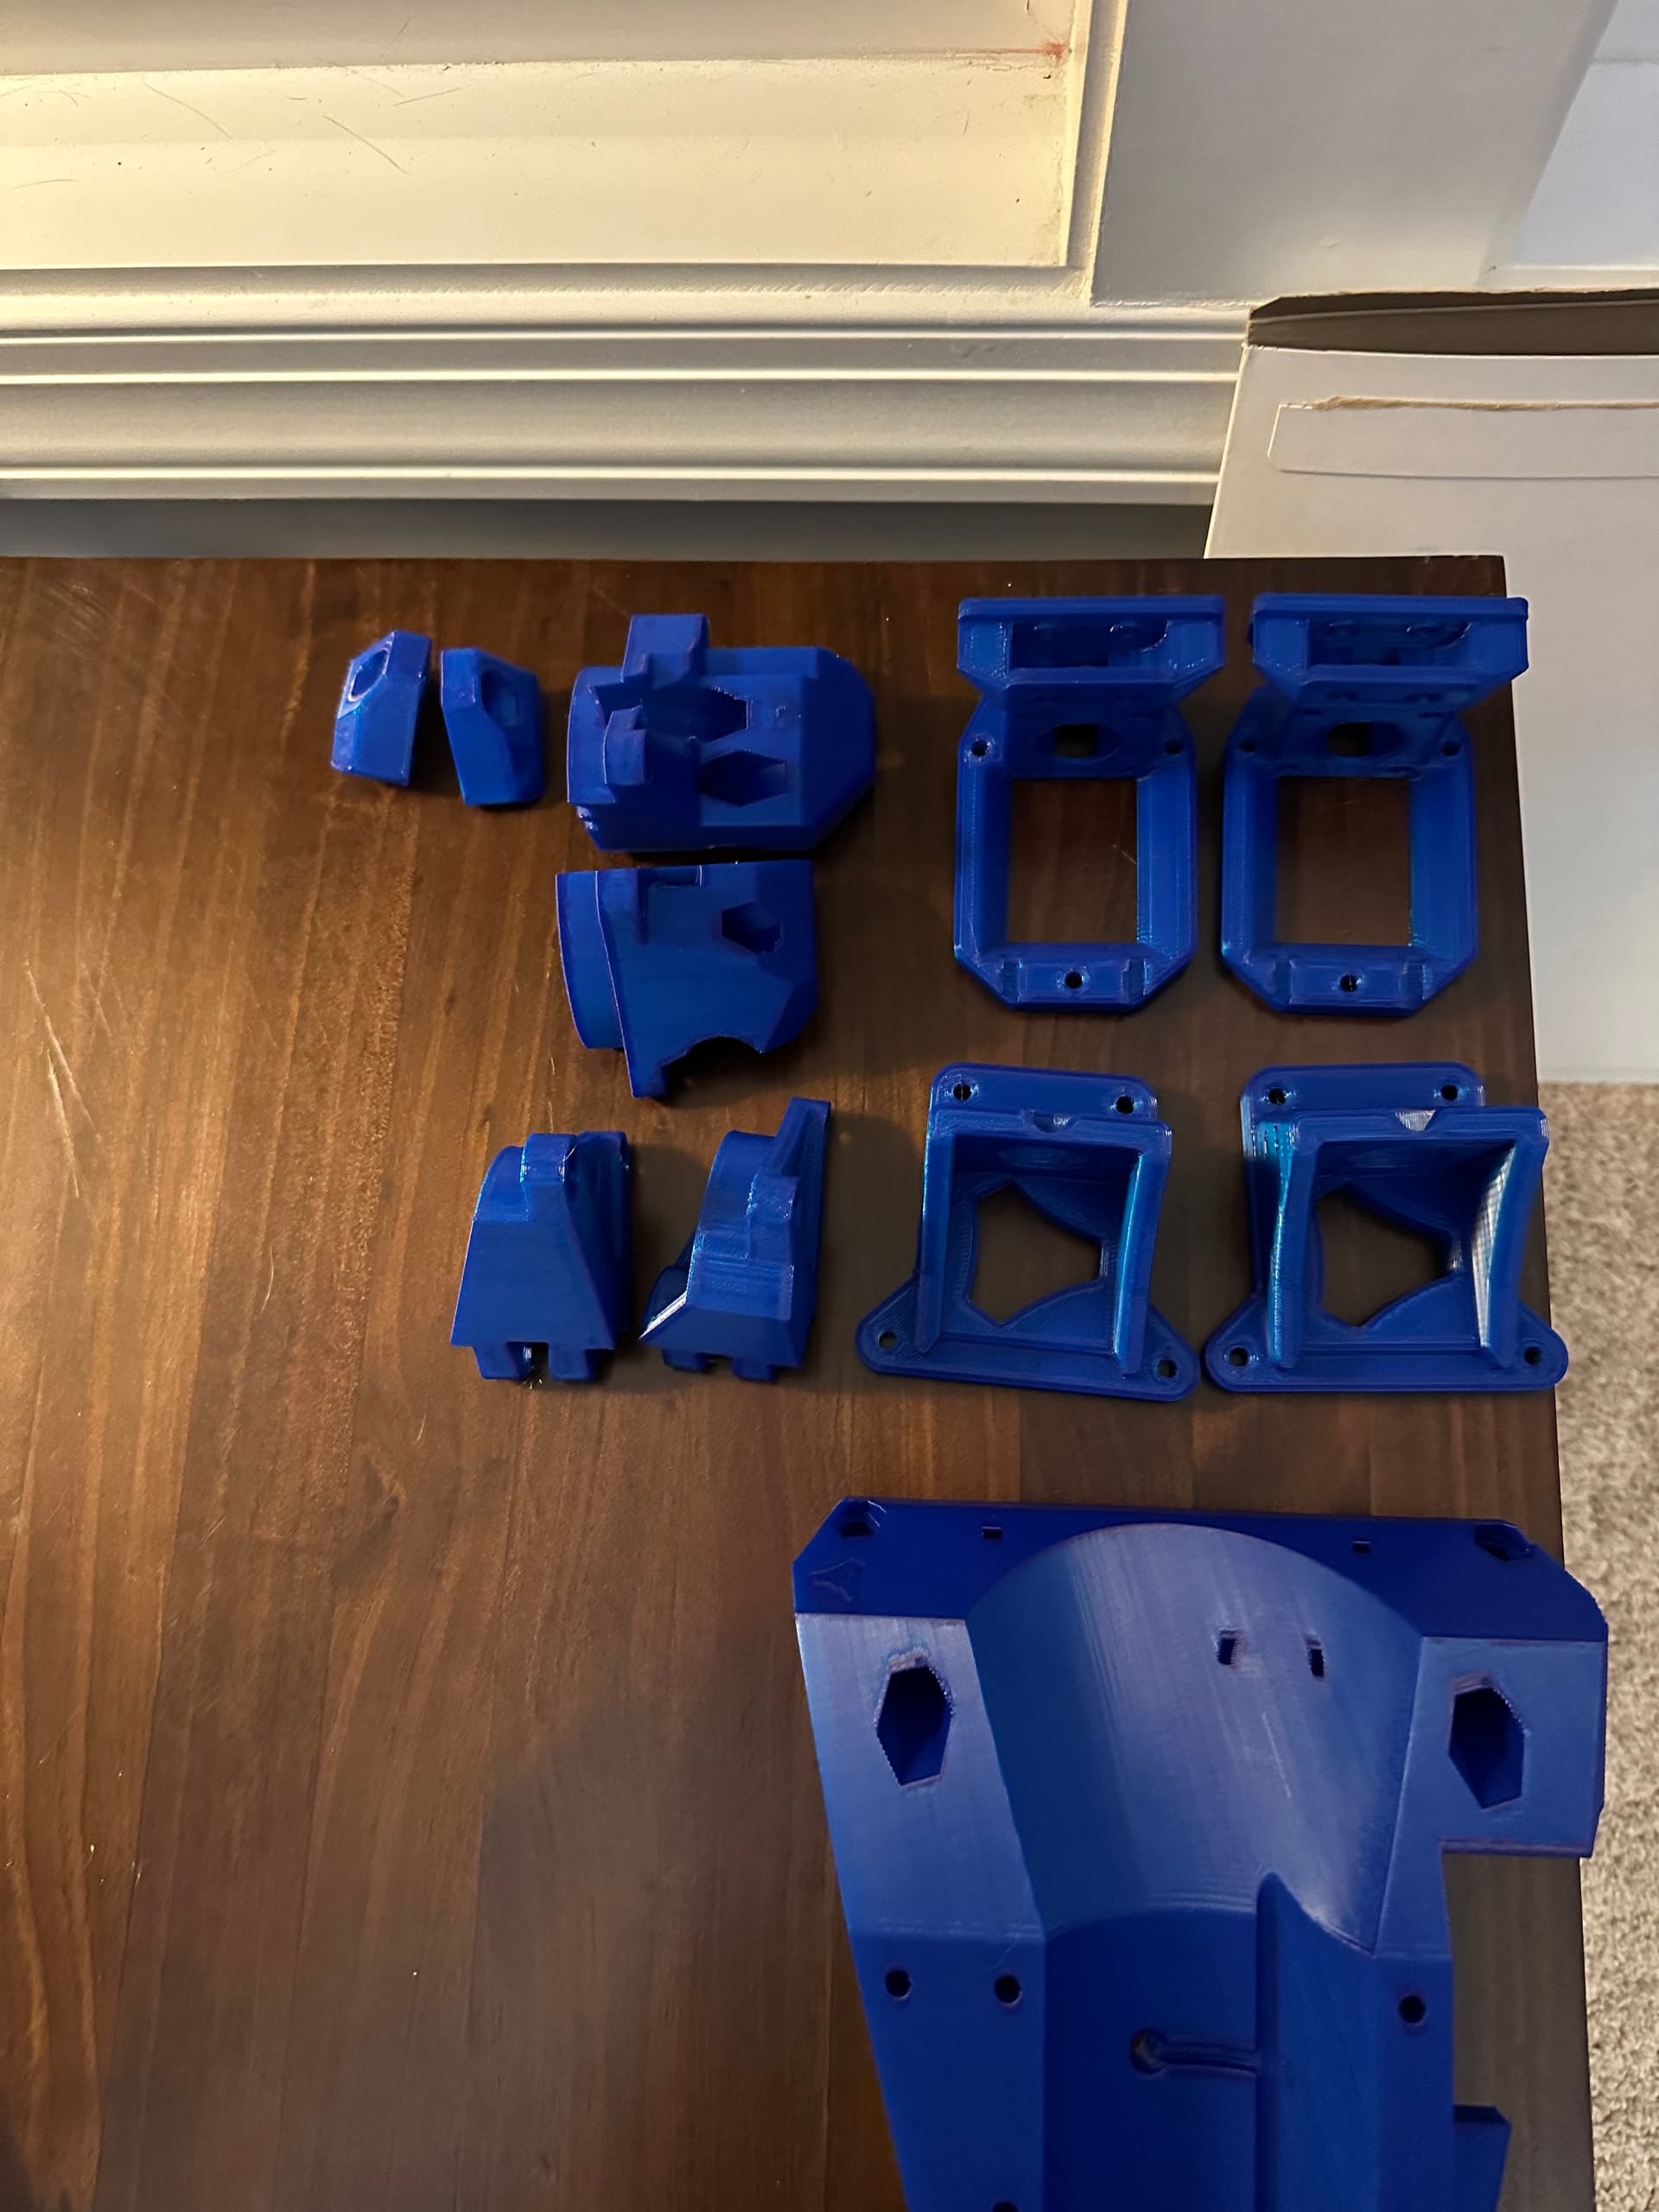
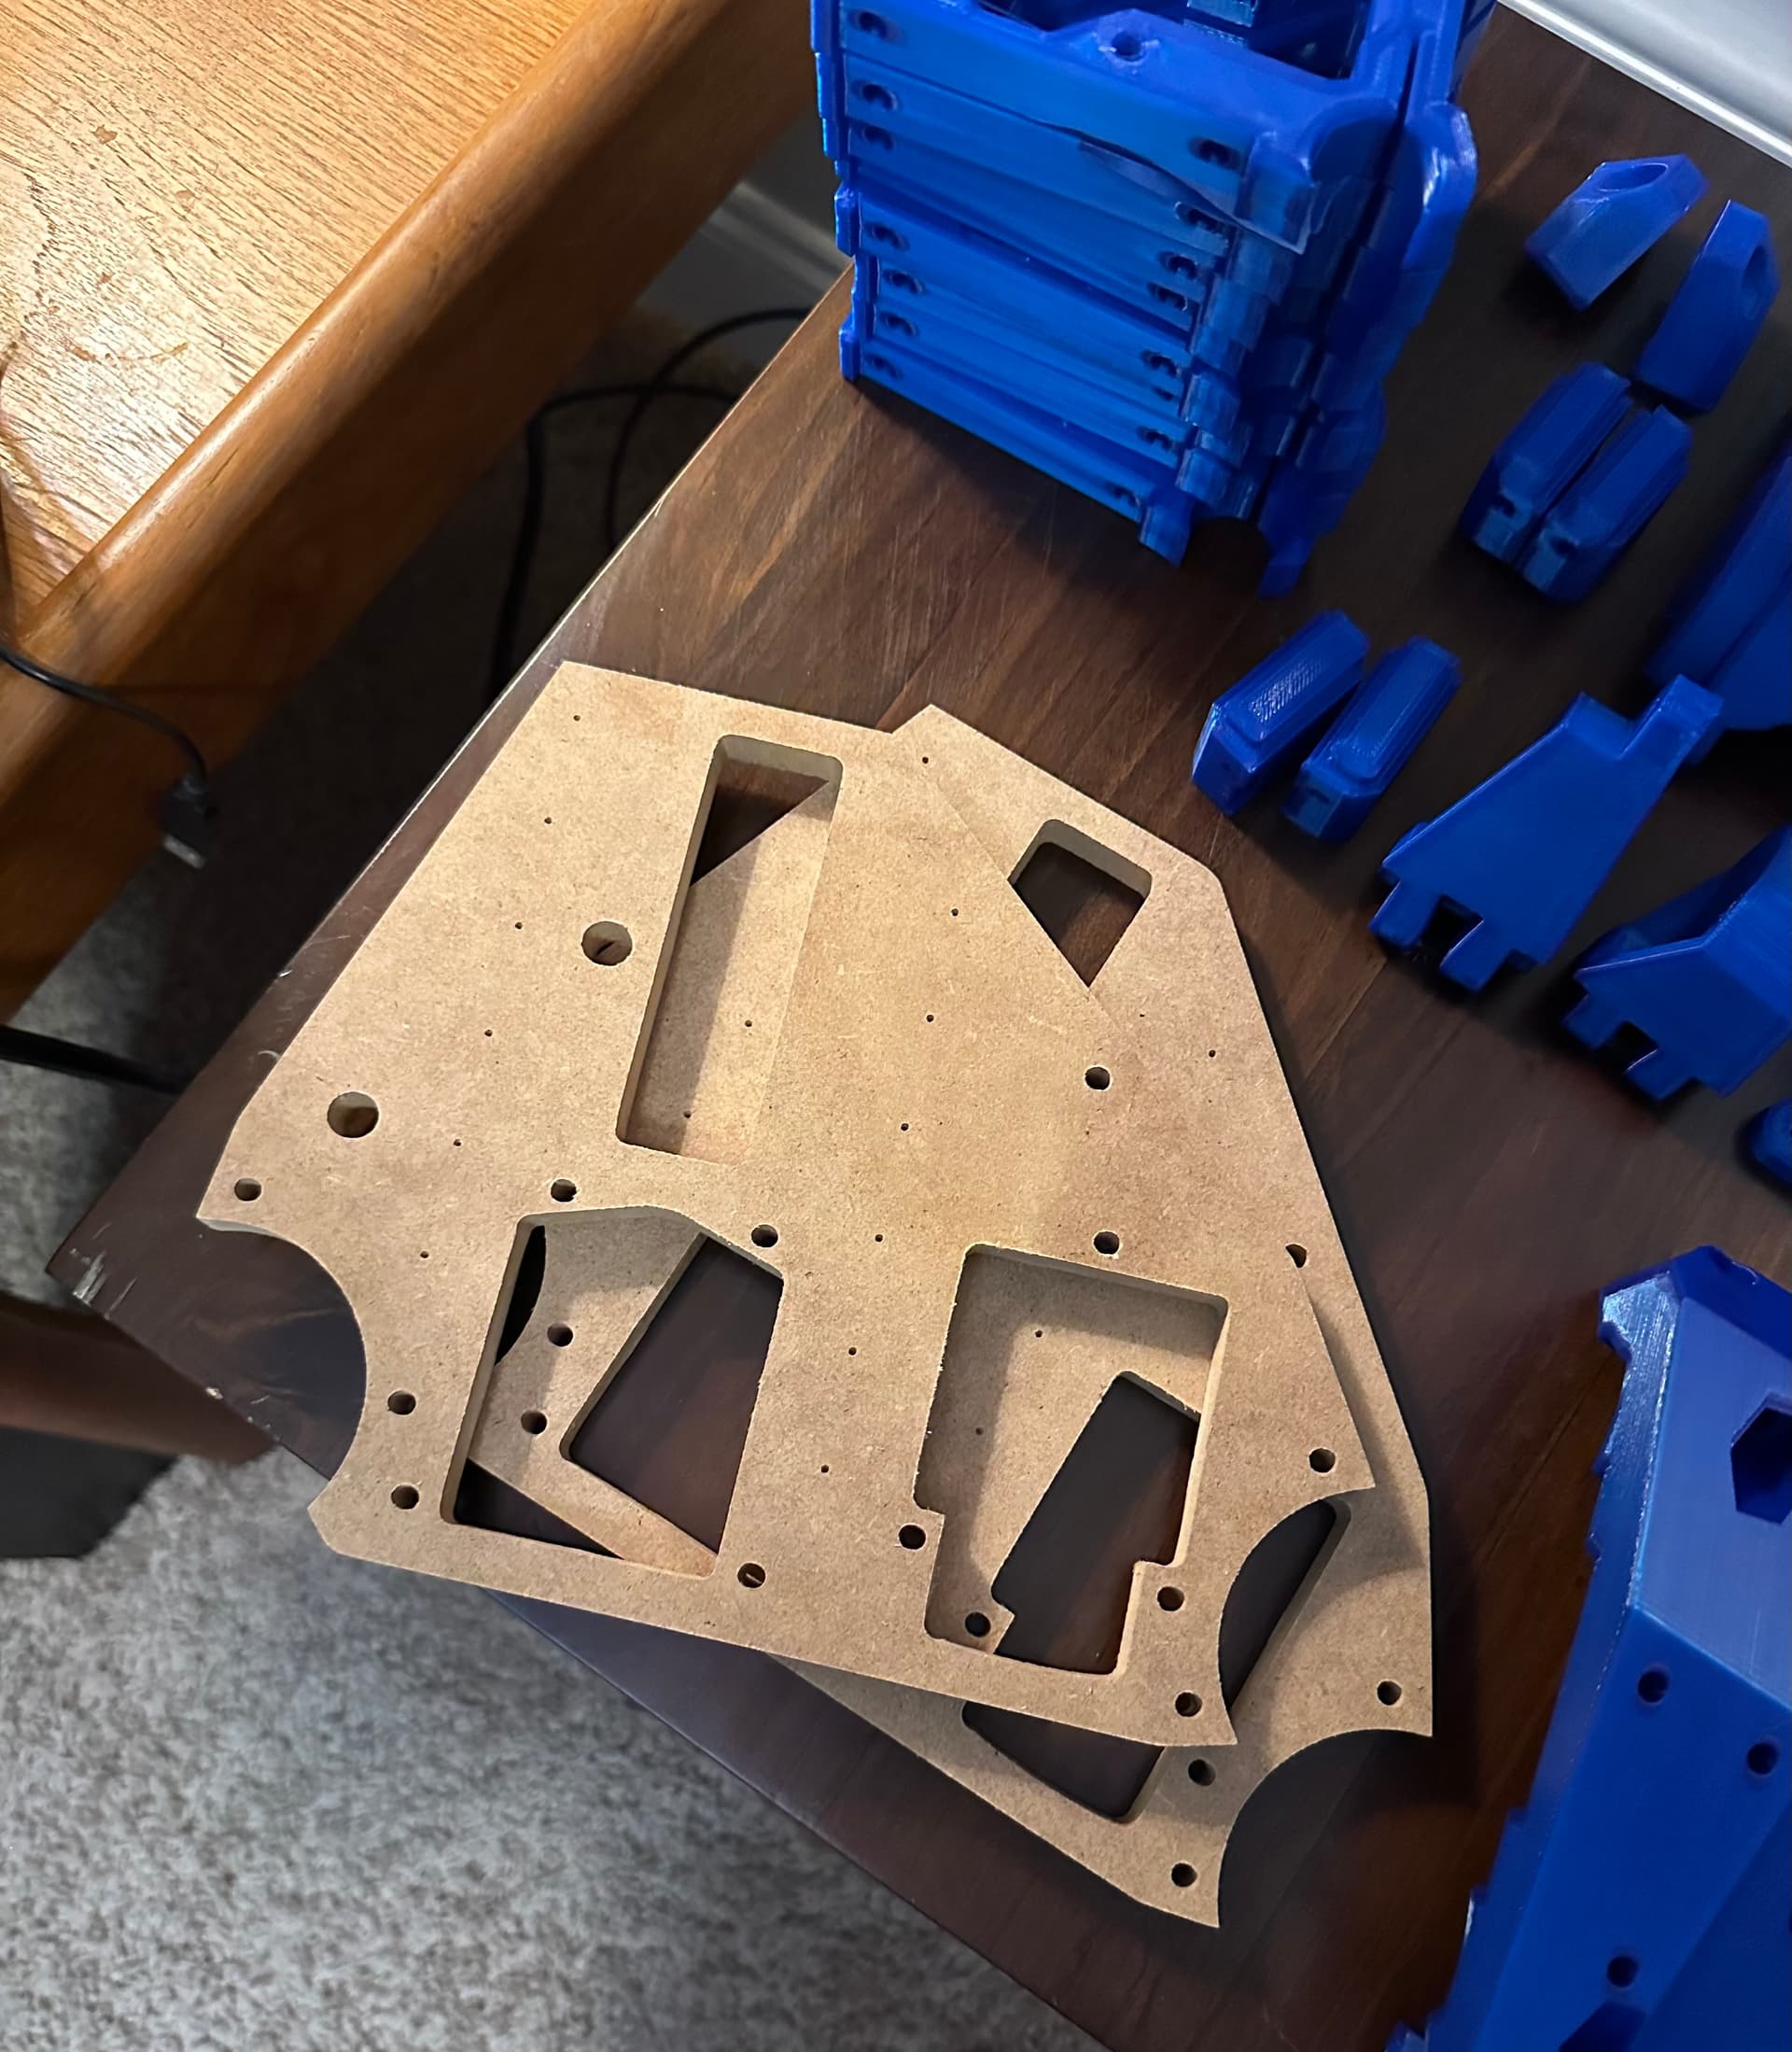
And so I come to you today to state I have begun my LR3 build journey. Last night I printed the core (12 hours, 34 mins), and I currently have a few pieces on the MAX printing (roughly 21 hours according to Cura - it said the core would be 15 hours, so we’ll see). I plan to cut the YZ plates in 1/2" MDF, and will be ordering everything else from V1 in the next week or so, as long as there is nothing that pops up on me that takes away from my play fund! Until then, I’ll continue to print parts. Initial thoughts would be for a full sheet build, but thinking I might parse that down to a 4x4 build. I want to redo my table saw outfeed table, and thinking if this might be good to just incorporate it all together. I like the tables @vicious1 and I believe @DougJoseph worked on. I can use the Maslow and Bob’s to get everything started, but I think I will have a bit of time to figure that out.

Until then, here is the core I printed. If anyone sees any issues, please let me know. I think I have enough filament to reprint if need be.


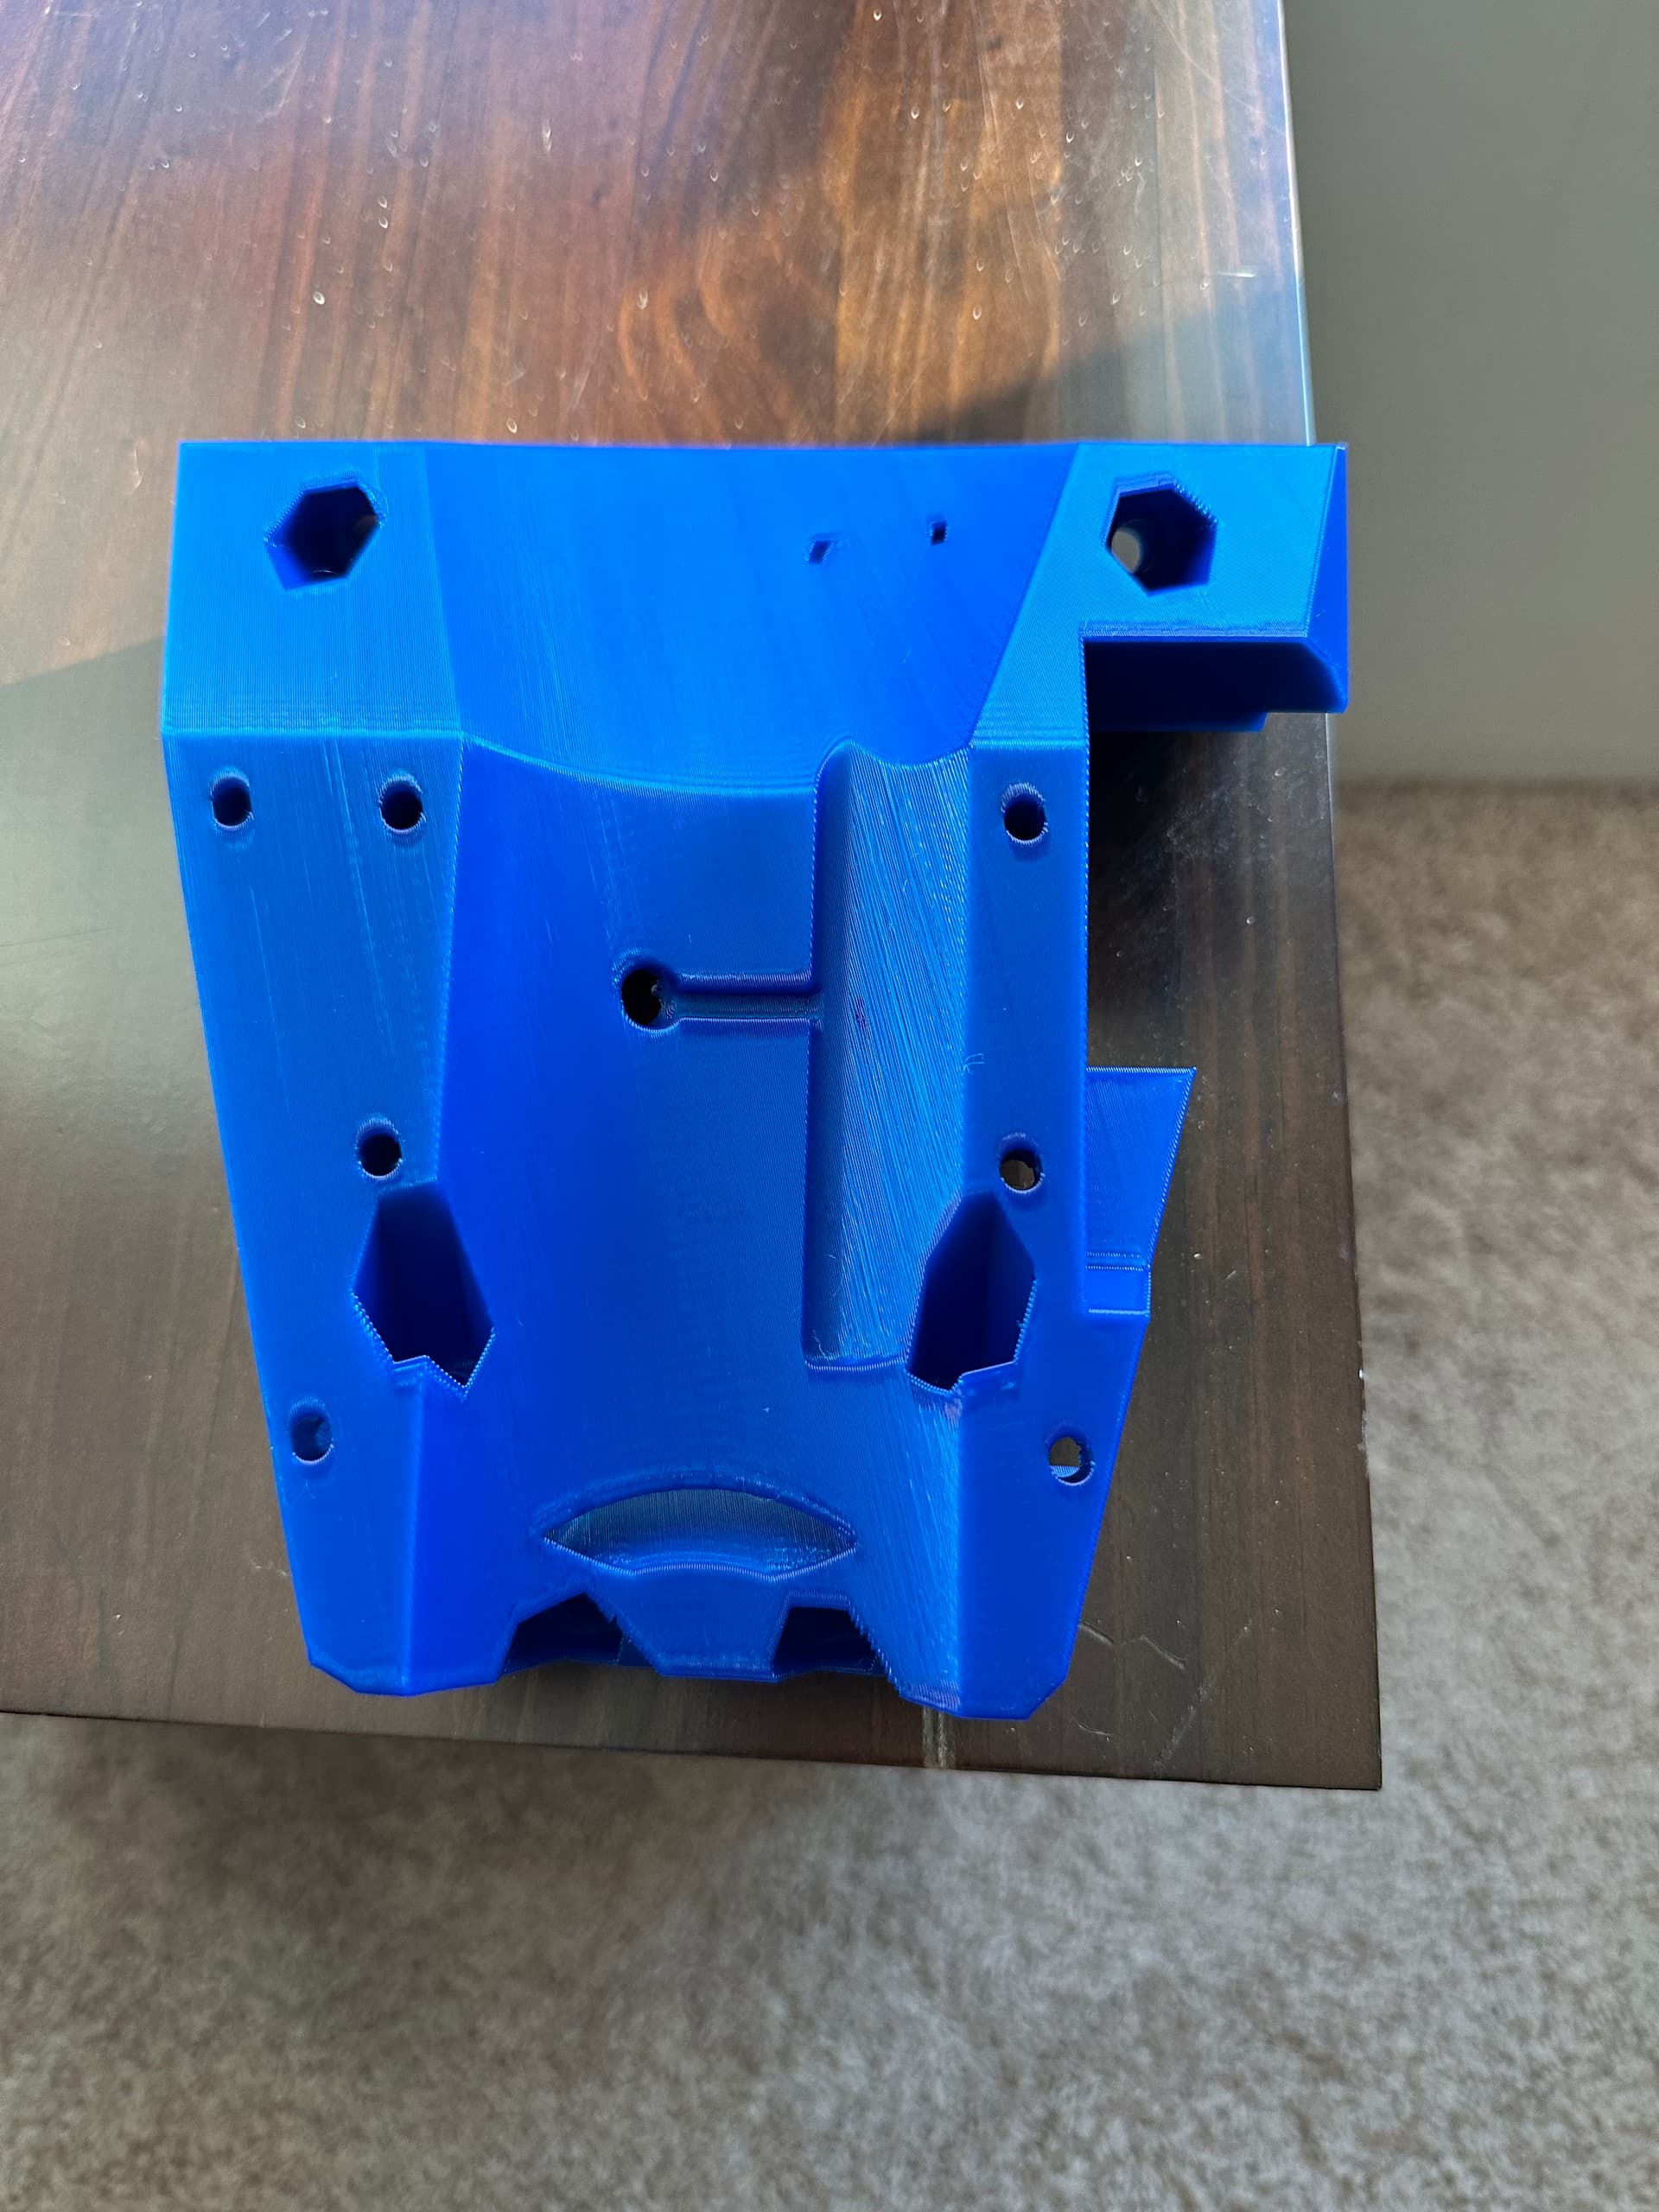
Edit: added a better picture that was a bit more in focus!

7 Likes

Aside from the fact that it’s clean, it looks OK from here…

1 Like

Clean as in a clean print, or clean as in there is no dust on it…yet?

2 Likes

Yes.

2 Likes

Long running joke, When someone shows a fresh clean new build with super fancy pictures…“ewww, gosh, why it is so clean!?!” HAHAHA

Just means you are part of the crew already. Very interested to see what you think of my style versus those others.

4 Likes

Looking good! Please keep us updated!

1 Like

looking forward to the rest of the build. I’ve seen everyone else’s here, and have a good feeling I’m going to like it.

3 Likes

Been a painstakingly fun adventure getting mine up and running (it finally is…kinda?) don’t be afraid to ask questions or anything everyone is beyond friendly and knowledge sharing. I lurked for some time as well, wish I had come into the forum sooner.

1 Like

Not a whole lot to update for today. I have a few more parts printed: 2x Y Drive, 2x Z Drive, Front Rail Roller, Rear Rail Roller (say that 10 times fast!!), Bearing Wheel Bracket Front, Bearing Wheel Bracket Rear, Z Stop, Z Stop M. All printed on the E3 MAX, took ~18.5 hours (so far ~ 31 hours of print time).

I currently have 4 braces (3/4 EMT), the Front Y Belt Holder (both left and right), and the Y Tension Block (both left and right) printing. Cura said 13.5 hours, but my printer has been about 3 hours faster, so we’ll see (currently 3:54 into it now) what the timer says when I get up in the morning. @vicious1 Did I read somewhere I need to mirror one of these for one of the ends? I’ll be printing more of them tomorrow, so just want to make sure I have it all correct.

I’ve also got the YZ plates laid out in V-Carve and getting ready to get those cut. I downloaded the DXF file, and nothing in that needs to be mirrored, correct? All cuts, are through cuts, correct? I’ll be cutting them out of the recommended 1/2" MDF, sealed and painted white.

I need to finish putting my Maslow back together (we moved about a year ago and have be "doing other stuff since) so I can get the struts cut ahead of time. I think I still have some hardboard left over from another project. If I am doing the standard 4x8 build, I would just need to use the 4ft DXF listed on the assembly site correct?

With as long as I have lurked on this site, and followed just about everyone’s build, I feel a little weird asking these questions as I feel they have already been answered a gazillion billion million times. But alas, due to my current and former careers, I have always learned to trust what I believe to be true, but verify to make sure! (most of the time the voices in my head aren’t actually trying to lead me down the wrong path…honest, I swear!!)

Edit: I guess I had more to say than I thought…

3 Likes

Brace note- Print the two left and right end braces with 50% infill and oriented so you can have the top facing out on each end, and the rest with 30% infill.

You can find it here: LowRider CNC V3 - V1 Engineering Documentation. So yes, print two with 50% infill, one of them mirrored. To be safe use a different colour and mark the top (the outside) with a marker. :slight_smile:

And that’s completely fine. Where do you think does the rest of us take their apprecition through others and will to live from? :joy:

3 Likes

Duh!! Now I feel sheepish as I have the table of all the printed parts to include the notes section printed out and sitting right at my keyboard. I knew I had read it, but thought it was in a post of someone else’s build somewhere, and to be honest, I wasn’t feeling up to searching though all of the posts. I was tired as over the last few years, the “time changes” here in the US have really put me off kilter more than I remember.

I also just realized I have not been following the chart as closely as I had planned. I have been printing everything at 35% as that is what I initially set for the core. I know it shouldn’t make too much of a difference, just cost me in a bit of time and filament. C’est la vie! My prints from last night were finished this morning, looked good. Will start the last 4 Braces printing (with the increase to 50% for 2 of them and one mirrored) when I get home form work today. After that, I’ll have to wait for the white filament I ordered last night to show up to print the rest of the parts needed. Supposed to be here Friday, but may show up tomorrow, but we’ll see how well the amazons work for that.

1 Like

It’s looking great! Clean prints!

Thanks…They are clean…for now, but that is only because they are in my home office. Once they get to the garage/shop, that’ll be a whole different story!!

Not a lot to update on my little adventure. I got my conduit yesterday, and started printing my last 4 braces (2 @ 50% infill with 1 mirrored). I did find out this morning that the run-out censor on my E3MAX works. Woke up this morning to an empty roll and the machine paused with what I am assuming the appropriate error on the printer’s screen. I have another roll to complete the job, but did not have time to mess with it this morning before I left for work. Fingers crossed that I can get it reloaded and continue as they look like they are just about finished, maybe another layer or two.

Oh, and my white filament will be delivered later today, so I can start the printing on the parts with that alt color.

3 Likes

So I did a thing:


Still need to drill the 1/16" holes for the linear rails. My drill press chuck would not hold the regular 1/16" bit I have, so will be picking up a hex shank set to remedy that.

Also was successful in getting my printer to resume from the “pause” taken after running out of filament, so got the braces finished. Have the rail blocks on the printer now. My white filament came in, so will probably start those prints tomorrow.

TTFN!!

5 Likes

Update for today:

Not a whole lot, just this: Order #23526 confirmed!!
And started printing the rest of my parts needed (basic parts). WIll still need to print mounts and dust shoe, and thinking of doing @DougJoseph’s floating dust shoe. With that, will @Michael_Melancon’s Kobalt mounts work with that floating dust shoe? With all the mods…too many choices…aaaahhhhhhhggg…lol!

For the table, I am 90% sure I will be redoing my outfeed table for the table saw. This should give me more ability to go the full 4x8 setup, with the ability to remove the gantry when the table saw is needed. I am also contemplating @DougJoseph’s hidden belt method as this would allow me to keep the belt holders mounted when using the saw as well. Hmmmmm… :thinking: :thinking: :thinking:

There is a floating-Z dust shoe that has Kobalt mounts. The upper mount has a major part of the float magic attached, and the lower mount has completely removed some “normal stock” LR3 bits in order to allow the slide action to facilitate the floating Z. Other mounts could be remixed to get this, but unless they are it’s unlikely they’d be compatible out of the box.

The upper mount has to also hold the end of the bit of flex hose that doesn’t move up and down, and the lower mount basically has to just get out of the way of the other end of the hose that does go up and down.

@DougJoseph I thought that might be the case as I was examining the pics on both printables listings, but wanted to confirm! Thanks for the info and all you have added to the project!!

1 Like

Basically what we need is a “Hero Me” of LowRider 3 mounts…

I like the cam mounts, but also want to integrate @DougJoseph dust shoe, as well as the kinematic mount.

But also, I have a regular 2.5” hose for dust collection I use, but I don’t know how many out there are using that.

As, of now, I don’t have any of it, because I haven’t had time to get everything to bring it together

2 Likes

I do too, if you’re looking to link it to one of Doug’s mounts, I have an adapter for that.

3 Likes