Ok, you got me. Analog thinking in a Digital world, LOL
1 Like
Didn’t mythbusters make concrete airplanes and a lead balloon fly…? Lol ![]()
3 Likes
OK, I am close to being ready to cut the plane.
I’m wondering about my end mill though.
I have a 2 flute, 1/4" endmill, which I used on my last plane. it did decently well but did notice some melted plastic on the end.
I’d like to get a single flute but the trick is the overall length I need. the fuselage has a z height of 3.5" which means I need an end mill long enough to make that cut plus fit into the router.
Any ideas where to get longer 1 flute (preferably ball end) end mills? I have been searching for a while and have not found anything.
I see some here, Extra Extra Long Ball End Mills.
Keep the rpm low or add an air blast, that might help with the melting. Other than that, just less depth per pass to clear out the chips as you go.
2 Likes
Thanks Ryan, but those are all 2 flute or more - at least I did not see any 1 flute. but still a good find. Slightly less then where I got my last endmills.
Less depth is a good thought.
I couldn’t find any long single flutes.
1 Like
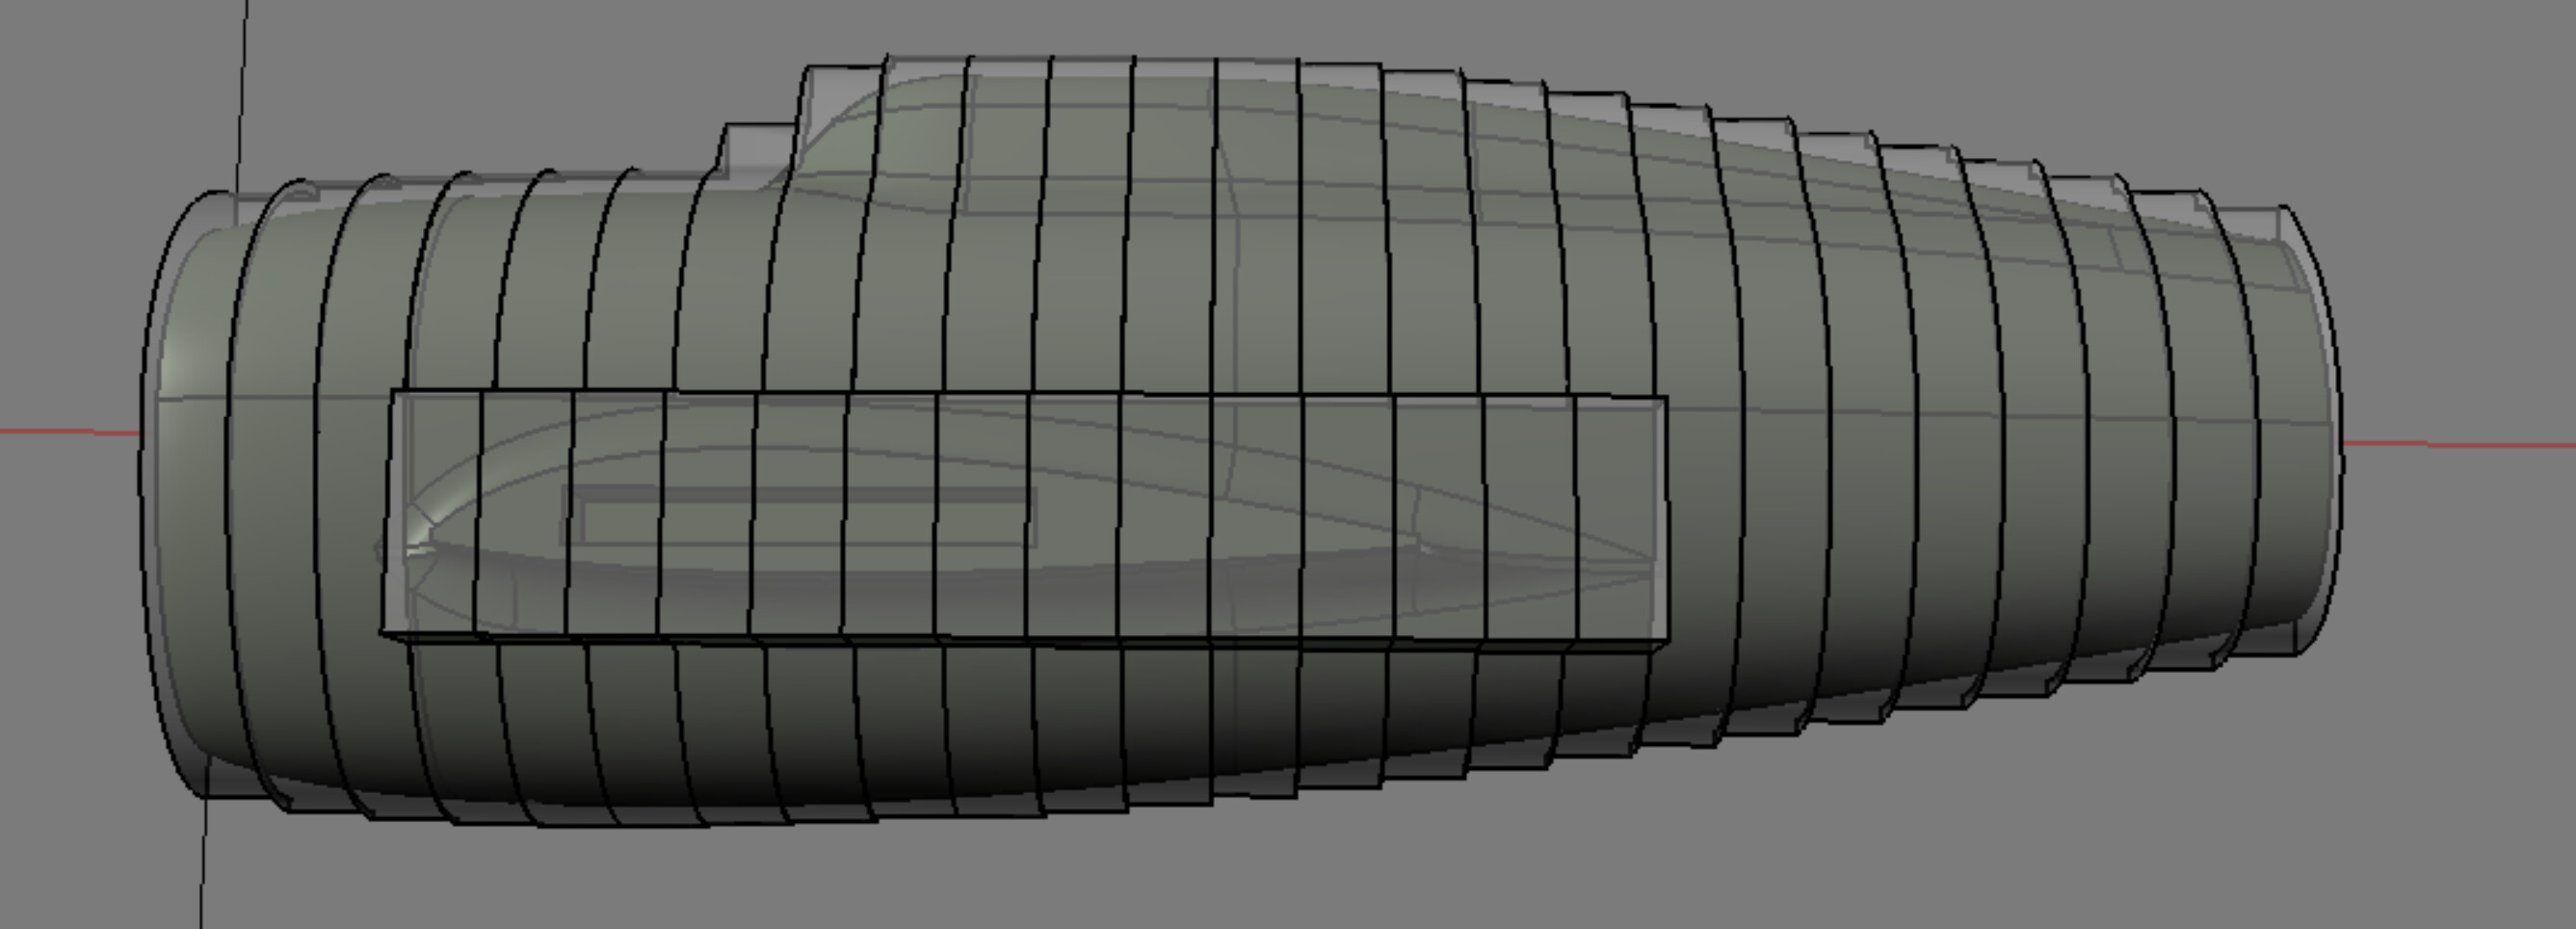
OK, summer got in the way of this project but finally manage to get 1 mile stone out of the way.
Rough cut of the foam sections that make up the fuselage.
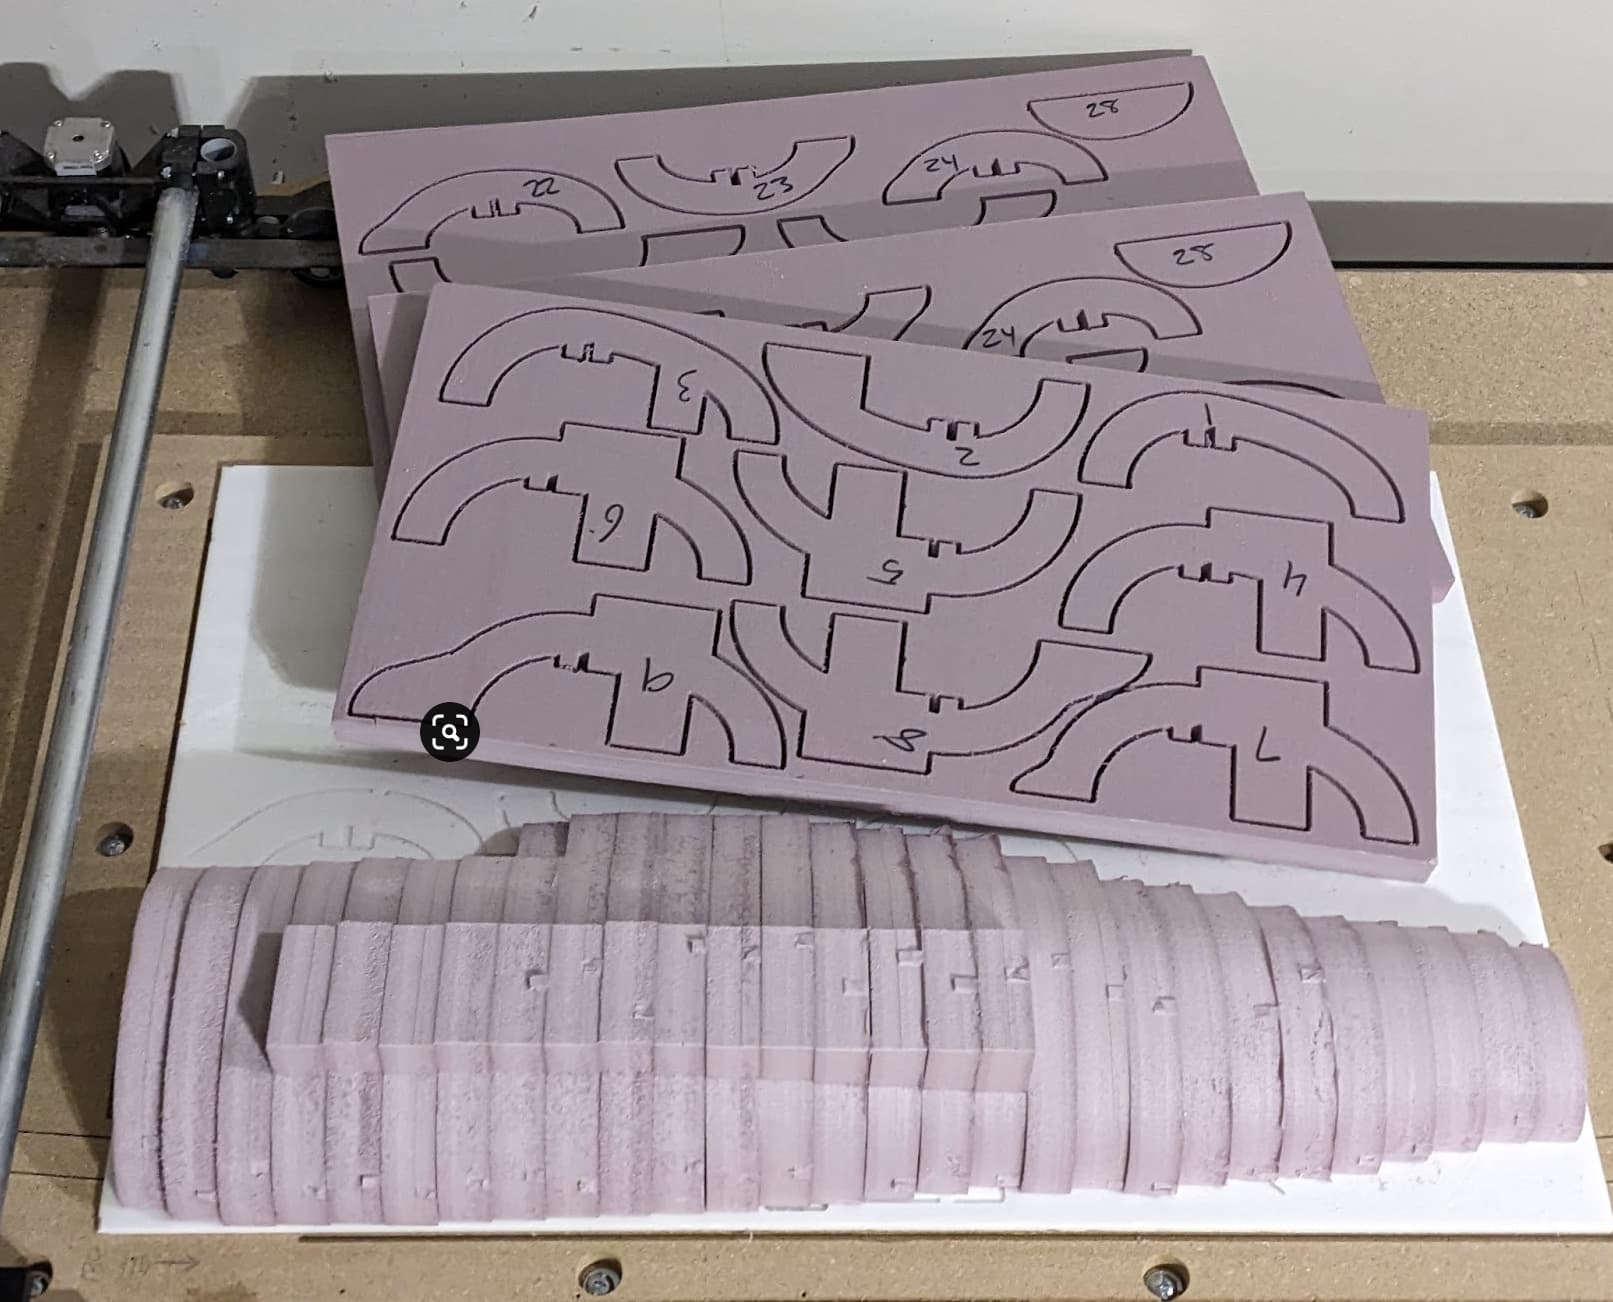
what is currently cut is the transparent grey sections in the image below. Next step is to glue them together and carve the final form.
9 Likes
Nice choice the razor back is my favourite.
One could say I am a bit of a jug head.
1 Like
Thanks. Hopefully I do it justice.
2 Likes
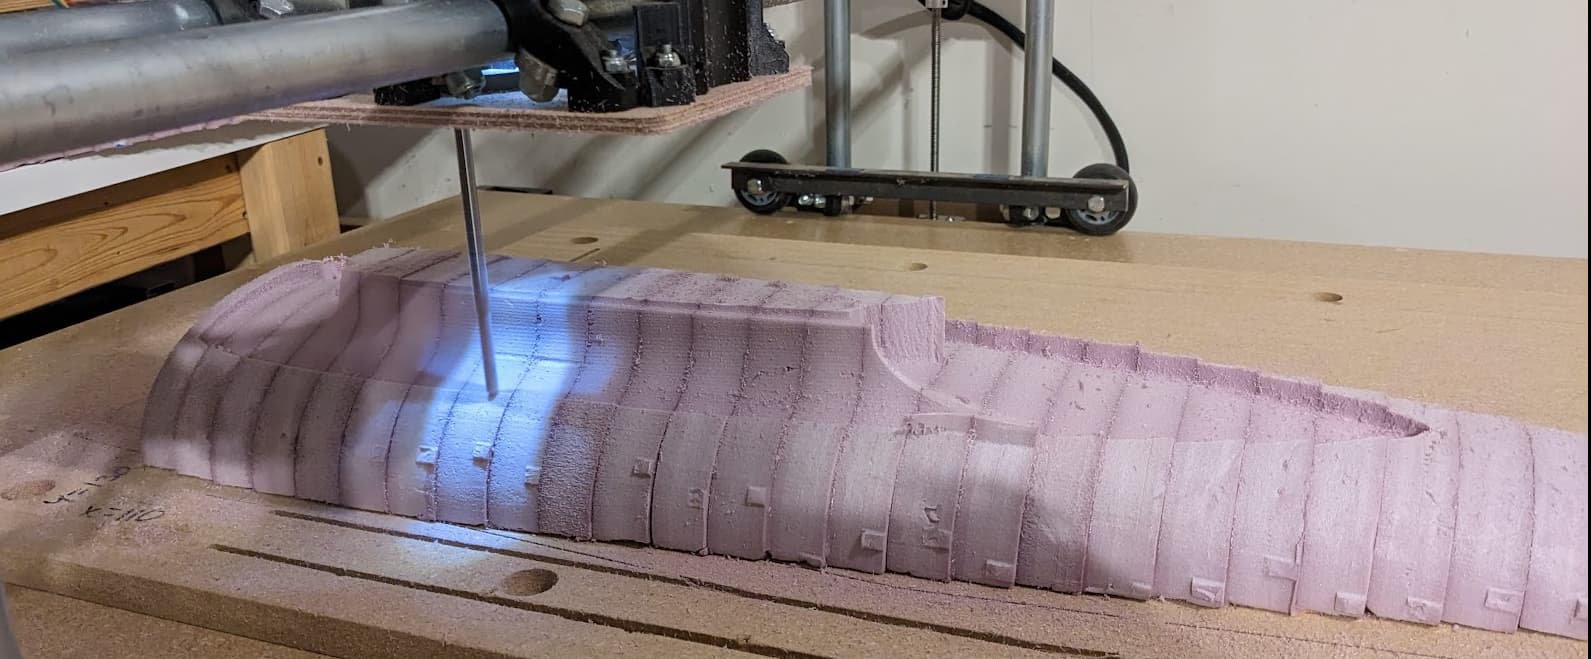
Started cutting the final form of the left half of the fuselage.
The foam cut great! but I need to start over. ![]()
I’ve been using only hard stops on my LR2. meaning I need to make sure everything is physically bumped to the 0,0. vs using endstops.
I’m doing a multi cut project so ensuring the start position is important.
Apparently, in one of my steps, I did not have my gantry bumped (homed) to 0,0 properly.
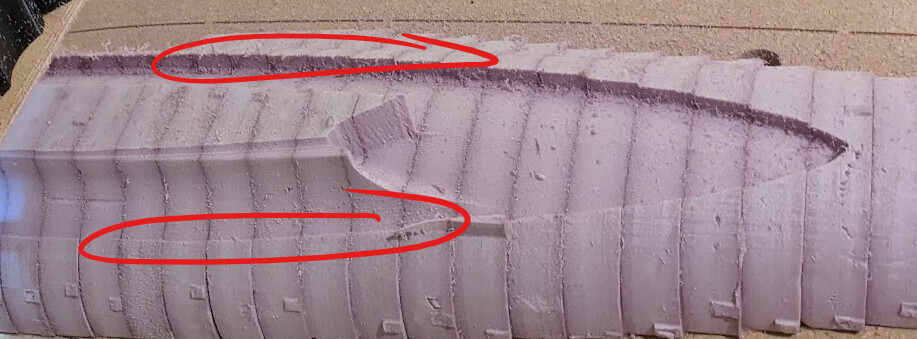
In the image below you can see a “spine” that I am using for alignment for both halves.
Apparently when I cut the groove for this spine, I did not have my gantry bumped (homed) to 0,0 properly.
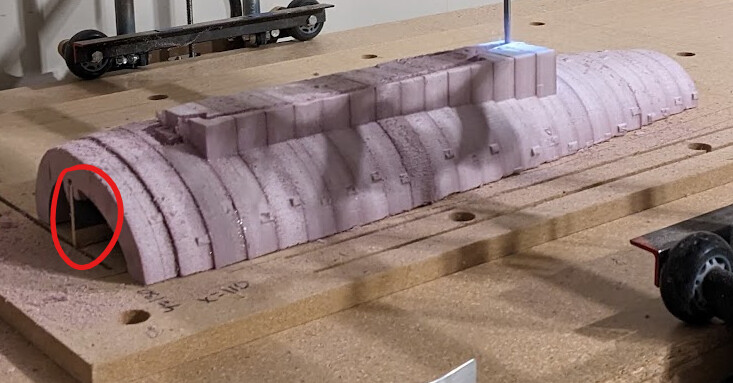
When I cut my final form, you can see that one side is very shallow and the other is quite deep. these should be equal. Meaning that my foam is not in the correct place. A.K.A. my homing did not use the same 0,0,.
Anyway, Ryan will be happy to know I will be putting in an order for the jackpot with some endstops! ![]()
7 Likes
I hope you are going to start filming some of these cuts. I have not seen many large carves in action.
3 Likes
I second the call for video of these carves of large foam! ![]()
1 Like
yes, I will plan on doing that next time.
I had a short window to run a cut and didn’t spend the time getting a tripod set up. But it did go through my mind also. ![]()
5 Likes
I know this is an older thread, but, ha…once again, I get an idea for a project or something I want to get back to, then do online searching, and BAM, I’m back to old forums I used to be on daily.
Such is this thread!
I’ve built many CNC machines (and 3d printers and some laser engravers) including an MPCNC and then the big low rider. I’ve wanted to do some RC airplane stuff for years. Ideally, eventually, get to making some sea planes (we live on a quiet lake and I can’t think of many things more cool than walking down to our little dock and flying something I built out of insulation from the hardware store and on a CNC machine I cobbled together.)
So…I’m back to tinkering here…my first forays into the RC world. I foresee many crashes and repairs; all part of the experience.
And, Slammer, awesome work!
5 Likes
I highly recommend the Sea Duck from FliteTest. It’s one of my favorites.
4 Likes
Appreciate the reply. I’ll check it out. Thanks.
1 Like
Thanks!
Probably would beore awesome if I finished it. ![]()
I do intend to but had a few distractions the last year or so. I need to finish building the lr4 to do so.
2 Likes