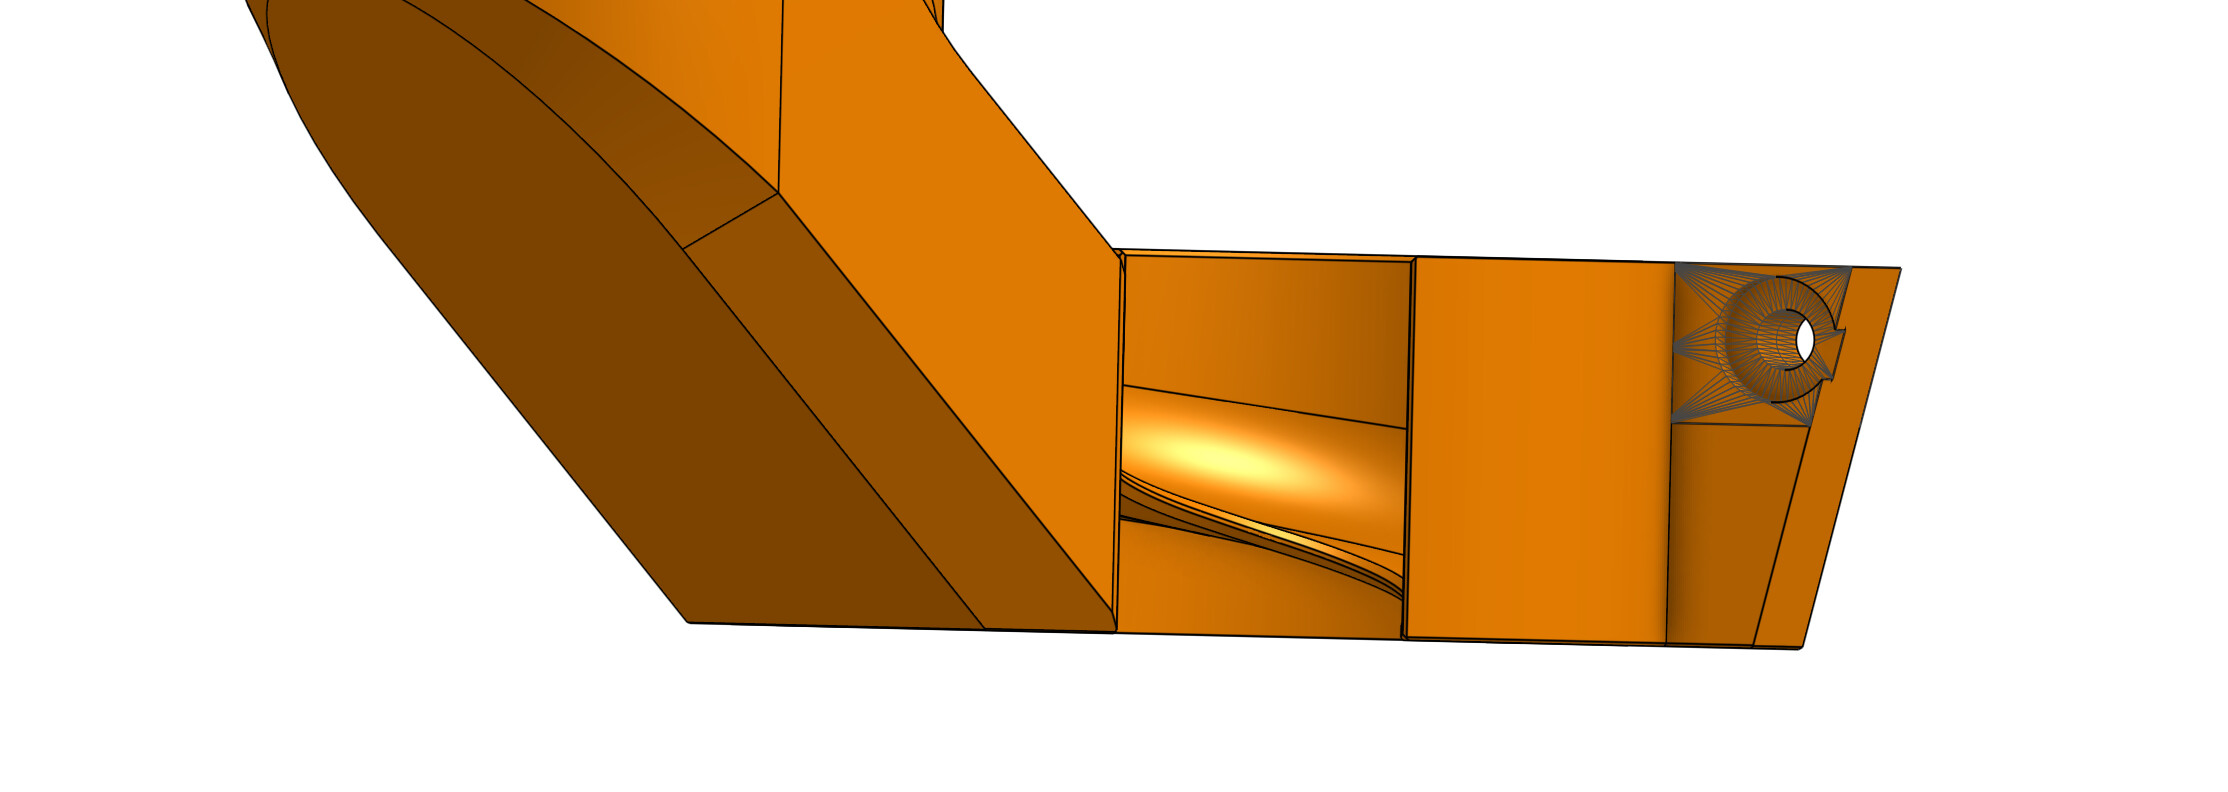
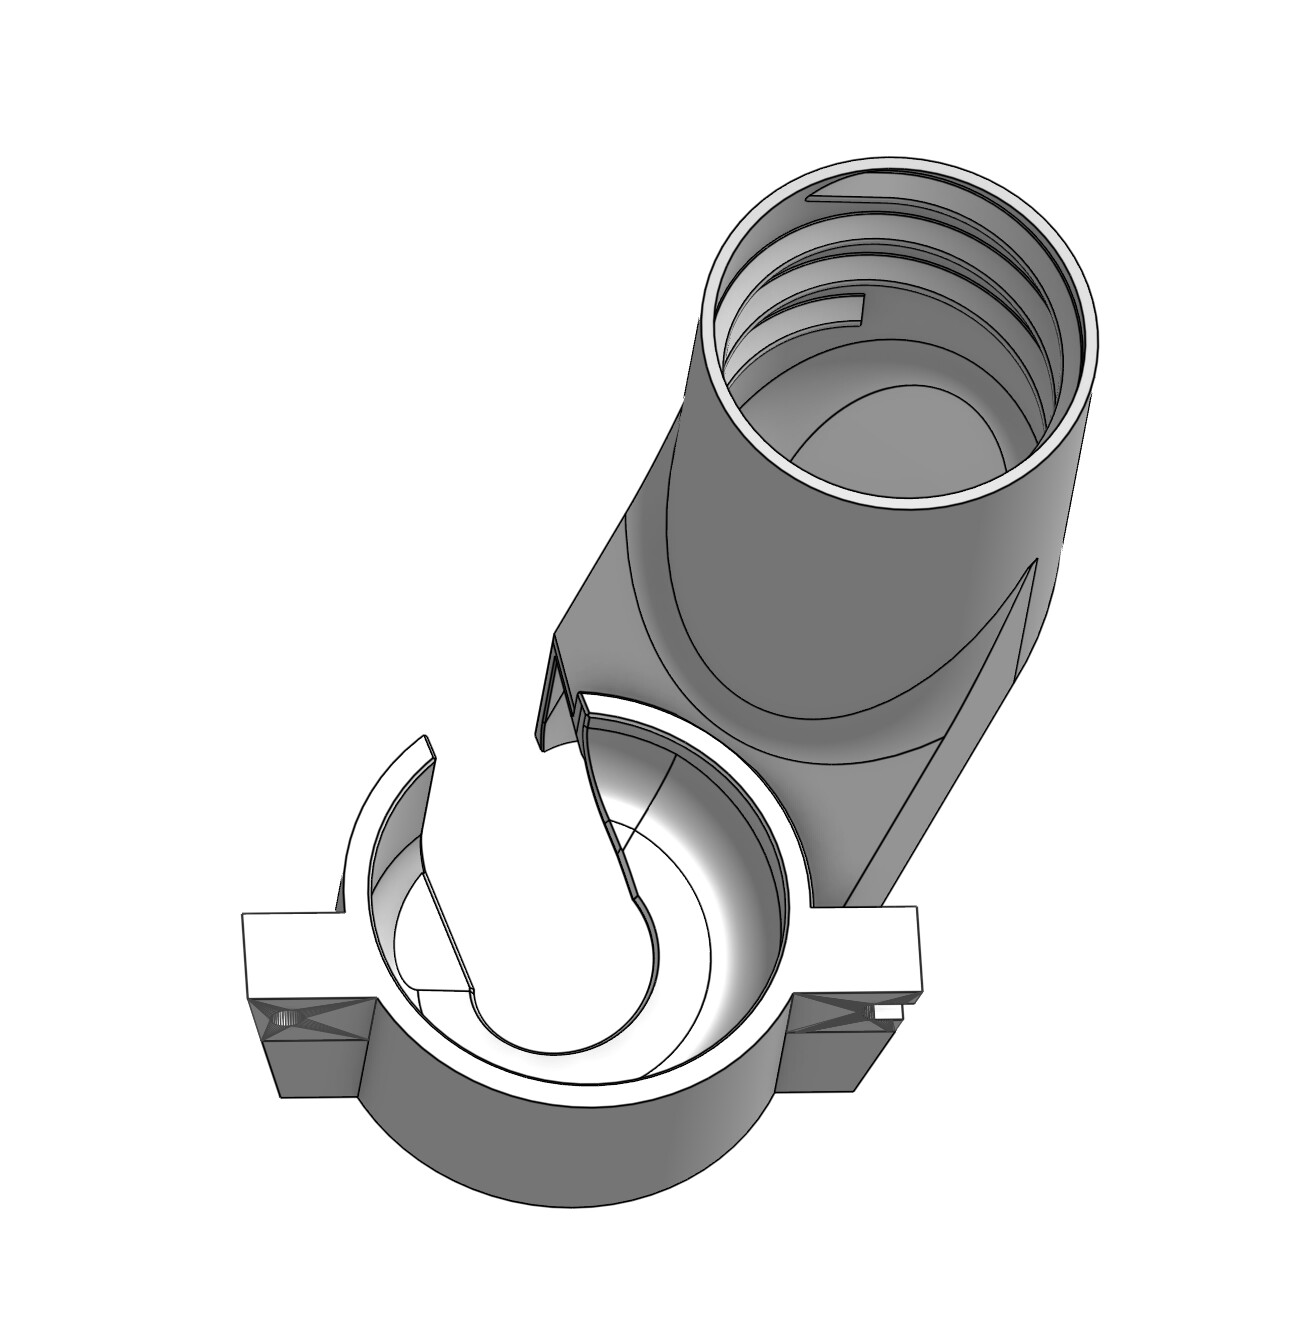
I’m not sure if these drawings are advanced enough for anyone but my tiny brain to understand, but here goes.
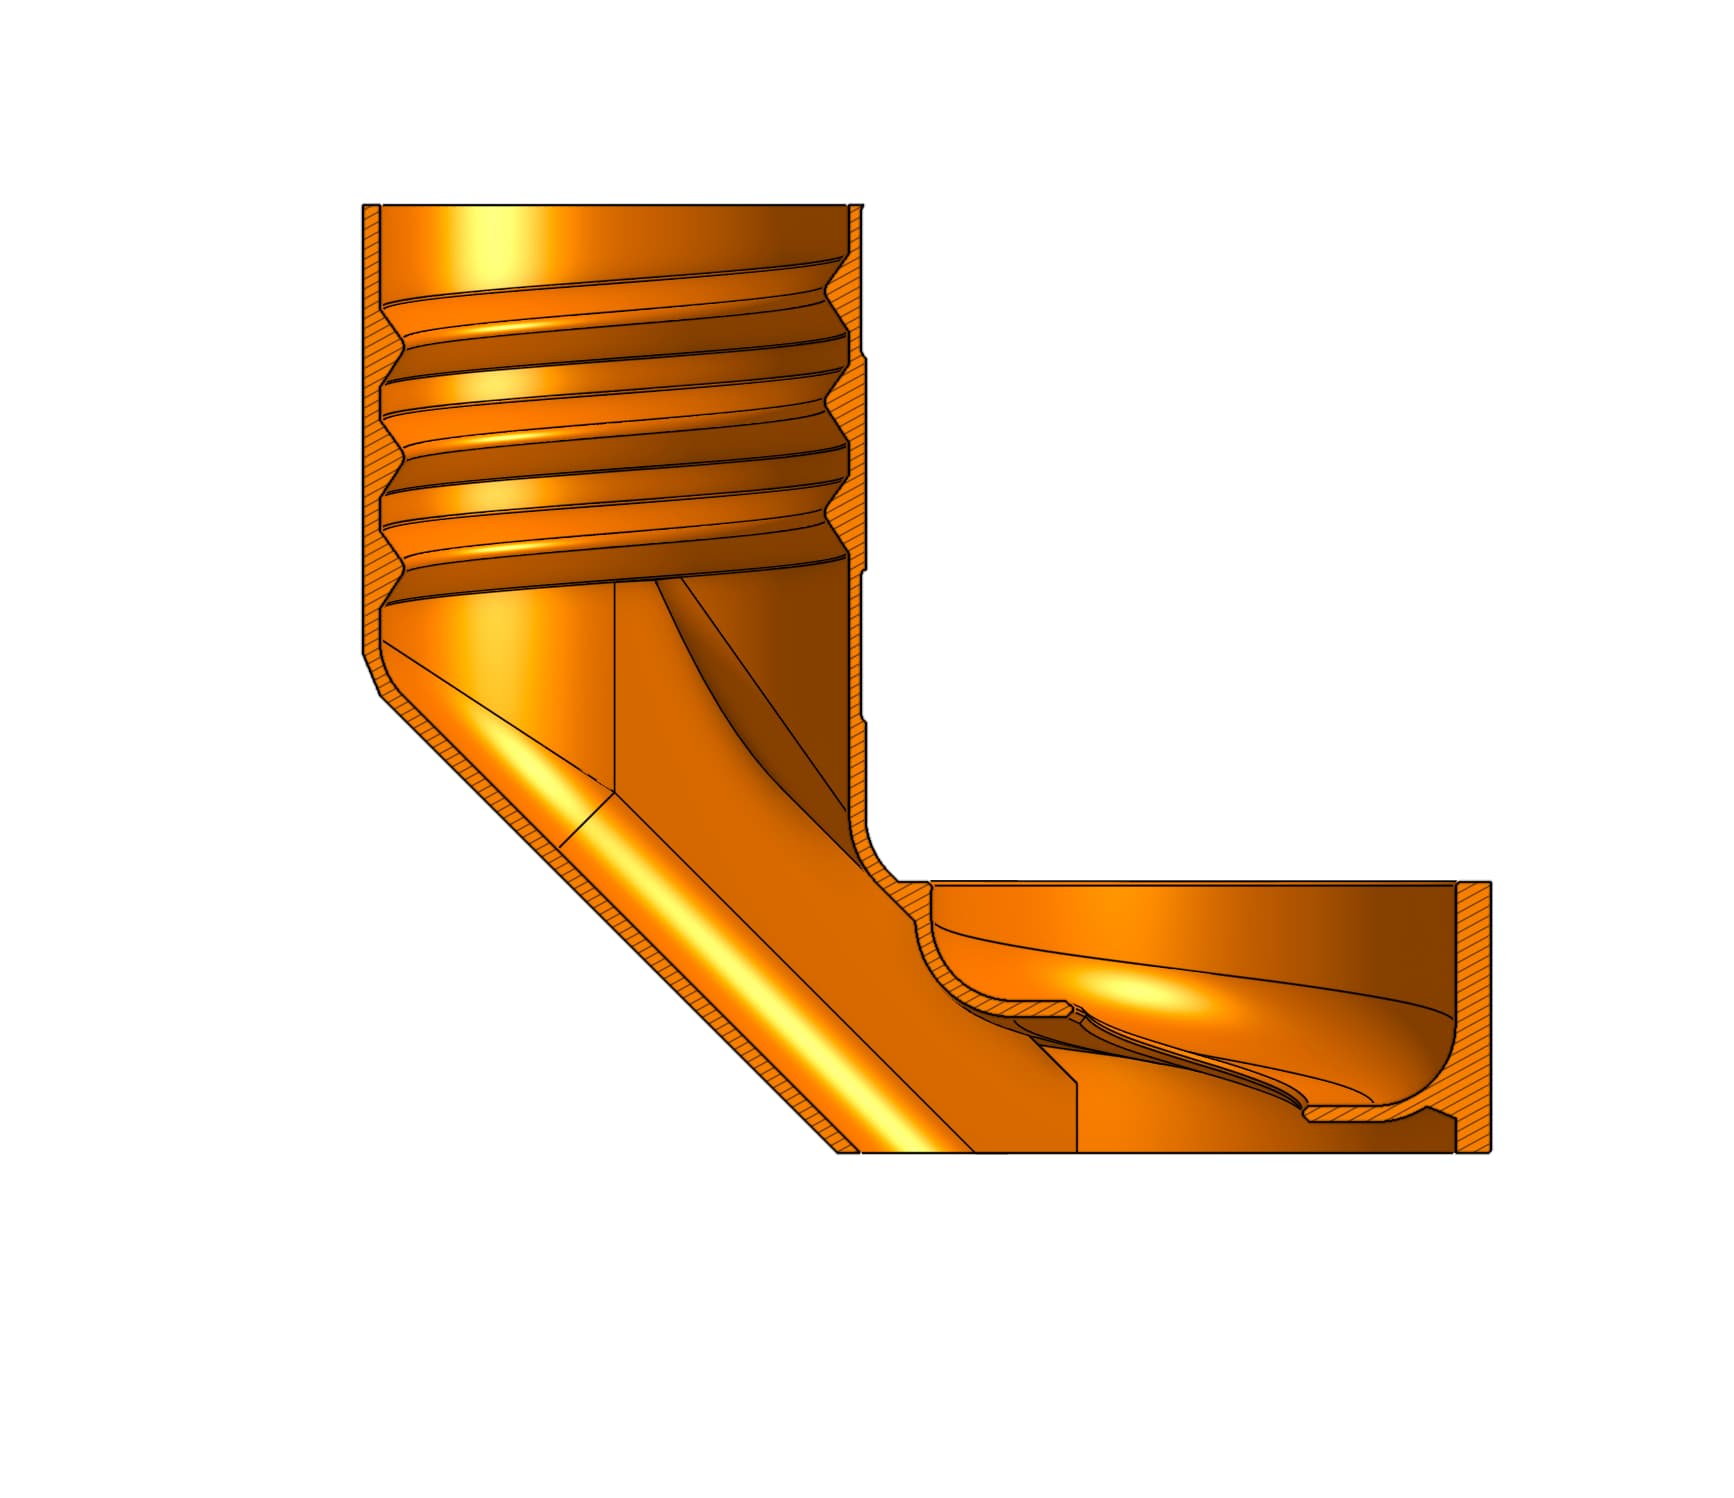
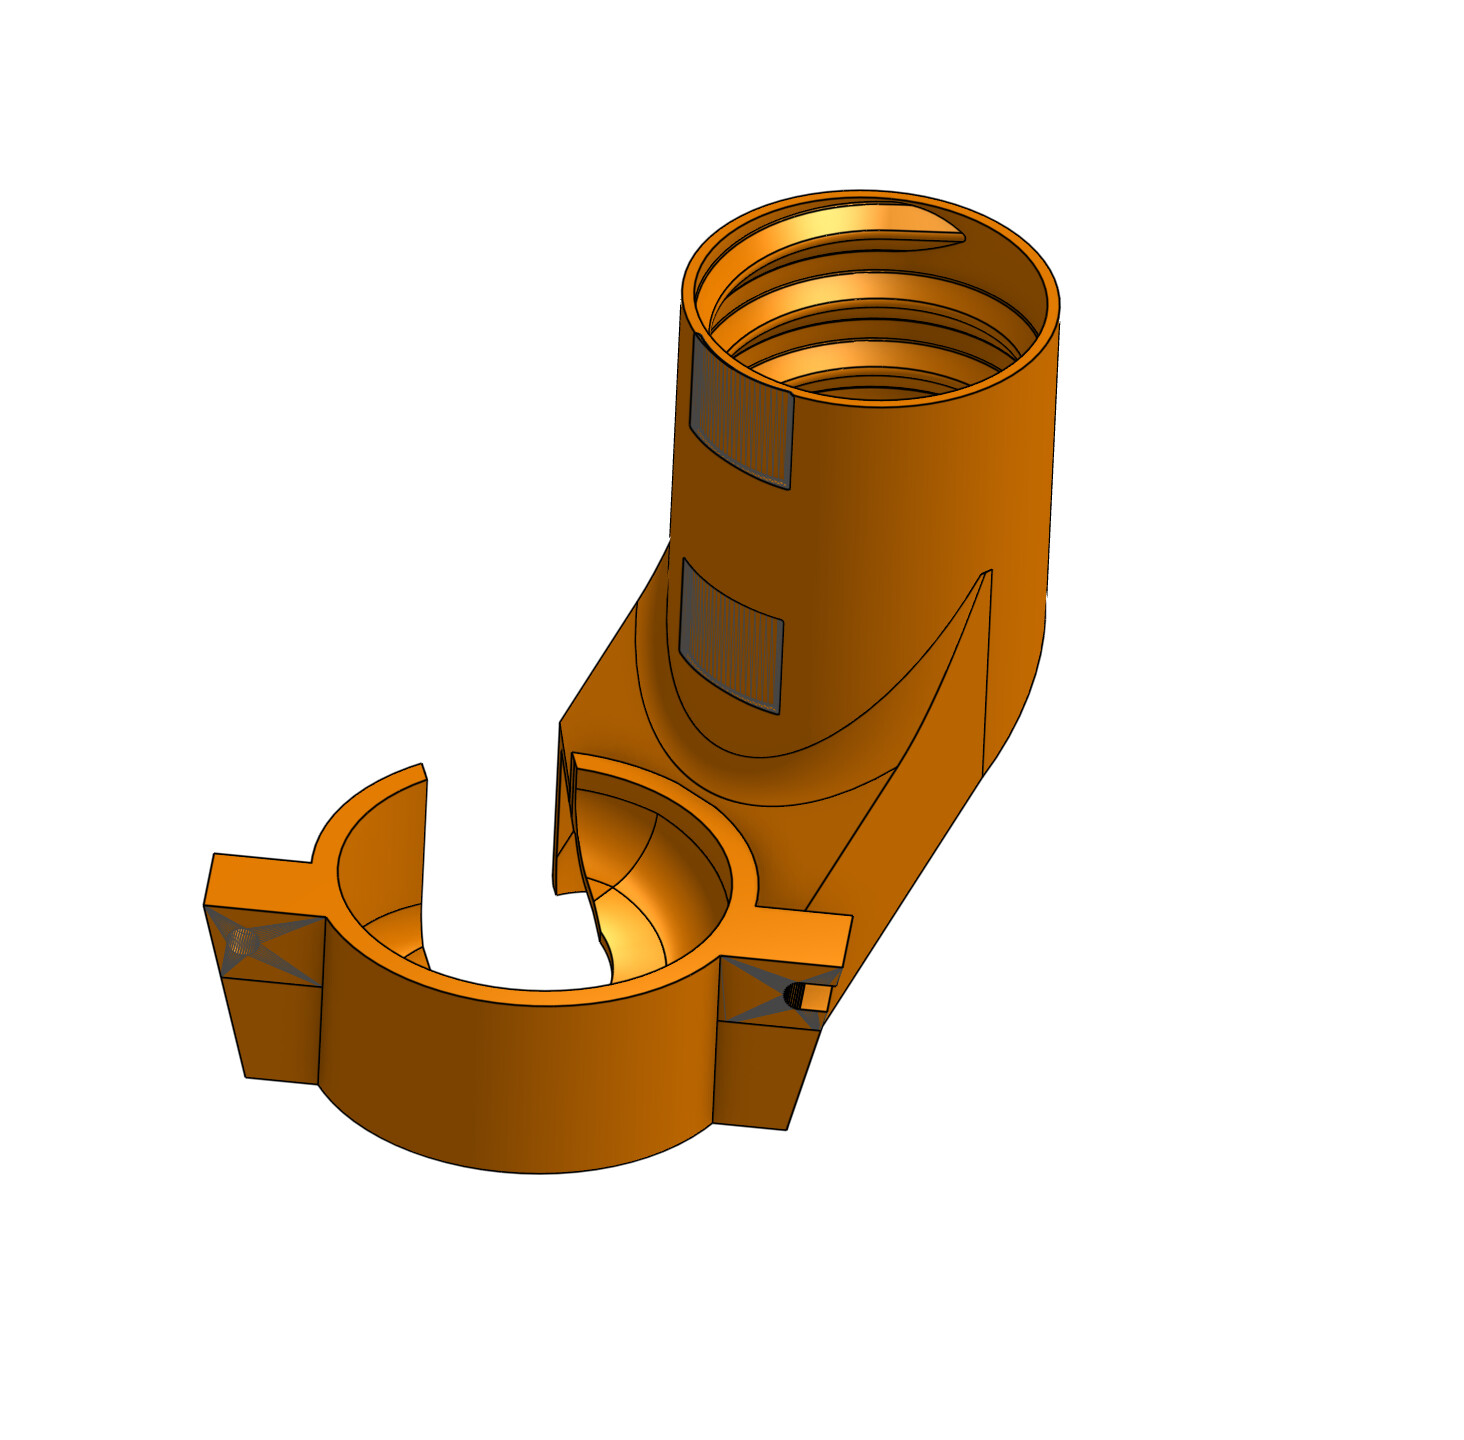
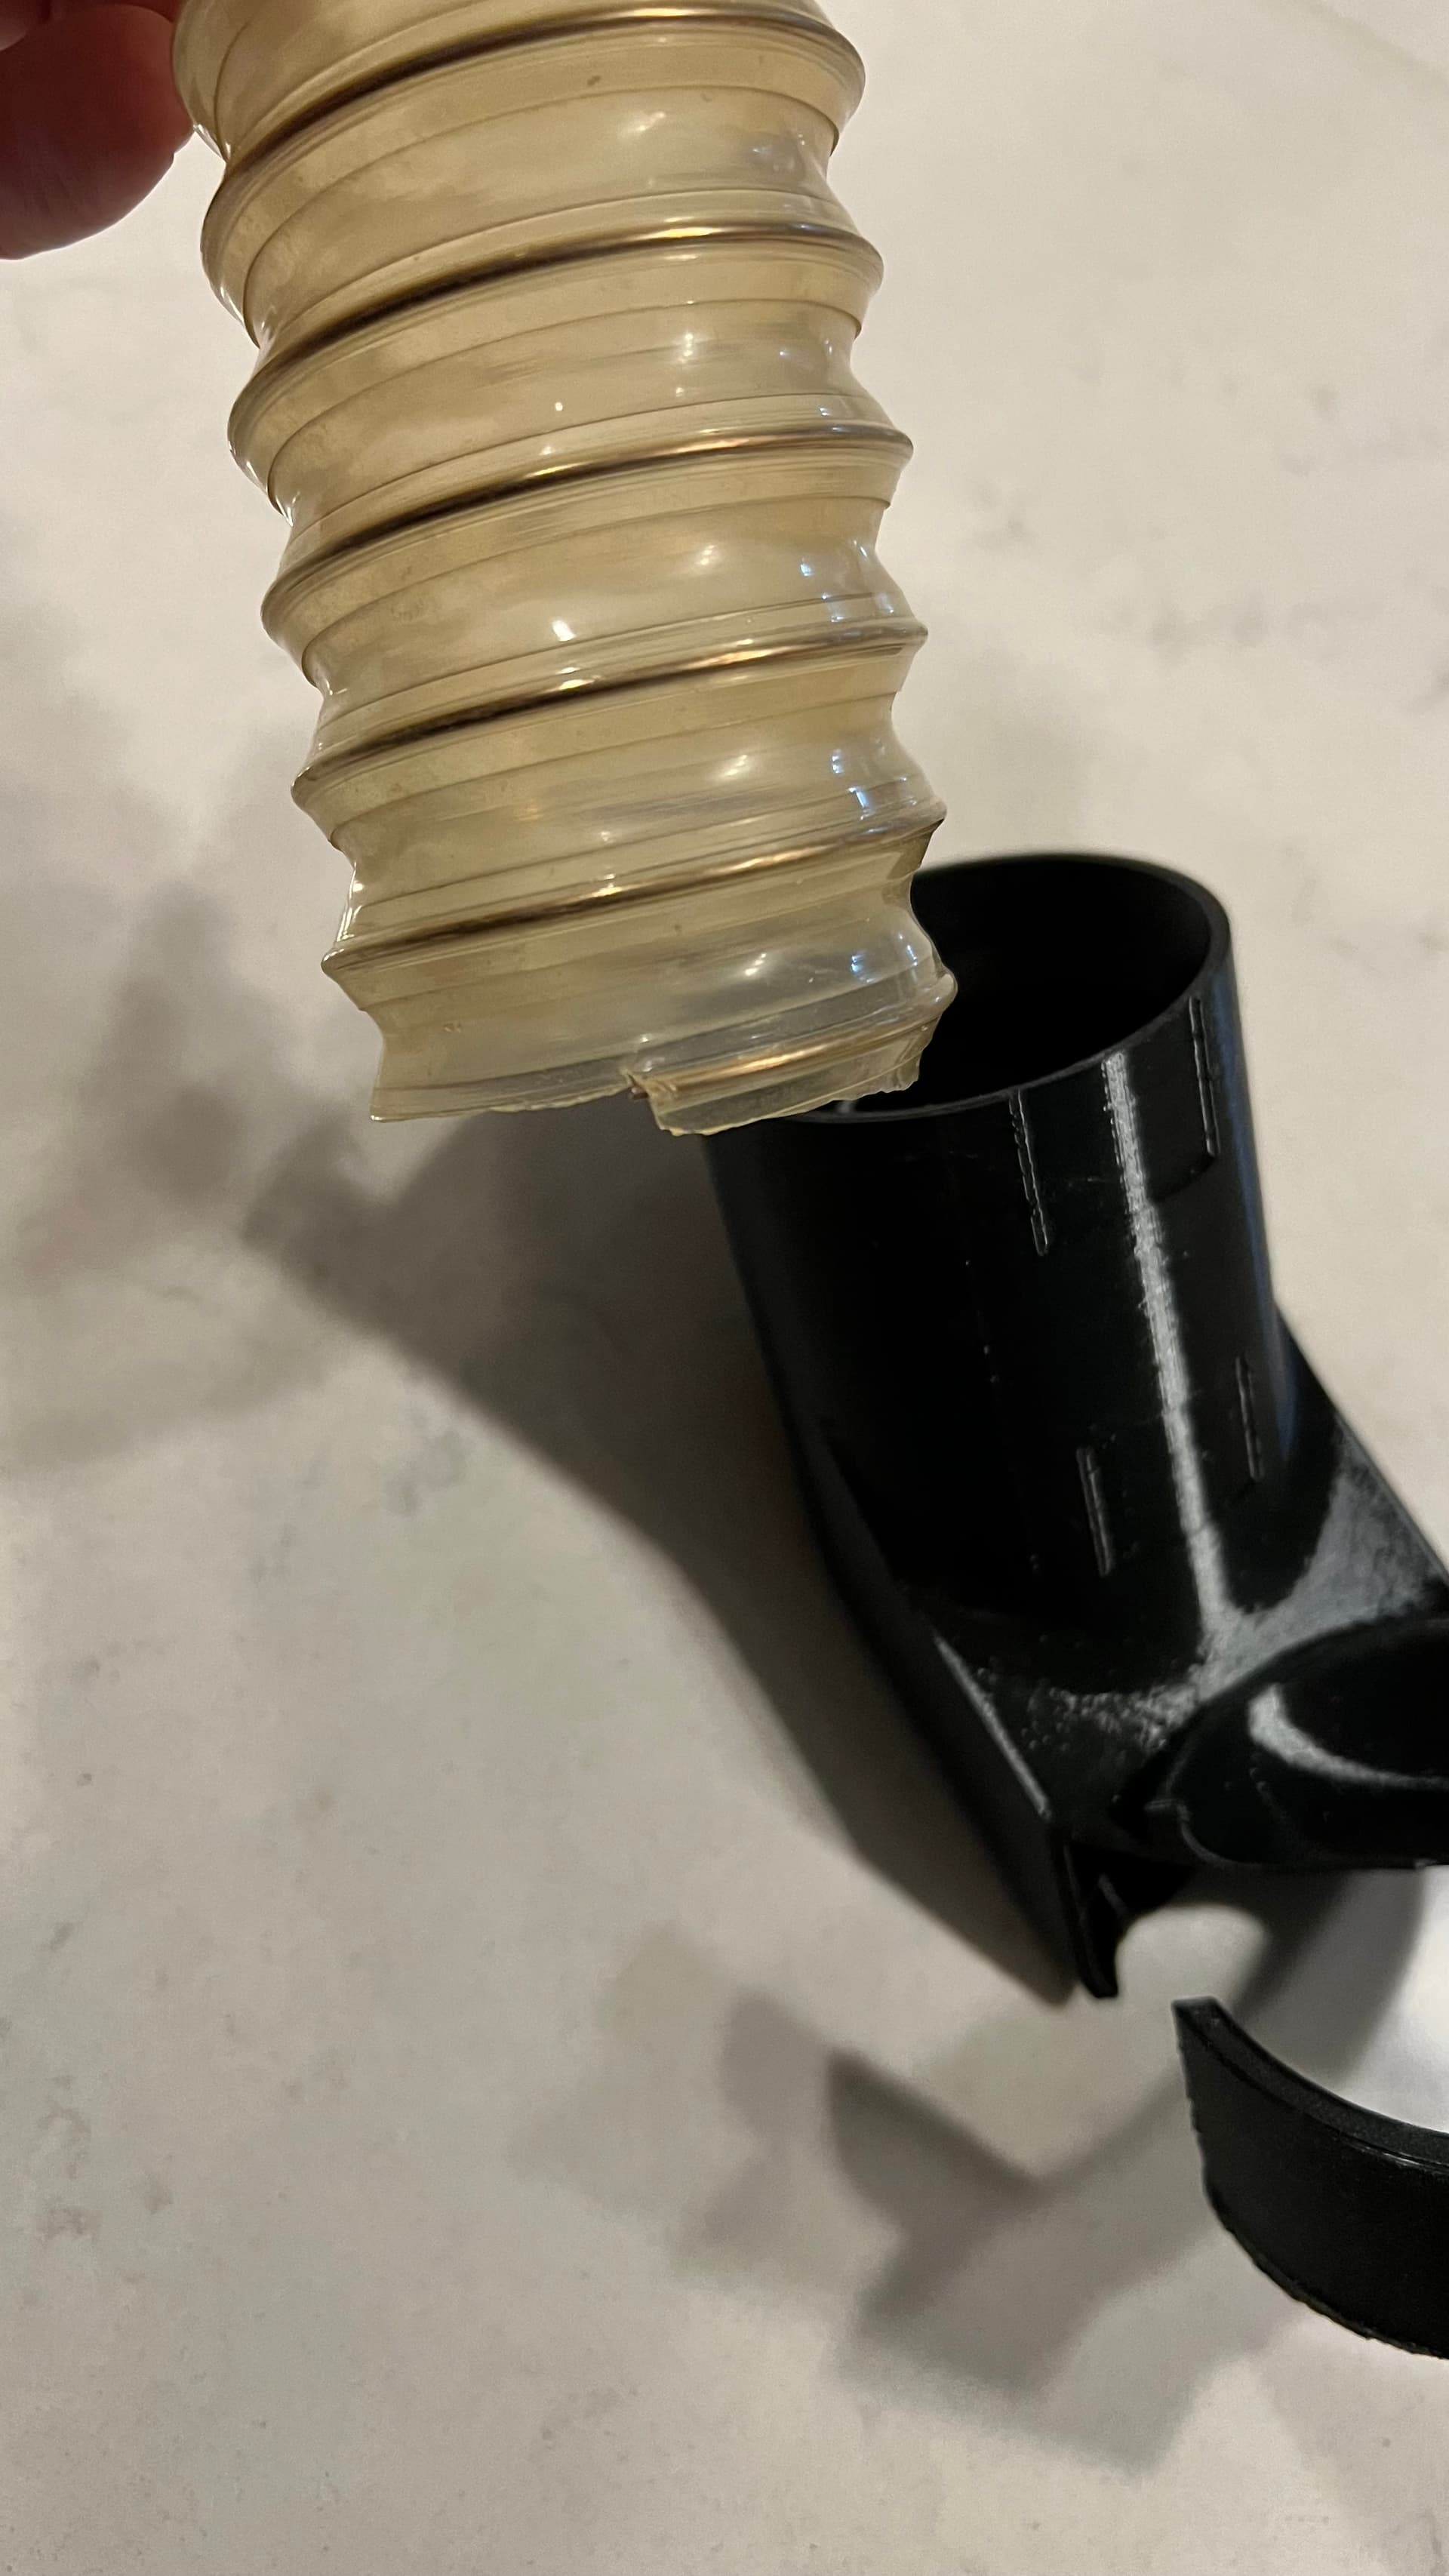
I’ve always planned to make a proper hose connection for the vac, to suit what we know as a 2" hose (ID), but might be a 2.5" even though it measures a lot more than that. I haven’t run the LR3 with the bottom part of the mount fitted and it now appears I’ve lost it, so no time like the present!
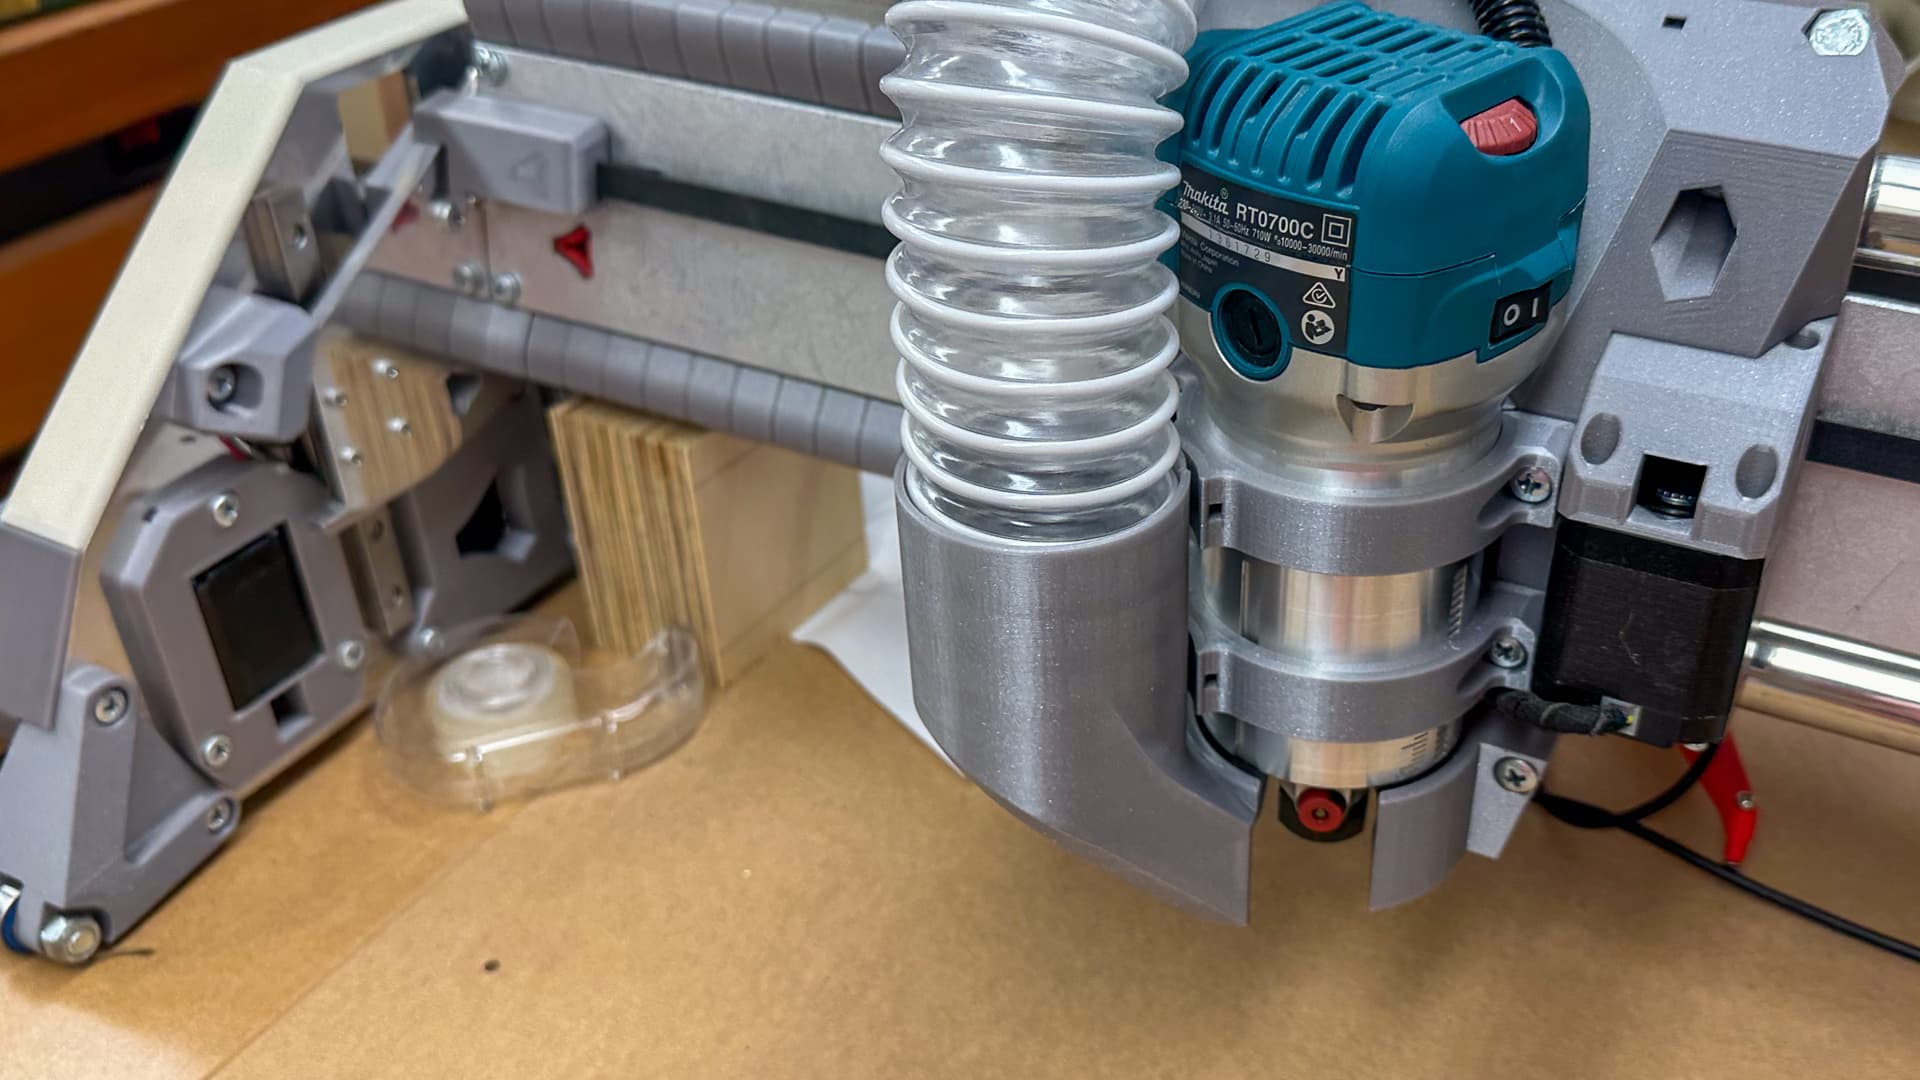
There have been a few reports of the Makita router running hot, and my theory is that it’s because the ventilation is constrained to a much smaller space than stock.
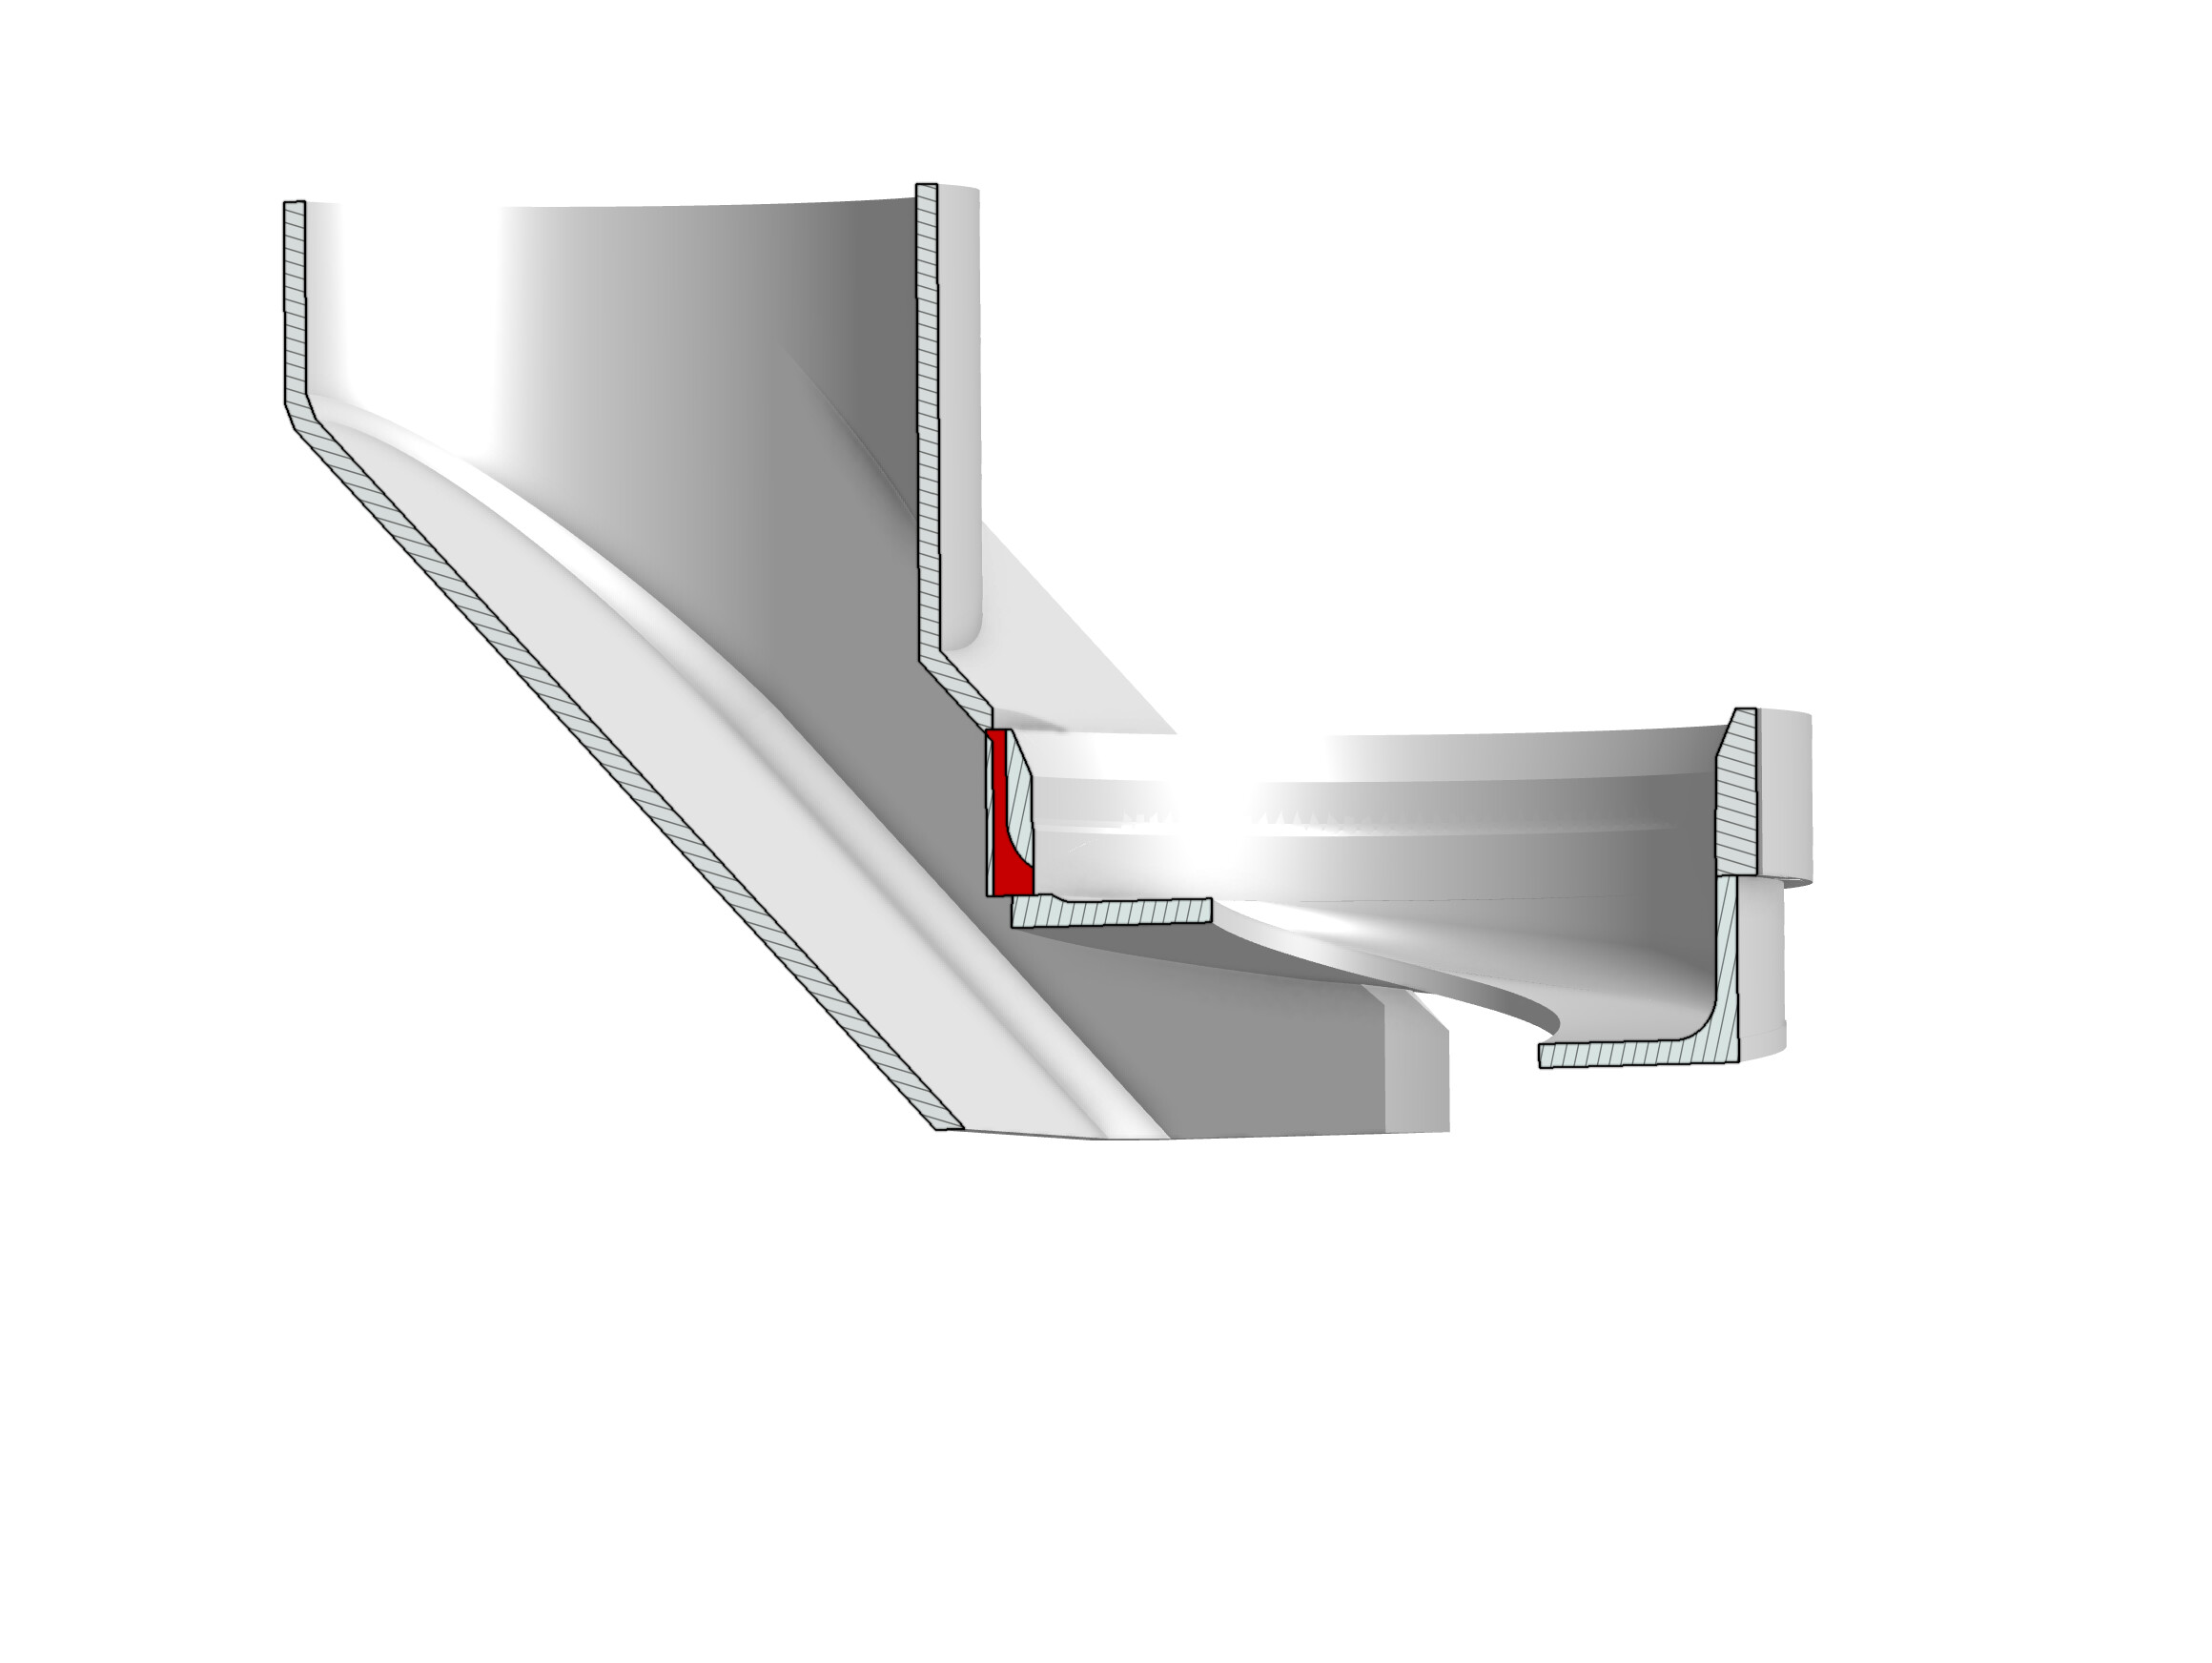
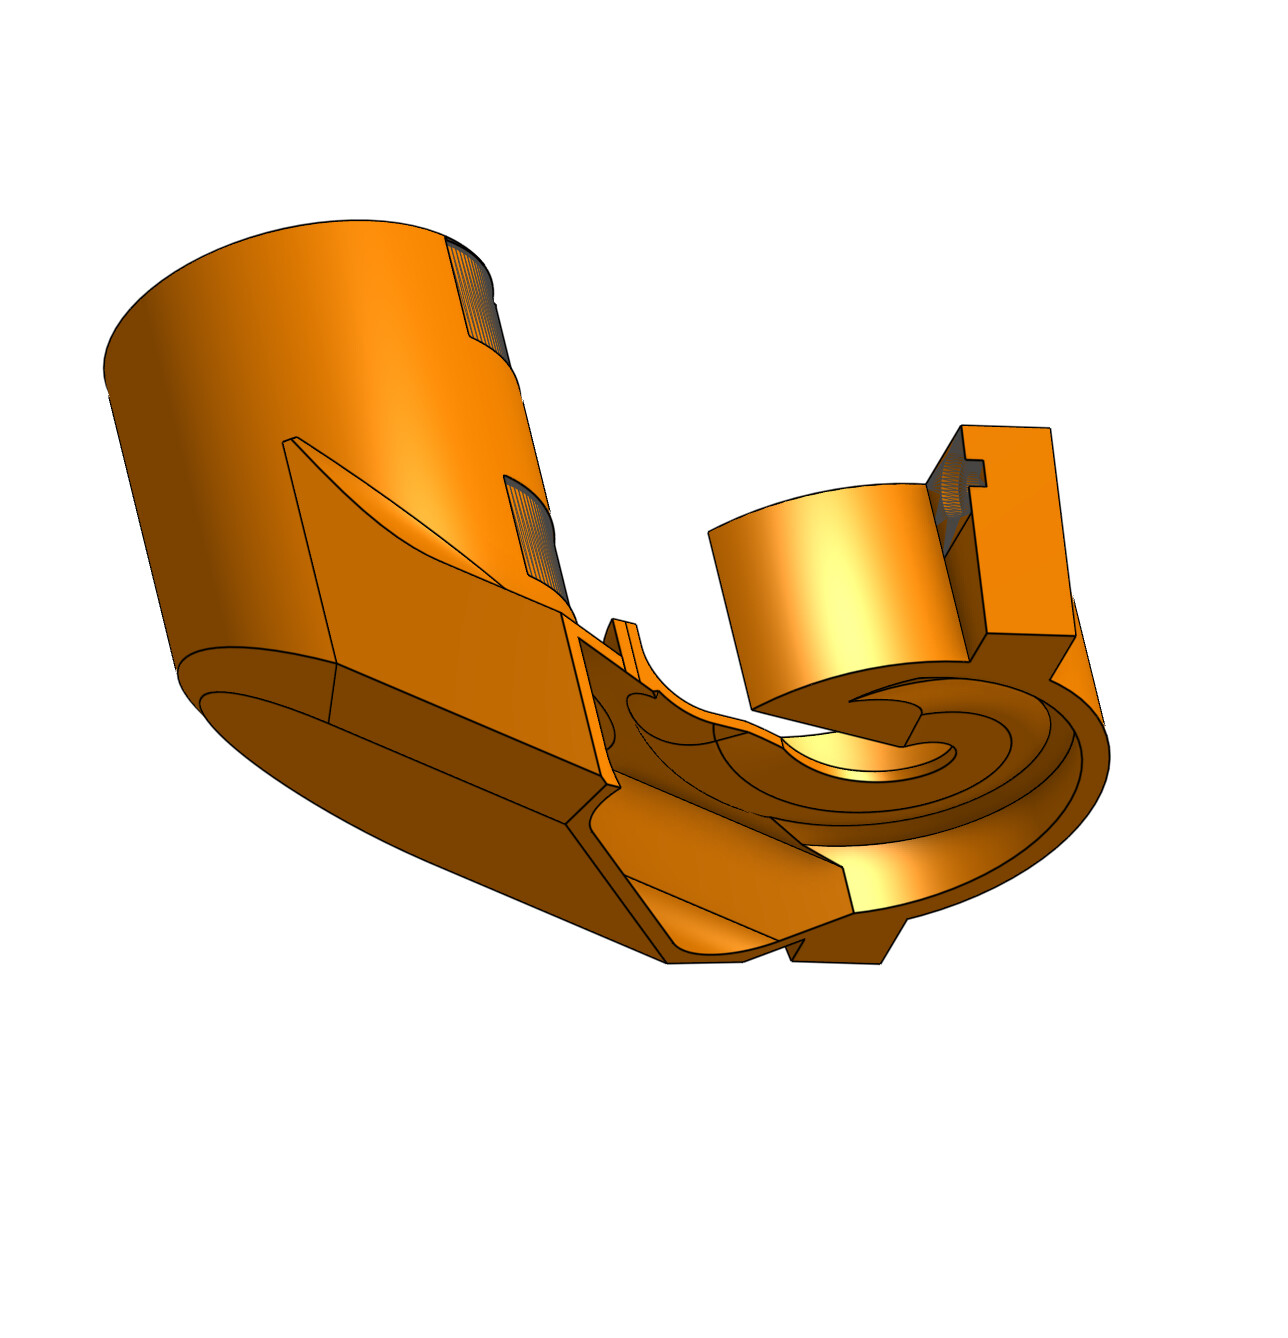
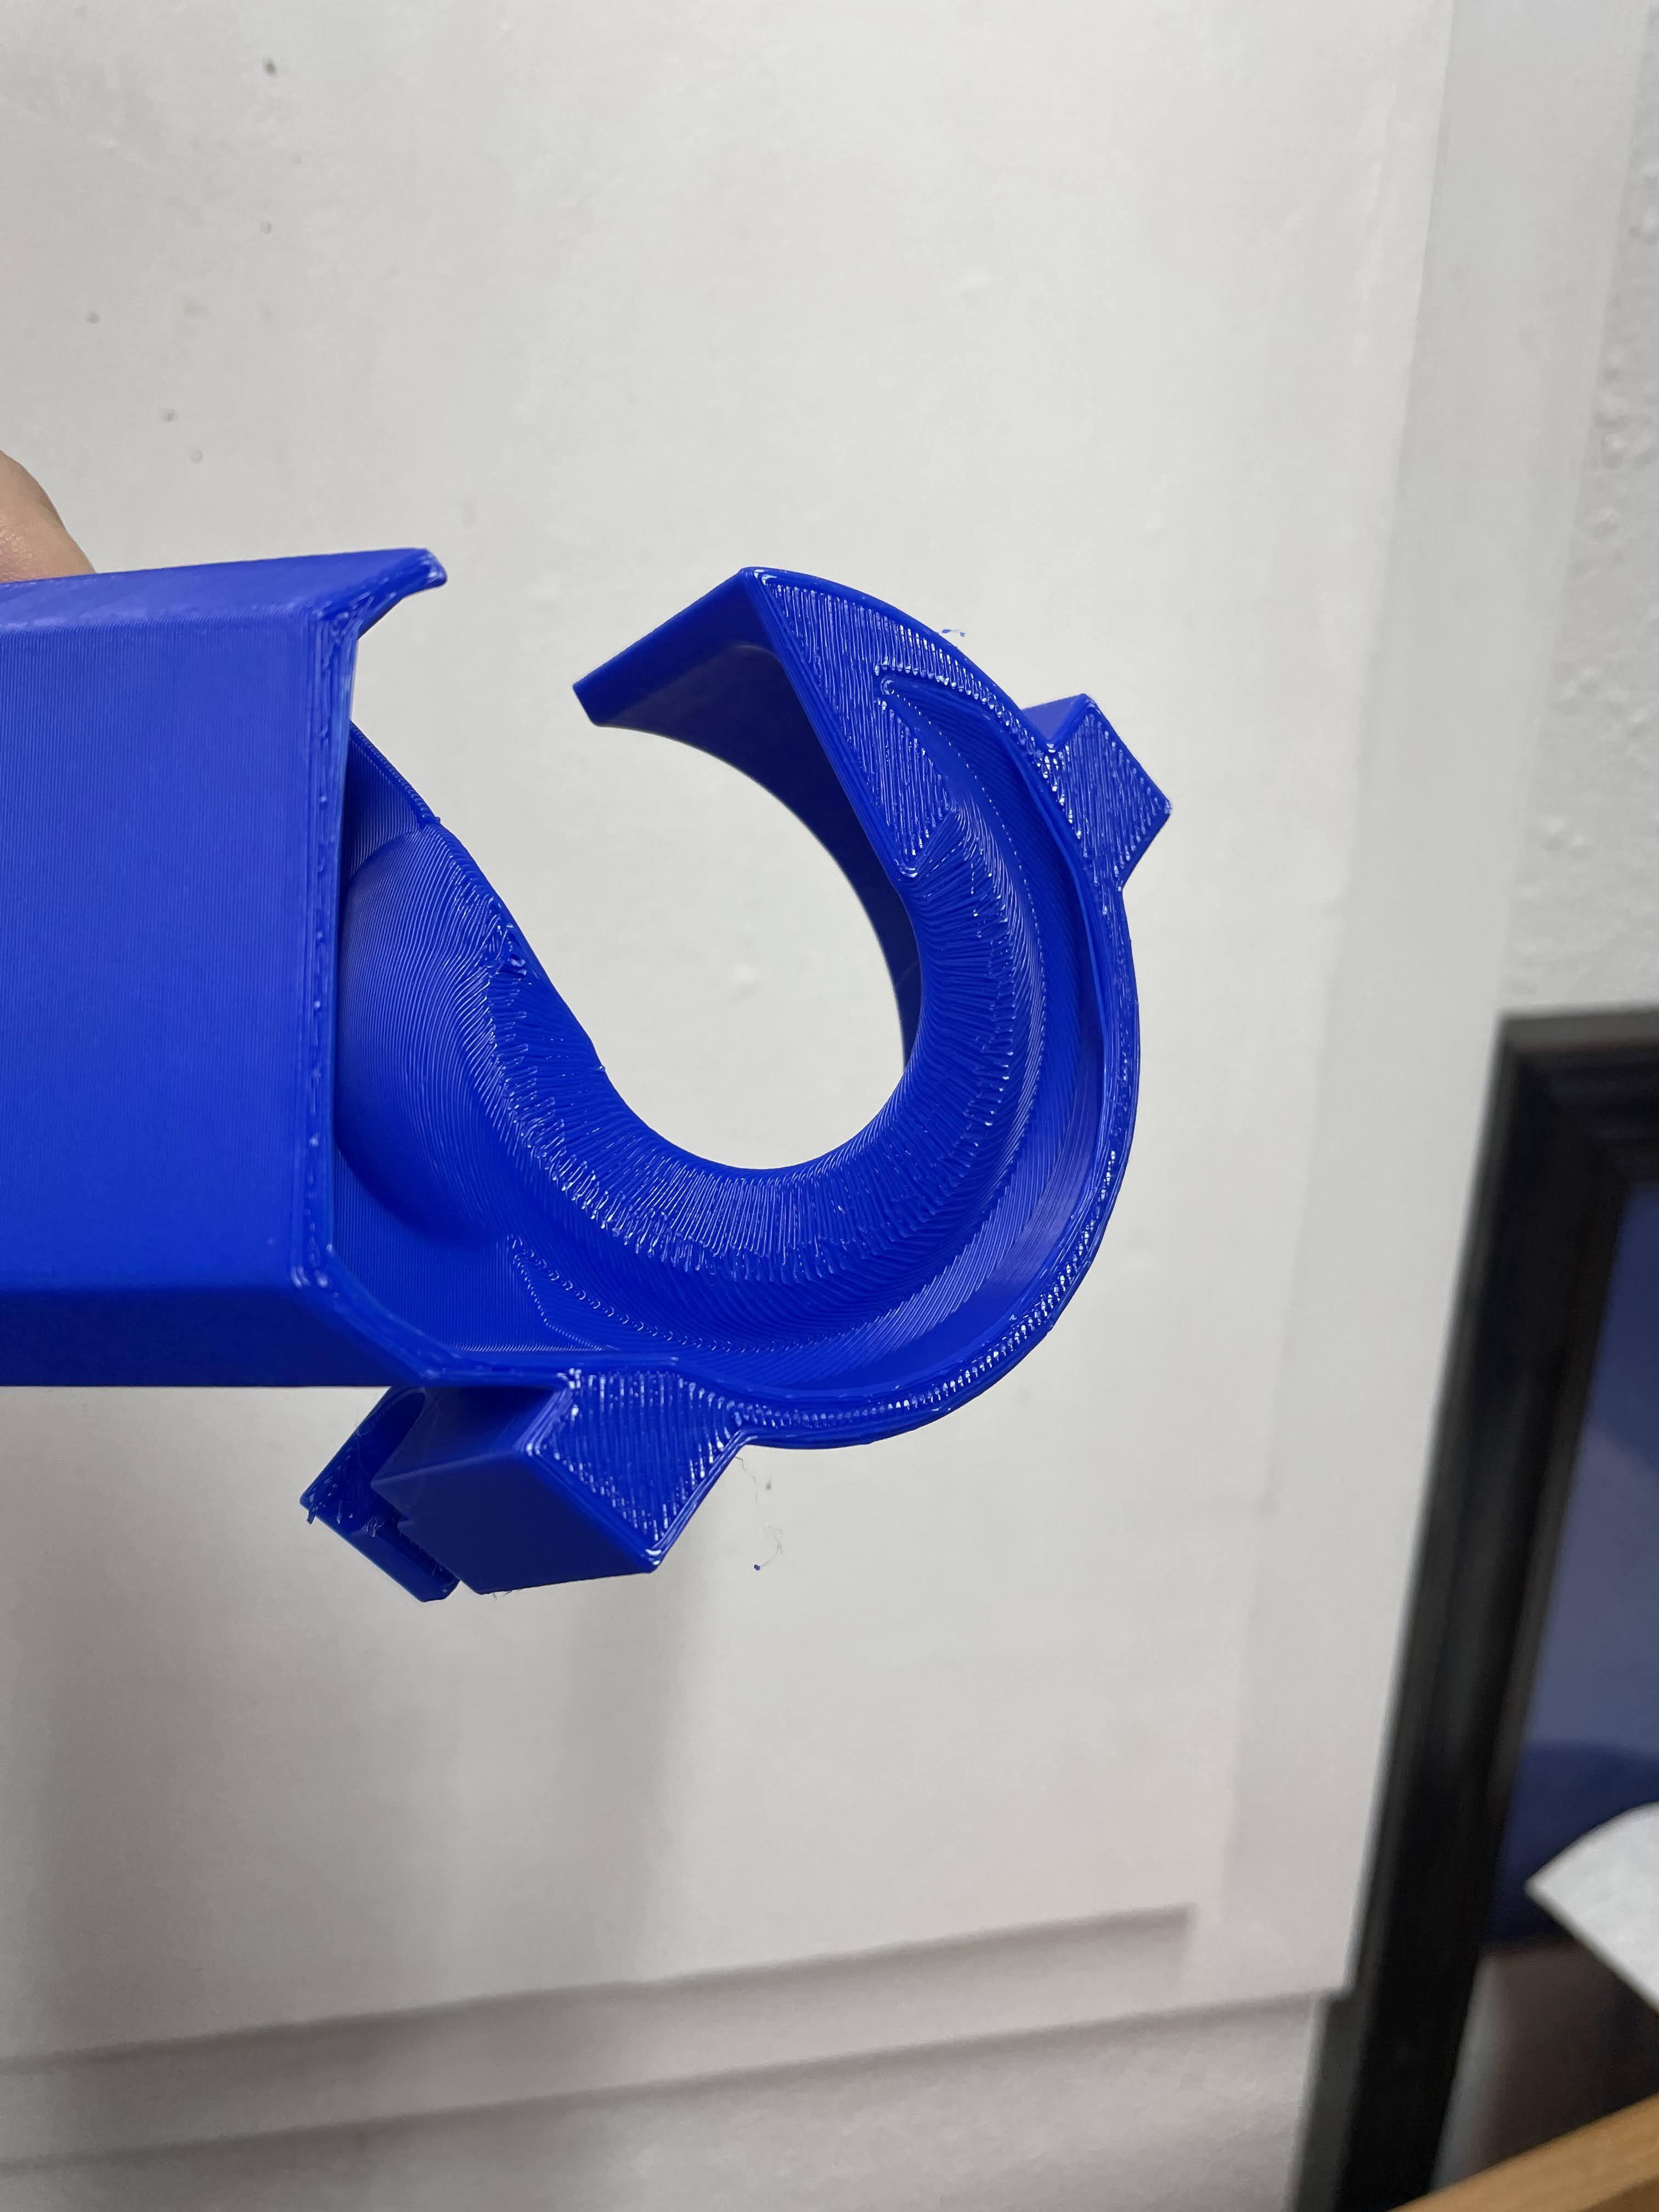
Why not make it a cyclone of sorts? In theory directing all vent air towards the vacuum will/might control fine dust better - no cover yet, but the “back” could be the only place a skirt is required if velocity is high enough?
Printing won’t be too bad (I have a plan) and there’s a lot of tidying up to do, but all thoughts and arguments are welcome!
Thanks Mike - I’ll get back to you hopefully later today - what size is your vac fitting - if it’s smaller I will make an adapter that screws into this one.
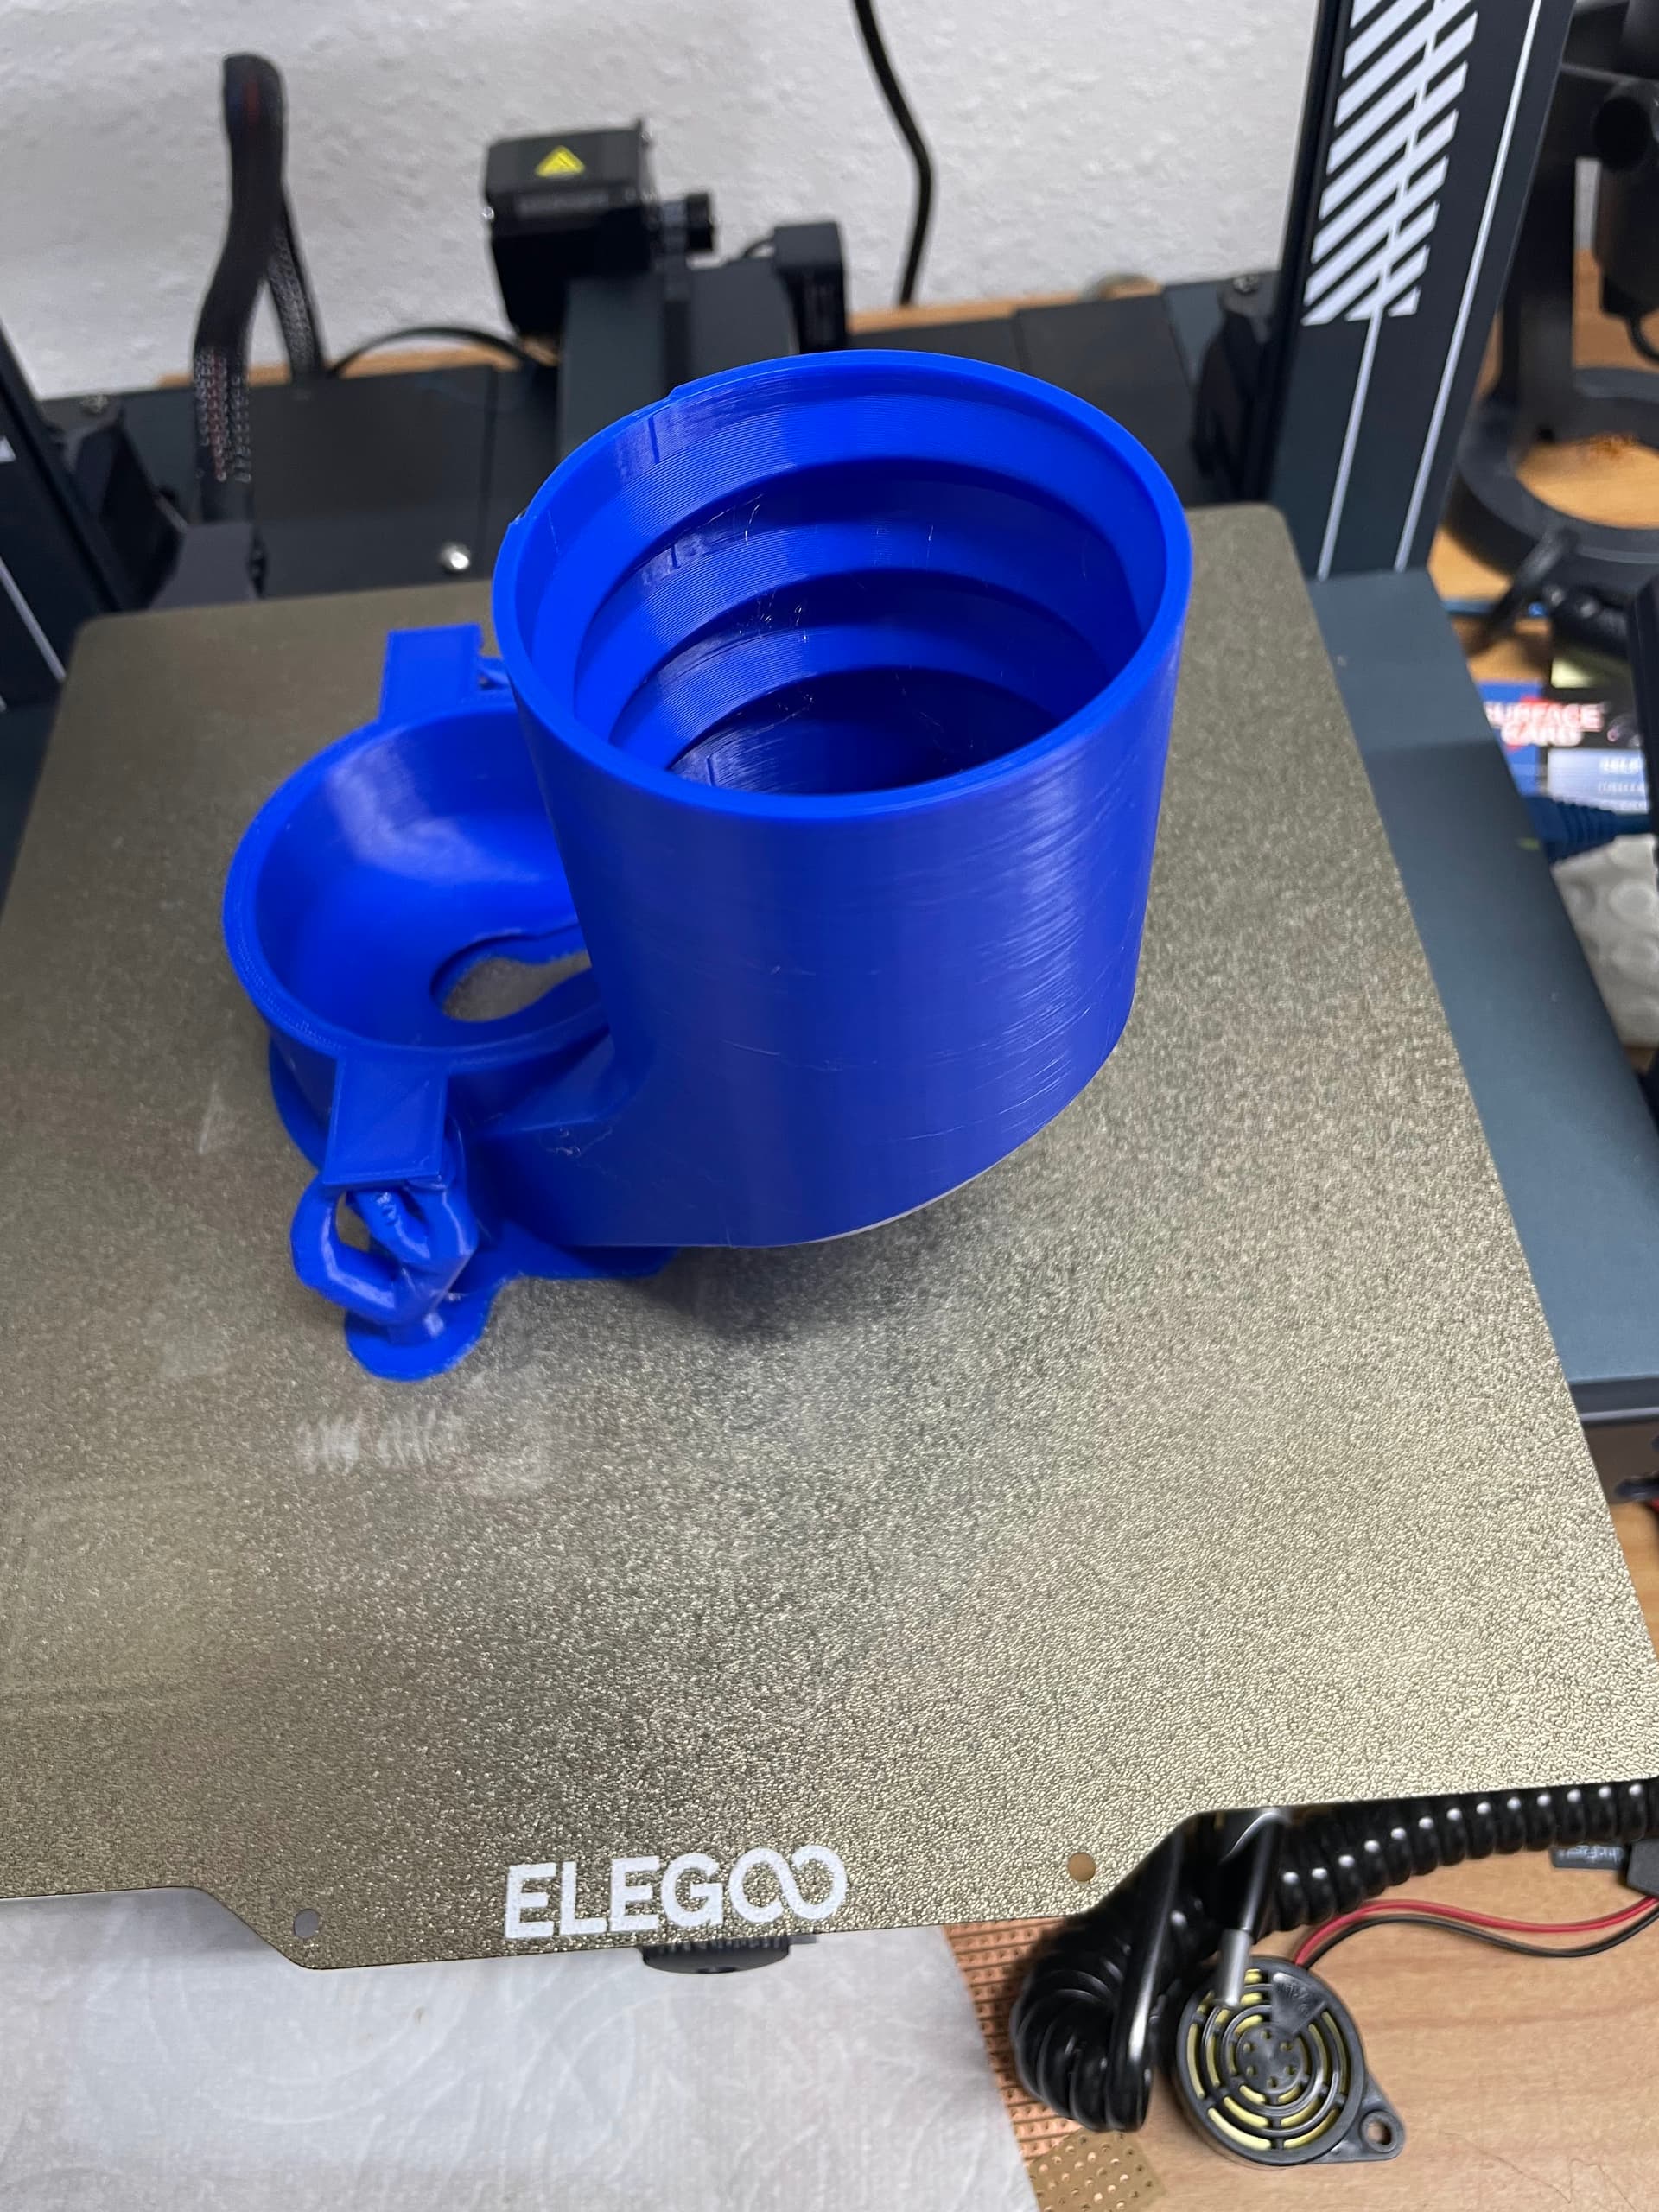
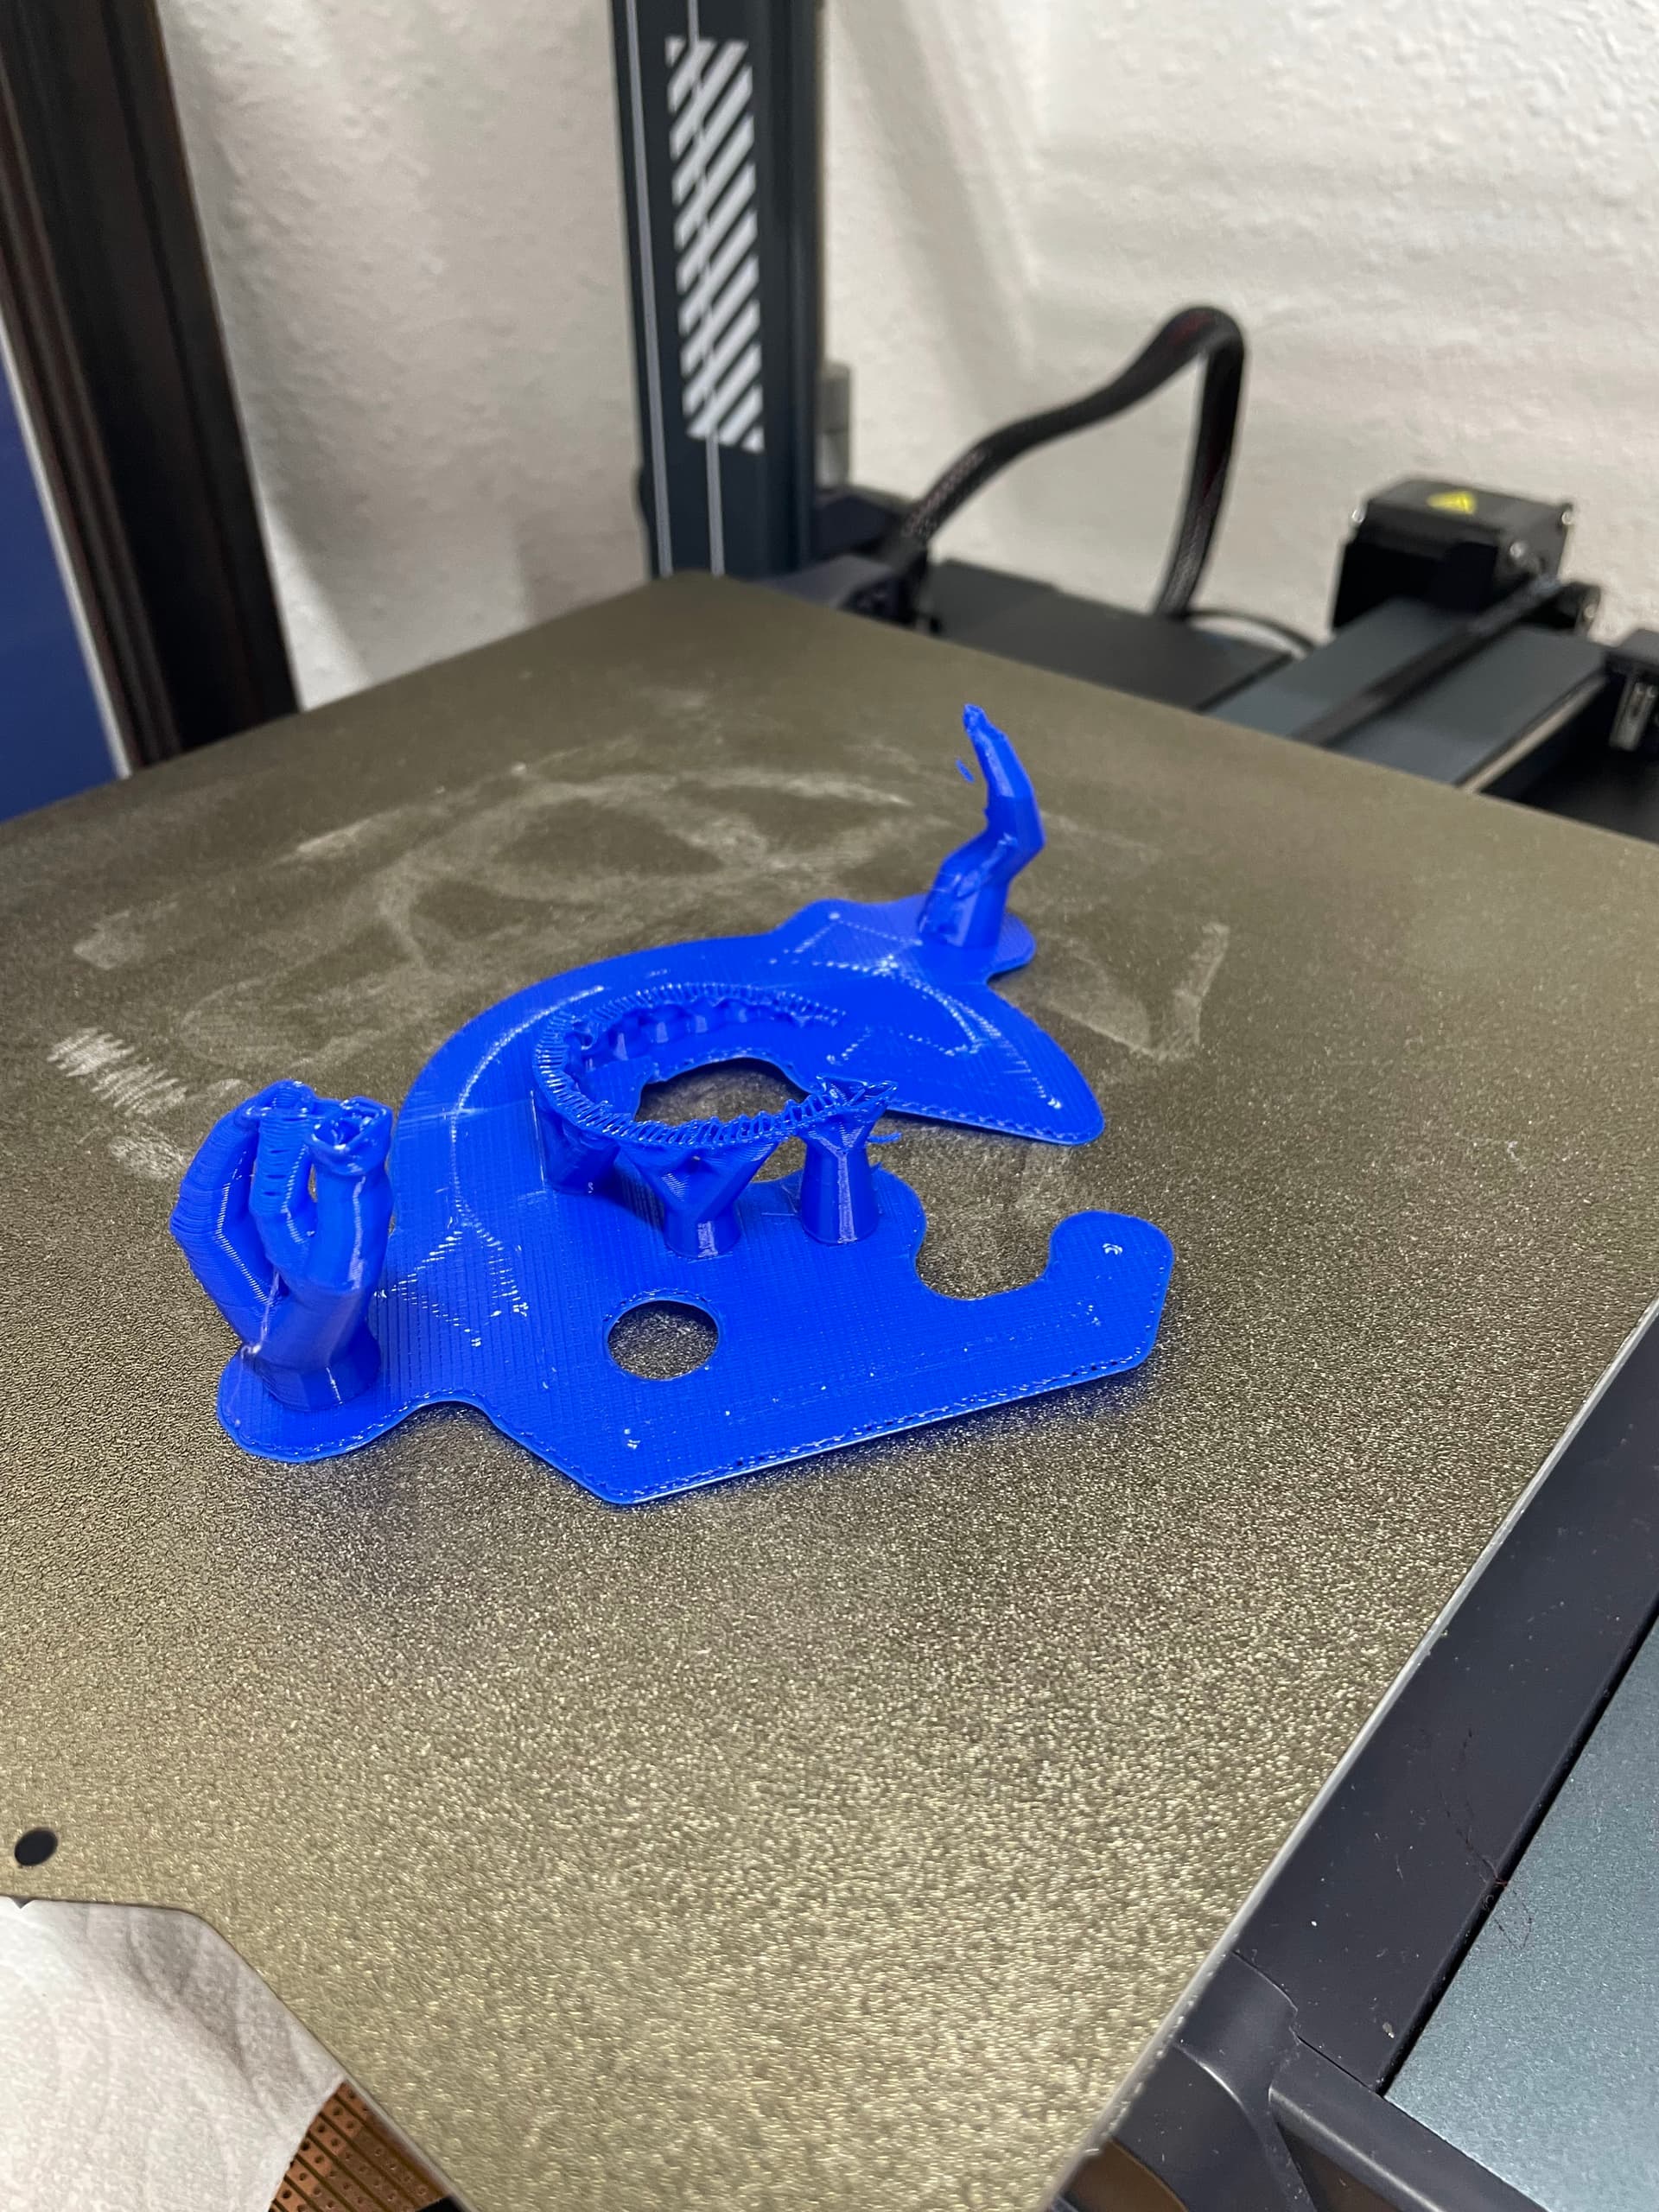
At first glance it looks like a bought one, but there is a lot to do in terms of refinement - it’s ready to test but here are the challenges -
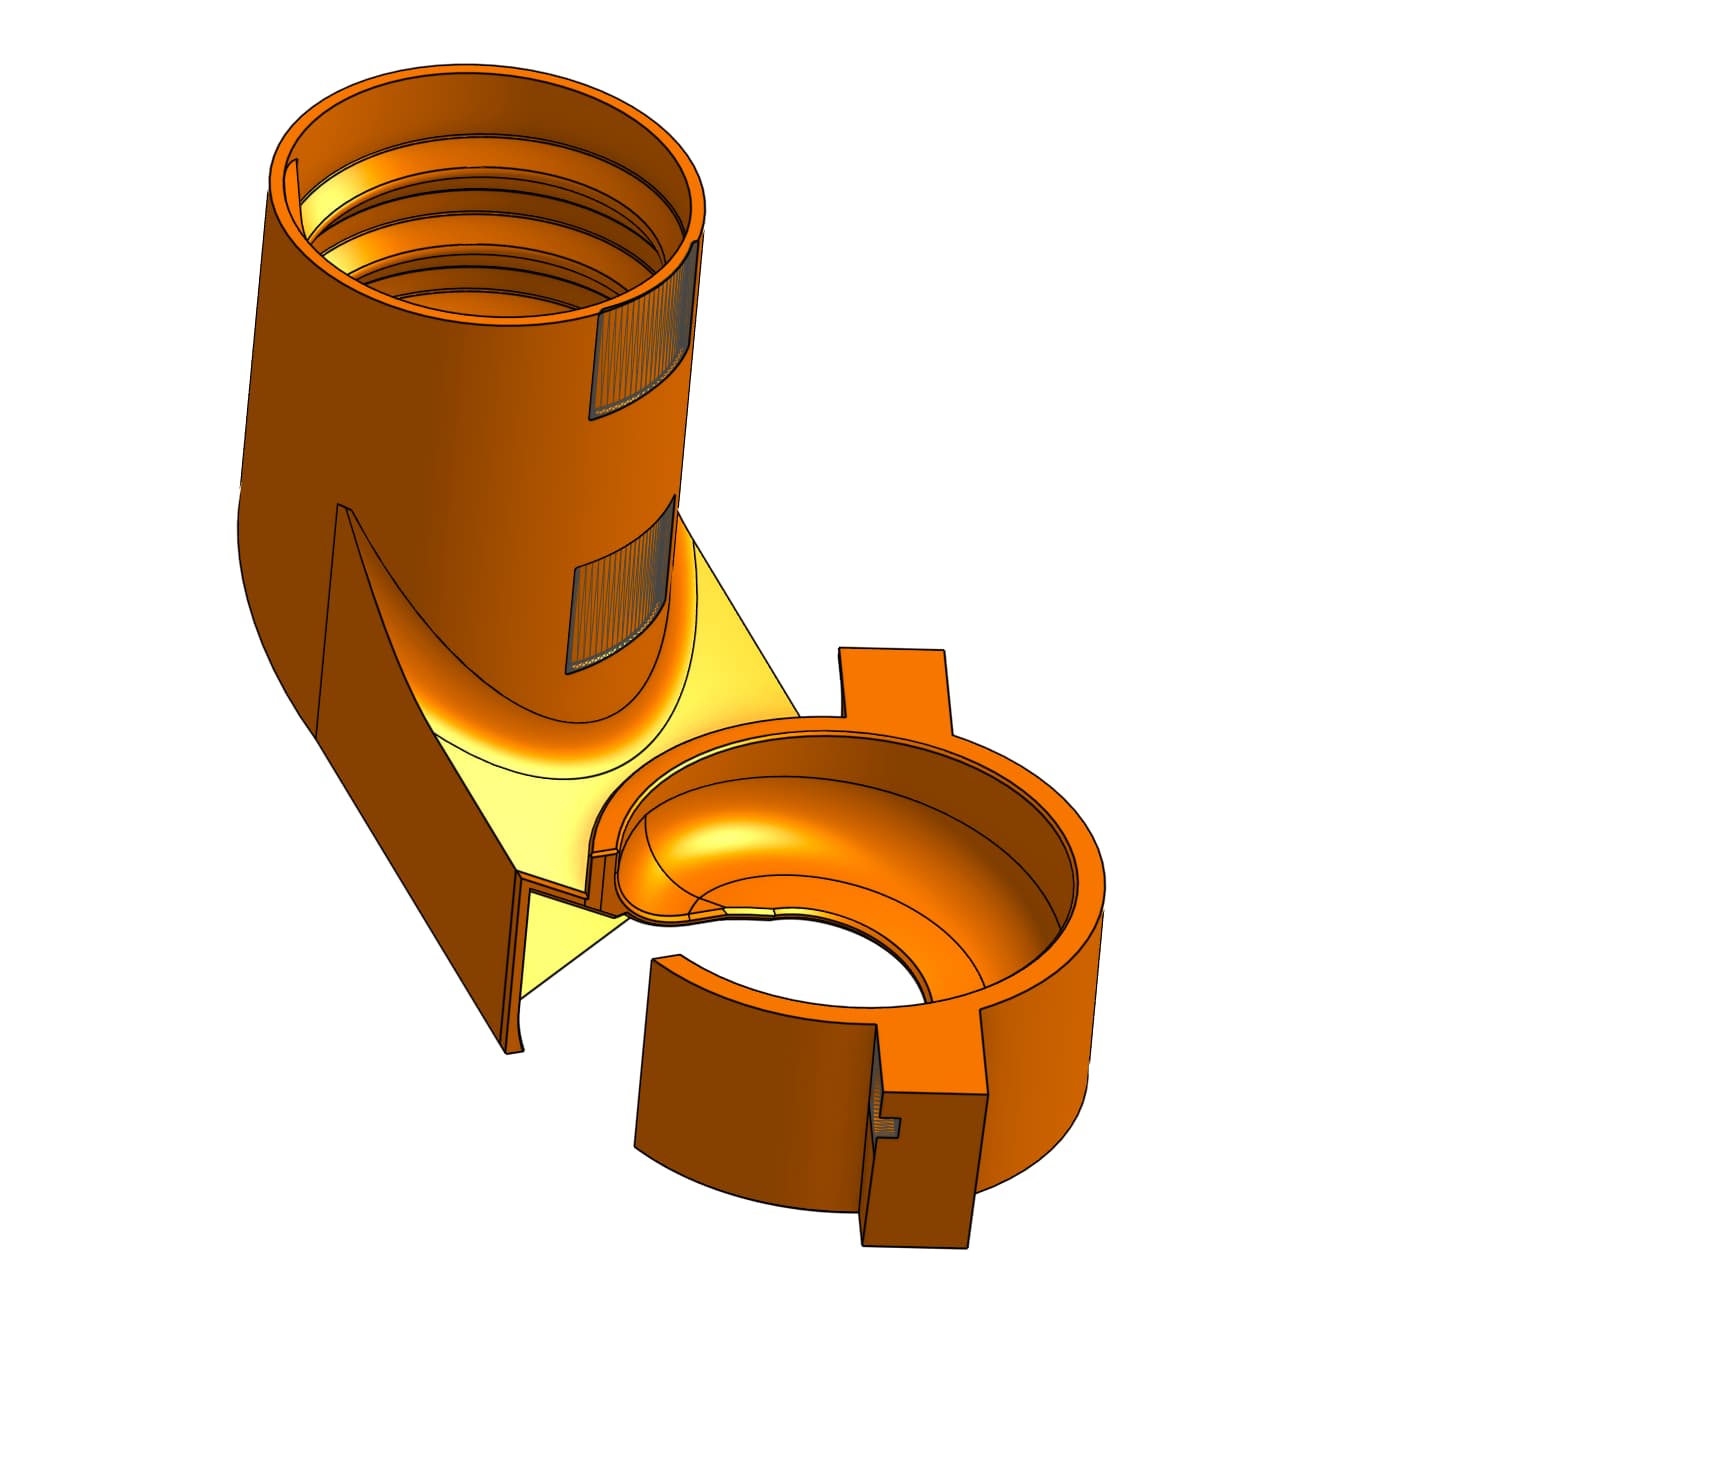
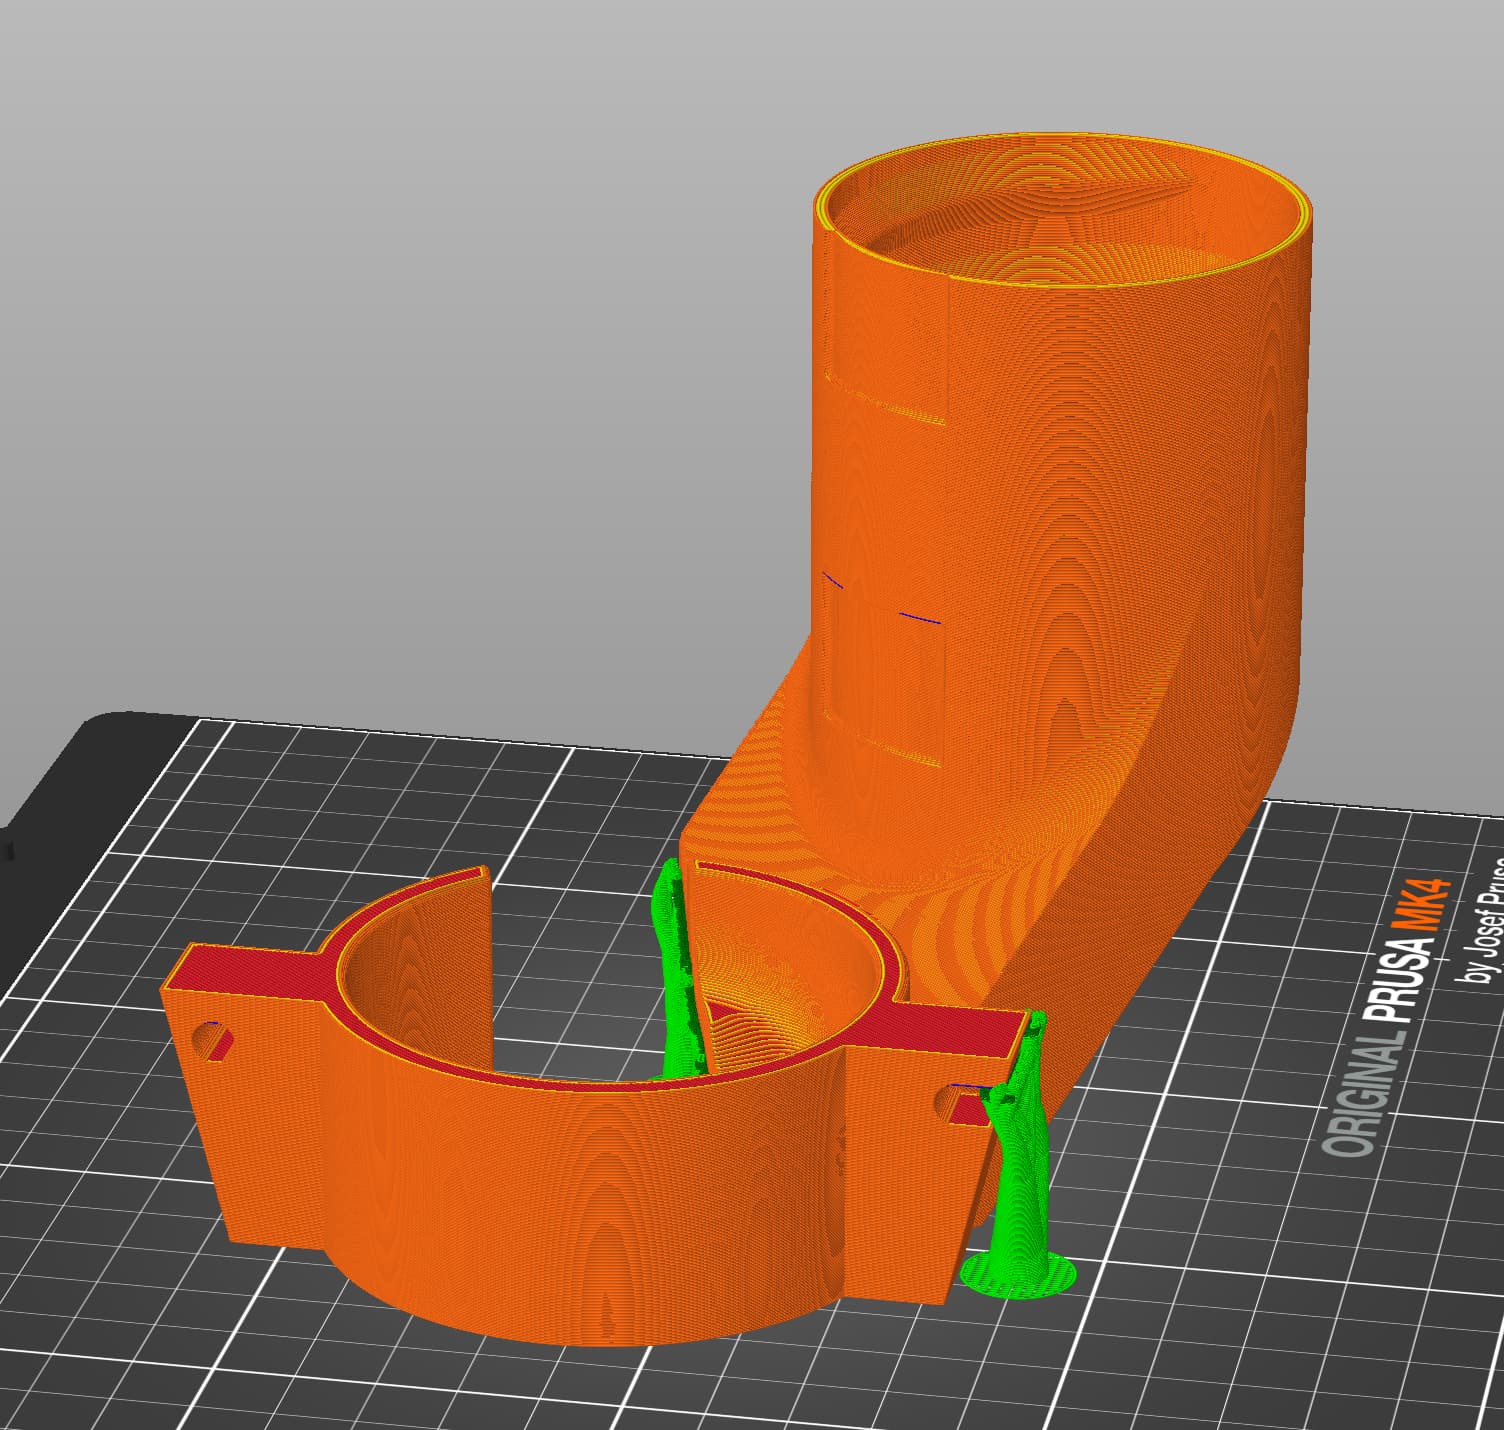
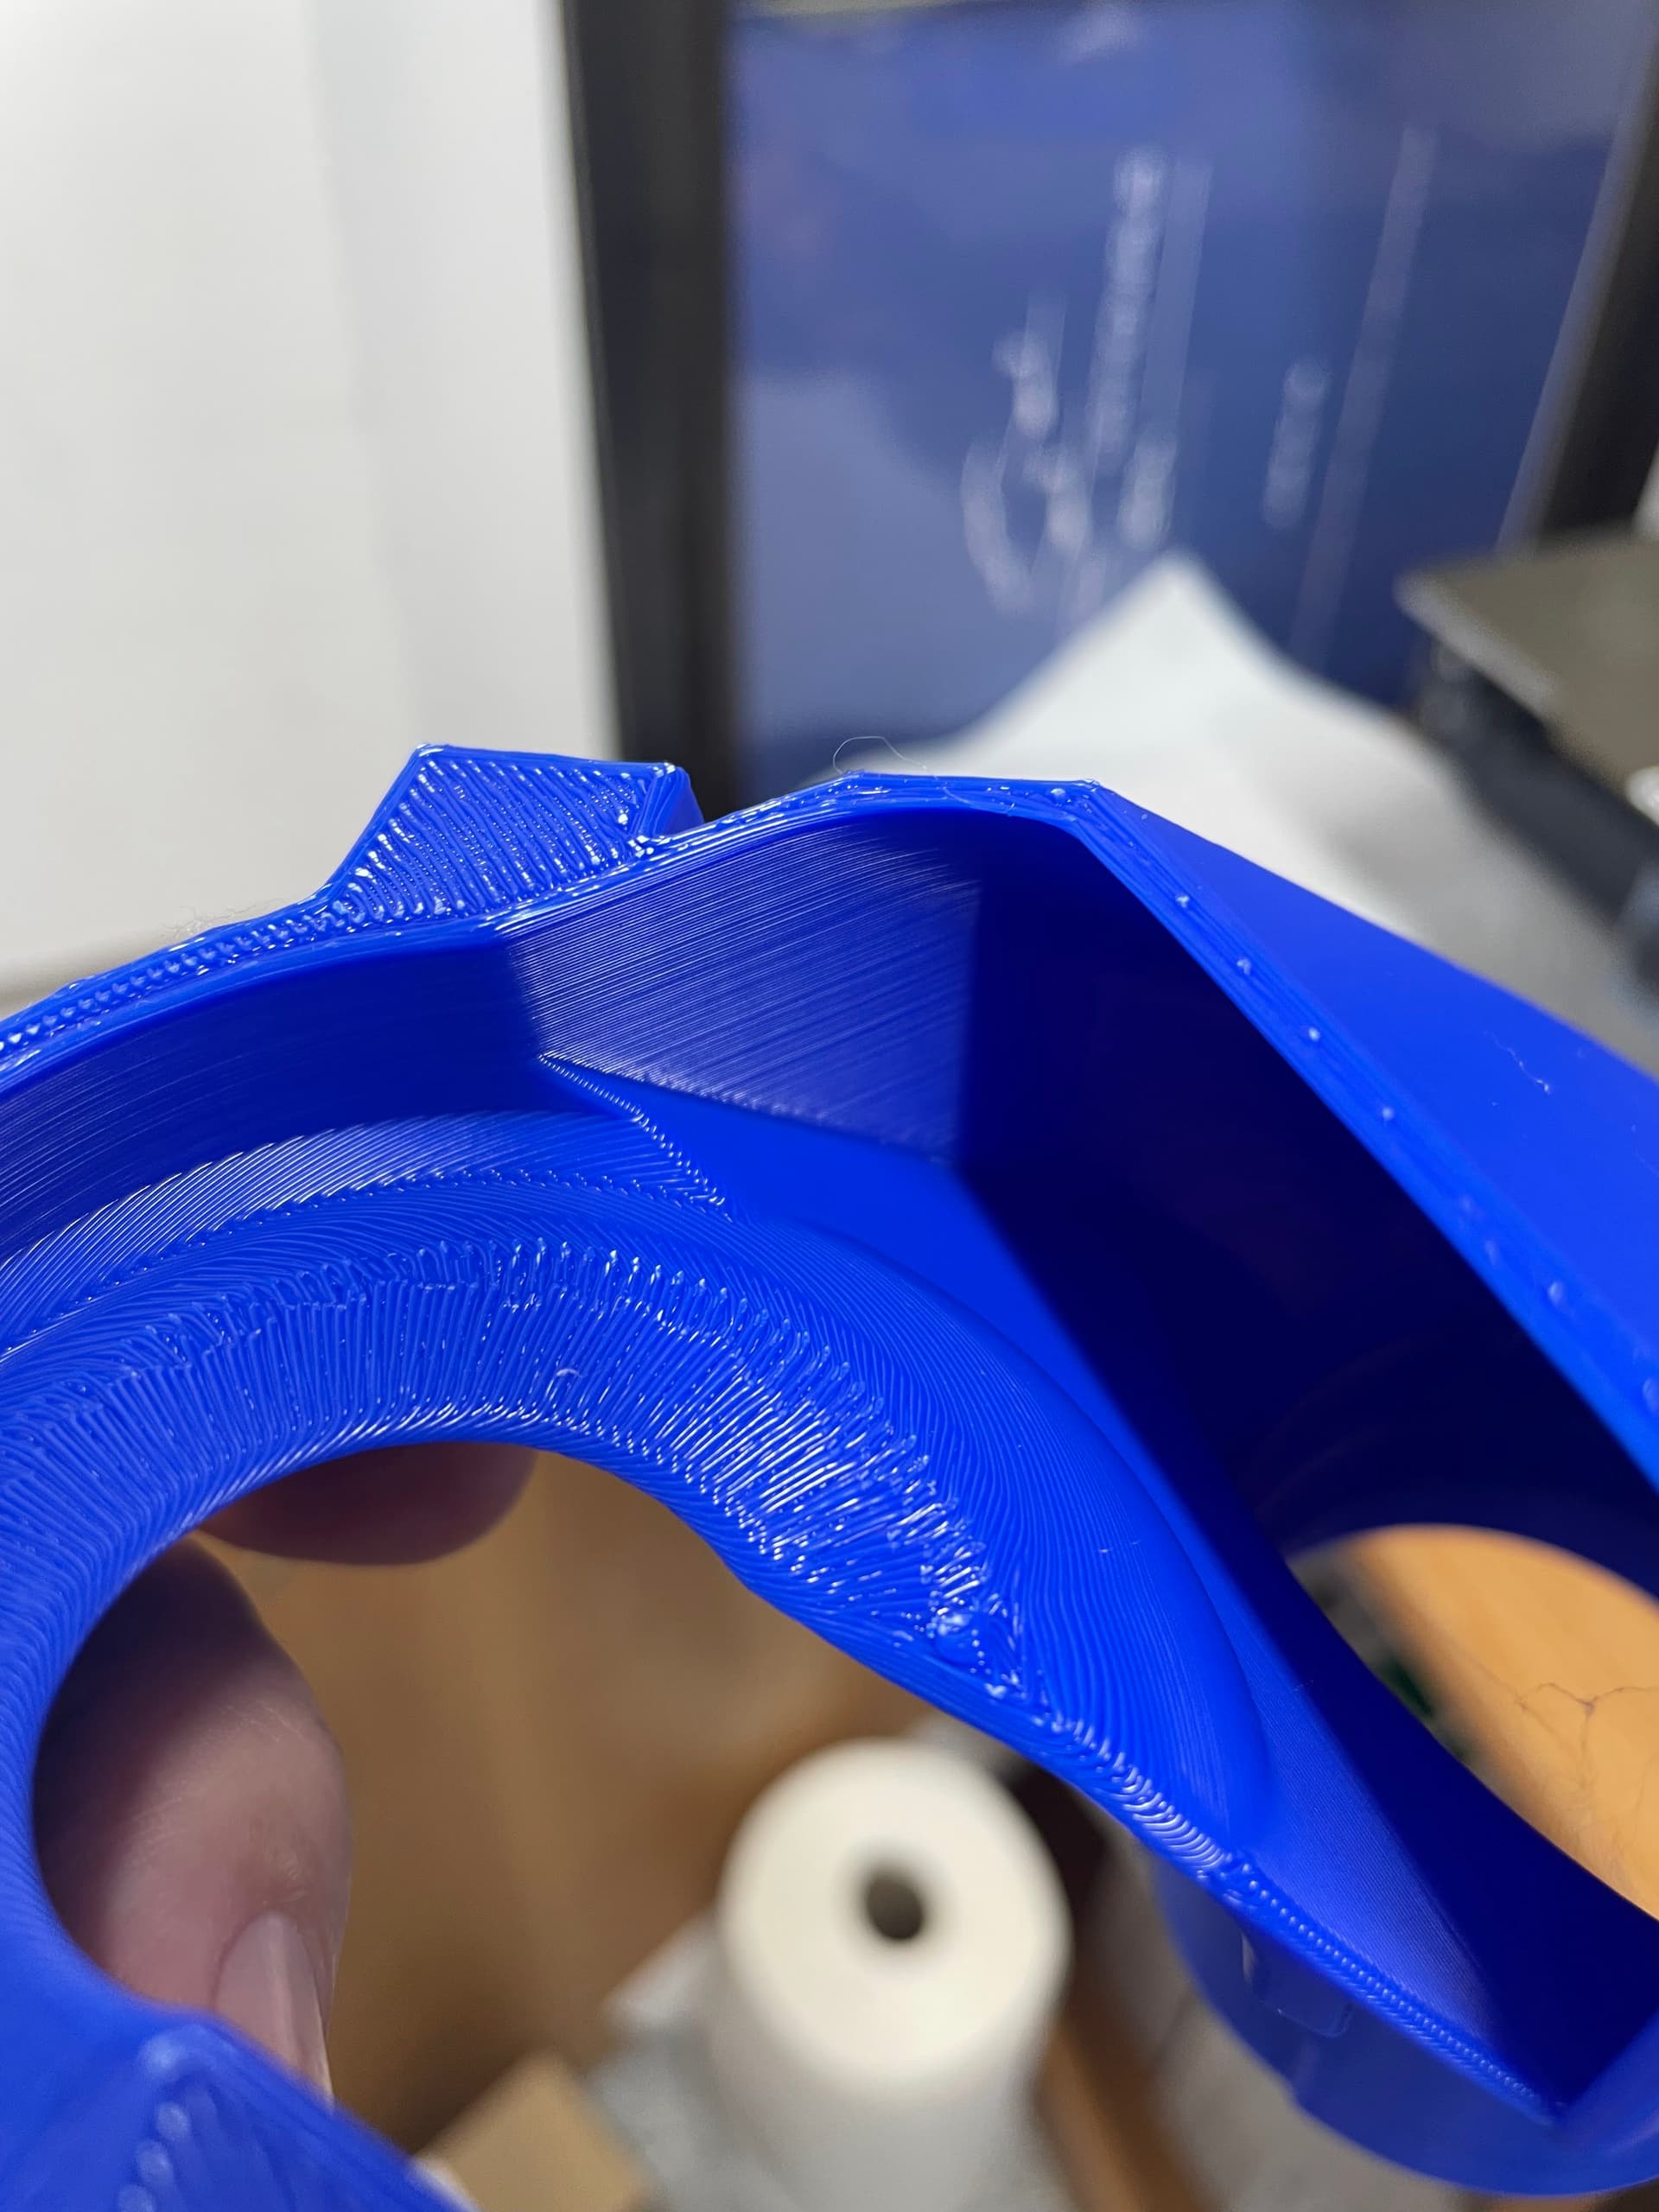
Printing - I’d definitely use a brim, I don’t like the thought of all those supports, but I’ve had a lot of luck with organics. If it doesn’t break away cleanly enough, I’ll insert a removable “plug” which should do the trick. The top of the indent for the bottom tool mount might get a bit ragged as I haven’t filleted it! Will do better.
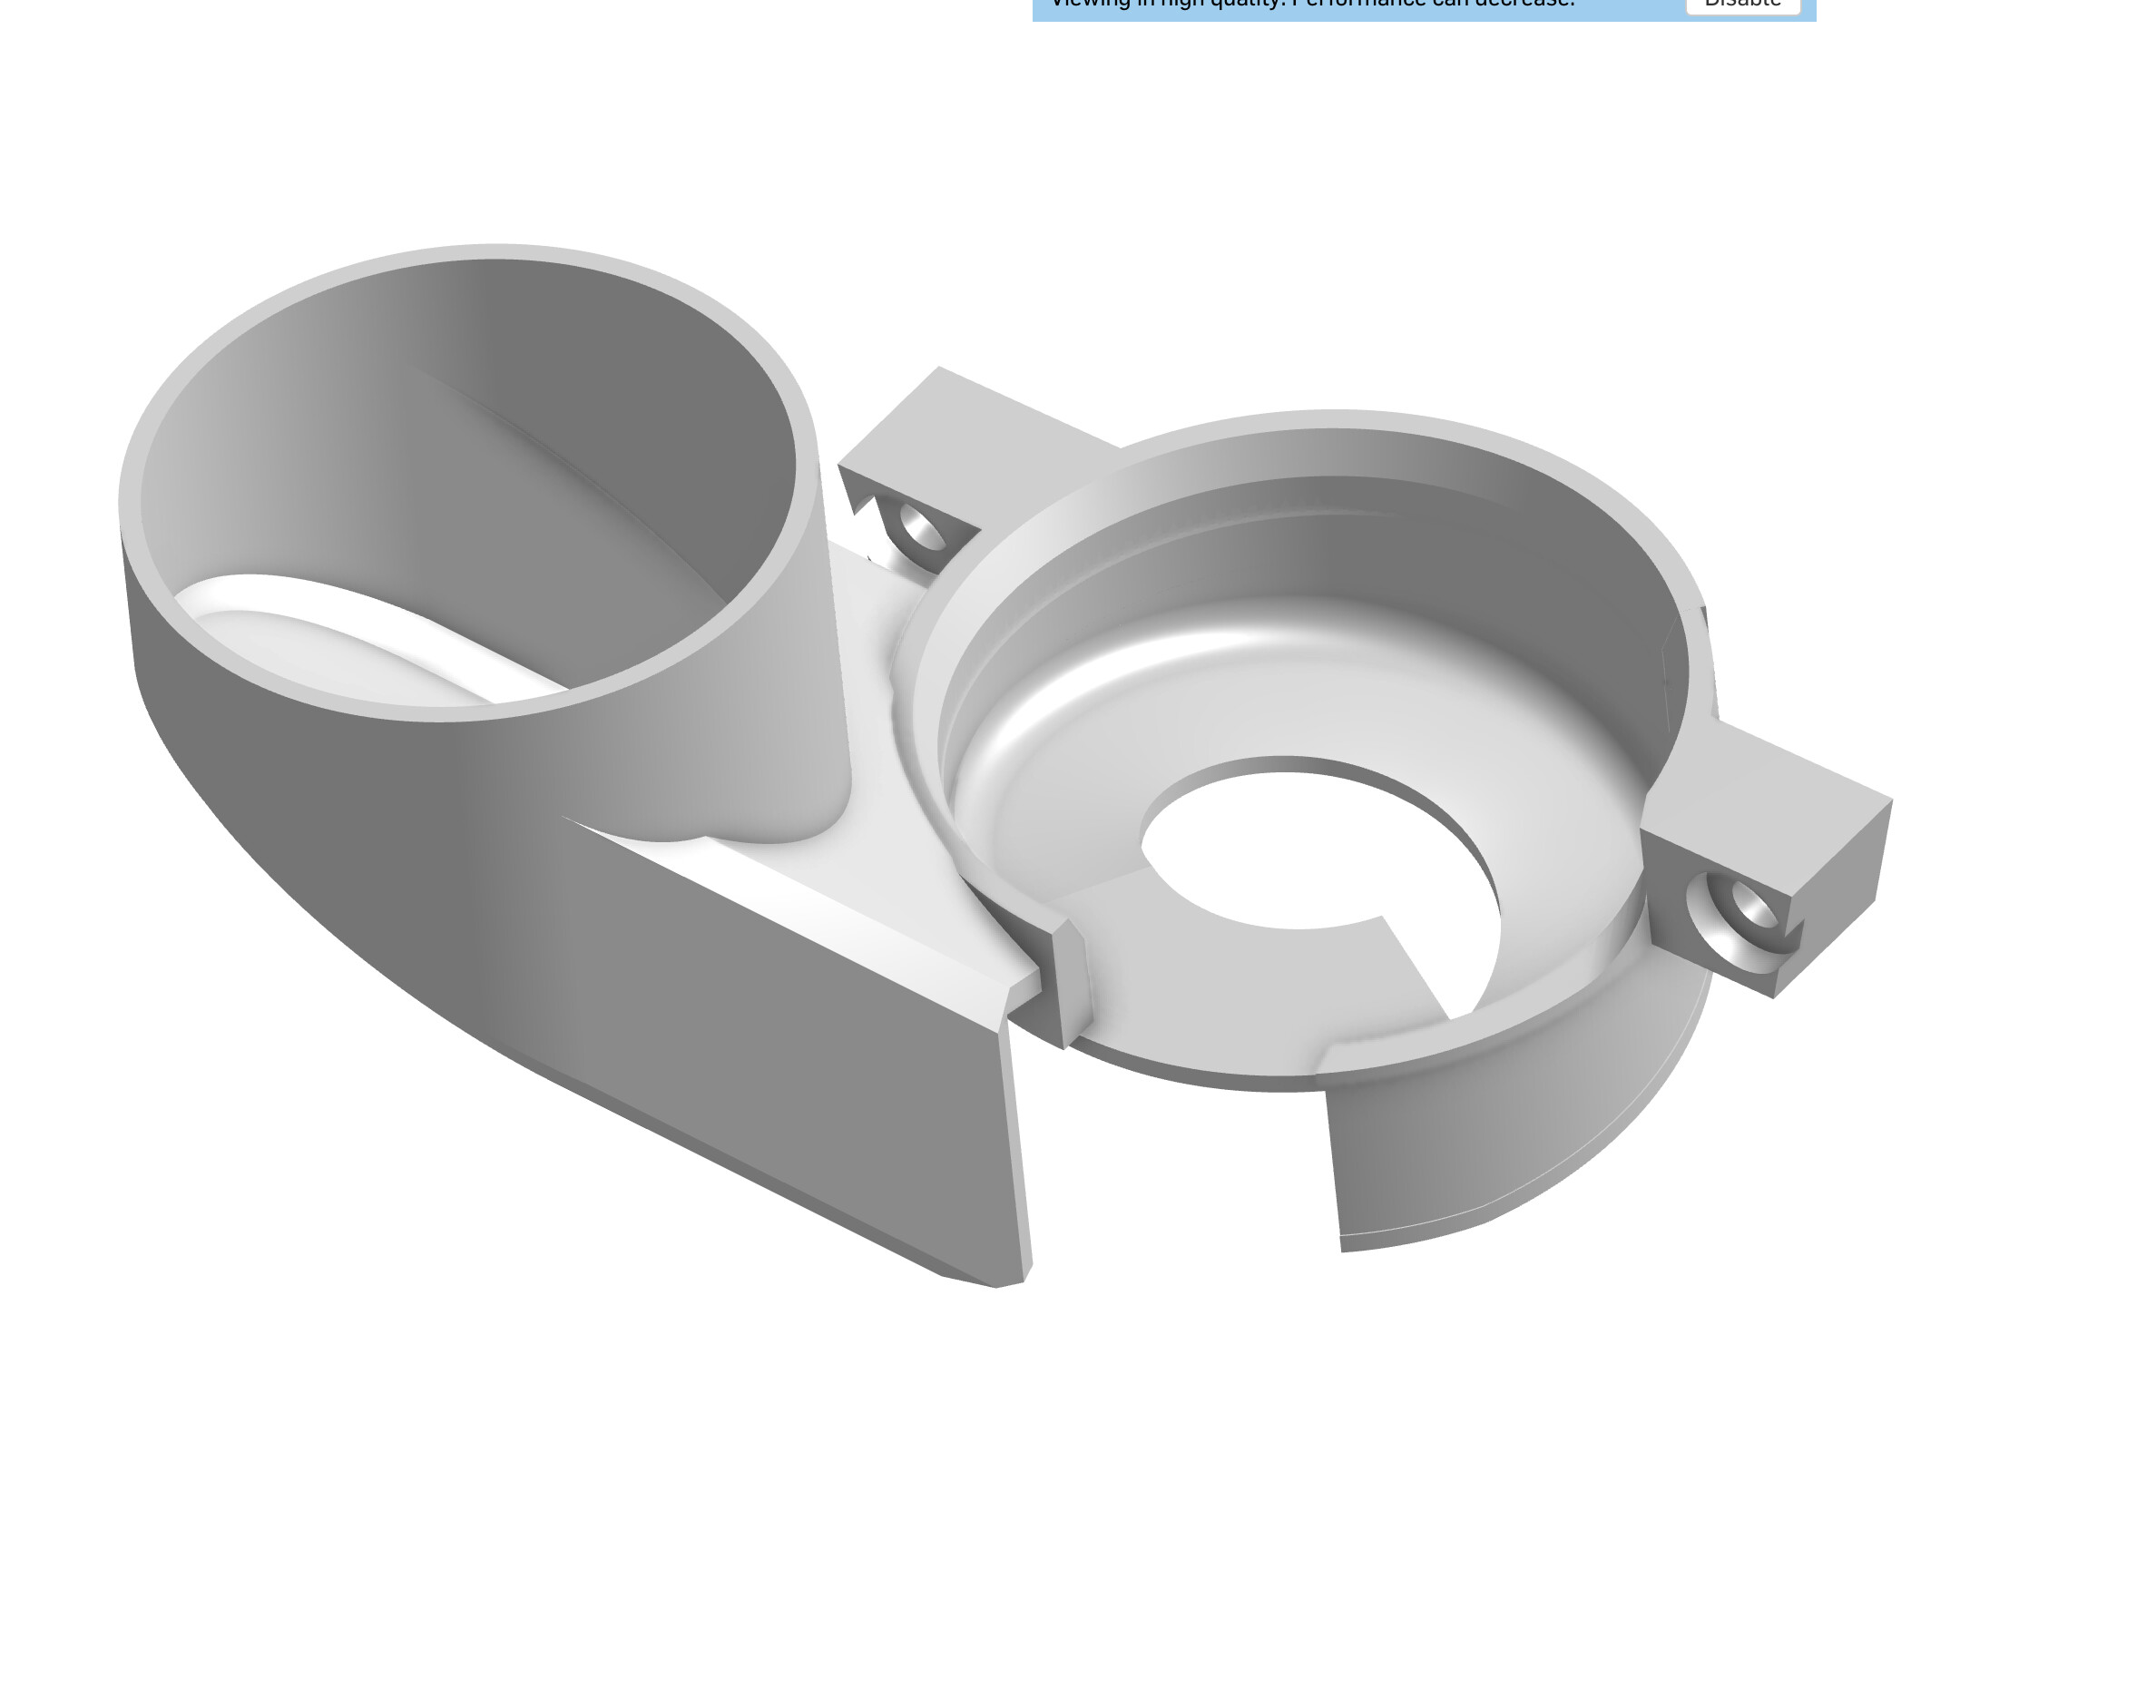
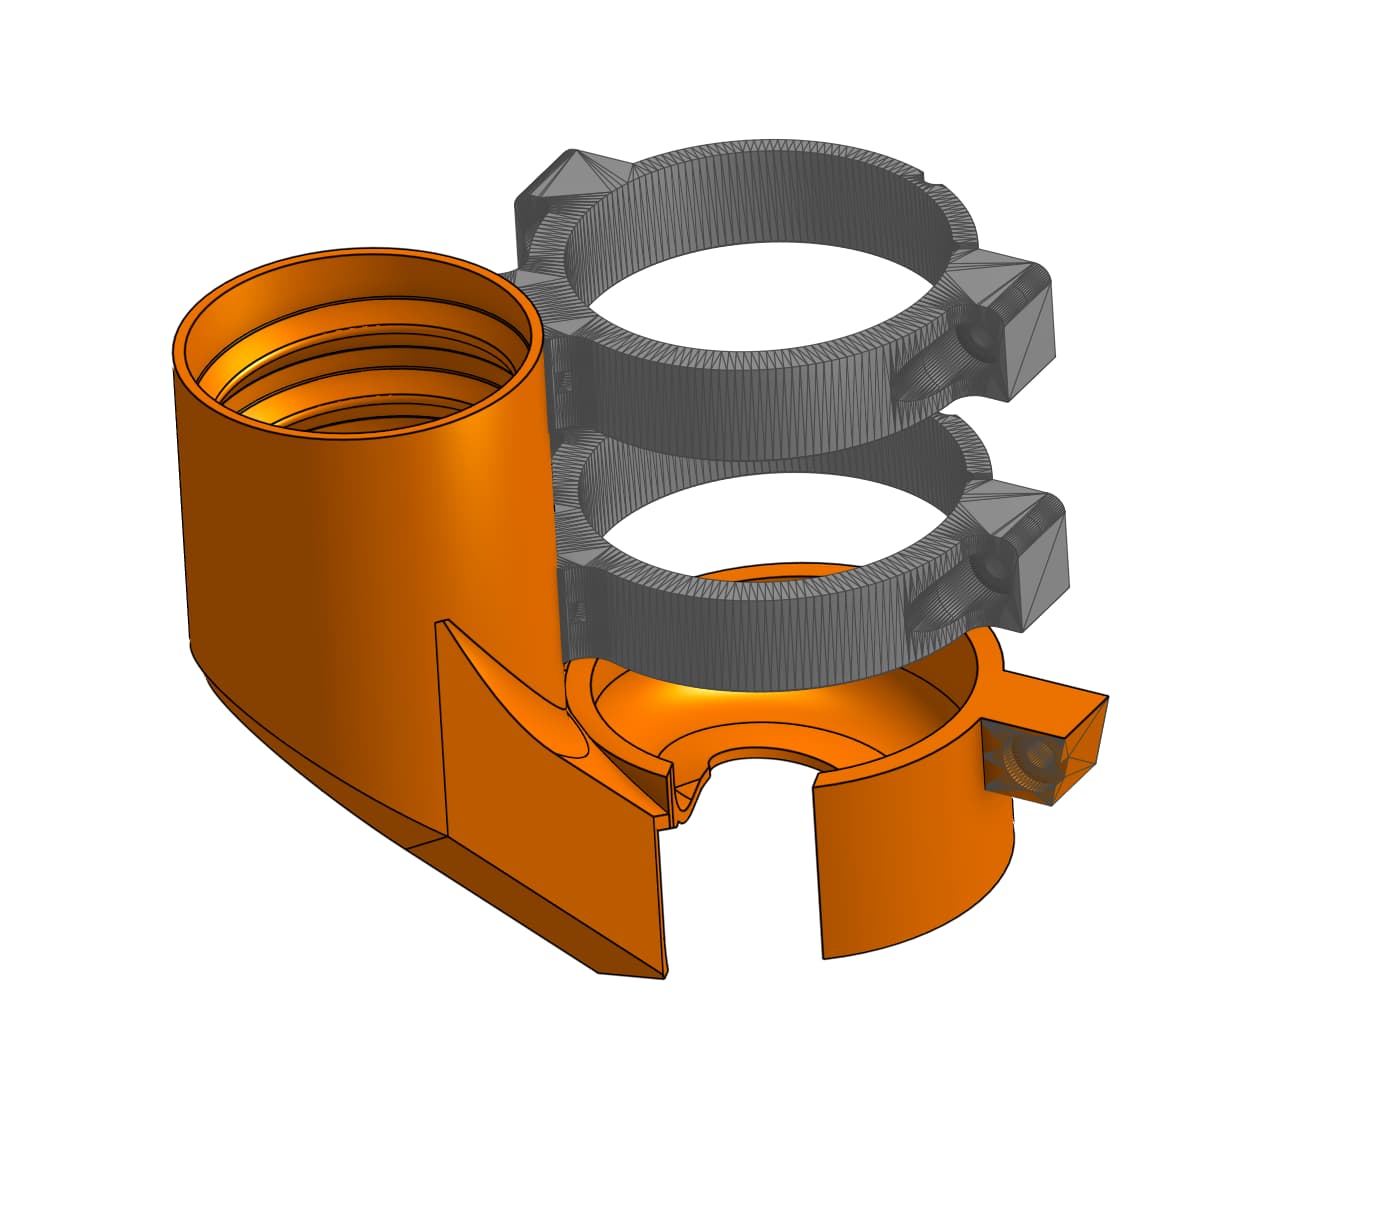
Mounting - for now it will (might!) line up with the mounts, and zip ties will do the job. If it looks as though it will work I’ll make some appropriate guides. I hope the ring on the “cyclone” is sufficiently small to support the router - if not use it as a height guide before tightening - that’s an easy fix!
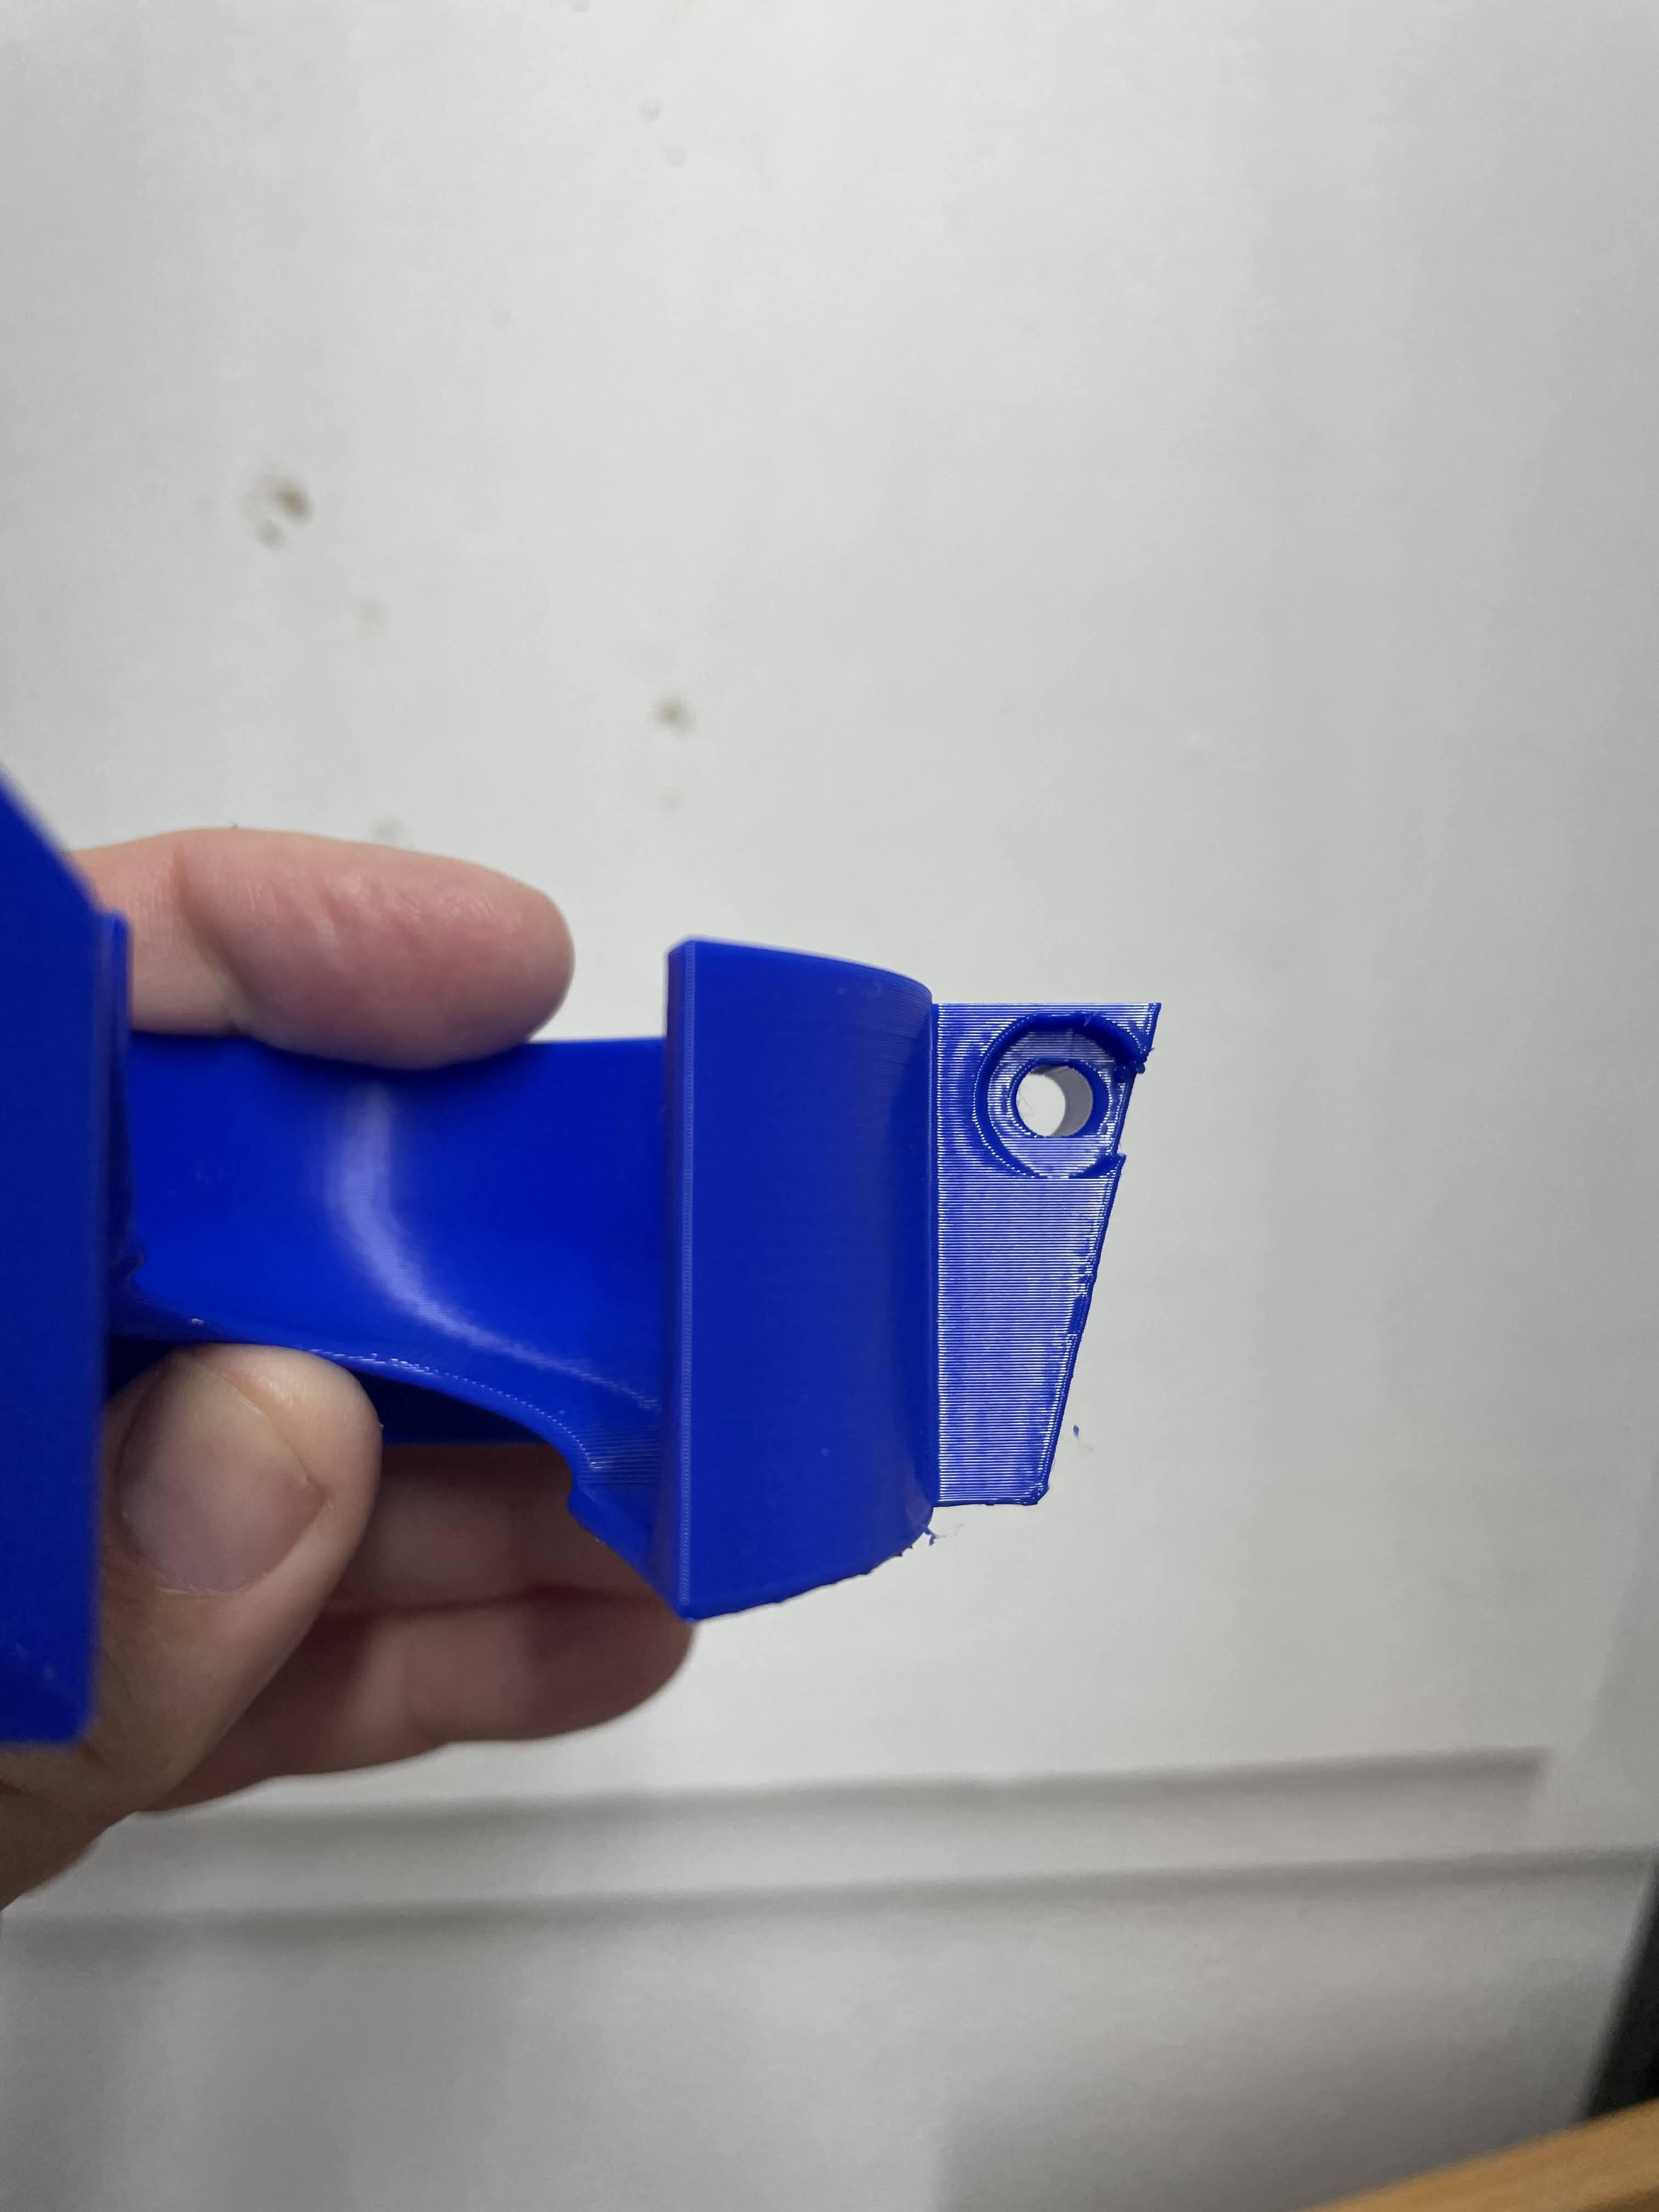
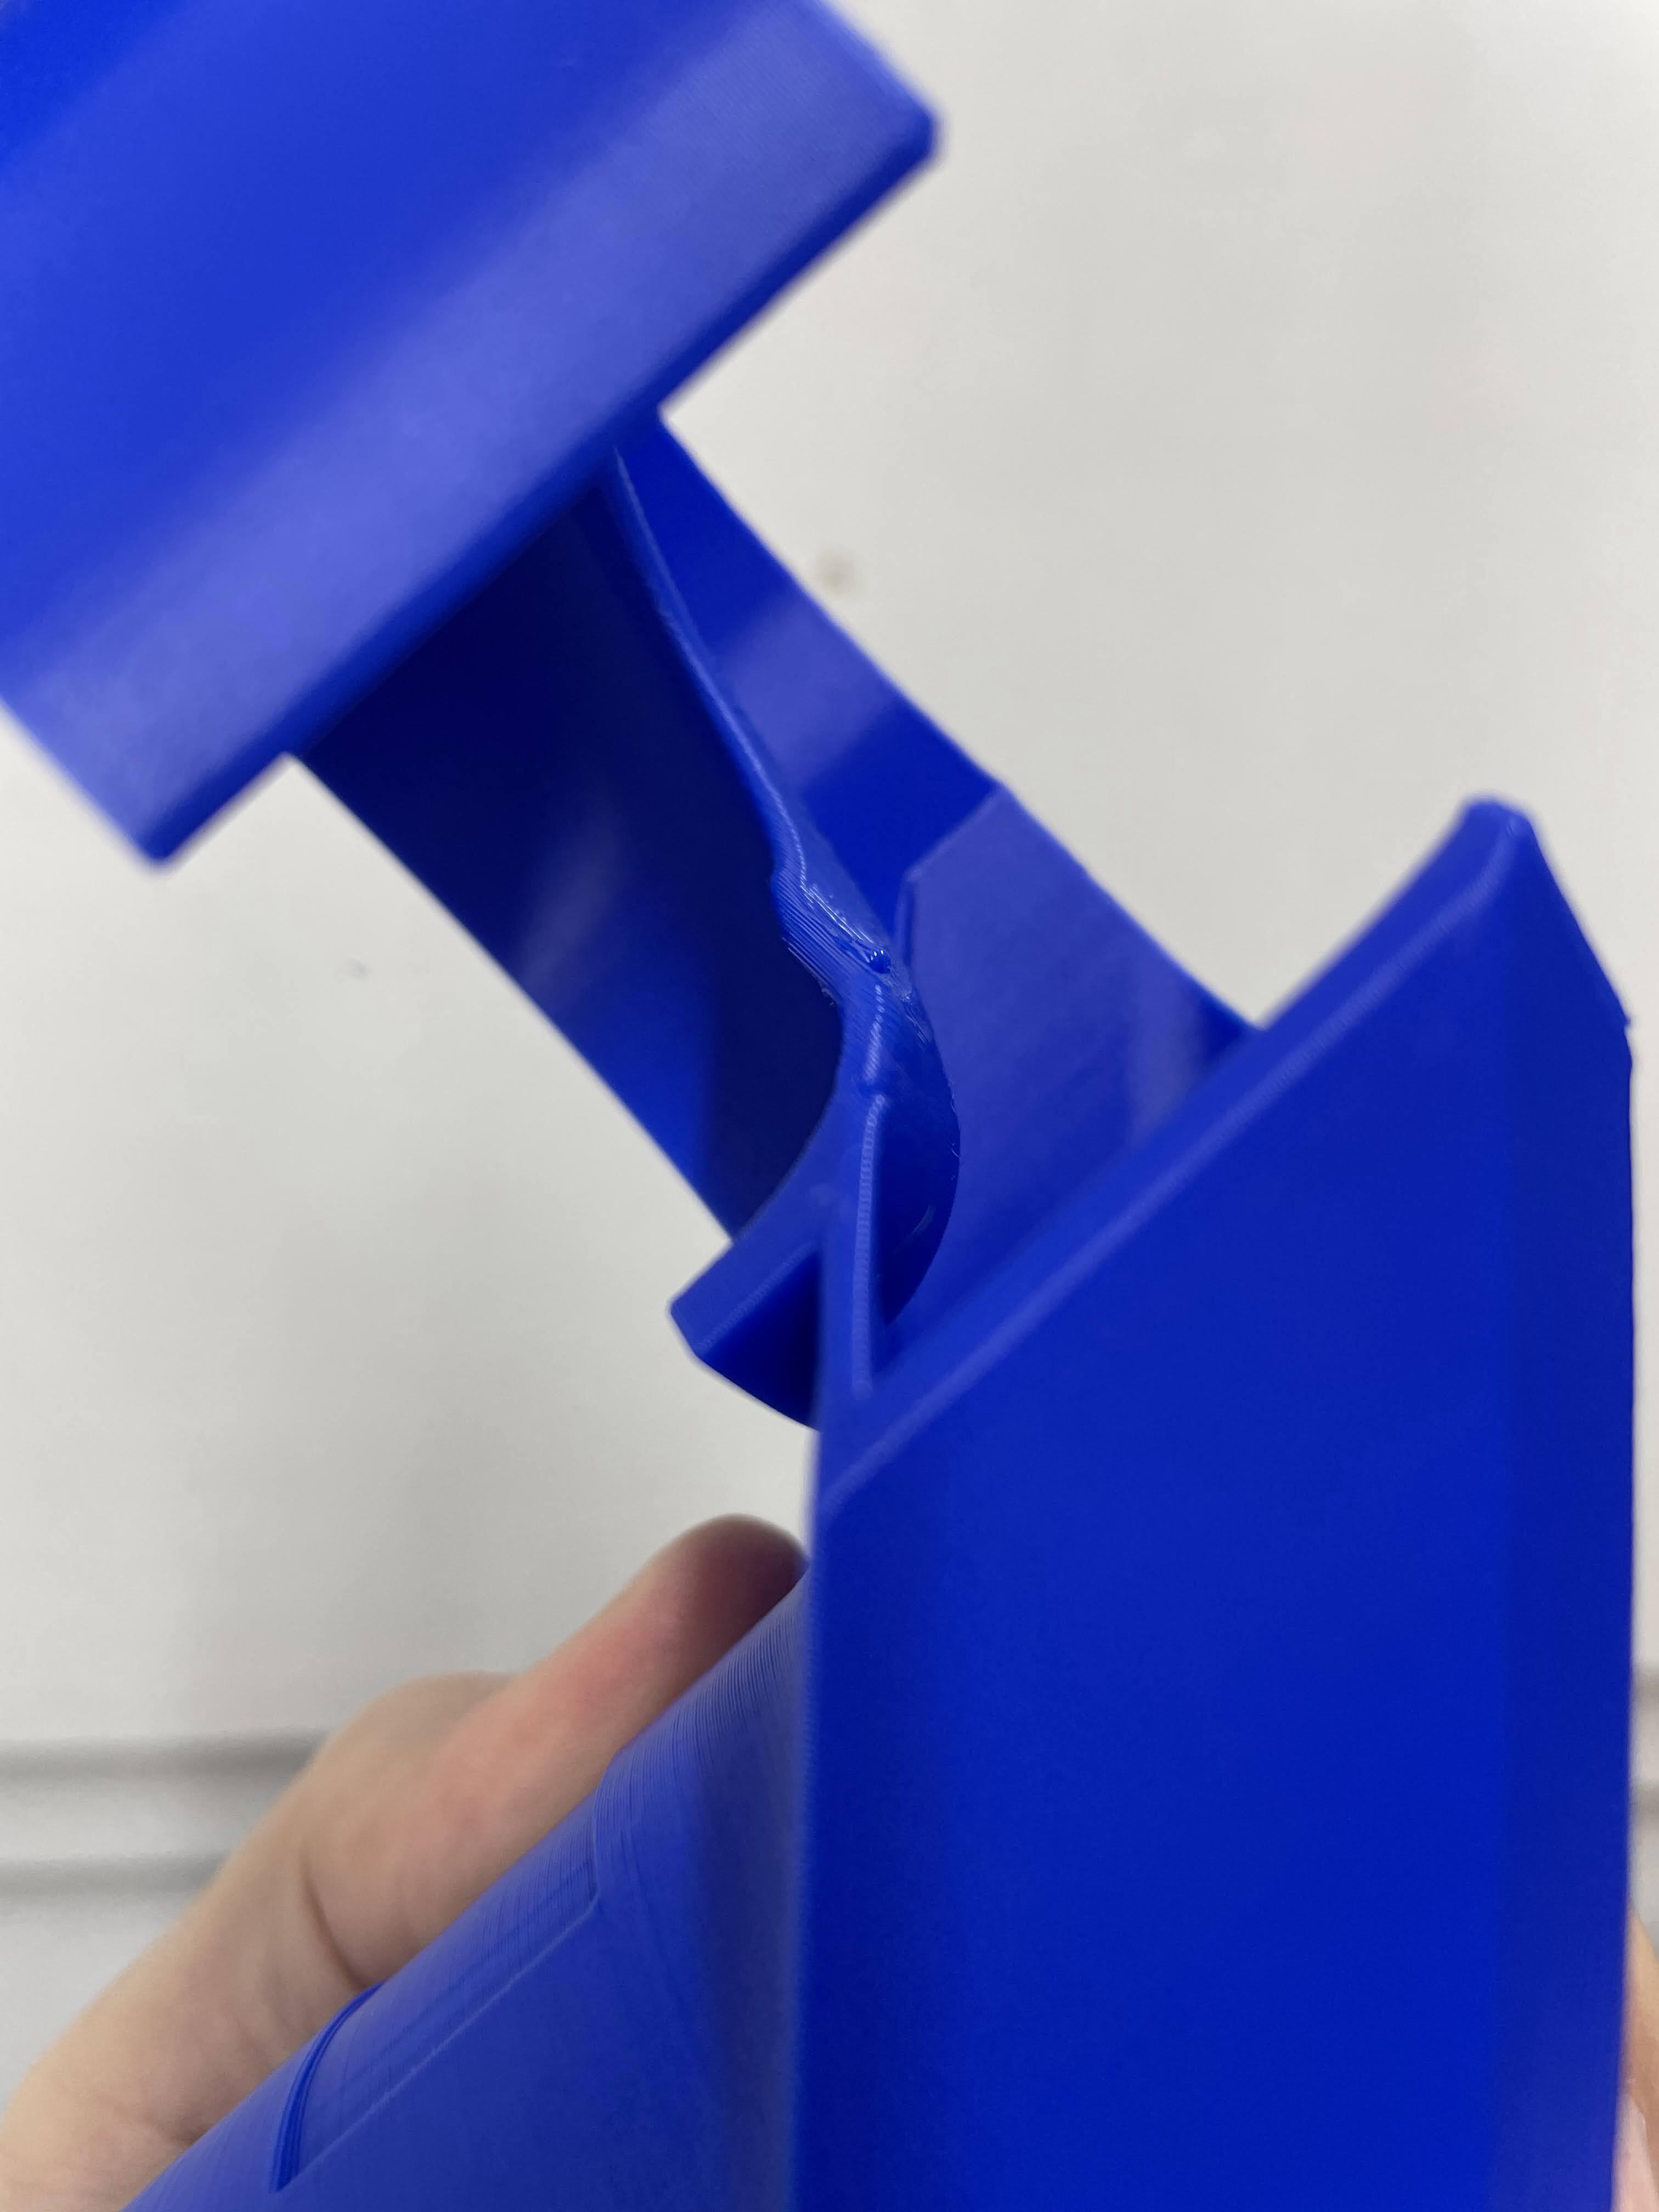
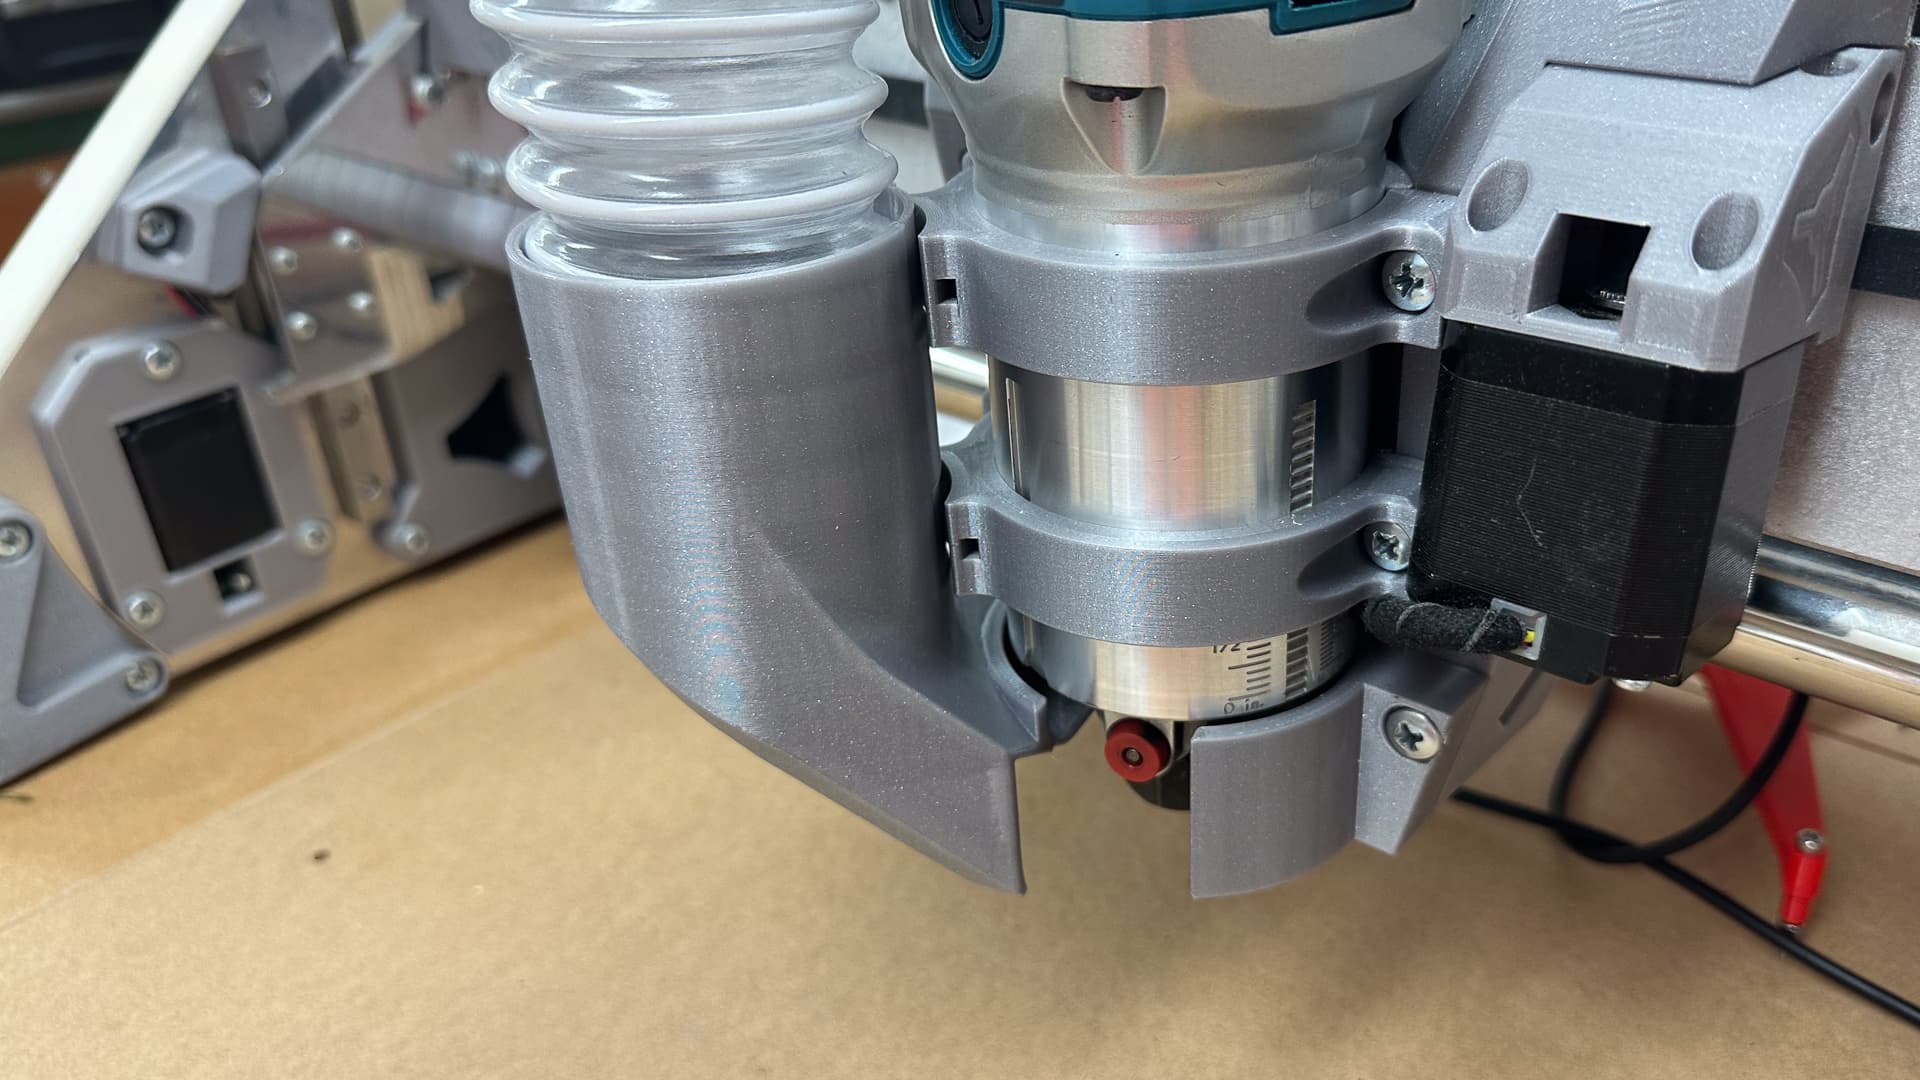
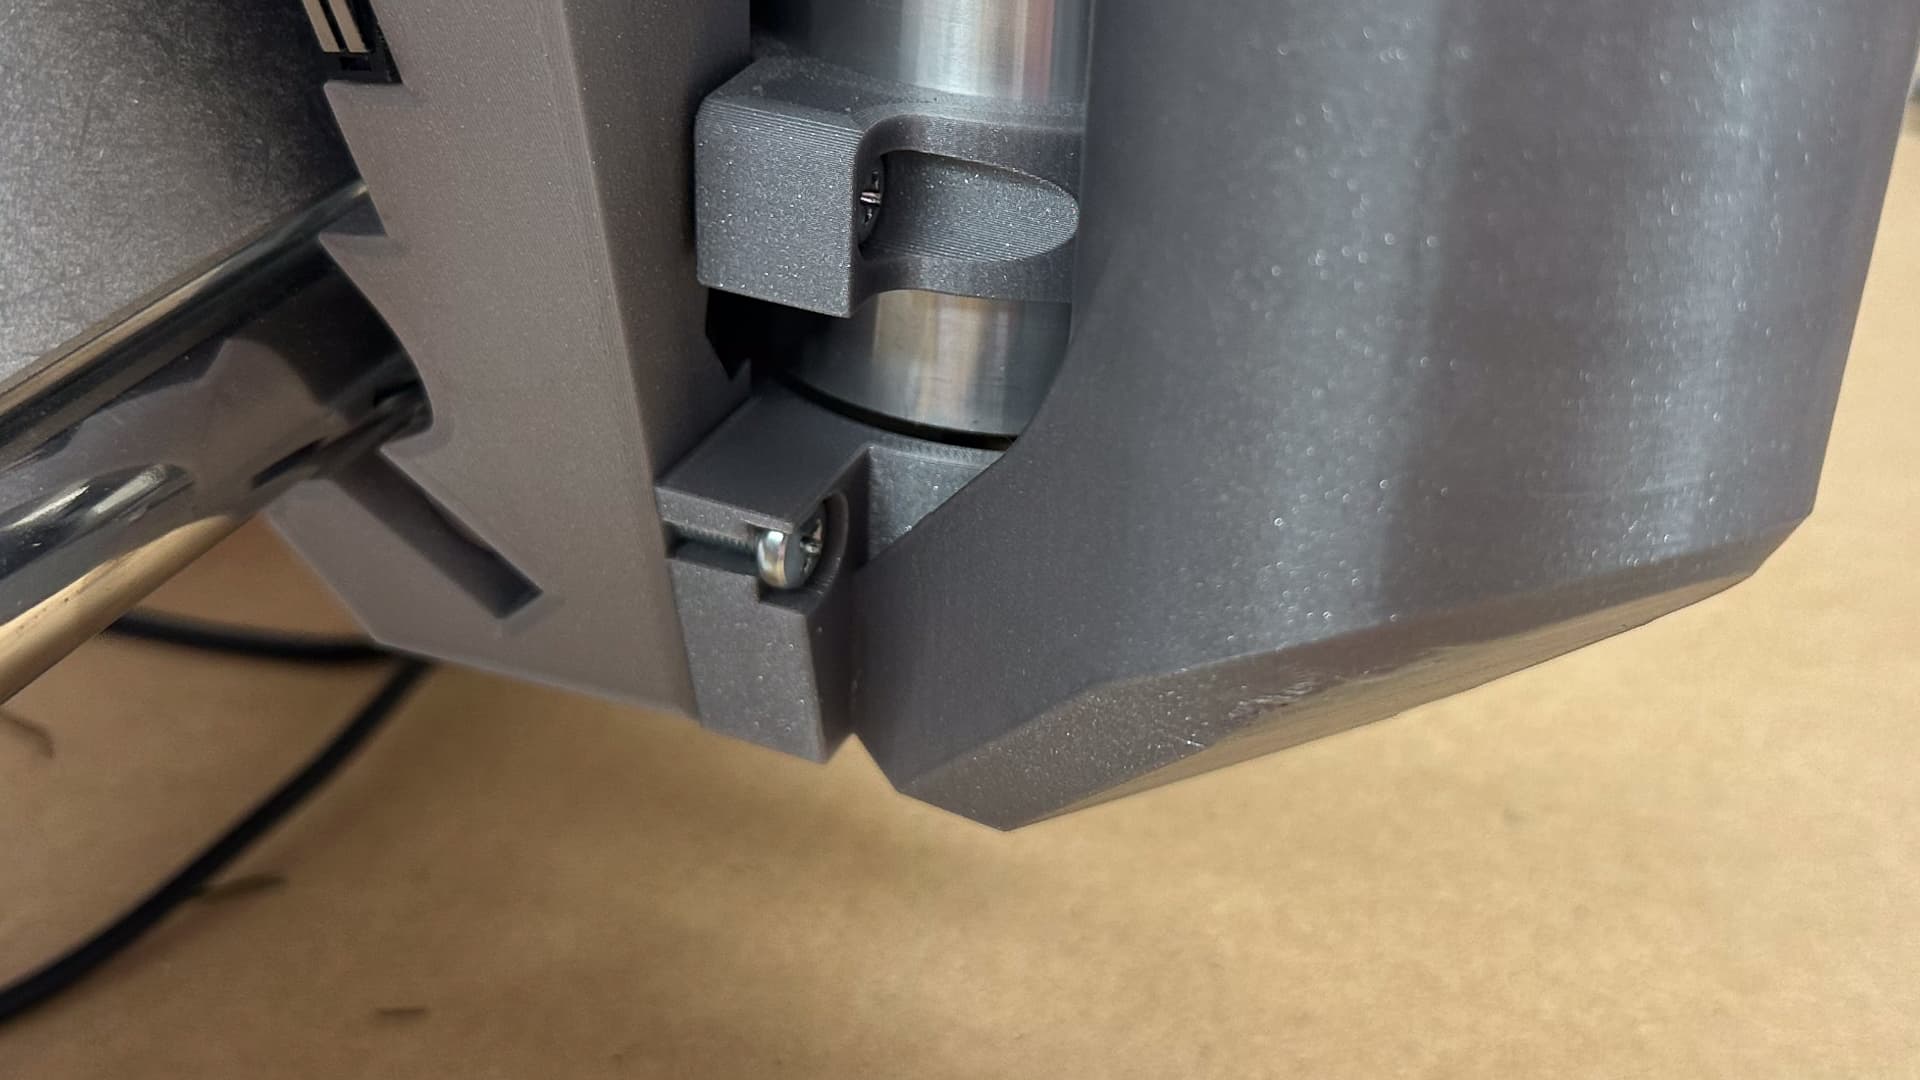
The left hand screw hole is now a slot. Fit the screw, slide the base on and tighten the other one. I don’t think a little ratchet phillips will fit in the space - but a cut down hex key should. I’m trying to avoid @vicious1 Ryan’s “hole through the whole shooting match” approach as I don’t have a snap on cover yet.
Tool change - ahh yes… sadly at the moment it’s going to be very awkward - it think some juggling of a spanner and the use of the red button on the Makita will be necessary.
Use - I’m hopeful that it will be better or at least as good as the stock version as it is, but the location of the “spanner slot” might work against us with the vortex from the router exhaust pushing faster than the vac can suck. Quick fix for that is a bit of tape - long term I see a skirt around it and the curved part of the base.
@mbamberg if you want to melt some filament - the stl is below- cheers!
Thanks so much for that, the ink isn’t even dry on the drawing yet!!
The kink is a little odd - but won’t affect anything for the moment. Now the test! It looks as though it might work - but it might need tape over the gap… I’m a bit nervous, and it’s bed time!
Hi Peter, @bitingmidge
I’d like to give this a go. As soon as I finish making an enclosure for my LR3, this weekend, I will try it. I’m waiting to try Doug’s floating dust shoe as well (its all assembled and just waiting to fit).
I printed off your design, and although the hose size is the same as mine, the thread is the wrong way round. Left hand instead of right hand. Don’t know if this is a US/UK thing.
OK here’s the very strange reverse thread version, just bear in mind this is VERY MUCH a prototype - I haven’t tested it at all - and the shortcomings that I am aware of are listed above. Hopefully I’ll get mine installed today - we’ll see, but it will be great to have another view on it.
Alan, can you tell me what you “think” your hose size is? As mentioned above, mine was bought as 50mm but it’s not the same 50mm as the vacuum hose - 2" ID?
I can’t remember what it was advertised as when I bought it. I’m awaiting delivery of 5m of 2.5” (or 63mm)
I have printed more hose adapters than anything else on my printer. I wish we could get some sort of international standard going. It’s particularly frustrating when
It’s too early to call it a success, but it’s definitely a small victory.
If nothing else it looks great. It really works well with @Ryan 's parts if I do say so myself. There’s no need for the zipties on the tool mounts, but I will add the top one and a bit of geometry to tidy that up.
I did not make the inner diameter small enough to act as a stop, so will fix that in the next iteration - some additional thickativity won’t hurt when I get on with my cunning skirt plan.
Of course we don’t know how it cools the Makita or picks up dust, but it’s a great ornament for now.
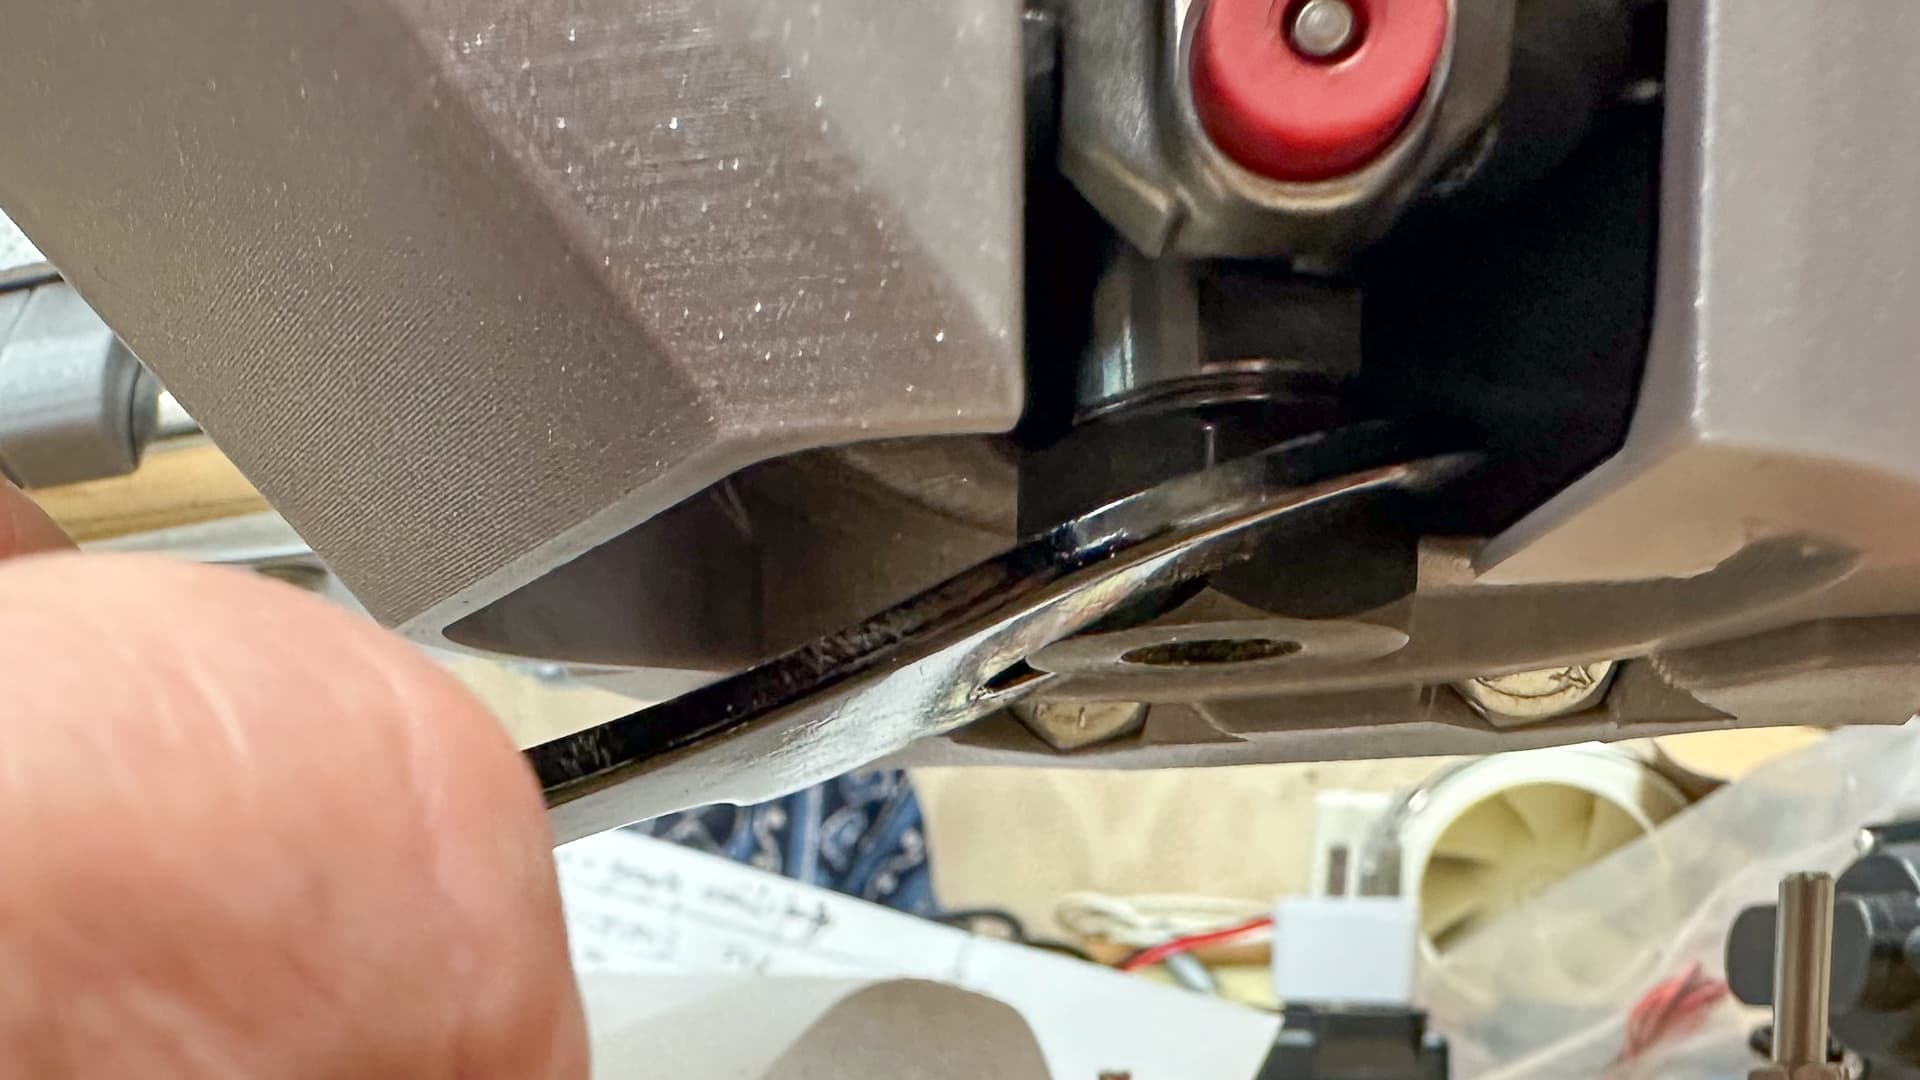
The screw worked out better than I feared it might. I had used a little epoxy to retain the nut for this purpose (not enough as I broke it free, but not to worry). Then I realised my bendy screw driver was not a Phillips but it did the job admirably - I’d got the screw into almost its final position first and it only took half a turn to snug it up.
The spanner is not a problem on the collet either - a little more awkward, and can only be turned half to quarter of a turn but it works well enough so that if the part works as planned it won’t be an imposition.

