Robert's MP3DP-Repeat Build

Well, I’m underway. Not going as smoothly as Matt’s recent build log, but I’m still pretty excited about how it is coming.

I started with a pre-build advice request:

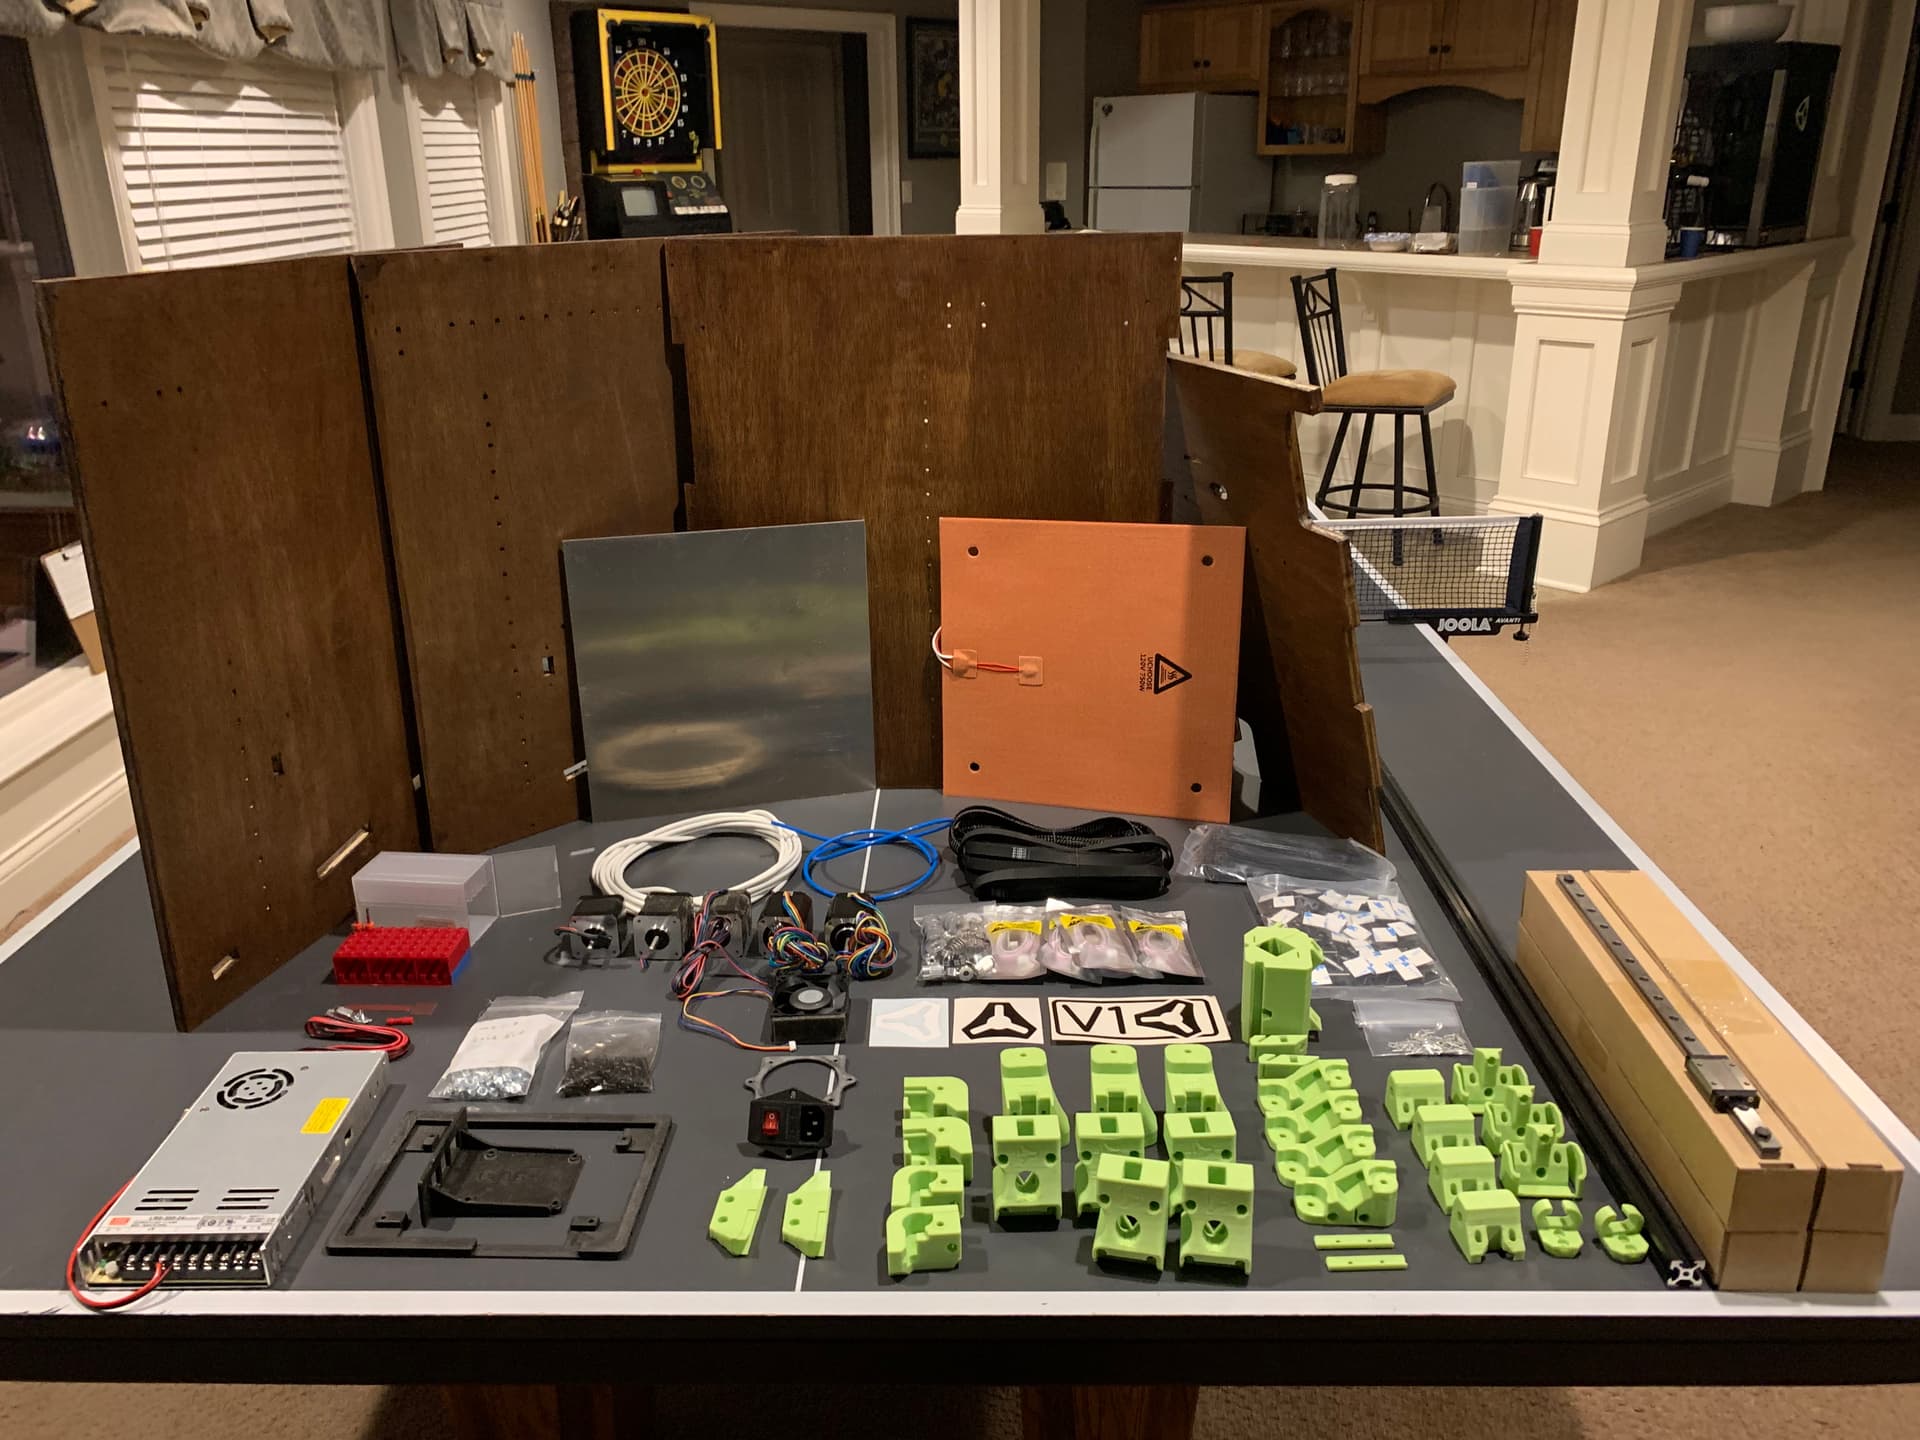
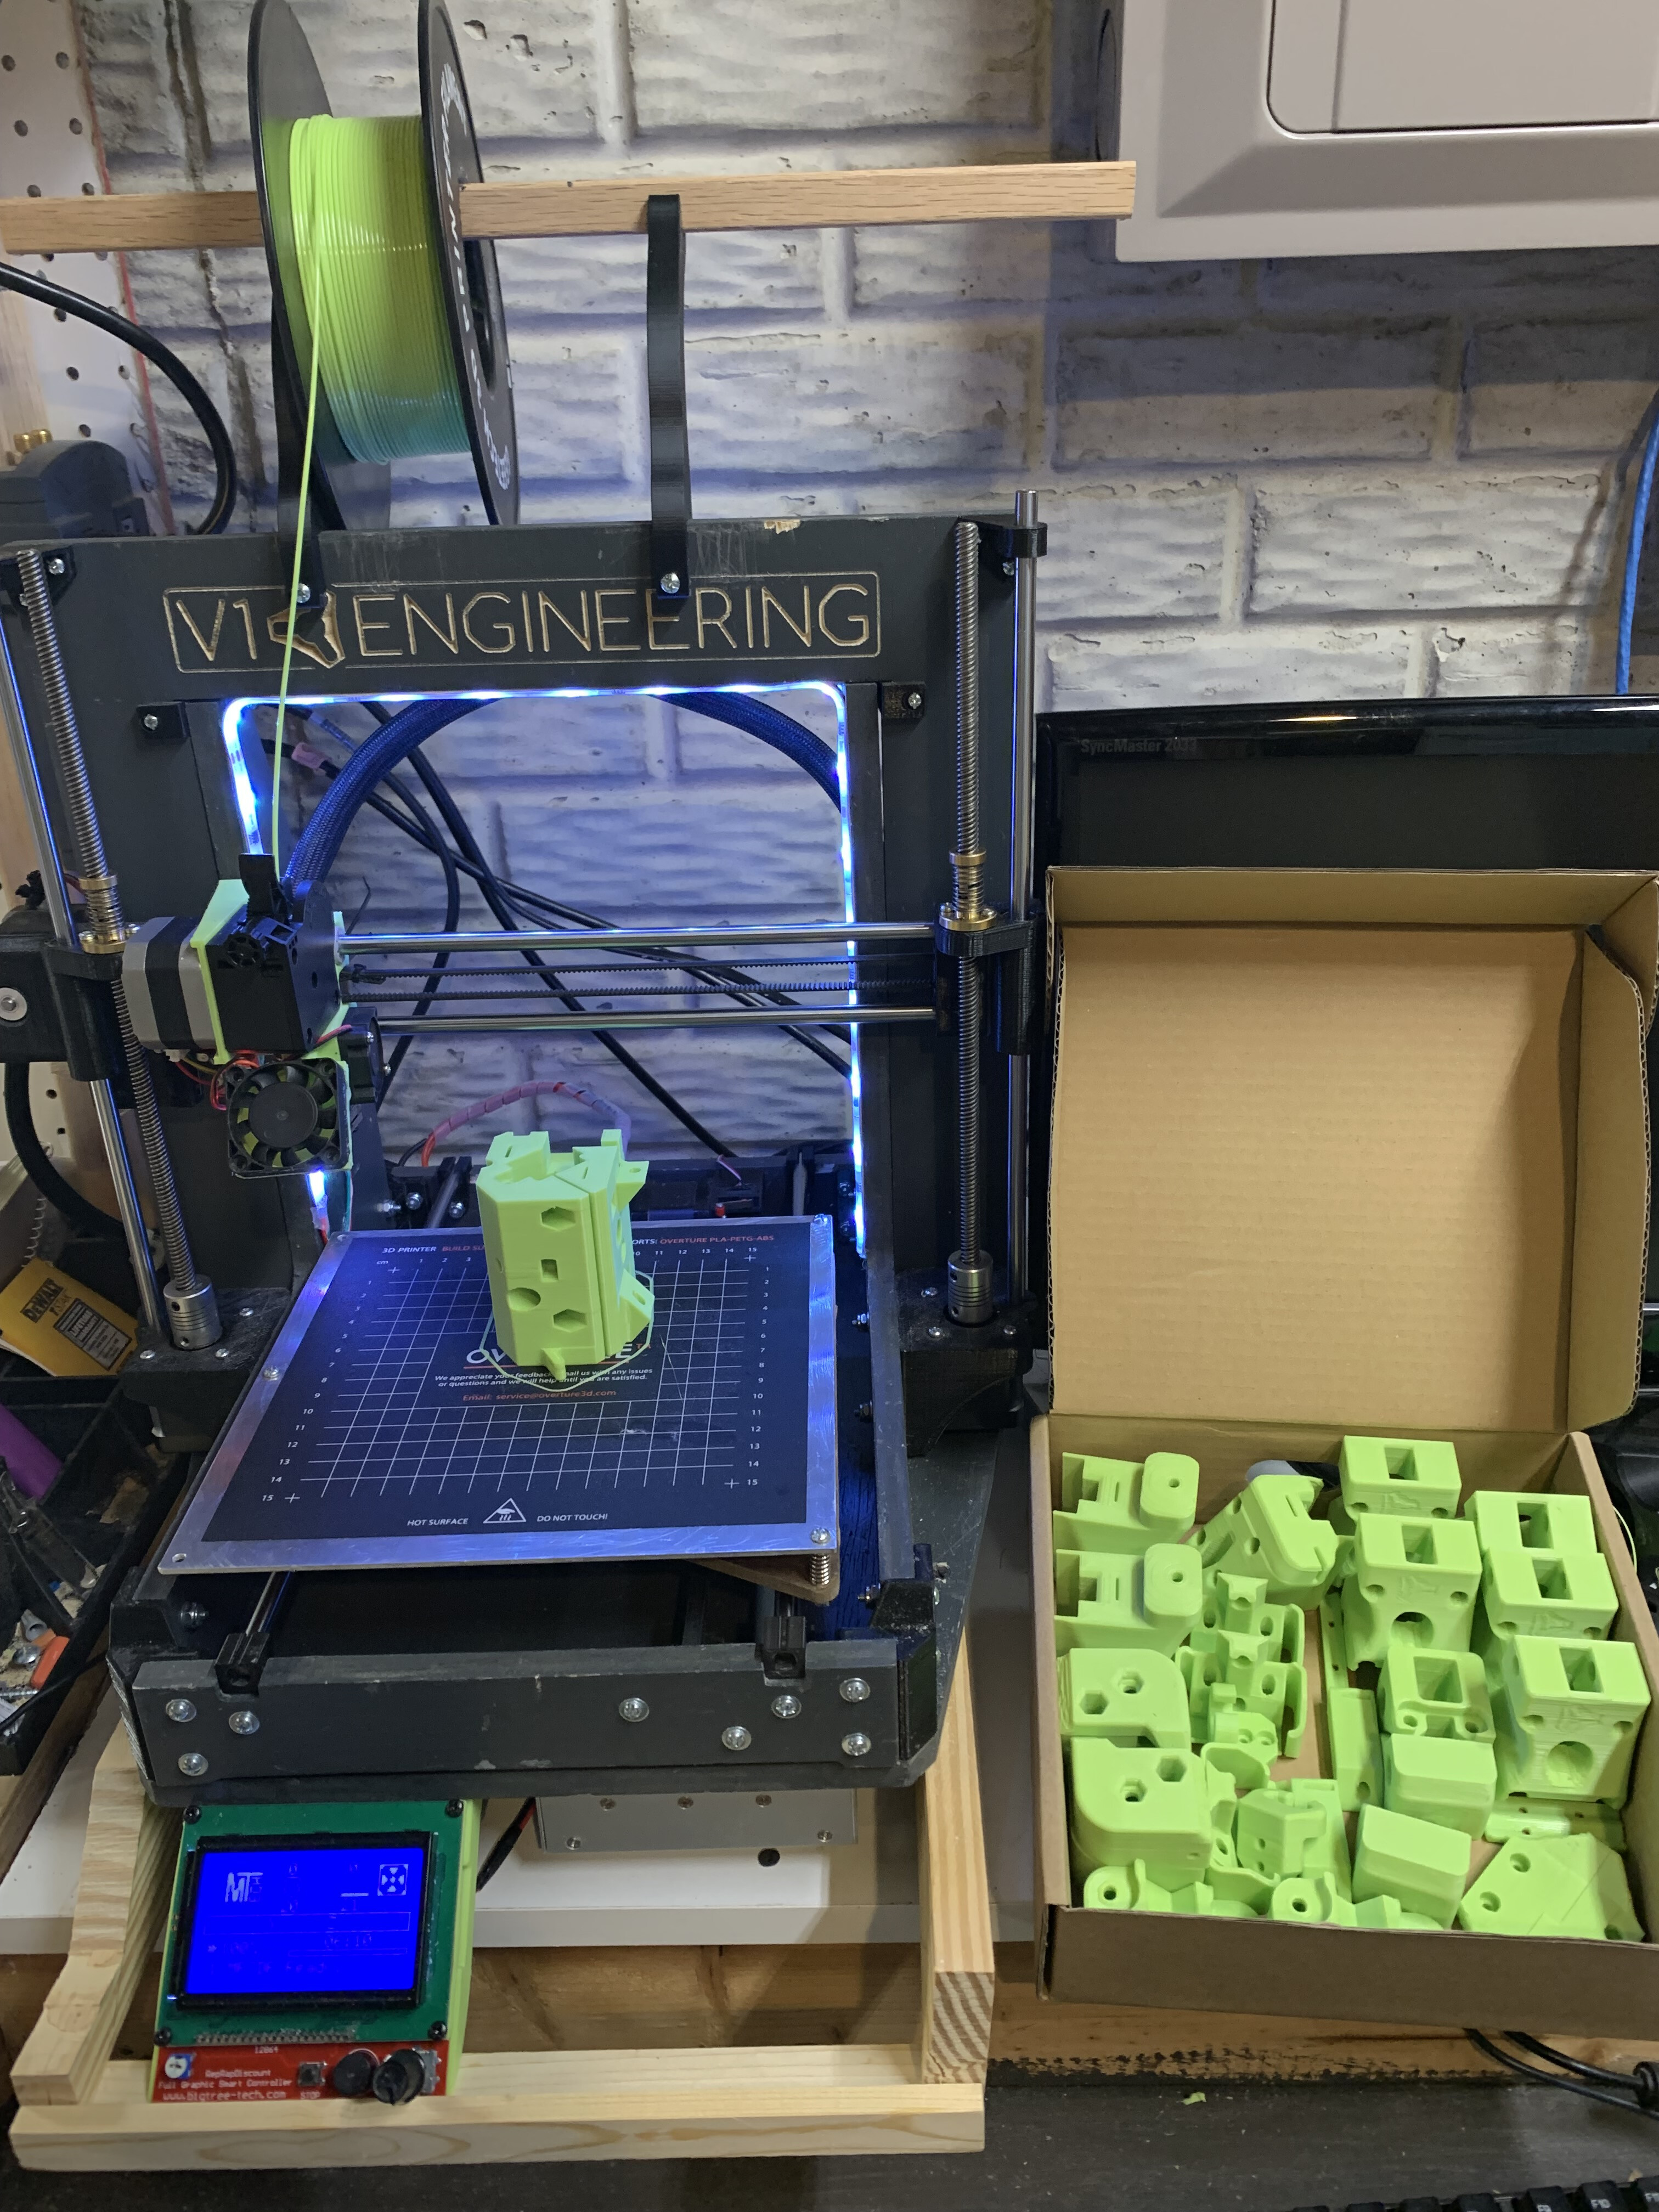
While I was printing most of the parts, I started messing around with Fusion 360.
I started with making a couple of remixes of the “Hub” - first, one for a 19mm square tube which is readily available to me localy, and second, one for a 2020 V-Slot profile tube which I had on hand.
I will say that even though it has a little more drag, the V-Slot version seems to glides on the rail super smoothly and feels great. The penalty is weight - it is quite a bit heavier than 1/16" wall square tubing. Having both on hand now, I am not sure what I will end up going with, but I will post both regardless. I did end up resizing the “Truck Trigger” parts for 19mm square too, so that remix will be available as well.

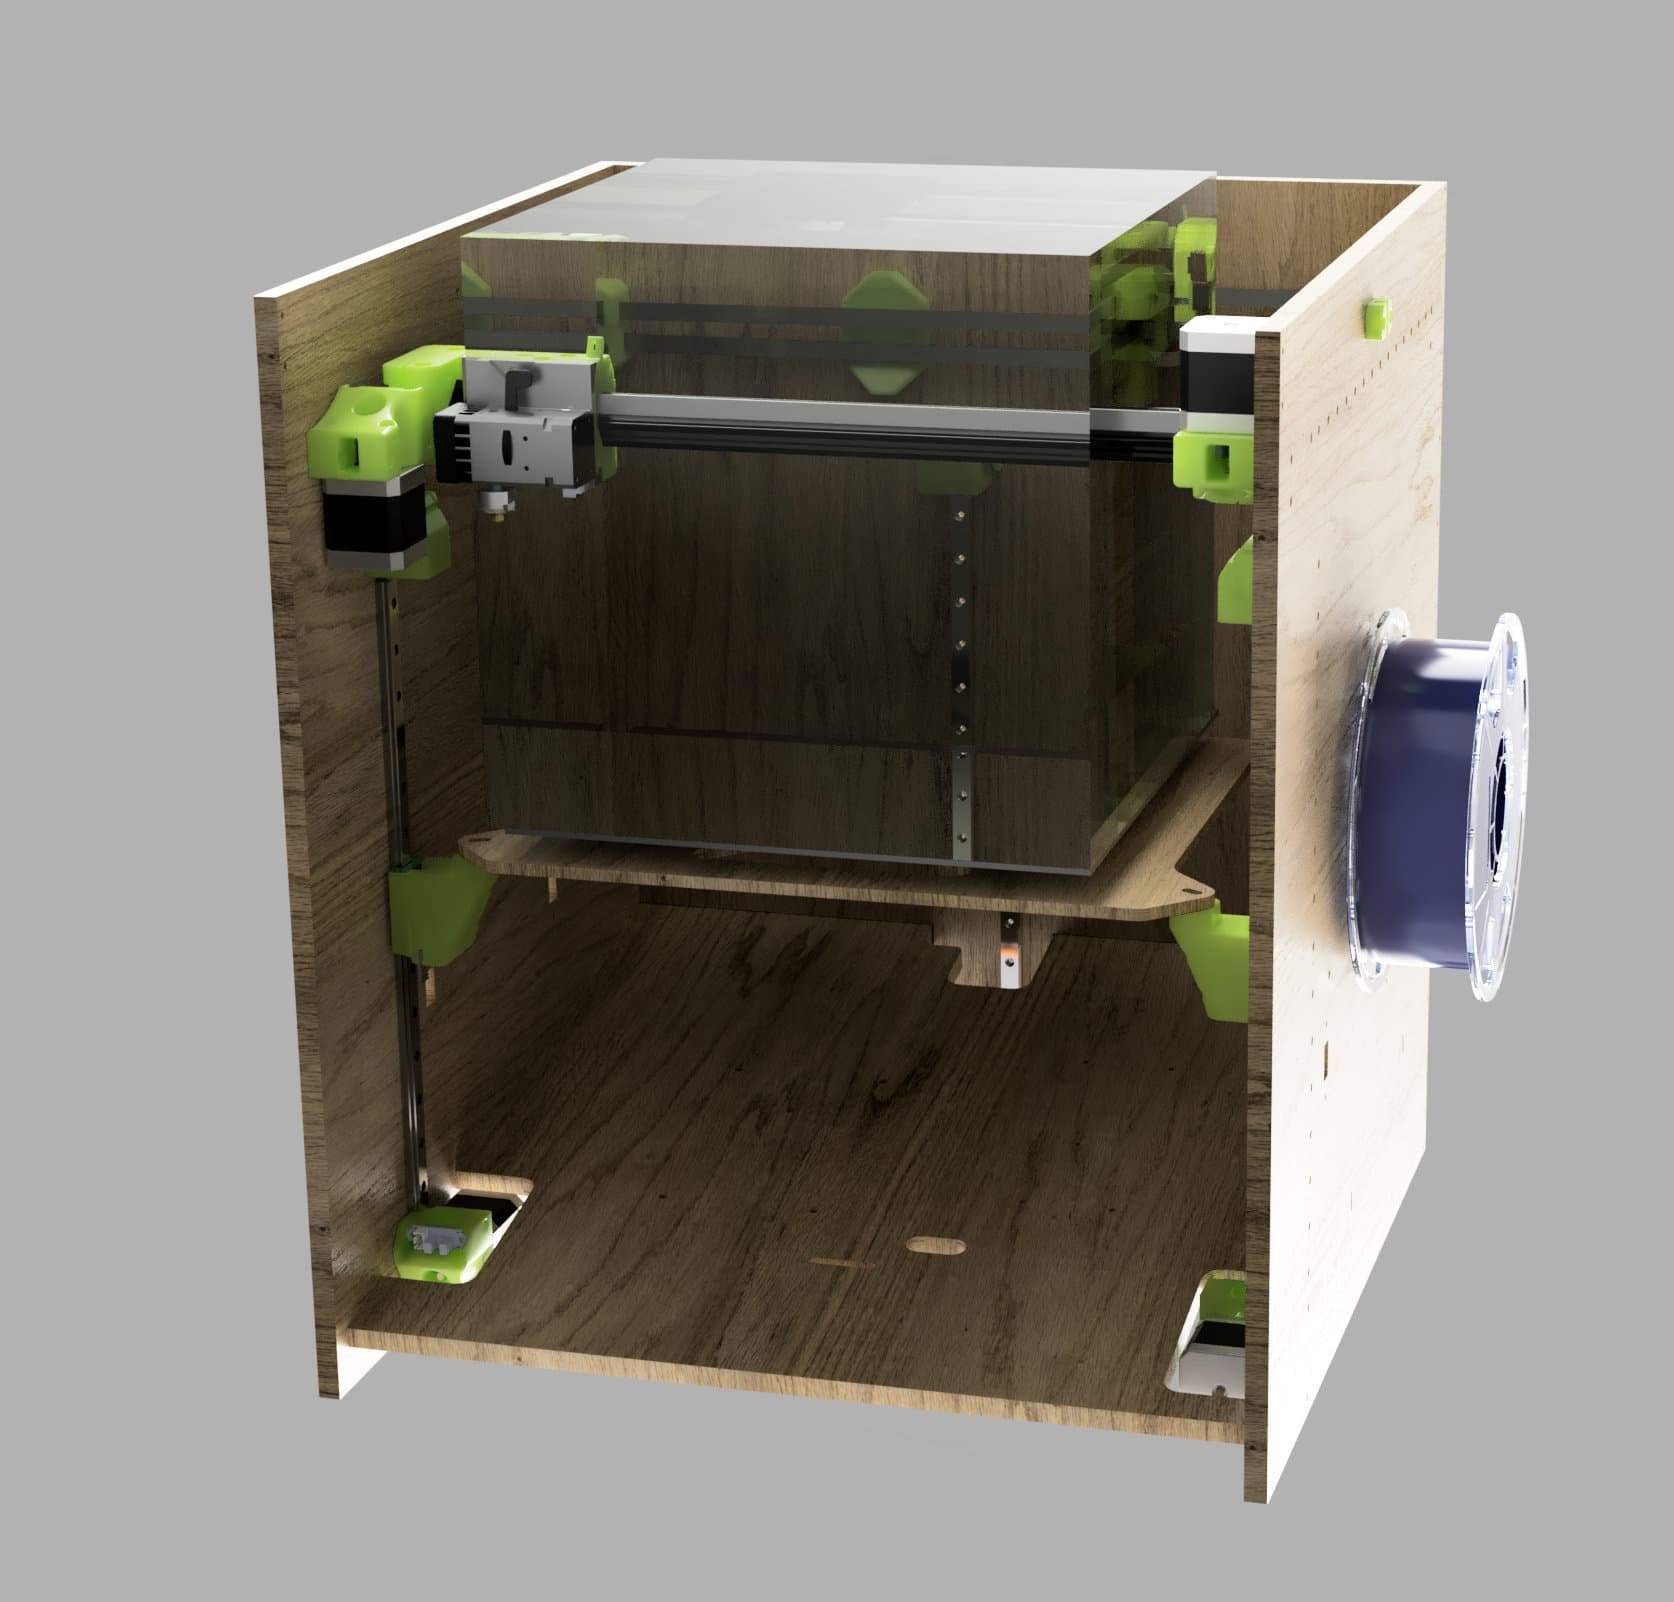
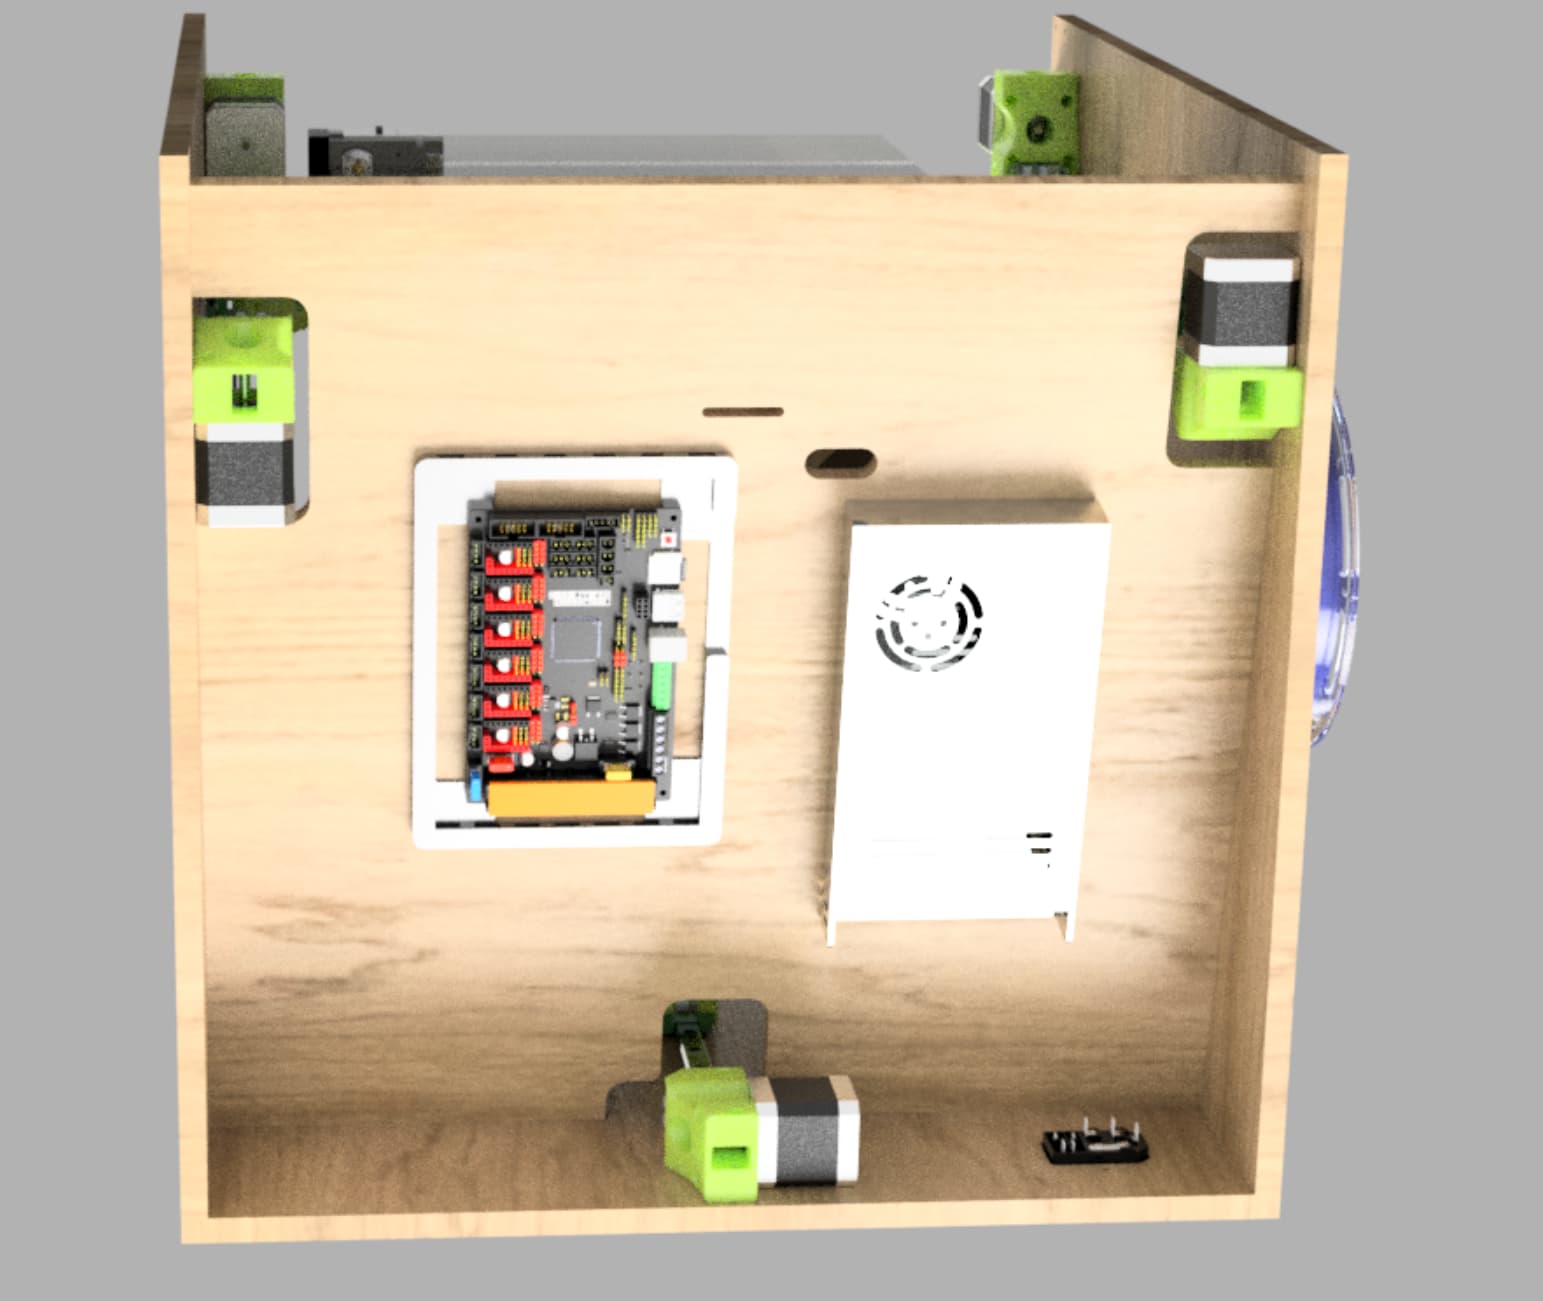
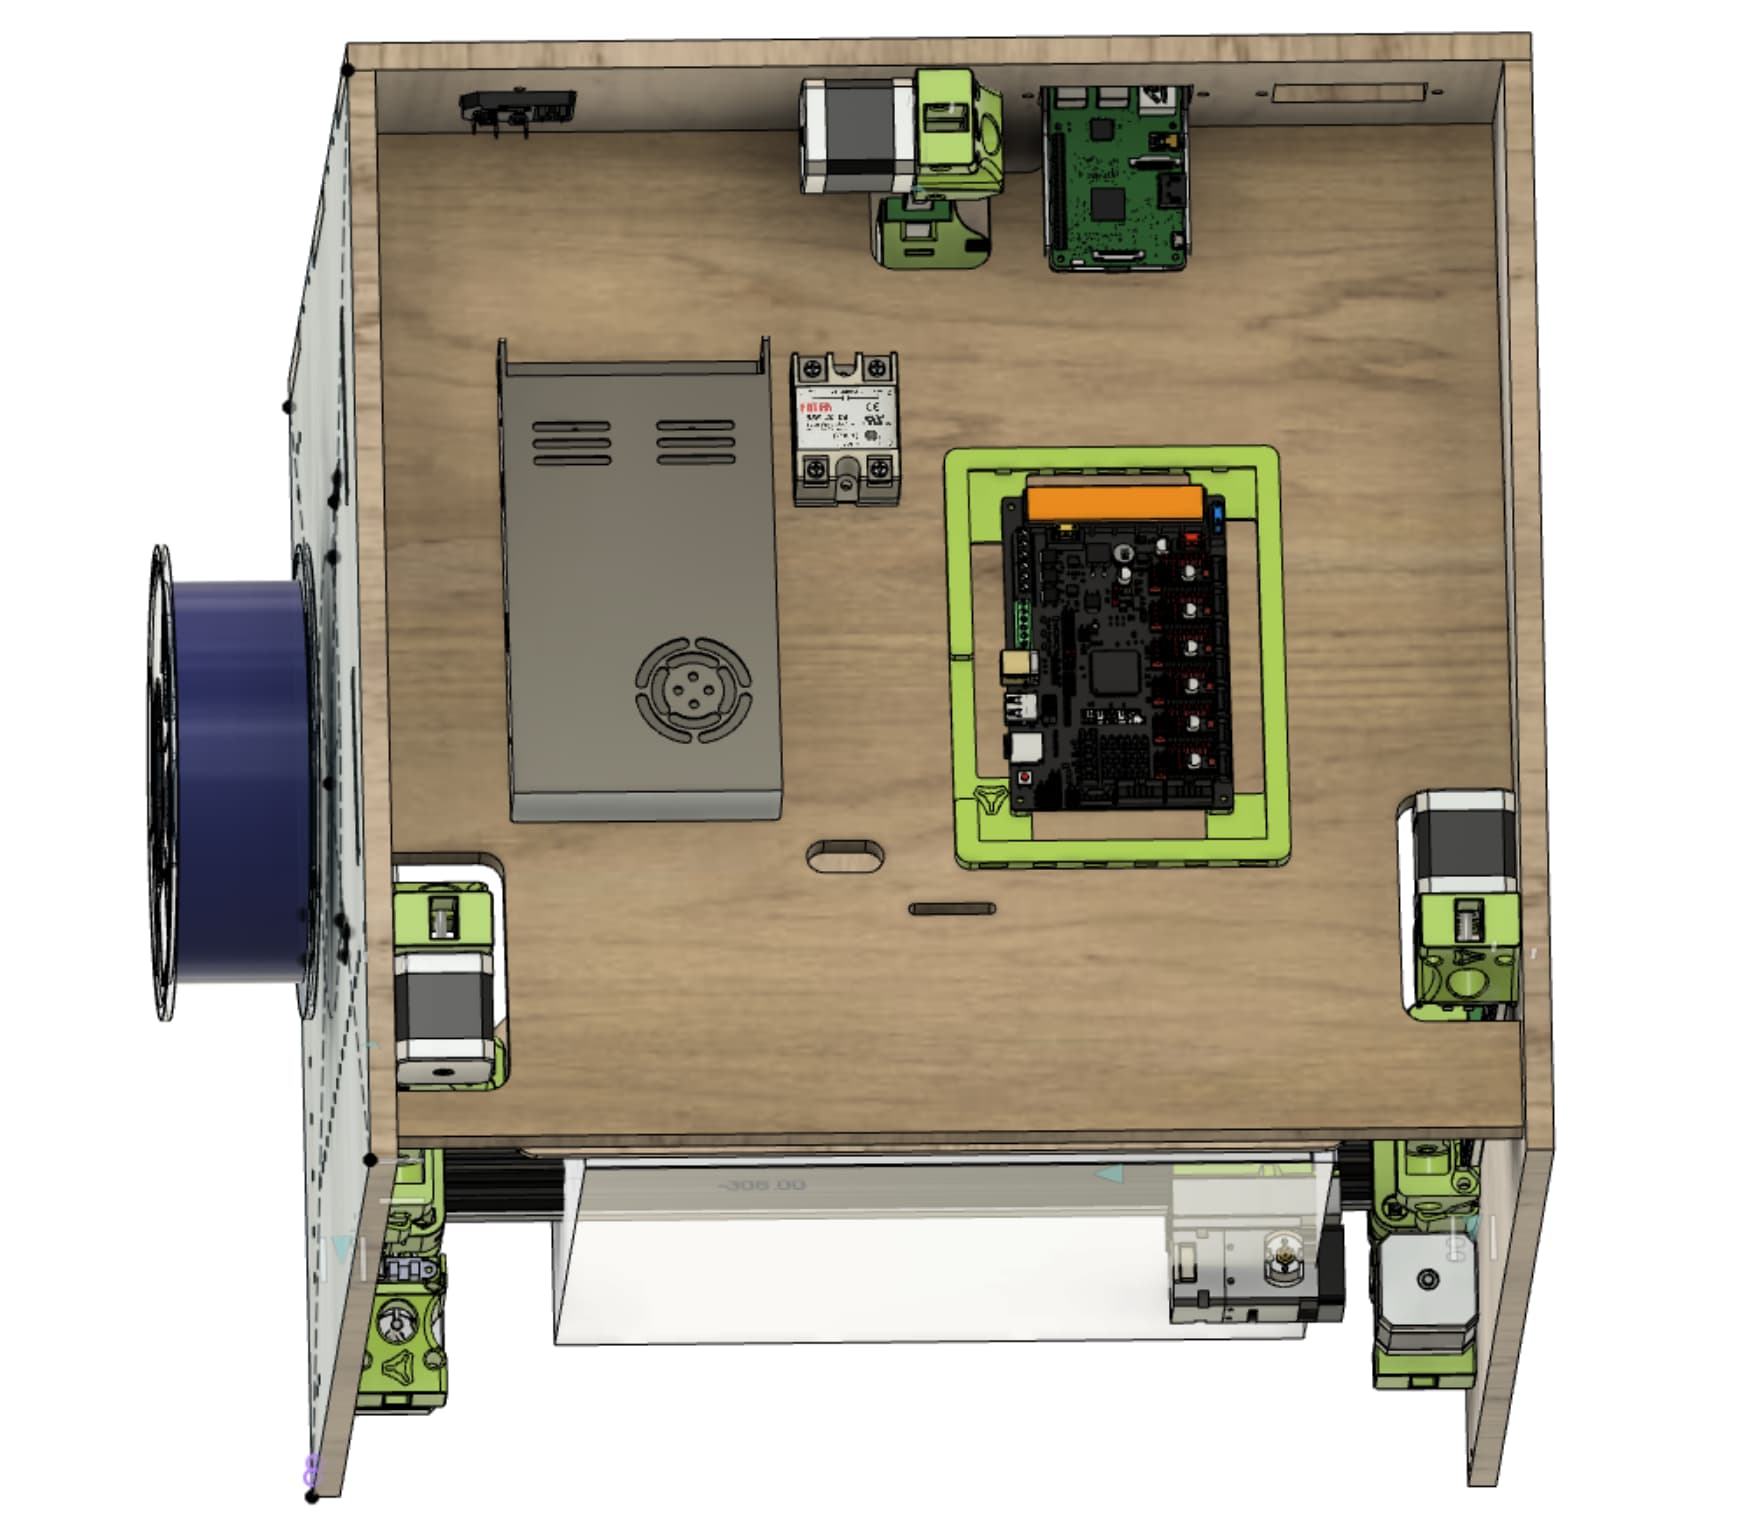
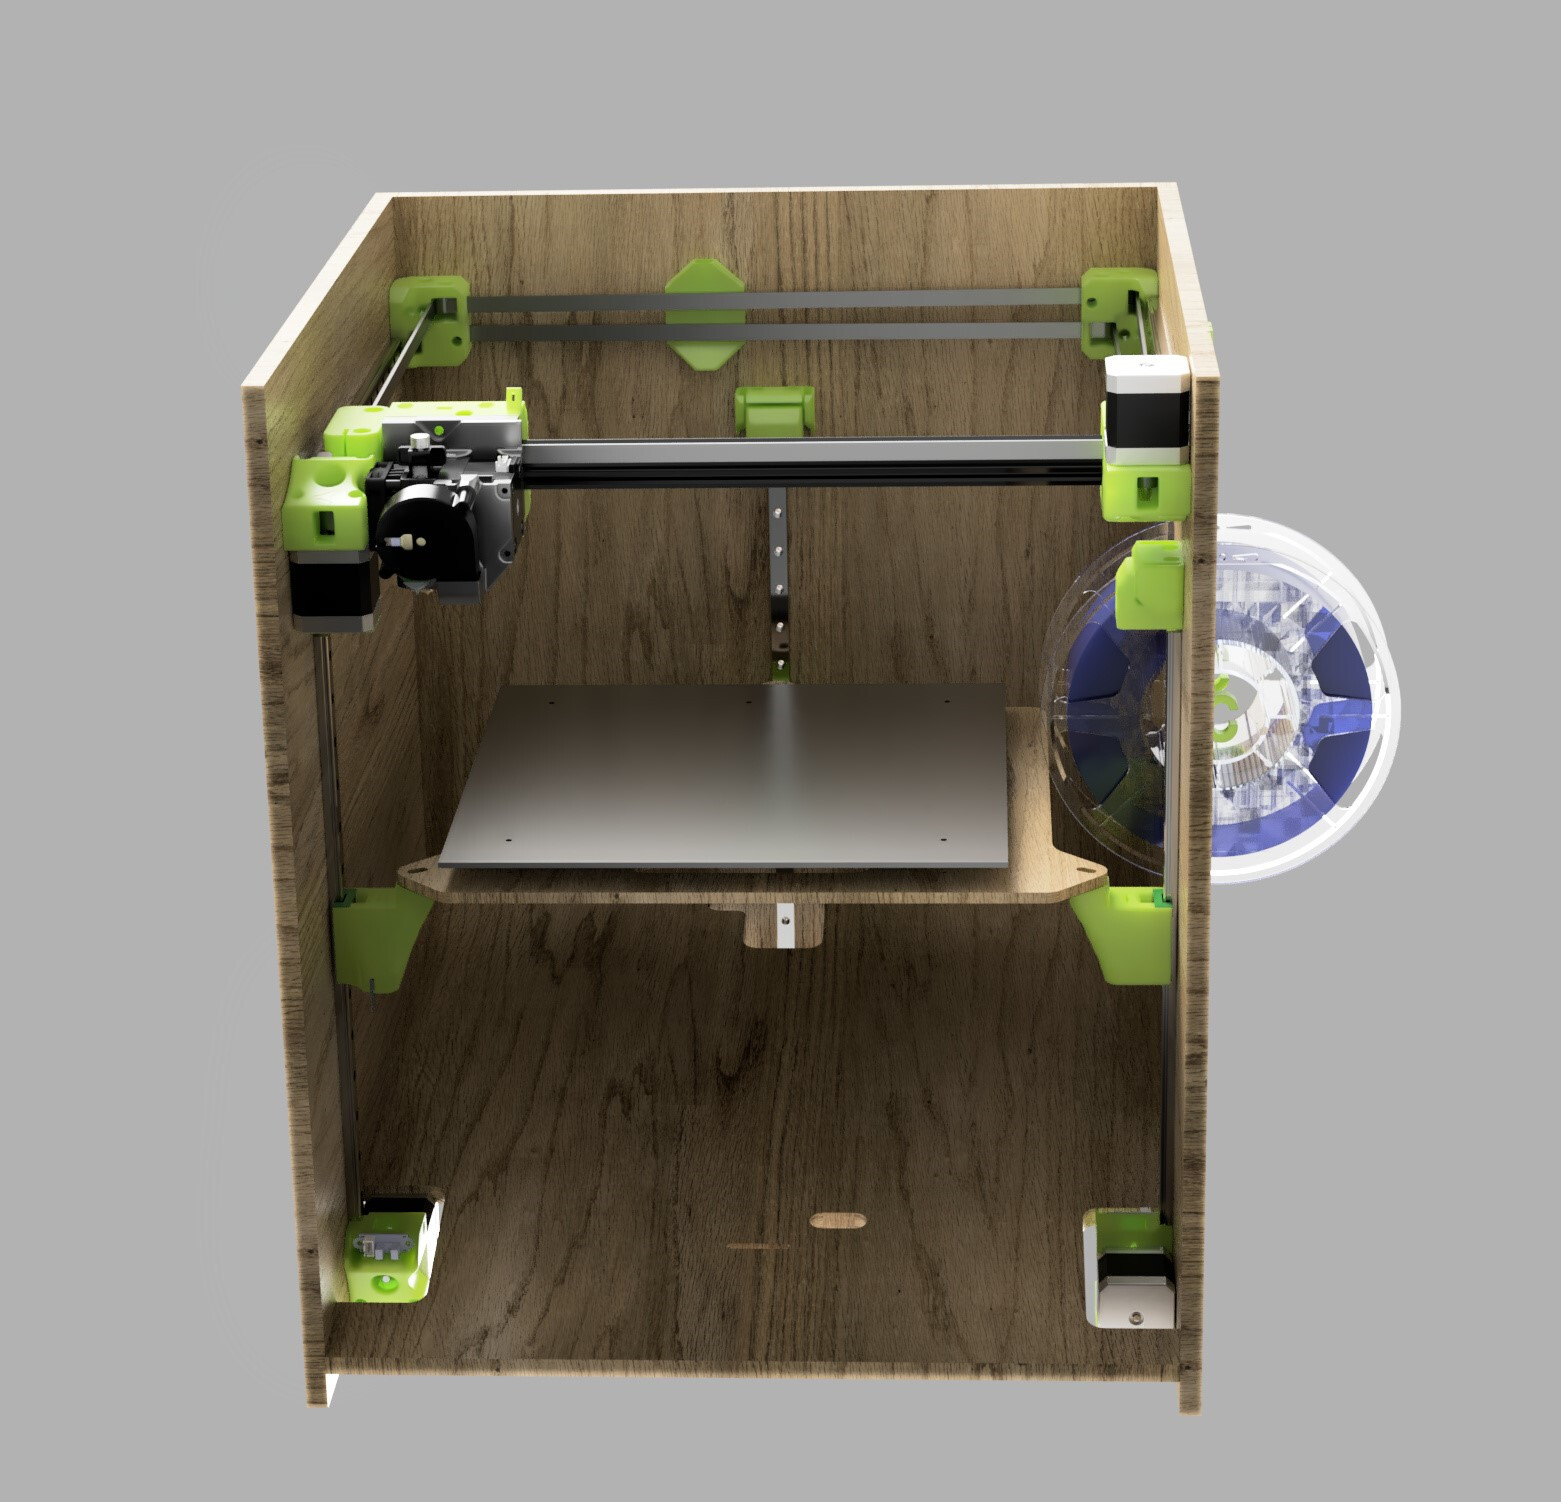
I also added a few parts to the Fusion 360 CAD assembly as I sorted out how all the endstops worked and belts were routed. In the process, I re-ordered features, named many and tidied up things so I could understand everything. In the end, I broke some part parametric relationships to each other, so it’s probably not better than the one Ryan shared, but its now easier for me to change the things I wanted to play with - namely the size.

I settled on 5 350mm MGN20H rails for a build volume of approximately 300x300x300. This was a magic size for me because the frame came out with a footprint of just under 20" square. My Burly was sized to run a needle cutter on 20x30 foam board, and the frame pieces are a very tight fit, but should be producible.

Unfortunately, the first side I cut from 1/2 plywood is not square. It’s been a while since I checked - most things I make are cosmetic and the error is small enough to not be readily apparent, but probably not good enough for this. I’m sure I can get it sorted out, but it’ll be a bit more tinkering first.

I’m almost ready to pull the trigger on my V1 shop order, but I’ll probably wait until I get the frame cut and assembled. The costs are starting to add up, but I think it’s going to be well worth the upgrade when I get it done. I’m on the fence about painting it - I will likely seal it and leave the look natural.

Pictures coming soon…

2 Likes

Plan:

Printed Parts:

Purchases (so far):
Geetech PLA: $16 (on hand, bought cheep because it was ugly…)

  • 1/2 Plywood (4’x8’) @ $52 (theoretically enough for 2, but I’ve already screwed up 1/8 of it :stuck_out_tongue_winking_eye: )
  • POM wheels - 10 for $10 (only need 3 for v-slot)
  • V-Slot Rail (~$5 / 440mm length - on hand)
  • MGN20H Rails 350mm x5 @ $22 ea
  • 5mm screws: $9
  • M3 Rivnuts: $9
  • 12"x12"x1/8" aluminum build plate - $12 + $5 packing
  • 3/4" aluminum tube - 1/16" wall x 18" for $2.57
    Spent: $225.50

To go:

  • Hemera Extruder - est $140
  • Steppers - reuse 3, buy 2 @ $11.50 ea: $23 out of pocket, (+$35 replacement cost)
  • Bedplate Heater: est $50 (120V 600W 300x300)
  • Bedplate Solid-State Relay: repurpose (replacement estimate $10)
  • Magnetic Build Surface?: est $40
  • Controller (skr & 3.5 tft): est $136
  • Pulleys, belt: est $50
  • Power supply: repurpose (replacement cost: $20)
  • BLTouch - $36
  • V1 donation - ???
    Est: $470 ($540 inc. replacement cost)

Total Cost Est: $700-800 - maybe I should rethink this :money_mouth_face:

6 Likes

I was sure mine didn’t cost me that much to build, but maybe I’m just blanking out my memory of how much the plywood cost…

I’m sure that I’m not budgeting that much for my second build, but it’s going to get spaced out a little, since I’ve got to wait for the CF rail to come from China. (And not much is getting out of China for a while.)

Part of my second build savings is not buying another SKR Pro, since I’ll be repurposing the one on my LowRider. I have a V1 cart piled up with a bunch of stuff (Motors, pulleys, springs, wheels, belts) to the tune of about $130. I think aside from the SKR, that’s everything in the V1 shop that I’ll need for it. I’ll assume about $50 for plywood and $25 for a spool of filament on top of that. (Plus shipping for the V1 cart…) I suppose that I could count the SKR Pro at about $150 with the 6th TMC driver, but that’s still in the range of an Amazon 3D printer for me.

1 Like

That looks great! I am not familiar with Fusion 360 in the slightest so I didn’t even bother with modifications. Looks like you are putting together a nice machine. Can’t wait to see it finished.

And yes, the cost does quickly get out of hand… im easily north of $600 so far. But I think ive just about got everything I need to finish it, so the costs I hope are over.

My first 3D printer kit was ~$250 initially, but then I didn’t really track how much I spent on upgrades for it. Most of them didn’t actually make it onto the printer - they piled up until I decided to just build a new one with the parts. It was supposed to be nearly zero out of pocket - just a few steppers really. However, my search for a design led me to V1 and my budget started ramping. Not because, the designs are expensive, but rather because they offer remarkable value and I just keep trying them all.

I liked the MP3DP much more than I what I had sketched out to build. Of course I needed an MPCNC first to cut the frame, or at least that’s how justified it. While I was building that I started printing parts for the ZenXY. The Zen was a quick and easy build that got fired up before the MPCNC, but I did tear it down so I could put the controller and steppers on their intended device.

$50 for plywood would be enough for 2 frames if I didn’t screw up the first piece, so I should have halved the cost for a BOM, but for me its part of the learning curve budget.

When I hit $280 in my V1 cart I was excited about hitting the free shipping threshold (this did include a bunch of goodies not specific to the MP3DP) and was very comfortable with the expense. Then I started adding up all the stuff not available in the shop and my eyes did open a bit.

The BLTouch is optional and I could retask a Titan knock-off extruder, so I could easily cut my cost $200. I might even be able to retask a controller to save another $140, but I’m not sure I have anything with enough drives to do 3 independent Zs - plus I’d really like to try the SKR Pro V1.2 and TFT display.
I’ve probably over-spec’d the bedplate, but figured why start skimping now…

Still seems like a remarkable value though, when I compare the print quality you guys are getting to the output of printers my son has at his STEM school which cost 10x more and have very high consumable costs.

2 Likes

@MattMed I think your build is awesome and really is an inspiration for me.
My actual build won’t be nearly as impressive as the Fusion 360 rendering, but I’ve been enjoying learning Fusion. I have experience with several other CAD packages which allowed me to get up to speed in a reasonable amount of time, but I do have more hours in messing around than I’d like to admit.

I still use Creo Parametric intermittently for work. Fusion appears very comparable in functionality and capability. Fusion make some things very easy by comparison, but without due care, the timeline can become a real mess. I do find it easier to find and manage dependencies in Creo, joint implementation in Fusion is easy, but not intuitive for me yet and I’m still wrapping my head around the concepts of Body’s vs Components and where to use each. However, once I have my Fusion techniques down I think it will be easier to use for hobby stuff.

I will try the CAM features at some point but for now I am exporting dumb models and DXFs and using my normal workflow.

@SupraGuy 3/4" 0.063 wall Aluminum tube is very light, seems plenty strong / stiff, is cheap and available in the US - I’m not sure carbon fiber could actually save all that much weight, though it does look cool…

Thanks Robert. Im ready to get it running! As far as CAD goes, I have a Solidworks license through my job so that is a major plus for me. That is the software I was taught in college and that’s what I have always used. I love it, but I had a tough time moving the Fusion file for the printer over to Solidworks to edit there. So I just went with the base configuration/size.

Yeah, I can get 3/4" easy here, the 20mm is a lot harder to get. I’d have gone with 1mm wall aluminum tubing if I could get it. I didn’t want to remix the parts just yet though. For some things, I’ll dive in head first, but if I wanted to do all of the CAD work for that, I’d have finished my own CoreXY design.

For what its worth, I put my 19mm and V-Slot hub parts on Thingiverse:

5 Likes

So, I was poking around other posts and saw mention of the BIQU H2 extruder.
I have decided that’s the way for me to go and ordered one. (lighter & cheaper)
I modeled a mount for it that puts the nozzle in nominally the same location as the Hemera, but may end up moving it a little depending on where the BLTouch probe ends up.

I believe I got my Burly MPCNC square now. Someone, possibly me or likely some smaller hands moved one of the end-stop blocks on the belt and auto-square became auto-skew. This did, however afford an opportunity to dial in the M666 offset even better than ever, so I think I am good to cut.

In the meantime, after considering the H2 extruder mount, I decided to give myself as much width as possible. My Burly X travel is 20.07". I would have loved to make the back (widest panel) an even up 20", but it came in just under to accommodate the 1/8" bit diameter and a little margin. In the process, I realized the spool was going interfere with my bed travel, so I rotated it so the axis to be in the X direction. I think this will be better for me anyway. I am contemplating a big window so that it is partially inside to minimize overall width even more, but I’d like to stop with the CAD and get it cutting. Besides unless I screw up again, I will have enough wood to remake the right side with a different spool mount, but its time to start physical fit-up.

I also added a few mounting hole features to the wedge to attach the control board and power supply.

I guess its time to get that V1 shop order in…

5 Likes

Well I am glad I put up the crappy CAD model, not only was that my first Fusion project, I am not all that comfortable sharing the CAD models in general. People have such different approaches to CAD and I know that one is done horribly. BUT…you made it work, for you in your way. Maybe I should do more super open stuff.

Can’t wait to see how this turns out for you. Different size and extruder, pretty cool to see so far.

I am going to try and mount my electronics on the side or back of the new build to see if I can get away with less extensions. The bottom is super clean though!

Oh and I have not added up the cost on mine either…I don’t want to. I always assumed $500ish so I really do not want to start adding it up now.

4 Likes

I love having the CAD available!

It is really hard to get a good assembly - especially if you are trying to make it parametric. Trying to have both the extrusion and wood models in there only compounds the difficulty. I think you did a fantastic job if you really are new to Fusion. I’m new to it too but have quickly realized that while it is super powerful, it is very easy to make a big mess of intertwined dependencies. I restructured a lot and it was cleaner at one point, but has gotten quite messy again since I’ve added features. I know what you mean about being reluctant to share something your not proud of. I’ll post mine, but I will be conflicted about cleaning it up again first :neutral_face:

Speaking of which, I have been “future proofing” by adding mounting holes for all kinds of stuff. It is turning into swiss cheese of sorts, but I figure it is way easier to get the holes in the right place now. A hand drill is easy enough, but I’m going for functional and at least not-ugly. I think I like the electronics on the bottom - we’ll see how much of a hassle extension wire will become.

I stole a panel mount idea for a Raspberry Pi (Octoprint server or Klipper?) and made a duplicate window to mount a USB port on the back.

I am also leading to a using a 120V bedplate heater, so added an SSR mount pattern. Features to mount the spool are probably good enough - I have time to work up the actual mount (likely a TUSH variant). I put the spool mount features on both sides because I am not sure where I’m locating this beast yet, plus maybe someday I’ll play with a dual extruder. Bowden mount features on each side are tempting, but I’ll have to punch those in later if I try it.

I might put a mount pattern on the case (under the wedge) for a cooling fan, but otherwise I think its time to shoot the engineer and go make some chips…

BTW, there are two slots in the wedge - a long narrow one and a shorter fatter one. I assume one is for the display cable. The other? (I can’t say I’ve read every post in the build threads, but haven’t seen one that shows the cables passing through.)

3 Likes

The little slot is for the screen clip “kick stand”.

1 Like

V1 shop order placed last week Friday. Shipped 1.5 hours later!
Arrived today :smile:

Wood panels are cut for the back, sides & wedge. They appeared to be square and fit before I stained them - hopefully they still go together smoothly.

The extruder I ordered is probably still at least a couple weeks out.
The SKR is back in stock in the V1 Shop. While I think that is the last thing I’ll need, I’ll probably wait until I get the mechanicals together to make sure - Ryan is super efficient with the shipping, so unless they sell out for an extended period of time, I don’t think that will be a critical path item.

I’ll post pictures once things start going together.

3 Likes

Parts staged.

Assembly commencing tonight.

8 Likes

I love that picture!

Ping pong table in the living room, train on the kitchen ? :wink: #Silver_Spoons

2 Likes

I loved that show…Oh and darts, I am not good at it but love playing! Used to be better at ping pong.

Meet up at your place needs to happen!

Maybe a kitchen in a rec room, instead.