The down side to MDF sides is they move with weather and can not easily be adjusted.
I just tuned my last printer to 0.05mm in any direction I test. I just could not do that with a wooden one. I would get them close but summer vs winter messed things up.
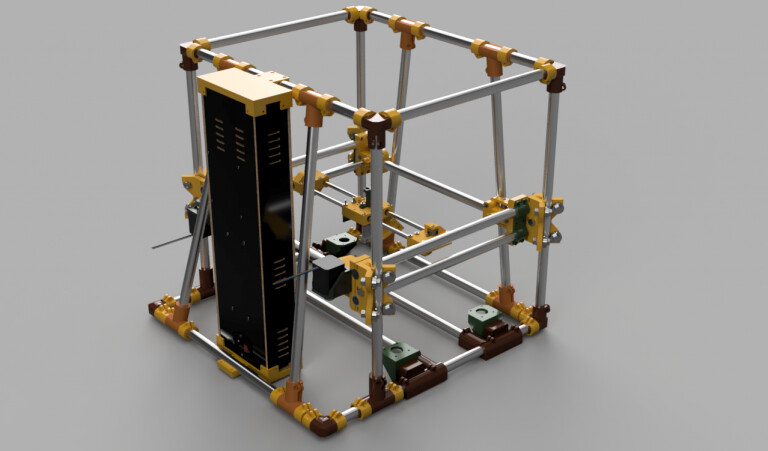
If we wanted a wood or plastic frame, it would need to be designed with some adjustments. And even then I ended up with specialty hardware to make it work well. The extrusion is expensive and you all know I hate it, but it is more stable and infinitely adjustable.
Screws can be ordered in bulk for a few cents each, bolt depot, but the nuts are a bit more. You can use your CNC to cut the corner brackets instead of buying them for $2-3 each. The slide in nuts are the only real hitch I can see.
Curious to see what creative material and labor saving Mods people come up with. Maybe a contest? Winner gets bragging rights for being the cheapest expletive, something I always aspire for.
Recent posts got me looking at printing corners/braces and using slot router bits to DIY extrusion alternatives out of ply/mdf, or Corian offcuts.
I do not like the twist in t nuts I do prefer the slide in. Pain in the butt if you forget one but in the end it makes adjustments suuuuuper easy. Those printed ones actually look pretty good.
Ugh. Made the mistake of buying cheap stepper motor cables from Amazon. And they are all wired in a strange way, so I need to rewire them all.
Right now, I have the L / R steppers functioning, but moving X in Pronterface actually moves in the Y direction, and vice-versa. I assume that means that I need to reverse the direction of the steppers?
X motion comes from the steppers moving in the same direction, and Y motion comes from them moving opposite. To get there from what you are seeing, one of the motors needs to be reversed.
Once you do that, the results will be one of 2 things: Either the motion will be correct, or it will be reversed (X+ goes left, Y+ moves toward you.) If it’s correct, congratulations, you’re done. If not, then you need to reverse both motors from there (put the one motor back, and reverse the other one.)
HAHAHA yeah that part is guess and check for sure.
When facing it the left stepper is X and the right one is Y. From there you might have to flip the plugs to get it right. Remember to power down when you do.
I am getting close to finishing my build as well. I did not have enough smooth idlers so I am waiting for a few of those to show up so I can complete my Z-Axes. After that, its just wiring left. Fun. Hopefully I can make it neat and tiddy.
So far, the most annoying thing about this build are the slide-in v-slot nuts. You can put them in no problem, but then they can spin inside the slot and become horizontal to where they can just pull right out. Is this a problem for anyone else? I can’t tell you how many times I have attached a part with a few nuts and find that one of them had turned sideways and now I have to take it apart and redo it. The worst part with this was the linear rails. Glad that part is over.
But so far it is looking good and I can’t wait to have it wired and running.
When I put rails on my ender5 I used some of these: 100-Pack 2020 2040 2060 Roll in Spring Loaded T Nut m3 for 20x20 20 Series Aluminum Extrusions 6mm Slot Aluminum Profile Accessories (M3) Amazon.com
They are better in that they don’t twist around like the more traditional ones. But they are not as easy to get into the slot if something is blocking the end. But once you get them in place, you can back the bolt out a bit, move the thing, and tighten it without having to worry about the thing spinning too freely in the slot.