yes it is wrong way marlin 1.1.5 axis but is first version of printer v1 Endineering.
Well, got my z rails yesterday. Guess I need to double check the list and figure out how I want to get fans on the toolplate now.
Or, wait for v2 and see how much better it is…
I think I have all my parts now, except for printing the new ones for v2. I still need to count all the nuts/bolts and see if they changed, but we have a pretty OK bolt store in a town not to far away that we shop and travel a few times a week so I’m not too worried about that.
Any thoughts on this setup? I still need to clearance/shape the mounting holes and edges, but I’m not really any better at modeling than when I started, so I didn’t want to do any more than I had to before asking, in case I have to do it again. Took me 4 nights and 3 restarts, lol.
1 Like
Sooo busy around here. Finally got the cabinet MOSTLY figured out.
Are screws sufficient to hold the rails to 1/2 MDF? Should I use insert nuts instead (do they even make those in m3?). I’m trying to avoid pushing screws all the way through with nuts on the outside. I could hog little pockets for the nuts to sit in, but I’d almost certainly still have the bolts sticking out, which I’d want to grind off but never get around to actually doing.
Thanks
Well, after spending way too much time thinking about how to fix the rails to the mdf, I’ve decided that I’m not really confident in the hardware holding all this together. I bought the mdf, and I was just about to cut it when i chickened out. If I haven’t thought it through correctly and have to redo, even once, then it becomes almost as expensive as just buying the extrusion, so I went ahead and bought the extrusion. 10x1200mm pieces for under $100 shipped.
I’ll 3d print some nut inserts and mill some aluminum brackets.
1 Like
Well, I ordered the tnuts, too, lol. Still going to print some corner brackets, though, lol. Until I decide I don’t have time for that, either.
2 Likes
I took a second to stop and look at the ender 3 power supply. The sticker says 15amps at 24volts. Is that going to be adequate for a 300mm bed and the mosquito hot end plus all those steppers?
From what i can see on the interwebs, that might be ok.
Heat bed and hotend are at 11 ohms and 3 ohms, so a little over 10 amps? Is that cutting it too close, or rock on?
1 Like
Not everything will be going full bore at the same time. I run my Repeat on a 24V 15A supply and it has never been a problem. 300mm square.bed, 50W hotend, 250W heated bed. Both use considerably less power once heated up, like whenever the motors might be moving.
Ok, I’ll keep going then. Any idea what the symptoms of an inadequate power supply are? It’ll be easy enough to add a seco d power supply to this board later.
I sometimes put a cheap digital voltmeter on, I have a few of them around. The most common symptom is voltage sag, where the supply just doesn’t make enough power to keep the voltage up.
1 Like
I think it will be just fine. If it takes too long to heat up, do it the old school way and heat the bed, then the extruder. After that it sips power.
1 Like
Well, after staring at it, moving it around for a half hour, and looking at the single pair of leads coming off it, and the screwed on plastic box, I decided to rebuild the Ender so I can use the power supply there, where it belongs, and I ordered another one lol.
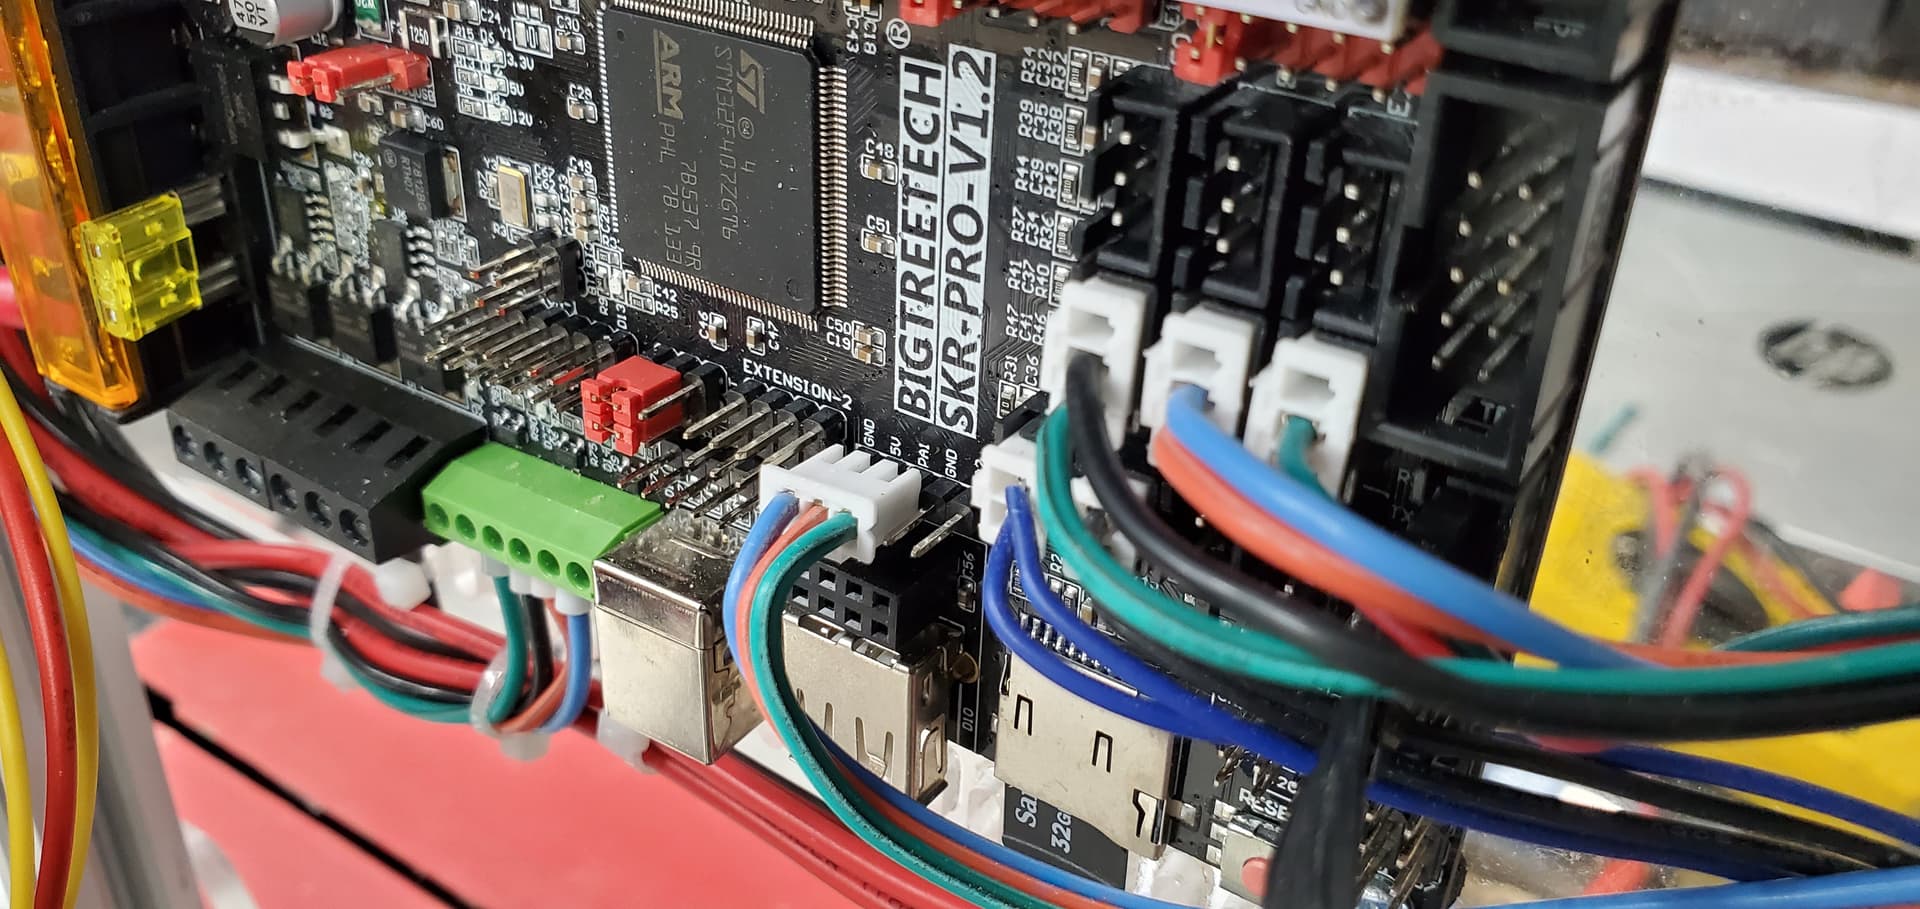
I still don’t have a build plate yet, but I still have some plugs to crimp for the tool carrier and flashing/wiring the board. I think that’s all.
Is marlin mode necessary? It doesn’t seem to be, and i dont want to mess with longer ribbon cables.
Bonus question, when I power the printer on, the TFT doesn’t see the printer at first, and after a few seconds makes a lot of ruckus, receives an unknown m211, then it’s fine
Also, while designing a mounting plate for the power supply I went to the Amazon listing to see if they had the layout handy (my measuring is often suspect). Happened on a two-day old review complaining about the voltage jumping from 9-18 and never hitting 24, and his replacement did the same. Took a moment to check mine and wouldn’t you know…

Fortunately I wasn’t quite ready to wire it up, so I ordered another one (that had the layout measured) and got back to the plate.
Also had an issue with the pt1000 thermistor reading really high at room temperature. After fiddling for a while double checking my config, and testing the resistance of the thermistor vs a chart for it, I just recompiled the firmware and that did the trick. No changes, just clean and build.
Pictures coming soon.
Well, that PSU is definitely fubar…
I just measured the back of my PSU for the screw hole locations (50X150mm IIRC)
I hope Amazon refunds you for that POS PSU.
Getting close for sure!
They will. I just ordered it a week ago, unlike everything else for this printer, lol.
Is it possible to reverse the motion of just 2 of the z steppers? I’ve cut wires and the plugs are directional. I’ll swap them around if I have to, but I thought I’d be able to do it in the firmware. All I can find is an invert for the entire z axis.
Is it the extruder inverts?
Edit: I think I found it in config_adv
Edit Edit: Yup, that was it, under “Multi-Z steppers”
Now I cant get the 3d touch probe to handle z homing. I started over with the v1 firmware, fixed my directions, set my bed size, selected the appropriate thermistors. The probe can deploy and stow on command, but the self test just sends the probe up, down, up, down over and over.
I’ve been hassling with this thing all day. I don’t even know where to start with this issue now.
Sorry I didn’t have the right colors, but i confirmed them against my other 3D Touch, and 3wire plug is indeed ground, power, signal, and the 2wire plug is the zmin and ground.
It’s really easy to remove the terminals from JST plugs, just use a pin to bend the plastic tabs back or press in the locking tab on the terminal and they slide right out.
Ground has to be ground for the BL touch. Most end stops it does not matter, this does. I messed that up a few times and the probe doesn’t work.
Yeah, the green wire is ground there, and the red ties to the white signal wire. I made a jumper plug last night so I could swap them around to test just to make sure. Also verified against the 3D touch I’m using in the other printer with the archim. I think I just need to step away for a couple days. Problem is I need this printer done and out of the way. Maybe I’ll flip a coin tonight to see whether I mess with it some more.