I’ve had my lowrider for about a year, but this is my first post! Thanks to the community forums for helping me get up and running. Awesome community and design.
I am making plywood cabinetry and want to save time by cutting all the lengths with my table/track saw. From there, I want to add all the holes and routed-out elements using my LowRider. The cabinets I’ve designed have four complex pieces, each 5-10 in wide by 70 in long and 3/4in thick. When this project kicks off, I’ll need to cut about ~100 of them. Using the CNC to cut the perimeters on these would take forever.
How do I consistently find the same alignment/positioning when swapping out workpieces? Is there a common jig for quickly nesting the workpiece in the right spot? Or will it be fundamentally easier to cut a template jig and use a handheld router to trace the jig?
If there’s an existing thread on the topic - glad to close this one. Just couldn’t find it.
You could just add something like a small board on the x and y to make a corner fixture. Then just put the boards lined up with that. Then you can write down the coordinates of the router to go back to when you start. There are a many different ways to do it.
OK - so build up a corner fixture at a predefined spot.
Is there anything I’ll need to do to account for bit width when defining that location relative to the corner fixture? 0 should be 0, regardless of bit size.
I’ve seen people mention installing a series of pegs along the X or Y axis as an easily removable, length-adjustable corner fixture. Is that the recommended route?
To perform repetitive work on different pieces with my LR3, I use this method:
First, in the CAD drawing, I traced a line from 0, 0, 0, and 15, 15, 0, and placed the bottom left edge of the drawing to be created at the end of this line. This gives me a fixed offset for the CAM file created with EstlCAM.
Then, on the LR, I bolt the wooden stops on the X and Y axes, which I then mill (15 mm away from each axis) to ensure precise positioning.
And voilà, you’re done.
It’s certainly not the only method, but it has given me good results.
I wish you success.
Paolo
When you get them, let me know. There are some changes to the MM_Pos on x-y you have to make in the config: basicly make them 0.000mm in the firmware. Make a full size rectangle in cam and place some holes on the outside (make sure you have the spare space on the negative side) make your holes and enjoy
Fix a thin piece of plywood - I use 6mm - in the corner of the bed corresponding to home.
Cut out a portion of the piece leaving an L shape. Be shure and relieve the inside corner a bit. The L can be any width/length you want, and the arms only need to be a 10-20mm wide. It’s just for alignment.
Now configure your job/config.yaml so 0,0 corresponds to that inside corner.
Place your workpiece inside the L, snug into the corner, and against both arms and run the job.
For a full sized machine, the work surface is already doing this. If you run an initial cleanup on your spoil board OD, the spoil board is already located, setting your zero to that corner means you are already there. So most of these tricks and tips are for less than full sheet machines or projects.
I place my 6mm on one side and back before turning on my vacuum table, so my sheets are placed correctly, then i remove the pins so my bits aren’t wasted when profiling (they are just helpers, i would like to use the pneumatic pins but thats a cost i dont really need)
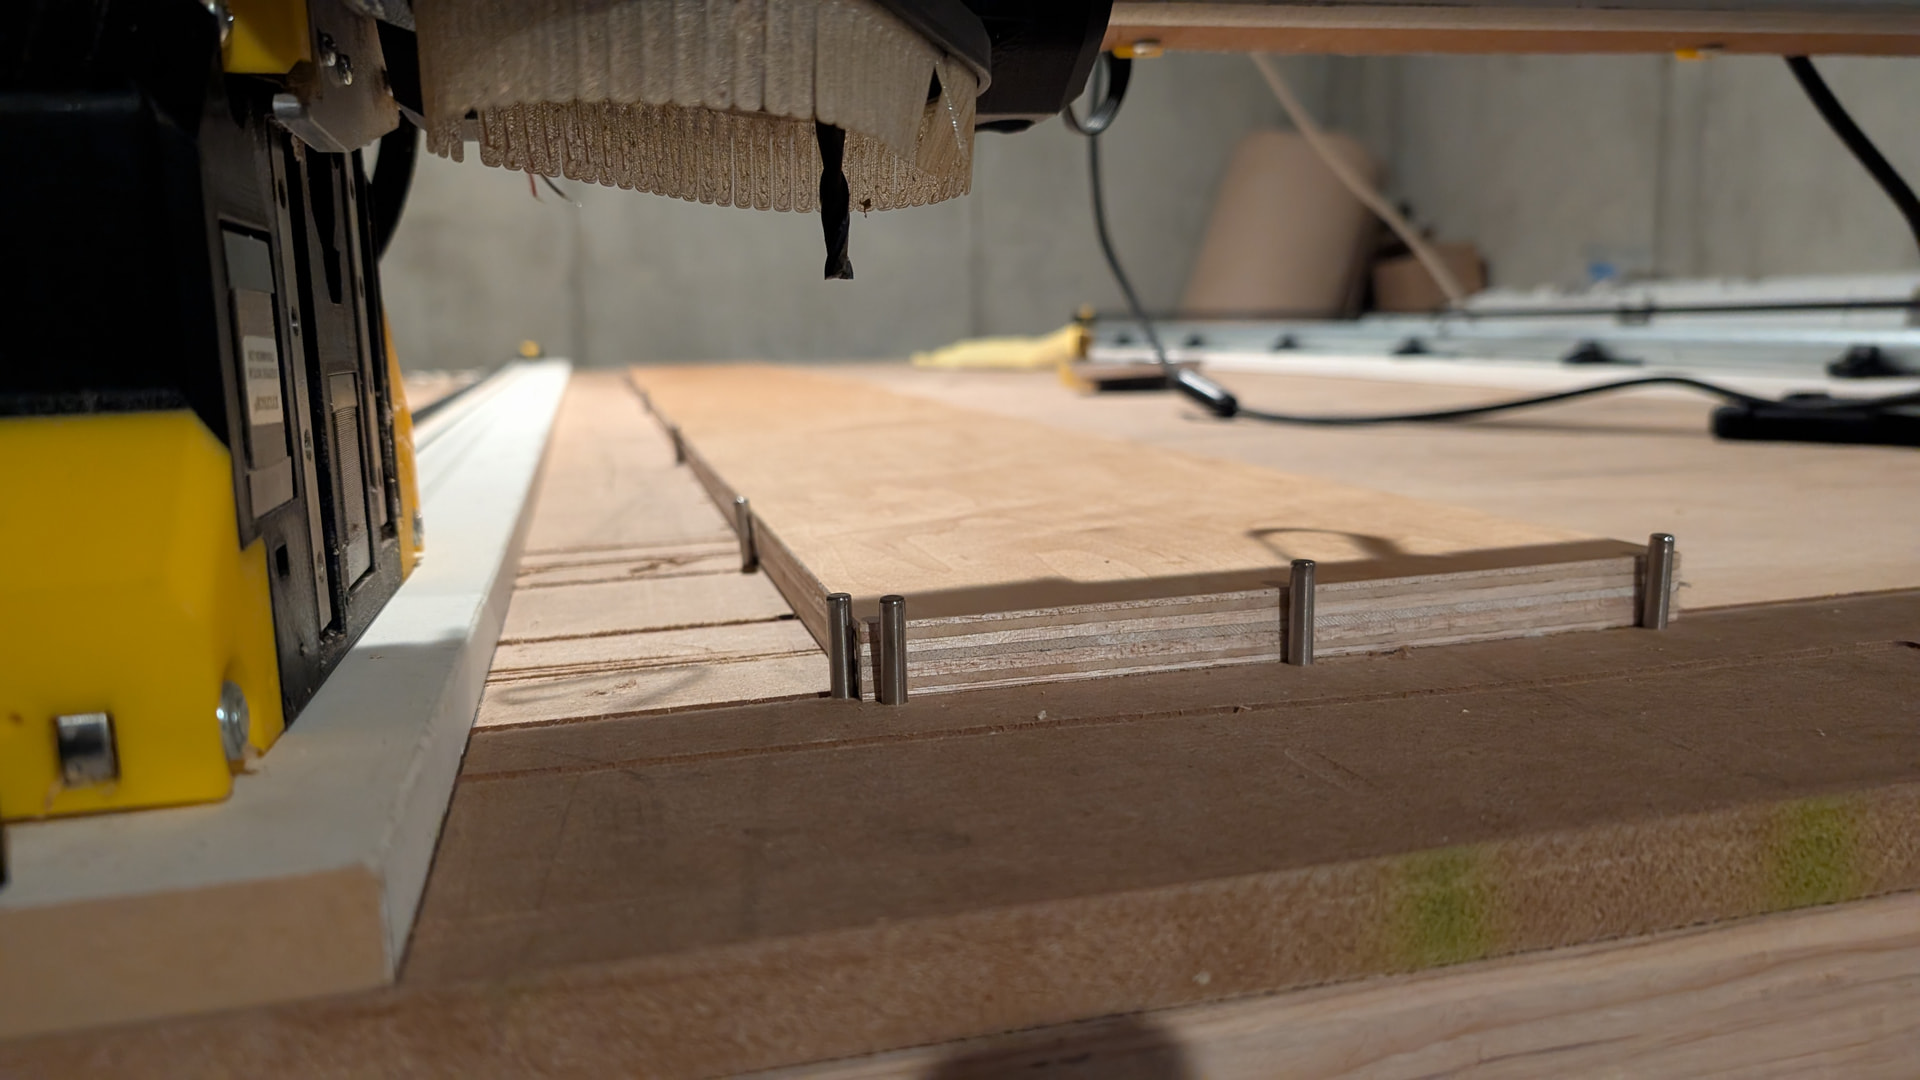
I made a pin grid using 6mm stainless pins for alignment. To make the grid, I used a 1/4in bit. After finding home, I then offset the machine by -2.825 mm. I then placed peg holes every 10 cm, running along the X and Y axes.
Cut about 30 parts last week, and the repeatability was insane. It’s easy now to align parts along the sides and corners. Amazing.