So here are some other things for RRF.
So at the very end of my config.g for both the LR3 and for the Primo, I set the following:
G54 ; Select Workspace Coordinate 1
This moves the machine into workspace coordinates. From this, I can keep the soft stops, so the machine won’t go past the limits as defined for the axes, but still lets “zero” be wherever I need it to be for the job.
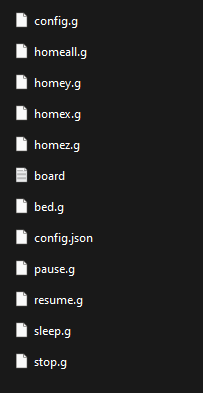
Then I have a few macros set up. (The TFT will now have a “macros” menu item instead of custom, so these gcode files go in the macros directory on your SD card in the SKR board.)
zprobe.g
; Probe the work, and set the workspace Z coordinate
M291 P"Attach Z Probe" R"Probe Work" S3 Z1          ; Display message with Z jog buttons
G30 S-1                                             ; Probe the work, (report machine position)
G10 L20 Z0.5                                        ; Set workspace position to 0.5mm
M400                                                ; Wait for save to finish
G00 Z5 F450                                         ; Move 5mm above work piece
You can omit the M291 command at the front. It’s intended for the PanelDue, and I don’t think the TFT35 will work with it correctly. It will display the message on the PanelDue, and also give Z jog controls until the user touches the “OK” button.
So what I am using here is the G10 command which in this case defines a current tool offset versus the machine space. This way I can still command a movement that is within the actual machine envelope, even if it’s well below the current zero position.
setworkzero.g
; Set the workspace X and Y to the current machine coordinates
G10 L20 X0.0000 Y0.0000
So once again, using the G10 command in much the same way as the G92 command gets used, but instead of setting the machine zero, I’m setting a workspace zero. Running the program in the machine workspace from here will then use the current position as 0, 0.
Now here’s a fun one… For this you must define the position of your Z motor screws in your config.g. With what I saw from the other thread, you probably don’t need this, but…
levelz.g
;bed.g
; If the printer hasn't been homed, home it
if !move.axes[0].homed || !move.axes[1].homed || !move.axes[2].homed
  G28
G0 X25.0 Y137.5 Z120
G30 P0 X5.0 Y137.5 H0 Z-99999
;G30 P1 X1020.0 Y137.5 H0 Z-99999 S-1 ; Report deviation, but don't do anything about it.
G30 P1 X1020.0 Y137.5 H0 Z-99999 S2   ; Adjust Z motor level
So here, we get to see some of RRF’s coolness.
First, there’s the conditional code, where we can home the machine if any axis isn’t homed, but don’t worry about it if it has been.
Next we use the G30 command (probe single point) in 2 locations to figure out the differential between 2 points (The Y at 137.5 was arbitrarily stolen from my 3D printers’ motor locations, and doesn’t really matter, so long as it’s a spot where the spoilboard or work can be probed.)
The second G30 probes a second point and tells RRF to adjust the Z position of the motors so that they are level. The same idea as G34 in Marlin. (In fact this is usually written into sys/bed.g which RRF calls when G34 is called, I think.)
Then I have a couple of macros to set CNC mode (M453) and set laser mode (M452) with a few parameters.