That is cool!
1 Like
Thanks, Barry. And thanks to all who’ve shown interest and offered encouragement!
And big thanks to Jamie for the neat idea! After all the head-scratching, flipping, and general gyrating… only to arrive at this point. Uncanny the resemblance, huh?

What fun!
– David
5 Likes
I am so thrilled that you went through with this. Ideas are plentiful, it’s the motivation and skill that are scarce (relatively). Huge props to you for doing all the real work!
3 Likes
Thank you, Jamie. I doubt it can be trusted for “mission critical” work but it seems to perform surprisingly well. The r&p already shows slight signs of wear… but hopefully the residue is just the roughness of the printed surfaces wearing smooth…

And here are a couple of your rulers…


In the first and second photos, the X ruler was initially ~0.75mm long (over 100mm) and the steps/mm value adjusted by 0.9926 to bring it to near “dead on”, when compared to an commercial metal ruler. Both X and XY rulers are now reasonably accurate, exhibit minimal backlash AFAICT, and the spacing appears pretty uniform.
All in all, I’m thrilled with how well it seems to perform.
Thanks again, Jamie.
– David
9 Likes
This is such an inspiring build in so many ways. Seeing the middle assembly like that reminds me of just how cool it is.
Printing the R&P makes it that much closer to the Even More Printed CNC.
4 Likes
Looks Good To Me!
1 Like
Another MPCNC logo plot…


I’m impressed those little arcs and circles came out so well… especially with ball-point pen. This Marlin logo file (downloaded from Ryan’s MRRF/2018 thread here) actually runs fine with the Grbl 1.1h firmware… though there is a command at the first the Grbl doesn’t recognize and results in a pop-up that says “Hit resume to continue” or somesuch. After that it runs to completion.
Just another data point…
– David
7 Likes
Are you going to edit the drawing for the R&P design? 
Nay, nay… just wanted to compare it to previous plots of the same thing 
Unbelievable… Great design…Love your work!
Thank you for sharing!!
2 Likes
Spent the last few days finishing up my MK3S build… it’s running nicely. Then attached a base frame and straightened up a bit of the wiring on the r&p MPCNC… and then installed an Eleksmaker 2.5 watt laser. Here, plotting the MPCNC crown

I used Lightburn to generate the GRBL gcode for this test.

– David
6 Likes
Well that burn looks just about perfect, I don’t see anything off about it!!! Freaking awesome!
1 Like
Just curious, did you ever release any files for the tractor, R & P, R & P Mounts?
Oh, my… and now I’m supposed to remember stuff? 
I don’t think I ever “released” anything to Thingiverse… but I did all the CAD in Onshape. Here’s the link to the public document, Modular Roller… that I think has all the pertinent files you are looking for. Except for the r&p bits and the tractors, it should be a stock Burly build otherwise. Custom rack sections can be made by opening the rack file “Adjustable_rack-v2” and adjusting the “Linear pattern 1” for the number of teeth you want… there are several different examples that I used on my machine. And I suppose you really ought to use anything marked “v2”… 
Remember that you’re only a few parts away from a stock Burly machine if, for some reason, it doesn’t work well enough and/or meet your need. I still have my machine intact (I’ve just moved back to East Texas and am still unpacking stuff…) but unused beyond the testing I last did in this thread… so I can’t guarantee how long it lasts or performs over time. But it’s a fun project and, as always… YMMV 
Good luck!
–David
3 Likes
I’m glad he asked about it! This was a really coop project I may have never seen if he hadn’t 
2 Likes
Same here! I thought I’d read through all the back logs but it seems I completely missed this one. Excellent project @dkj4linux! I saw the Jan '20 date and forgot it was 2021. I thought, man, this is a long and detailed thread for just being started this month!
3 Likes
a bit late to the party, but so true! i have so many ideas that it’s really hard for me to choose what to put my time into. i’m so glad i found this project, it’s really helped reel in some of that wasted potential everyone’s always telling me about 
3 Likes
i’m sure all the chickens loved it
2 Likes
An update…
About 3 years ago I began this project to see if I could swap out the X and Y axis of a stock MPCNC with a printed rack-and-pinion (R&P) drive. All in all, it was a very fun and satisfying collabrative project that turned out far better than most anyone expected. It’s not an improvement on the MPCNC… it’s simply an old man’s quest to satisfy his curiosity.
Anyway, a little over two years ago, I moved back to East Texas. To facilitate the move, I dismantled several of my machines completely and partially disassembled the rest… and the R&P MPCNC made it to East Texas in some condition to play with further, should I ever find the energy and motivation to do it. I’m pretty much out of the scratch-building business now… it’s harder to concentrate and I’m getting so shakey it’s difficult to work with smaller parts. But my daughter has voiced concerns a couple of times about how she’s gonna dispose of all my “toys” when I’m gone… and I’ve decided to start revisiting the remaining machines to play with and dismantle as required.
So, a few days ago, I pulled this machine out of the closet it’s been in for the past couple of years and started piddling with it. The Dupont connectors were in horrible shape (as expected) and I had to redo almost all of them. I built new series-wired motor adapters and had to find a controller board as the original one was mysteriously gone. I dug around in my stash and found a little Nano-based 3-axis board that already had Grbl 1.1h flashed on it and soon had a machine running somewhat predictably… so much so, I was encouraged to shorten the Z-axis tubing (I finally found my tubing cutter!) and leadscrew and print a laser mount for it.
So, here is the R&P MPCNC in all it’s glory once more…
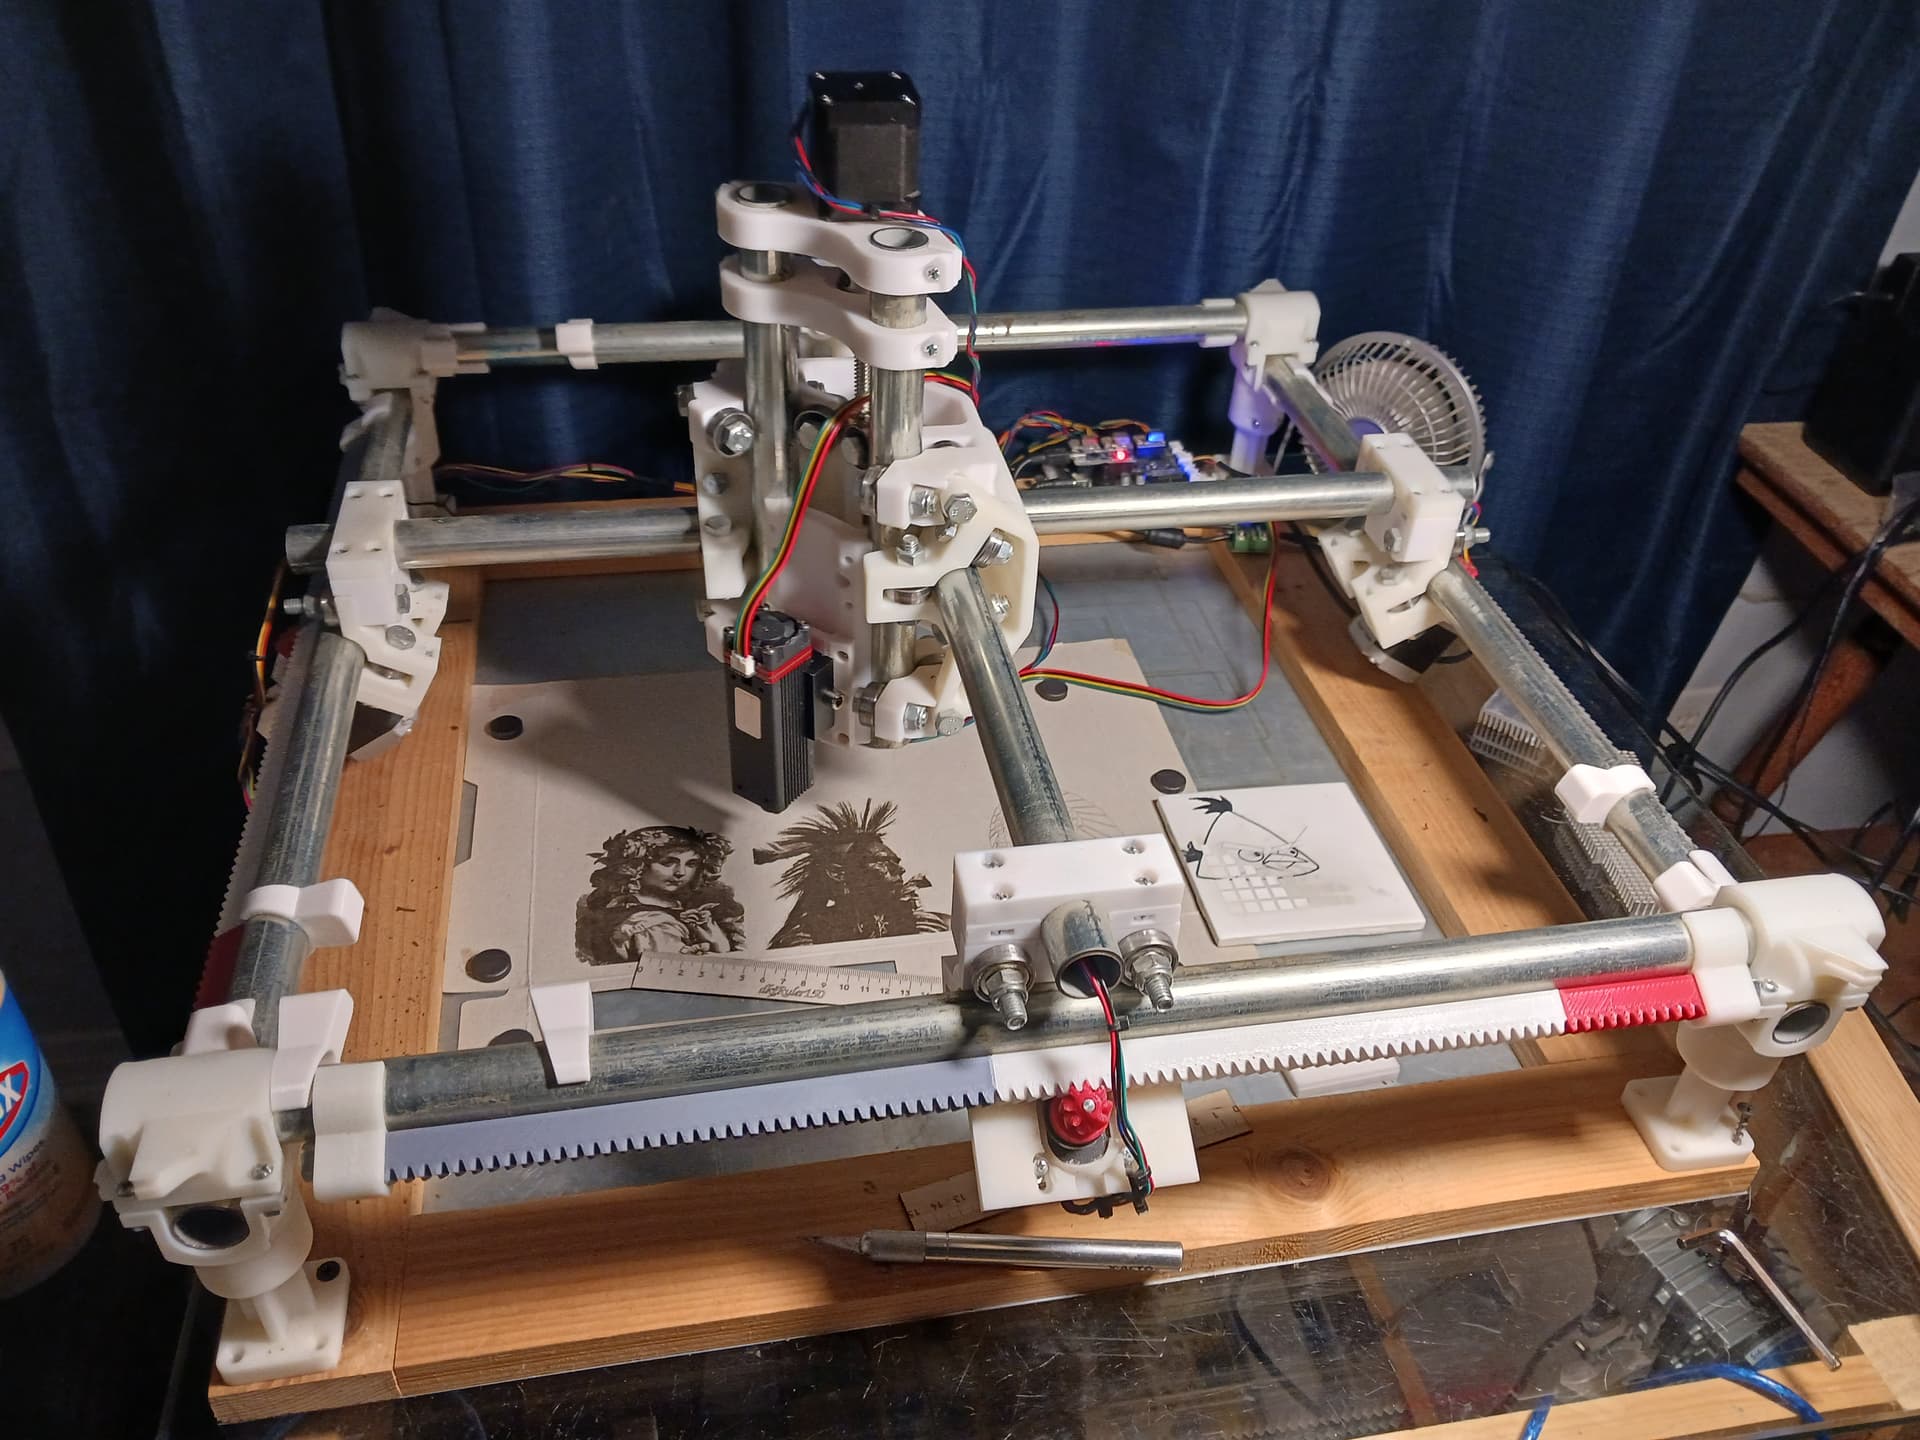
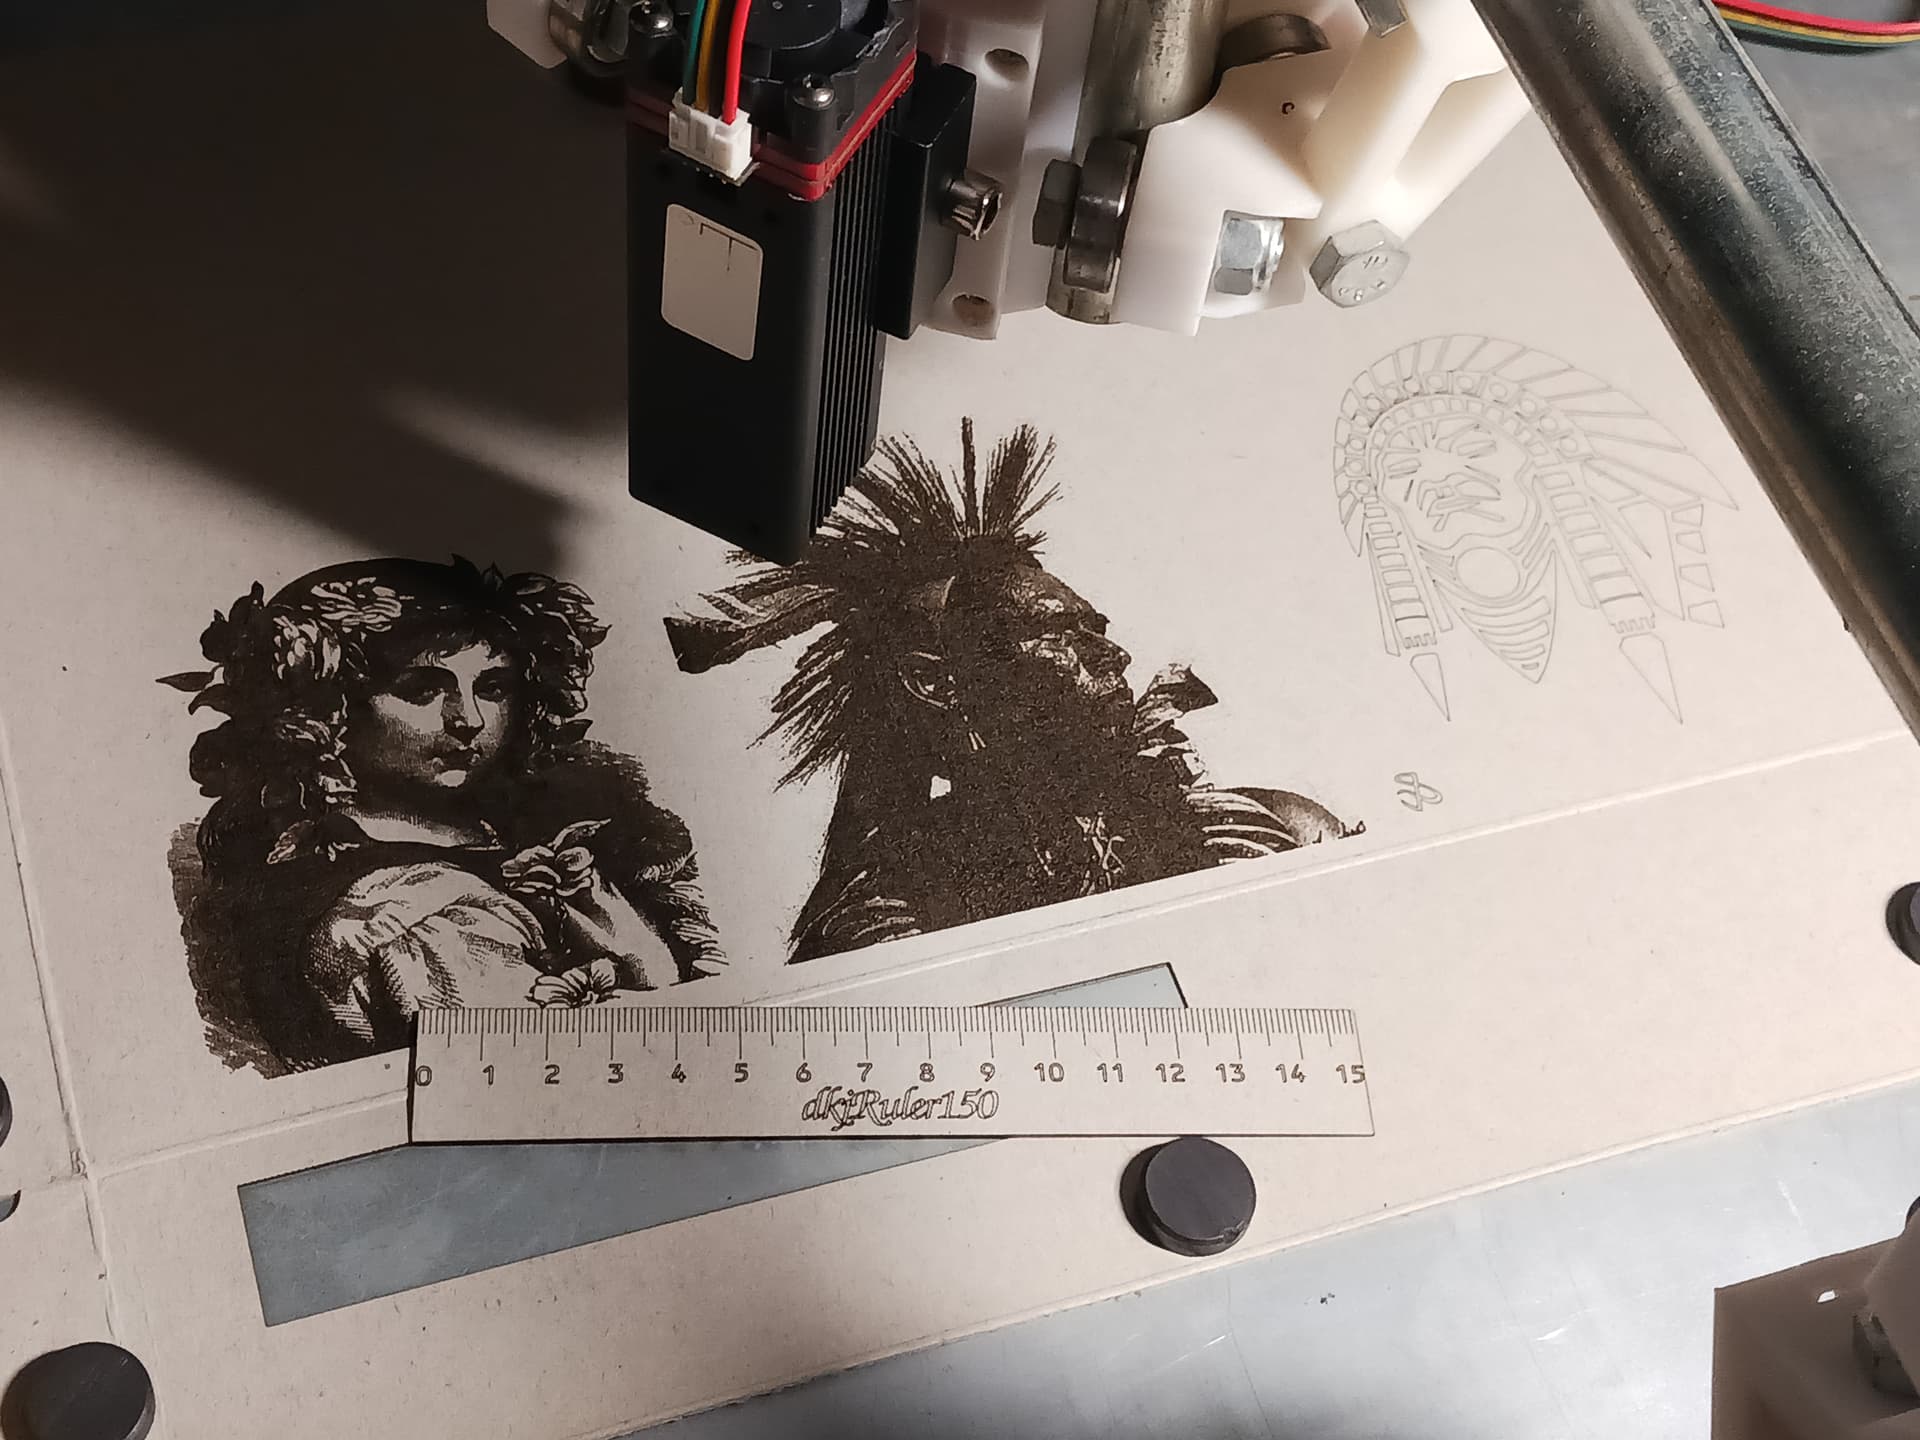
Here it is in action, raster engraving…
")
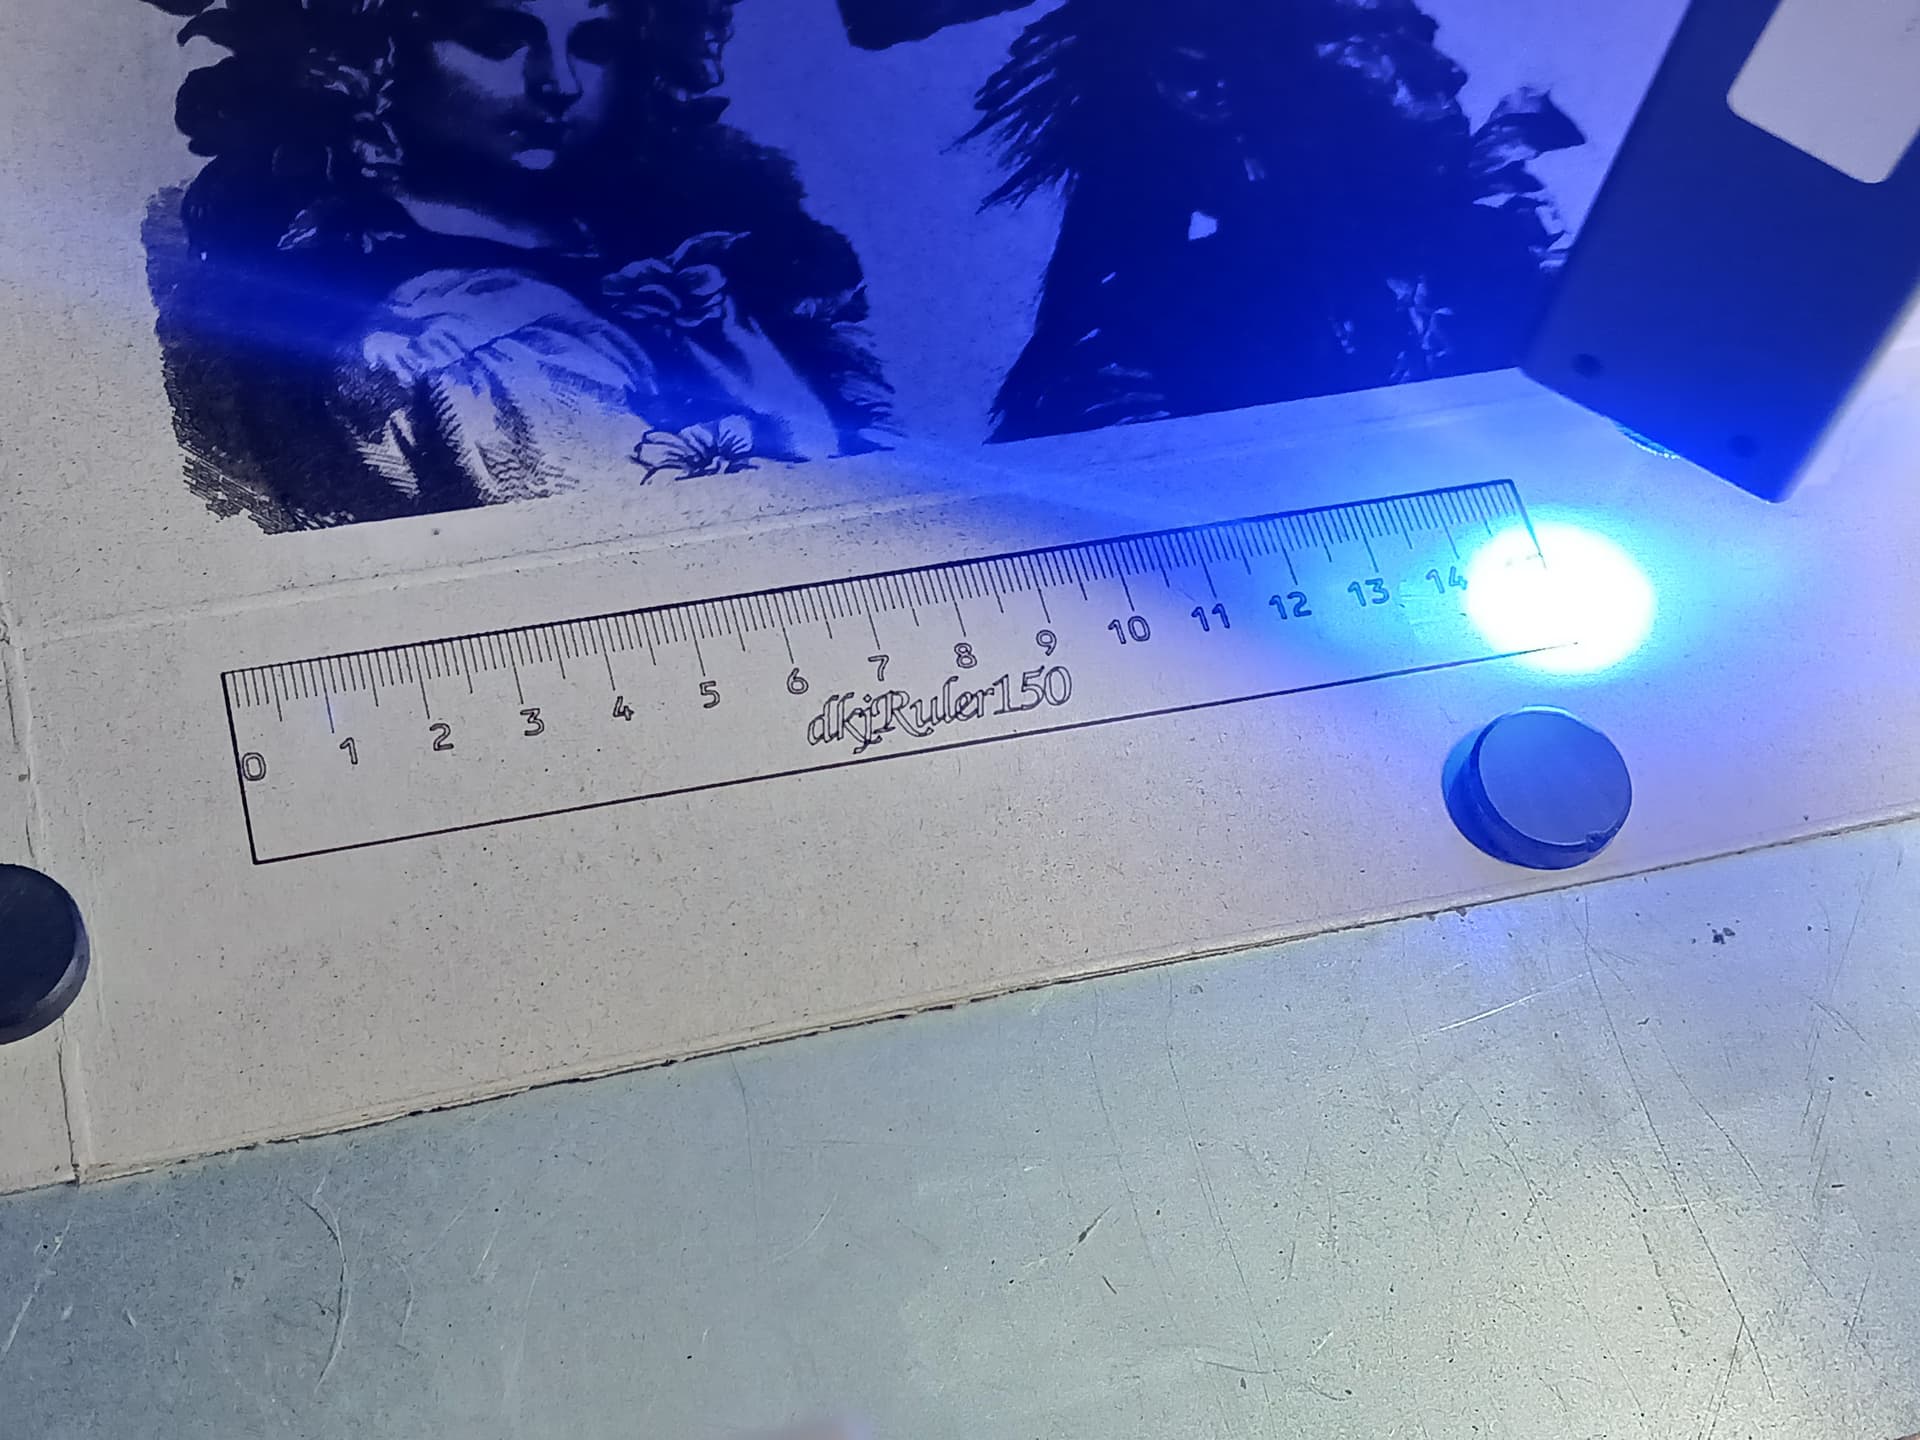
and vector engraving…
")
I think it is running now about as well as it did 3 years ago and I’ve actually enjoyed playing with something a bit more challenging for a change.
– David
8 Likes
That seems to be working perfect. I am not seeing any flaws at all. You never cease to amaze me.
R&P would sure make it easy to change gear ratio’s and would make and MPCNC a lot more “Mostly Printed”. Getting close to mpcnc update time, I am not discounting anything at this stage.
3 Likes