Printed R&P X/Y drive for MPCNC

Well that burn looks just about perfect, I don’t see anything off about it!!! Freaking awesome!

1 Like

Just curious, did you ever release any files for the tractor, R & P, R & P Mounts?

Oh, my… and now I’m supposed to remember stuff? :stuck_out_tongue_winking_eye:

I don’t think I ever “released” anything to Thingiverse… but I did all the CAD in Onshape. Here’s the link to the public document, Modular Roller… that I think has all the pertinent files you are looking for. Except for the r&p bits and the tractors, it should be a stock Burly build otherwise. Custom rack sections can be made by opening the rack file “Adjustable_rack-v2” and adjusting the “Linear pattern 1” for the number of teeth you want… there are several different examples that I used on my machine. And I suppose you really ought to use anything marked “v2”… :thinking:

Remember that you’re only a few parts away from a stock Burly machine if, for some reason, it doesn’t work well enough and/or meet your need. I still have my machine intact (I’ve just moved back to East Texas and am still unpacking stuff…) but unused beyond the testing I last did in this thread… so I can’t guarantee how long it lasts or performs over time. But it’s a fun project and, as always… YMMV :astonished:

Good luck!

–David

3 Likes

I’m glad he asked about it! This was a really coop project I may have never seen if he hadn’t :slight_smile:

2 Likes

Same here! I thought I’d read through all the back logs but it seems I completely missed this one. Excellent project @dkj4linux! I saw the Jan '20 date and forgot it was 2021. I thought, man, this is a long and detailed thread for just being started this month!

3 Likes

a bit late to the party, but so true! i have so many ideas that it’s really hard for me to choose what to put my time into. i’m so glad i found this project, it’s really helped reel in some of that wasted potential everyone’s always telling me about :stuck_out_tongue:

3 Likes

i’m sure all the chickens loved it :stuck_out_tongue:

2 Likes

An update…

About 3 years ago I began this project to see if I could swap out the X and Y axis of a stock MPCNC with a printed rack-and-pinion (R&P) drive. All in all, it was a very fun and satisfying collabrative project that turned out far better than most anyone expected. It’s not an improvement on the MPCNC… it’s simply an old man’s quest to satisfy his curiosity.

Anyway, a little over two years ago, I moved back to East Texas. To facilitate the move, I dismantled several of my machines completely and partially disassembled the rest… and the R&P MPCNC made it to East Texas in some condition to play with further, should I ever find the energy and motivation to do it. I’m pretty much out of the scratch-building business now… it’s harder to concentrate and I’m getting so shakey it’s difficult to work with smaller parts. But my daughter has voiced concerns a couple of times about how she’s gonna dispose of all my “toys” when I’m gone… and I’ve decided to start revisiting the remaining machines to play with and dismantle as required.

So, a few days ago, I pulled this machine out of the closet it’s been in for the past couple of years and started piddling with it. The Dupont connectors were in horrible shape (as expected) and I had to redo almost all of them. I built new series-wired motor adapters and had to find a controller board as the original one was mysteriously gone. I dug around in my stash and found a little Nano-based 3-axis board that already had Grbl 1.1h flashed on it and soon had a machine running somewhat predictably… so much so, I was encouraged to shorten the Z-axis tubing (I finally found my tubing cutter!) and leadscrew and print a laser mount for it.

So, here is the R&P MPCNC in all it’s glory once more…

Here it is in action, raster engraving…

and vector engraving…

I think it is running now about as well as it did 3 years ago and I’ve actually enjoyed playing with something a bit more challenging for a change.

– David

8 Likes

That seems to be working perfect. I am not seeing any flaws at all. You never cease to amaze me.

R&P would sure make it easy to change gear ratio’s and would make and MPCNC a lot more “Mostly Printed”. Getting close to mpcnc update time, I am not discounting anything at this stage.

3 Likes

Again? The Primo is only, like, 2.5 years old. :open_mouth: I haven’t even build the LR3…

1 Like

Playing around a bit more with R&P MPCNC while it’s acting nicely…

Torus…

and “traveling salesman” Tux…

I’m running it with a RPi 3B+ and Jeff’s V1Pi image and CNC.js. I really want to calibrate the X and Y axis just a hair finer and then do some of Jamie’s rulers. I could do them with a pen (as designed) but will probably just be lazy and figure out how to modify his gcode for M4/M5 laser in lieu of removing the laser to mount the pen.

– David

1 Like

Probably my last update on this machine…

It occurred to me that I could probably just as easily whip up a new pen holder with the Neje clamp/mount plate… rather than swapping between laser and pen mounts. So that’s what I did.

I then did the “Indian chief” from times past… already had the gcode file

Then I calibrated all axis and drew an assortment of Jamie’s rulers from his test pattern generator…

and finally penned the obligatory crown and logo…

Found myself stumped for a bit… how do I CAM for pen? It’s been so long since I’ve done anything with Z-axis moves… and have updated my Chromebook several times since I last messed with this stuff. Kiri:Moto? Inkscape? Then I remembered F-Engrave. It installed on my Chromebook without too much difficulty and I was able to generate gcode for the crown and logo in short order.

I’ve really enjoyed playing with this machine again… and once I got the motor cables and connections squared away it’s not missed a lick. I’m gonna hate putting it away… for fear I’ll never see it again. But it’s so big and bulky and I’m a bit pressed for space.

I’ll think on it a bit… maybe something will come to me. I’ve got several laser machines sitting about… maybe one of them should go back in the closet? Then I could give the R&P machine a prominent spot… and call it “art”, like a painting , even if I never use it again.

:grin:

– David

9 Likes

There are some instructions for making the test crown. You can use estlcam. Choose the engrave tool, set the depth of “cut” to be how much you want the pen to be pressed down (0.5mm, 1mm, depends on your mount).

You can also use sandify. You need to add some starting gcode, like:

There are also a bunch of svgs for plotters. I have a few at plotterfiles.com:

I think axidraw plotters use an inkscape plugin to create gcode from svg.

1 Like

Thanks, Jeff, but F-Engrave did a great job. I really don’t expect to use this machine much in the future but to put the finishing touches on this R&P project, I just wanted to do a crown plot and Jamie’s rulers with a pen… as I did 3 years ago.

Back in the early days, when I was still running Marlin-based machines, I did use Estlcam for a few router projects but TBH I rather preferred Inkscape and the JTech laser plugin to create gcode for laser, needle, or pen. The JTech laser plugin allowed you to specify not only the laser on/off commands you needed… but you could also specify Z up/down commands and create gcode for needle or pen.

J-Tech-Laser-Tool-inkscape-picture-2

But since I’m several Chromebooks removed from then and about all I do now is laser stuff, I simply didn’t have a suitable CAM installed. I did take a cursory look a Kiri:Moto and quickly decided I didn’t wanna invest that much time figuring it out. I was about to install Inkscape but then I remembered F-Engrave. It’s much lighter-weight than Inkscape and relatively easy to use and install… and I quickly had the plots to finish up that last post.

– David

2 Likes

For any Inkscape users out there…

I’m not entirely sure why, but after mentioning using Inkscape and the JTech laser plugin for pen plotting in my post above, my curiosity got the better of me. So I’ve spent the past couple of days playing with different versions of both Inkscape and the JTech laser plugin on my Chromebook. Things have changed over the past couple of years… Inkscape is now up to version 1.2 (vs 0.92 from before) and a newer 2.5.1 “community version” of the Jtech laser plugin is alive and well out on Github. I was able to get both installed and running… pretty simple thanks to “appimage” technology.

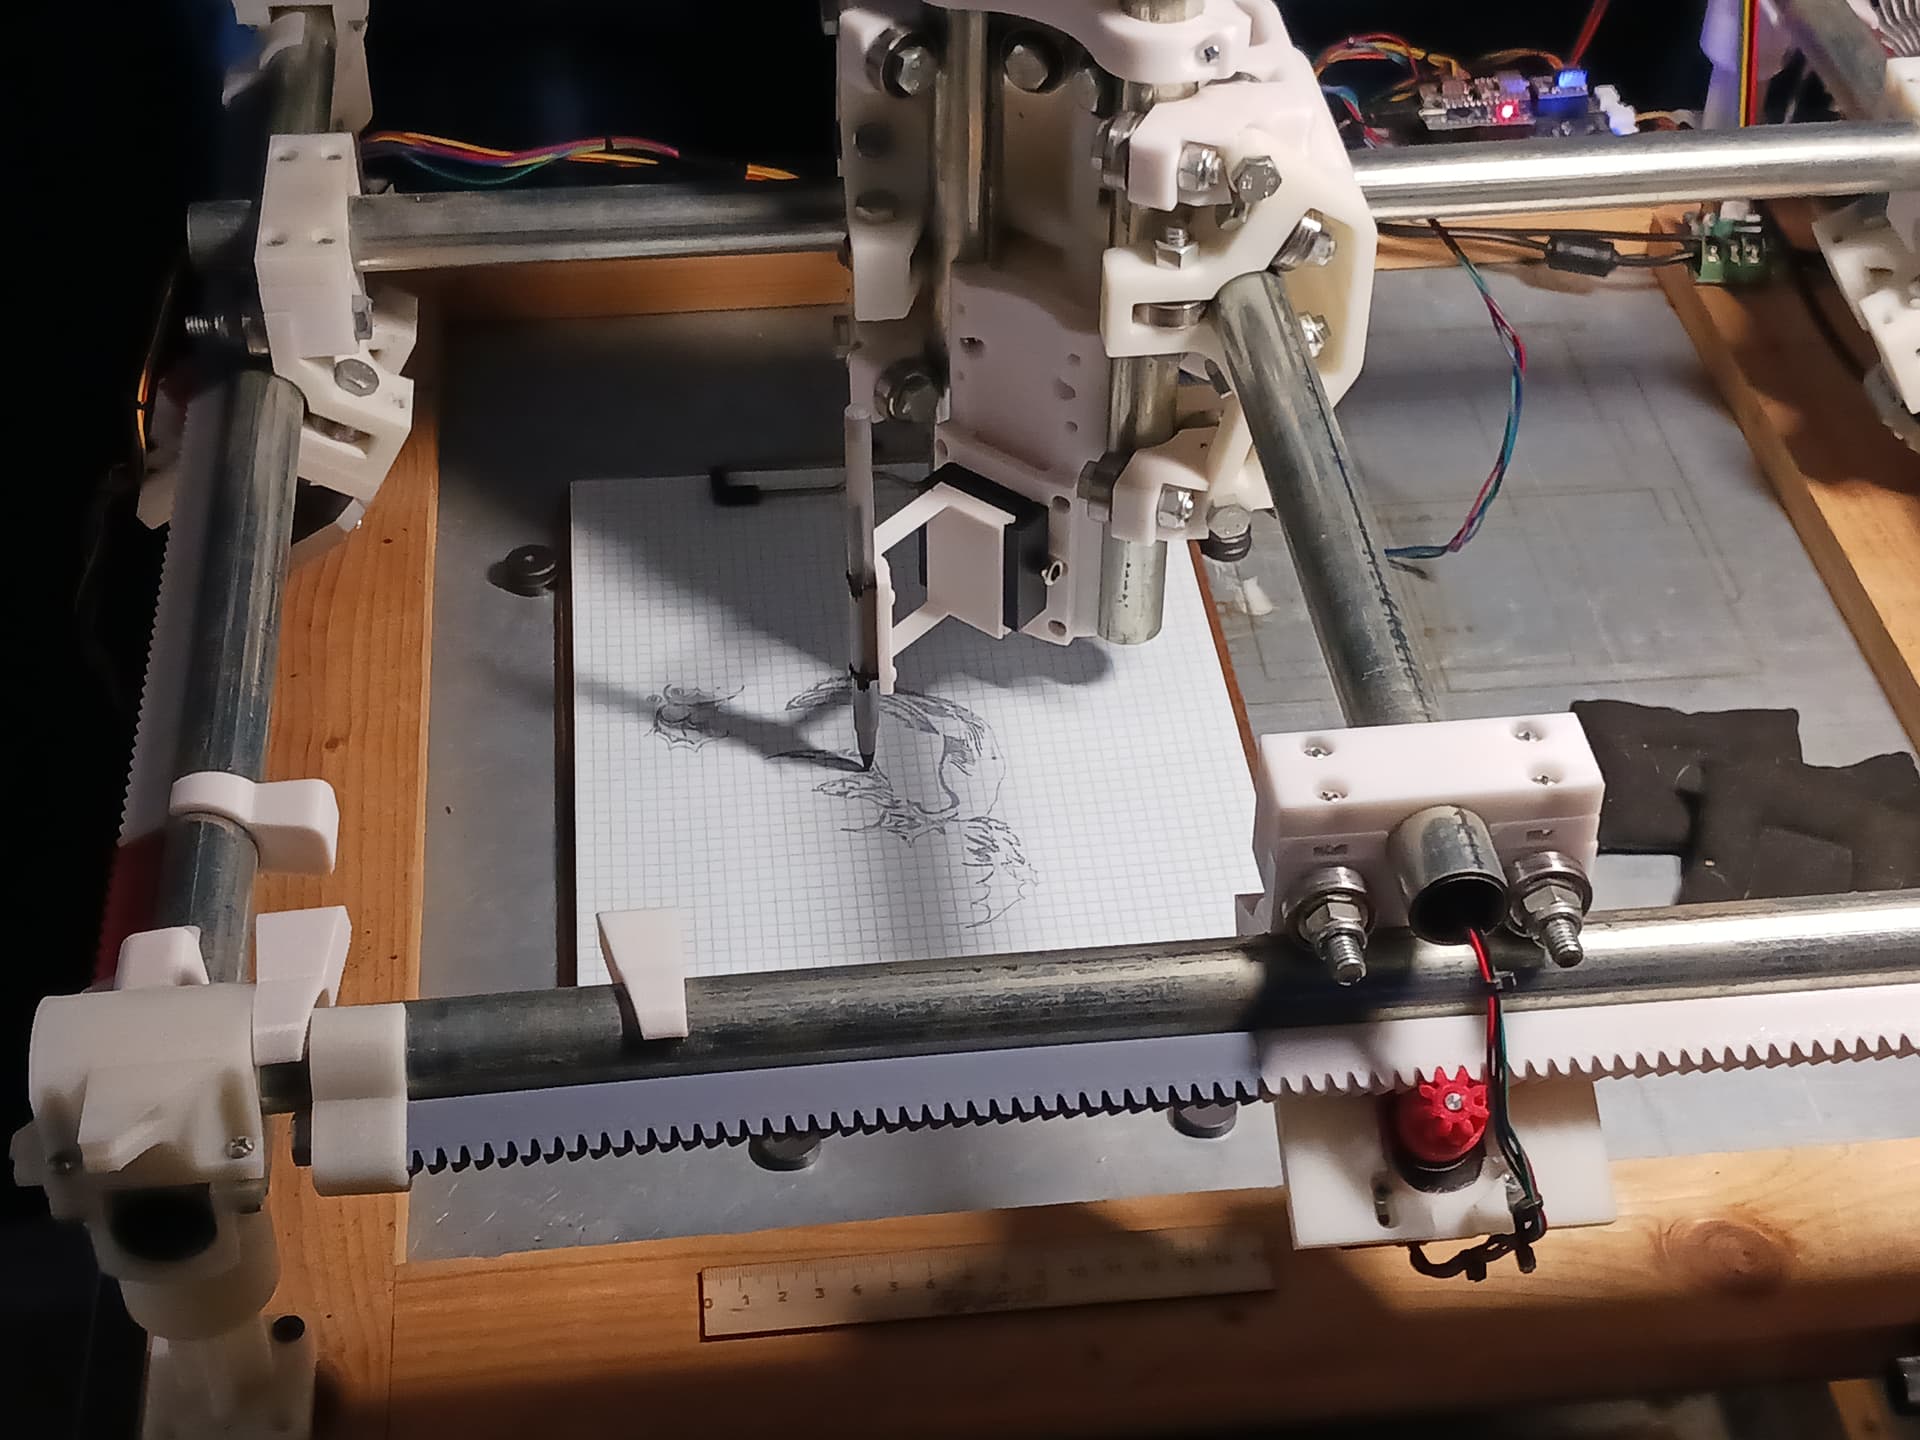
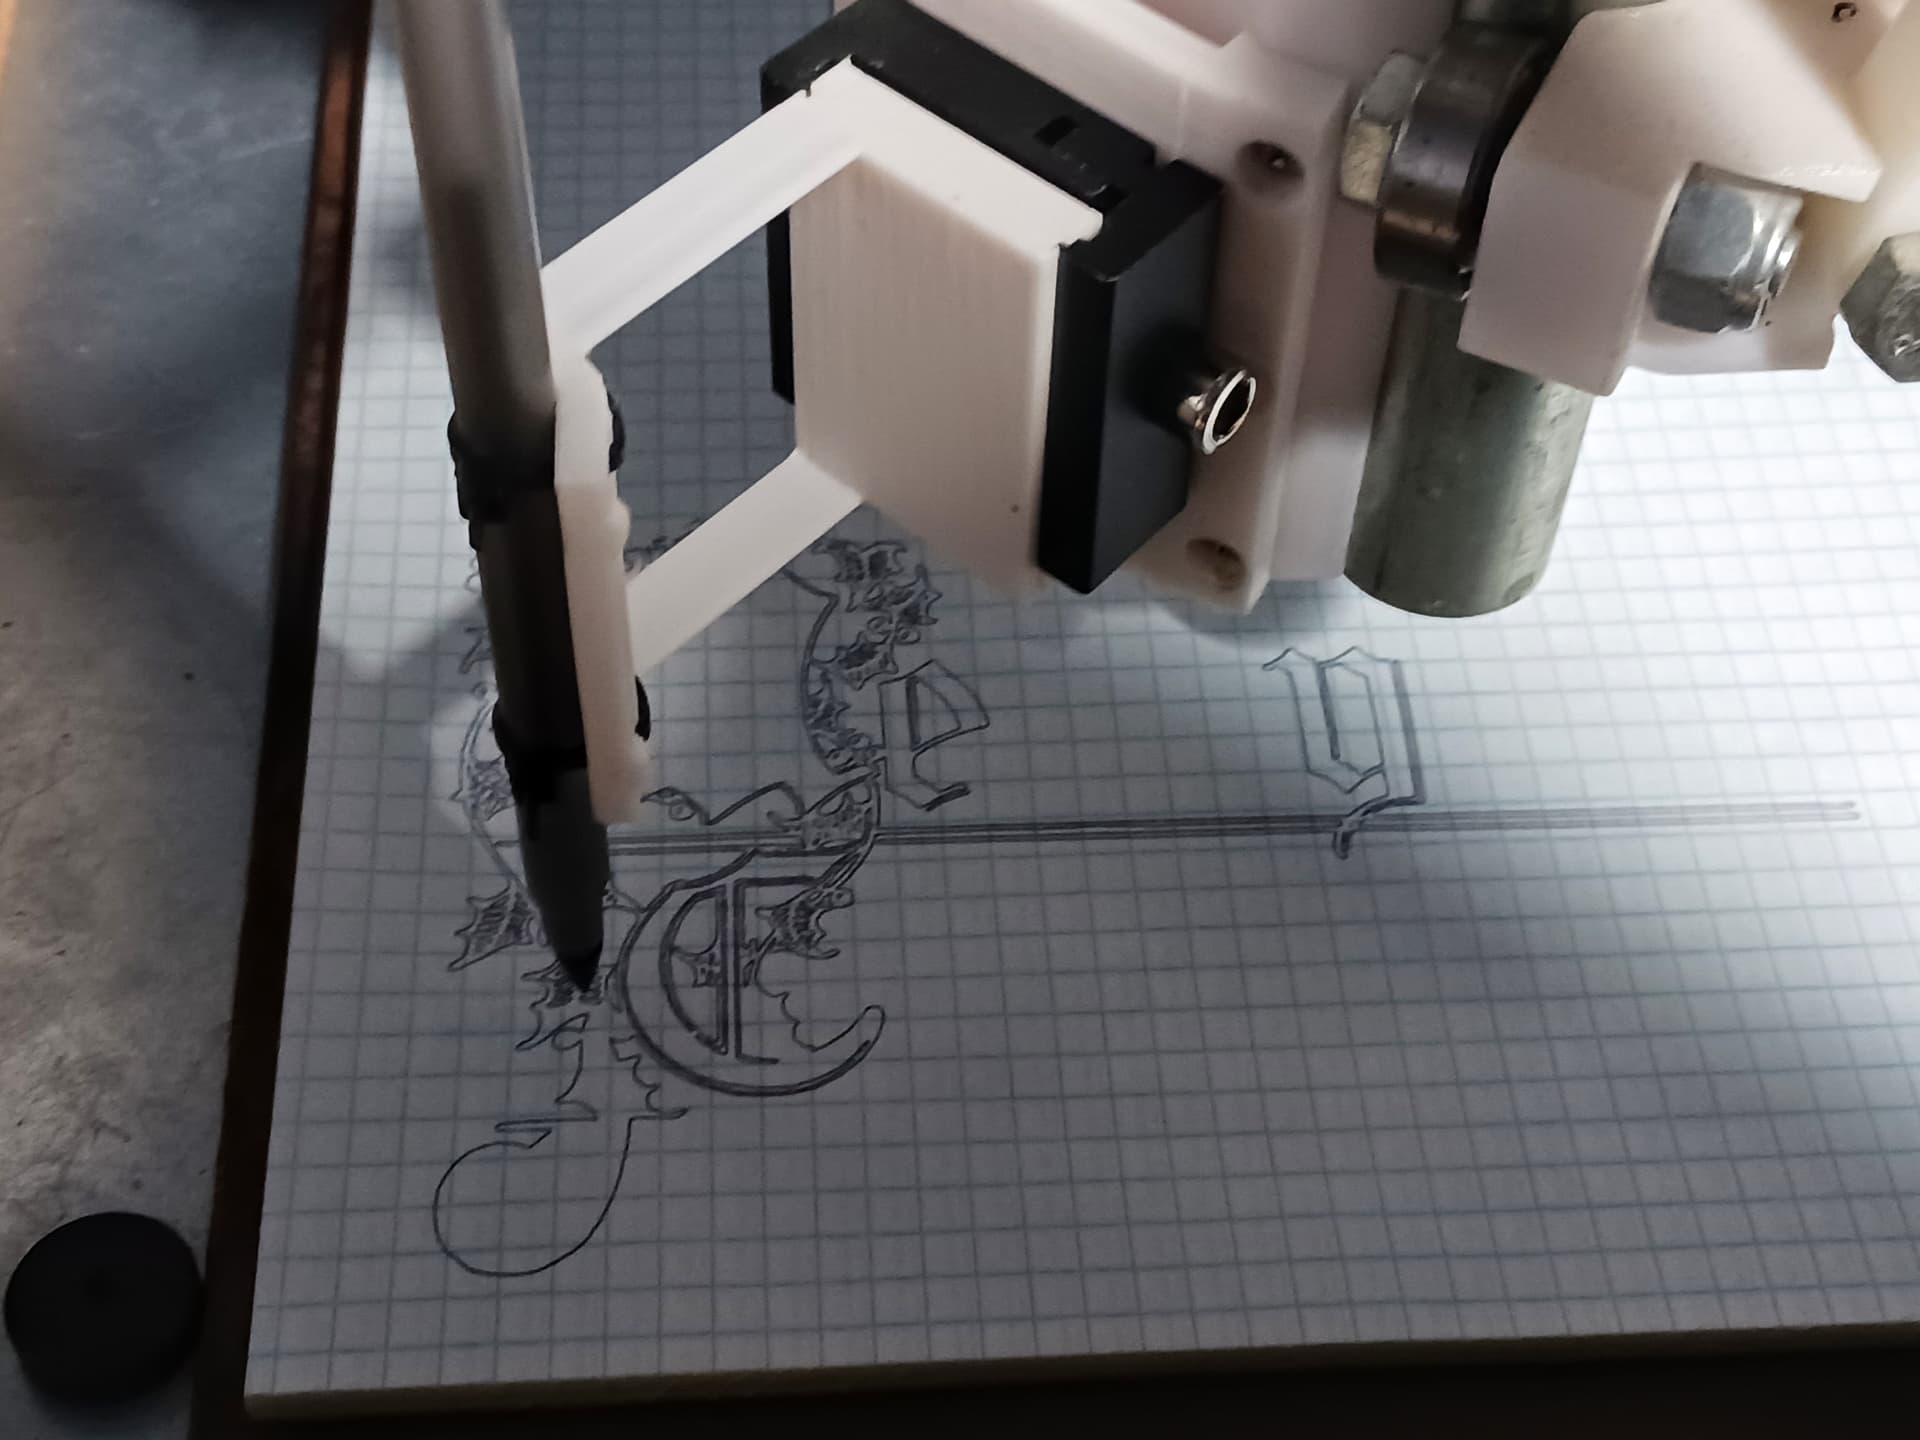
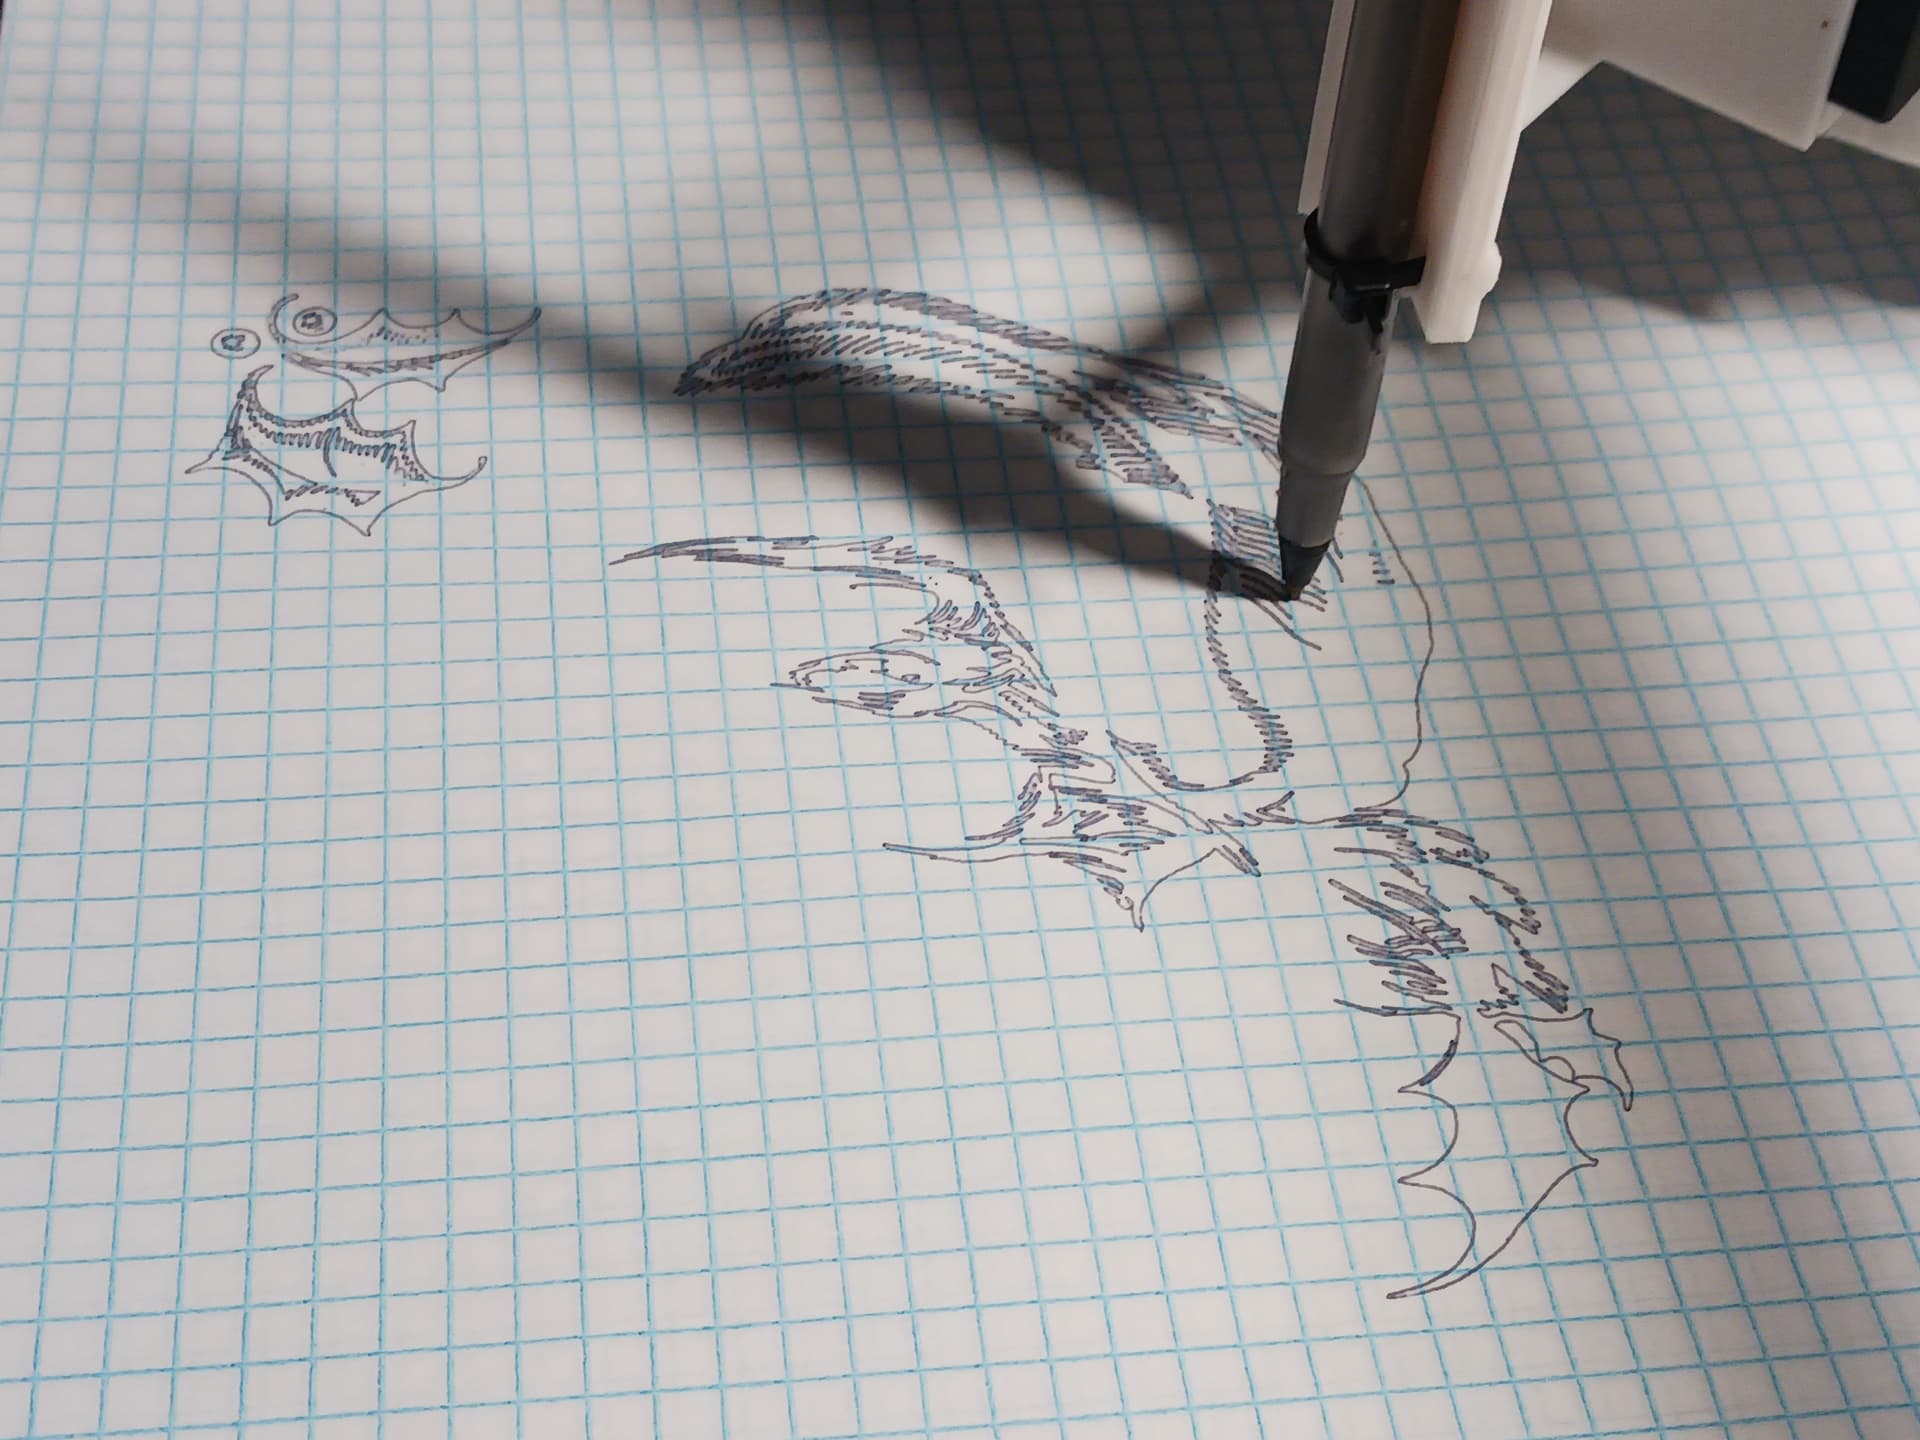
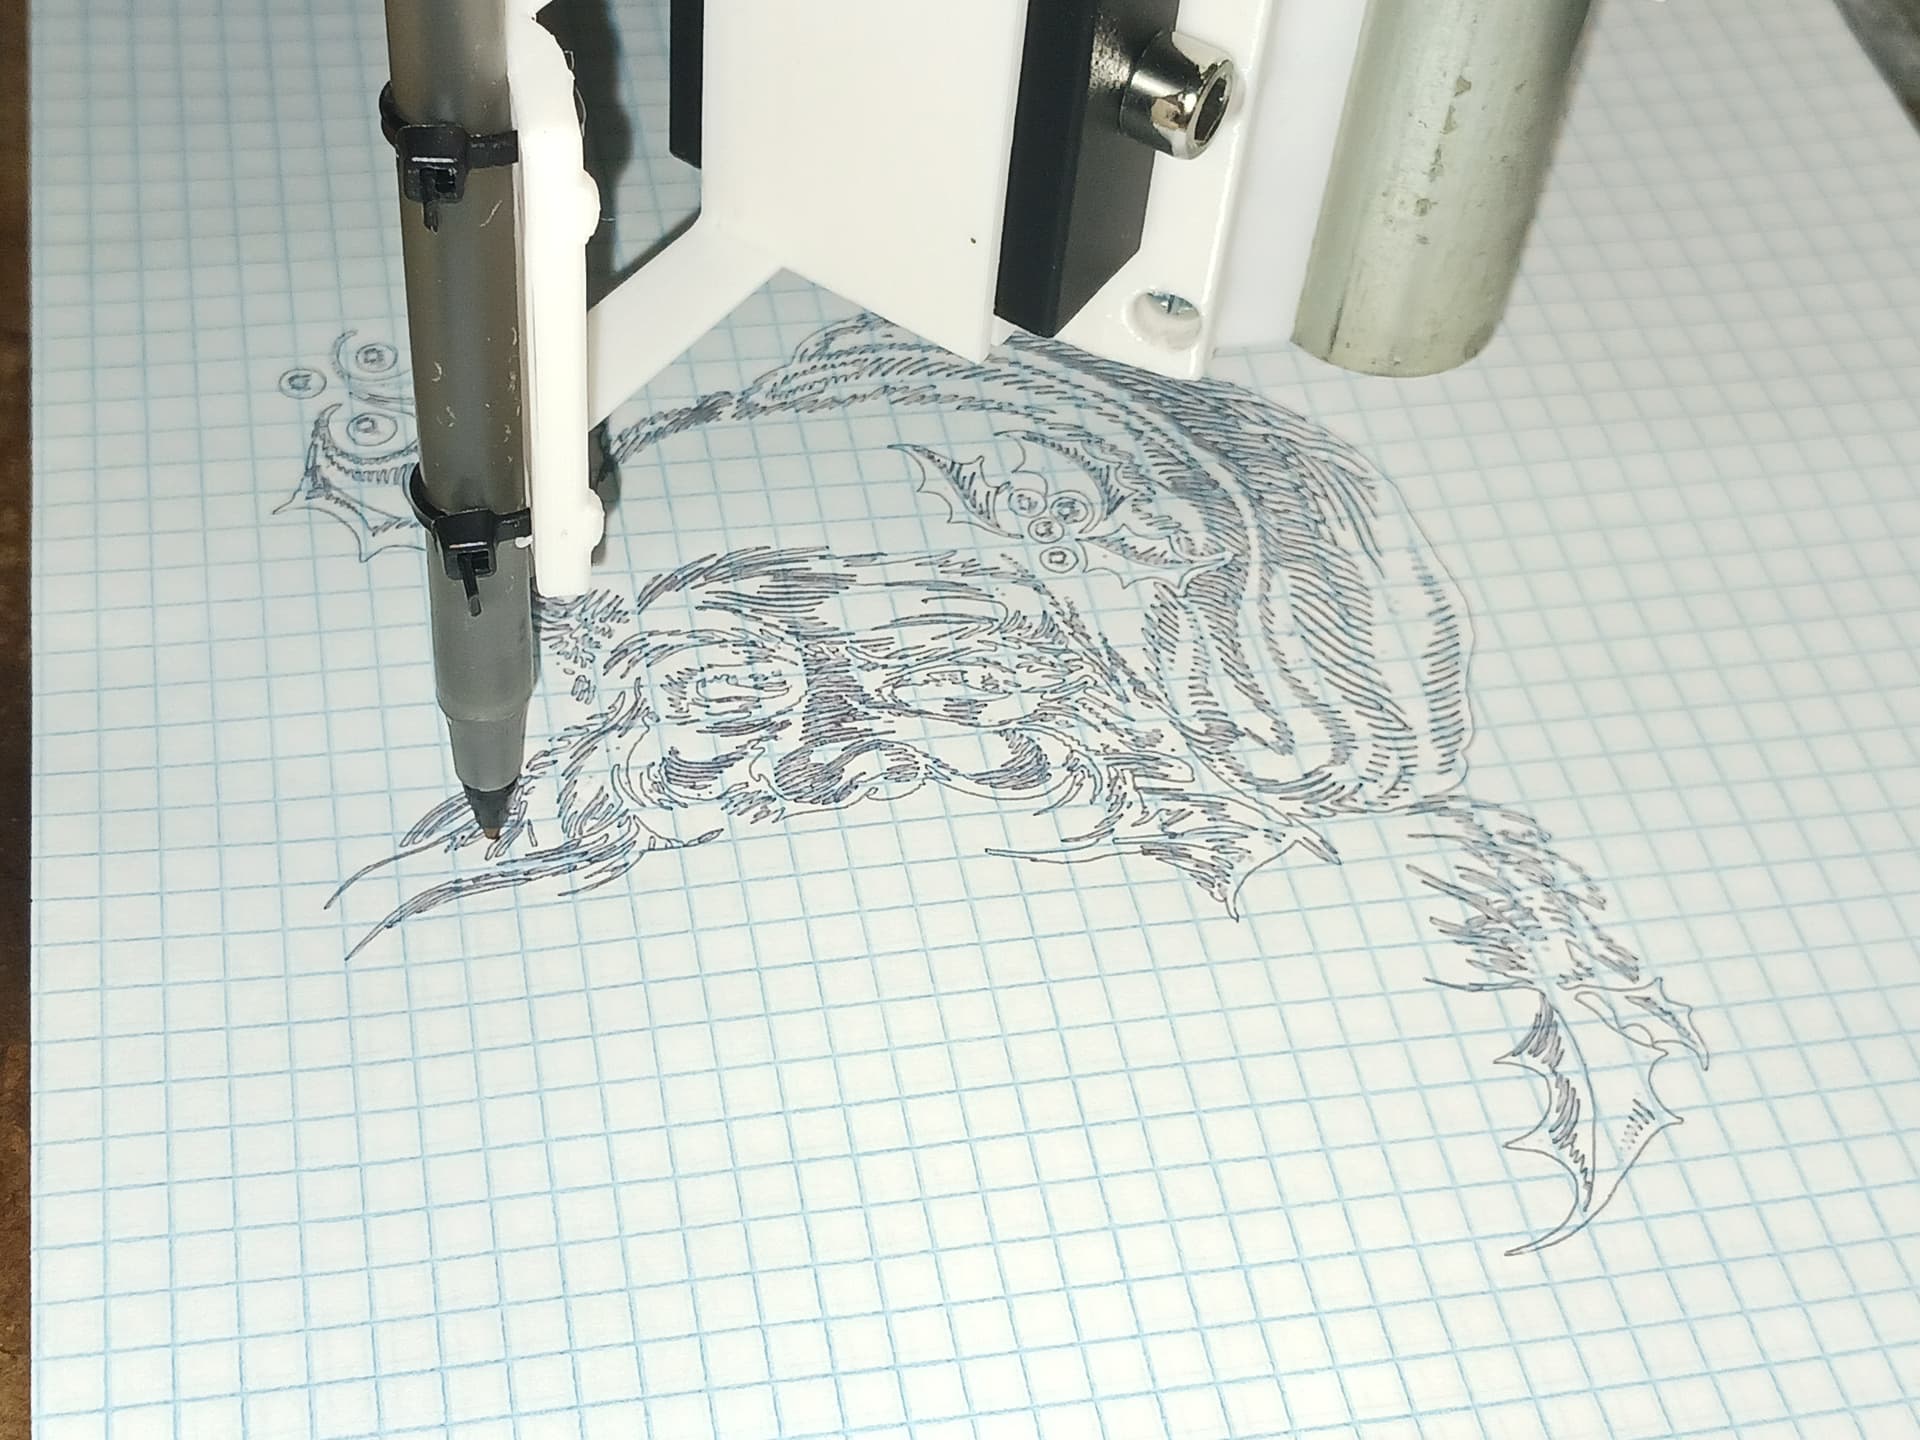
As mentioned above, I used Inkscape and the laser plugin when I was still running Marlin-based machines… for both laser and pen. Back then most of us were using the RAMPS fan pins and M106/M107 for laser control IIRC… and the plugin allows for specifying the laser ON and OFF commands you needed. But I also “discovered” (from somewhere I don’t remember…) that the ON/OFF commands could also take the form “G0 Z-0.5” or “G0 Z2.0” to lift a pen up and down. It does work though the gcode isn’t the most elegant and requires a tiny bit of editing… note the pen wasn’t lifted before returning to the start, leaving and unsightly line that doesn’t belong. But Grbl has no trouble with the pretty generic gcode… and I suspect Marlin won’t either.

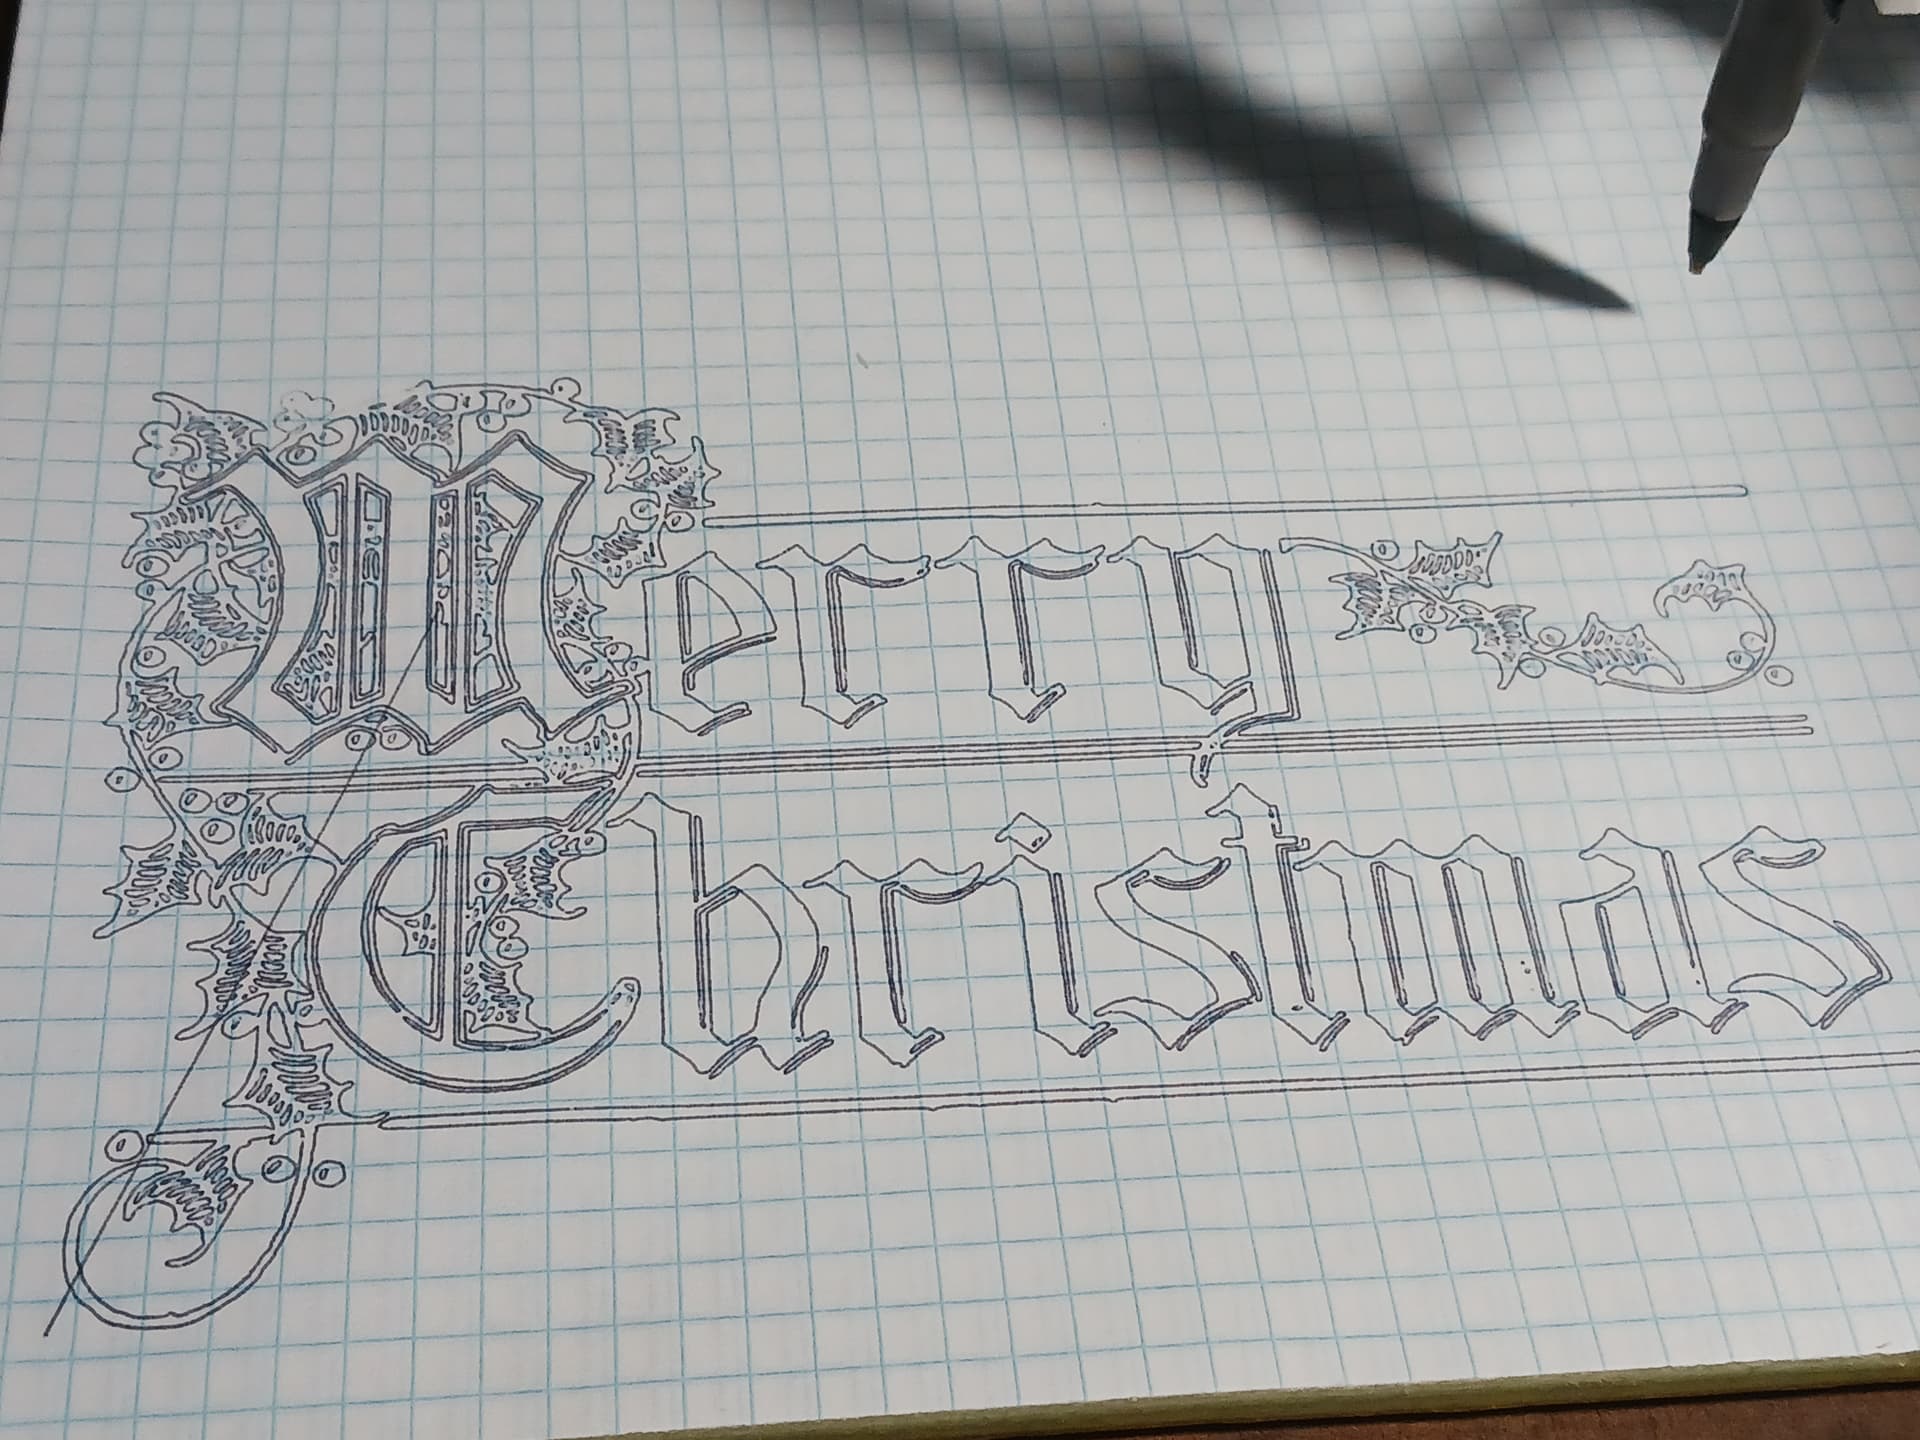
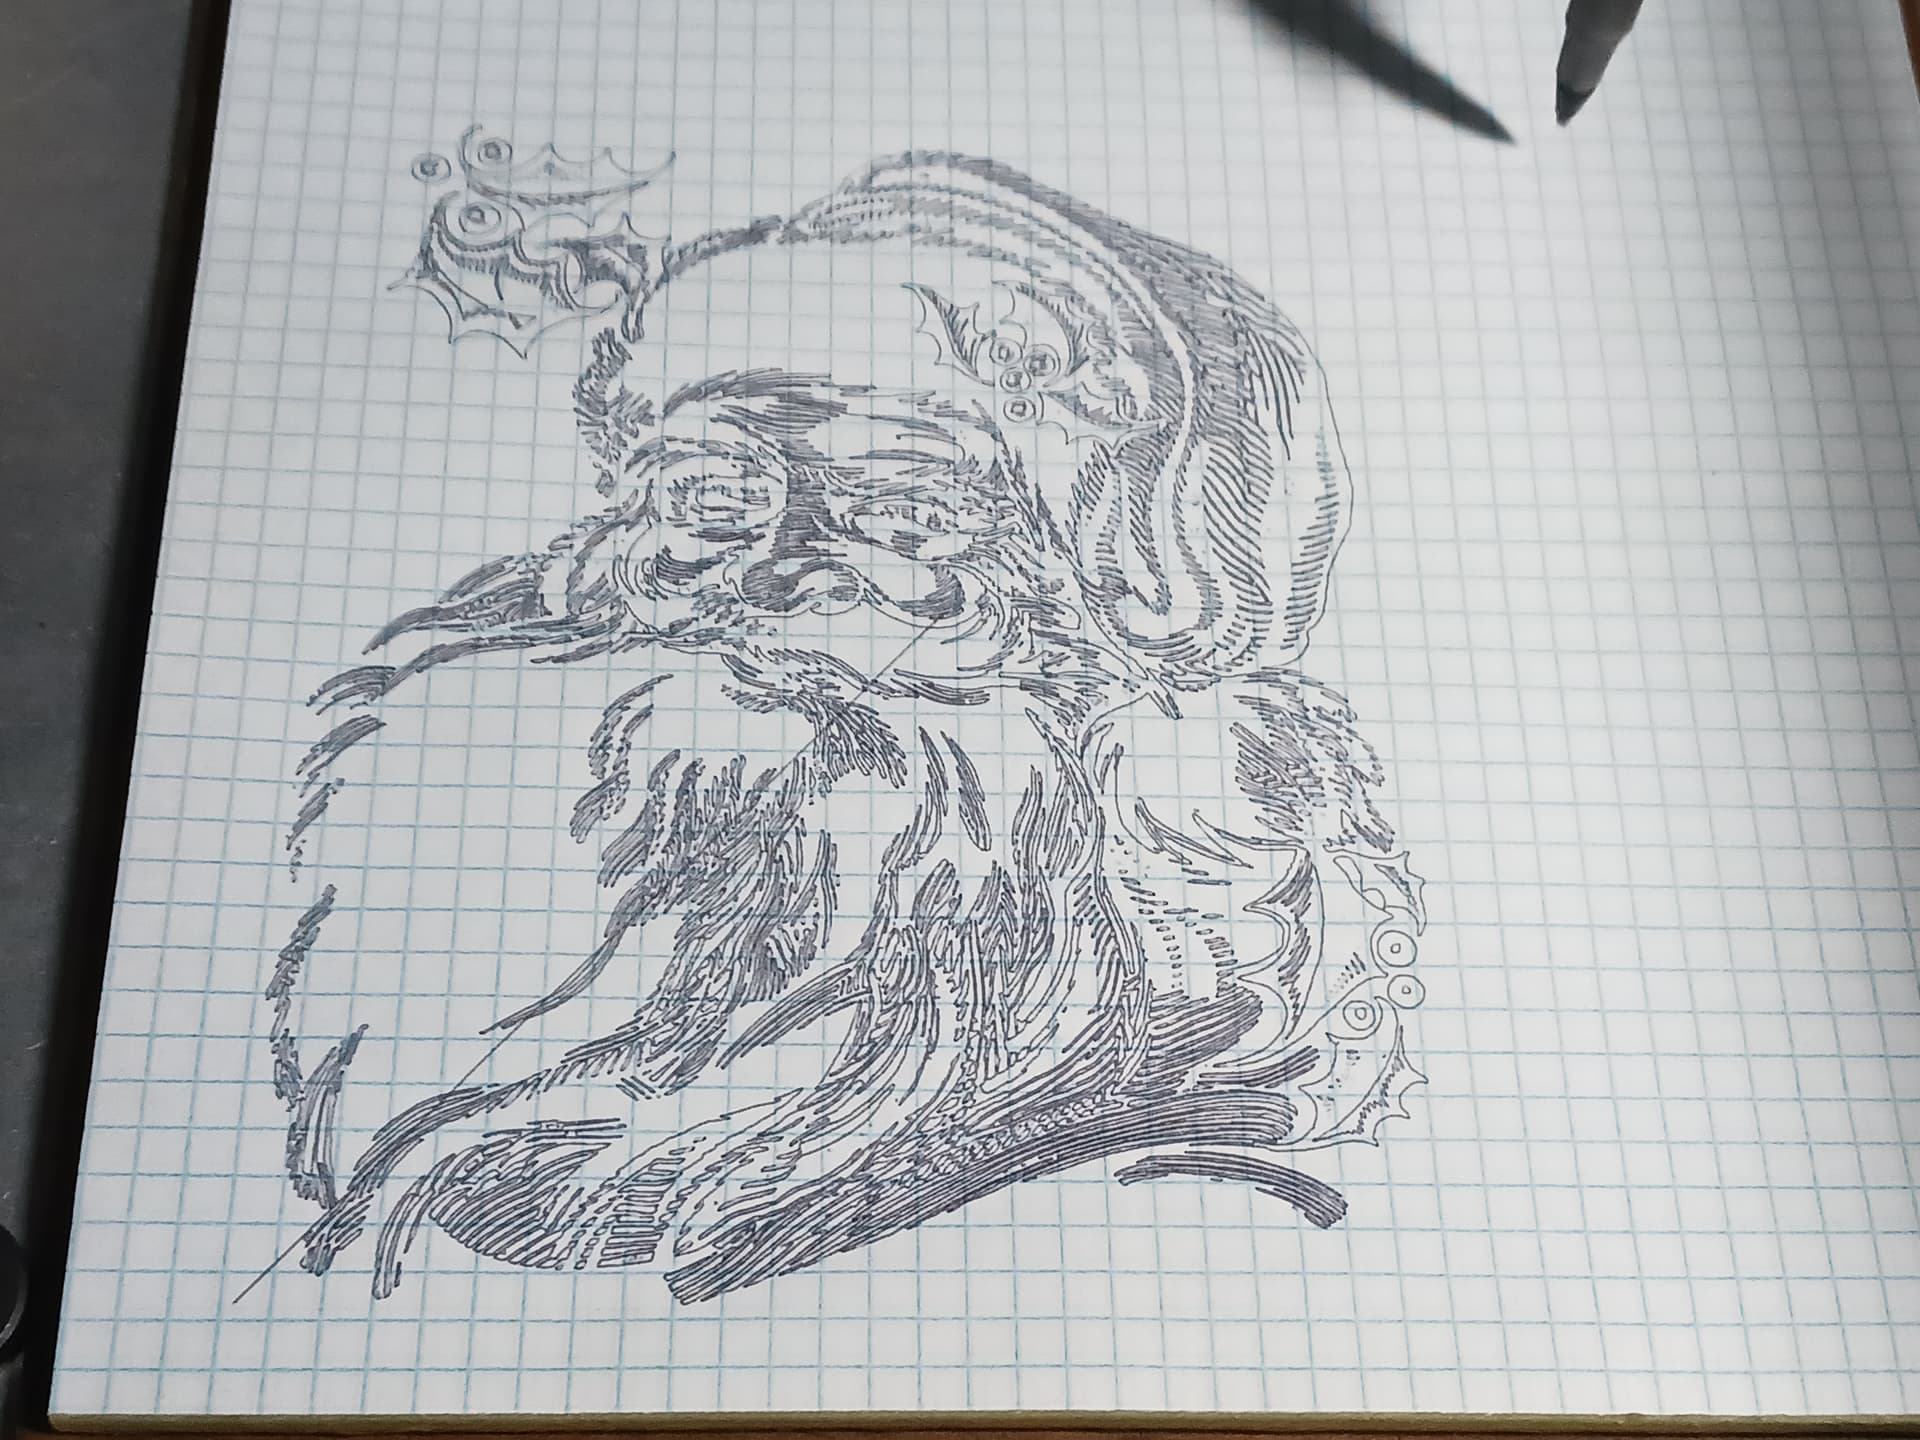
Oh BTW… stay warm and Merry Christmas, y’all!

– David

11 Likes

Well, the day has finally come… goodbye, old friend. I’ve had a blast playing with the R&P MPCNC (Burly) for the last month and a half. But there are only so many ceramic tiles and craft sticks that can be engraved/cut with 2.3W of laser power…

The fancy new Atezr P20 Plus 20W (quad-diode) laser machine has arrived… and begs to be played with. This beast is big (430mm X 430mm work area), fast, powerful, all-metal, and easily put together with 25 - 30 screws. It comes with air-assist, a fancy touch-screen display (which I detest and, thankfully, is not required to use the machine), runs Grbl 1.1h, and is Lightburn and V1PI/CNC.js compatible. Other than in Step 1, where I mistakenly swapped the left and right sides, with 16 screws to be undone and redone, there was not a single issue with assembly or test… i.e. it ran perfectly out of the box.

There are a couple of things that can be cussed/discussed but, all in all, nothing to make me regret the purchase. The biggest problem is that it is a major smoke generator. If you wanna run this thing indoors, you’ll definitely need to figure out a way to handle the smoke when cutting anything with any thickness to it. Silly me, this morning I started reading/studying the forums and cobbling together a plan for DIY smoke extraction… fans, ducting, too-small generic laser enclosures, etc. Then it occurred to me I ought to go see what the Atezr shop might offer and… there it was! An all-in-one solution, right there in their store. Imagine that! An enclosure with everything needed for $189, and, right now, an additional $20 discount… and no headache from trying to piece together a DIY solution that would undoubtedly cost more in the end.

Engraving at 3000 mm/min, 35% power, in yellow pine 2x4 scrap…

I didn’t intend this to be a review of the Atezr P20 Plus machine but I felt I needed to “justify” putting my thoroughly lovable R&P MPCNC to rest.

A bitter-sweet day indeed…

– David

7 Likes

Wow I cannot believe I had not seen this entire thread, what a great read!

Until i got to this part.

Hopefully you can sell it as I am sure someone would just love it

3 Likes

Thank you for the kind words. Sadly, as we age we have to start making concessions… and I’m rapidly getting to that point. But you have given me pause for thought…

– David

4 Likes

well, because of you I am starting a journey of lasers. I wish you well my friend!

6 Likes

A happy ending! It turns out that @jamiek lives in Dallas, only about an hour away from me. I was able to lure him into making the drive… and giving the R&P MPCNC a new home. As Jamie offered up several important ideas that affected its design and development, I was thrilled that he would want it. It was an absolute treat to meet face-to-face and we spent a very pleasant few hours talking about machines, life… and even a few of you guys. :wink:

Don’t you just love it when a plan comes together? :smiley:

– David

10 Likes