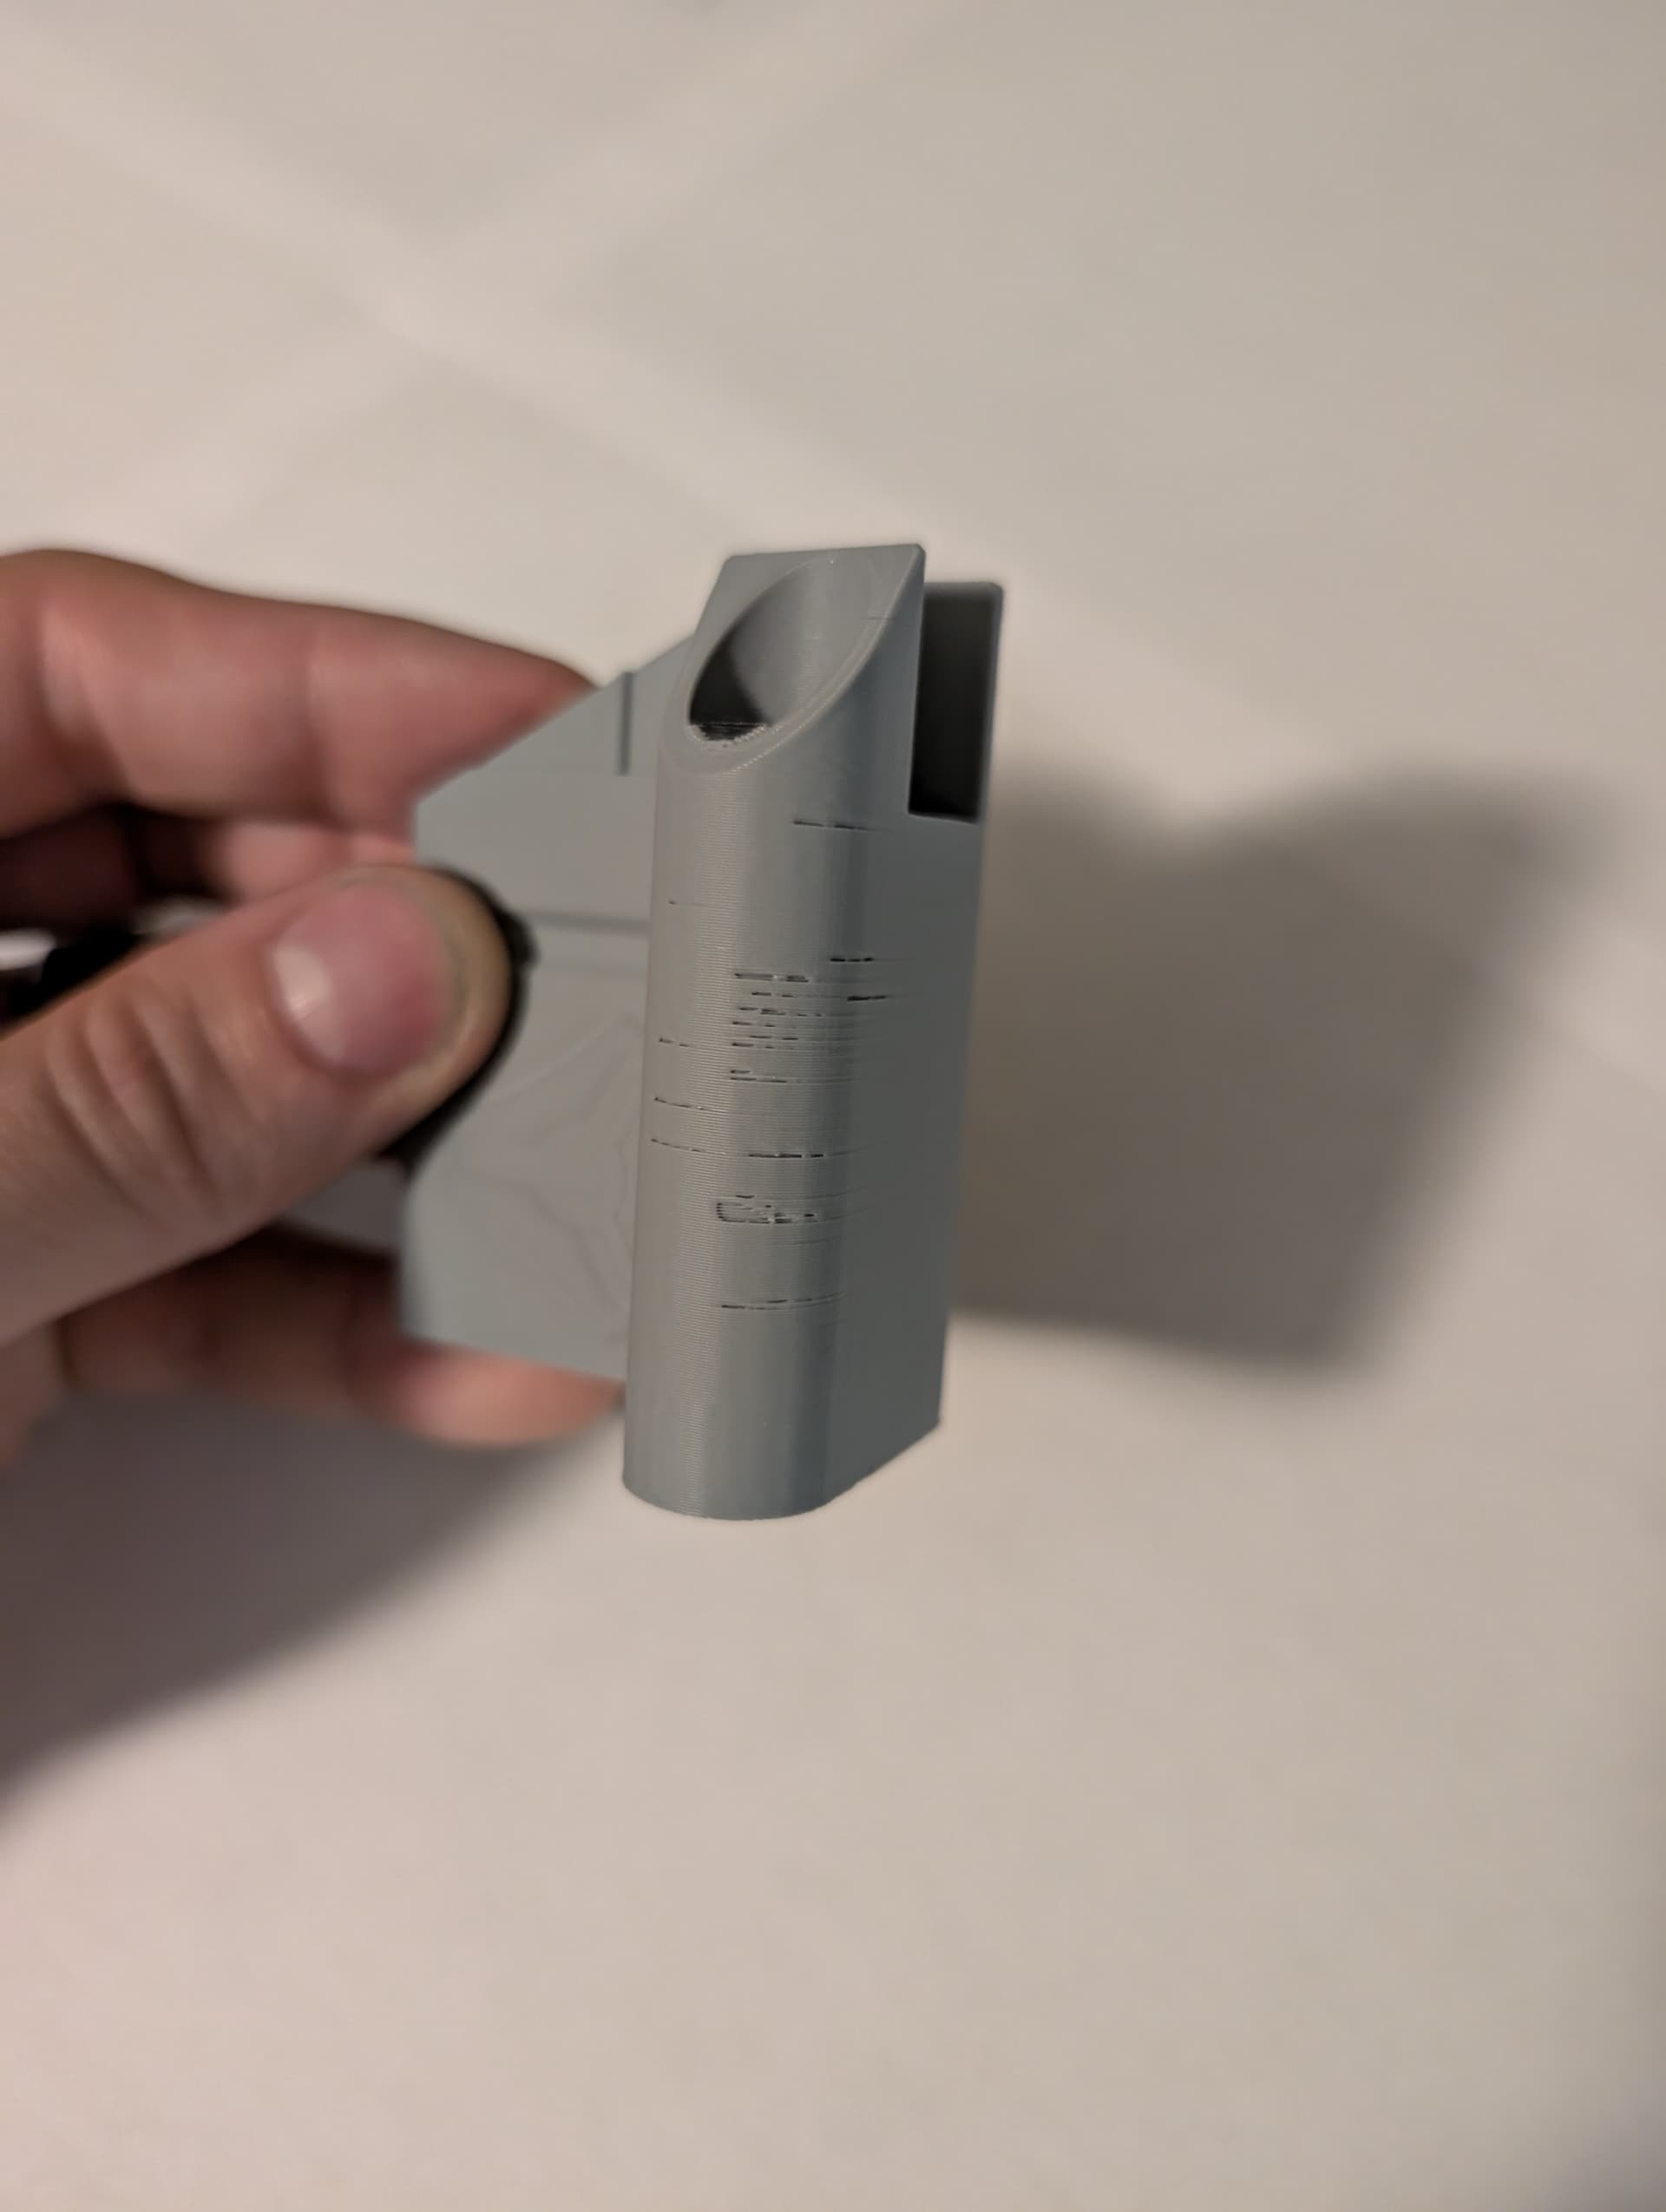
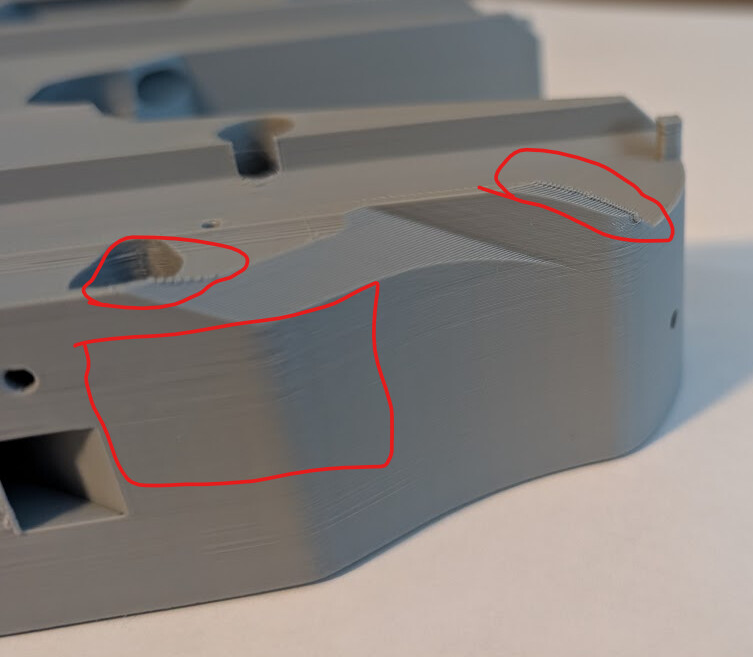
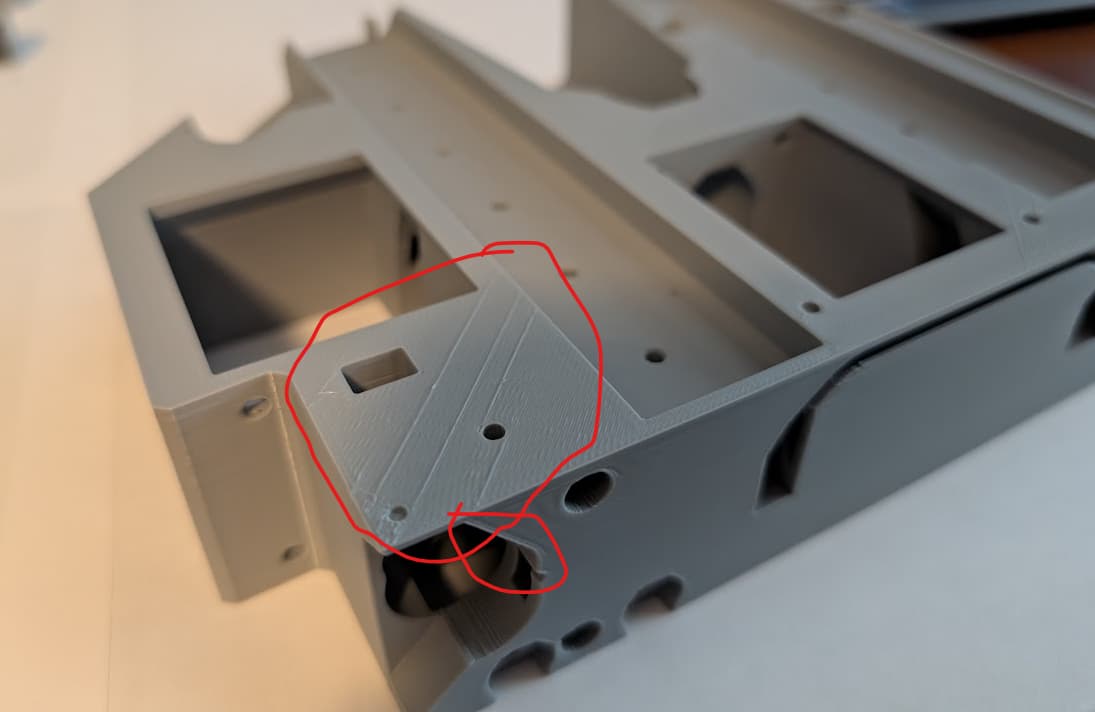
I am having some print issues. These taller parts started having these odd gaps. I just replaced the nozzle and I am pretty sure there is a print setting I need to change, but I don’t know what this issue means.
Any help is appreciated.
I am having some print issues. These taller parts started having these odd gaps. I just replaced the nozzle and I am pretty sure there is a print setting I need to change, but I don’t know what this issue means.
Any help is appreciated.
The rest of the print looks fine from what I can see. Is it only in that corner?
Is the filament old?
Nope I cut the vacuum packing today and immediately put it in the filament dryer for all day printing.
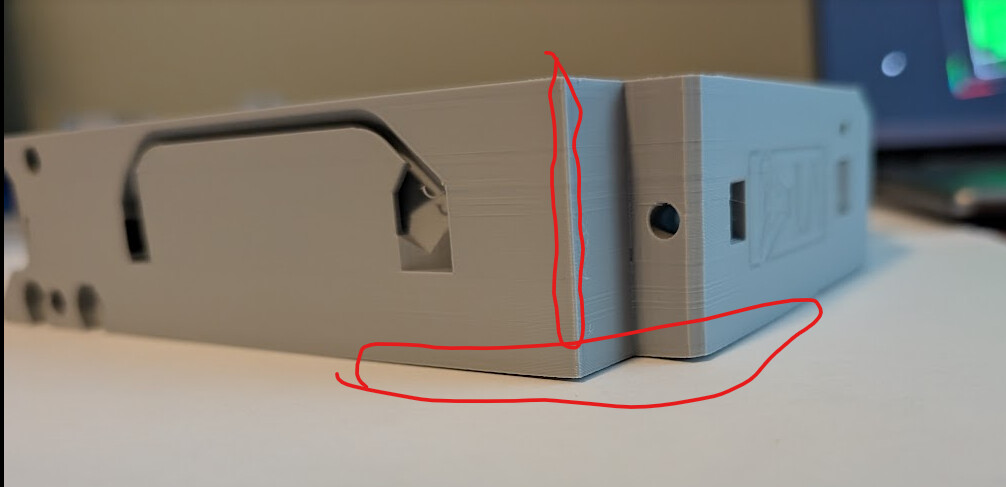
The quality on the other parts look good, but these 2 parts. Also, it is only one side on that curve.
Personally I would just try to print the same part again and see if you get that artifact in the same location. Then you know there is a slicer change to make. It looks really good though.
The next thing I would try, is increasing the temp by 5* (depending on what you are already at). Maybe your filament has some less pure sections that don’t melt the same way. If you are printing right at the low end of the temp, sometimes you can get mini clogs that fix themselves.
All this to say, that part will likely work fine. You could use it to build your LR.
Ya, I am running it at 205c right now using Overture PLA. I might try to bump it up 5 and reprint. Your right, it will function just fine, but it will drive me nuts. Lol
Those appear to be some pretty under extruded perimeters. If it’s PLA, it seems like 205 should be good. Is it PLA Pro or just standard PLA? What happens if you rotate the part for the next print?
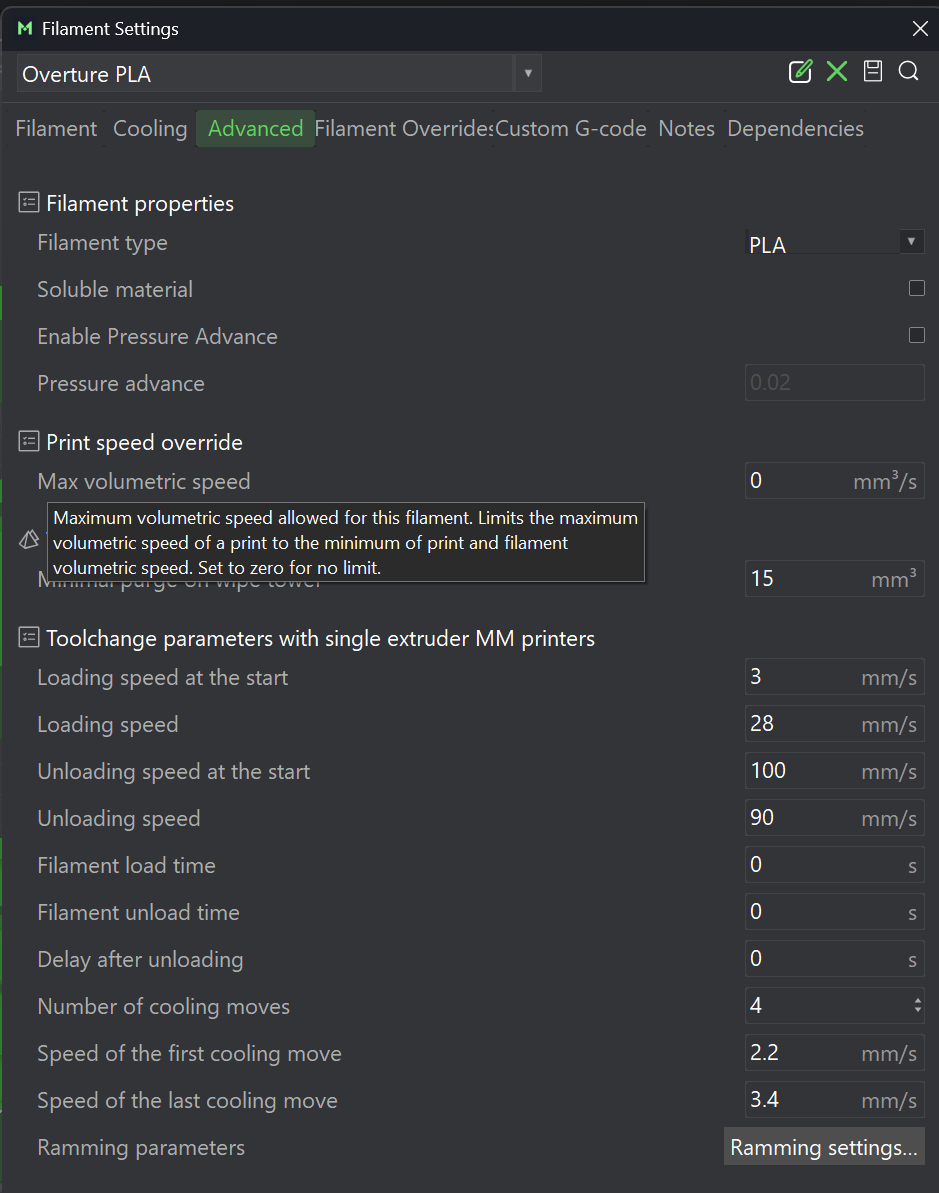
You are probably trying to print faster than your extruder and push the filament. That is under extruded. You can slow down or try increasing the temp a little as @srcnet said. What do you have your max flow rate set at for that filament?
Not talking about the extrusion multiplier. I am talking about the max volumetric speed mm³ That will cap how much the slicer tells it to extrude. Depending on your printer it can only flow so much. That number can vary drastically depending on the printer and any mods. An old ender 3 boden might be at 10mm³/s vs a Rapido HF at 45 mm³/s
I found it. Apparently I have had it set to 0, which means no limit. I have been printing with my printer for over a year and never messed with that setting. How do I figure out what this should be set to?
Since I have you guys here and you all know way more than I do, I have a few more 3d printing questions.
I have been living with a few print quality issues. They are not deal breakers, but I am pretty sure I just need to adjust some settings to maximize the quality of my prints.
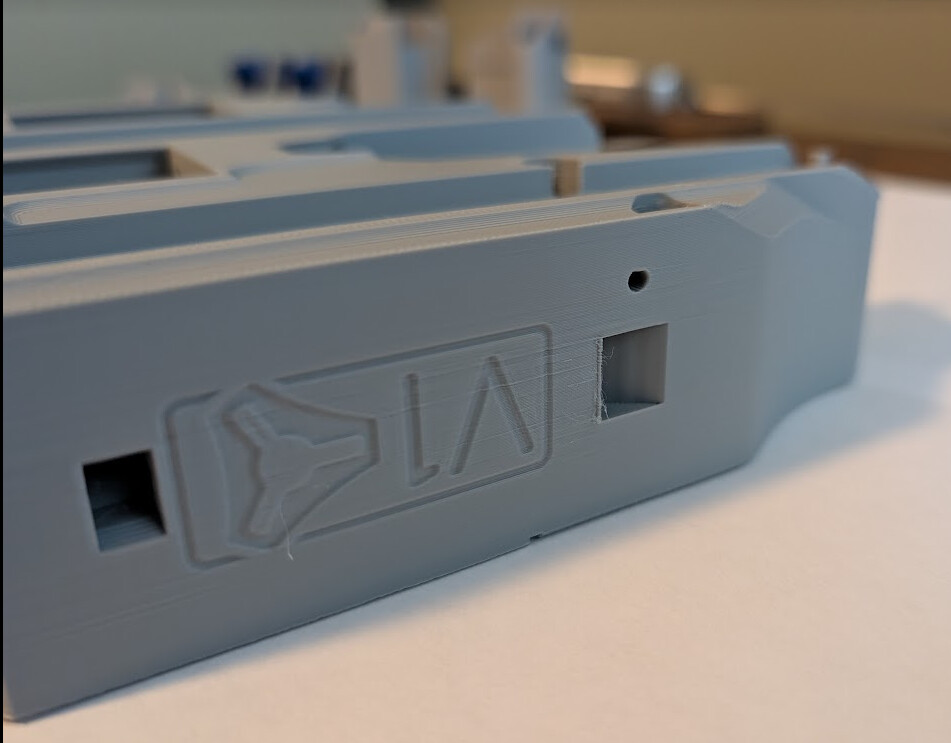
The pictures below show 5 issues, at least.
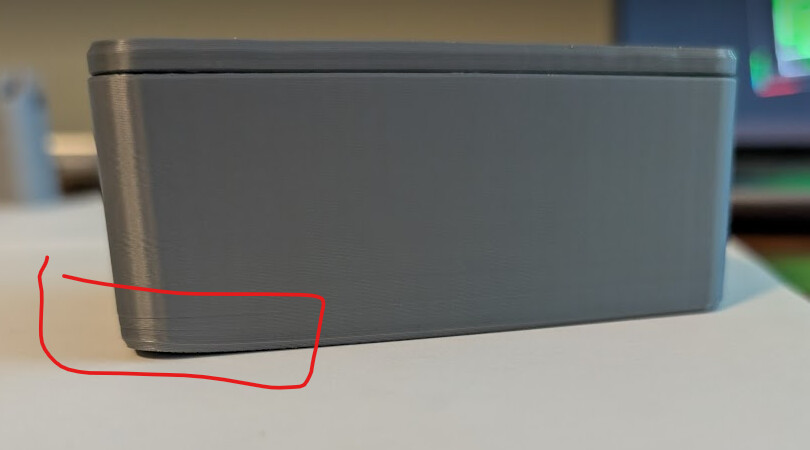
1. On occasion, 1 corner of the prints is lifting off of the bed.
2. Budging corners.
3. Wrinkly finish.
4. Uneven top layer.
5. Uneven (bulging) layers.
I am open to everyone’s experience and curious what I can learn. My 3d printing journey has been good enough, but I am taking an opportunity with this project to learn even more.
Here are most of my filament and print settings I am using.
Printer: AnkerMake M5C
Nozzle: 0.4
Slicer: AnkerMake Studio (Based on PrusaSlicer)
It actually says it is PrusaSlicer in the title.
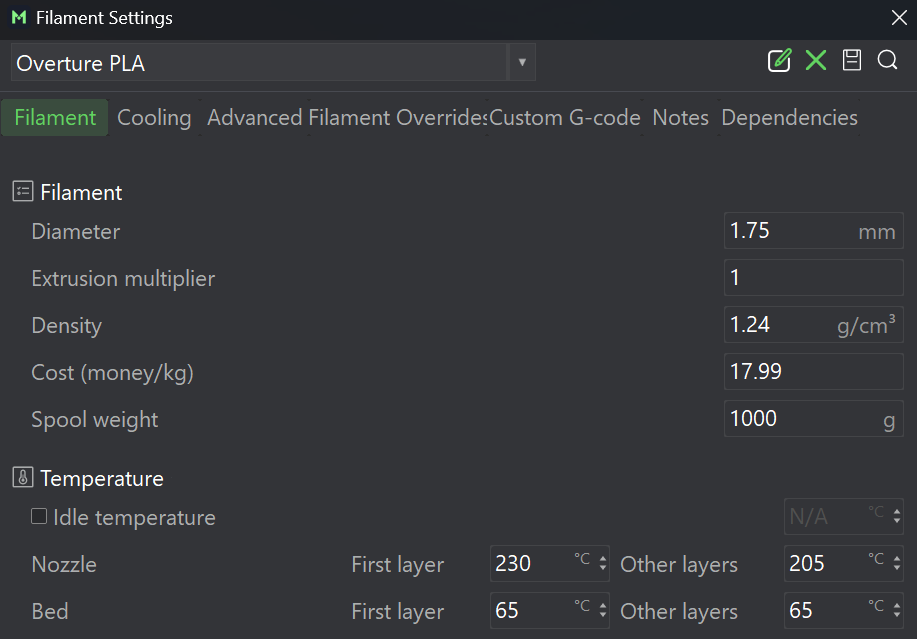
Filament Settings:
Name: Overture PLA
Diameter: 1.75
Extrusion Multiplier: 1
Density: 1.24 g/cm3
Nozzle Temp First Layers: 230
Nozzle Temp Other Layers: 210
Bed First Layers: 65
Bed Other Layers: 65
Keep Fan Always On: Checked
Enable Auto Cooling: Checked
Fan Settings: Min: 100%, Max 100%
Bridges fan speed: 100%
Disable fan for the first (layers): 3
Full Fan speed at layer: 0
Dynamic Fan Speed: Unchecked
Max Volumetric speed: 0 (unlimited)
All Retraction settings are unchecked
length, lift z, retraction speed, de-retractions speed, etc.
Print settings:
Layer height: 0.2
First layer height: 0.14
Line width 0.4 mm for default, inner wall, top, sparse infill, internal solid infill.
First layer line width: 0.44
outer wall line width: 0.44
Seem position: Aligned
staggered inner seams: unchecked
seam gap: 15%
Role base wipe speed: checked
Slice gap closing radius: 0.049
resolution: 0.012
Ironing type: no ironing
Wall generator: classic
First layer minimum wall width: 85%
bridging flow ratio: 1
bridging density 100%
Wall Loops: 3
Detect thin walls: checked
Top layers: 4
bottom layers: 4
infill density: 30%
infill anchor length: 30mm
max lengths of infill anchor: 60mm
infill/wall overlap: 25%
infill direction 45
first layer speed: 50
initial travel speed: 130
outer wall speed: 150
inner wall speed: 250
small perimeters speed: 75
sparse infill speed: 250
internal solid infill speed: 150
gap infill speed: 75
support speed: 150
Travel speed: 250
Acceleration: 2500 for normal printing, inner wall, sparse infill, internal solid infill, first layer, top surface, travel
Acceleration outer all: 1500,
Acceleration bridge: 500
Jerk (xy) 8mm for outer wall and inner wall
Jerk (xy) 10mm for infill, travel, top, first
As a bandaid, just print your walls slower.
It’s a bit of work, but Ellis’ Print Tuning Guide is helpful for every single filament I try to dial in. Even changing brands of PLA can start introducing little artifacts. I do think different finishes can need different settings (i.e. matte, silk, etc.). Some of the things you show look like pressure advance problems (bulging corners), others are extrusion / speed problems (like the top finish).
When I get a new filament (or brand) I create a new filament profile containing the brand name, and always run the relevant parts of Ellis’ guide to really dial in that profile.
Beware though - it makes you think twice about choosing a cheaper brand on Amazon, since you’d have to do the work. For me, it makes a couple bucks difference easier to accept. ![]()
Oh - and by the way, the first thing I’d do is give the printer mechanics a once-over. Check for anything lose, do a cold pull on the hotend, check the extruder gears, adjust the pressure on the filament at the extruder. If you’ve run any abrasive filaments, you should check the nozzle orifice and ensure it’s still circular.
And that warping at the corners is unusual for PLA, but can happen. I’d suggest a full cleaning of your build plate with dish soap (Dawn) to really remove all the oils. Then some isopropyl alcohol after you reinstall it. (If it’s safe for your build surface.) If that printer didn’t come with a PEI build plate, you could consider trying to find a third party PEI plate - they’re awesome for a wide range of filaments.
I don’t think you’ve mentioned what printer/hotend you have. If you have not modified it from stock, you should be able to look it up. You can also derive it with tuning help as noted above.
Some possibilities:
May be moving too fast on your fist layer
May have bed not level
May have a build plate surface problem (Is it always in the same location of the bed?)
May need to use a build adhesive
Looks like an extrusion/motion problem
Looks like an inconsistent extruder operation. Have you checked that your extruder drive gear tension is set and there isn’t any filament jammed in the teeth of the drive gear?
Already did this. In fact, every time I do a filament change, I do a cold pull.
Already do this regularly.
Yep my printer came with a PEI plate.
It is a stock Ankermake M5C. The only thing I have done is replaced the nozzle and got a dry box to feed the fillement.
Ya, I am starting to get the idea that I might have extrusion problem. I have an extrusion test printing now. However, Ankermake says my printer can handle 35 mm3s.
I didn’t know this was something I needed to check. When the current print is done, I will check it.
Manufacturer numbers can be a bit ambitious in real world settings.
Every time may not be a good plan.
I’ve encountered a lot of PEI that is very inconsistent.
My TAZ has an (Aftermarket) PEI/sprint steel plate that I spray lightly with hairspray because no amount of cleaning or scrubbing will get it happy.
You may want to double check that nozzle.
Again on my TAZ, I put a nozzle on one of my toolheads where I had really inconsistent extrusion.
When I pulled that nozzle I found that the machine work was horrible. The hole in the nozzle wasn’t round, and the machining inside the nozzle was rough and inconsistent.
Orcaslicer (I haven’t used Prusaslicer enough to know if they now have something similar, my other slicer was SuperSlicer, but it was always behind.) has a test to determine the max flow rate for a given filament through your hotend and extruder. I ran mine, then I backed it off 20% for safety. There are “high flow” PLAs that will print faster.
Are you using the AnkerMake Filament? It does say its:
I am not using ankermake Filament. I am using basic Overture PLA.