Your starting gcode will work but is missing the typical things I have listed in the milling basics page.
Can you upload some pictures of your build and wiring?
I have listed a handful of questions you have not answered.
12v or 24v?
Your starting gcode will work but is missing the typical things I have listed in the milling basics page.
Can you upload some pictures of your build and wiring?
I have listed a handful of questions you have not answered.
12v or 24v?
Thanks for the support on this. I have not had time to go back to the machine, but will take pictures and answer the questions soon. On the starting code, I tried the code in milling basics, but it did not seem to work with my process, or I do not understand. My process is:
home x and y
put touch plate in and home z.
Move z
remove touch place
Drive to starting location and then start the gcode.
The starting gcode then sets the current position (G92X0Y0Z0.5)
moves to safe z height and then starts.
From milling basics:
On the MPCNC you will typically home the XY axis before starting your job and drive the machine with the control panel to the starting position. This gcode would then run to reset the coordinates and probe the surface.
G92 X0 Y0 Z0 ; Set Current position to 0, all axes
G00 Z5.0000 F500 ; Raise Z 5mm at 8.3mm/s to clear clamps and screws
G28 X Y Z ; Home in order, w/z touchplate
G92 Z0.5 ; Account for probe thickness (set your thickness)
G00 Z5.000 F500 ; Raise Z probe off of surface
M00 ; pause for LCD button press so you can remove the touchplate
If I use this starting gcode it will rehome and then how do I drive to the starting location?
No. You do it just as you have it you are just doing a lot of it manually.
I home XYZ manually. Drive to above my starting location, and then run my file. The resets the coordinates and probes all by itself.
If the homing is in the gcode, how do you drive to the start location? Can you do that while it is paused?
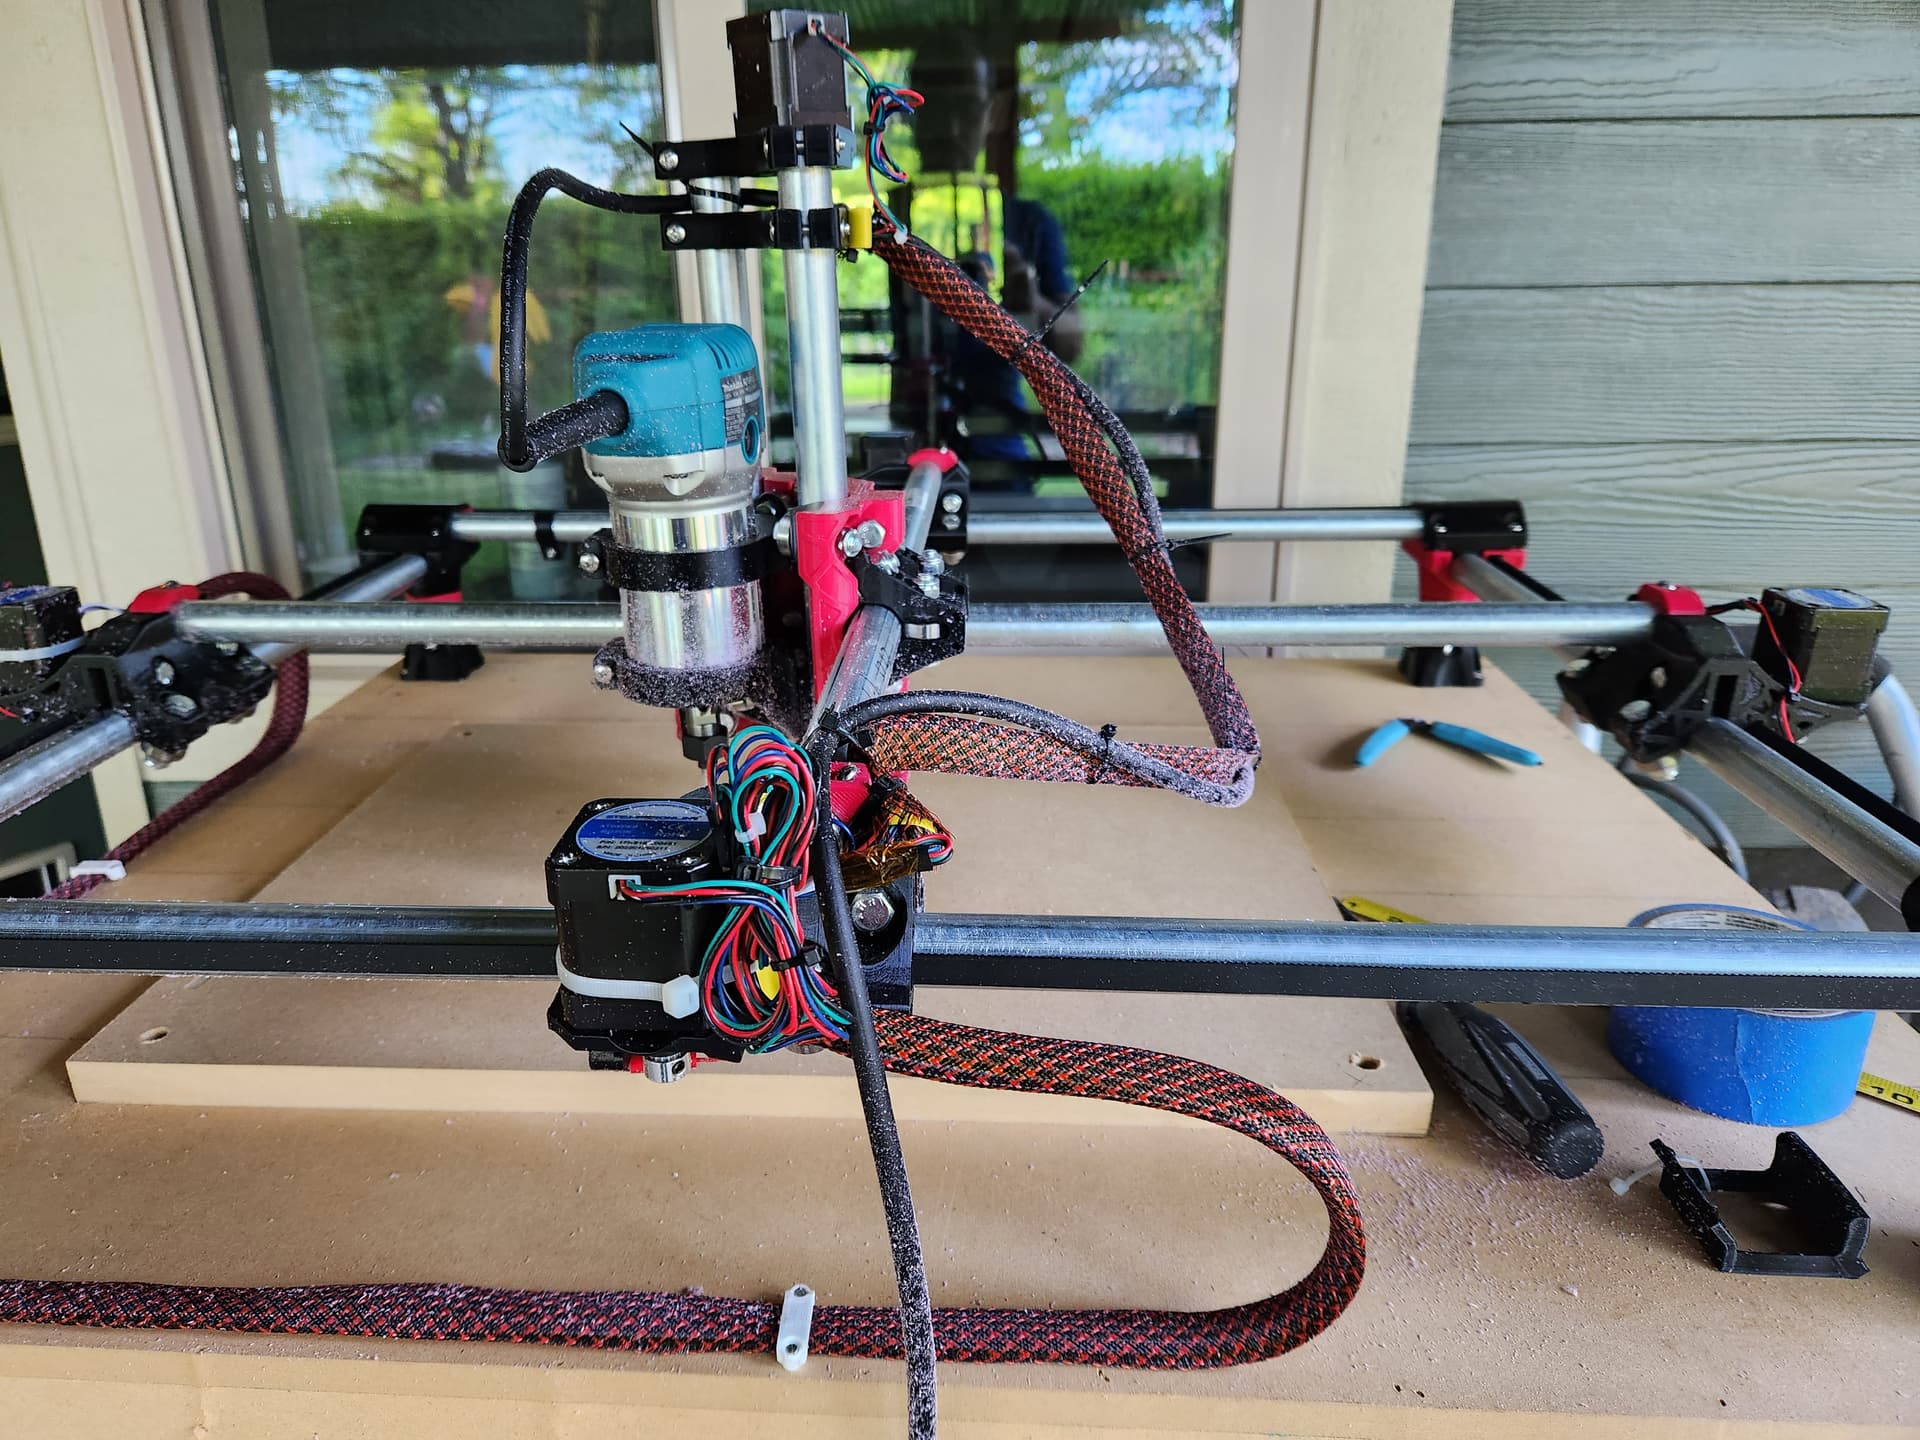
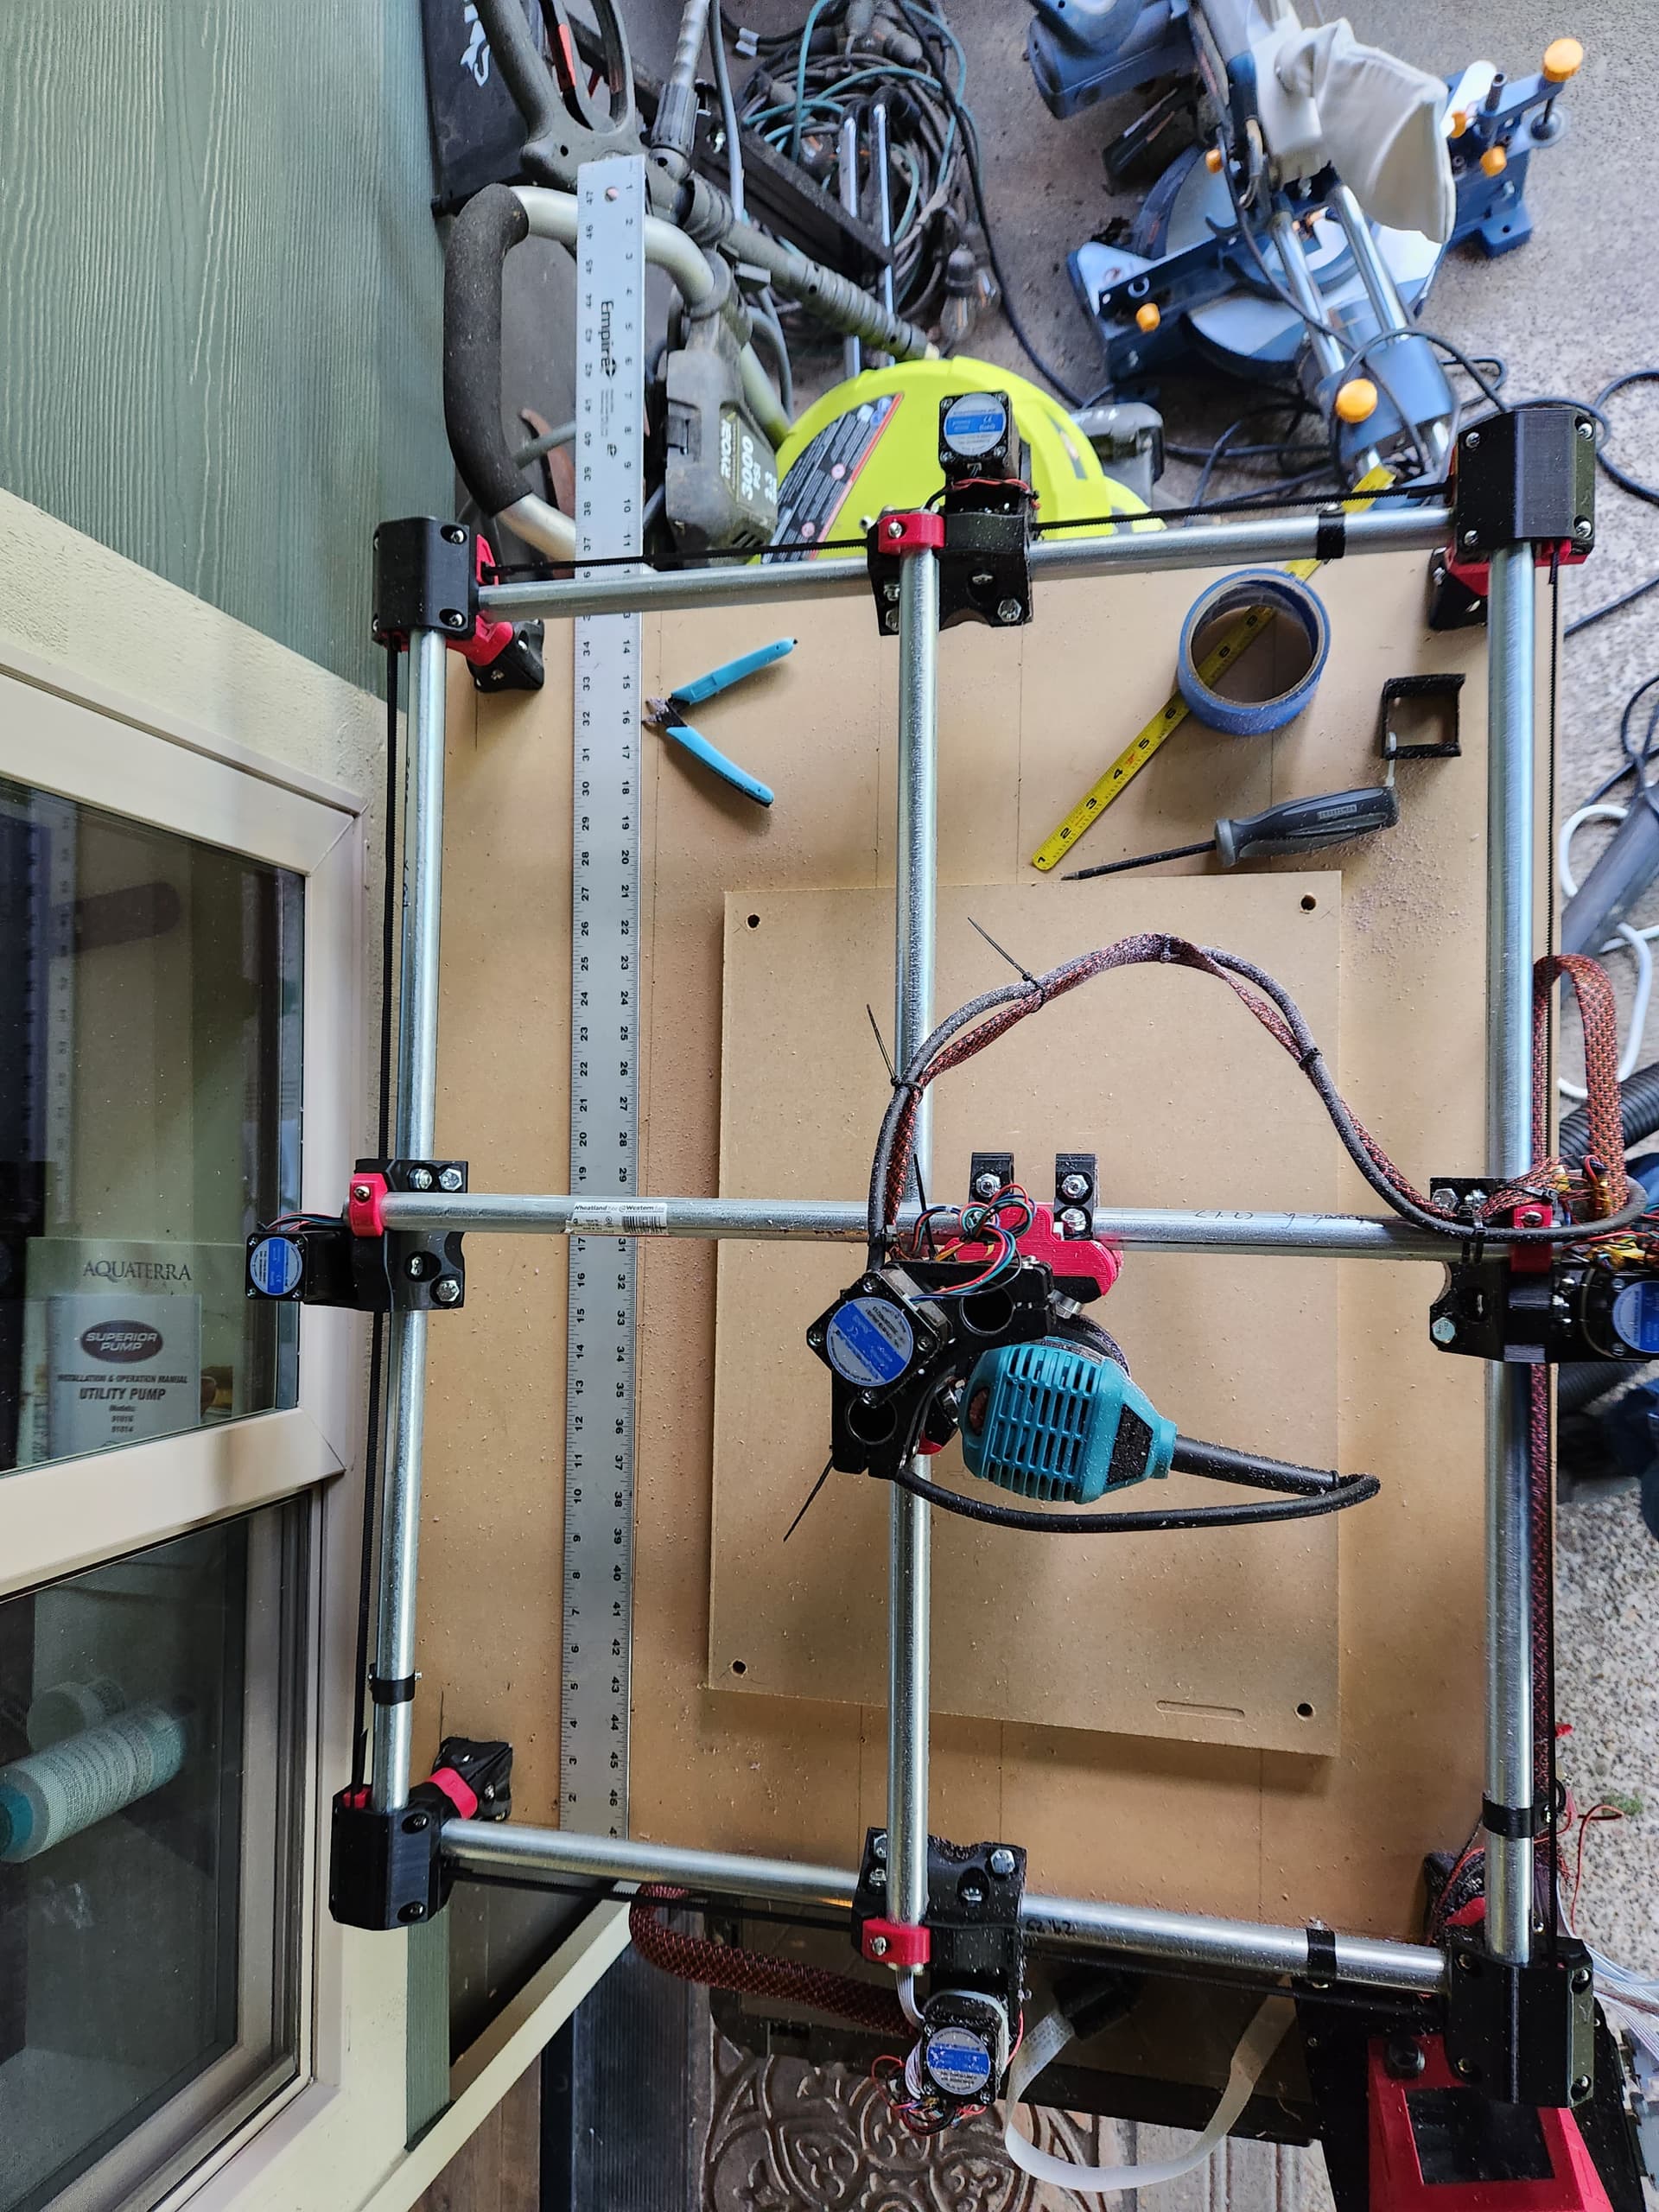
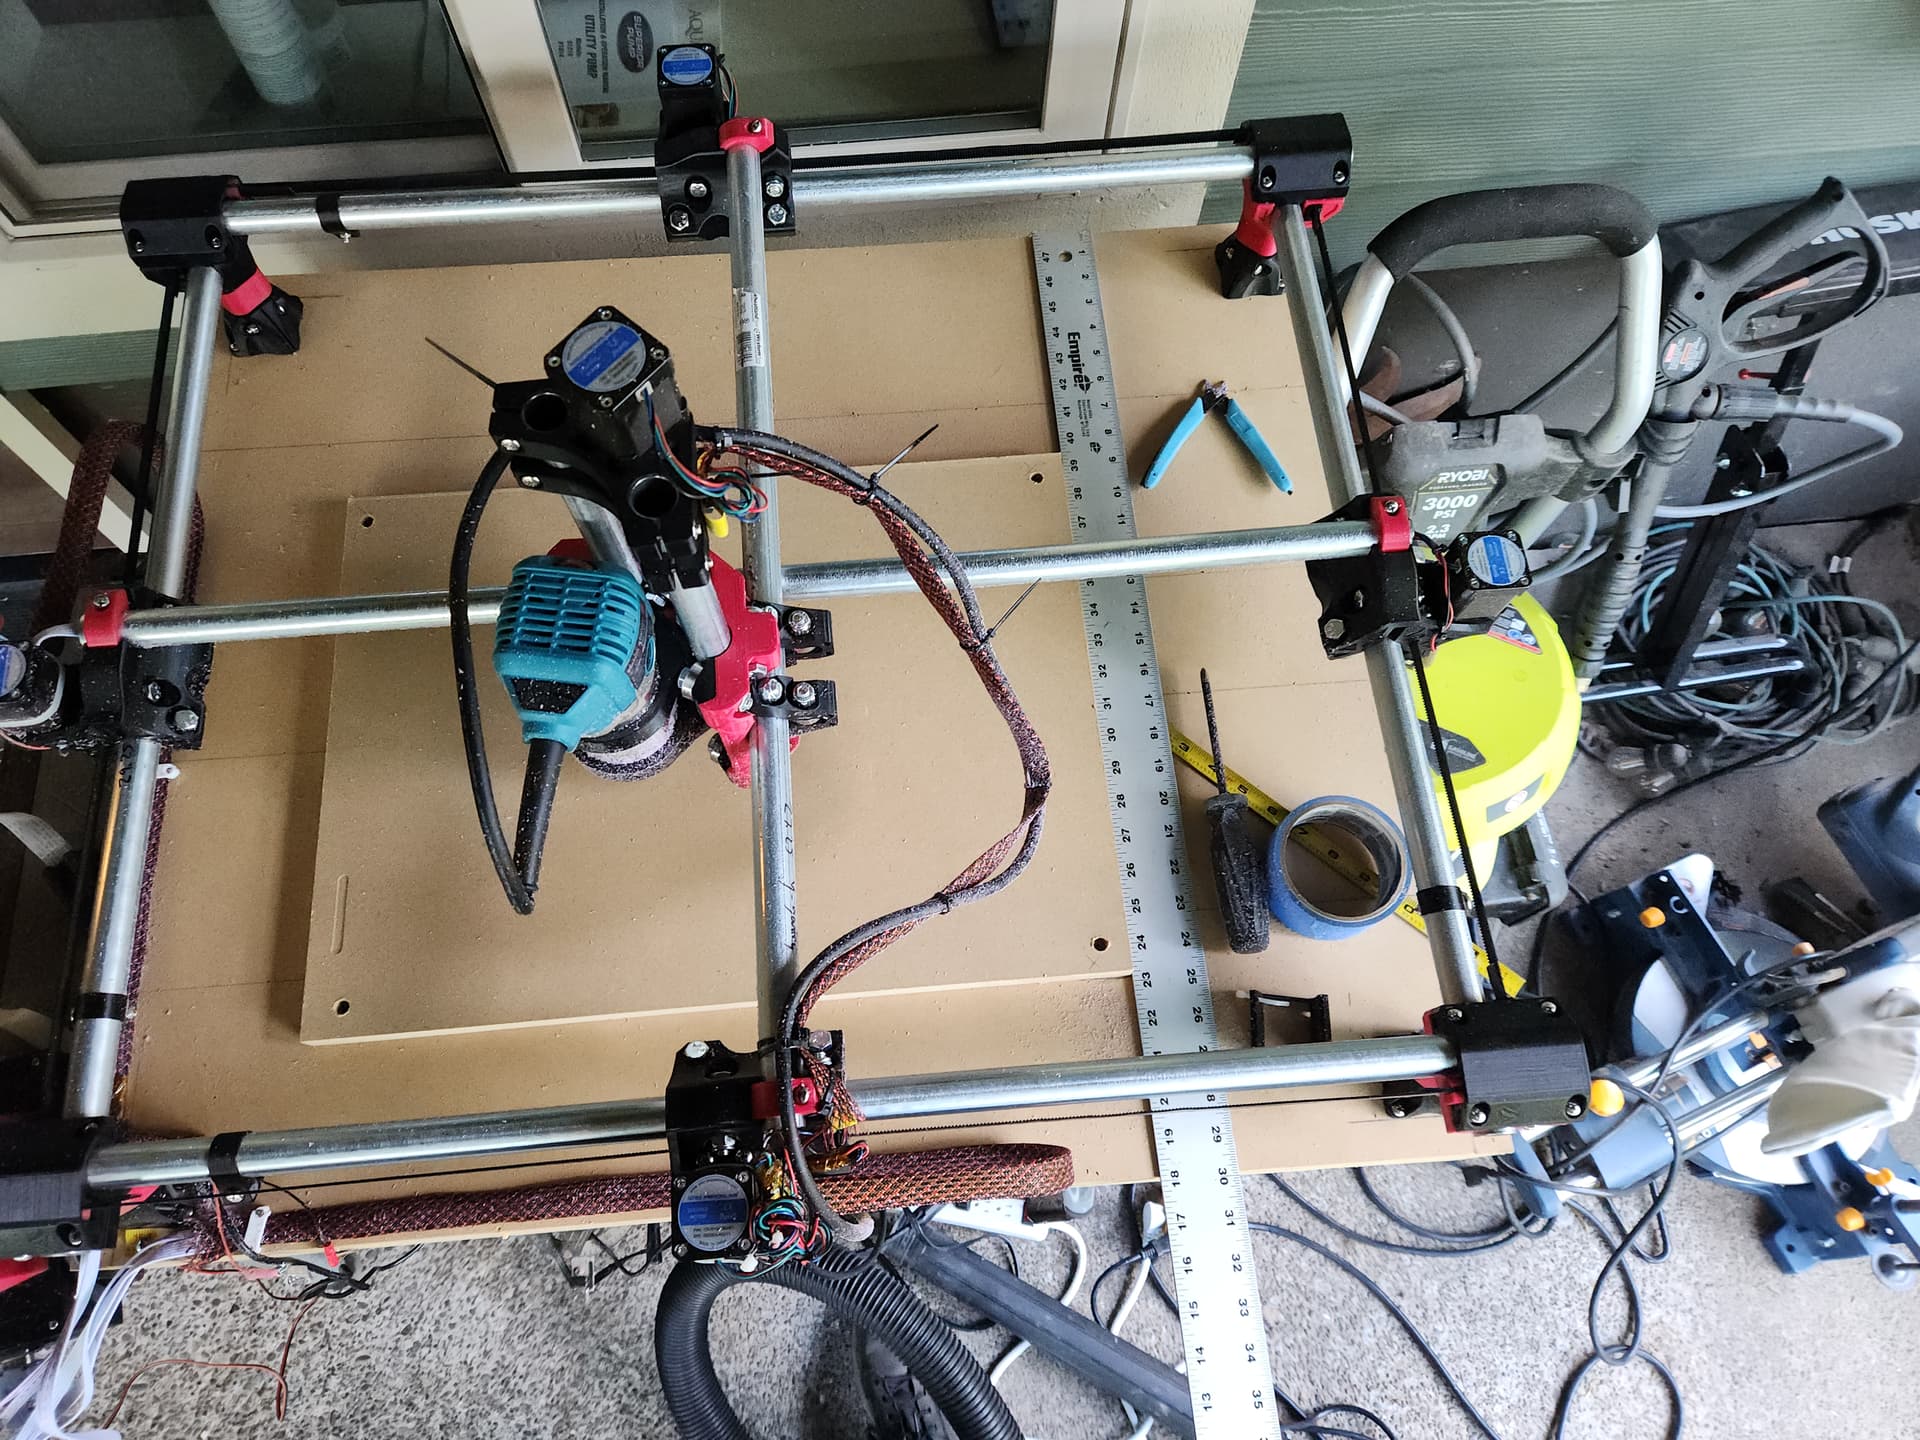
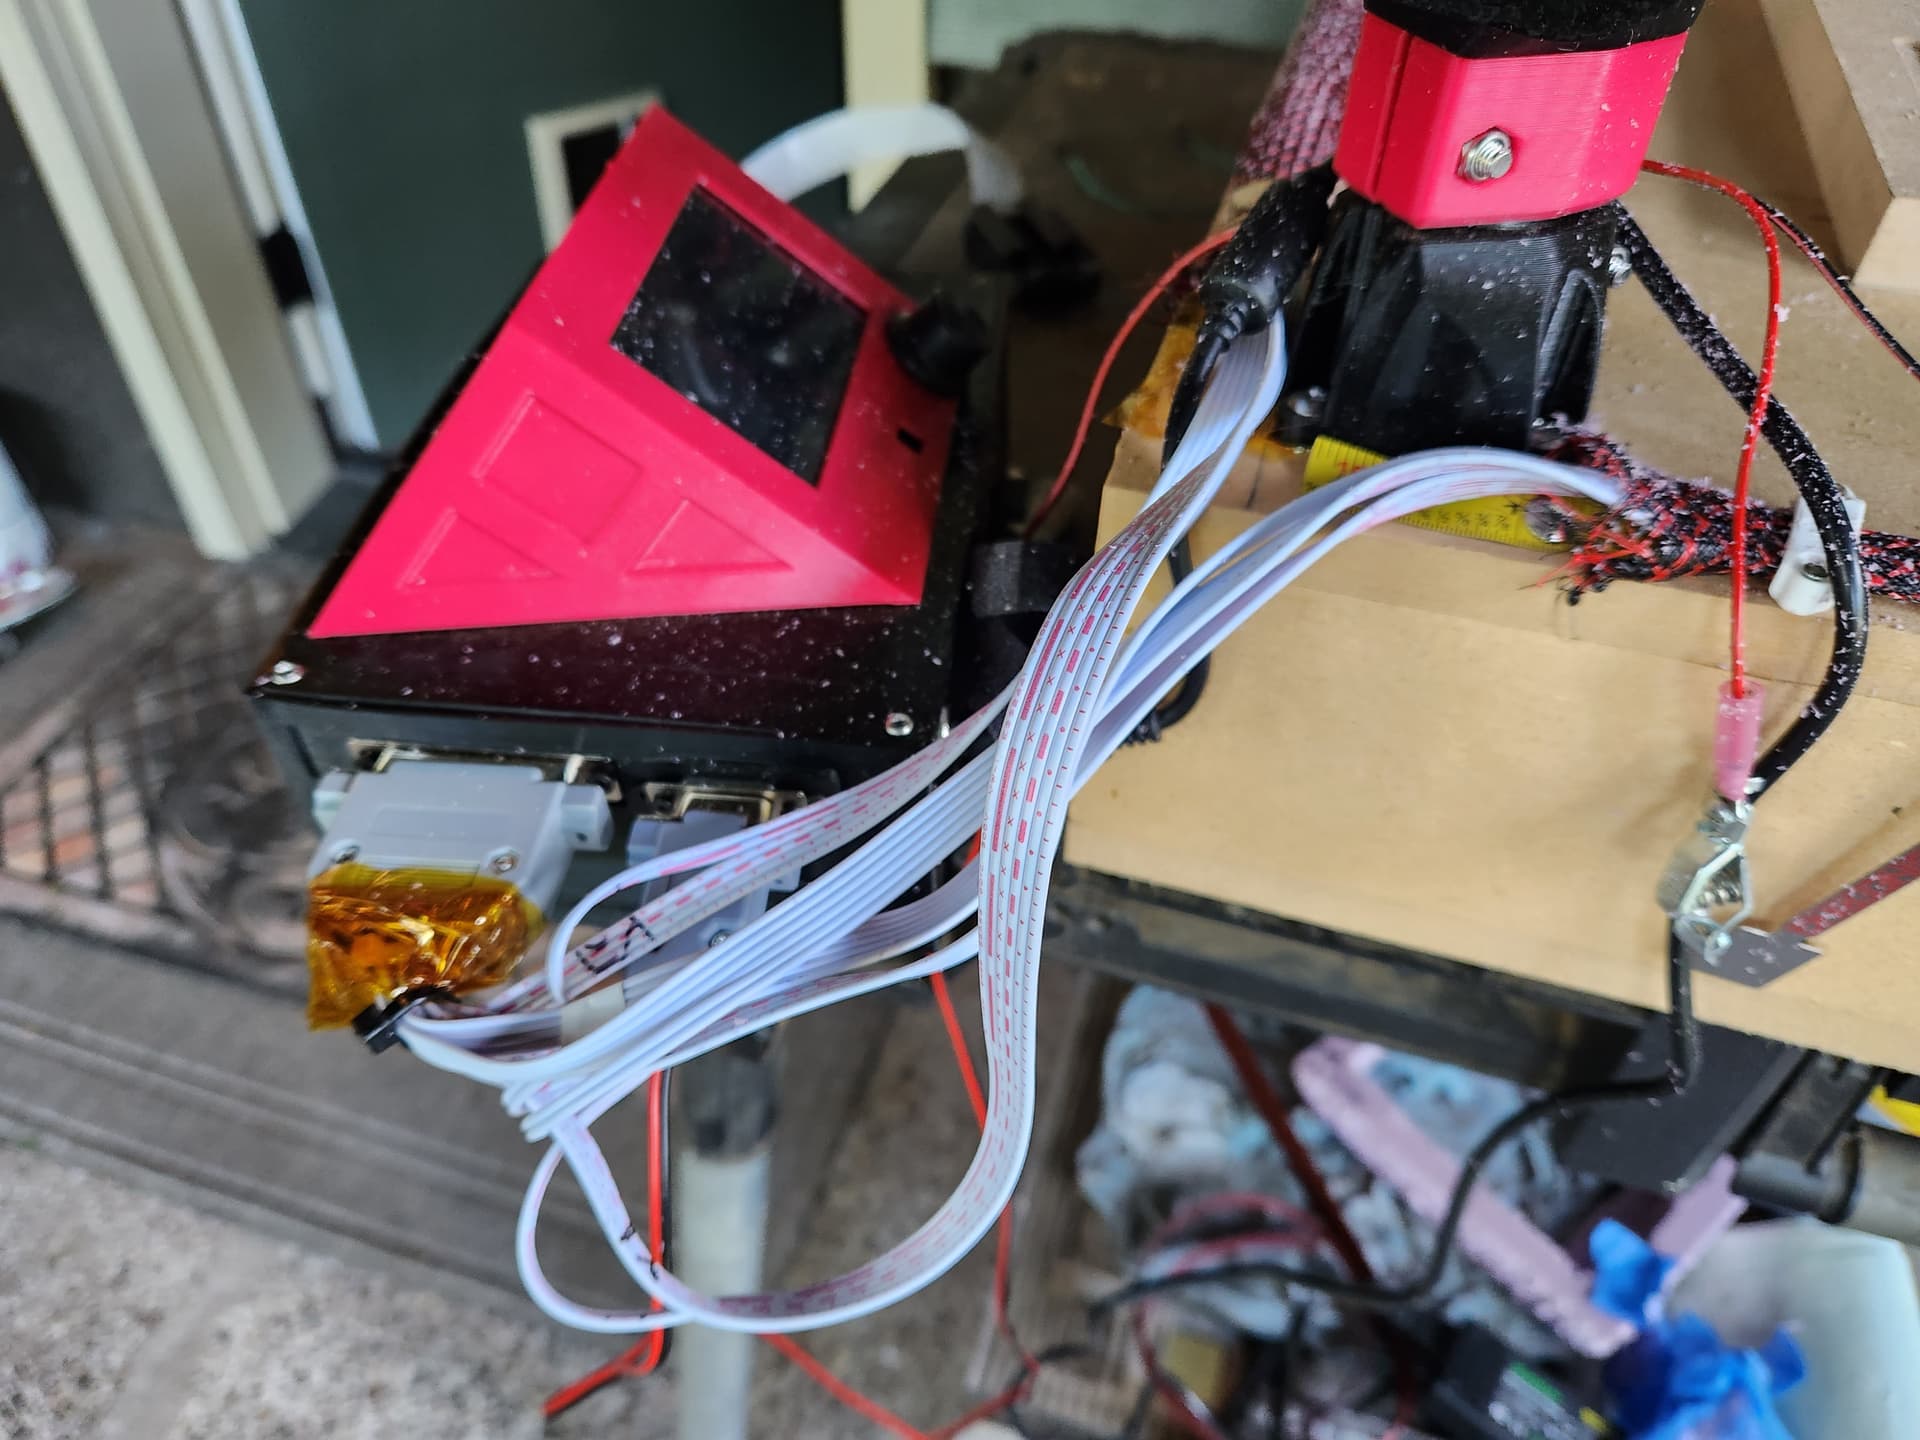
Here are some build pictures.
I used a tape measure trick. The z looked good before I added the spindle wire, now it sags a bit. May need a beefier tape measure.
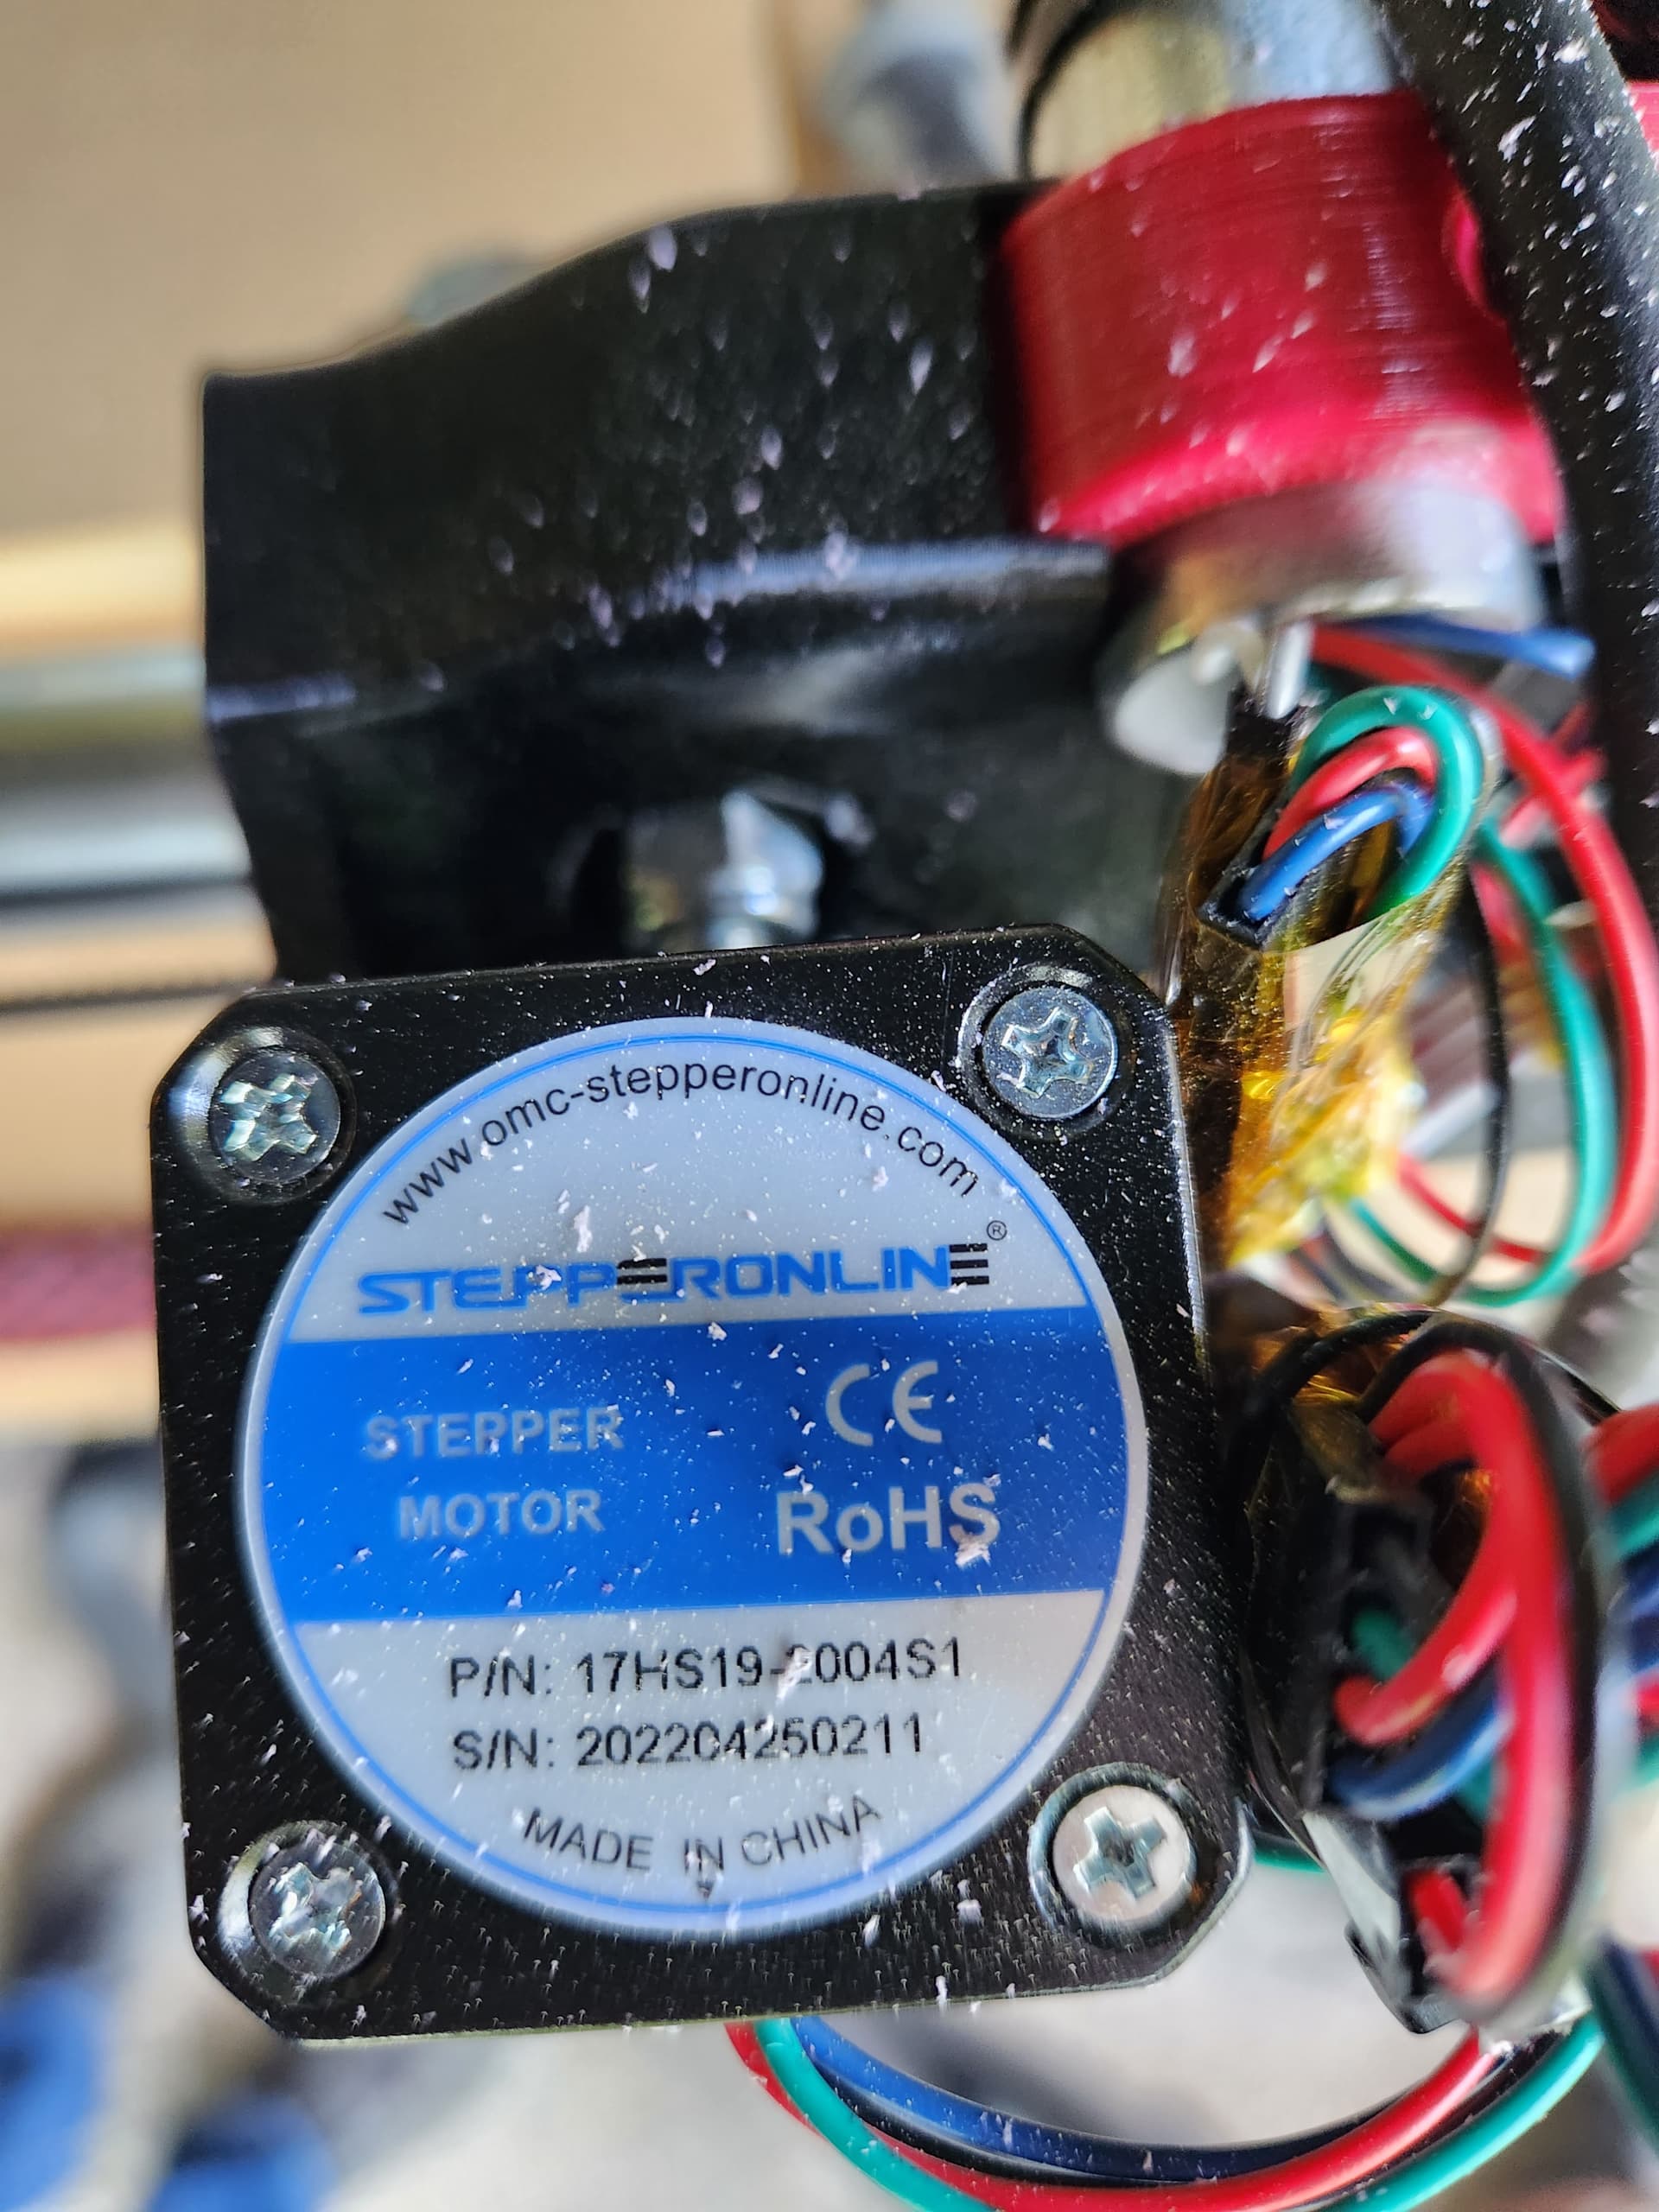
Here is the the stepper I am using.
The working size is 17x23in
Since I don’t have a pemanent table, I am still working out how to mount the box. I may need to modify this box to put the connectors on the other side and clean up the connections.
Homing isn’t in the code unless you want it to be. I home XYZ manually. Drive to above my starting location, and then run my file. The resets the coordinates and probes all by itself.
I am not at home right now and will need to check this. I bought the SKR Pro bundle and am using the power supply provided. I think it is 12V, but you will know better.
I will run a test tonight or tomorrow.
I am not too familiar with this. I am using the SKR Pro with 5 drivers, so they are wired independently. I followed the instructions here: SKR Pro - V1 Engineering Documentation
Movement is smooth when it is running. I have not checked that each is running, but I would expect it to bind if only one was running. I will check this when I run the next test.
Mostly. As I was assembling, the trucks moved easily. When I attached the belts, they moved less easily. When I attached the core and gantries, they move easily if I either push on both trucks at the same time, or if I push in the center. If I push off center, it tends to bind and is difficult to move. The x-axis (shorter axis) moves more easily than the Y. When the tool runs they run smoothly.
[/quote]
Okay keep us updated.
It is 12V.
I am not sure how to tell if all the steppers are running. I tried to push against each one and they all seem to be moving.
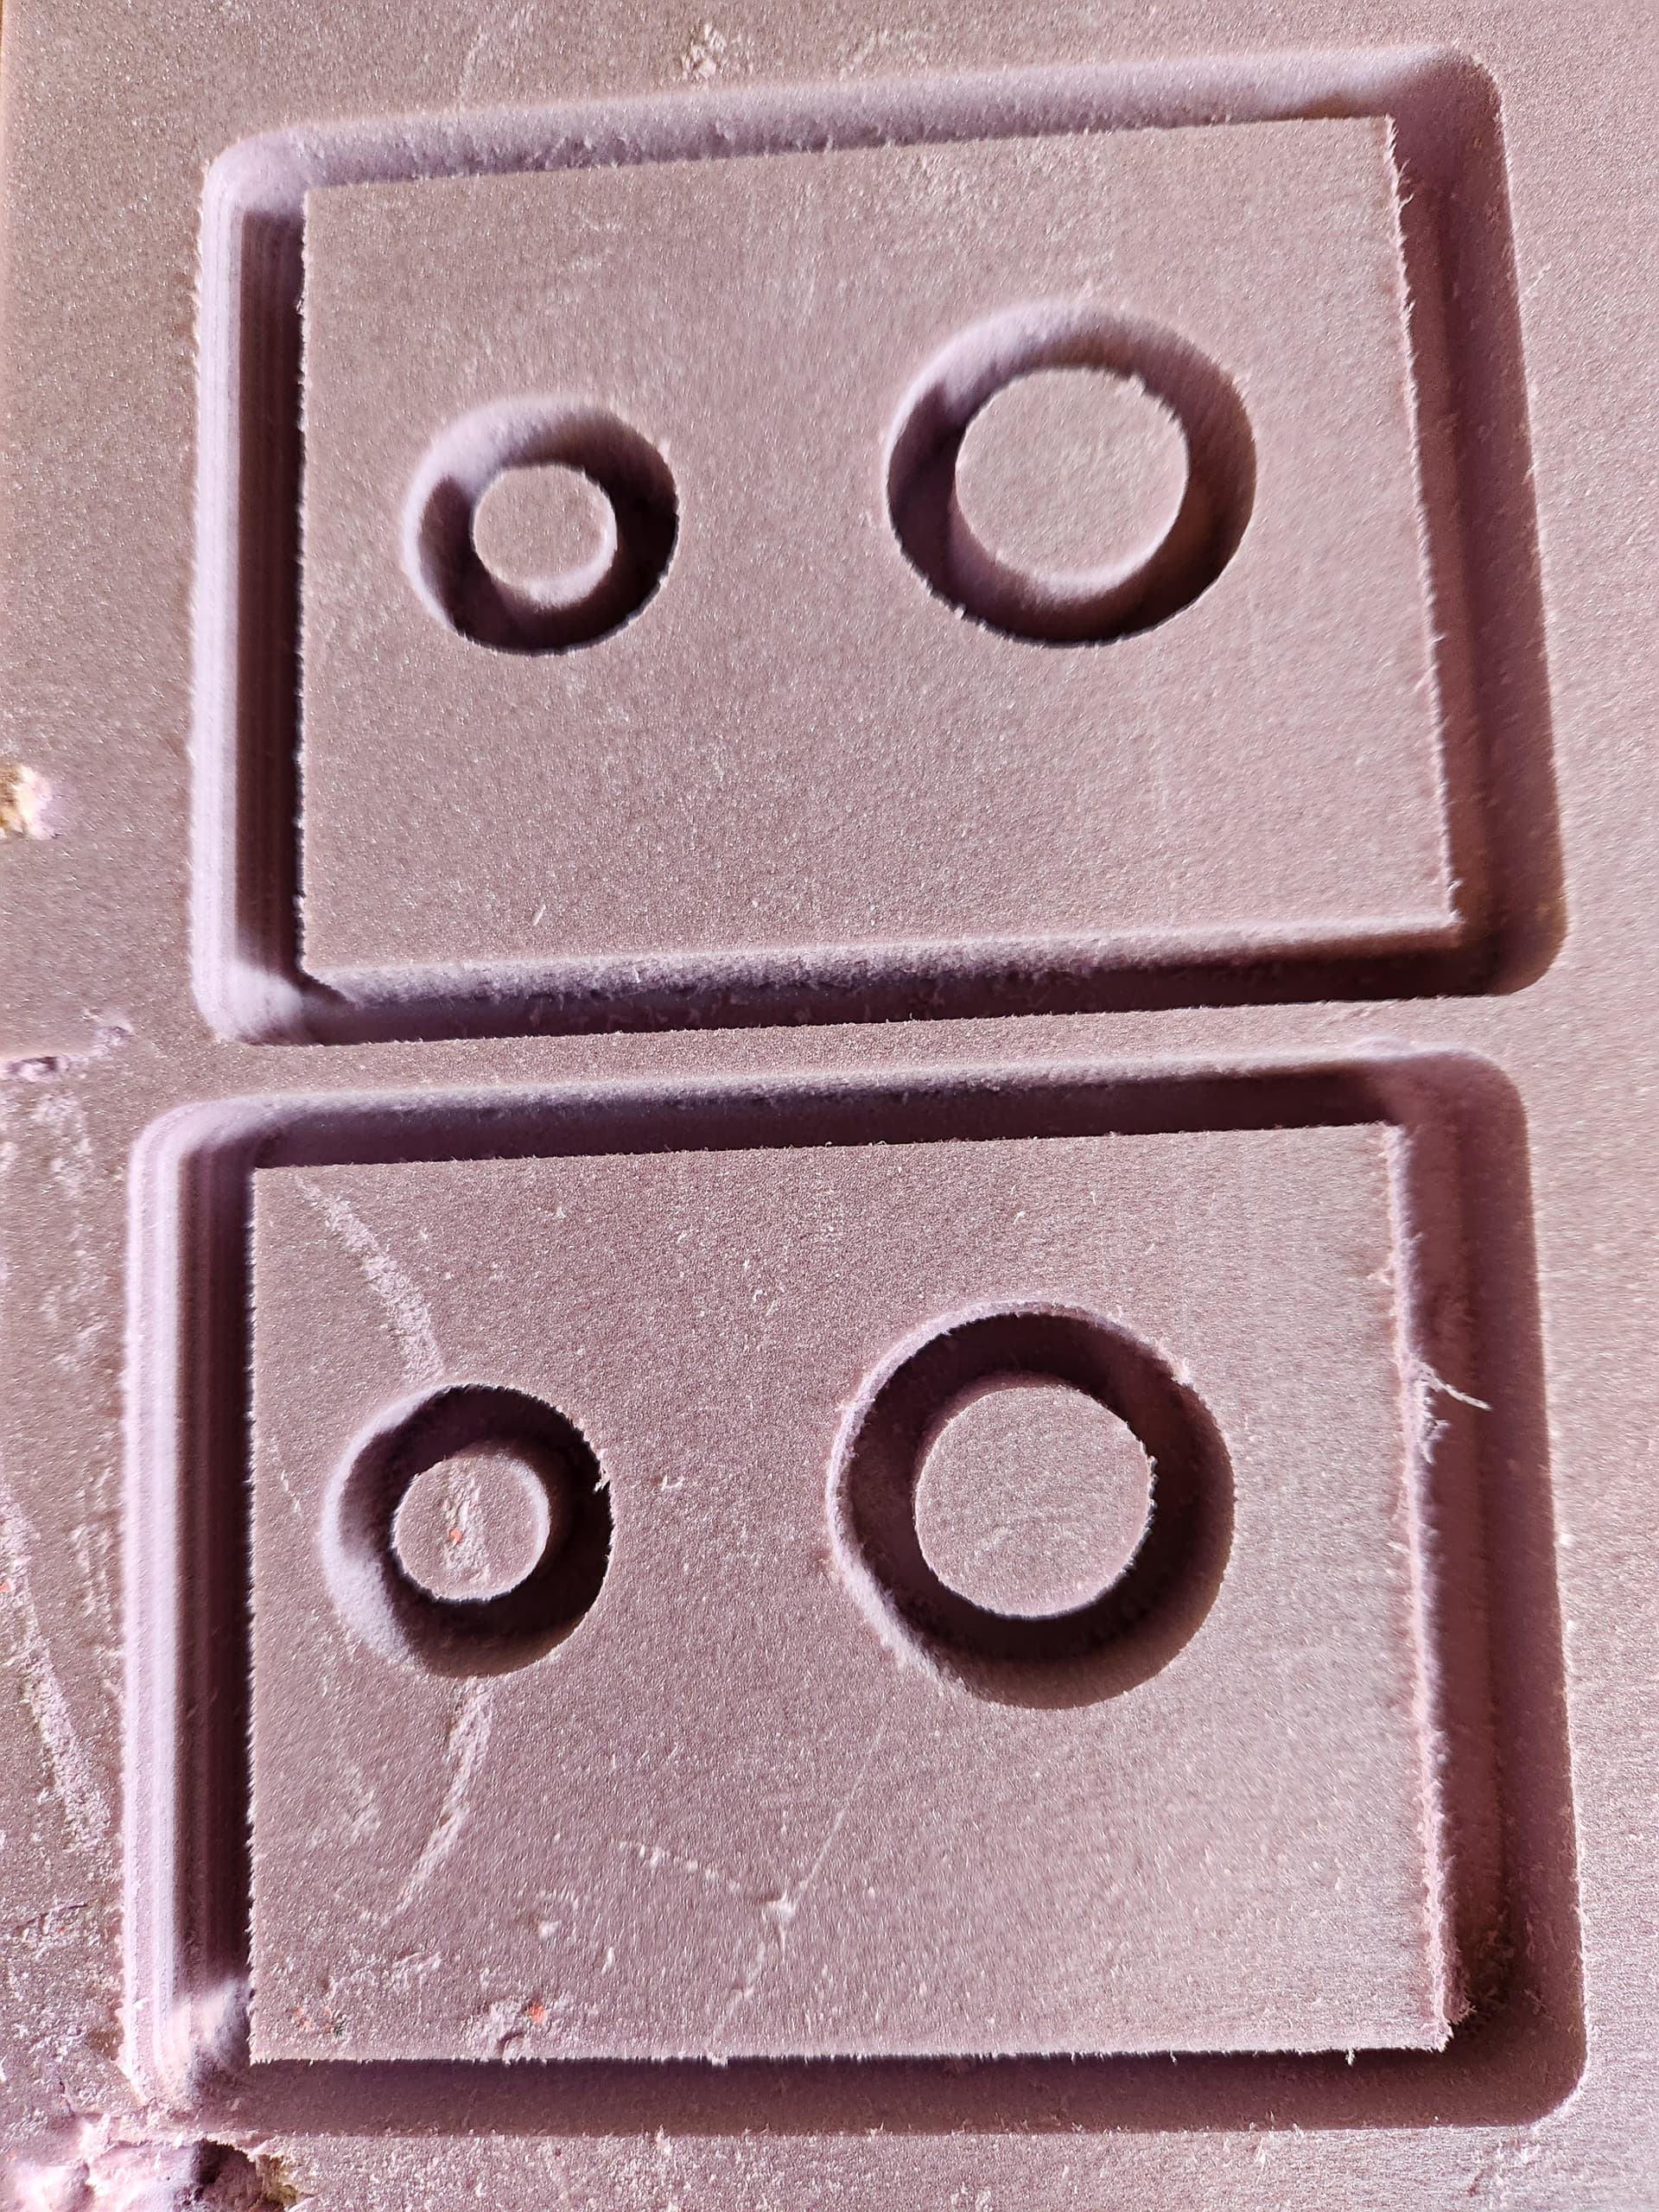
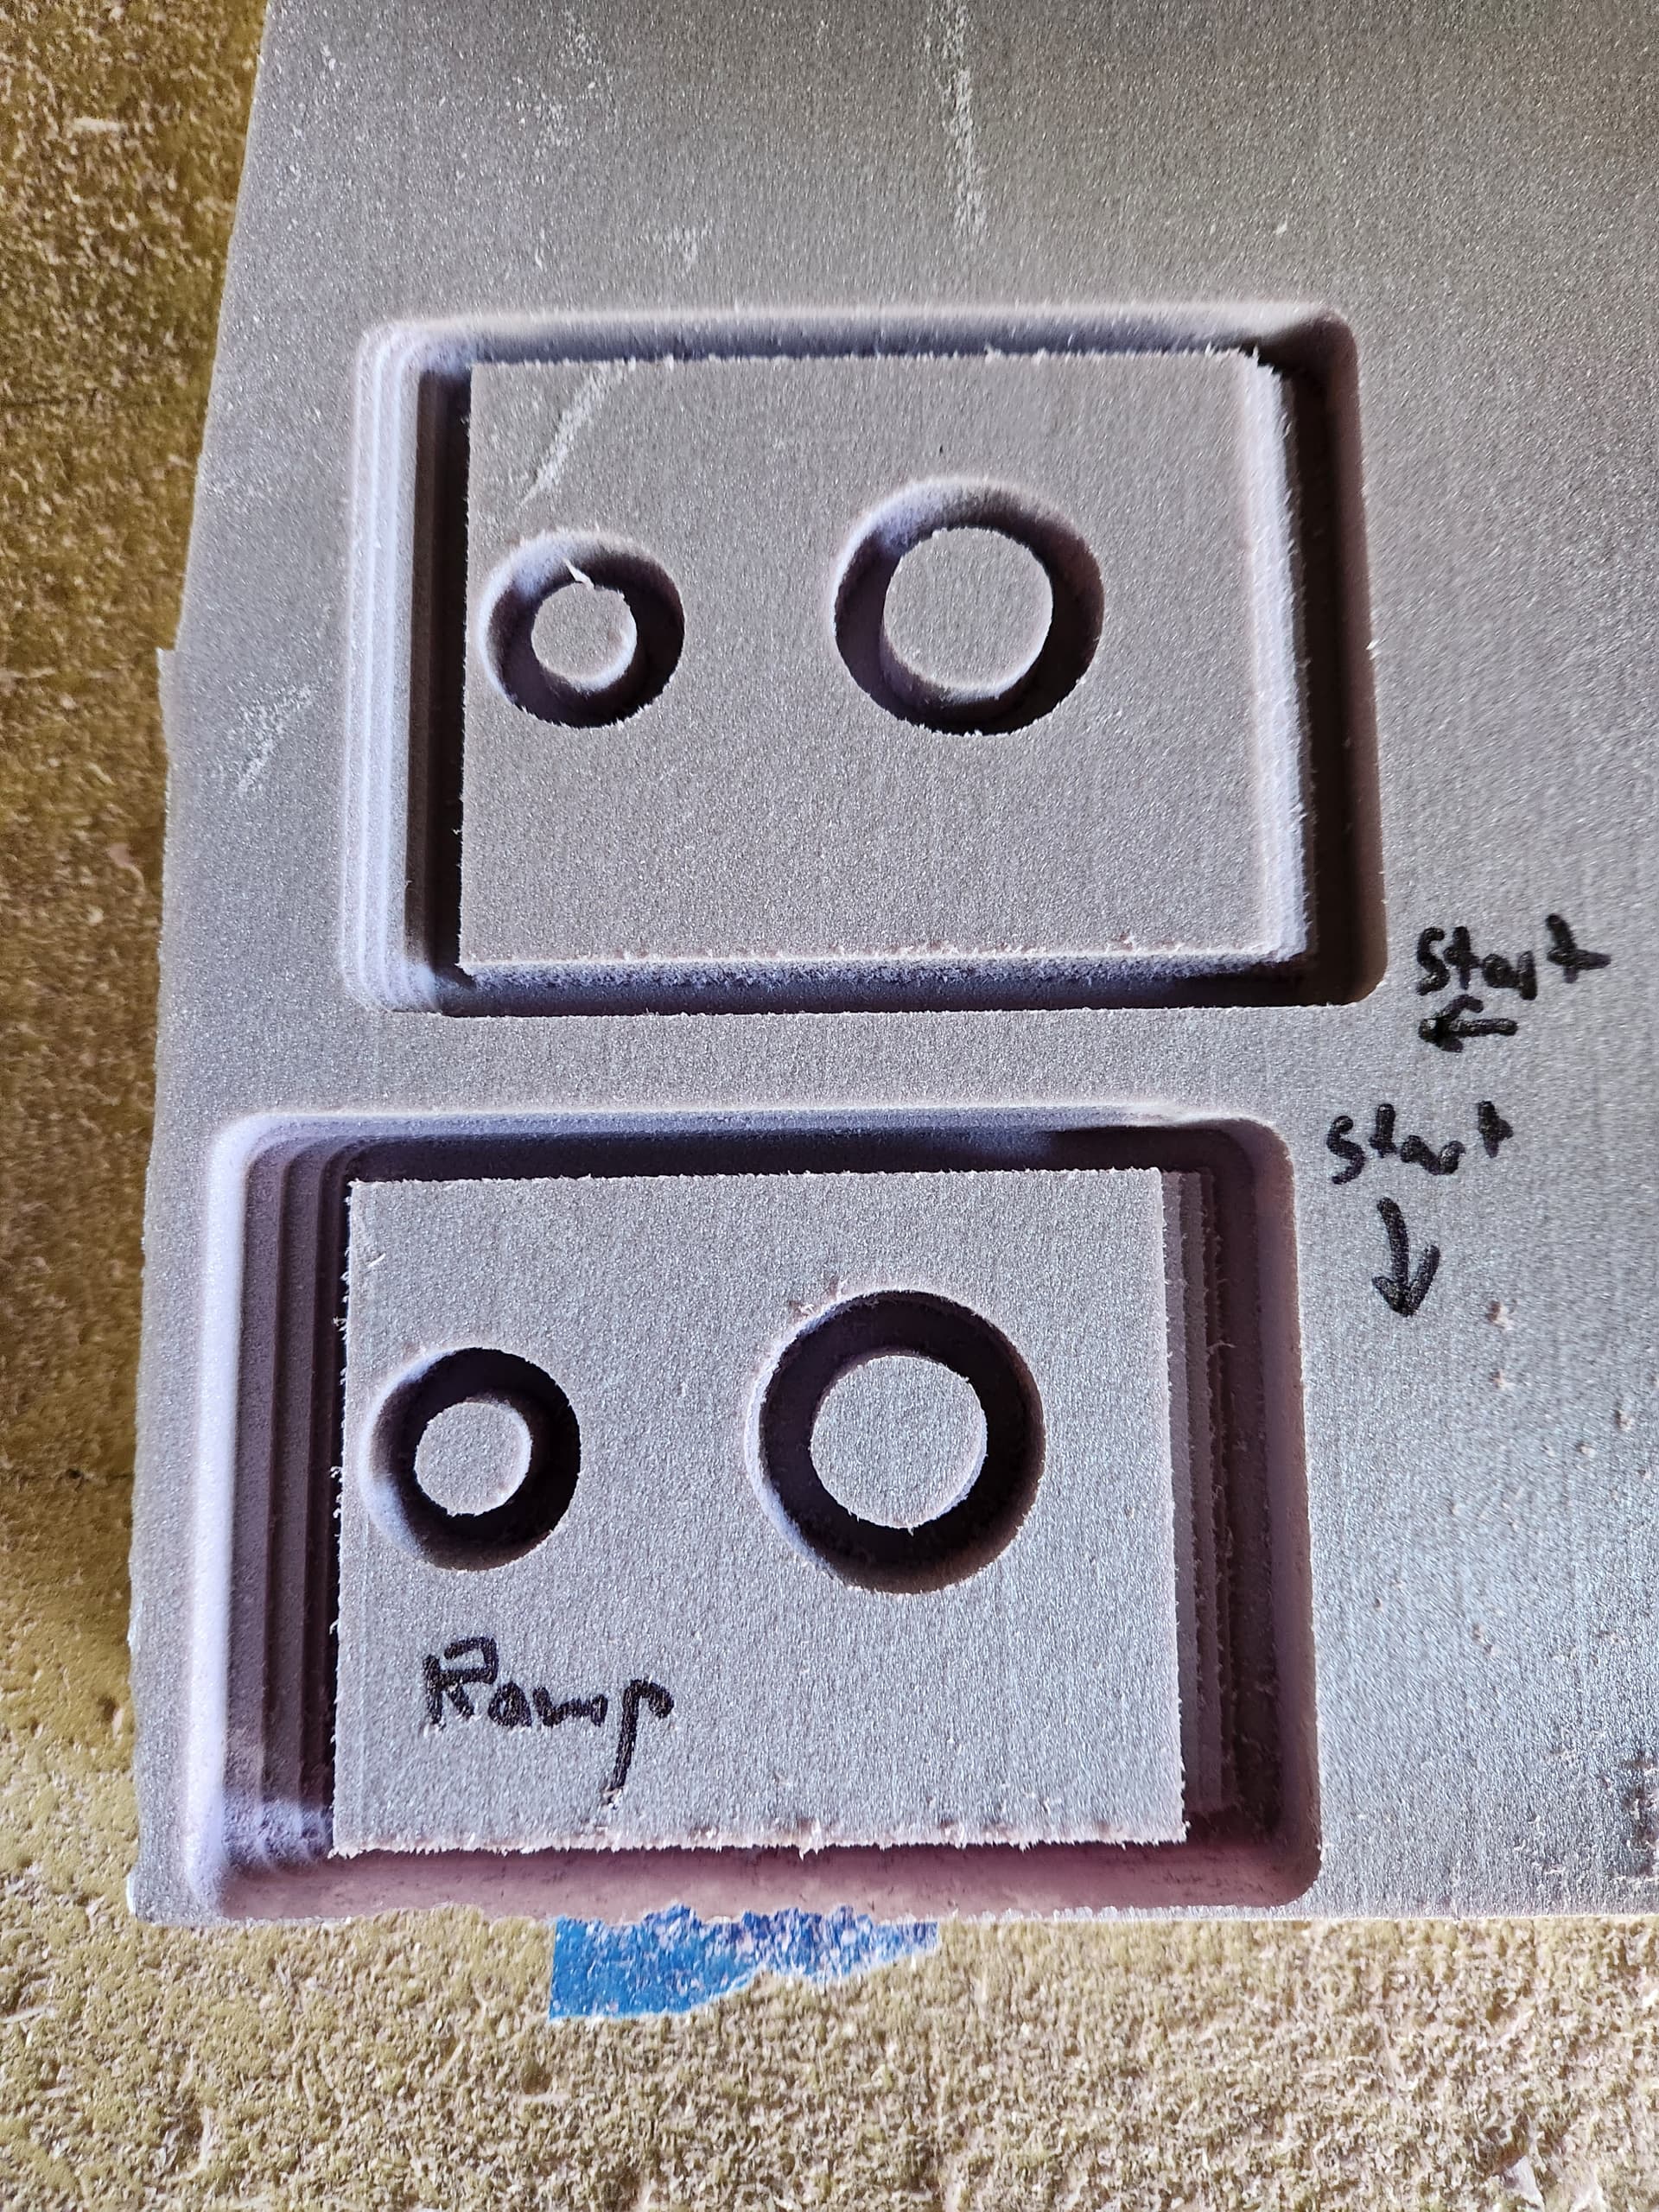
I ran another test with similar results. In the image it is to separate runs back to back. The plunge happens in the upper right corner and then moves clockwise. The right edge right after the plunge seems to be were the shift originates. The circles were mostly ok, but the is one shift. The steppers stayed cold for the whole run of about 18mins.
Profile 2vcarve_primo GCODE ARCS rapid1.gcode (4.4 KB)
Please let me know what ideas you have and what else I can try.
One more test this morning. I noticed it seemed to shift most of the time on the right side after a plunge. So I tried two tests: move the plunge to a different corner and do a lead in plunge. The top cut is with the plunge corner moved from the top right to the bottom right and the lead in is the bottom cut. They both still shift prodomonetly in the right (positive x direction). The lead in did have a small shift toward the negative y. The lead in also had large and inconsistent shifts where as the corner change had more uniform shifts. I don’t think it is mechanical, because I would expect that to cause skipped steps. I would expect to hear skipped steps. Maybe a tuning issue with the steppers as ryan mentioned prevoiusly?
I just realized when I was searching for any info on the forum about tuning steppers that I have a TMC connection error that is likely the root of the issue. I incorrectly assumed this was something to do with a 3D printer like a missing thermistor, so I ignored it, but it has been there from the start. I think initially I was using the touch screen and the error there is “All open”. Most of the posts I have seen on this would prevent the steppers from moving at all, like no connection to the power supply. I am not home right now, but should be able to check this out in a few hours. What should I check?
Have you checked your grub screws? Especially on the axis that’s drifting?
Turn up the current. That means your steppers are not the same as mine. Turn them up 50ma at a time at the end of 15-20 minutes they should be warm, but stay under 50C. Cold means they are not getting enough power. You can do it from the screen.
Show a picture of your board wired up please. If you are not connected you are not getting enough power to your steppers.
Some progress here. I upped the motor amps to 1.3. 4 of the motors are running at about 35C. The other one (X2) is staying cooler. I upped that one all the way to 2.0amps. It is still running at ~30C and feels cool. I think this explains the stairstepping. One of the X axis motors is not behaving. I did verify that it is moving by taking it off. I still have the TMC error, but the stairstepping is much better (maybe gone, need to do more testing). I though I would swap the X motors to see if it is the motor, or maybe the driver or wiring. Any thing else you would suggest?
I swapped the x motor wiring at the board and the cooler motor moved to x1. I think this tells me it is the driver or the board. I will try swapping driver chips next unless there are better ideas.
OK, here is a summary of the issue I am having:
With default settings, I am getting stair stepping, mostly in the x-axis, but some small ones intermittently on the y-axis.
When running, all motors were cool to touch after running at least 20mins
I increased the current from the default of 900mA to 1300mA. Now 4 out of 5 motors run between 30-40C depending on the ambient temp. The X2 motor runs ~5 C cooler. When I upped the current on X2 to the max of 2000mA, it still was not running warmer.
I then swapped the X1 and X2 motor connection at the board. This resulted in the X1 motor running cooler. This tells me it is likely not the stepper or the wiring to the stepper.
I then swapped the X1 and X2 drivers. This resulted in no change. I ran this both with the wires swapped and then put back to default and the cool motor is always the one plugged into the X2 location (E0).
Not sure where to go from here. Is it possible to try it with the Z1 slot? Is there any other settings on the board/firmware that may fix this?
With the current increased, this did improve the stair stepping. I need to run some tests to see if it is completely fixed, but I still think I need to address the issue with one motor not getting the amperage it should. Also, I have only cut foam or run in air, so I am concerned that when there is a greater load, the issue will come back even if it is gone now.
Careful that iss too high, the drivers themselves have a thermal shutdown as well. That sounds way too high how are you keeping them active? The have to literally be in motion. If they are not in motion the smart drivers turn down the current.
This is priority #1. If there is no connection the drivers default the the onboard pots. Is the baud rate on the screen correct? Did you bend the pins? Are the jumpers correct.
Be sure to rest the current settings to normal or you might pop something with 2amps.