Ok this will be my first true 3d carve. Ive done a bunch of V carve stuff but this is a whole new world for me. I have several bits on hand. 1/2" ball nose, 1/4" ball nose 1/8" ball nose 1/4" upcut bit and all kinds of 1/8" bits. Im lost as of what to use to make this go smoothly and come out looking good. This will be carved in Afracian Mahogony which this one signle board cost $130 so i want to make sure its going to go smoothly lol. I trust the machine i just want to make sure im making the right choices on bit and how to set up the cut in Estlcam. I tried to attach the STL but its larger than the forum will allow
2 Likes
Find something cheap to test with.
I have some foam I’m thinking of gluing up a piece and giving it a shot in that. But this is showing at 17hr carve So I wanted to make sure I’m starting with the best settings lol.
If you have endstops you can break it into multiple steps. Have the roughing pass seperate from the finishing pass.
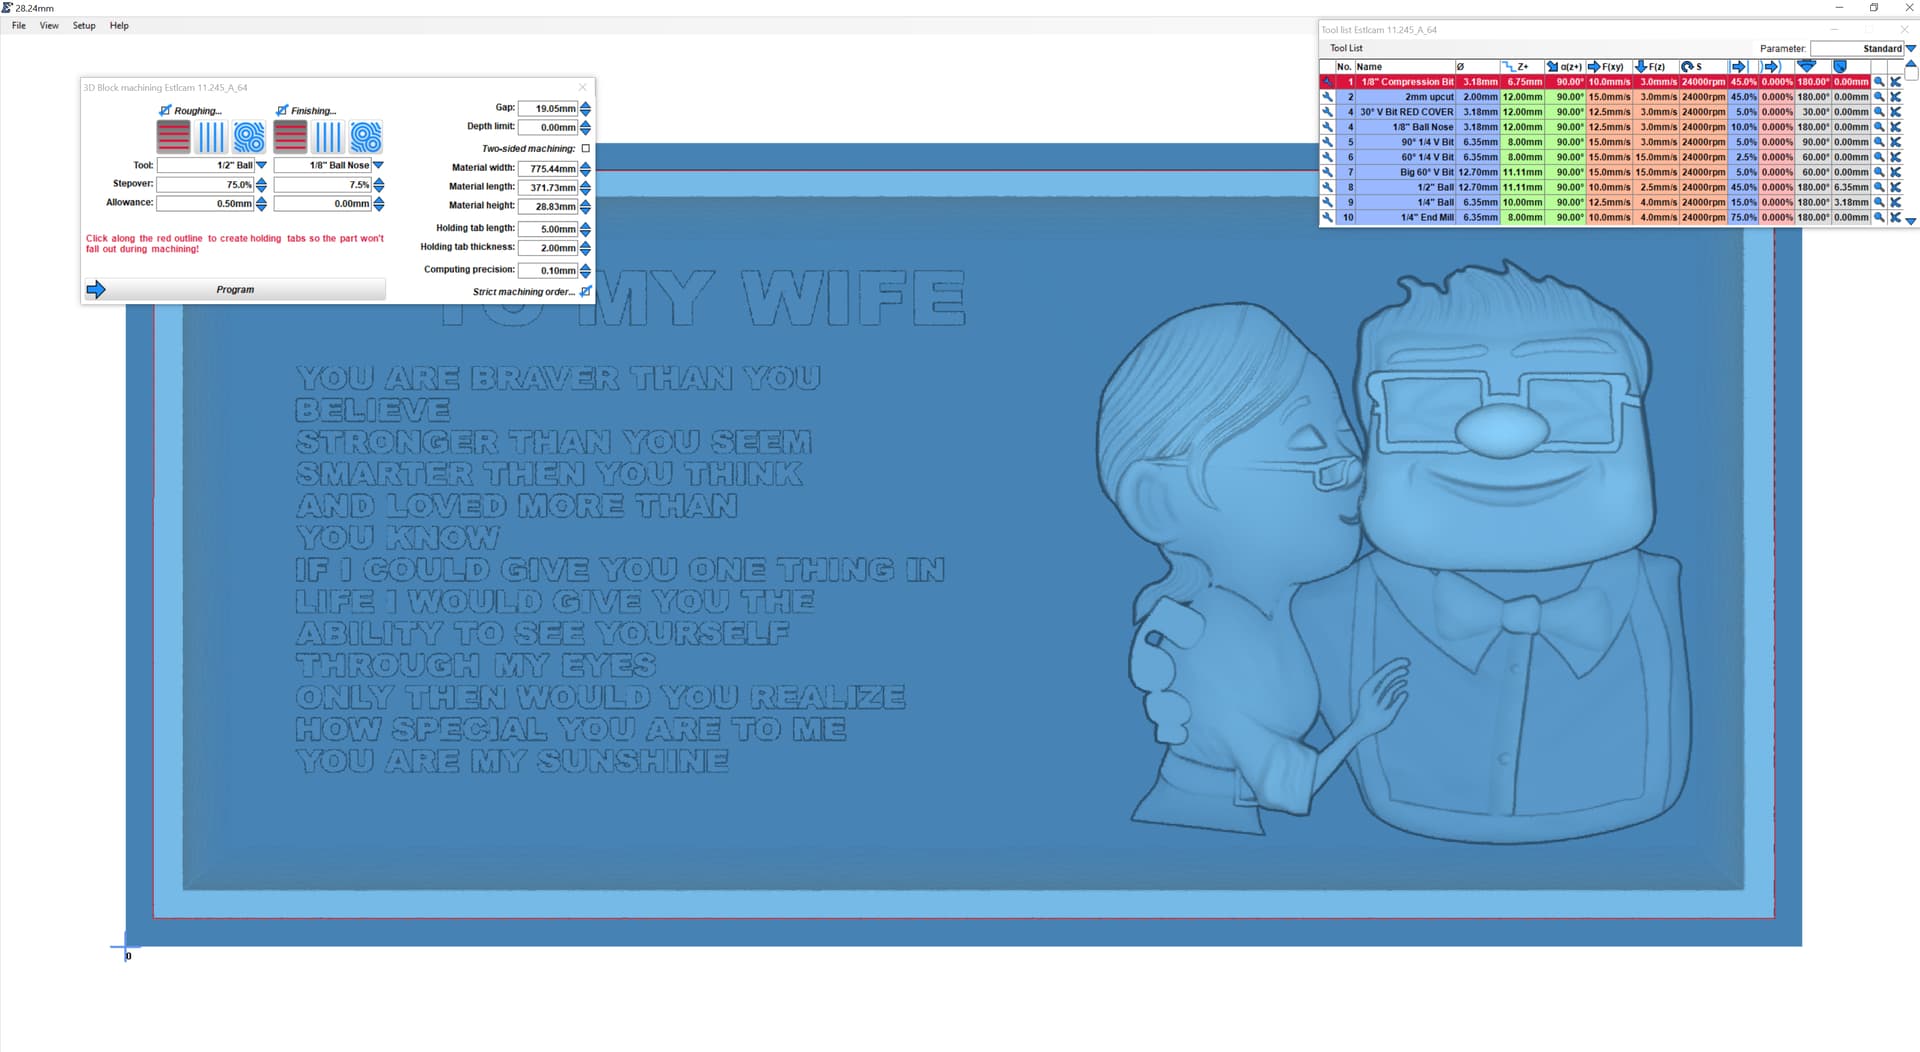
I do have endstops on my LR3. When i bring the STL into Esltcam it really only gives 2 options. Roughing and finishing. but it almost seems like there should be a 3rd intermediate option but im not sure.
I’ve only started playing with 3d carving on my mpcnc. These are just my two cents. Definitely seperate the rough and finish operations into two seperate files. There’s probably a better way, but I just copy the g code file and manually edit them so one is roughing and one is finishing. It gives me a much needed break in between. Do a full test run in something not so pricey like pine or poplar first.
1 Like
I like the idea of separating it into 2 different operations. Ill have to take a look at the G code and find the tool change and split it there.
Does anyone have an opinion on which bits to use for either operation?
1 Like
I typically use 1/4" for roughing and depending on level of detail, finish with 1/4" ballnose or 1/8" ballnose. They’ve worked well for me so far.
Thanks. I had a small cut off of the same wood left over so i set it up and I’m running a smaller version of the sign now. That way I can see how it all cuts in this type of wood as well. I thought I had a 1/4" ball nose but I only have a 1/2" and 1/8" looking on amazon now for a 1/4" With the size the final sign will be i think the 1/4" will do good. Also going to look for a better 1/4" bit for the roughing. Only ones i have on hand are 3 flute and i have to run them slow as possible and bump the feed rate way up and still they are pretty rough.
Do you use the Parallel or the Water Line Machining in Estlcam? The test I’m running now i did Parallel in the Y direction but I’m wondering if it will be better to do the waterline to get better detail. I wish I could set it to finish the letters out with a V bit so they would be extra crisp but I don’t see a way to add that in here. hopefully the ball nose will do good. I think if the 1/8" can do it in this test sign then a 1/4" should be able to do it in the final no problem.
So far, I’ve only used parallel, which if i remember correctly is recommended by estlcam for steeper edges. The results have been good with the 1/4" roughing and 1/8" ball finishing. I may try waterline for roughing just to see how it does, but parallel is my go to for finishing.
Ok. the 1/8" ball was too big I guess for the small words on this shrunk down version. I’m going to attempt to run it again with the 1/16" ball i have. Set up estlcam and then just remove the roughing part of the Gcode and only run the finishing over what I already have. That’s the nice thing about doing a test. if it doesn’t work oh well lol. If it works out well then I will attempt the large version with the 1/4" ball I just ordered and run it again with the 1/8" if I need more detail.
Glad your test went well and now you know what tweaks to make. I look forward to seeing the finished product!
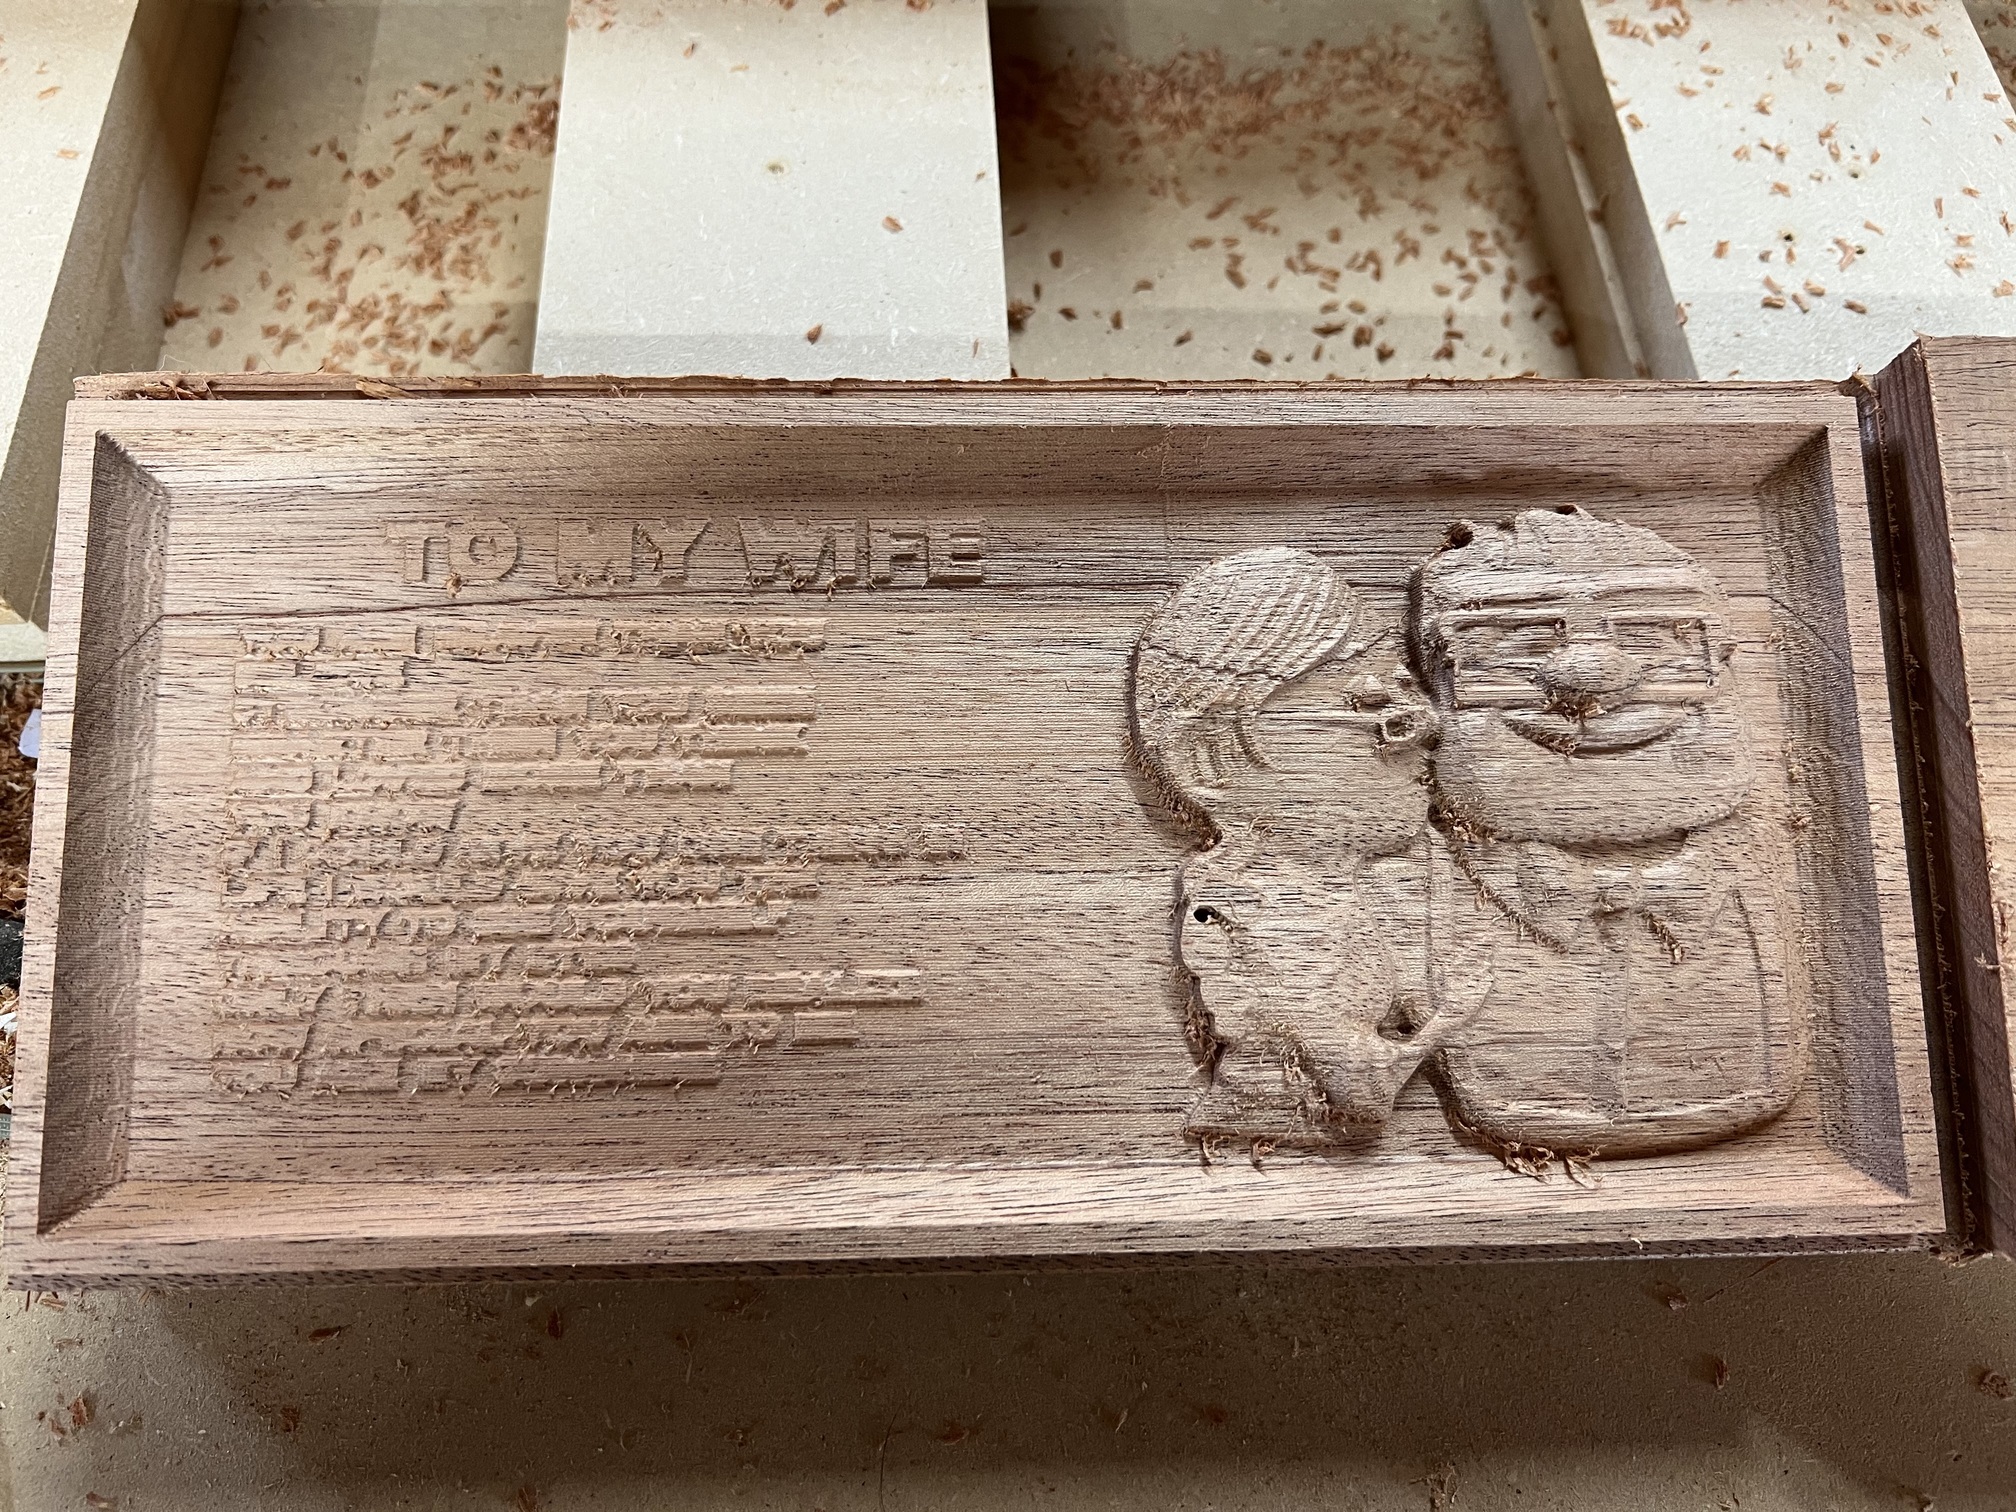
Just finished running the 1/16" ball over it. Much more detail but it was still unable to make the words legible. I don’t think that will be an issue on the larger sign. Glad I know I can come back and run a smaller ball after the fact and everything go well. Defiantly was a good test and I learned a lot from it. Thank you very much for all the help!!!
Glad to help. Let me know how the final piece comes out.
1 Like
Is that a purchased STL? Do you get a 2D DXF with it? Only the couple is 3D, the rest would be faster/cleaner if done with a 2D island pocket and square end tools. With a DXF it would be possible to island the couple and use the Free machining Mask option to 3D cut the couple separately.
You could also try cutting the STL with square end tools, everything but the couple is sure to look better. I’d create a rough mask and test cut the couple first to see if decent results are possible there.
1 Like
It was purchased from Etsy and only came as the STL. I agree if I could have had the DXF as well it would have been much cleaner. I’m sure getting the sizing right would have been fun. Unfortunately it didn’t come with anything but the STL so I’m stuck doing it all 3d carve. The small one I did turned out really well. The words are just so small in it that it was about impossible for even a 1/16" ball nose to get them cleaned up. But with the size the final sign is I don’t see that being a problem at all.
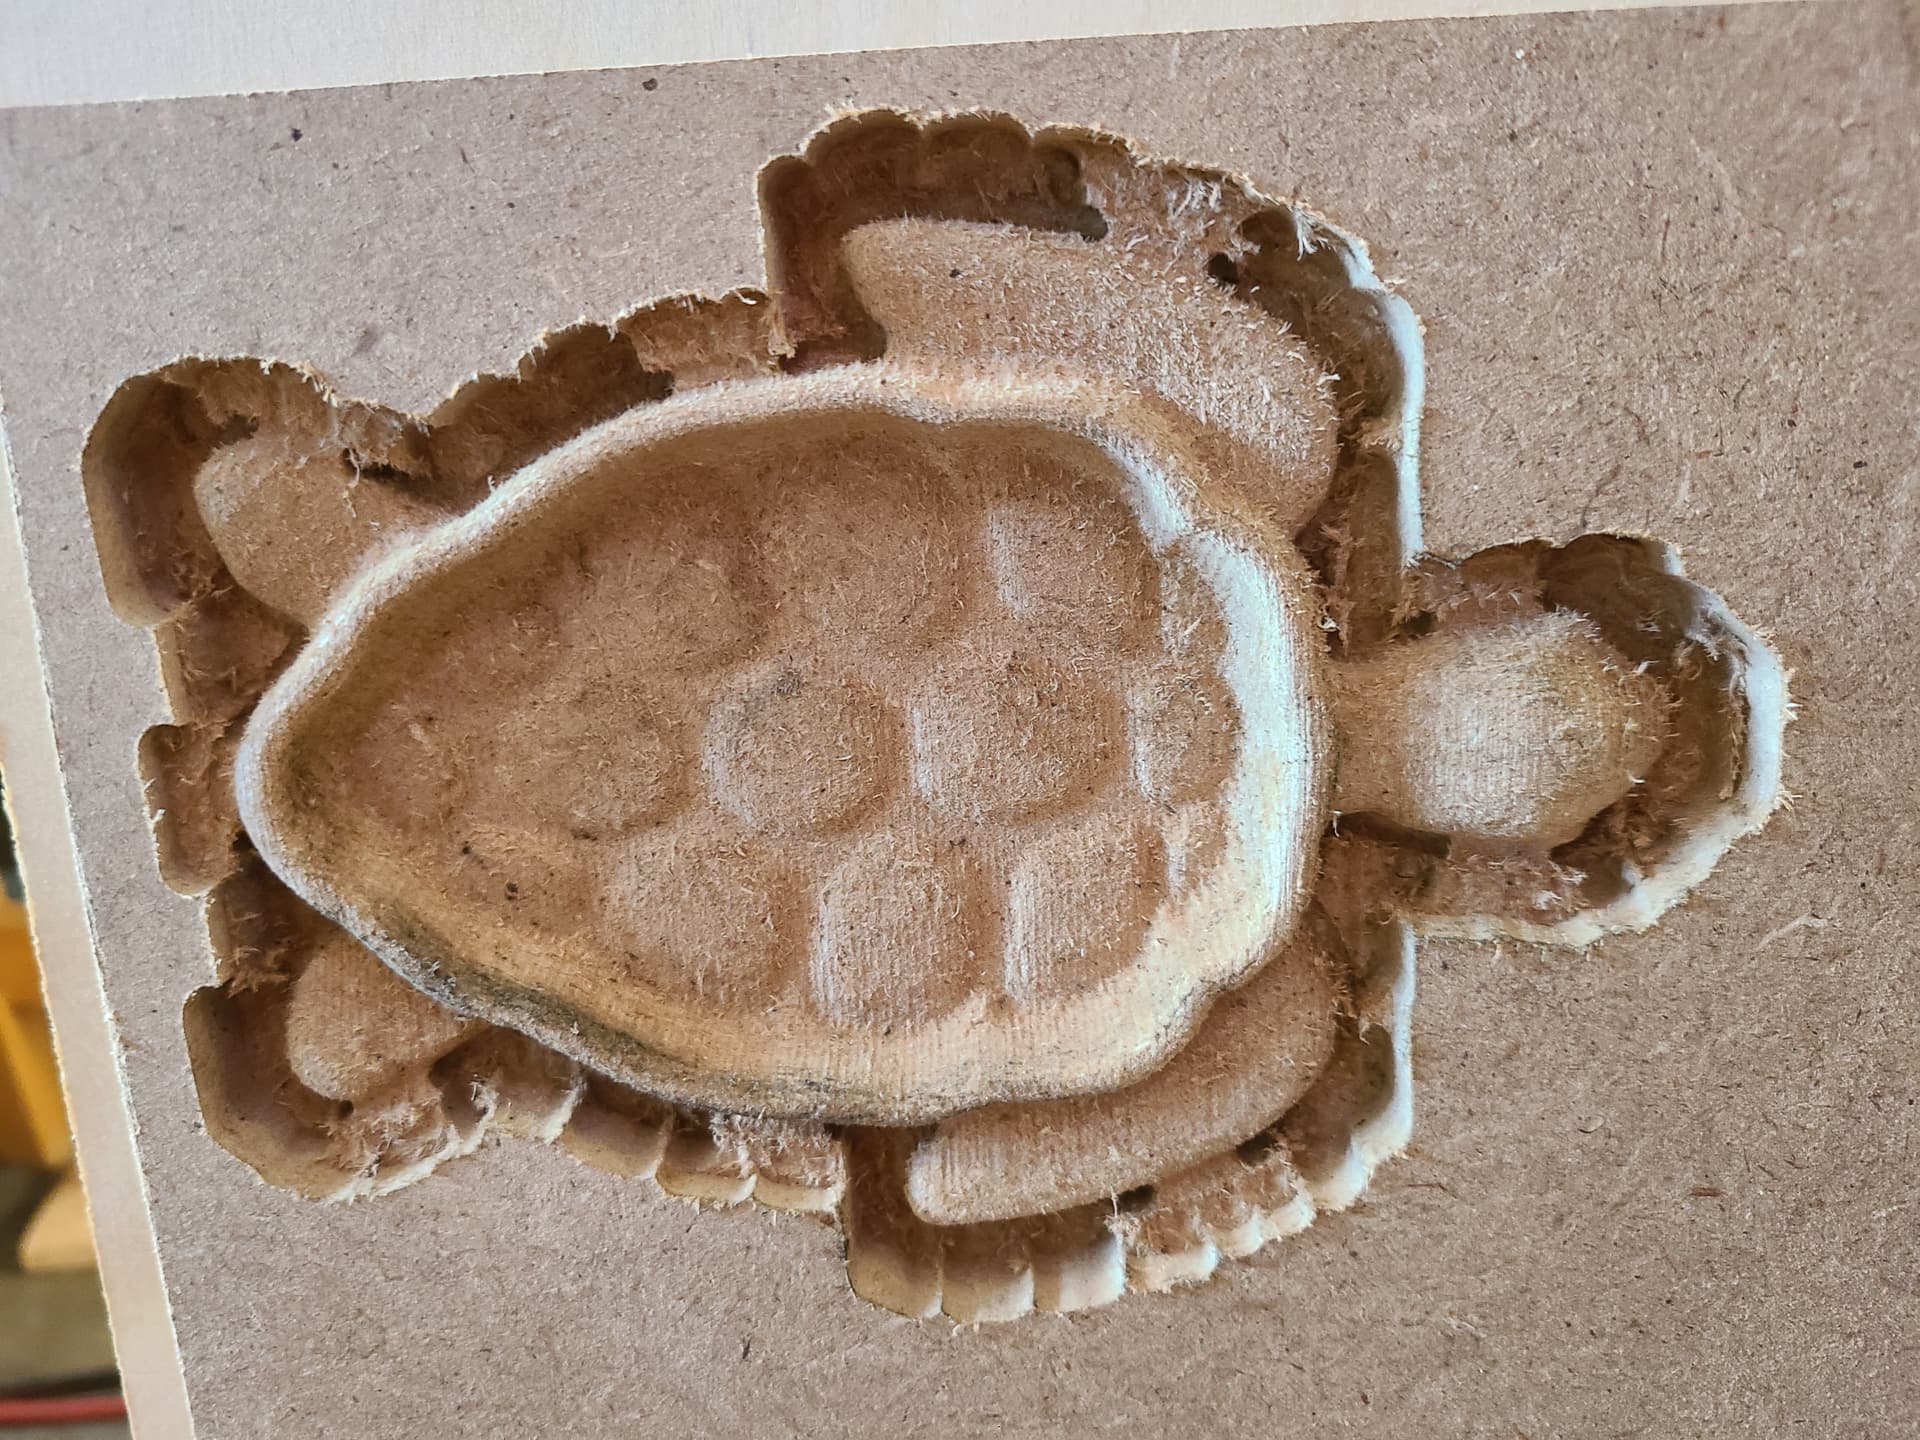
Here is the test carve I did yesterday…
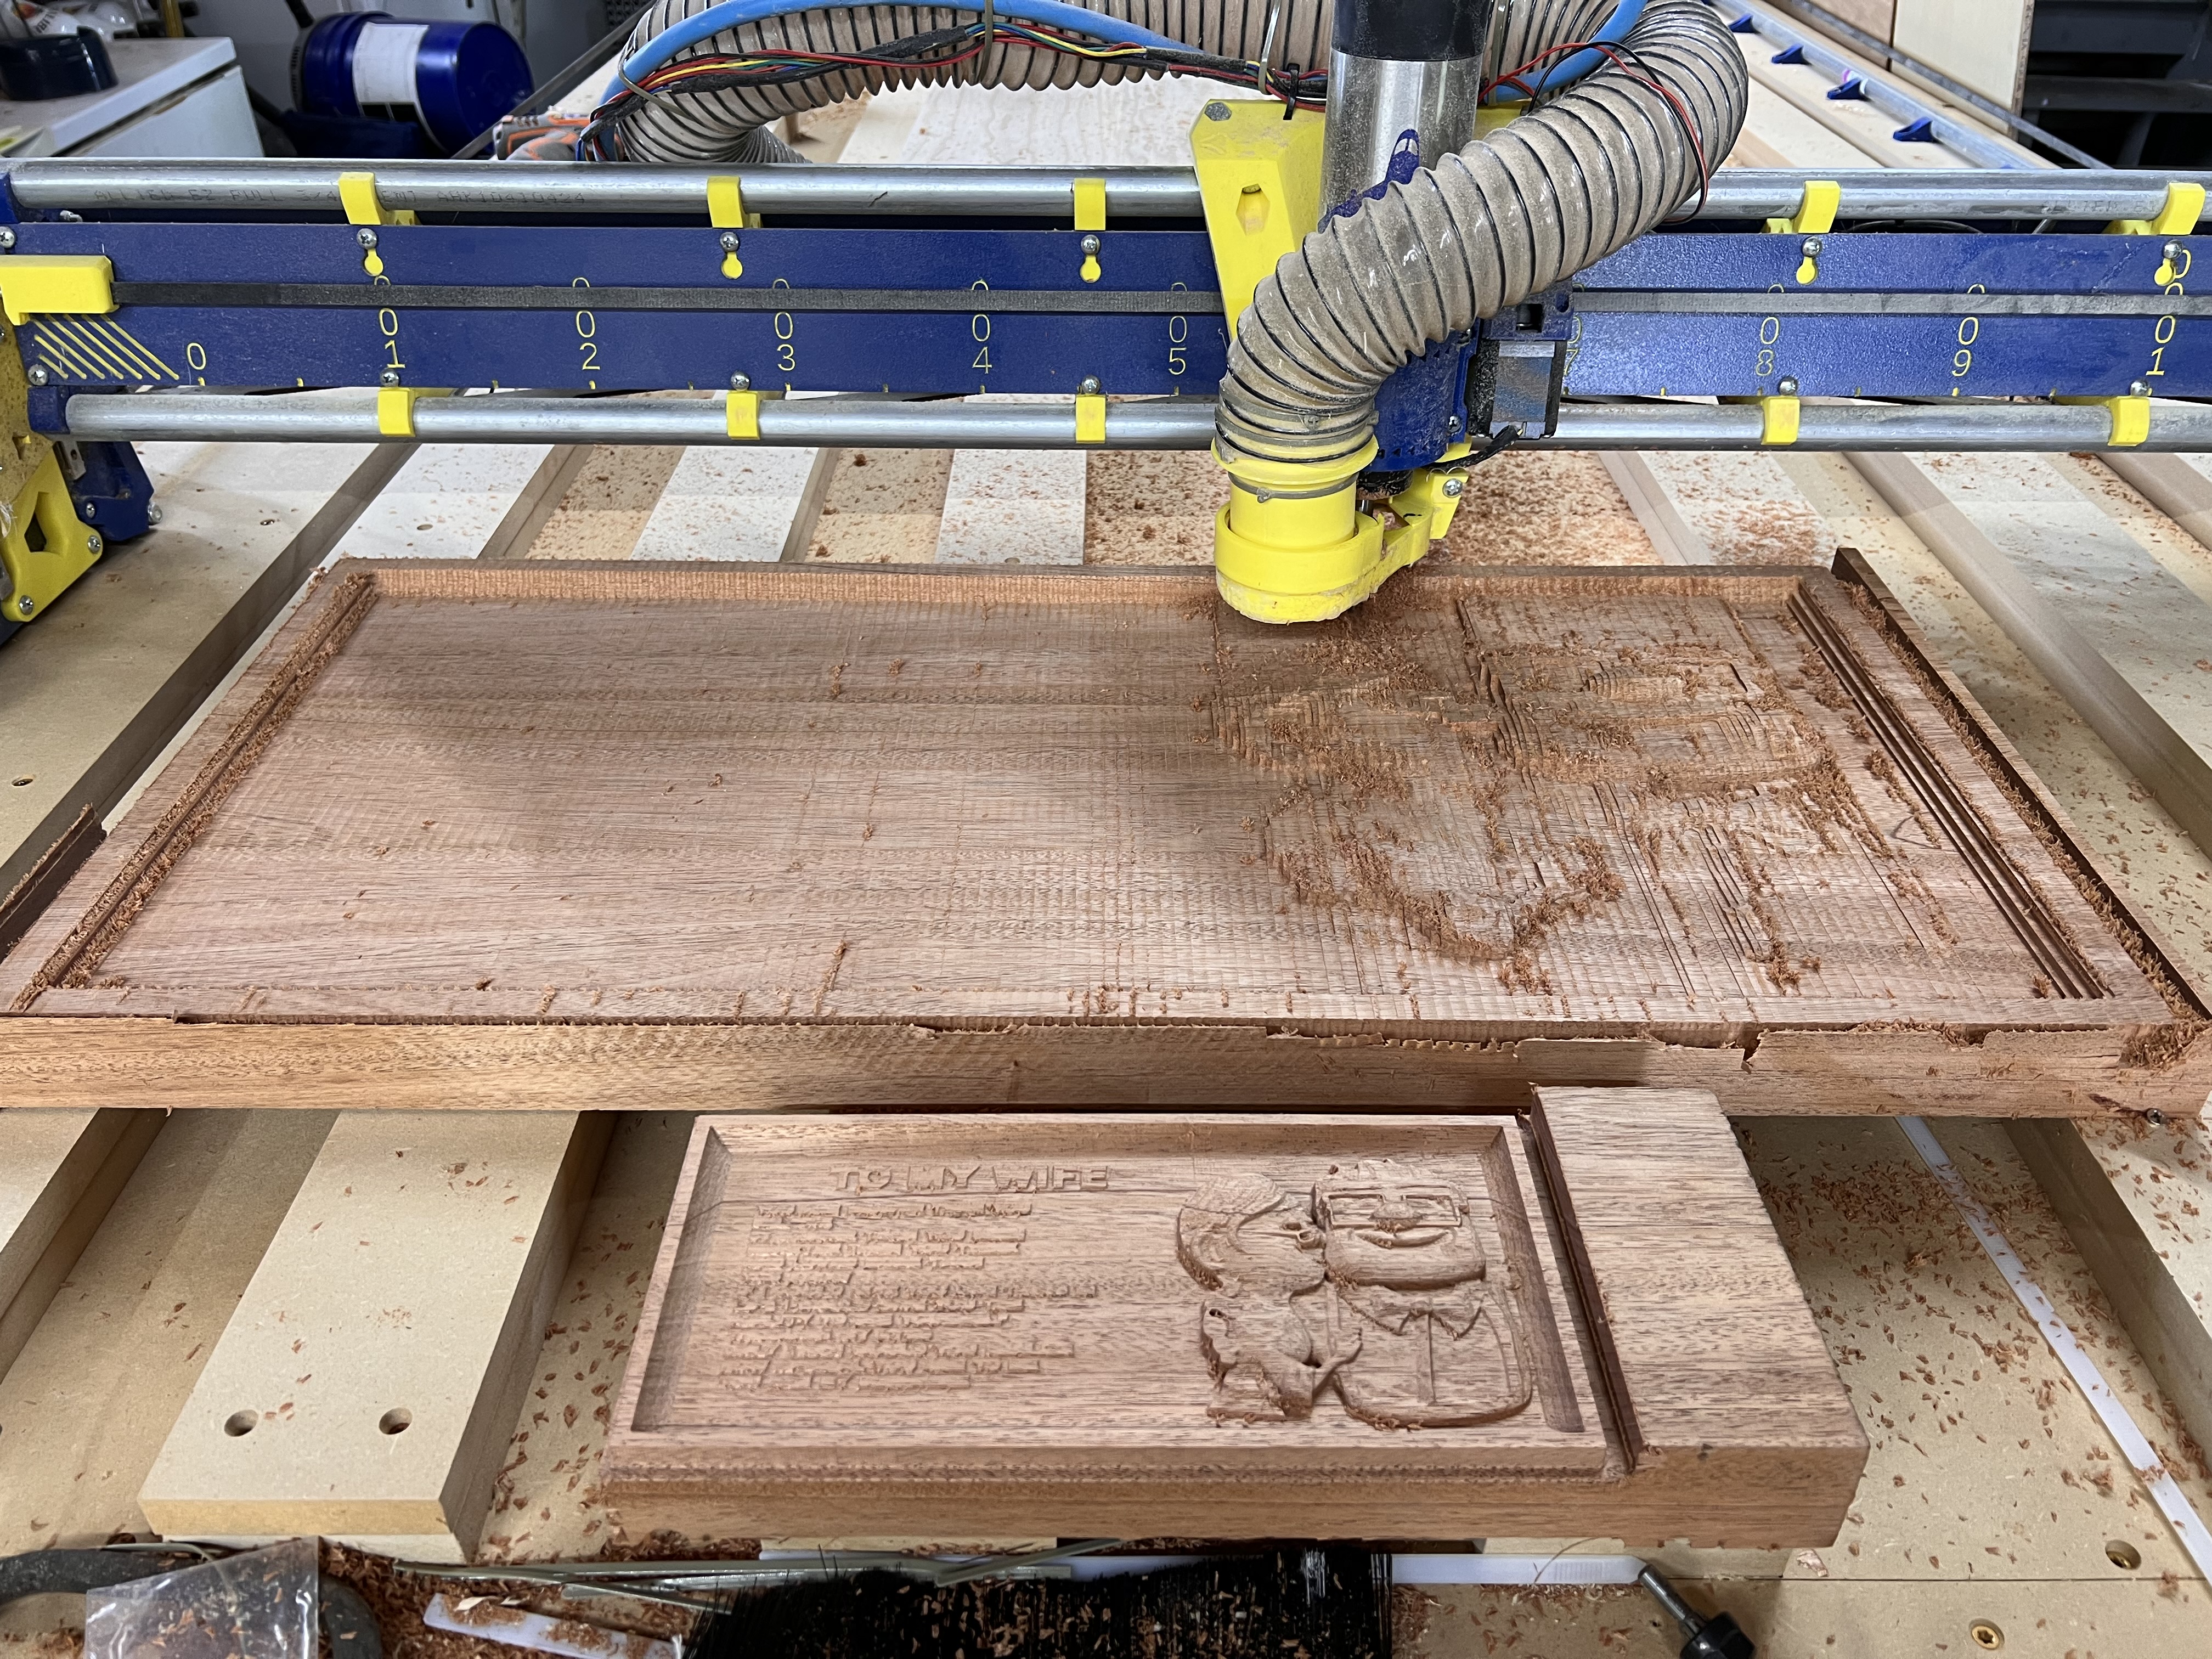
And here it is next to the final sign. Currently cutting at 20mm deep and haven’t gotten to the words yet lol
1 Like
I’ve purchased some off etsy also. You can reach out to the person you bought it from and they will often help you out with modifications. But… not always.
Thanks. I’ll definitely keep that in mind next time. I didn’t purchase this one. A friend of mine did but once he got it and started looking he wanted the sign larger than his 24”x24” primo could handle. Plus it’s a surprise for his wife so no way he could have kept it hidden while it was cutting for this long lol