I don’t want to derail your side project. But there is a relay control plugin:
A very long time ago, in a web galaxy far far away, I made a guide to control a relay from octoprint without using any plugins:
I have not looked at it in years. It used to be my most popular public project. Linux hasn’t changed. And octoprint hasn’t changed that much. But some of the gpio stuff might have. So the plugin is probably a better choice unless you want complete control.
I saw the relay project, but I want to turn the fans on and off based on the temperature of the enclosure. There is an enclosure plugin that says it can do it, but it doesn’t load for me and it looks to have been abandoned.
My plan is to read a temp from an i2c device and turn either the fan or heater on in order to keep the temperature between a set range.
Marlin has the ability to control a chamber heater, but not an exhaust fan. Or, at least, not one that I could tell.
I did most of the skeleton for the plugin last night. I just need the relays and i2c device to come in so I can write that part. I need to figure out if I can trigger a function every X seconds in octoprint, otherwise my second option is to run my function every time octoprint receives the temperatures from marlin for the extruder and heated bed.
I plan on having a button you can use to prewarm the enclosure before starting a print. Scope creap has me wanting to do a tapered cool down at the end of the print, but I’ll probably just turn the heater off and turn the exhaust fan on.
My current enclosure control is a little arduino beetle. It only controls the exhaust fan. It has a physical switch that switches between pla and abs and only has a single set point for where it turns the fan on. For pla, the fan pretty much runs all the time except for in the winter. I use the heated bed to prewarm the enclosure in the winter. I just set it to 100c for 10-15 minutes before starting my print. I also have my power supply set up to blow the exhaust into the chamber and my controller is in the chamber.
I think I’m really just using this plugin as something to tinker with.
You can add macros to the ending gcode and octoprint can be set up to intercept them. Then call a system function (like the python scripts I had). Those could do the I2C and any kind of control you want.
This is probably why I haven’t really written an OP plugin. There are a lot of ways around it.
But you do you. A project like that is perfect to get the creativity flowing while waiting for parts.
Oh yes. Many, many, ways of solving for this issue.
One nice thing about the Octopus Plugin is it has a Mixin for the print progress, so you can just trigger the shutdown function when progress hits 100%. No need to put anything special in the g-code.
I could also intercept gcode and have my own custom gcode trigger which chamber profile to use at start up. M587 S0 for pla and M587 S1 for abs… or something like that.
I like how simple Octoprint has made it to create plugins. They take advantage of cookiecutter to create the framework for you. Then it’s just a matter of writing the code. Their plugin walk-through answered most of my questions and taking a look at others’ plugin code helped with the rest.
It’s also not something I’ve done before, so it’s nice to learn new tricks.
Pretty much all the parts for the printer come in today. I’ll take inventory of everything in the morning and start printing parts tomorrow. I need to get some 1/4" mdf for the z table (?) not sure what the big tringle-ish shaped piece is called. I’ll need to take measurements of the heated bed and see where the mount holes need to be so I can cut that part. It looks like the heater I bought has 4 holes, so I guess I’ll be going for a 4-hole bed. I’m thinking the cap screws holding the heated bed will be recessed under the magnetic PEI sheet.
It’ll be interesting to not have to turn thumbscrews to level my bed anymore.
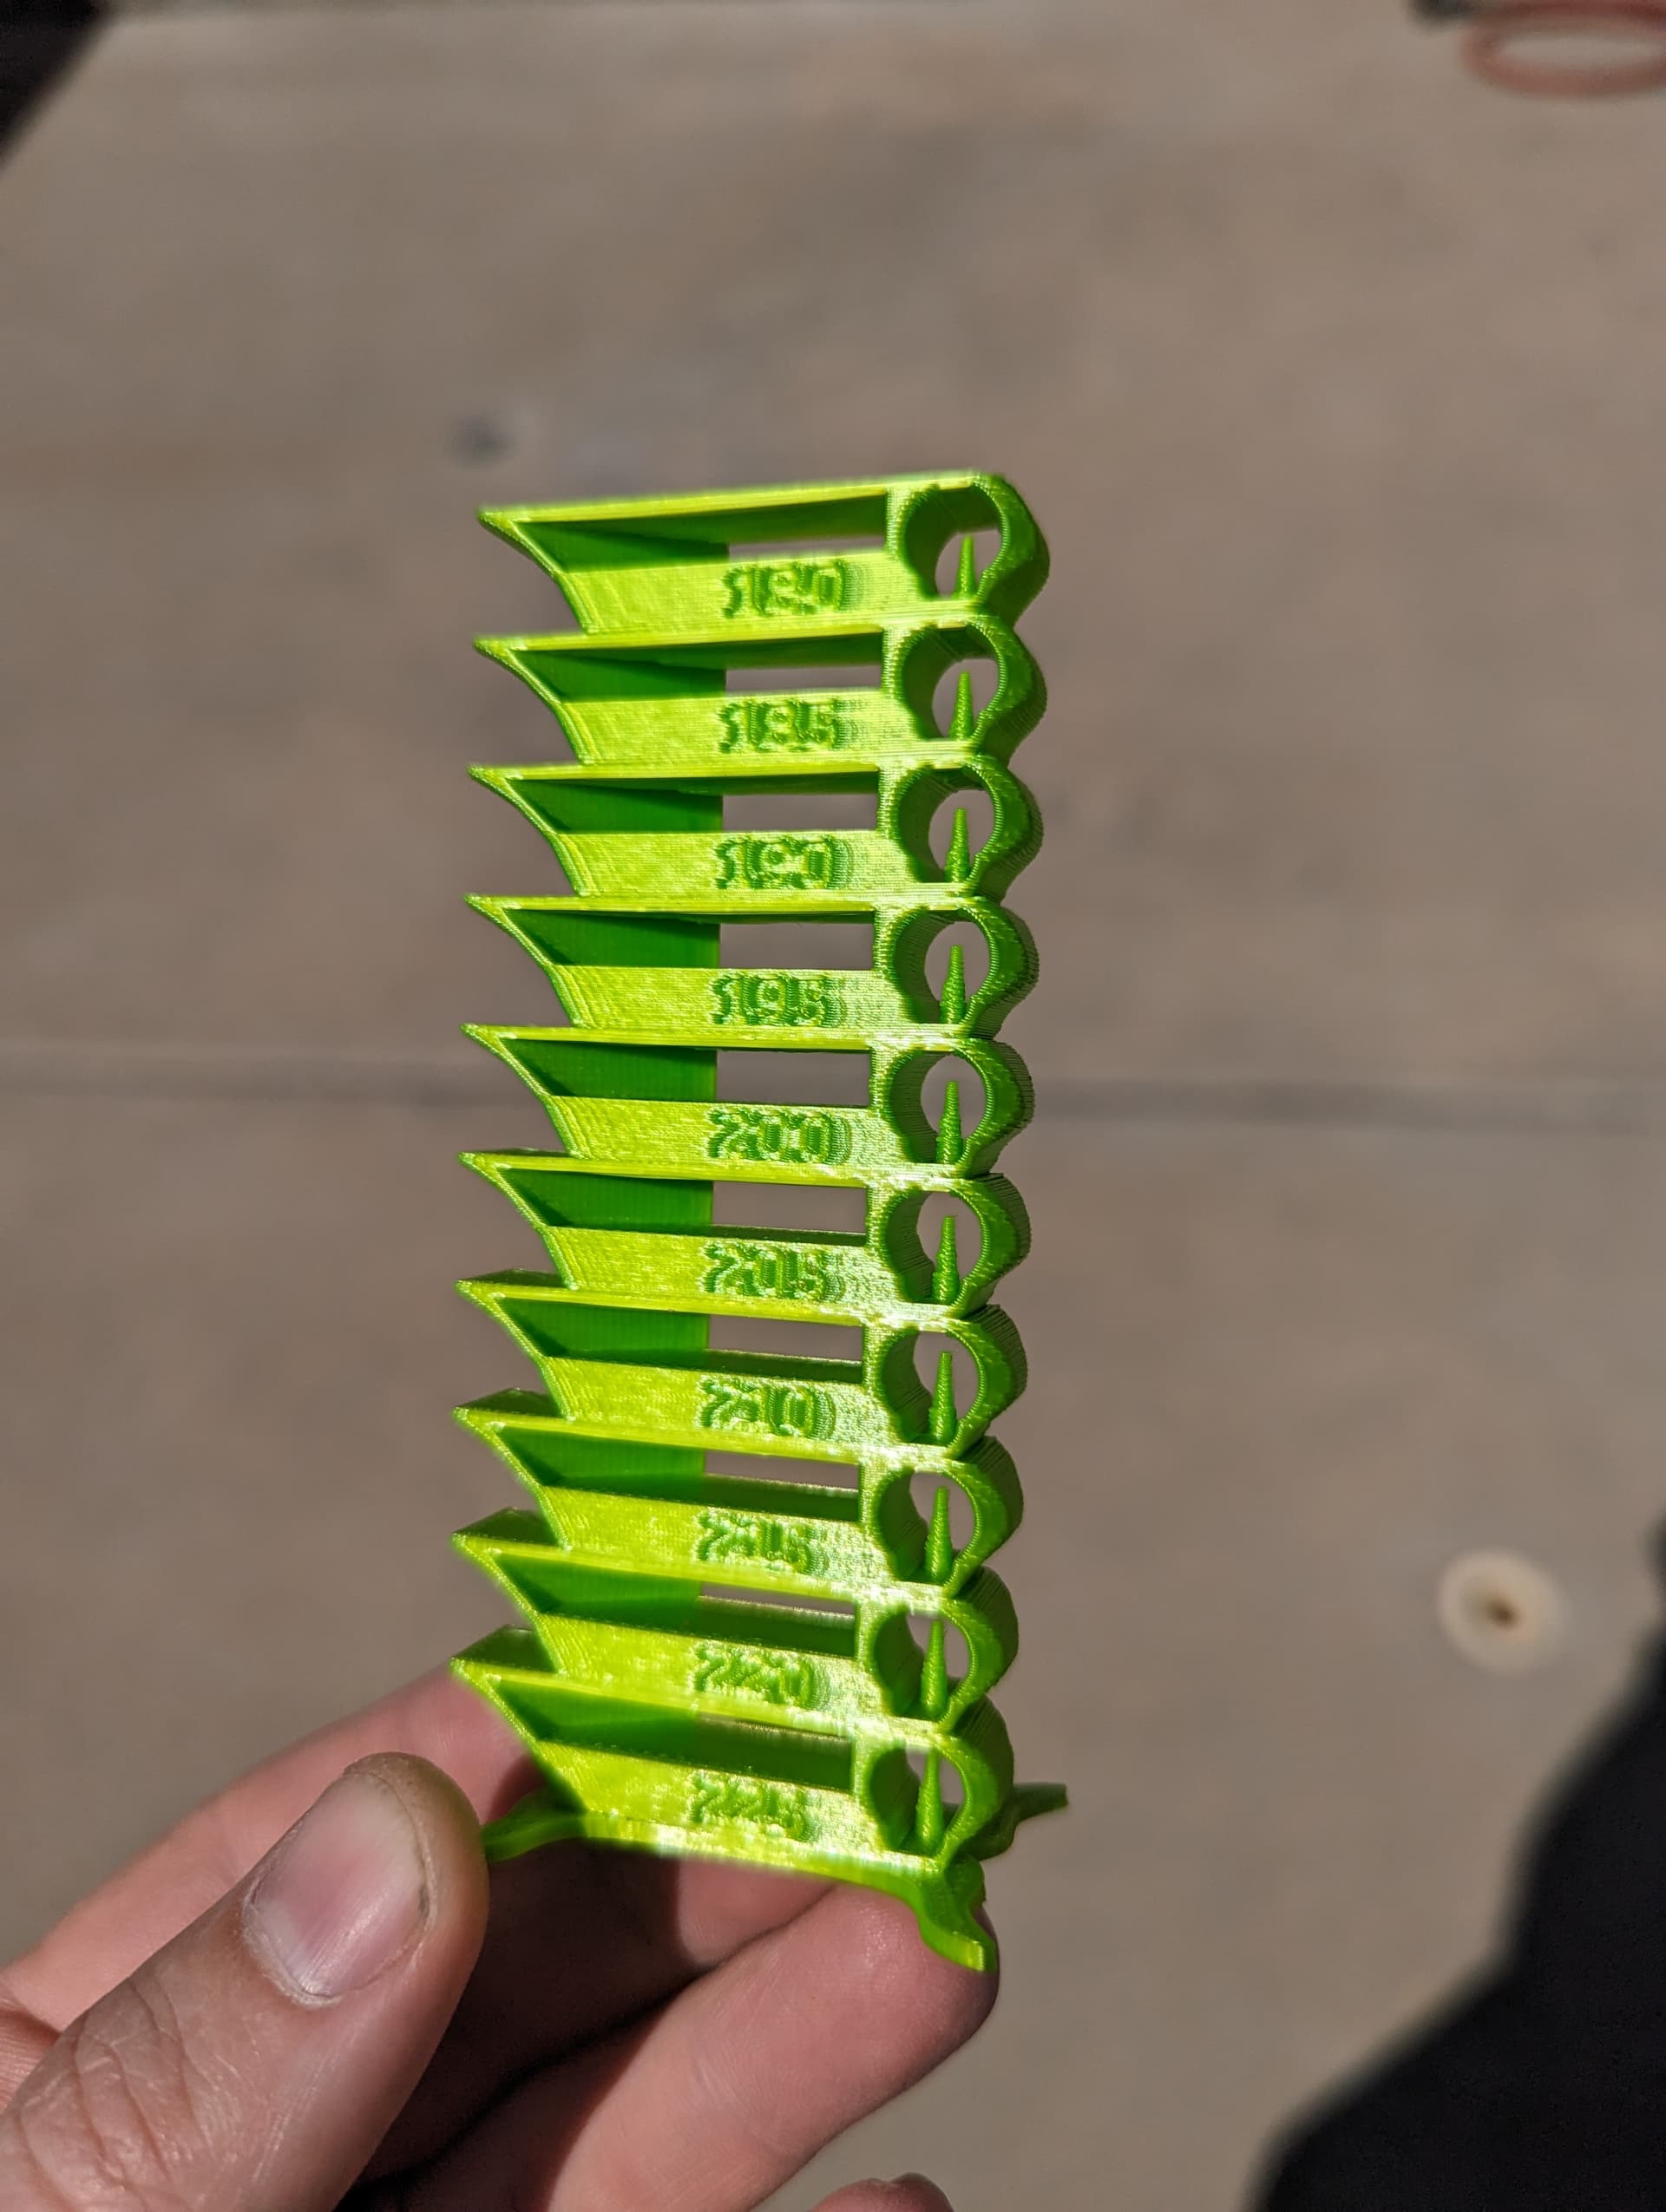
Personally, I’d be happy with most of the temps. Liked bridging for 210 and 215 over the rest. If quality is pretty much the same between them, would personally lean towards higher temp for better adhesion?
Is that much ringing normal, or worth tensioning belt(s), and/or placing printer on foam pads and concrete paver. So many ways, and even more info/videos discussing how, to reduce ringing effects. Too many variables!
I’m ignoring the ringing. The firmware on the current printer is an ancient version of repetier. It’s running a radds controller. I don’t think it’s worth trying to tune that out with the new printer on the way.
The only real difference I see between 205 and 210 is the small tower is a tad smoother at 210.
Alright. I decided to go with 210. I realized that my PLA settings was set to 205 for first layer and 200 for rest of the layers. 210 definitely looks better than 200 and is worth re-slicing everything.
I’m only printing one part per print with the exception of the Z_Post, Tension blocks, washers, and Z belt holder.
Estimated total print time is ~39.5 hours. I should be through printing all the parts around May
I do have another question for the collective… If I were to extend the 4 vertical posts to put a lid on the printer, how much taller does it need to be to clear the ptfe tube for the filament and the bundle of wires for the hot end? 100mm?
Had similar questions/thoughts… After looking at Voron 2.4 and Trident, ended up leaving extra 200 up top, and an extra 100 below the deck, going to try putting electronics underneath. This is way taller than needed for MP3DP, but is about the right size if I end up converting to a Voron later. Started with 48" extrusion, so just cut it in half plus trimmed a bit so all the cuts are same length. Can always cut them shorter… Another option was leave nothing extra up top and make a separate enclosure/lid after the fact when you know what space is needed.
Thanks for asking, curious what thoughts others had at this point too.
The longest that cord needs to be is to reach the far corner. The highest it will be is if it was at the closest corner. If the ptfe was exactly folded in half and pointed straight up, that is the worst case.
But really, it will sag or be more of an arc than two lines.
If you are making a 300x300 XY, 150mm extra seems conservative. It is probably better to have it too long than not long enough.
I knew I was testing fate by trying to print parts on a storm-filled day. Made it through the first storm fine with no issues. But the second set of storms knocked the power out just at about the 90% mark on a print. It was the 3 washers and the Z belt holders
I knew I should have ran an extension cord to the large UPS in the shop for the server rack. idiot.