I will say that is an AWESOME build plate. The other side is just black and everything sticks to it super well and once cooled it releases well. Probably one of the best build plates I have ever had. And yes, the logo embossed into 3d prints is cool! Wish I would have had him make the logos about half the size they are. @vicious1 talked me into it ![]()
![]()
![]()
1 Like
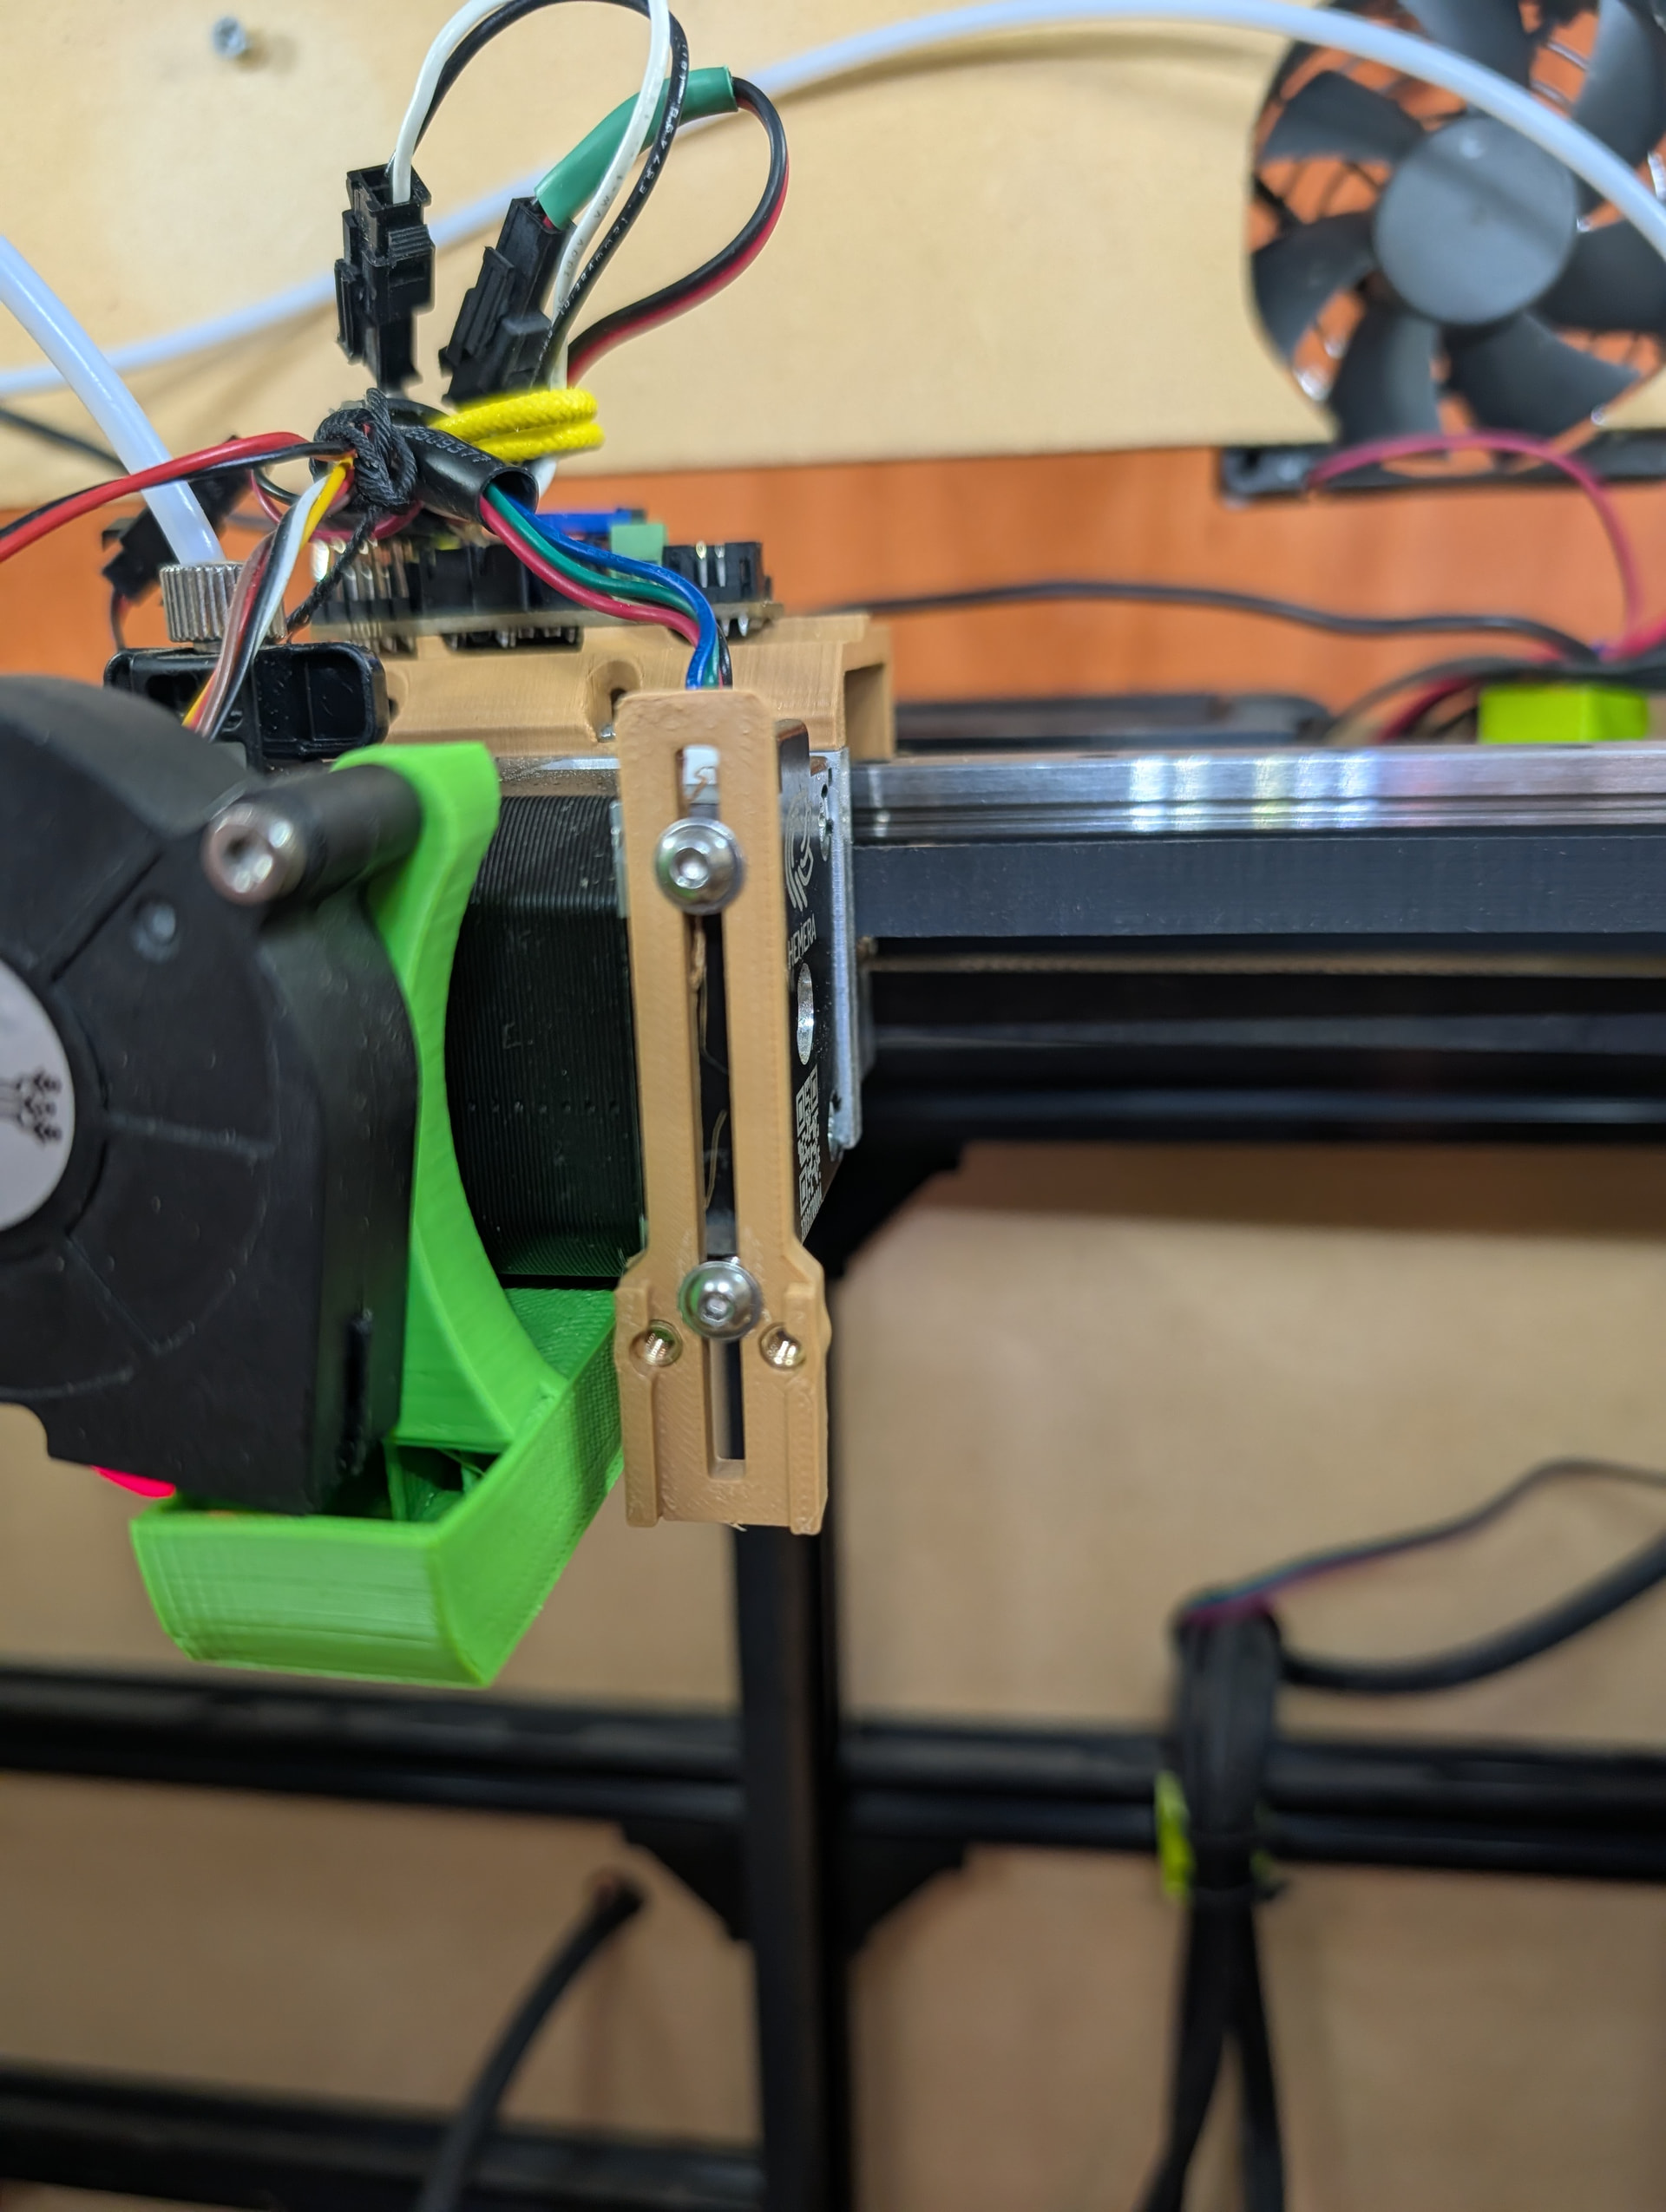
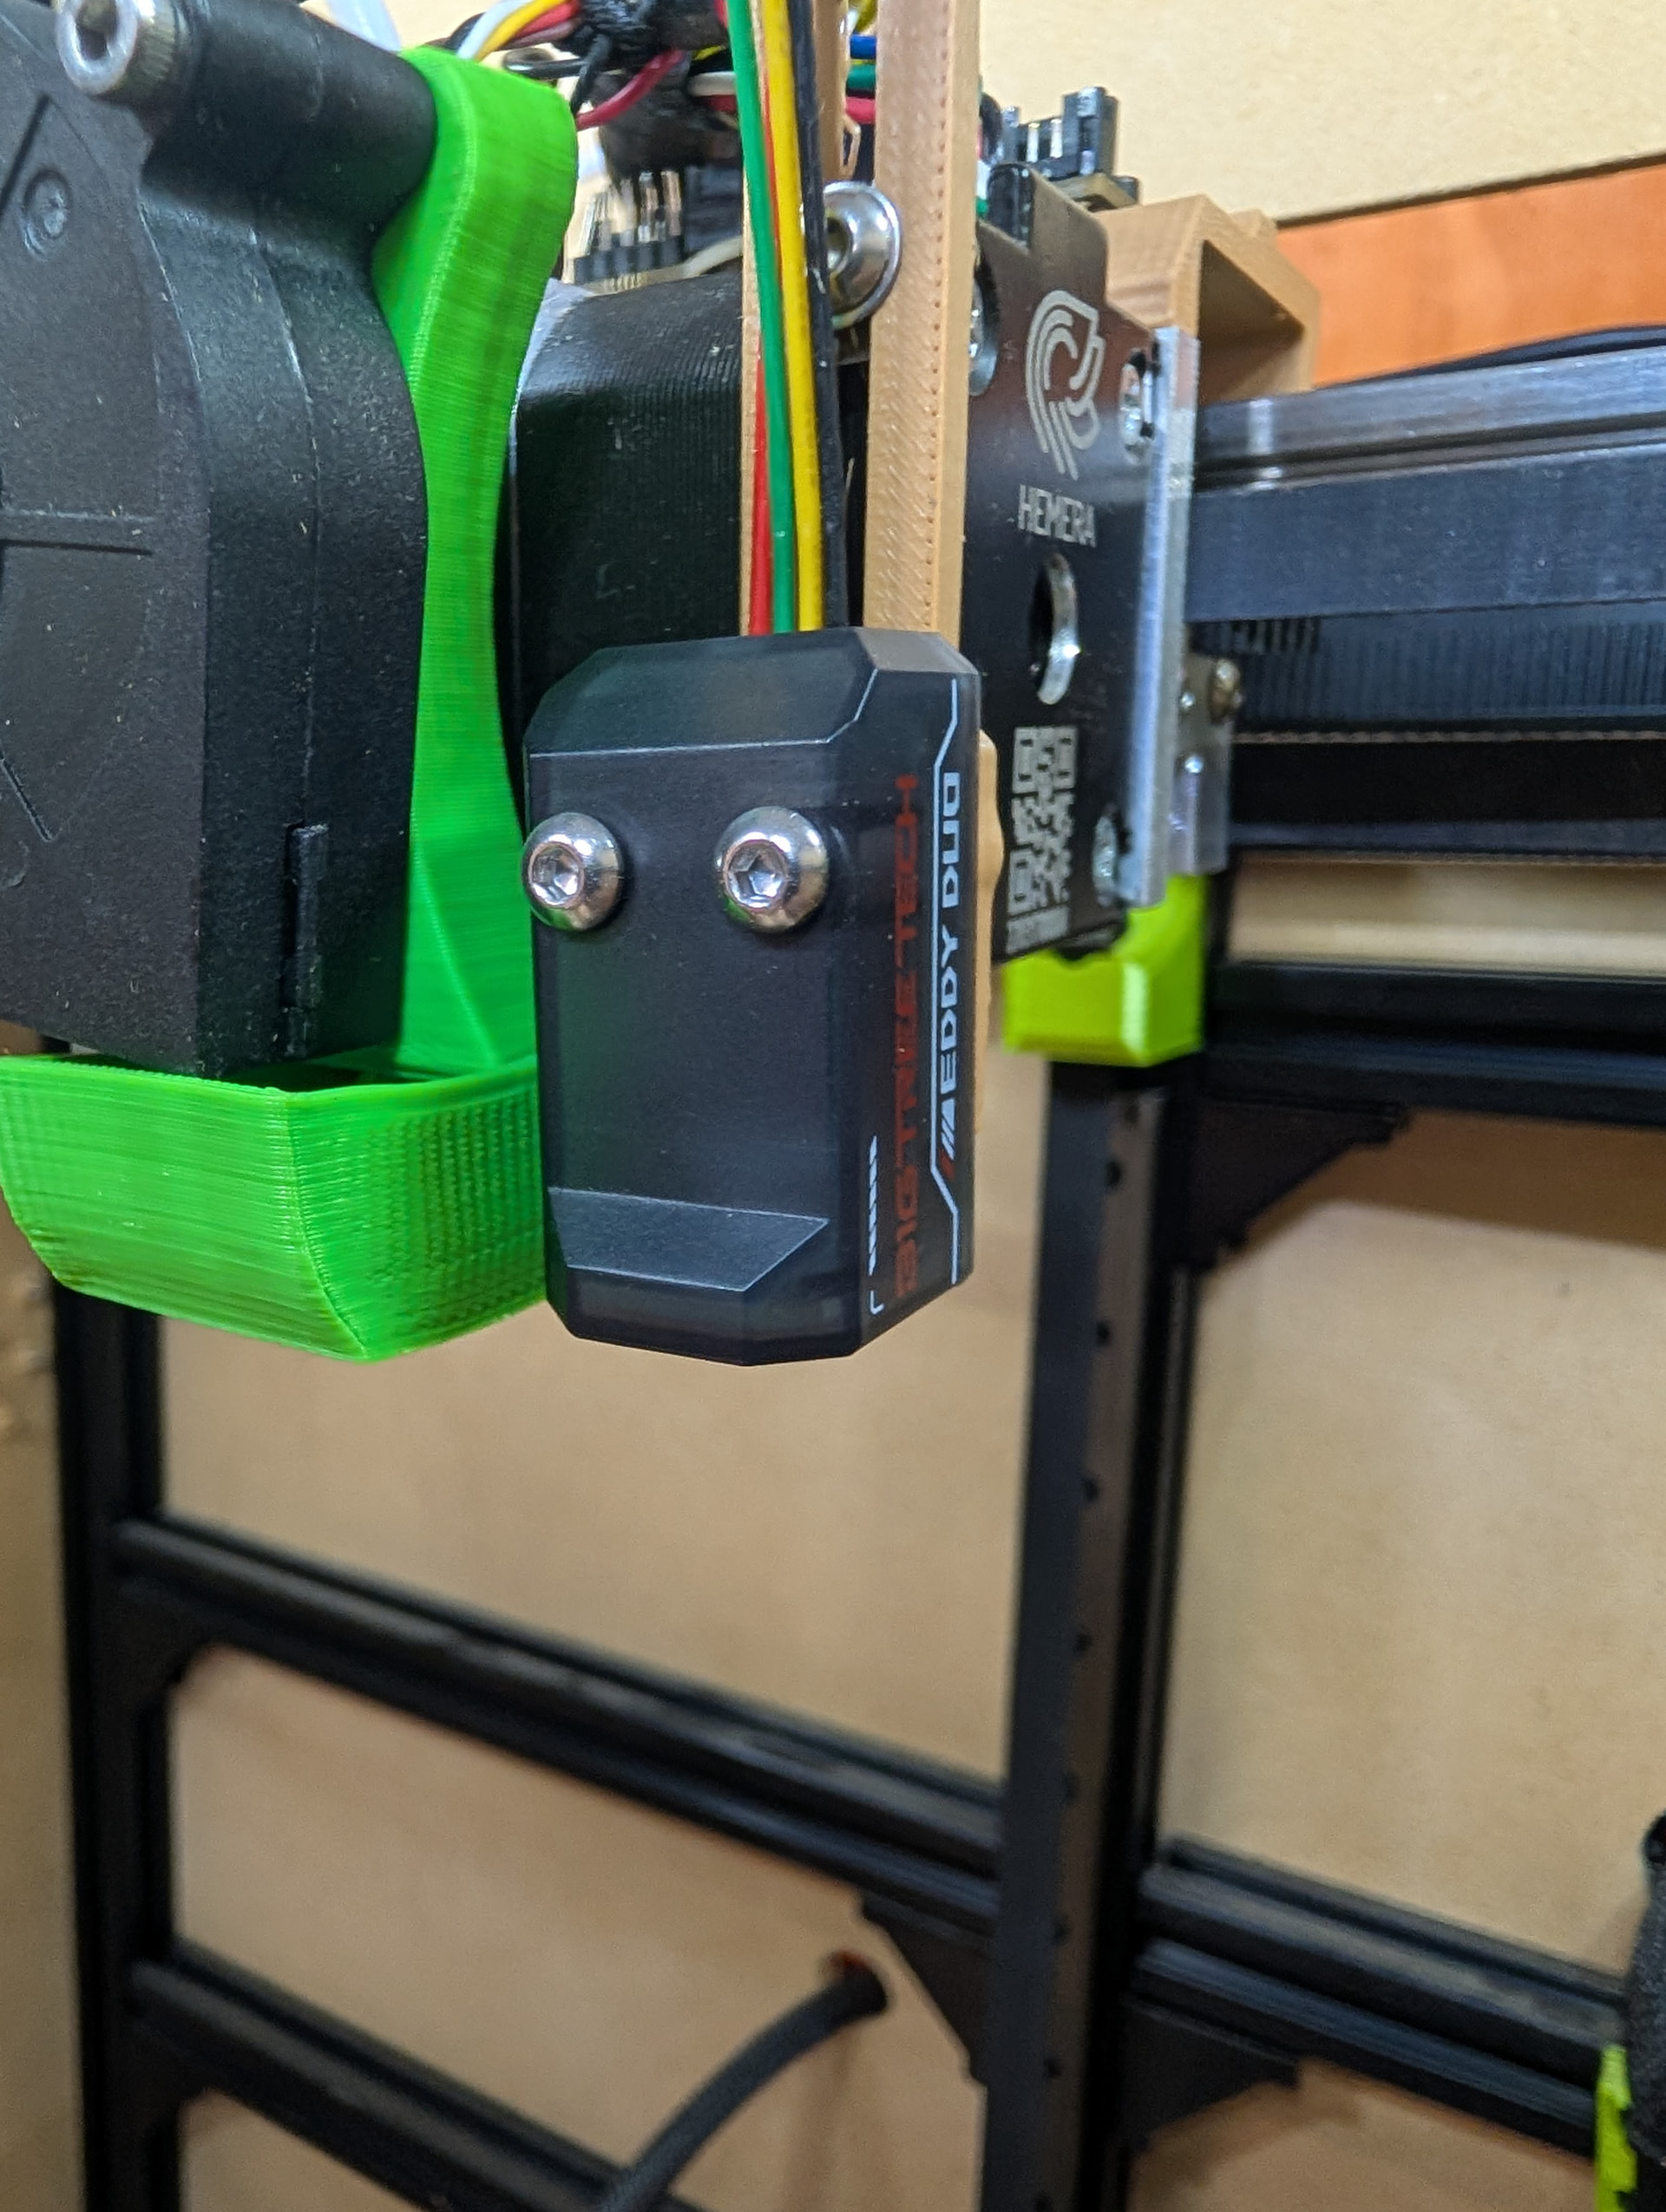
New eddy mount designed. I can set the height, remove the eddy to tighten and lock in the mount, and then put the eddy back on.
I’ll test it tomorrow. I think I’ll home with the bltouch. Then I can measure from the bed to set up the initial height.
1 Like
I wanted to leave the weekend on a win. So the last thing I did last night was finally get up the courage and I clipped the two wires going to the hot-end. I crimped on some connector pins to the end of the wires and used heat shrink to protect the exposed metal. Then I screwed them down to the EBB36 terminal block. A single quick edit in the printer.cfg and it worked.
It’s not much, but it’s progress. Tonight I want to get the z_brake working before I go back to the Eddy. Testing the Eddy runs too many M84 commands when something fails and I’m tired of dropping the bed. The transistors should be in by tonight and I can wire up a little adapter board.
2 Likes
I need to take a week off everything and work on my printer. This would be very cool to replicate on my gridbot.
2 Likes
Do it!
2 Likes
I know that had to be a great feeling!
These things will kick you down hard for sure. But the wins feel that much better! Keep poking at it and you will get it that’s for sure!
1 Like
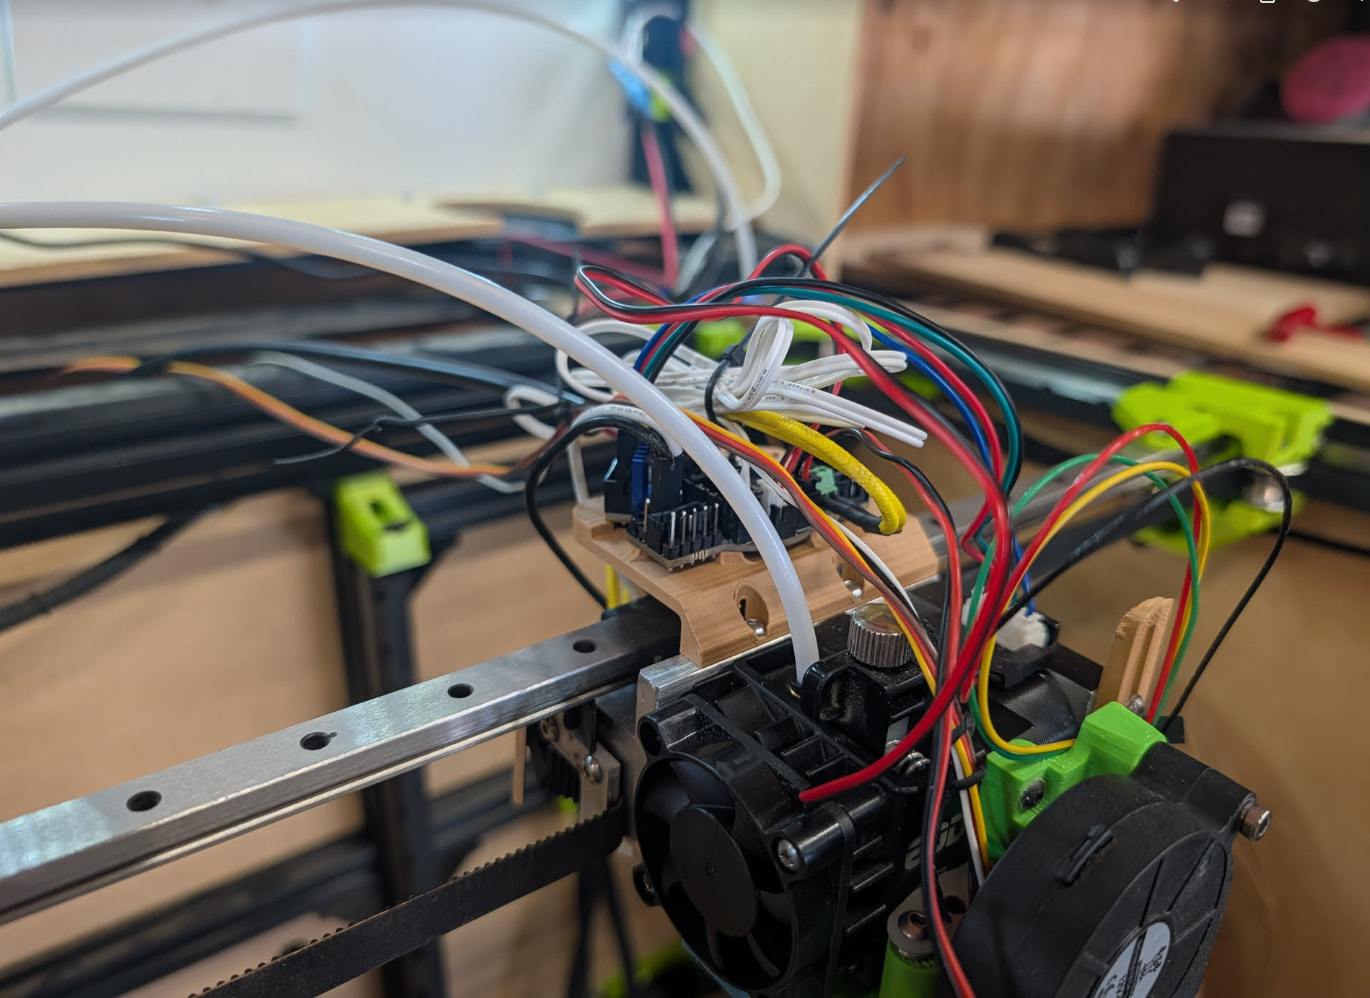
Github was down, so I went out to the shop and did the thermistor. Instead of crimping itty bitty wires, I just put a new thermistor on that already has the correct connector on it. I took the opportunity to swap out my nozzle too. I noticed the heat throat looks bent. I wonder if I crashed the nozzle at some point. There’s way way too much wire on the thermistor, but I just zip-tied it out of the way for now. I’ll cut the wires and make them shorter when I do more cable management. Just need to do the stepper motor and two fans now.
1 Like
Anybody have a link to the heat sinks for the TMC-2209 or a good heat-sink glue I can use to re-attach one? The one that came with the ebb36 hit the floor and the pad is no longer sticky.
1 Like
Ha! Yeah. I think that’s more than I’d need… Ever.
I ordered some of this. Thanks.
1 Like
It’s always good to have heat sink tape around if you mess with a lot of electronics
https://www.amazon.com/Thermal-Adhesive-Performance-Heatsink-Computer/dp/B085CLXM7J
I sometimes make my own thermal adhesive by mixing in powdered silver to an epoxy that’s very much like JB Weld but that’s… expsensive.
1 Like
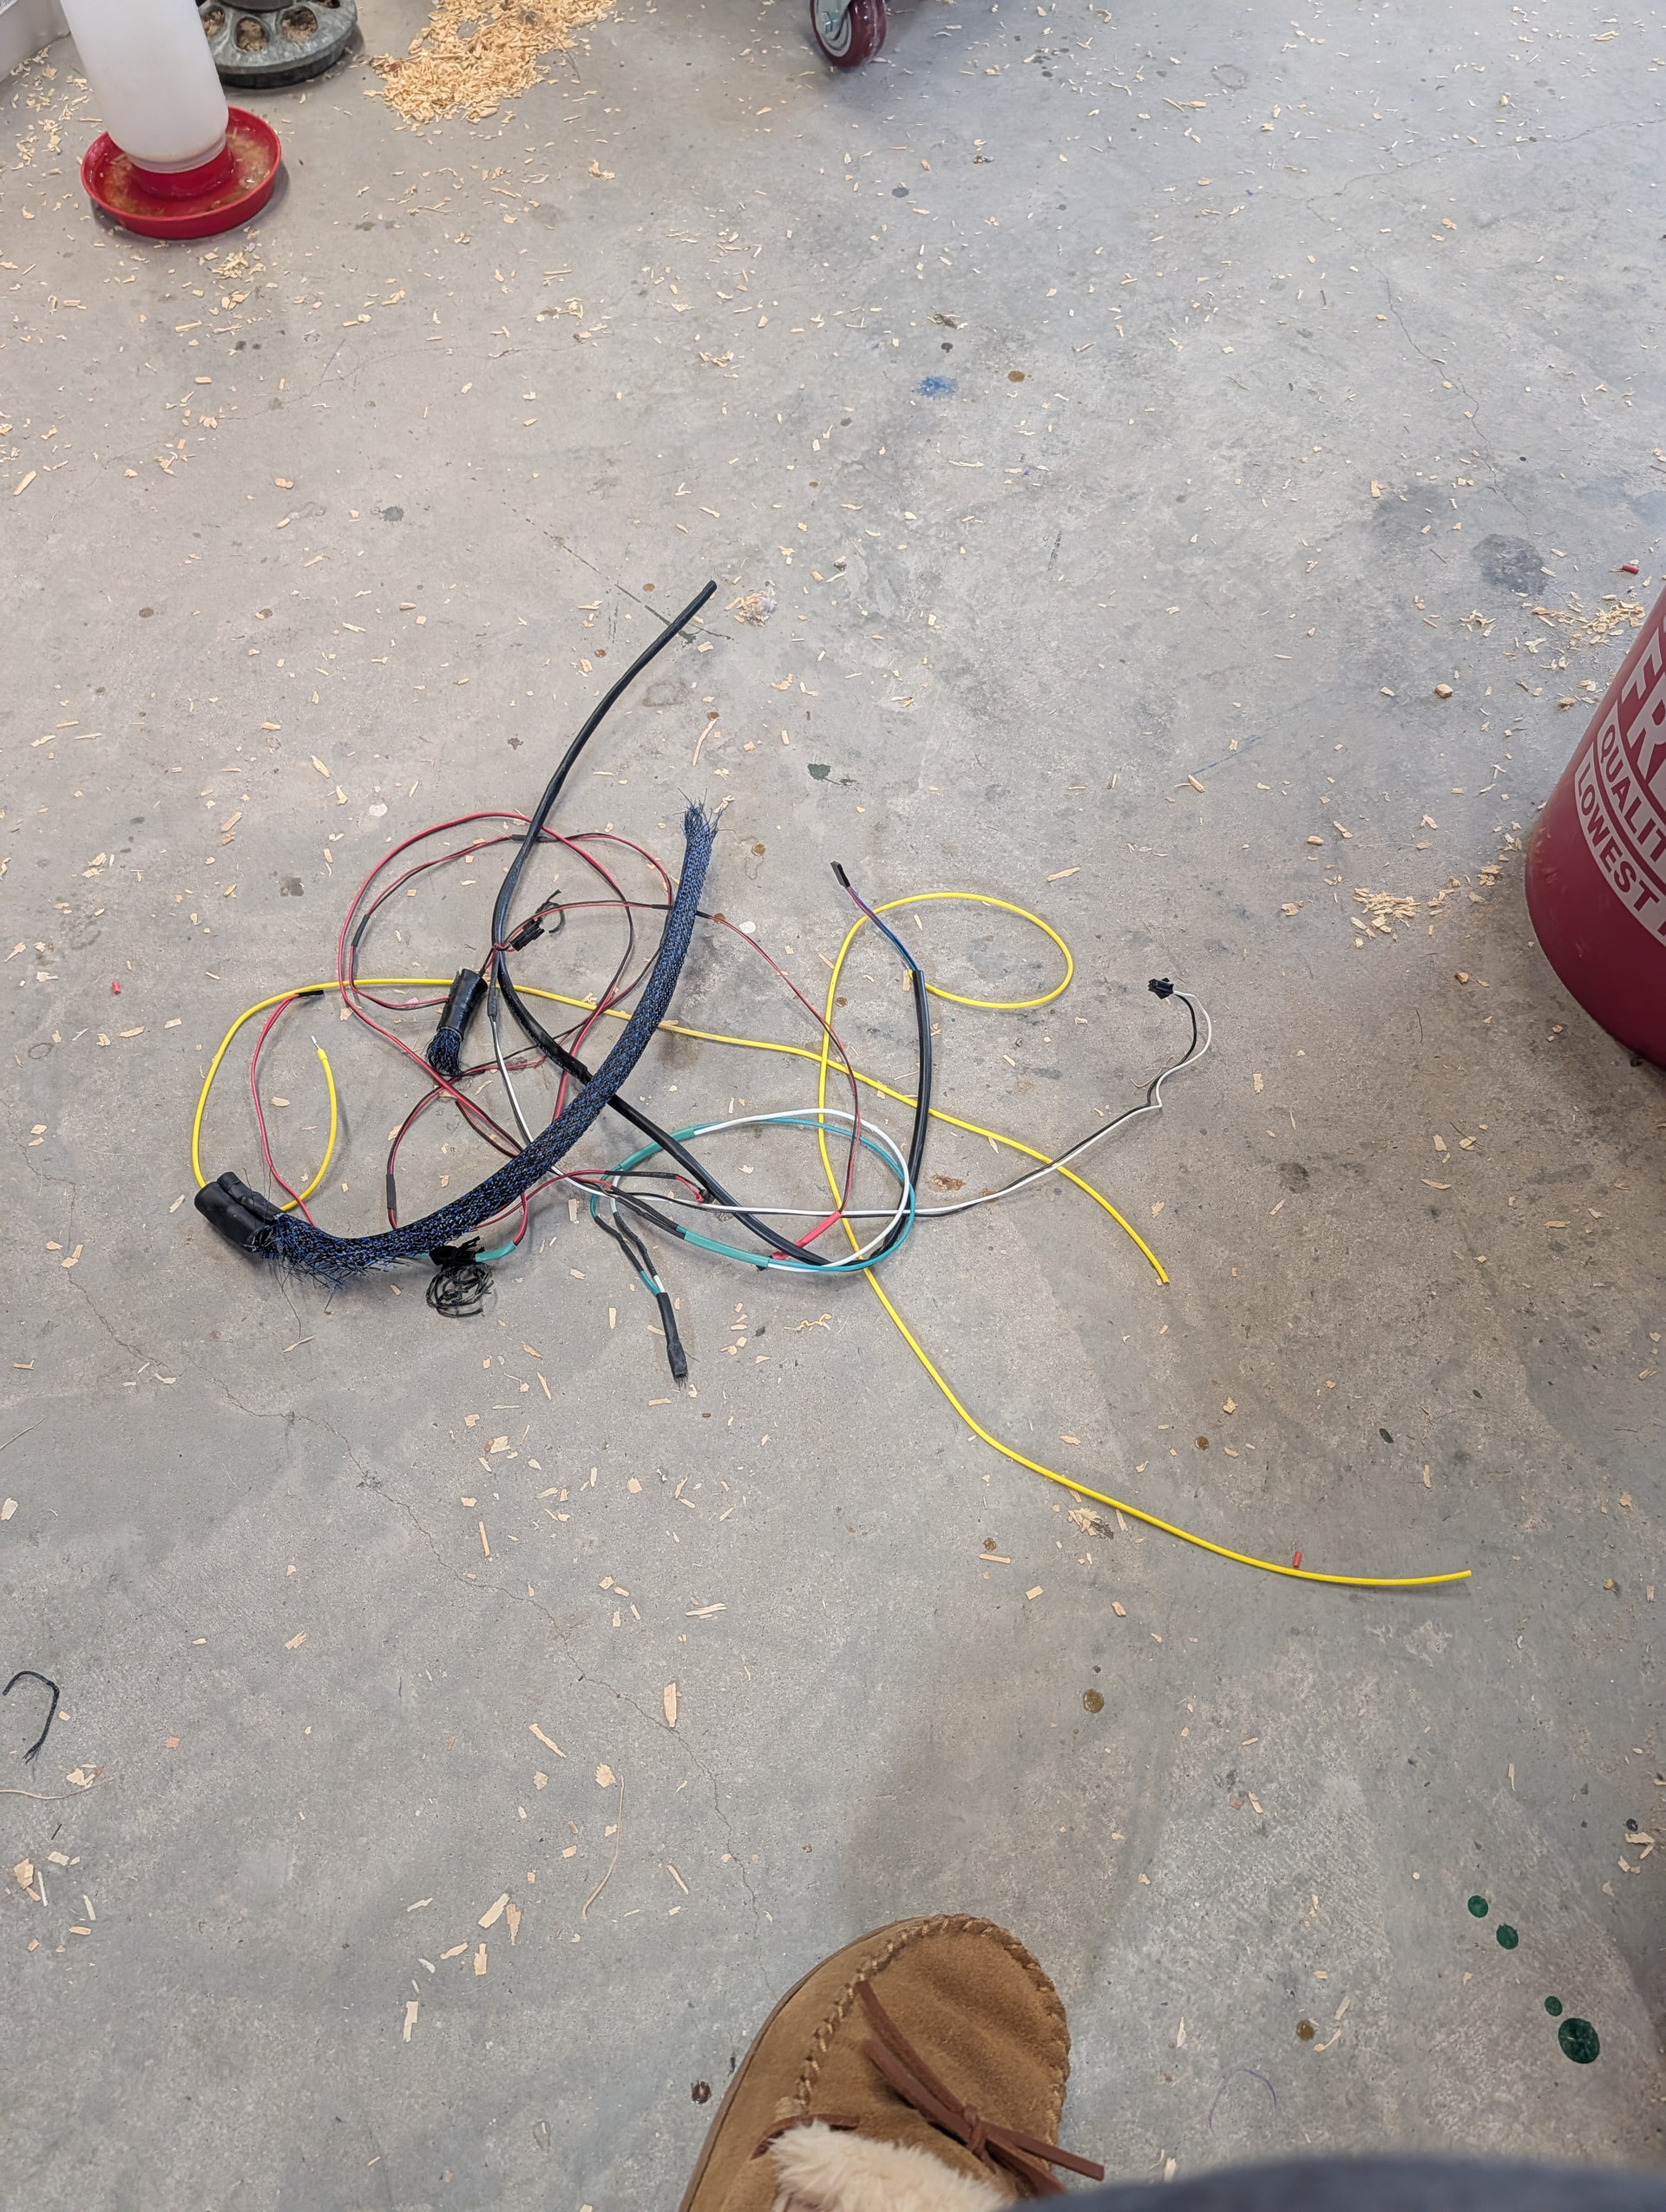
I remembered I had ordered replacement extruder fans that already have the correct plug on them. I replaced the plug on my printer with a more robust one for the umbilical so it wouldn’t pull loose. I ran out to the shop and swapped the fans out. I also went ahead and crimped on the cables for the parts fan. Those are working now. I just need to put a new connector on the X endstop and then wire up the stepper and I’ll be able to remove the umbilical. The inside of the printer is a mess right now of clipped wires ![]()
1 Like
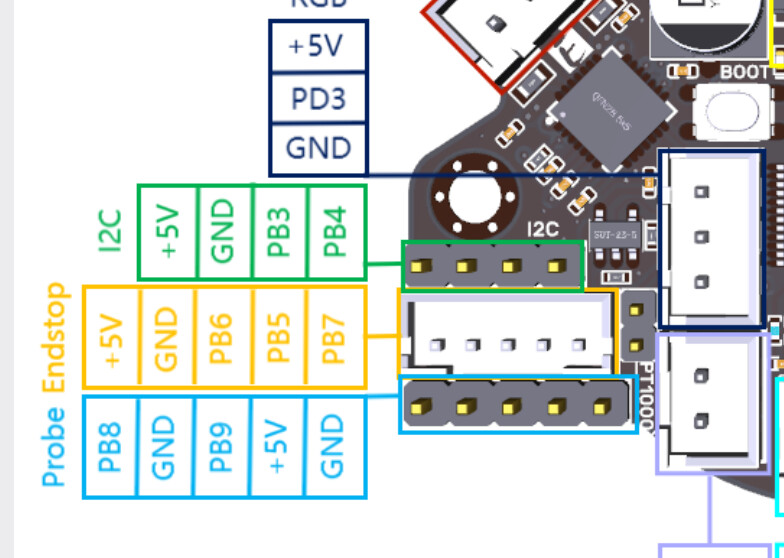
Is there any reason I can’t use an i2c pin for the x-endstop? The endstops use gnd and a data pin. I could use the endstop connector, but the normal sized header pins are easier to crimp ![]()
1 Like
They say your “not supposed to” but I have used those pins before and had zero issues.
This should make things lighter. I still have the bl-touch going back to the SKR. I don’t want to move it to the ebb36 because I want to use some of those pins for the eddy.
2 Likes
That should help a LOT. Run your Shaketune again and see how the numbers change
I want to finish cleaning all this up first, but I want to do a XYZ cube before I start cutting wires to shorten them.
1 Like
The transistor experiment failed. The relay board doesn’t have any protection diodes. The transistor circuit worked great… Once. When the relay shut off it fried the transistor.
Now I have to figure out how I want to proceed. Options are… Logic shifter (most likely), replace the 5v relay with a 3.3v one. Or some other idea.
1 Like
These are the ones I use on my V5… was before @orob board came out. I just use 3 of them and only short one half of the motor. Its plenty safe but does make some noise when it falls. Personally I like that, its my alarm that something happened lol.
https://www.v1e.com/products/24v-opto-isolation-relay-z-brake
If it’s dumb, but it works, it’s not dumb.
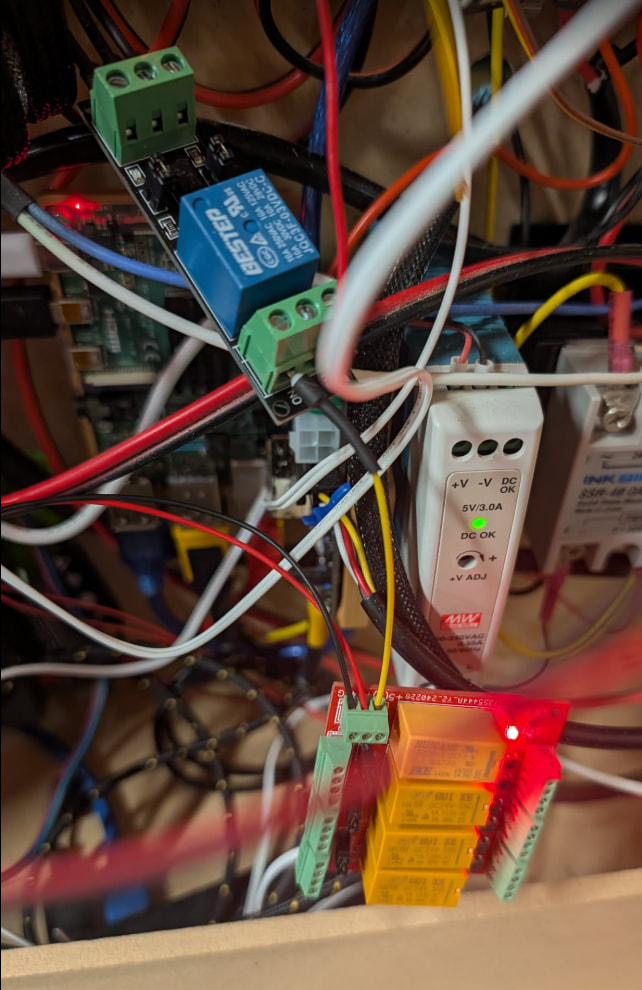
What I have for you today is a 3.3v relay controlling a 5v relay controlling 24v relays.
The 3.3v, signal, ground, and 5v for the 3.3v relay board come from the skr. The 24v and ground for the Orob board come from the 24v power supply. The 5v signal for the Orob board comes from the NO of the 3.3v relay.
I knew I had these 3.3v relay boards somewhere in the shop because I used them on a chicken coop door controller that I built (but never installed). A bit of digging in the correct drawer found them. 5 minutes of attaching wires this morning before work, and here you go.
Off
On
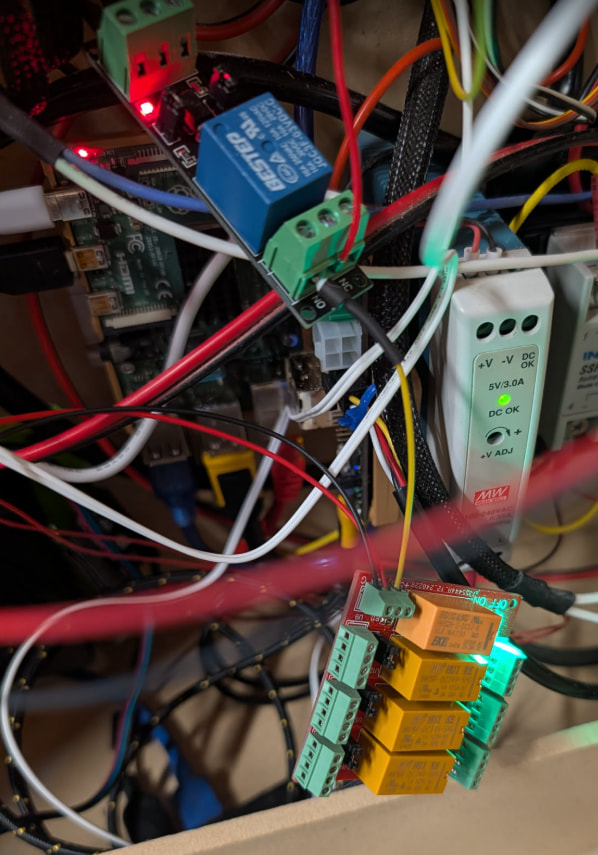
I’m working on a DIN mount to mount these side by side. I’ll need to mount another DIN rail in the cabinet to make it fit, but we’ll worry about that this evening. I may just hot glue the board to the wall at this point.
I’ll also have to extend all the stepper motor wires to get them to reach where these boards will go. Also another issue to deal with this evening… maybe Thursday evening. I keep forgetting I need to prep the travel trailer for our camping trip this weekend. Need to make sure none of the pipes burst during the recent freeze. I only drained all the lines and didn’t blow everything out like I usually do. It’s all PEX, though, so should be fine.
1 Like