Hello - My wife received the ATEZR 36W L2 this Christmas and we finally had some time to open it up today, put together and installed LightBurn. Thats about as far as I’ve gone. I’ve been reading MANY sites, watching youtube and etc. Anyone out there, have some time to answer a few questions for me? I really want to get this going and my wife has something she would like cut/create. It looks very easy (honeycomb layout) but I’m not sure how/where to get this svg file, design it in LightBurn, or where to begin. I’ve gone as far as, adding the machine to my macbook pro and stopped. I’m an IT engineer and work on servers all day, but this is something completely out of my "area’. LOL. I have a photo of what I’m trying to accomplish if you would like to see. I know i have to get auto focus and etc. setup and would like to start, but I feel like a deer in headlights. Any help would be greatly appreciated. I’m hoping to get a hang of this, over the weekend and attempt to cut this honeycomb holder my wife would like. Thanks in advance.
I don’t know anything about the ATEZR 36W L2, but I’m reasonably handy with Lightburn. Post a picture, and I can give you some guidance…as can a number of people on this forum. If you need to post multiple pictures, you may have to do multiple posts with one picture in each. When people first join the forum, there are some limits to what can be posted (to help combat spam). These limits quickly go away.
I cannot help you get Lightburn to connect and manage your specific laser. Once you make that happen, here are my recommended steps.
-
Do some material tests. You want to find out the power and federate settings that cut the specific material you want to use for this project. In Lightburn, you will find an “automated” Materials Test under the Laser Tools menu. In addition, material tests can be built by hand using Lightburn’s array tool and its Shape properties. There are YouTube videos on both processes. Note, for real cuttings, I use settings that are conservative compared the the cut test. It is a real pain to have something almost cut out and have to work the piece by hand to get the shapes out.
-
Find a simple SVG or DXF shape on the internet. There are many sites that have free vector files. Import that vector file into Lightburn, size it, and cut it out on one of the materials you tested.
-
Import a silhouette image into Lightburn, use the Tools/Trace image feature to create vectors from the image, then cut that image out. It is best if you pick a black and white silhouette with no shades of gray. Clipart is often a good source of pure black and white images.
When I was starting out, I cut a bunch of cardboard before moving to more expensive materials.
The steps above will build the skills you require for your project. The image you posted is poor for making a vector file for your laser. The biggest problem is the low resolution. A smaller problem is the shadows. It can be hard to get a good trace from this image. Even though our eyes can clearly see the object apart from the shadow, the trace functionality often cannot. If all I had to go on is this image, I’d recreate the vectors by hand in either Lightburn or Fusion 360.
Fortunately, I did a reverse image lookup and found a much better image of your project. This new image is still a bit low on resolution given how tight some of the features of the project are, but it has a good chance of working. The size you make this project will have a big impact on whether the features are too close together or not.
Here is a ZiP file containing the Lightburn file that with your project traced. (Lightburn files cannot be posted directly to the forum).
HexRack.zip (422.7 KB)
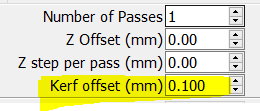
When you open this Lightburn file, you will see two different line colors. The two colors are so the cuts can have different kerf compensations. For some areas, you want the laser to cut inside the line, and for some areas outside the line. For many of the diode lasers, the kerf is about 0.2mm, so the kerf compensation will be 1/2 of that number. So, 0.1 will cut outside the line and -0.1 will cut inside the line. The power and speeds for the lines is random and will need to be changed based on your material cut tests.
This post is high-level roadmap with a lot of details left out. Feel free to ask questions as you work your way towards cutting out your project.
I really appreciate all your help and information. My wife actually has this piece. I can get better photos easily. She last a photo box so I could take photos that have no shadows and etc.
Assuming the piece is not too big, you may get better results from scanning it on a flatbed scanner. Photos have distortion for various reasons including perspective and built-in lens distortion. Scanners are largely distortion free, though you can still get shadows. Some image editing software allows you to edit out the distortions, but it is a pain.
If you are planning to make these as a business, I would recommend redrawing the vectors. If you are only going to make a couple as gifts, then tracing the bitmap is faster and easier.
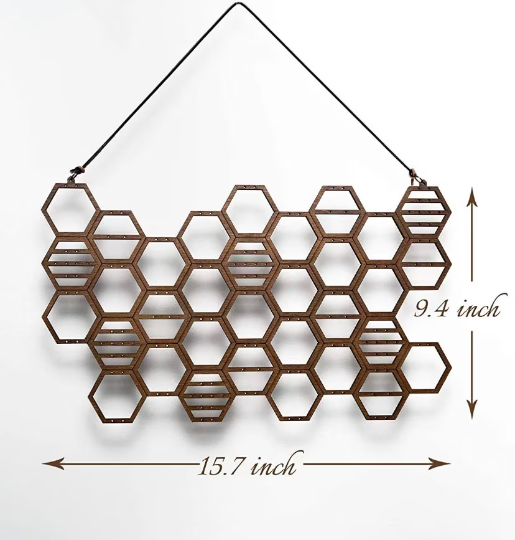
For now it would be for family, teachers she works with and our daughter. Here are two photo’s of the one we have. Unfortunately you can see the upper right hand corner is broke.
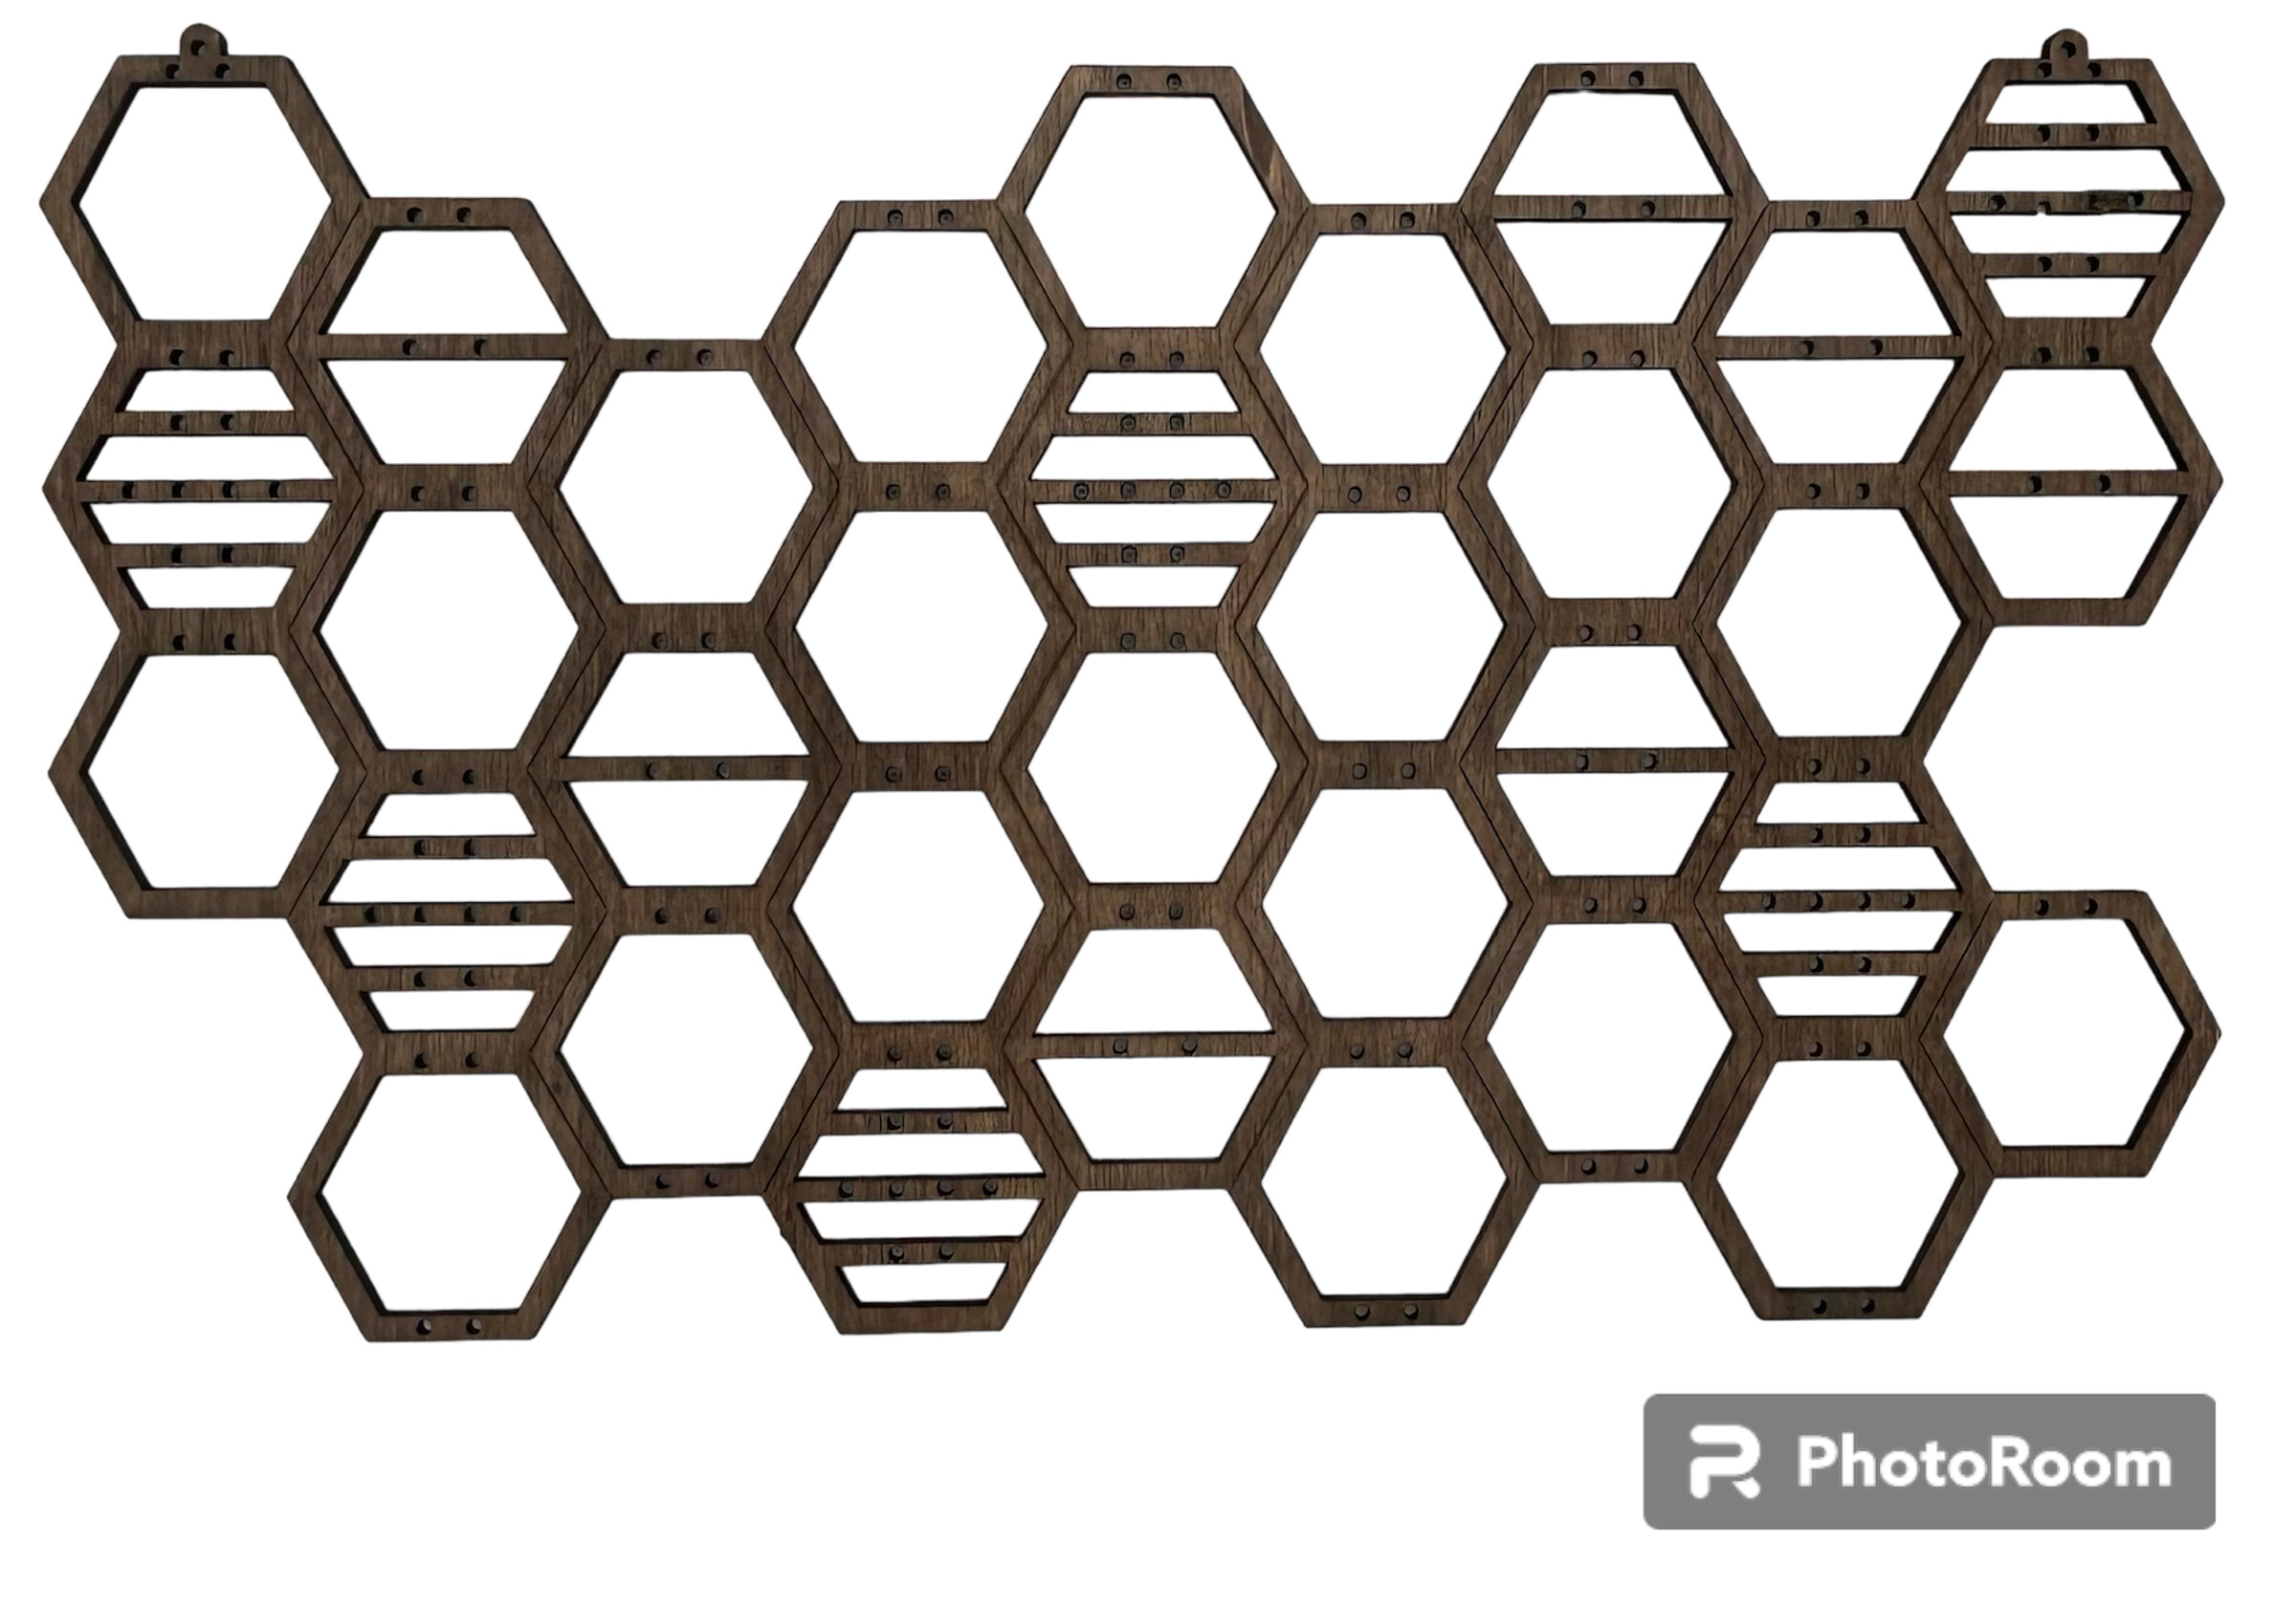
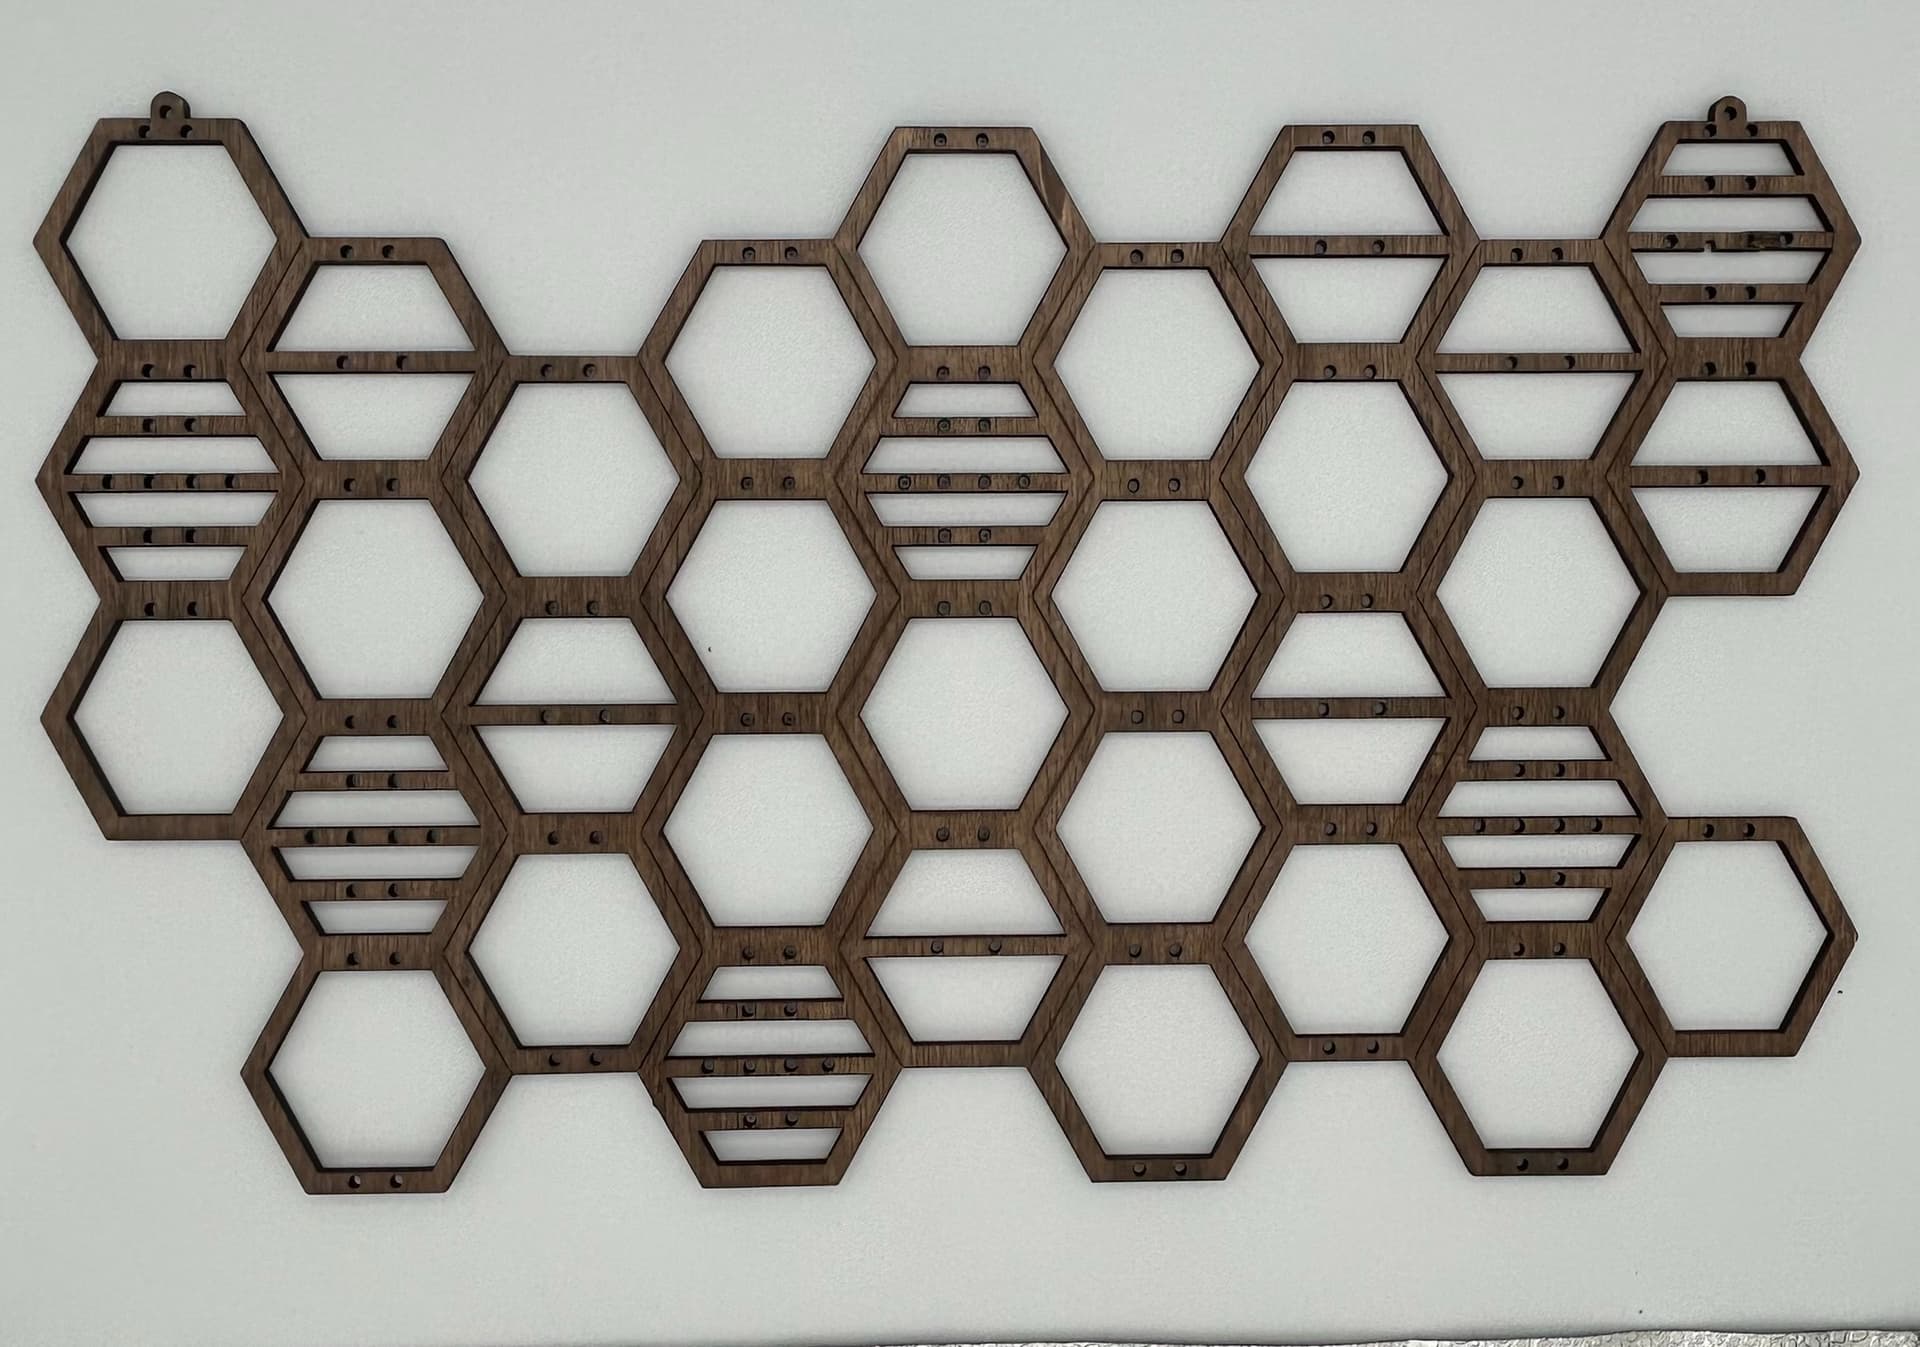
Both of these photos would trace well, but neither of these two photos show the holes in a way that can be auto-traced. The holes are easy to add, but there will be a learning curve figuring out Lightburn’s circle and alignment features. The photo I traced in the Lightburn and posted in the ZIP file showed the holes clearly, but the vectors of these holes are a bit misshapen. Often features that look odd when zoomed in, burn just fine since often the scale of these features is small.
As for the chipped “rod” in the upper right corner, it is easy to fix in lightburn, but there is a learning curve involved.
- Ungroup the shapes
- Enter node editing mode
- Delete the nodes where the rod is chipped
When I’m finally, 1/8” plywood?
I picked up a 4’x8’ sheet of 1/8" plywood from Home Depot, and I was not very happy with it. It was tougher to cut than expected and with inconsistent on how much laser power was required. I had to slow way down compared to what I guessed the settings would be…and even what the cut test indicated in order to be assure the laser cut through everywhere. I suspect the issue was sap pockets and/or glue pockets.
It may be too thick for your project, but I’ve had much better luck with Home Depot’s 5mm underlayment plywood. Also, basswood plywood purchased off Amazon cuts easily (and really easily for your laser), though it costs more.
That’s great to know! I will be making a trip to Home Depot Sunday morning. You have been extremely helpful and I appreciate you taking the time. If you don’t mind, I may have a few more questions while trying to design this in lightburn. I plan on working on this throughout the day while watching football. ![]() we’re originally from western NY(Rochester) so definitely not missing the Bills game!
we’re originally from western NY(Rochester) so definitely not missing the Bills game!
‘honeycomb earring holder’ looks like a popular design and pretty easy to find. Add ‘SVG’ to the search and you can buy the files if that’s your preference.
Looks like it would be reasonably easy to remake in fusion 360 or cuttle.xyz.
Since I’d never seen this design before, I did not even think of looking for the vector file. I had to add ‘DXF’ rather than ‘SVG’ to find someone selling the file. It is available here. I was somewhat surprised that this shop is the only place I found the file being sold. Typically, once one person starts selling vector a file, others steal the file and sell it in their store, so it can be impossible to figure out who owns the original art. Note that the pictures show engraving lines (which I did not capture with my trace and would need to be redrawn), so the vector files should have the engraving lines as well.
I also did a quick search for earring holders on 3Axis.co, and found a number of hits. None of them are the earring holder in your picture, but perhaps some interesting alternates. Frequently, files on 3Axis are CDR files. Most of the time, these files are easily converted to SVG files using an online converter.
I found the SVG on Etsy. Given the number of times I’ve seen free files for sale on Etsy I don’t want to encourage anyone to buy files from there though ![]()
But I’ve always wondered if the selling of “free” files is sometimes the reverse problem. That is, I’m sure sometimes people buy the file and then post it on a free site, rather than people taking public domain files and selling them on Etsy. I bet it goes both ways, and, usually, there is no way for us to know who the rightful owner is. This unknown sometimes makes me uncomfortable using art from free sites.
I’m trying to design it on my own in lightburn. I won’t learn by just buying a file. I’m an IT engineer and I need to be doing the work “hands on”. But I’ll always take advice ![]()
If I was trying to create the vector art for this jewelry holder, I’d first rough it out in Fusion 360. There is a learning curve associated with Fusion 360, but the sketch workspace has a lot of functionality missing from Lightburn. For example, you can specify the distance between the holes, the alignment of the holes wrt each other, and the alignment of the holes wrt the hexagon frame. You can create patterns at odd angles, and suppress cells in the pattern.
There is a free/personal version of Fusion 360, and there are other free CAD tools that provide similar functionality.
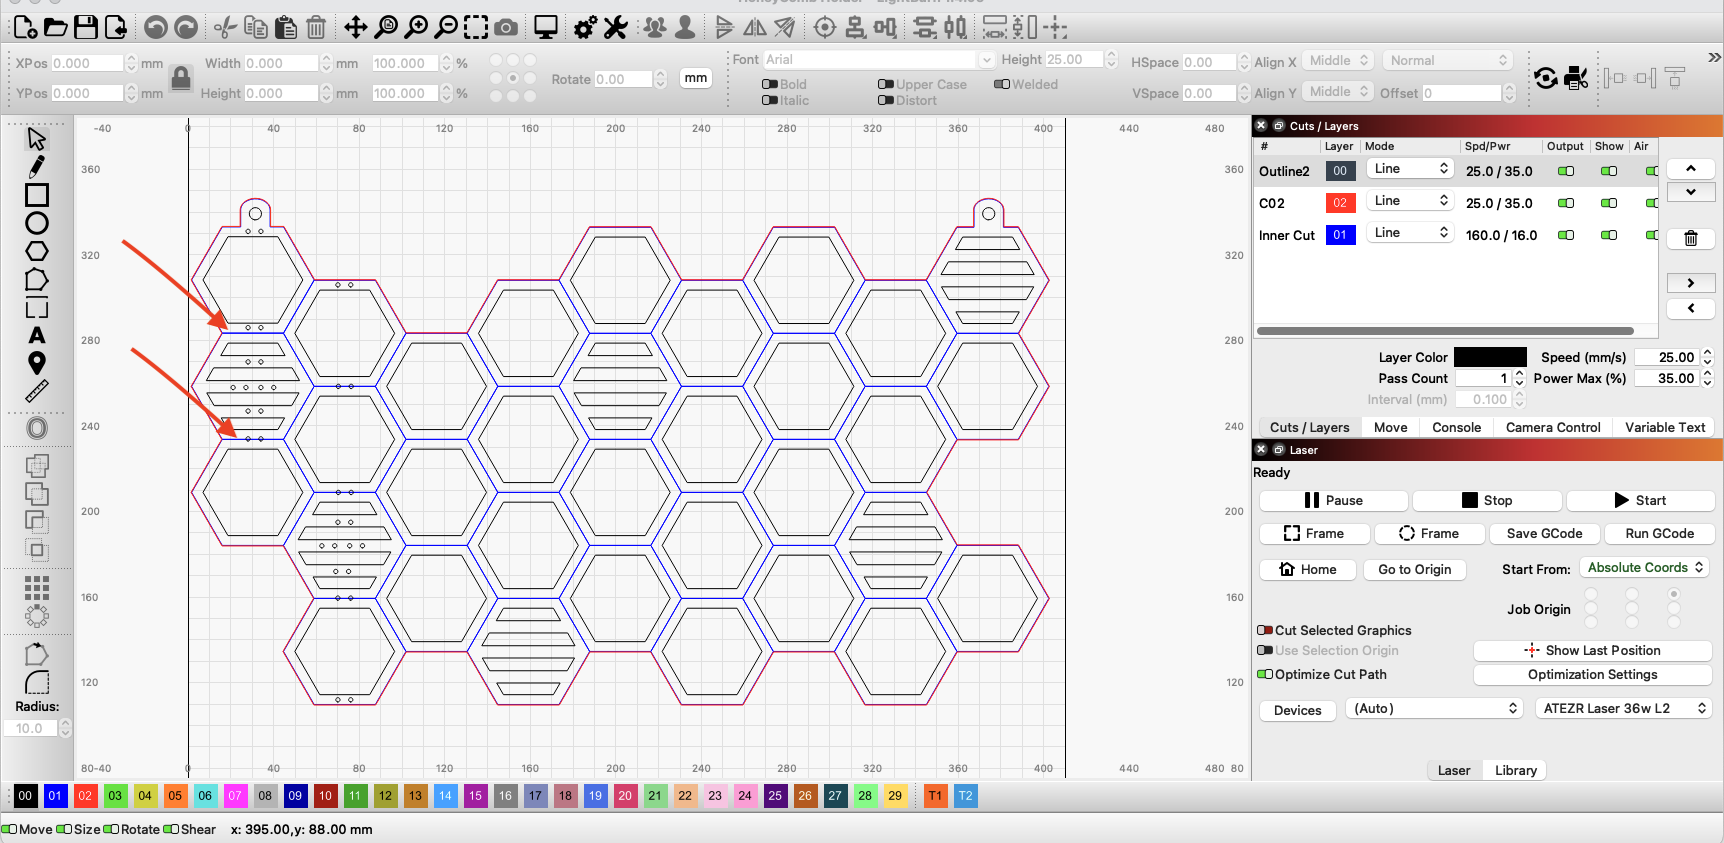
I’ll have to check it out. I am having trouble placing the holes so they’re evenly spaced in lightburn. Im sure I’m probably missing s tool or doing it wrong. This is what I have so far. I need some of the blue lines removed, but when I delete the blue engrave line, the entire line deletes. For example: In my piece I own (photo i uploaded yesterday), The upper left hand corner, the 3 hexagons going vertically do not have an engraved line under each of them. The engraving is between the three hexagons and the 4 hexagons to the right., Im not sure how to remove certain “blue” engrave lines. Ive also started adding holes as you can see. Not sure if I have the correct diameter for them. I just uploaded a screenshot. You can see what blue lines I’m talking about. (Red arrows)