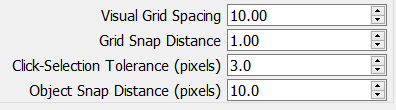
You’ve made good progress. The issues you are facing now are why I would have roughed out the design in Fusion 360 first, but there are tools in Lightburn that you can use. First, you have the arrow keys. The arrow keys, arrow+ctrl keys, shift+arrow keys, and the ctrl+shift+arrow keys all move precise but different distances. If I’m eyeballing things, I’ll often use some combination of these keys, and count the number of each, repeating the same numbers with each set I’m moving. You can set the distances for each of these keys in settings:
![]()
Circles as well as groups of objects snap to lines, so another technique is to use reference lines. For example, in your drawing, you could create a new hexagon by offsetting the inner hexagon by a half the amount of the larger hexagon. Then you can use this middle hexagon as reference for sets of circles, then delete the hexagon after the circles are placed.
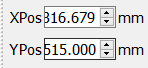
Another technique is to edit the position directly. Lightburn has a duplicate command (ctrl+d or right click) that places the new copy directly over the old copy. Then you can just edit the X and or Y position to move a precise location for the duplicate:
Another way to approach the problem is to set the grid so that the snap points work where you need them to. Making your critical objects some multiple of your grid height and aligned with the grid regardless of the final height of your object. You can always do a scaling at the end of the drawing.
The last method is a bit difficult and longwinded to explain, so I’ll give you the elements, and if you need this technique and cannot figure it out, I can make another post. On the Cuts/Layers panel, you can turn on/off (Show) lines by color. When you duplicate something, the duplicate, and not the original is selected. You can use a master copy of the hexagon (in a different color) with the holes placed and use a combination of grouping/ungrouping, alignment, duplication with an immediate color change, plus hiding and showing to apply elements of a master at various places.
As for your editing/deleting lines segments, you need to select the object and then go into node editing mode. In that mode, if you hover over a line segment, the ‘d’ key will delete that segment. In the beginning, I was going back to the reference to figure out the keys for the node editor until I figured out that, when I hover over the node editor icon, there is a flyout menu. My clipper won’t capture flyout menus, so here is a photo.

PS: The Bills won! I just watched the highlights, not the actual game, but it wasn’t looking good when NE scored on the opening kickoff.


