New to 3D Printing - Advice for LR3 Print Settings

Another thing to bear in mind is that sometimes even with the best bed levelling, I’ll still sometimes just have random issues on some parts. I leave a heater on in the room that my 3D printer is when printing bigger stuff to keep it at ~30c to try minimize warping, which helps a LOT for my glass print bed.

Fundamentally, though, it’s a case of trying everything and seeing what works. I used to be able to print fine on just clean glass. I don’t know what has changed but that hasn’t worked for me in a long time. I’ve tried hair spray and glue stick without much luck. ‘ABS juice’ is what worked for me, to the point where sometimes I’ve had to put the entire printed part and plate in the freezer for 10 minutes to get it off the build plate without breaking it.

If you try a bunch of stuff, you’ll get a feel for what sticks insanely well but is annoying, what is easy but questionable etc. Save the annoying processes for critical parts and use the easy process for things that are simpler to print.

Use a brim. Hell, use a raft if that’s what it takes. If it works, it wasn’t stupid :slight_smile:

4 Likes

Thanks for that. I did a bit of reading, and it seems that the biggest difference between PLA and PLA+ is that the + will bend before breaking, so yes, rigidity is significantly lower. Ease of print and quality of finish are supposedly better with the +, but in this case I think that performance (rigidity) would be preferable .

Looks like I will drop the Esun PLA+ as an option, and start looking at regular PLA options instead.

Just talking about this today. Filament (Polar Filament of Troy, MI) - #2 by vicious1

Ryan and Jeff both use hatchox pla. I will be now too!

2 Likes

Hatchbox is my “beans and rice” PLA. I don’t print very often, so I usually have more expensive filament loaded in the printer. Nothing wrong with HB, but I like the ziro CF and the protopasta PLA+ for being extra fancy (I make zero claims that these filaments are better, they just look cooler). I don’t print all that much, so the price difference is NBD. If I am printing a drawer full of containers or a bunch of prototypes, I will load up the HB.

1 Like

Thanks to all for the suggestions!

The following is from my build thread, (Bartman's LR3 build thread - A New Adventure!), but most of it is relevant to this thread, so I’m copying it here (hope that is within the forum rules).

I’m making progress dialing in the new Ender 3. I checked the e-steps for the extruder, X, Y & Z axis. The three axis were all within 0.08 mm over 100 mm of travel, so no adjustments necessary. The extruder only pushed 94mm of filament on a 100mm command, so I adjusted the settings and now it pushes 100.07mm (pretty darn close).

I had already leveled the bed, set the Z Offset, created a bed mesh, and tuned the PID for the nozzle and bed. I then printed a single layer bed adhesion test file, and it came out pretty good, as far as I can tell:

Sorry for the crappy pics - photography is not my strong suit.

The rectangles look like there are no voids or gaps, and they were sticking really well to the bed in each location.

Next was a skew test.

The adhesion of these to the bed was through the roof! I literally had to remove the glass plate and use a scraper as a chisel to remove them.

The XY test was within 0.05 mm (100mm rectangle, 140mm diagonal), so that was pretty good.

The XZ test was also pretty close (0.02mm difference), but there is a lot of stringing, along with a bit of elephant foot. Not sure if that is because of the filament (the white stuff came with the printer, and has been exposed to the air for several weeks), or because I still need to dial in the temperature and retraction settings. Now that I have used up the old filament, I’m going to load up the shiny new red Hatchbox PLA and do those tests next.

The YZ test was a little bit less where I was hoping, with about 0.70mm difference, and again lots of stringing and elephant foot issues. Not sure if this is a reasonable amount, or if I need to compensate in Cura or in Marlin. Once I dial in the temperature and retraction settings a bit better, I plan to re-print that test and see how it looks. I should hopefully also be able to do some of the shorter pieces (pretty much everything but the core, I’m thinking) as is, and maybe try to fine tune it a bit more before tackling that one.

2 Likes

Looking good. Stringing is something you can usually correct with either retraction adjustment or print temperature adjustment or both. I suggest trying retraction adjustment. Baby steps.

1 Like

OK, still dialing in the settings. Just printed a Temperature Tower, and I’m uncertain how to interpret the results.

Hatchbox recommends 180-210 range. I found an STL file that covers 205-180, so tried that. Virtually no stringing at any temperature (which seems to suggest that the white filament had moisture issues). Top two sections (180, 185) broke off fairly easily. I tried to break off the 190 section, but it was stuck firmly, and it ended up breaking at the transition between 195-200 instead. Similarly I could not break it easily at the 200-205 transition either.

The main noticeable difference is in the bridging. The best quality seems to be in either the 190 and 200 sections, with slightly better quality in the sharp cone area with 190. 195 shows some defects, as do 180, 185 and 205

So given that 190 and 200 seem to show the best results, but 195 possibly shows both strength and bridging issues, which would be the better choice to print the LR3 parts with? As always, I appreciate any input and advice.

Hey @Bartman, expected to see more variance in print quality for the different temperature settings.

Am curious what slicer you’re using? Am using Cura, within Cura can select a temp tower part…

But, I also need to Add, and Configure a Post Processing Script called TempFanTower that will change the nozzle temp at the right layer given the model height and layer height settings am using. To figure out Change Layer settings I do an initial slice, look at the slice Preview and use vertical scroll bar to figure out.

Am using Overture PLA (printing at 215C for my setup) instead of HatchBox, and also using uncommon layer height (0.6mm nozzle, 0.32mm layer height), so you’d need to tweak the Change Layer, Change Layer Offset and other settings to make sense for your setup.

Vaguely recall Teaching Tech and Chep have couple of videos that helped me through this process.

It’s great that you’re investing time up front dialing in your settings so you have good solid dimensionally accurate parts. A critical step for ending up with a decent machine. Learnings from this time consuming exercise will pay off for all your future projects.

Hope that helps!

2 Likes

Yes, I was surprised as well, especially given the earlier stringing issues with the white filament

Cura.

I used Cura’s Extension - Post Processing - Change at Z - Change Extruder 1 Temp (5 individual scripts for the 5 temperature changes) and used the dimensions given on the Thingiverse site (1.4mm base, each section 10mm) to determine the change location, then confirmed it with the preview function as you described.

Thanks for that. I figure that using up a bit of time and filament now to dial everything in is more useful than spending time and filament to reprint when the part doesn’t come out as planned.

2 Likes

I have tended to over the years get the best results in my PLA prints at 190 or 195. I usually print the first layer at 195, the 190 for the rest.

However, given the variances in machines and filaments, I would probably suggest to just print something in both and see if there is a discernible difference in strength.

If both pass the “strong enough” test, use the one that looks best.

I print at 190 with 5% infill in Overture PLA and am sometimes shocked at how strong the parts can be.

It’s possible you may need to tune your retraction as well. I had this problem recently and found that my retraction settings needed to be cut in half.

2 Likes

Woohoo! I think I have everything dialed in, and just printed my first LR3 part. Pretty stoked about how it turned out.


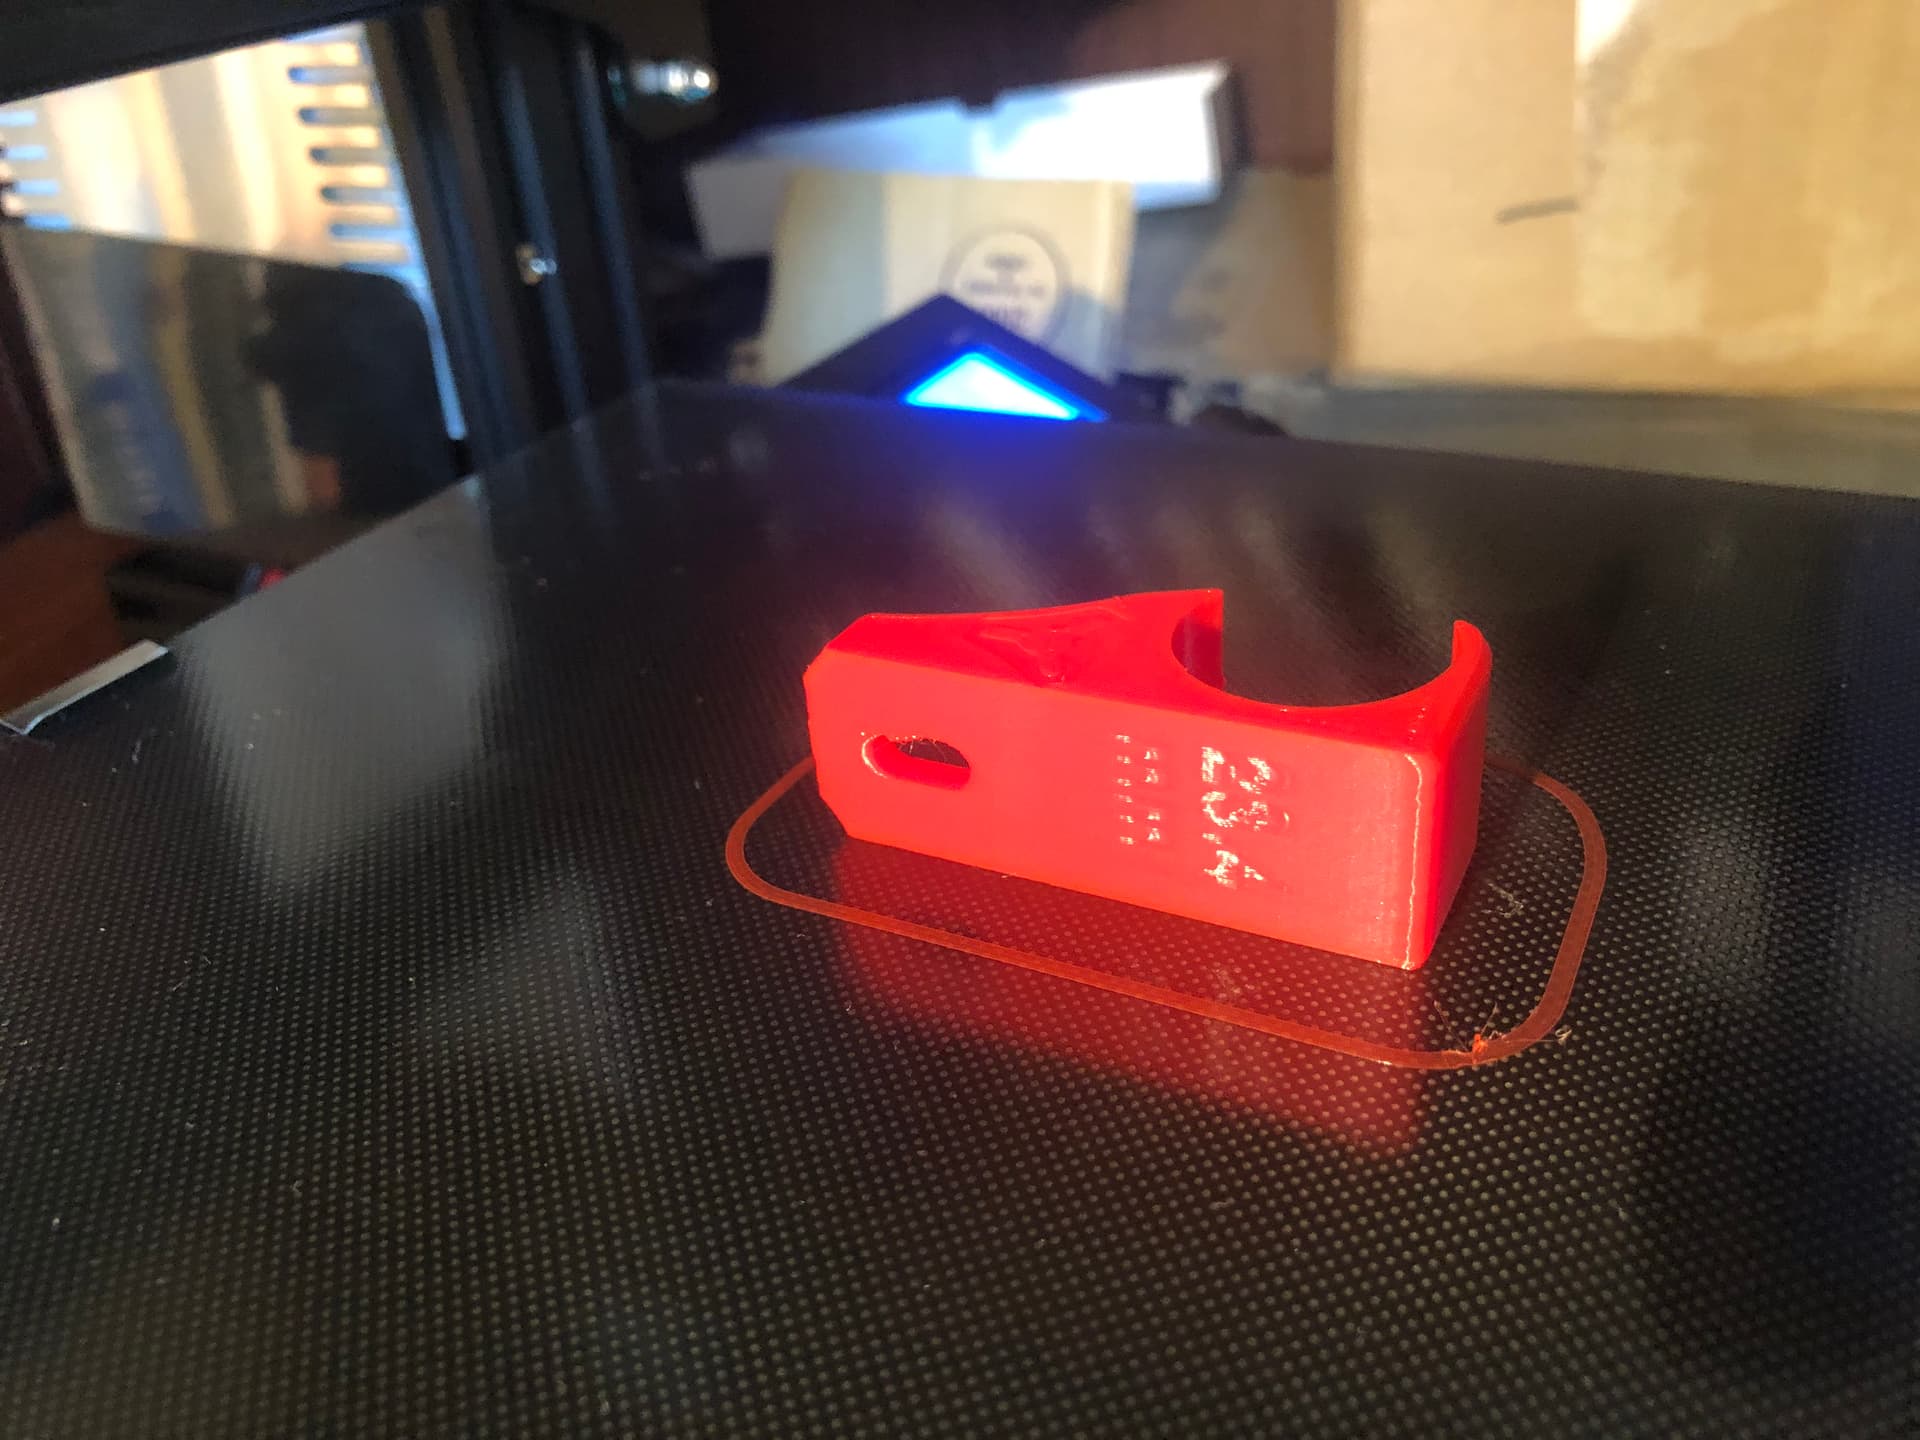
I’m going to try again with multiple copies in the same print, as I need 16 of them (120" Y rail, every 8").

Follow along at Bartman’s LR3 build thread - A New Adventure!,

5 Likes

Lots of good advice in this thread.
Throwing in an observation of mine- White filament (not “Natural” AKA un-colored) is THE WORST for printing and dialing in (and part strength) in my opinion.

That’s because of the additive used to color the white filament. Not sure if it is titanium dioxide or other additives, but I’ve universally had bad experiences printing white filament. White PLA in particular was really difficult to get satisfactory results with. White PETG for me was pretty much not printable in my TAZ or flashforge printers.

3 Likes

That last part looks good. Can’t wait to see your build take shape.

2 Likes

Yeah, was surprised by this as well…

2 Likes

I’m not disagreeing with you, but I think some of the issues I experienced were due to having the white filament exposed to the air (and moisture) for several weeks. I have since bought a bag of desiccant sacks and several heavy duty vacuum bags to store the filament in when not actually printing.

Yes, moisture really impacts PLA, ABS and PETG (Filaments I print with). I live in a relatively low humidity location (Colorado), and it’s noticeable. In really high humidity locations it is much worse.

Working to keep filament dry is very much worth doing

1 Like

I didn’t notice it until I took the part off of the bed, but there is a little bit of elephant foot, and some ringing/ghosting on the numbers.


I checked the machine and found a few screws that had come a bit loose (still mostly snug, but was able to get about a 1/4 turn to tighten them fully). I guess this is not uncommon with a new machine, where the first few hours tend to shake things a bit loose.

I’ll also get a rubber mat to absorb some of the vibration. If that doesn’t fix the ringing, I’ll reduce the acceleration and jerk settings a bit, and maybe reduce the print speed if that doesn’t solve the issue.

For the elephant foot, I decreased the Z Offset by about 0.010 mm to reduce first layer squish, and reduced the bed temperature from 60 to 50. We’ll see how the next batch of 4 rail supports come out.

Any other suggestions?

Your slicer should have an Elephant foot compensation setting or equivalent.

image

2 Likes

Looking at the print above with that part on the bed, the skirt looks fairly squished.

How many loops do you have it configured for? If just one, then the print head is actually two low on the first layer and part of the elephants foot is from squish. Might be worth re-checking the z height.

1 Like

Three loops, 250mm
minimum length.

I’ll re-check the height again, but I’m wondering if lowering bed temperature, raising initial fan speed (currently 0), and possibly increasing initial layer height might give better results.