New member, just got my MPCNC up and drawing today for the first time.
Actually printed the parts several months ago, but hadn’t decided whether to source parts myself or buy the kit, so they sat in a bin until recently.
Decided to bite the bullet and buy the parts kit, and started the build earlier this week.
Went with stainless for the tube, and only pain there was not having a good option for cutting that would give me nice square cuts. Used a cordless oscillating tool which cut fairly quickly, but needed a good bit of cleanup. Drilling the stainless was also a little rough…burned two 5/16th bits in the process.
The end result is nearly finished…need to print an enclosure for the electronics and tidy up the wiring, but initial tests were fantastic!
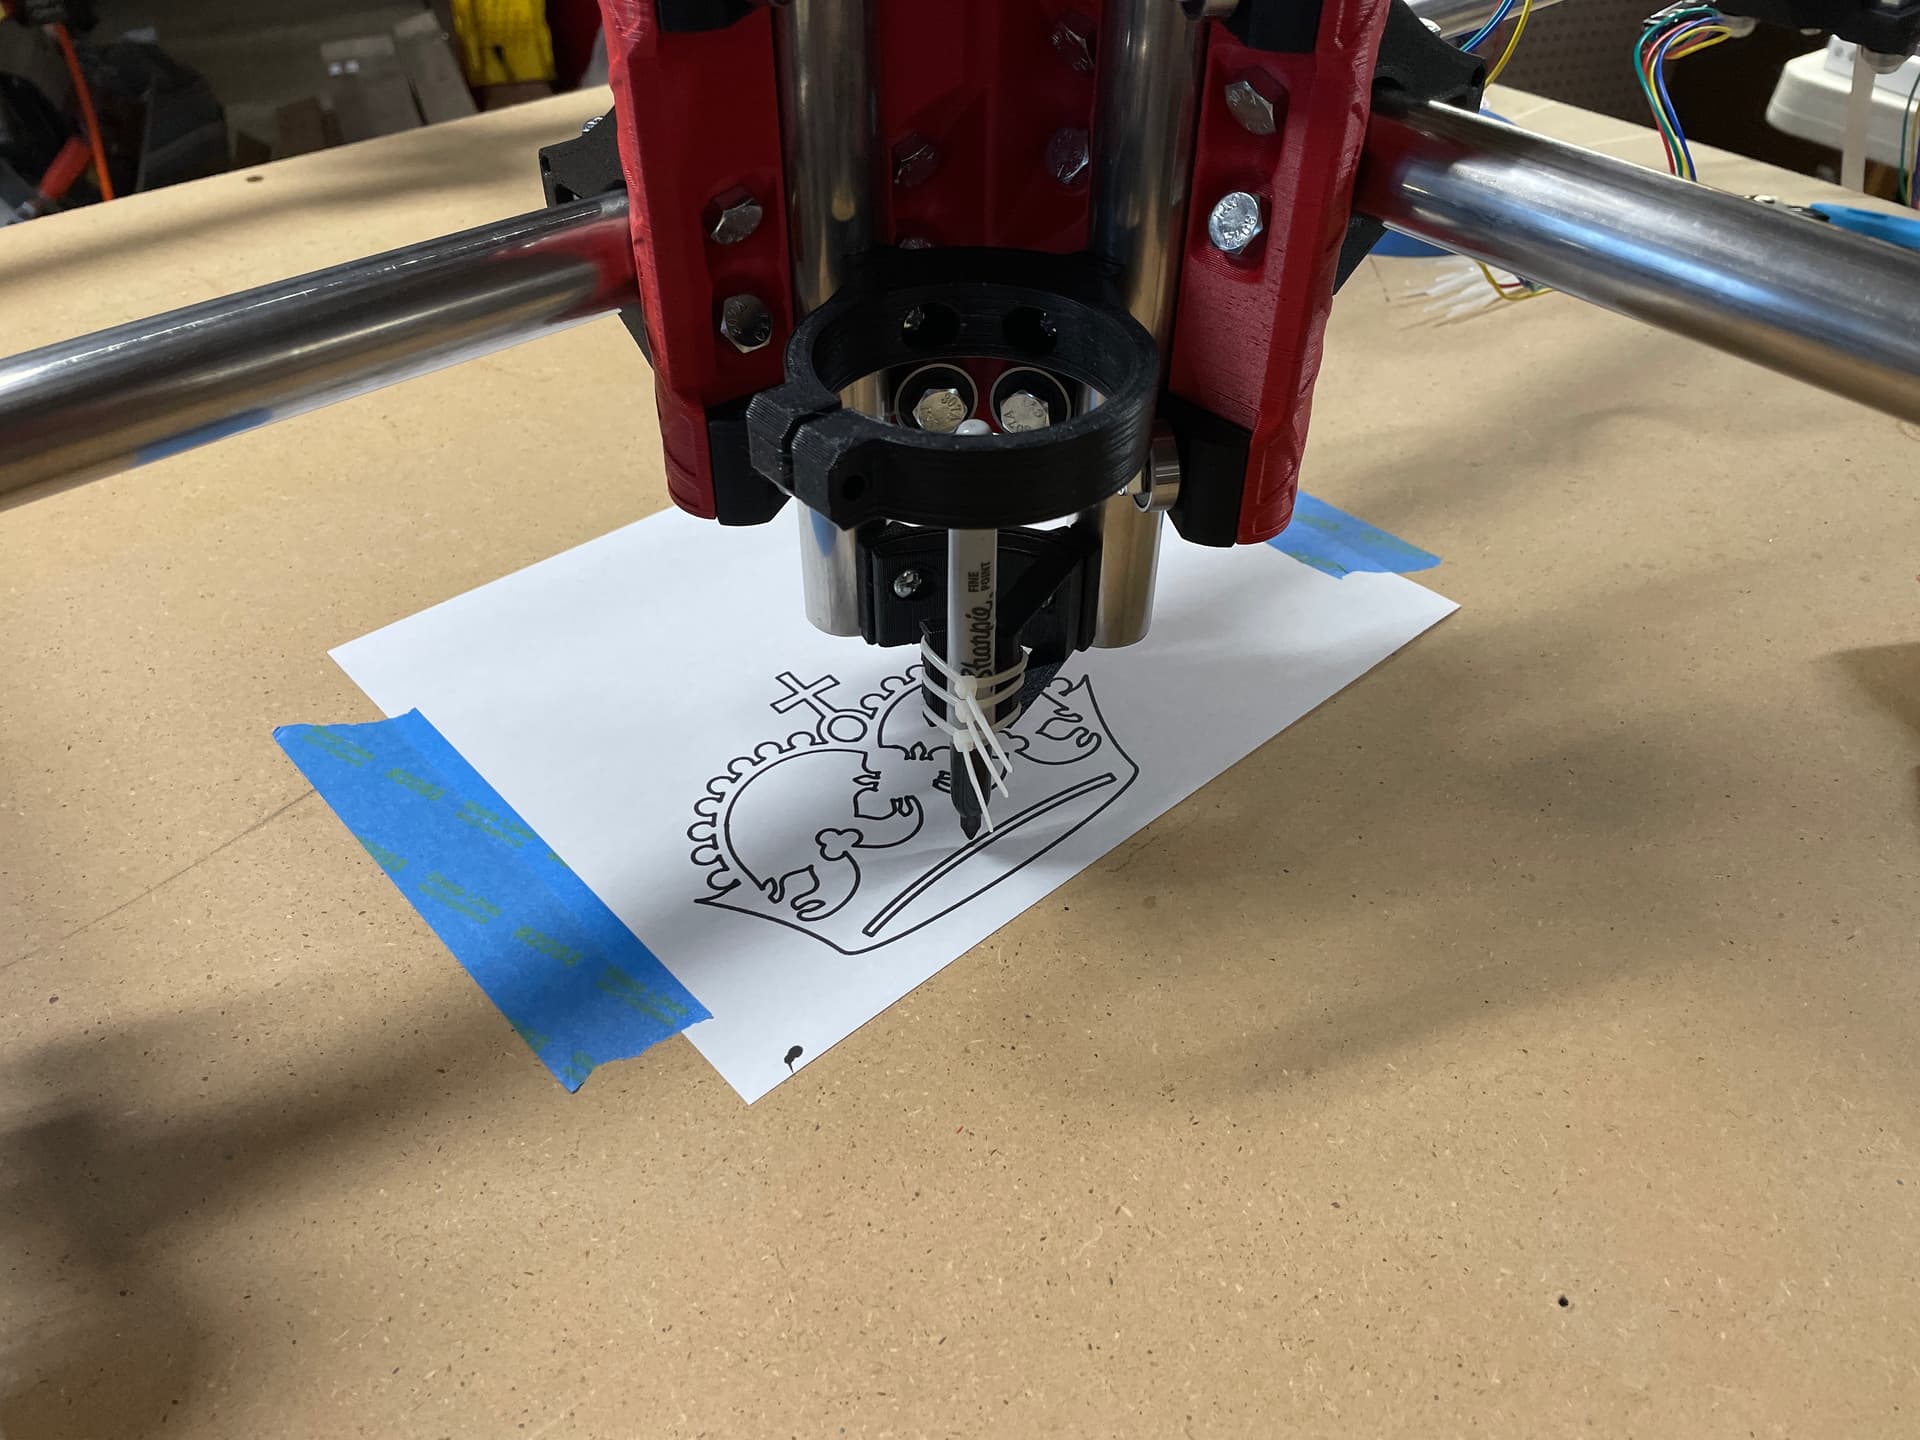
I would welcome recommendations in terms of determining how accurate my drawings are. My current plan is to design a few primitives in Fusion or similar, and then draw them on the CNC and measure the result.
Thanks, Ryan and team for a really nice design and good documentation! I’ve been 3D printing for more than 4 years which probably helps with the concepts, but I was still a bit intimidated getting started. Feels great to have the machine to the point of drawing.
Once I test accuracy of drawing next test will be adding the router and milling in soft materials like cardboard or foam core, which I’m guessing will be less likely to trash an end mill if I goof up.
Forgot to mention that I printed the parts on a Micro Center $99 special Ender 3 Pro (upgraded with an SKR e3 silent board) with a 0.6mm nozzle.
I was a little concerned about accuracy at the higher layer height and larger nozzle, but I think the larger nozzle helped make the parts stronger, in addition to printing faster, and while things might have been a bit more snug in spots than if I’d gone with 0.4mm, everything seems to have gone together well. Only issue I ran into was cracking the upper tool mount plate, but I think that was more due to snugging the screws on just the plate, without the tool mount itself. Since it’s sandwiched between the tube and the tool mount, I’m not worried.
The filament is Polymaker Matte PLA. I love the look of it, but it seems to have a lot of moisture, as it pops like crazy and leaves occasional gaps. Even tried drying it in my filament dryer. If I could work out that issue, I’d probably use this filament like crazy. When it prints well, the surface is gorgeous.
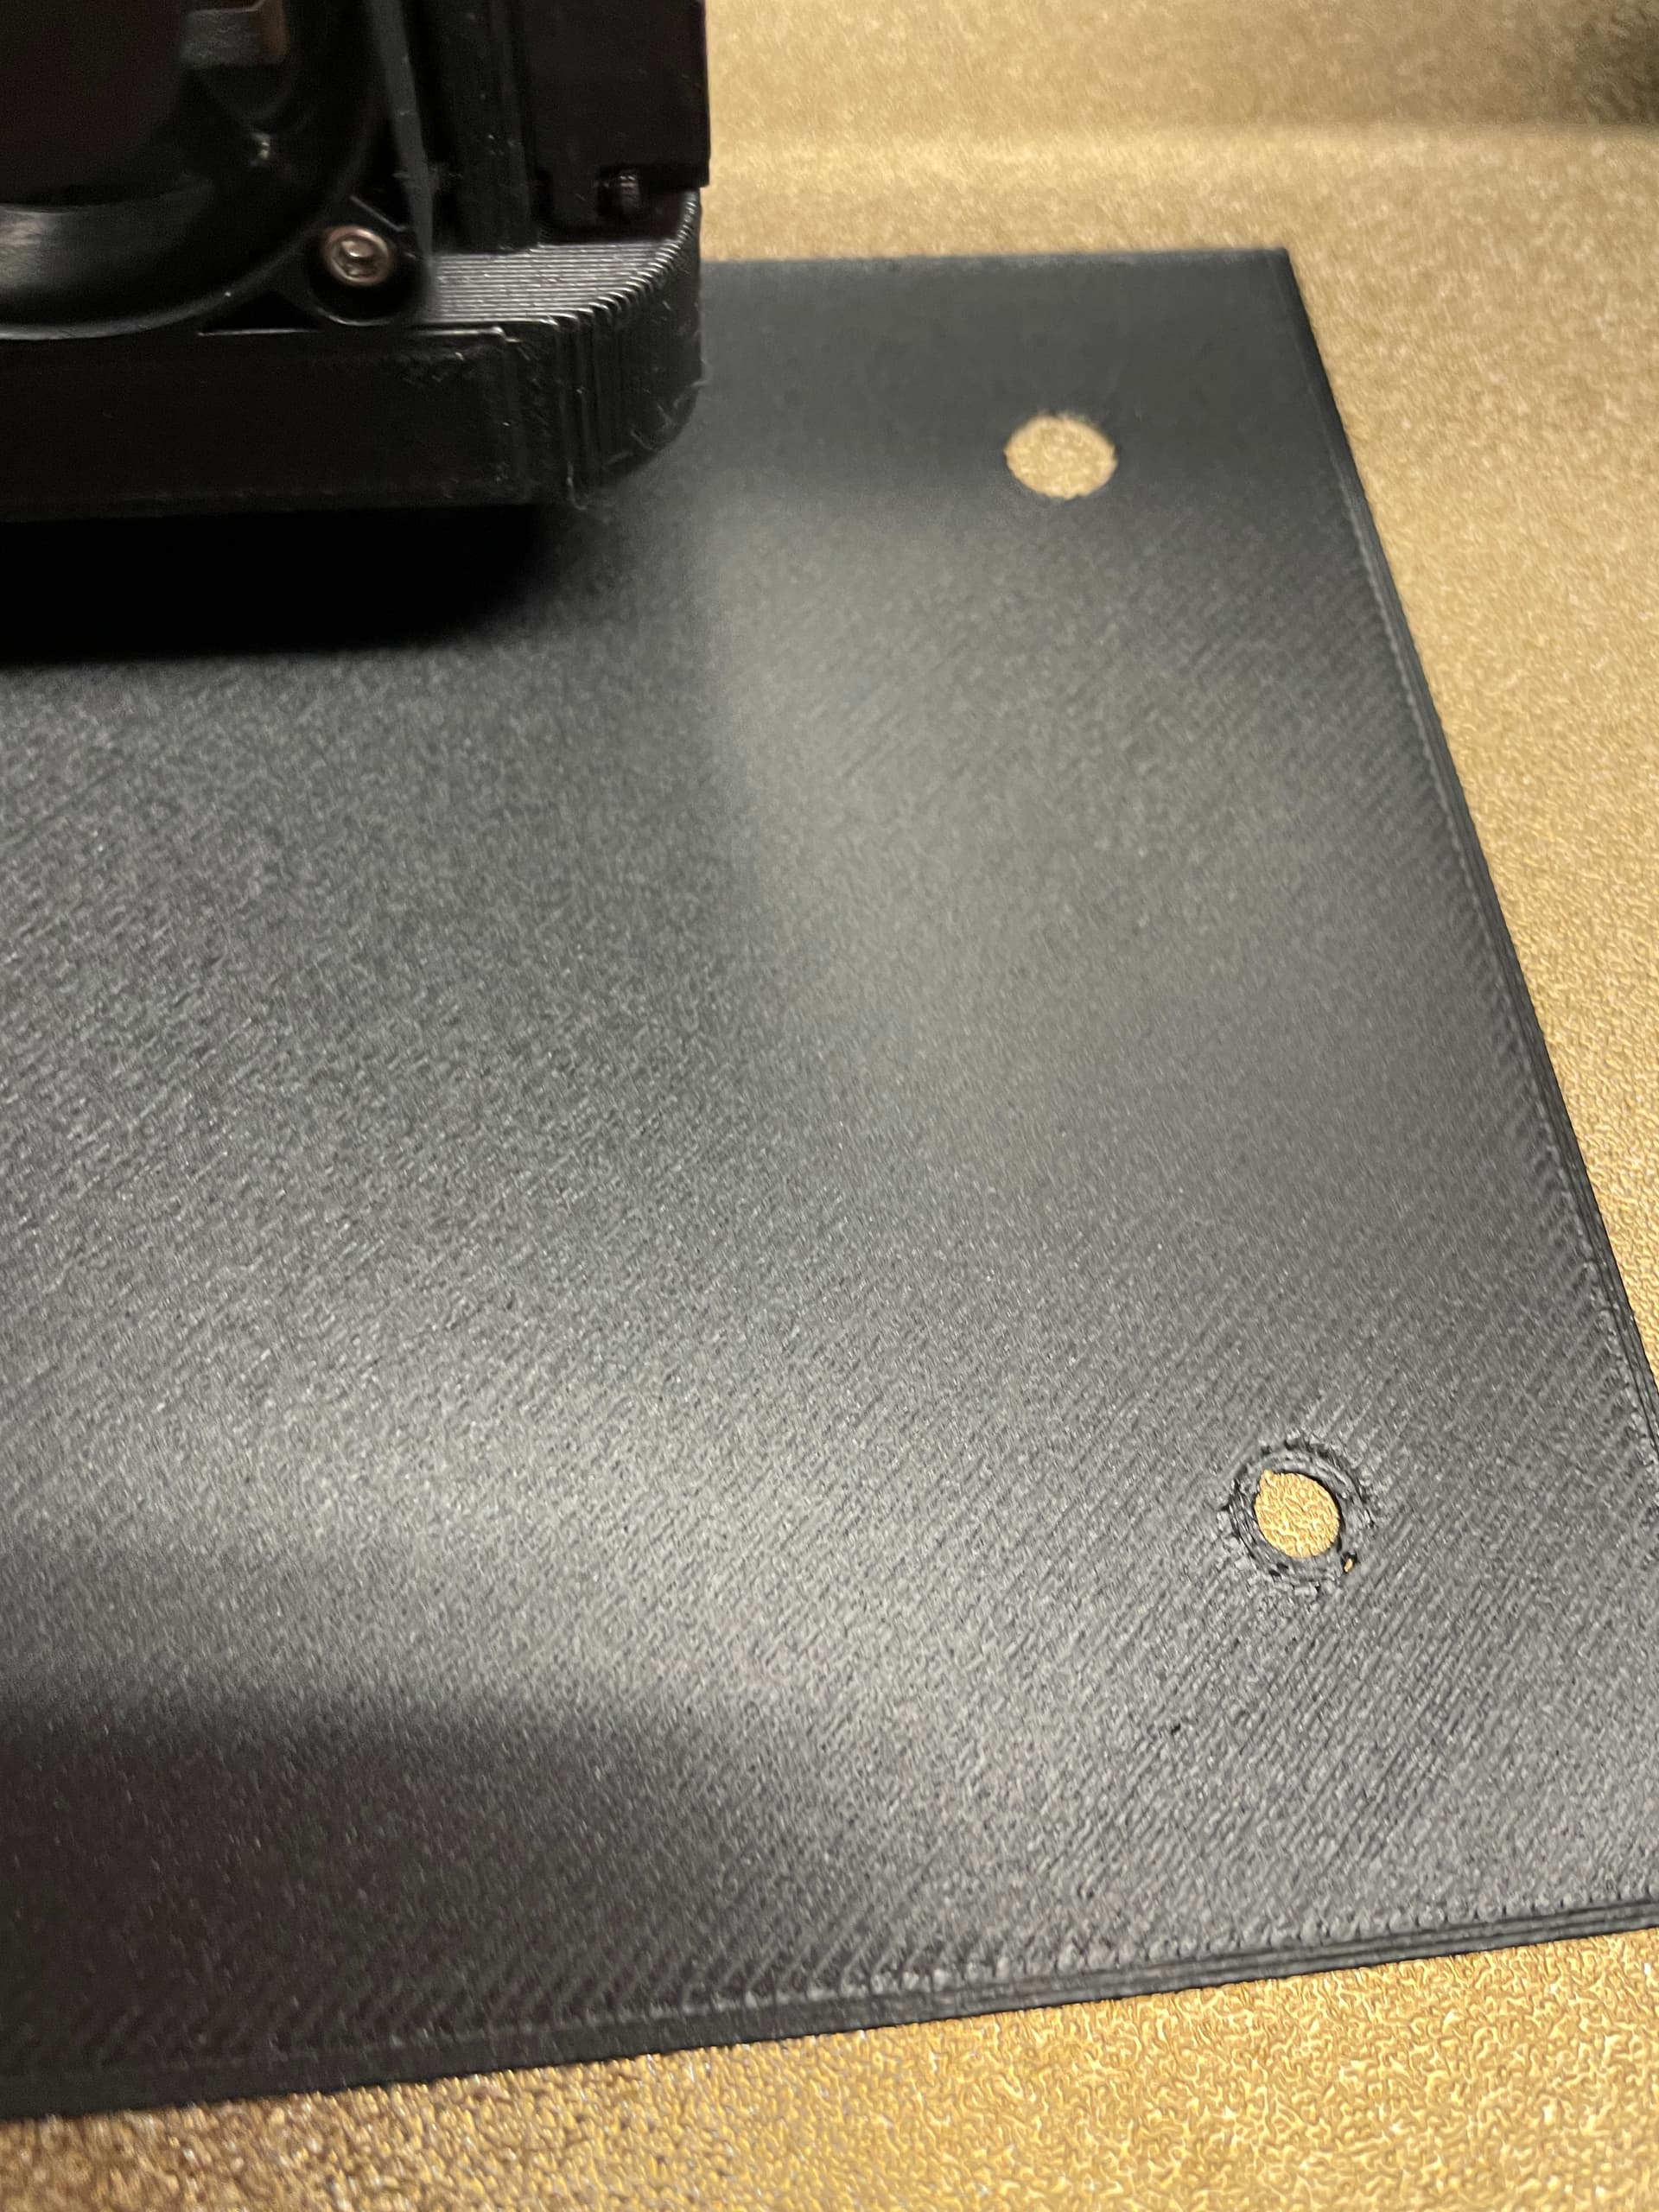
For reference, I started printing an enclosure for the RAMBo, and this is how the first layer came out…
I haven’t had a chance to test that one yet, but I did use Inkscape to create a 25mm square and pulled that into EstlCAM, prepped it, and pushed it to the CNC via Repetier, and it came out spot-on (at least to the limit of my ability to eyeball it with my digital calipers). I ran it once with a sharpie, then realized that was kind of dumb, since the line width is at least a couple mm with that. Re-ran with a pencil, and it seems very accurate.
I’ll have to do something larger to check for square and to see if there are any small inaccuracies that would add up over a longer line/shape. But I’m encouraged by the results so far.