Was strongly considering a Maslow 4.1 for the space-savings but it came down to the fact that they look (and sound, from the forums) kind of finicky whereas the LowRider has a strong history of iteration and improvement (and frankly much more info out there from the beta testers like @DougJoseph et al.). So I just ordered a hardware kit with the Jackpot and a few other things from @vicious1 and am printing my first prints now! I’ll document things here, should be a blast.
Updates! Just ordered the Makita router from Amazon, as a plus they had a plunge base to go with it on a return item so I took a chance and got the whole package for ~$150. The plunge base will be nice since I could use it when the machine is torn down, due to space issues I don’t expect the LR4 to have a permanent home for some time. Added to that a 4-pack of PLA for printing and a few other things I’ve needed as well. So I think apart from the EMT conduit and table supplies I’m in pretty good shape to keep on printing and then when the package from V1E arrives to start building.
Printing parts appears to be going pretty well so far. I have an Ender 3 Pro I got for $100 at Microcenter maybe three or four years ago and it’s been amazing. I recently converted it to direct drive so I could print TPU, and the only other modification I’ve made is to go to a v 4.2.7 Creality board I got off of eBay for $20 so I could have the silent stepper motor drivers, adding a Creality CR Touch sensor for automatic bed leveling, and then running Marlin 2.x on that board to support the new features.
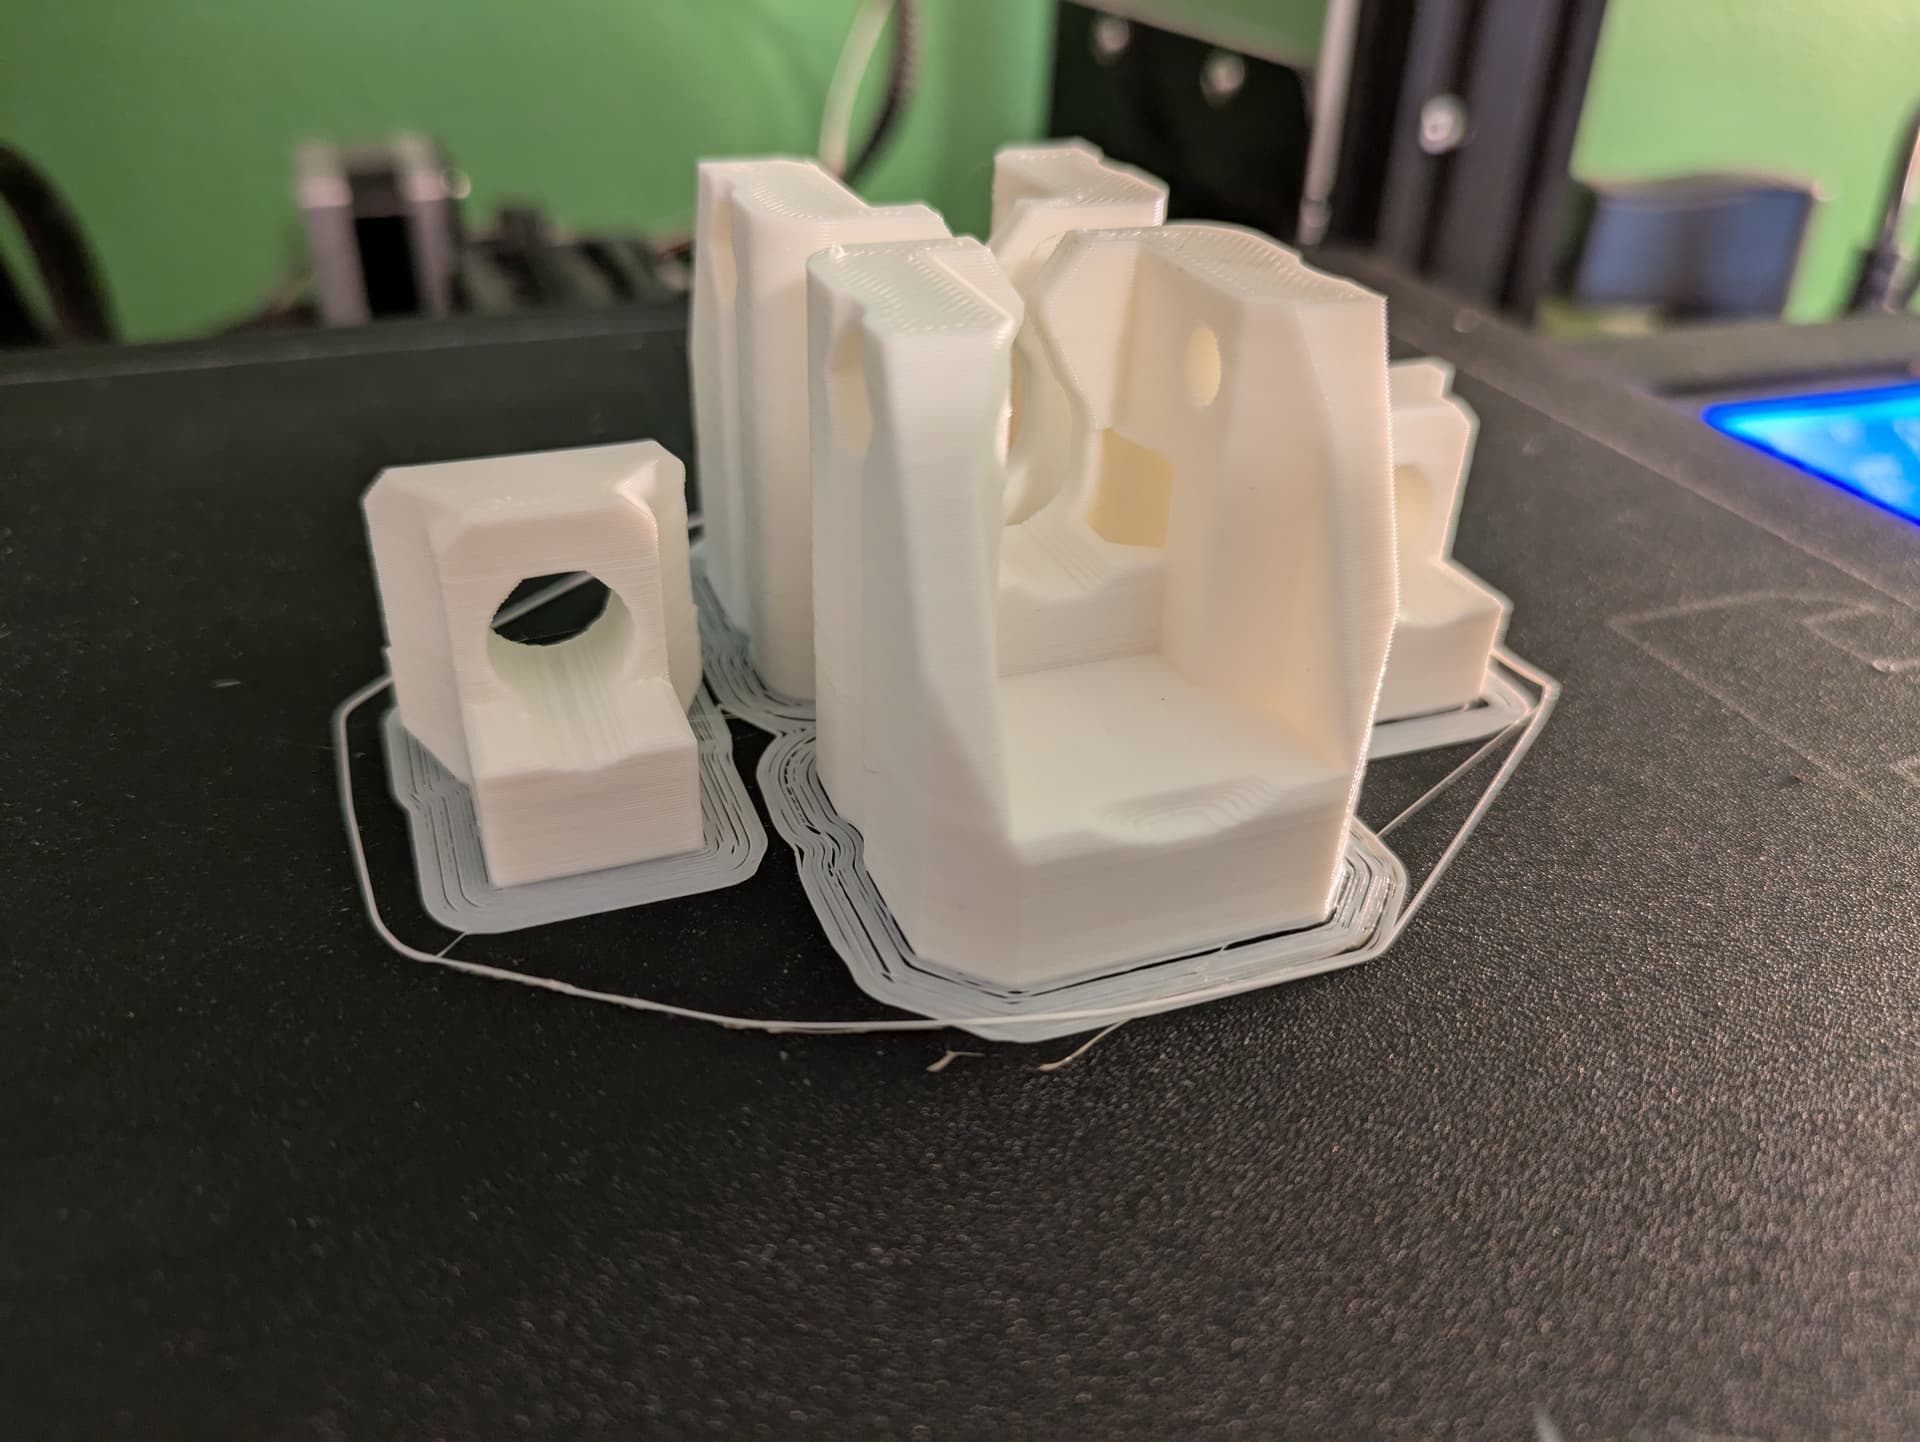
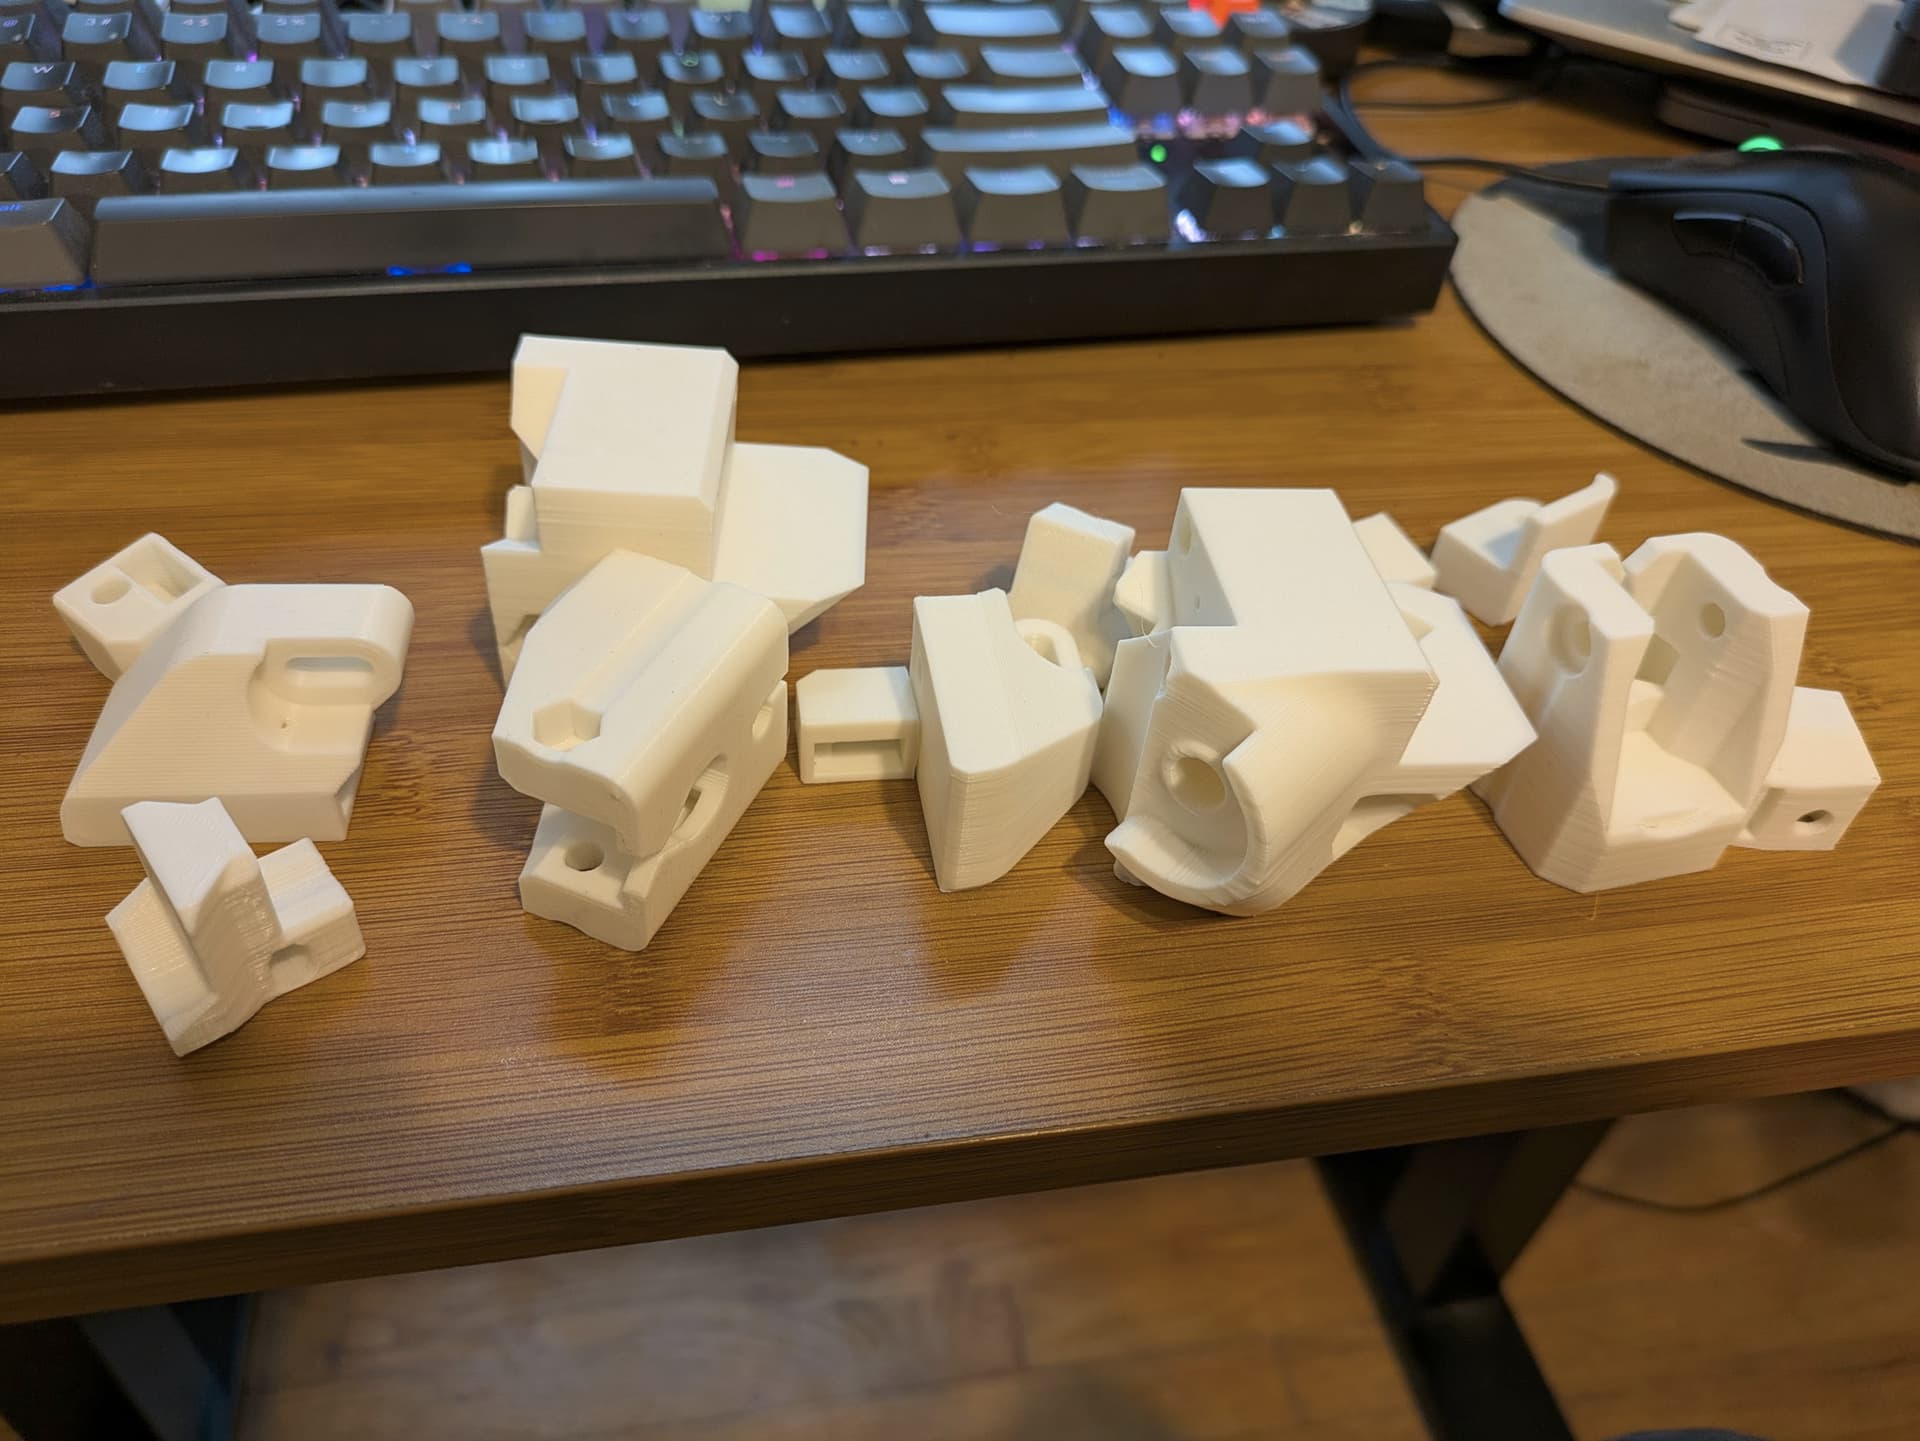
I started with printing the Z-Stub and Z-Nut parts as recommended in the documentation to make sure everything fit well and then have kept printing smaller batches of parts (5-10 hour prints) since I’m at the last quarter of a roll of filament. The parts seem to be coming out with very good quality. The only changes I’m making in my slicer (PrusaSlicer) are using a .28 layer height (“SUPERDRAFT” on the presets) which matches the 3:4 ratio mentioned in the docs and I’m also adding a brim since I regularly have adhesion issues at the corners of prints (I think it’s just a room-temperature thing).
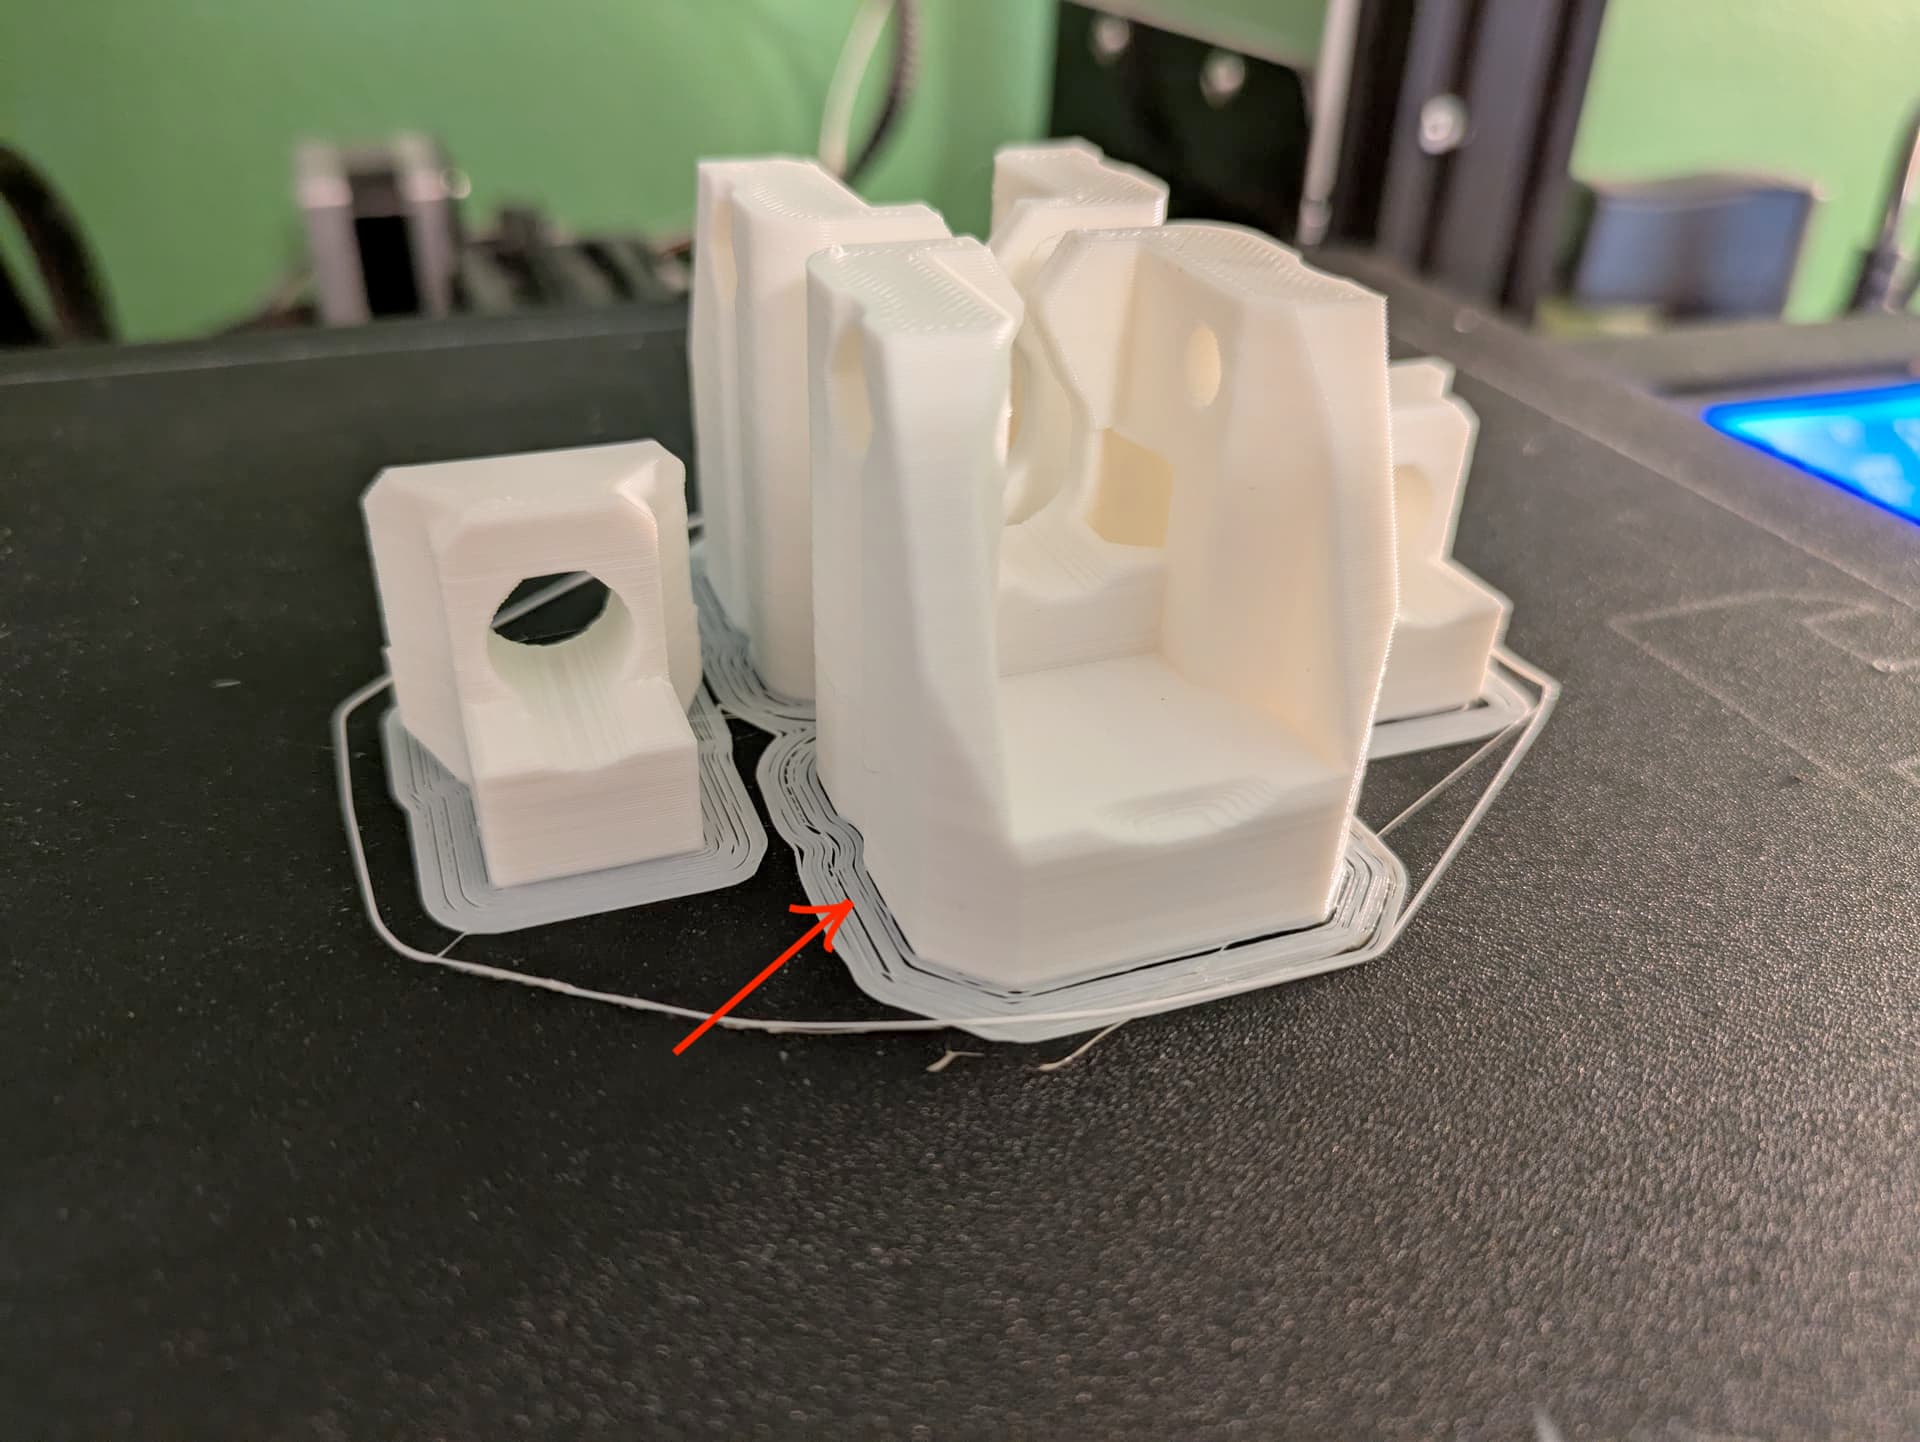
It almost looks like z-offset to me, but I agree under extrusion seems likely as well. I’m drawing closer to z-offset as if you look at that purge perimeter it isn’t following the contour like most slicers use. Maybe adhesion based if the plates dirty but my two cents.
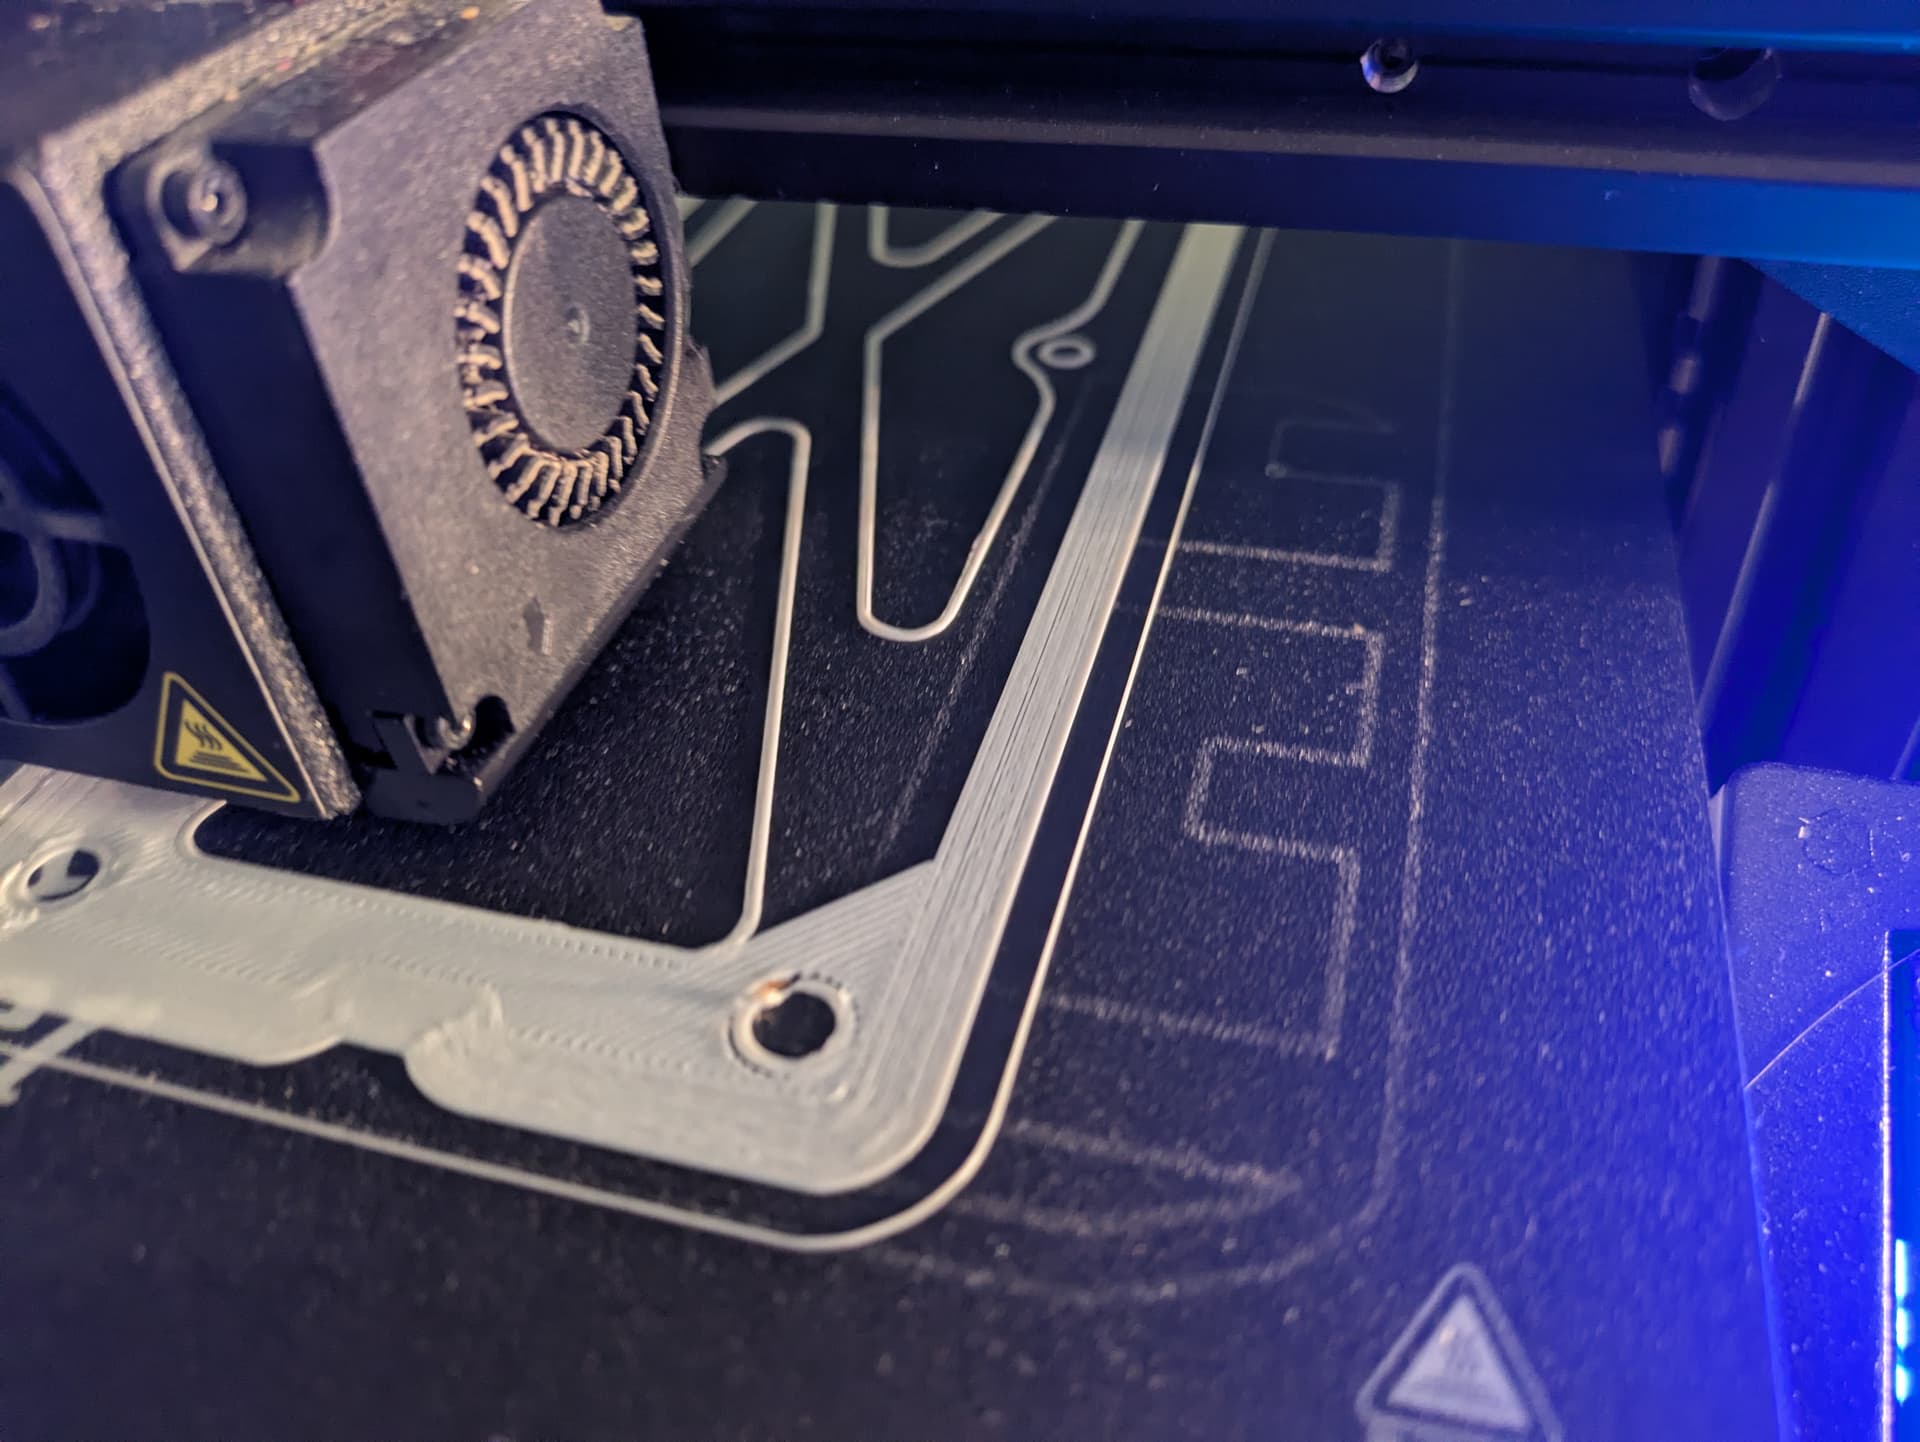
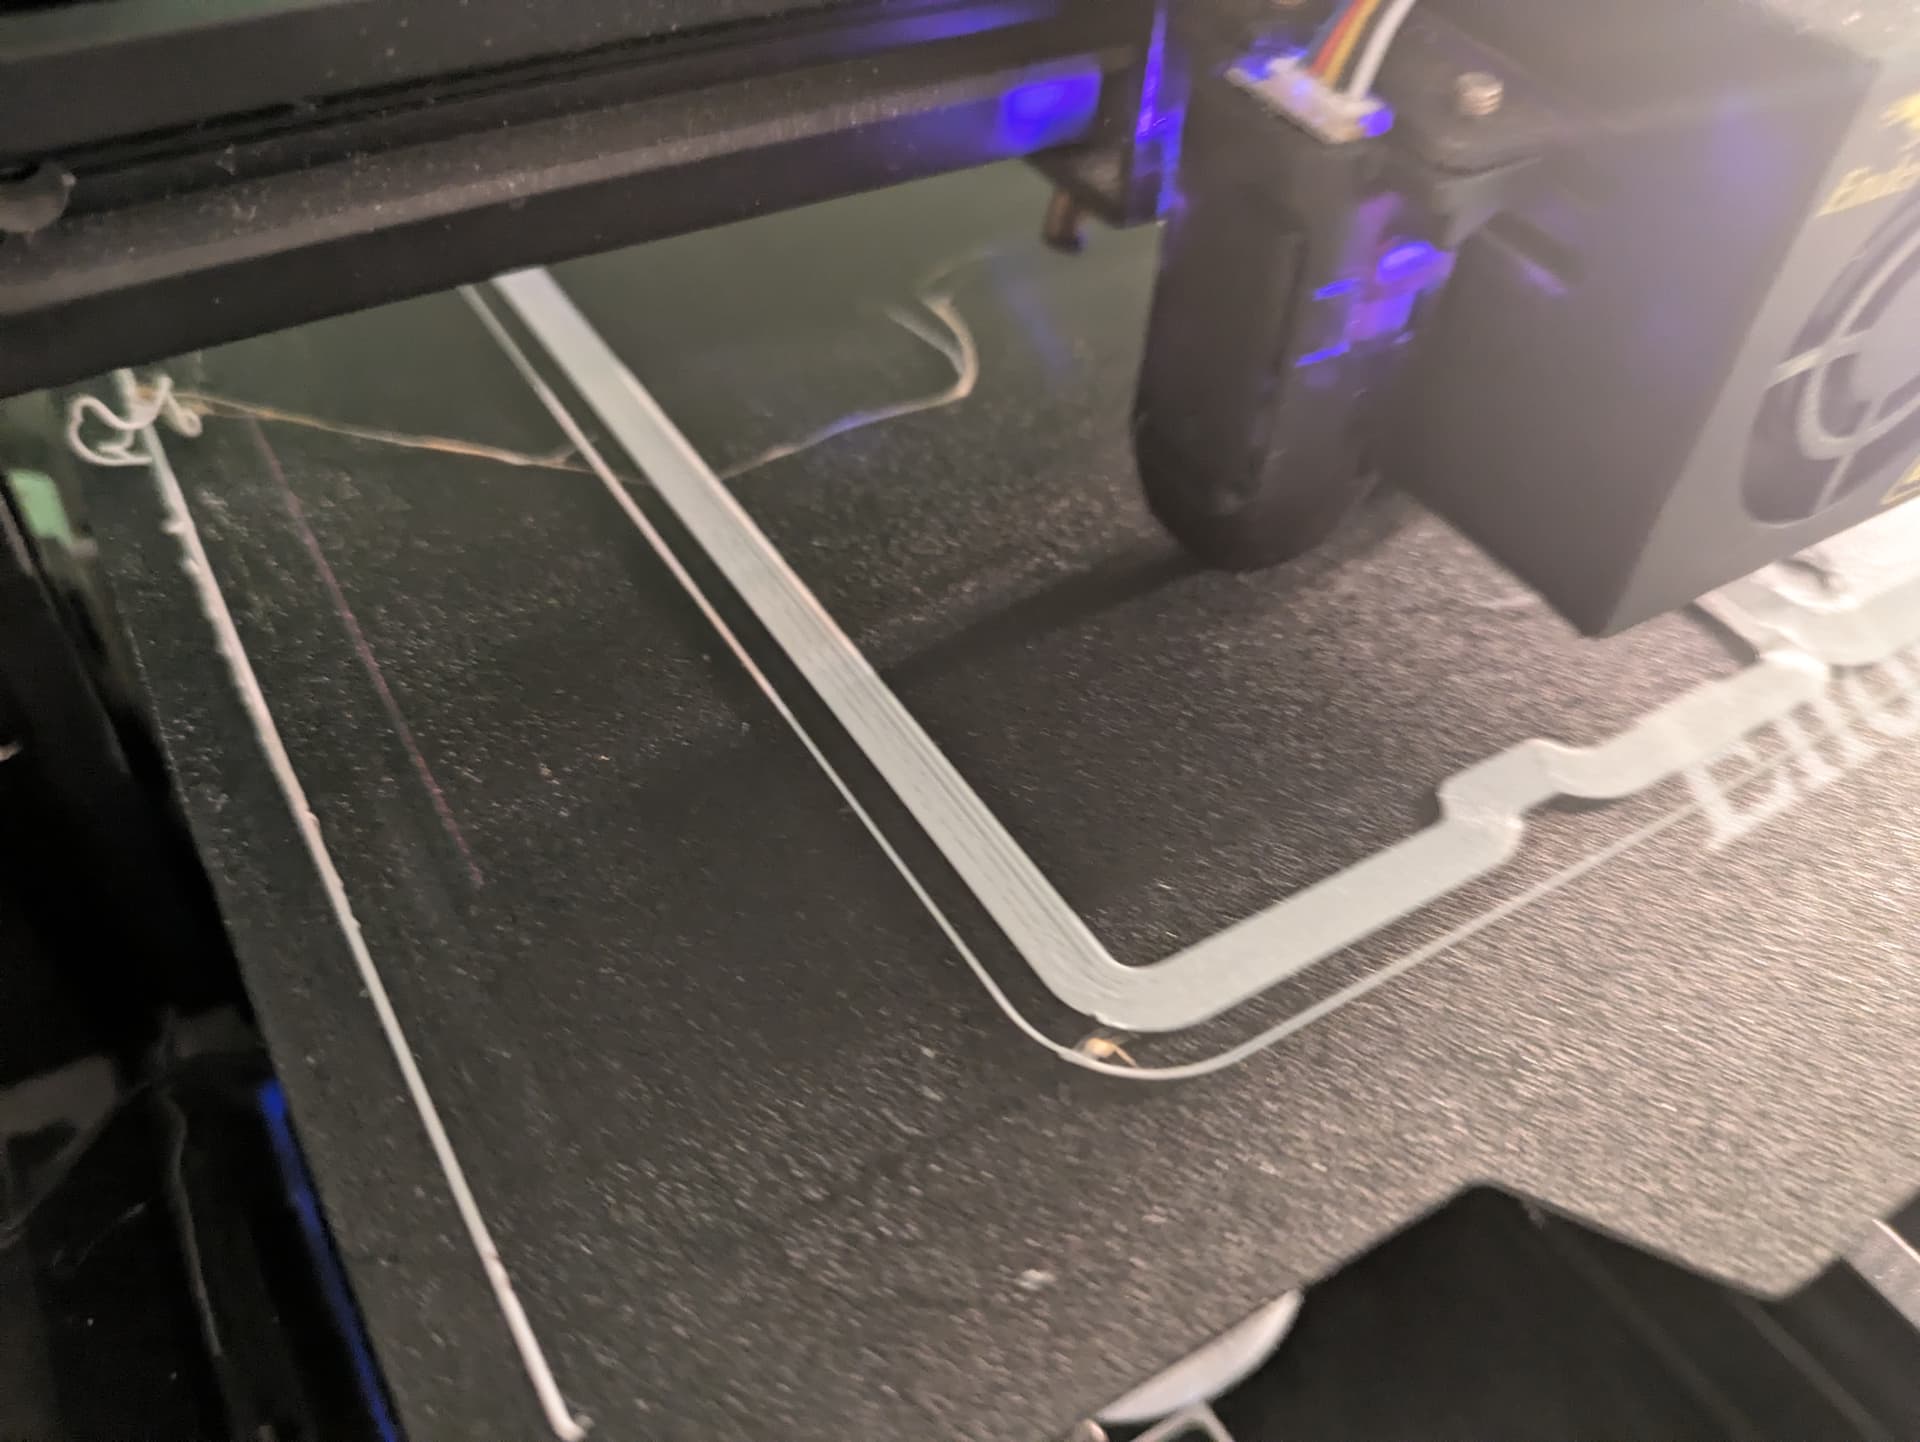
Also completely credible, or using too fast a first layer speed. The filament isn’t adhering to the build plate. Note that on the background side of the image, the purge perimeter is squished flat flat, and on the foreground side of the image it pulled up completely.
Could be Z offset or build plate warpage, or build plate tilt.
Good pictures of the first layer in progress would help a lot in troubleshooting that.
100% agree, I wouldn’t be surprised if it was unlevel and that cause a partial Bowden tube clog cause skipped step->under-extrusion
Looks like a ender 3 or a clone and in my first days on the ender 3 that happened to me to many times usually caused a complete blockage but not always. BL touch was a lifesaver
@Peacester I think it’s a few of the things you and @MakerJim have discussed. The printer is an Ender 3 Pro. According to the slicer preset I’m using first layer speed is 20 mm/s, though I run at 75% of speed using “M220 S75” in my custom printer Start G-code since I think the acceleration set in the pre-compiled firmware is a little aggressive. So first layer is probably 15 mm/s as a result?
I converted to a CR Touch a little while ago and am trying to get Z-offset dialed in. As you all are seeing I’m not getting great “squish” on the brim. That said, the bottom layers of my prints look good to me apart from the brim. The brim definitely helps with adhesion though, even though it’s a bit messed up…I get corner curling if I don’t use a brim.
Plate warpage: I think the plate is pretty warped. I went through a few iterations of firmware setups (mainly compiling my own with various options) before I settled on using pre-compiled firmware for my version 4.2.7 board from 3Dprintscape.com. While I was doing the firmware switching I experimented with a few different plugins on Octoprint and a few different bed leveling grid sizes, and even when I did 7x7 the visual map was wild. I think I’ll probably revisit the grid size (currently doing…3x3 I think) now that I’ve got bed level locks in place. I’ll try to get a pic of the visualization, it looks like a piece of abstract art .
It’s probably not the Bowden tube or extruder path being clogged, I switched it to a printed direct drive when I swapped in the CR Touch and cleaned everything out pretty good (and of course there’s now not much tube left).
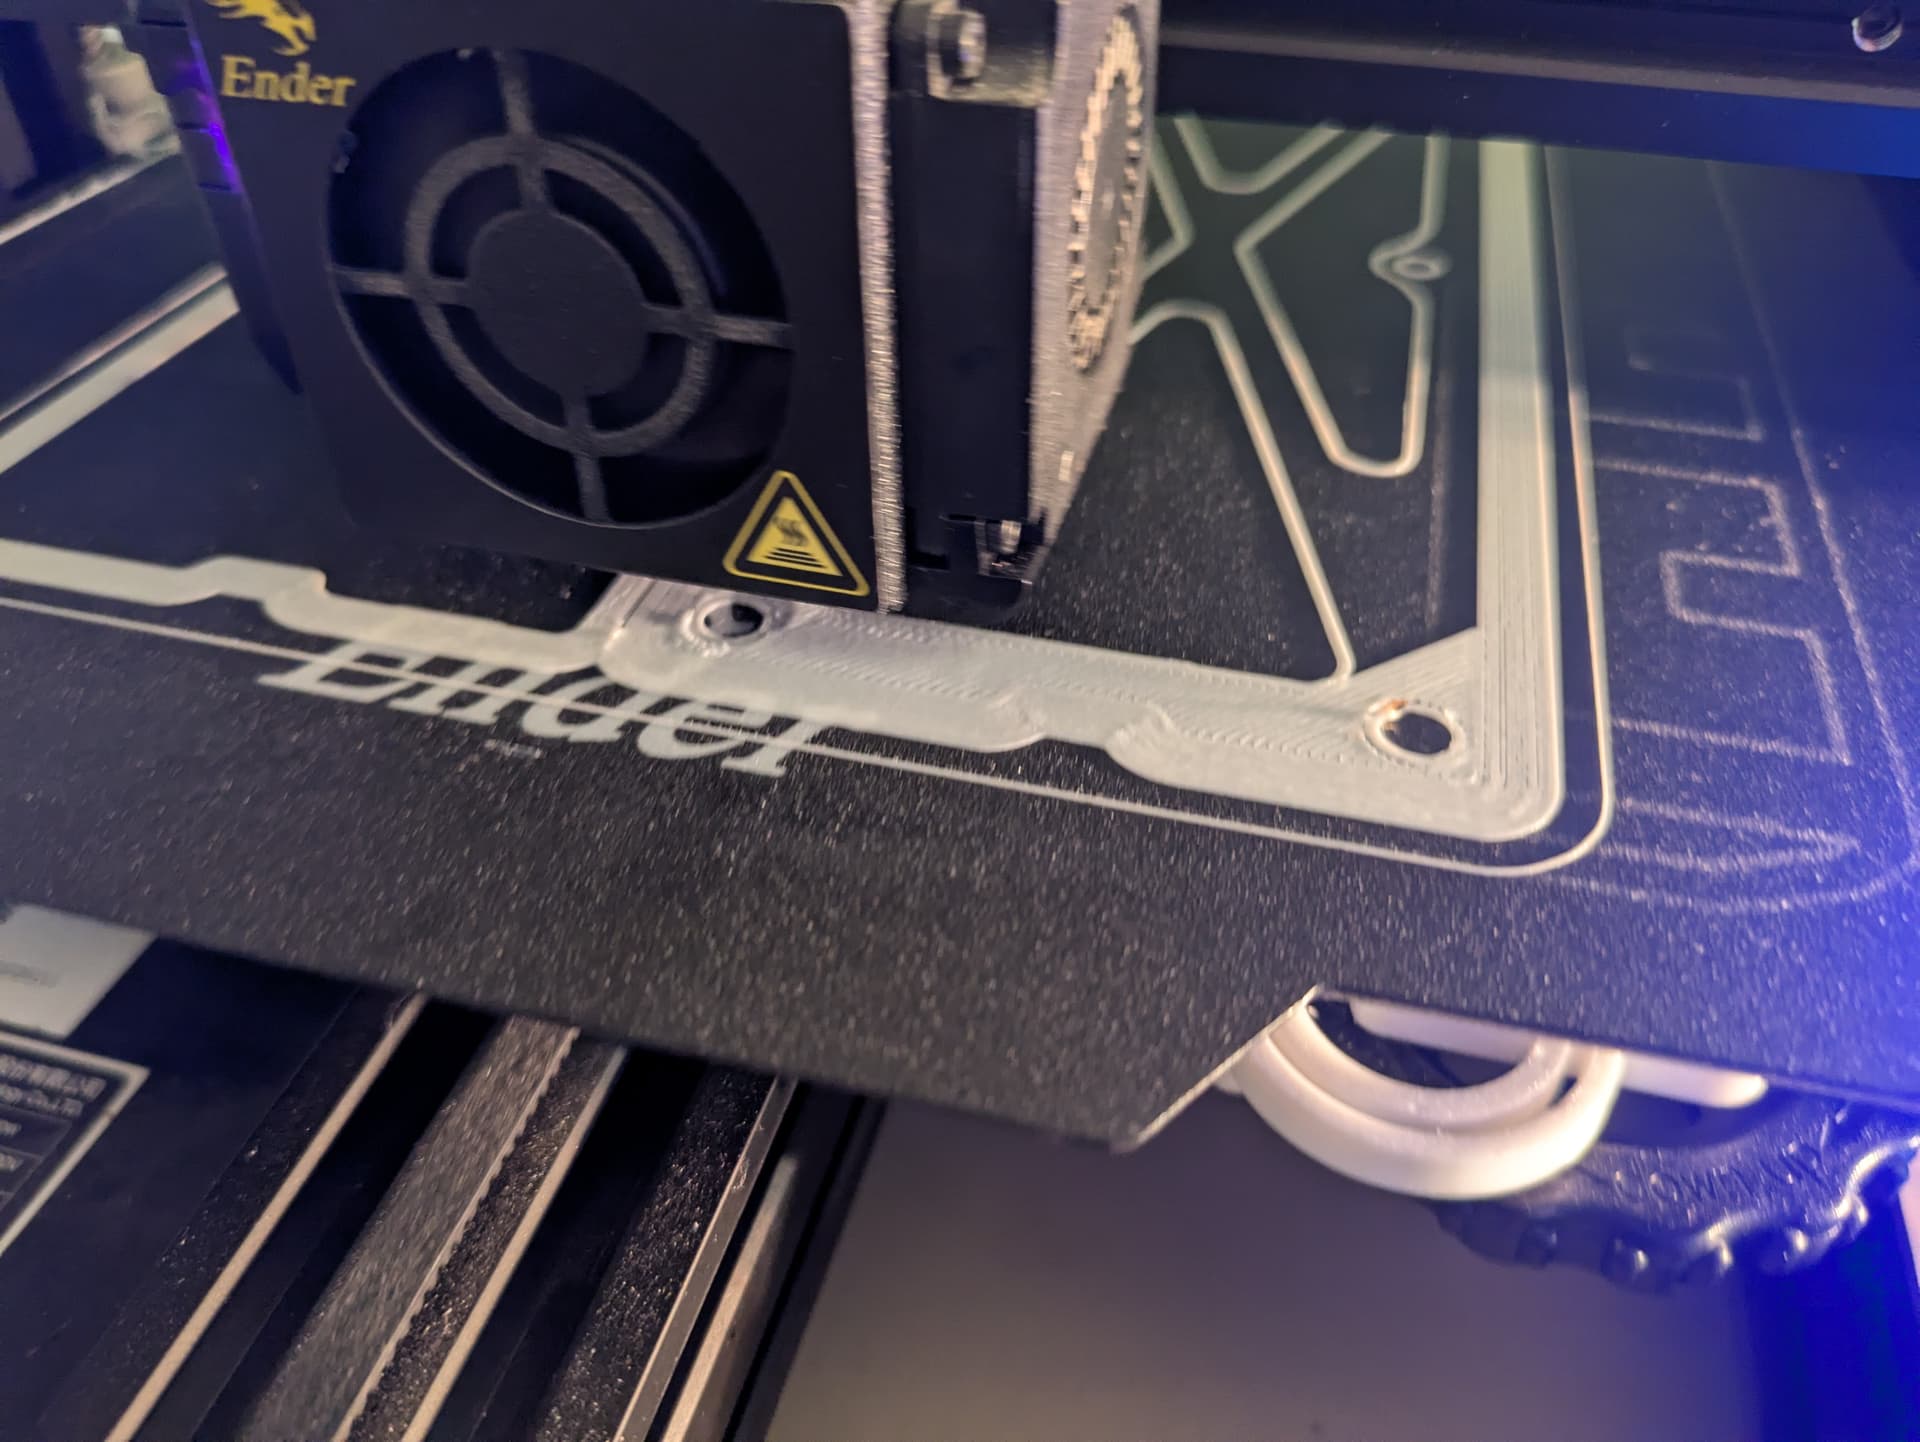
Here are some pics of the first layer on the print I just started. Note these are probably somewhat improved since I dropped the Z-offset by 0.01 mm. The squishy was definitely better on this layer! I’m starting to think I might have some nozzle issues to muck with after all there are a few burny bits which could be that. I’ve had the same nozzle for four years and tons of prints so maybe it’s just time for a new one?
If you are getting what I call boogies which are small sections of burnt plastic (which when you look at white filament has a yellow tone to it) that’s usually caused by a partial clog. I need to iterate that it could still be a Bowden clog but I need to clarify what I mean. On the ender 3 hot end the Bowden tube goes into the heat break tube and meets at the bottom just above the nozzle. Two things happen either the Bowden gets warped/shrunk from age/heat (why ender 3s are limited to sub 250 and really recommended below 230)the Bowden can lift away from that bottom mating surface a leave a gap that plastic can squish into that causes similar issues.
A old nozzle generally just isn’t as accurate it can get closed if you crash into the bed and it prints for a while but usually even that isn’t enough.
As for leveling cr touch is great octoprint is great, send us the visual from there. Unfortunately with the touches you still need a semi level surface for it to correct properly however we’ll be able to address warpage/etc with that photo
I’ve been tinkering with it a bit on and off today and I think I’ve got leveling improved where it compensates for most of the bed warpage, at least better than the right side in the screenshots above.
I do think it’s time for a new nozzle though as I’ve seen the nozzle get clogged/unclogged quickly with a “booger” during the pre-print wipe down the left side of the bed. I think I have spares somewhere.
I feel like I saw somewhere in the instructions I could/should consider printing certain parts in PETG or ASA/ABS since they might experience additional heat, but now I can’t find the reference. Maybe I’m getting it mixed up with another DIY CNC, but does that ring a bell for anyone? I’m printing most of it in PLA, but I happen to have some PETG installed I was using for some drill guides and figured while it’s on there I’d ask the wisdom of the crowds .
A high temp filament can be good for the router mounts but isn’t necessary. Personally if you are going to do any carving with the cnc I think it’s a necessity. But if you plan to do simple signs or plain cuts PLA is more than adequate.
PETG I believe is usually the one recommended. It’s all about the heat resistance not the strength.