I think on this one you are just going to have to be patient and wait for the printer to finish printing the new ones
1 Like
Right now I’m regretting my 50” gantry decision…
1 Like
You’ll be good once you get the new braces printed. My LR3 and LR4 have both had that size beam, And I always run an extra brace so even more to print lol. Be glad you didn’t have an extra one to wait on.
1 Like
It’s times like these that make me want to own a print farm.
Maybe when this is done I’ll shift gears and start printing the LR4 upgrade!
1 Like
Multiple printers really help speed things up that’s for sure. A few slow printers will out print one fast printer all day long.
1 Like
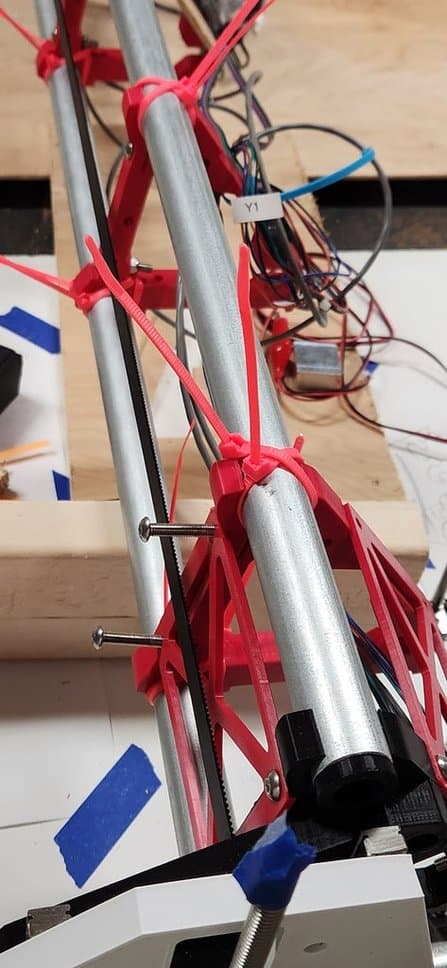
You know, the part I’m planning to cut is only like 4”x8” (4” on the X, 8” on the Y). Once these 4 new gantry braces finish printing around noon tomorrow, I could install 3 of them on the zero-end of the gantry and the other new one on the opposite XY plate, and then try my zip tie trick on all the other broken braces where the core won’t even need to be moving. Otherwise, it’s going to be about another 4 hours per brace, and I really don’t want to lose the whole weekend (or at least well into Sunday).
I’m flying out Thursday for the birthday weekend. Not much time to spare.
Good news – upon closer inspection, I think it’s mostly the right-hand (X+) braces that got broken. I’ve zip-tied all but the end one, and I was able to home all axes and move the router around a little. It’s possible that these 4 new ones (plus maybe a 50% infill new one for the Xmax brace) will be all that I need… at least to allow me to proceed with the birthday present. That’s the main thing for this weekend.
Photo of the right end with double zip ties top & bottom. It really does hold the conduit pretty snug against the intact half of the pipe clamps.
2 Likes
Update: Got the 4 new braces printed, but I only felt it necessary to install the rightmost 2 with the temp braces. The other ones toward the middle really are holding pretty firm with the zip ties.
Next, I got my “intro” gcode worked out, ran an air cut, then ran the toolpath in 1” foam board. It’s working great. Now I’m moving to wood… was going to use pine but I can’t find any suitable 1-by on hand so I’ll try a scrap of soft maple. Final version might be either maple or some scrap mahogany/sapele. Photos of the item may have to wait until after the birthday next weekend. ![]()
1 Like
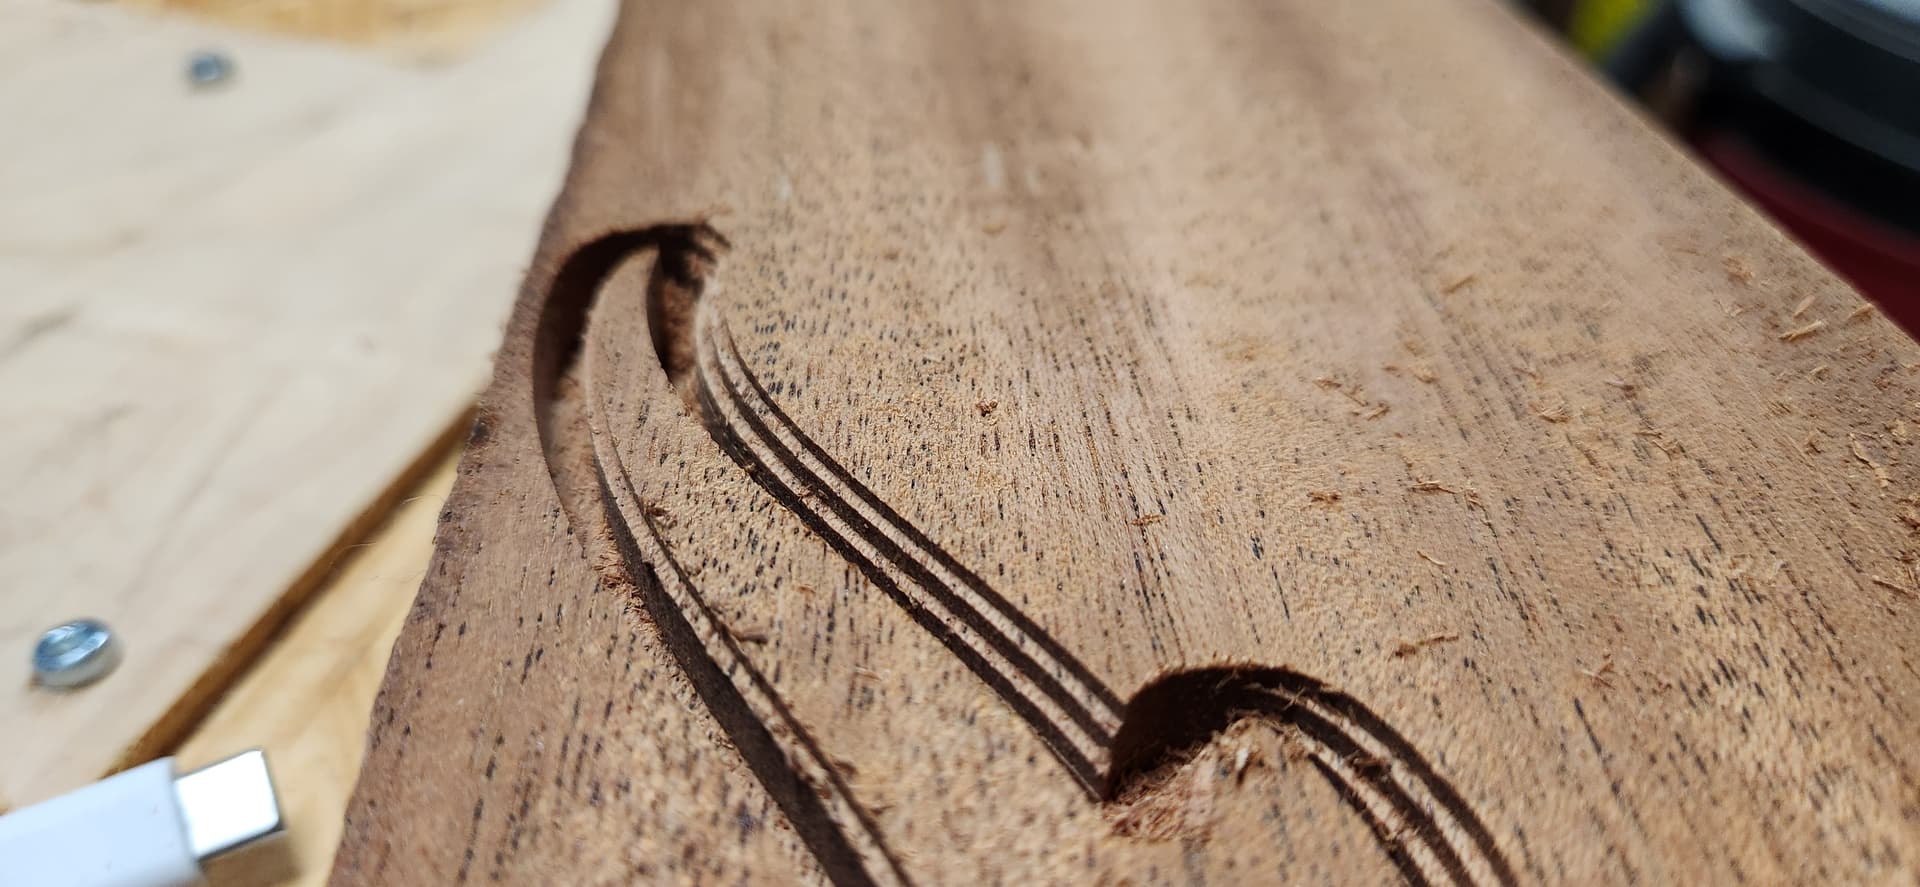
Okay – I have a new problem: Drifting in the X axis on deeper cuts.
I’m pocketing, drilling, then cutting the outline of my design. Using 1/8” upcut spiral, 2mm stepdown with a final finishing pass, 3/4” solid wood material. First in my soft maple, and now again in a test piece of mahogany, it seems that every successively deeper pass gets shifted toward X=0 a little bit.
I assume I’m skipping steps. What’s the normal solution for this? I tried slowing down the program to 75%, and I have the Makita running at full RPM.
Should I boost the amperage on my X stepper? I’m running Klipper, and I’ve just noticed that my X stepper is set to run_current: 0.500 (I assume that’s Amps), but both Y steppers are at 0.8 and both Z steppers are at 0.65. I have no idea where I got those numbers; probably from some sample config when I was first getting this thing running. My stepper motors are 2A rated, I have TMC2209 drivers.
It also seems that the X stepper on this machine should possibly be set to a higher amperage than the Y or Z because there’s only one motor pushing it along the X axis; it’s not sharing the load.
Any thoughts? Is this a reasonable direction to go? How high should/could I push the amperage?
Slow your router down. You are most likely burning the bit up spinning that fast. Dull bits dont cut.
Yes that is too low. I believe the jackpot stock is set to .8 or .85. As long as your steppers aren’t getting too hot you will be good. You want them to be less than 50°C or you will start softening the PLA
1 Like
My thought was that spinning the bit faster would make the cut easier: more cuts per inch, smaller bites. Is this not right?
That said, I think the problem did get worse when I spun up the router higher. Too many variables, and I didn’t correlate that with the worse performance.
Not exactly. You want to make chips not dust. Chips are what remove the heat from the bit. Spinning it too fast you end up cutting the wood multiple times and not removing any heat from the bit.
On my machine I run 40mm/s feed rate, 4mm doc on a 1/8” single flute with my router on 2 2.5 and get good chips and the bits last a decent amount. You are probably running a lot slower than that, at least you should be starting out until you get used to the machine. So I would be running even slower on the router.
Makes good sense – thanks for the responses!
1 Like
No problem. Take that bit you were using and toss it. Start fresh and slow that router down, and up your amps on the X motor, you should be good to go after that.
1 Like
That was the ticket – awesome!
FYI - I had gone ahead and adjusted amps & RPMs and gave it another failed try and was shutting down for the night, THEN I saw your last reply.
I rummaged around and all I could find was a new 1/8” 3-flute upcut bit, so I figured I should slow it down a little further (#2 speed on Makita). I gave it one last run, and did great, except for a little chattering on the final finishing pass of the outline. I may get this gift done yet!
Thanks again! (And yes, I’m going to toss that other bit. Maybe the best advice of all.)
1 Like
3 flutes are far too many for our high RPM routers. You need 1 flute with our routers in wood.
If you are spinning at 12k rpm a single cutter comes around once every rpm. With a three flute it is equivalent to 36k rpm…..and the flute opening for the wood chip to come out is less than 1/3 the size. You end up recutting, burning, making the load far too high.
1 Like
Gotcha - thanks. I did later find a couple of (new) 2-flute bits in my collection, and somewhere I’m pretty sure I have a 1-flute, though maybe 1/4” diameter. Lots of dials to turn to get this all tuned in – but I’m getting there!
You might pick up a pack like this to learn and make test cuts with. I have used them and they work well for cheap bits.
1 Like