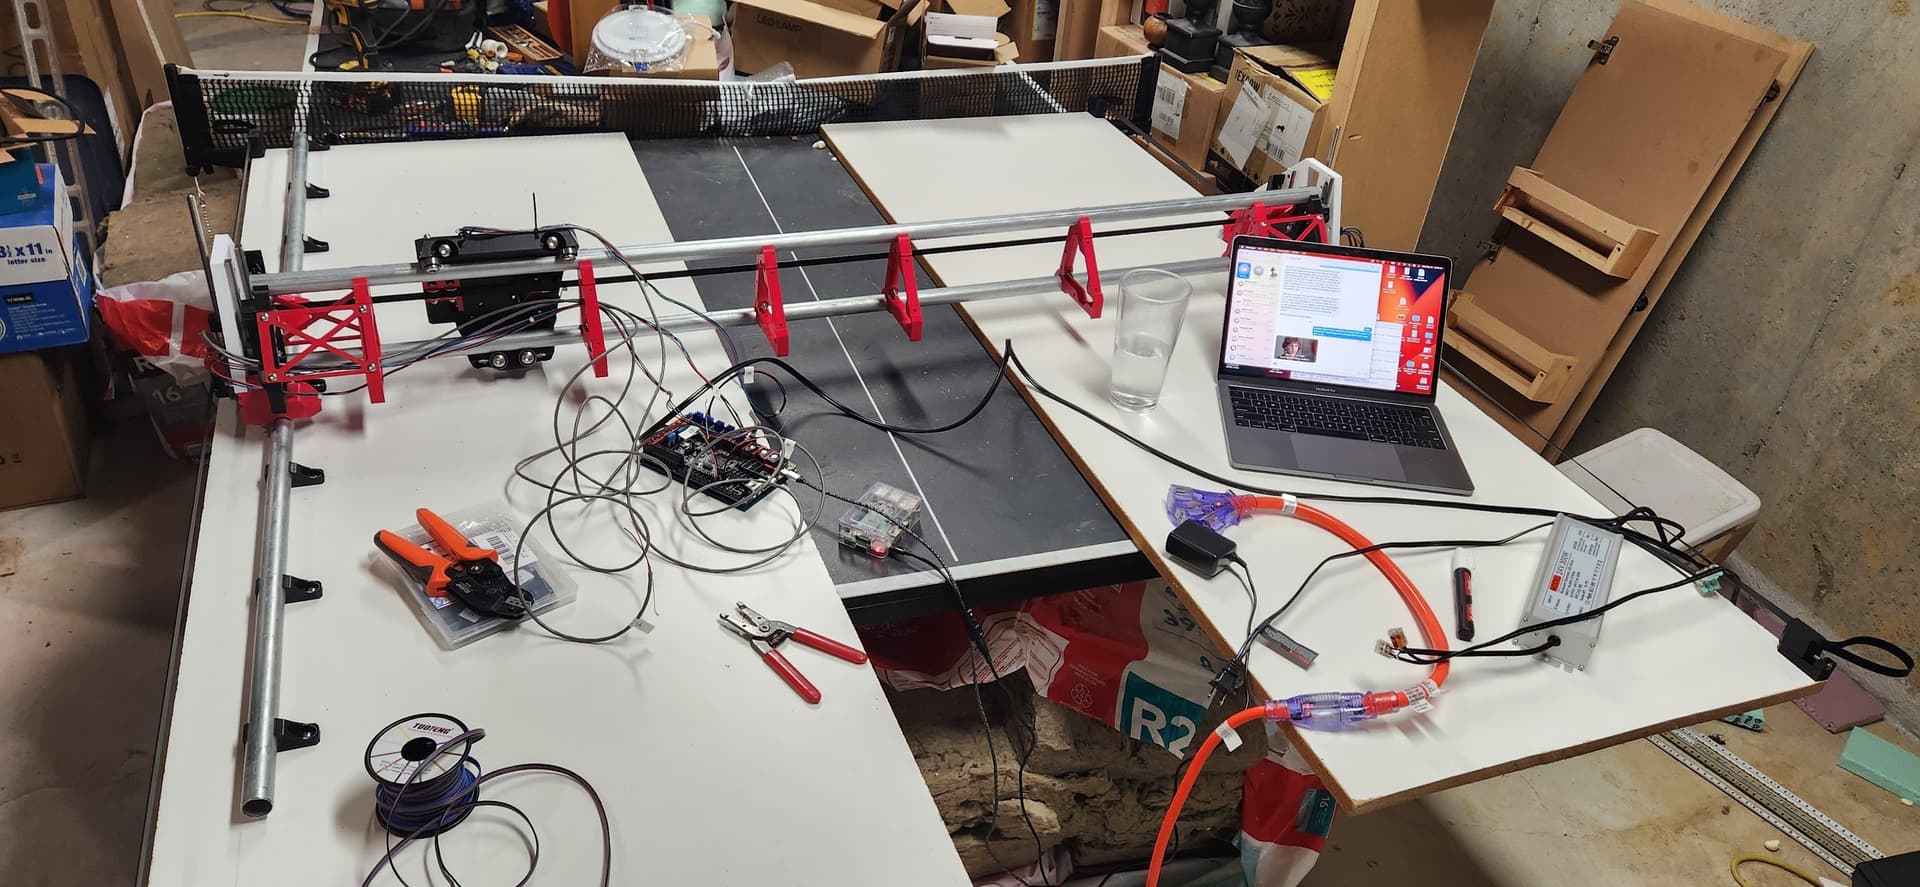
Yeah, looks like mine won’t happen until tomorrow either. I got my Y belts all set up, gantry is in place – even with freshly-printed Makita router mounts – and then I started testing my Y motors and homing the Y axis for the first time. One motor was spinning the wrong way (easy fix), but now it looks like one of the end stops is stuck open, so that ground me to a halt for tonight.
It was after 11pm anyway, so the crown was already getting iffy for the night.
Yep I had a busy day today with work and other hobbies. Tomorrow I have to wire the tiny touch plate, mount my router, mount the pen mount and print a crown. If it all goes smoothly I might even be able to square everything up. I should be in the shop all day!
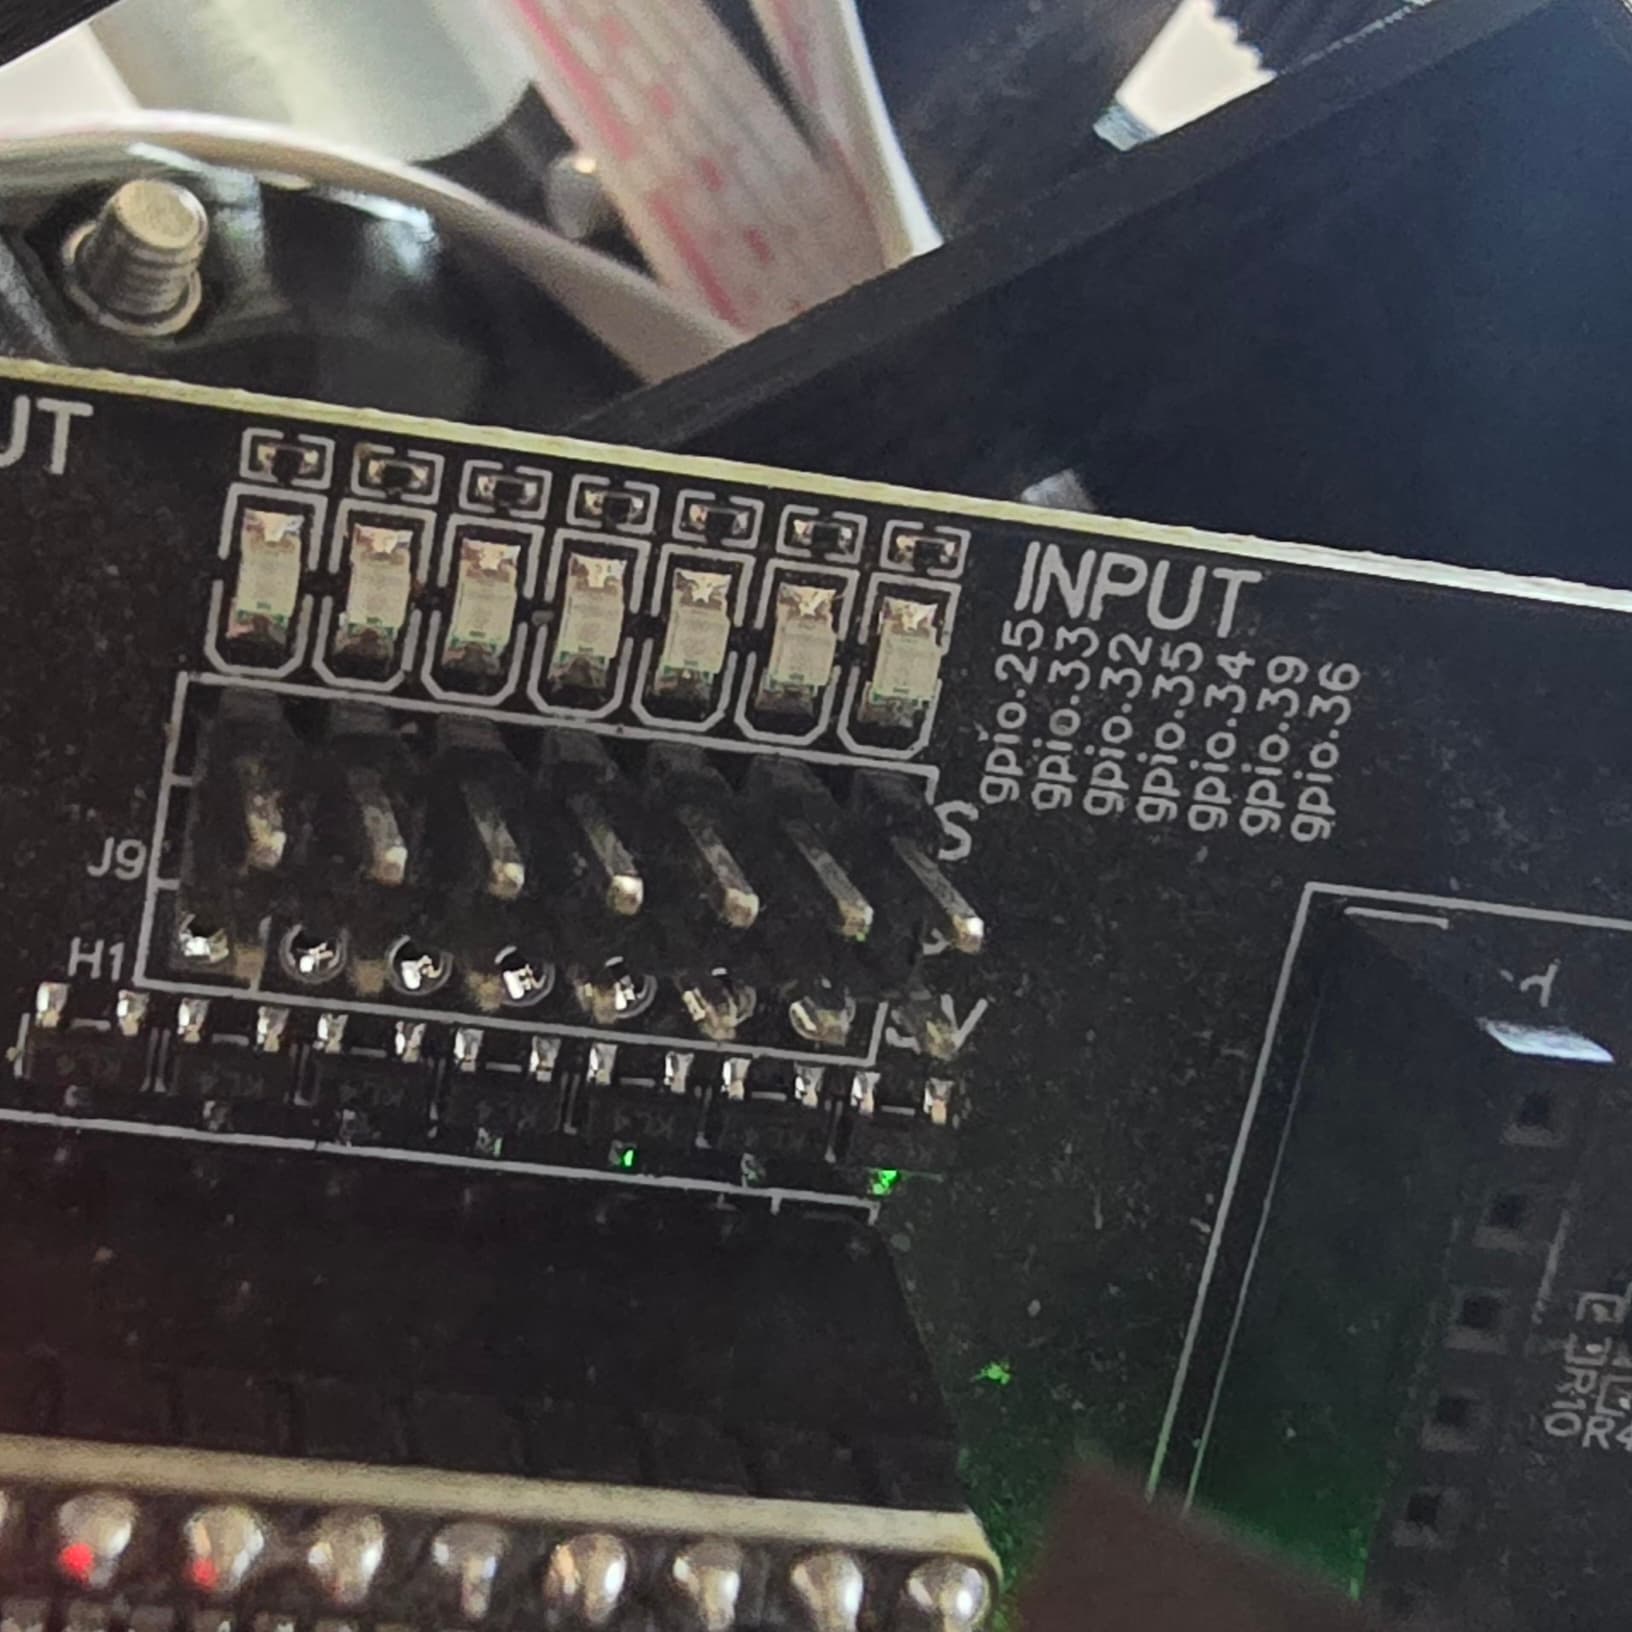
Switches have 3 terminals; I think I’m using the NC pair, with the internal pullup enabled on the I/O pin. I’m connecting the two switch wires to the I/O pin and GND.
So:
if the switch is broken or disconnected, the input pin will read high
if the switch is attached via NC terminals, input will read low if the switch isn’t triggered
if the switch is triggered, it will open the NC terminals and the input should read high
I just haven’t had a chance to trace out the wires or test the switch. After work today…
After 15 hours straight on a video/conference call for work yesterday, I finally got back down to the basement, and I figured out my Y1 endstop switch issue! Just a configuration problem; I was inverting the input on the I/O pin. Simple fix.
Then I tried to send the crown gcode file, and I only got strange errors like
// Unknown command:“G00” // Unknown command:“G01”
It finally dawned on me that the gcode command reference I had been looking at talked about commands G0 and G1, but not G00 and G01. I extracted a few lines from the file and did a manual edit to remove the extra ‘0’ and I think it might work. But that was like 1:30am, so I punted it again.
I’ve found macros, but not yet where to edit/add them! For tonight’s test, I just copied the file into a Mac terminal window and edited using vi.
I discovered another thing last night that it didn’t like: the default Cancel Print macro includes a reference to another command I don’t have: // Unknown command:“TURN_OFF_HEATERS”
If I can’t figure out how to edit the Cancel macro, maybe I can add an empty TURN_OFF_HEATERS macro.
I’ve known that my config for X and Y steps are way off, just put something in the printer.cfg as a placeholder, and 1mm of gcode movement produces way less than 1mm actual.
Still… I decided to give it a try and see what happens. My Sharpie is installed at a tilt and slips in the zip ties. There are some marks made where it should have lifted before travel. But it’s a start!
Progress sir progress. That was the coolest thing yet for me was to actually watch the machine move around all by itself and produce something.
Nice job, keep on pushing.
Last night, it appeared that my problem might have to do with Z-hop. Whenever the pen should have lifted to make a move to a new start location, it actually went down for the move, then back up to continue drawing.
I haven’t yet studied the stock gcode file to see where these commands are happening. What I do know is that (a) Z on these machines is backwards from a typical cartesian 3D printer, and (b) this stock file works for other users who have their machines configured correctly.
Any tips on setting the correct Z-hop motion in Klipper? TIA!
I’ll have to take a look at my config later today to see how I have my z setup, but I remember it being tricky since you want z to home up, but that is z max rather than z=0. It is normally some combination of placing “^!” before the “dir_pin:” in your cfg.
In terms of editing the macros, it should be pretty simple within the printer.cfg, or maybe a “macros.cfg” if there is one of those. You can take out anything regarding heaters/heated bed since we don’t have any of .
For Z-hop, that is done via the gcode rather than the firmware. For using klipper on 3D printers, the z hop is managed by the slicer, or at least that is how I have always done it/easiest. When I use klipper on my LR4, the z hop is managed by fusion 360/Estlcam and is called “safe z distance” or “retract height” or something like that. Basically how much the tool goes up and over the workpiece when performing a travel move, so as not to hit the workpiece.
Based on you saying that when the sharpie was supposed to z-hop it actually went farther down, gives me the impression it is just something with the z config. I remember having to try several options between the printer.cfg and Estlcam to get it work correctly. Thankfully with just using a sharpie and drawing a test crown it is safe and easy to work through all the options.
Thanks for the quick reply. I have Z homing and the endstop set up and working right (both Z and Z1 in printer.cfg).
But yeah, I’m finding things online about “safe Z homing” or something like that. Haven’t gotten too deep into it yet.
Am I wrong, though, that the crown gcode file on v1e.com DOES work for other people on LowRiders without having to recreate it in Estlcam? Sadly, Estlcam is Windows-only, and I’ve managed to eliminate all such machines from my house. We’re Mac/Linux only at this point. (And no emulators, though I did used to run Windows inside a VM for some things about 4 years ago.)
Could it be that your Z movement is going the wrong direction, down is up and up is down? If so, there is a setting to flip it, or you could just unplug the wires to the steppers, flip them around, and insert again.
Yes, if a machine is configured correctly (movement all checks out in correct direction) the provided G-Code crown file just works.
Please note that most CNC firmwares will allow you to “home” (check limits) to either direction, so having your Z to “home” “correctly” does not prove it’s not wired backwards. When you press Z+ movement button, the gantry should move up.
I really don’t think so at this point. Homing raises the gantry to the endstop, and clicking on the “Z up” button in fluidd lowers the gantry (increasing Z coordinate)