New version v1.1: NEW for 3 makes of Routers - LowRider v3 Floating-Z Dust Shoe and Router Mount, for 2.5-inch Vac Hose (VacMaster Shop Vac) v1.1 by Doug Joseph (design8studio) | Download free STL model | Printables.com
The following is pasted from the description of the new improved edition on Printables:
After the original version’s success, I’ve made quite a few improvements (some minor, some major), which include the following. I won’t editorialize here over which are trivial tweaks versus crucial must-haves, because different things matter more to different makers. If you already built the original v1.0, consider these change notes to decide whether to stay with your current version or reprint some parts to upgrade.
Summary of what’s new:
- Design now allows X-axis homing to happen closer to the left side of the gantry.
- Improved new dust shoe body. This and the above can be done independently or together. An existing v1.0 build can do just this new dust shoe, or just the above, or both.
- The new version now offers support for three trim routers (whereas the original was only for Makita):
- DeWalt 611
- Makita 700 series
- Kobalt’s new “V1E-friendly” corded trim router for CNC makers.
- In my testing on this version, I had to glue in the EVA foam bristles. I used CA glue.
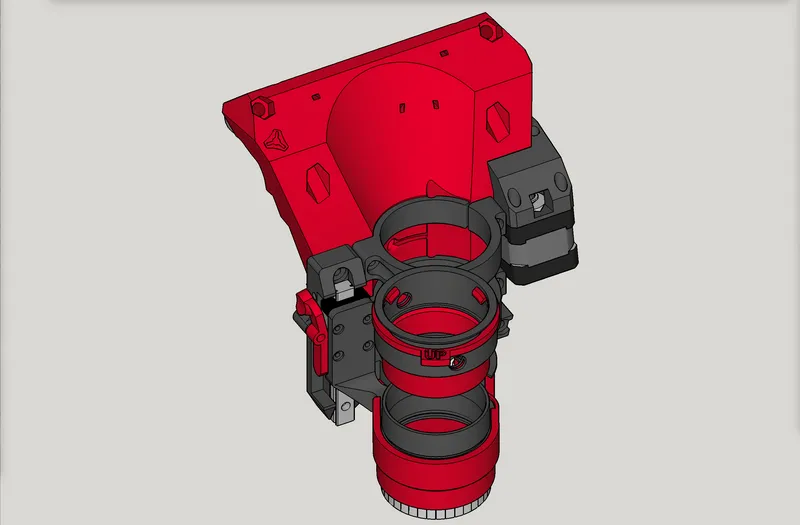
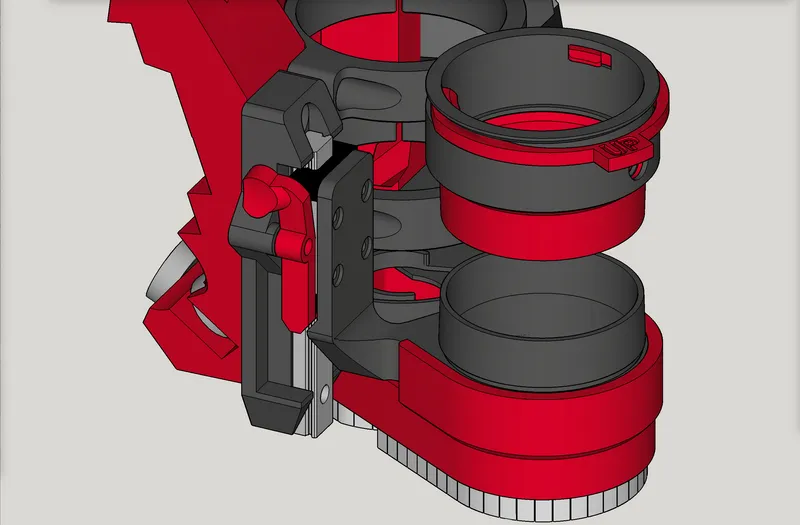
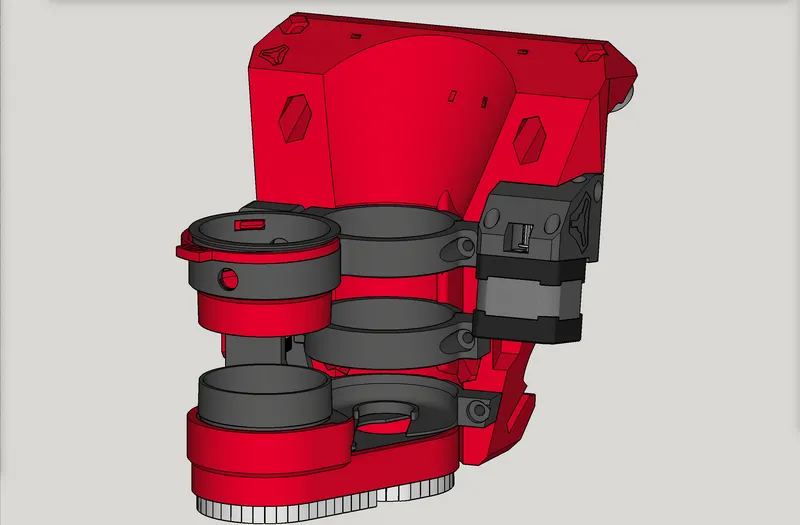
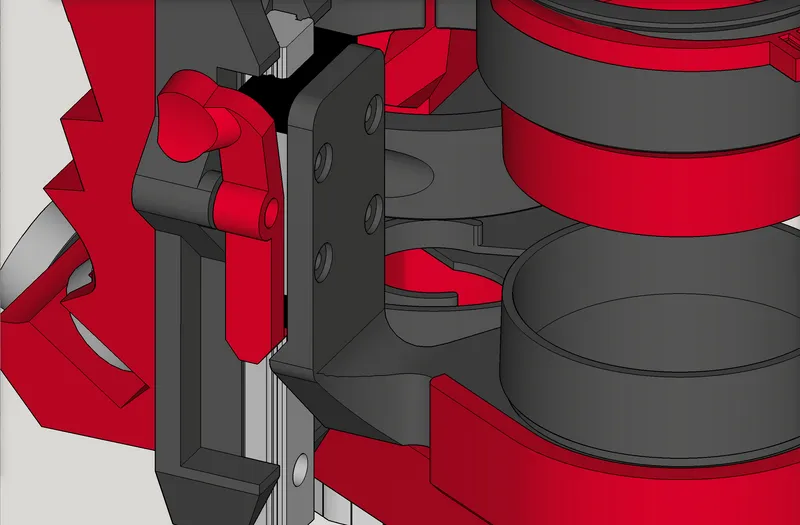
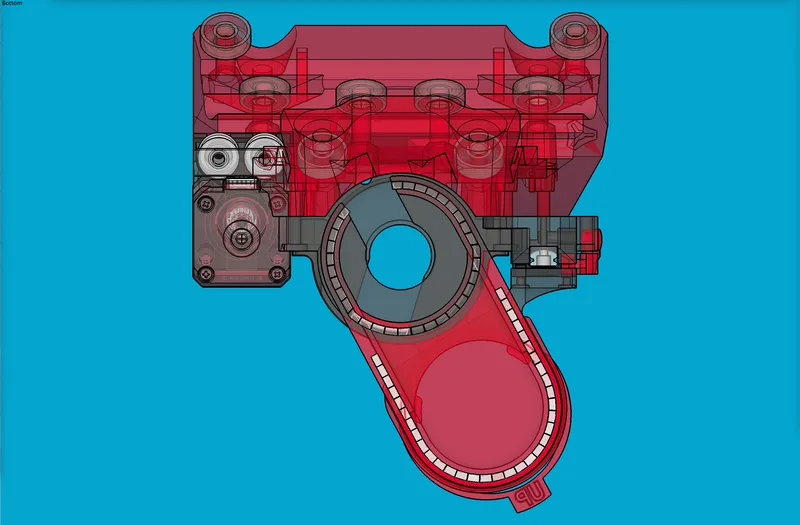
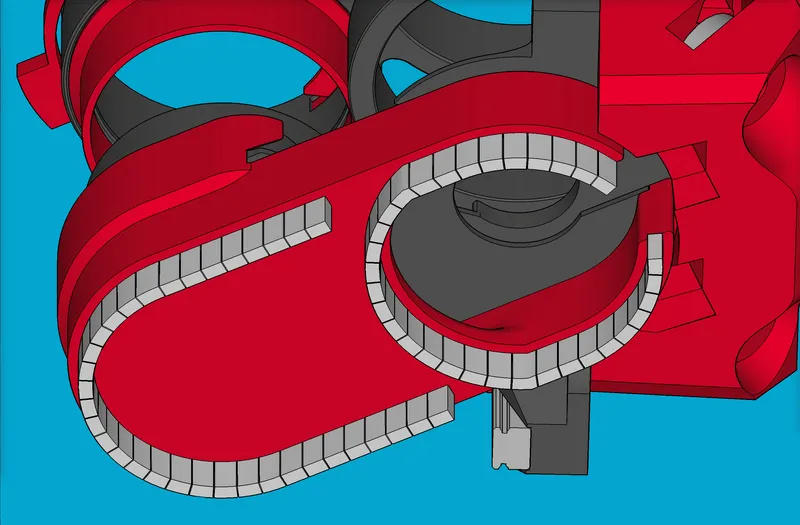
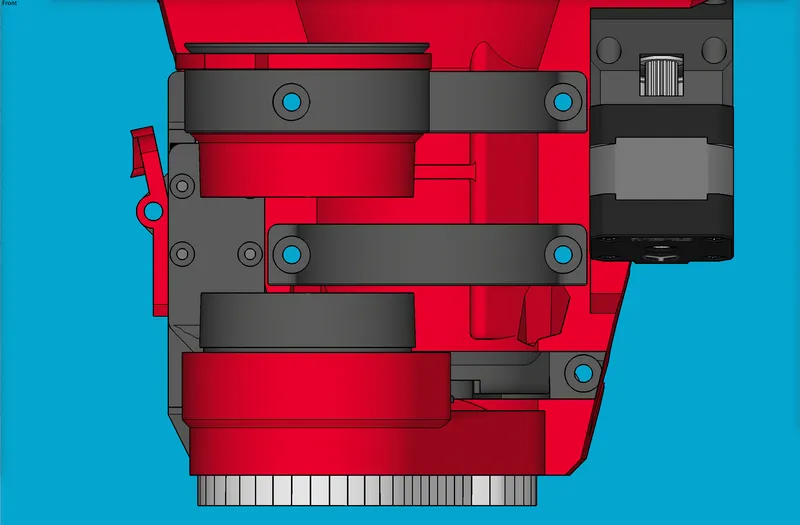
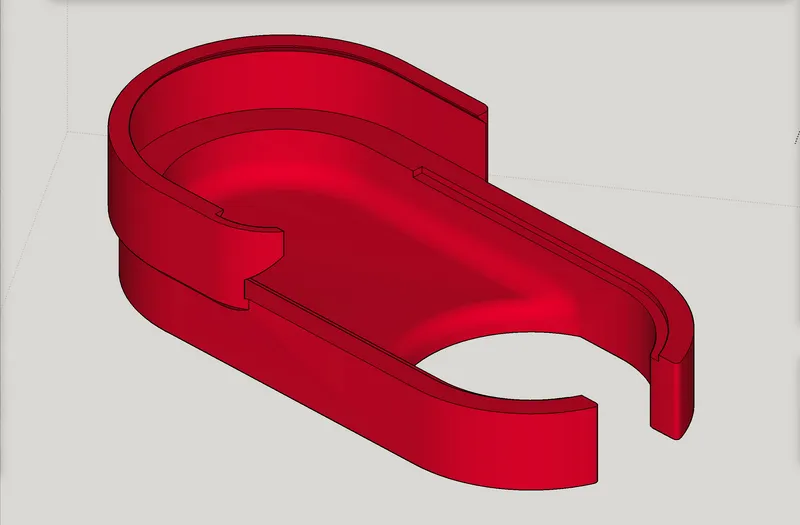
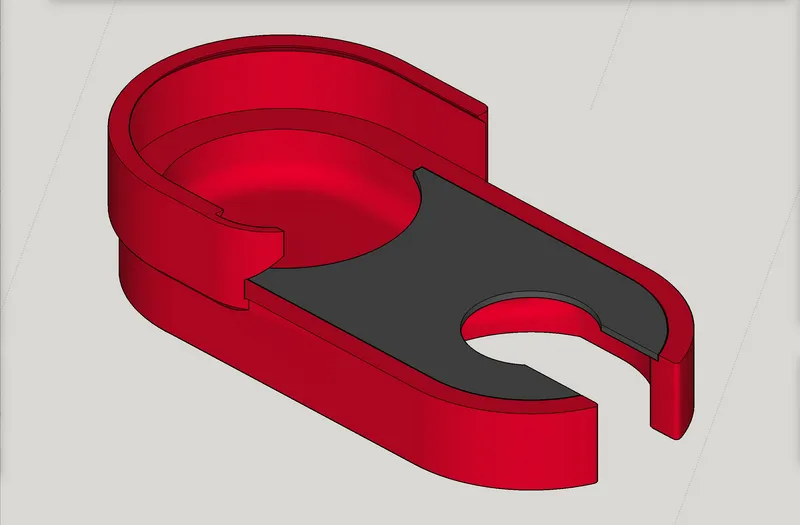
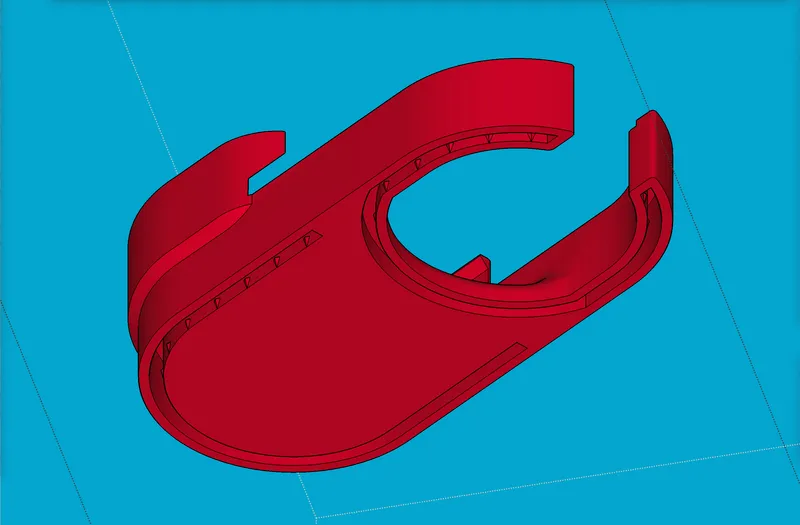
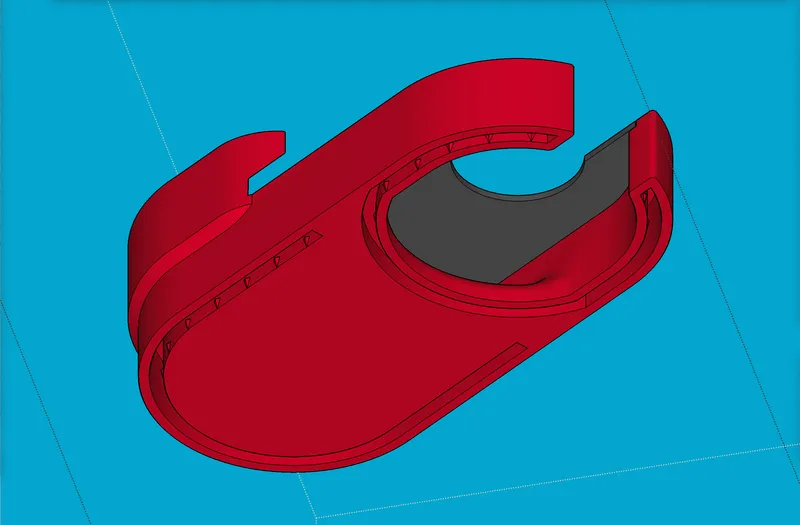
Before giving you all the juicy details, here are some renders and screen shots:
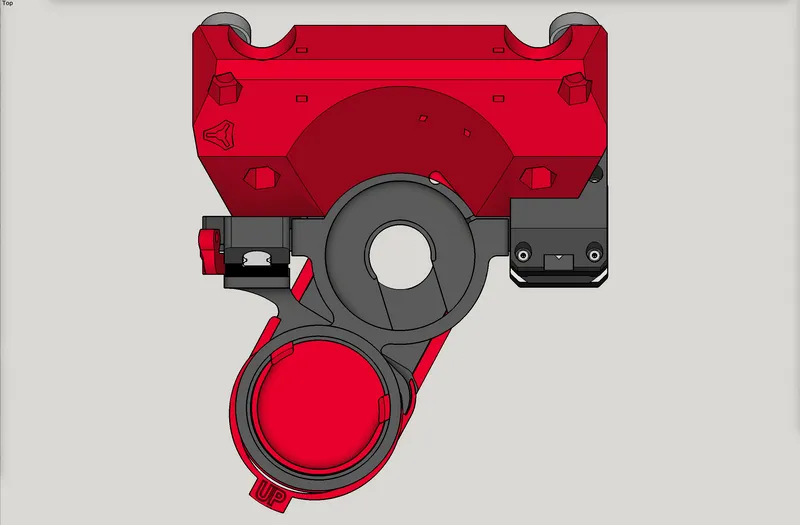


Re. X-axis homing closer to the left side of LR3 gantry
- After v1.0 was released, makers with standard LR3’s found that the original design had to homed with the aid of a screw in the X tensioner block / end stop, to have homing happen before the design bits met the left side. My apologies for not catching this sooner. (I missed it in the prototyping and testing phase because my LowRider v3 homes to the right side of my gantry, as I have my X and Y swapped.)
- In order to get the X-axis homing point as close as possible to left side of the gantry, the following parts were modified:
- Floating-Z Dust Shoe Mount
- Motor Mount Upper
- Hose Mount (2.5") (lower)
- Hose Mount (2.5") (upper)
- If you already made v1.0, and want to upgrade, the above are the only parts that need reprinted. All other parts will work. However, while your existing Shoe Body v1.0 will continue to work, there is a new, improved Shoe Body v1.1 in this remix. See below.
- The additional distance gained to get homing to happen closer to left side of gantry was accomplished by:
- Swinging (pivoting) the air column’s placement toward the right by 6.2 degrees.
- Raising the linear rail guide and its mount upwards by about 2mm, and trimming down the left bottom side of the Linear Rail Mount part.
- Taking 2 mm worth of height off both the Hose Mounts, to help accommodate the raising of the Linear Rail Mount part, which also helped with the following….
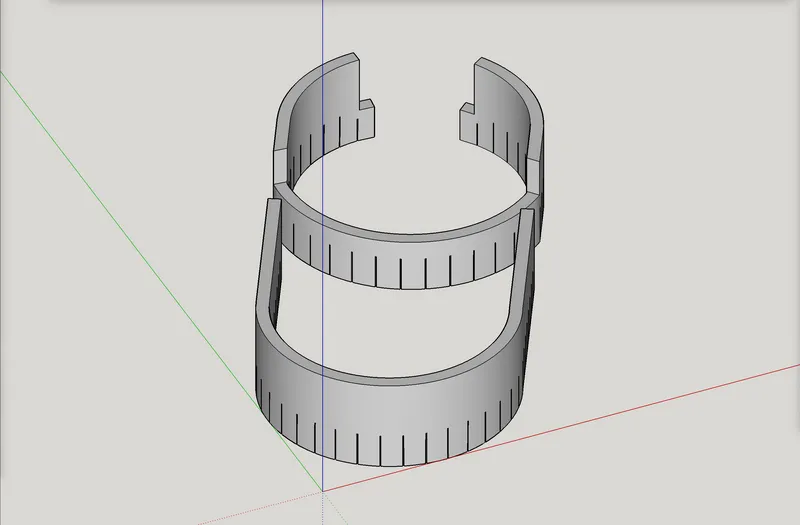
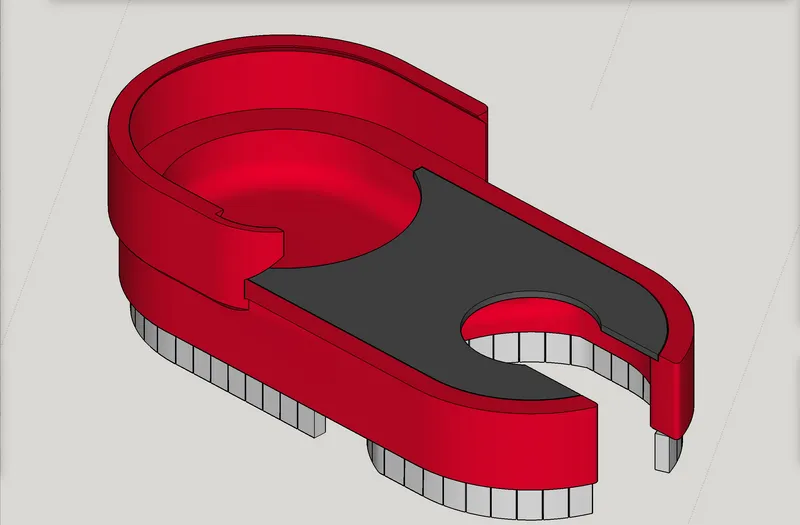
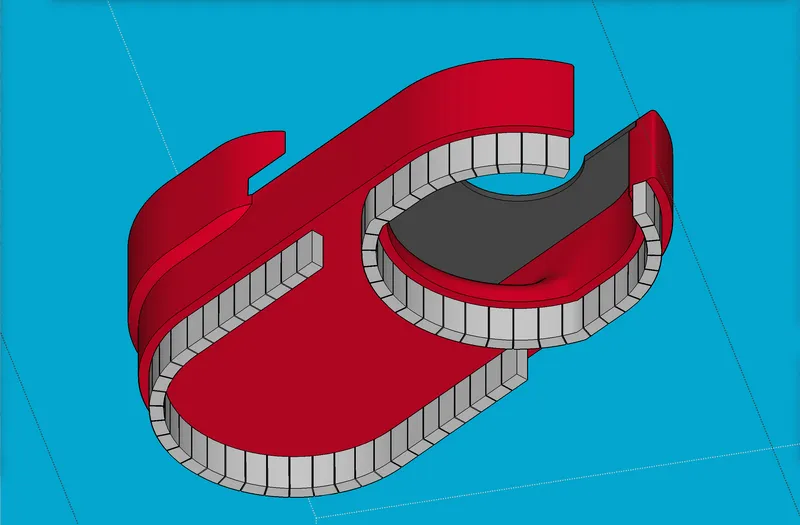
Re. improved Dust Shoe Body
- On v1.0, the groove for the EVA foam bristles followed the perimeter of the shoe, while the airflow opening is only at the business end. This meant that whenever the shoe had its backside off the material, there was a loss of “seal” allowing a reduction in effective suction. This new Dust Shoe body still has bristles around the perimeter, but also how has a new stretch of bristles tightly surrounding the airflow hole at the business end. The bristles at the back side are now just optional, and I left them in place just to have “equal footing*” whenever the whole body of the shoe is “sledding” on the material. *Please pardon the pun. Dad jokes are what they are.
- The extra groove space for this new stretch of bristles was accomplished by thickening the bottom of the shoe (by 5mm). With the aforementioned 2mm raise, this gets the bottom of the new shoe right even with the bottom of the core. This is why the 2mm raising mentioned above, was helpful.
- The groove for the bristles now has tiny little barbs to help hold the 2.4mm thick EVA craft foam bristles. See the original v1.0 listing for BOM and affiliate links etc. Kudos and credit to @clayscustom for suggesting the barbs in a comment on the first video in the series! Thanks for the idea!
- New design (SVG and DXF) provided for cutting new bristles (out of 2.4mm thick EVA craft foam).

Re. now supporting three different trim routers, DeWalt, Makita, and new Kobalt
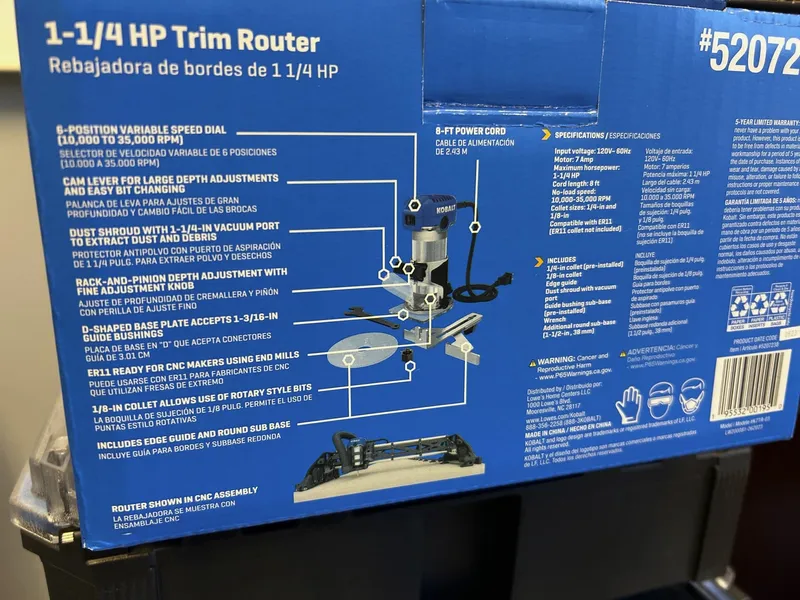
- In case you had not heard, the makers of Kobalt requested input from Ryan Z. of V1 Engineering, to focus their development of a new, corded, trim router intended to meet our “CNC maker” needs more closely than other brands. I’ve included it in the three supported routers.
- The new Kobalt router…
- offers support of standardized ER11 collets for use of affordable collets and affordable, readily-available bits, in a range of sizes.
- offers a fairly wide range of speeds, including slower speeds that are helpful for CNC use of ¼" bits.
- comes with both ¼" and 1/8" collets right out of the box.
- lowers the price point for makers getting started with a LowRider or MPCNC.
- shows support for V1E / LowRider by displaying a model of the LowRider v3 on its box, in product displays at Lowes stores, and on the online ordering page on the Lowes website!
-
- Full disclosure: Kobalt provided one of their new trim routers to me free of charge, with only a request that I share some video of it. Below is my video of the unboxing and results of my initials cuts with it. See my YouTube channel for more great content.

And these other videos are also related to this:
 & collet-nut set + some plasma cutting too!")
")
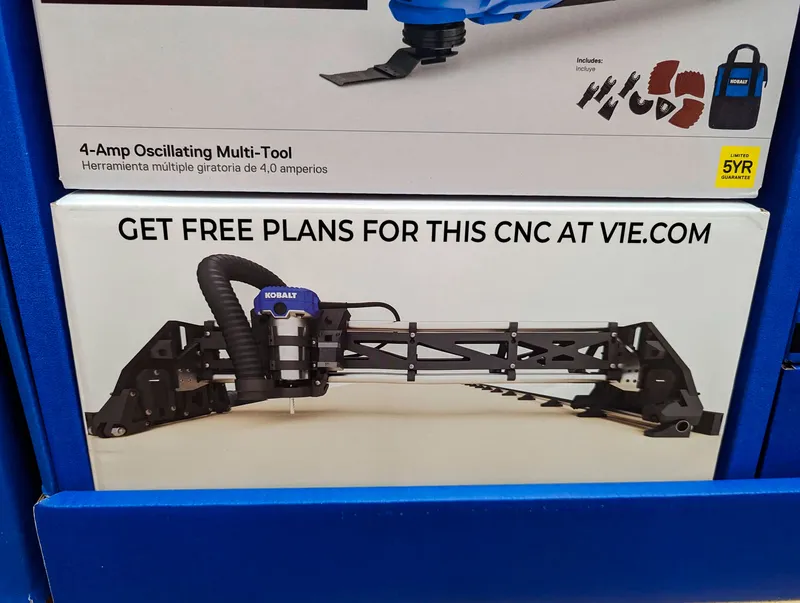
And here are some pics of the box and store displays that feature a LowRider v3 CNC!
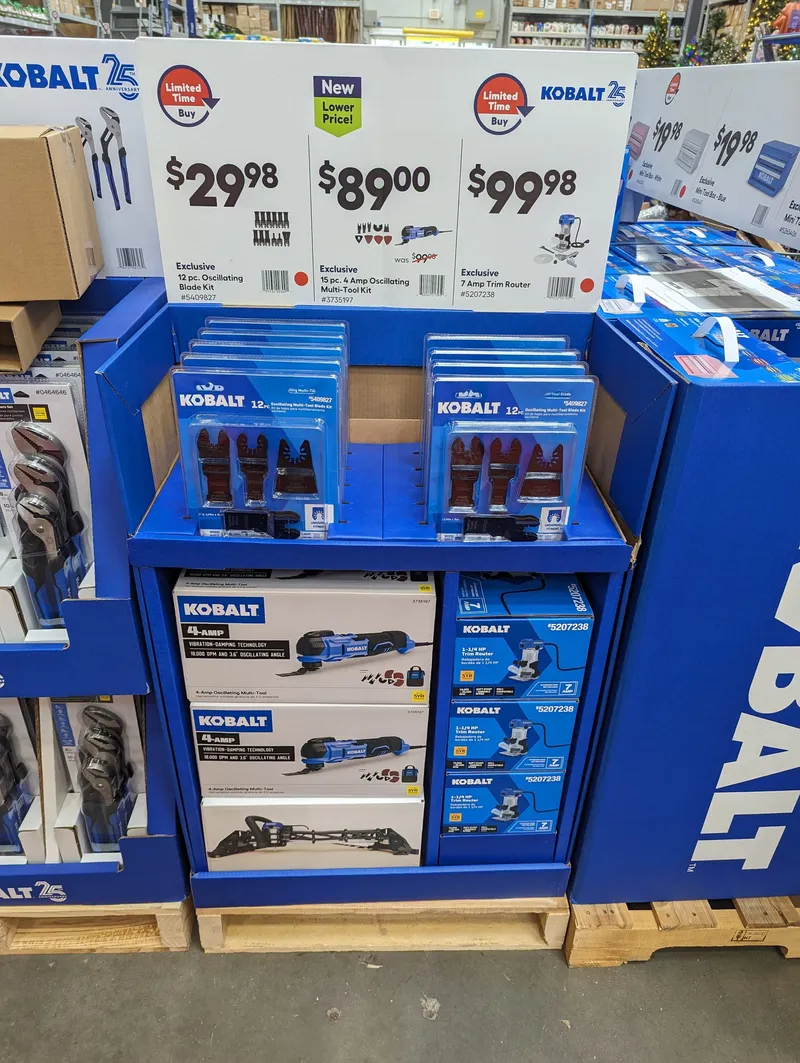
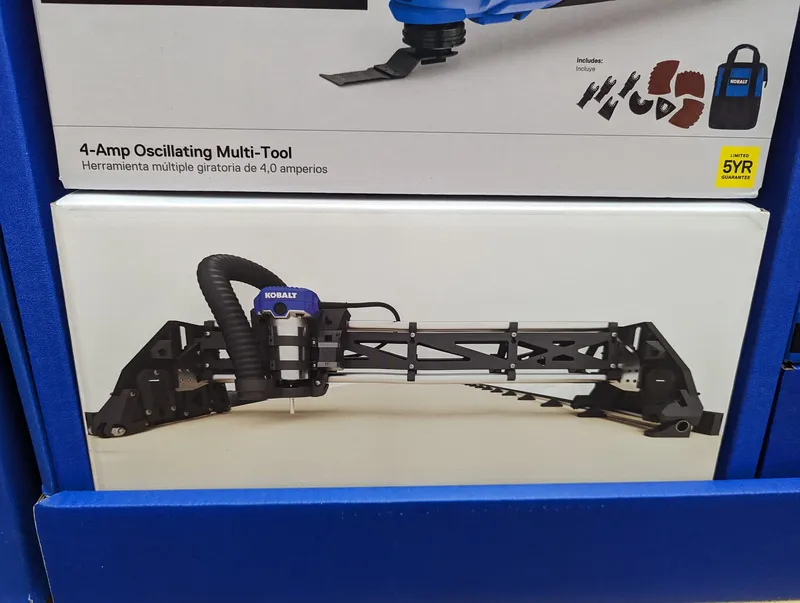
And below is how I wish the above photo looked, but they probably wouldn’t say this due to advice from their attorneys. (I didn’t verify this with their attorneys, but I’m probably right):
And here’s the box for the new router, showing off a LowRider v3 CNC!
Notes of interest:
- I made all three editions of the motor mounts by simply grabbing Ryan’s V1 Engineering designs for all three, and then attaching my floating-Z air column stuff onto his designs.
- I am dependent on owners of the various routers to let me know if you see any issues with the support of your model — especially for the DeWalt 611 router, since I don’t possess one and thus cannot test for it. It’s bigger and heavier, and it required its own elongated versions of the Shoe Mount, Shoe Body, Shoe Lid, etc. I have not printed those items! I have printed and tested the mounts and other items for both the Makita and the Kobalt routers.
- Print files that are specific to a certain router will have that router’s name at the start of the file name. For example:
- For the Dewalt Router, the file names look like:
- DeWalt_Floating-Z Dust Shoe Mount v1.1.stl
- Dewalt_Motor Mount Lower v1.1.stl
- Dewalt_Motor Mount Upper v1.1.stl
- DeWalt_Router Shield v1.1.stl
- DeWalt_Shoe BODY (for 2.5-inch Hose) v1.1.stl
- DeWalt_Shoe LID (for 2.5-inch Hose) v1.1.stl
- For the Kobalt Router, the file names look like:
- Kobalt_Floating-Z Dust Shoe Mount v1.1.stl
- Kobalt_Motor Mount Lower v1.1.stl
- Kobalt_Motor Mount Upper v1.1.stl
- Kobalt_Router Shield v1.1.stl
- Kobalt_Shoe BODY (for 2.5-inch Hose) v1.1.stl
- Kobalt_Shoe LID (for 2.5-inch Hose) v1.1.stl
- For the Makita Router, the file names look like:
- Makita_Floating-Z Dust Shoe Mount v1.1.stl
- Makita_Motor Mount Lower v1.1.stl
- Makita_Motor Mount Upper v1.1.stl
- Makita_Router Shield v1.1.stl
- Makita_Shoe BODY (for 2.5-inch Hose) v1.1.stl
- Makita_Shoe LID (for 2.5-inch Hose) v1.1.stl
- Print files that are usable for all three routers have “Universal_” at the beginning of their files names. For example:
- Universal_C-Clip (Hose Retainer) v1.3.stl
- Universal_Hose Mount (2.5") (lower) v1.1.stl
- Universal_Hose Mount (2.5") (upper) v1.1.stl
- Universal_Linear Rail Mount v1.1-A (no slide latch).stl
- Universal_Linear Rail Mount v1.1-B (with slide latch).stl
- Universal_Slide Latch v1.1.stl
- For some print files, the Kobalt and Makita files are identical. Their motor mounts are different, but most other parts are shared. To spare any confusion, whenever a DeWalt difference required separate files, I went ahead and made separate Kobalt and Makita files too.
Printing and Assembly
- Please refer to the instructions on the original v1.0 and please watch the first three videos in the series (see below), as the printing and assembly are almost identical.
- Re. the Hose Mount Upper: there is now no need to re-drill the access holes — where the original part caused some closing off of the tool access holes, the new version has notches to align with the access holes to keep them fully open.
Change log
- V1.1 was ready on October 25 (a little over two months after the original was posted), but published on Nov 1, 2023, primarily due to waiting for green light on mentioning the new Kobalt router.
My PayPal tip jar: https://paypal.me/design8studio
Various LowRider 3 CNC remixes:
View all my models and remixes on Printables:
*Product links to Amazon items are affiliate links.
Part 1 video:

Part 2 video:

Part 3 video:

Part 4 video:
…pending…