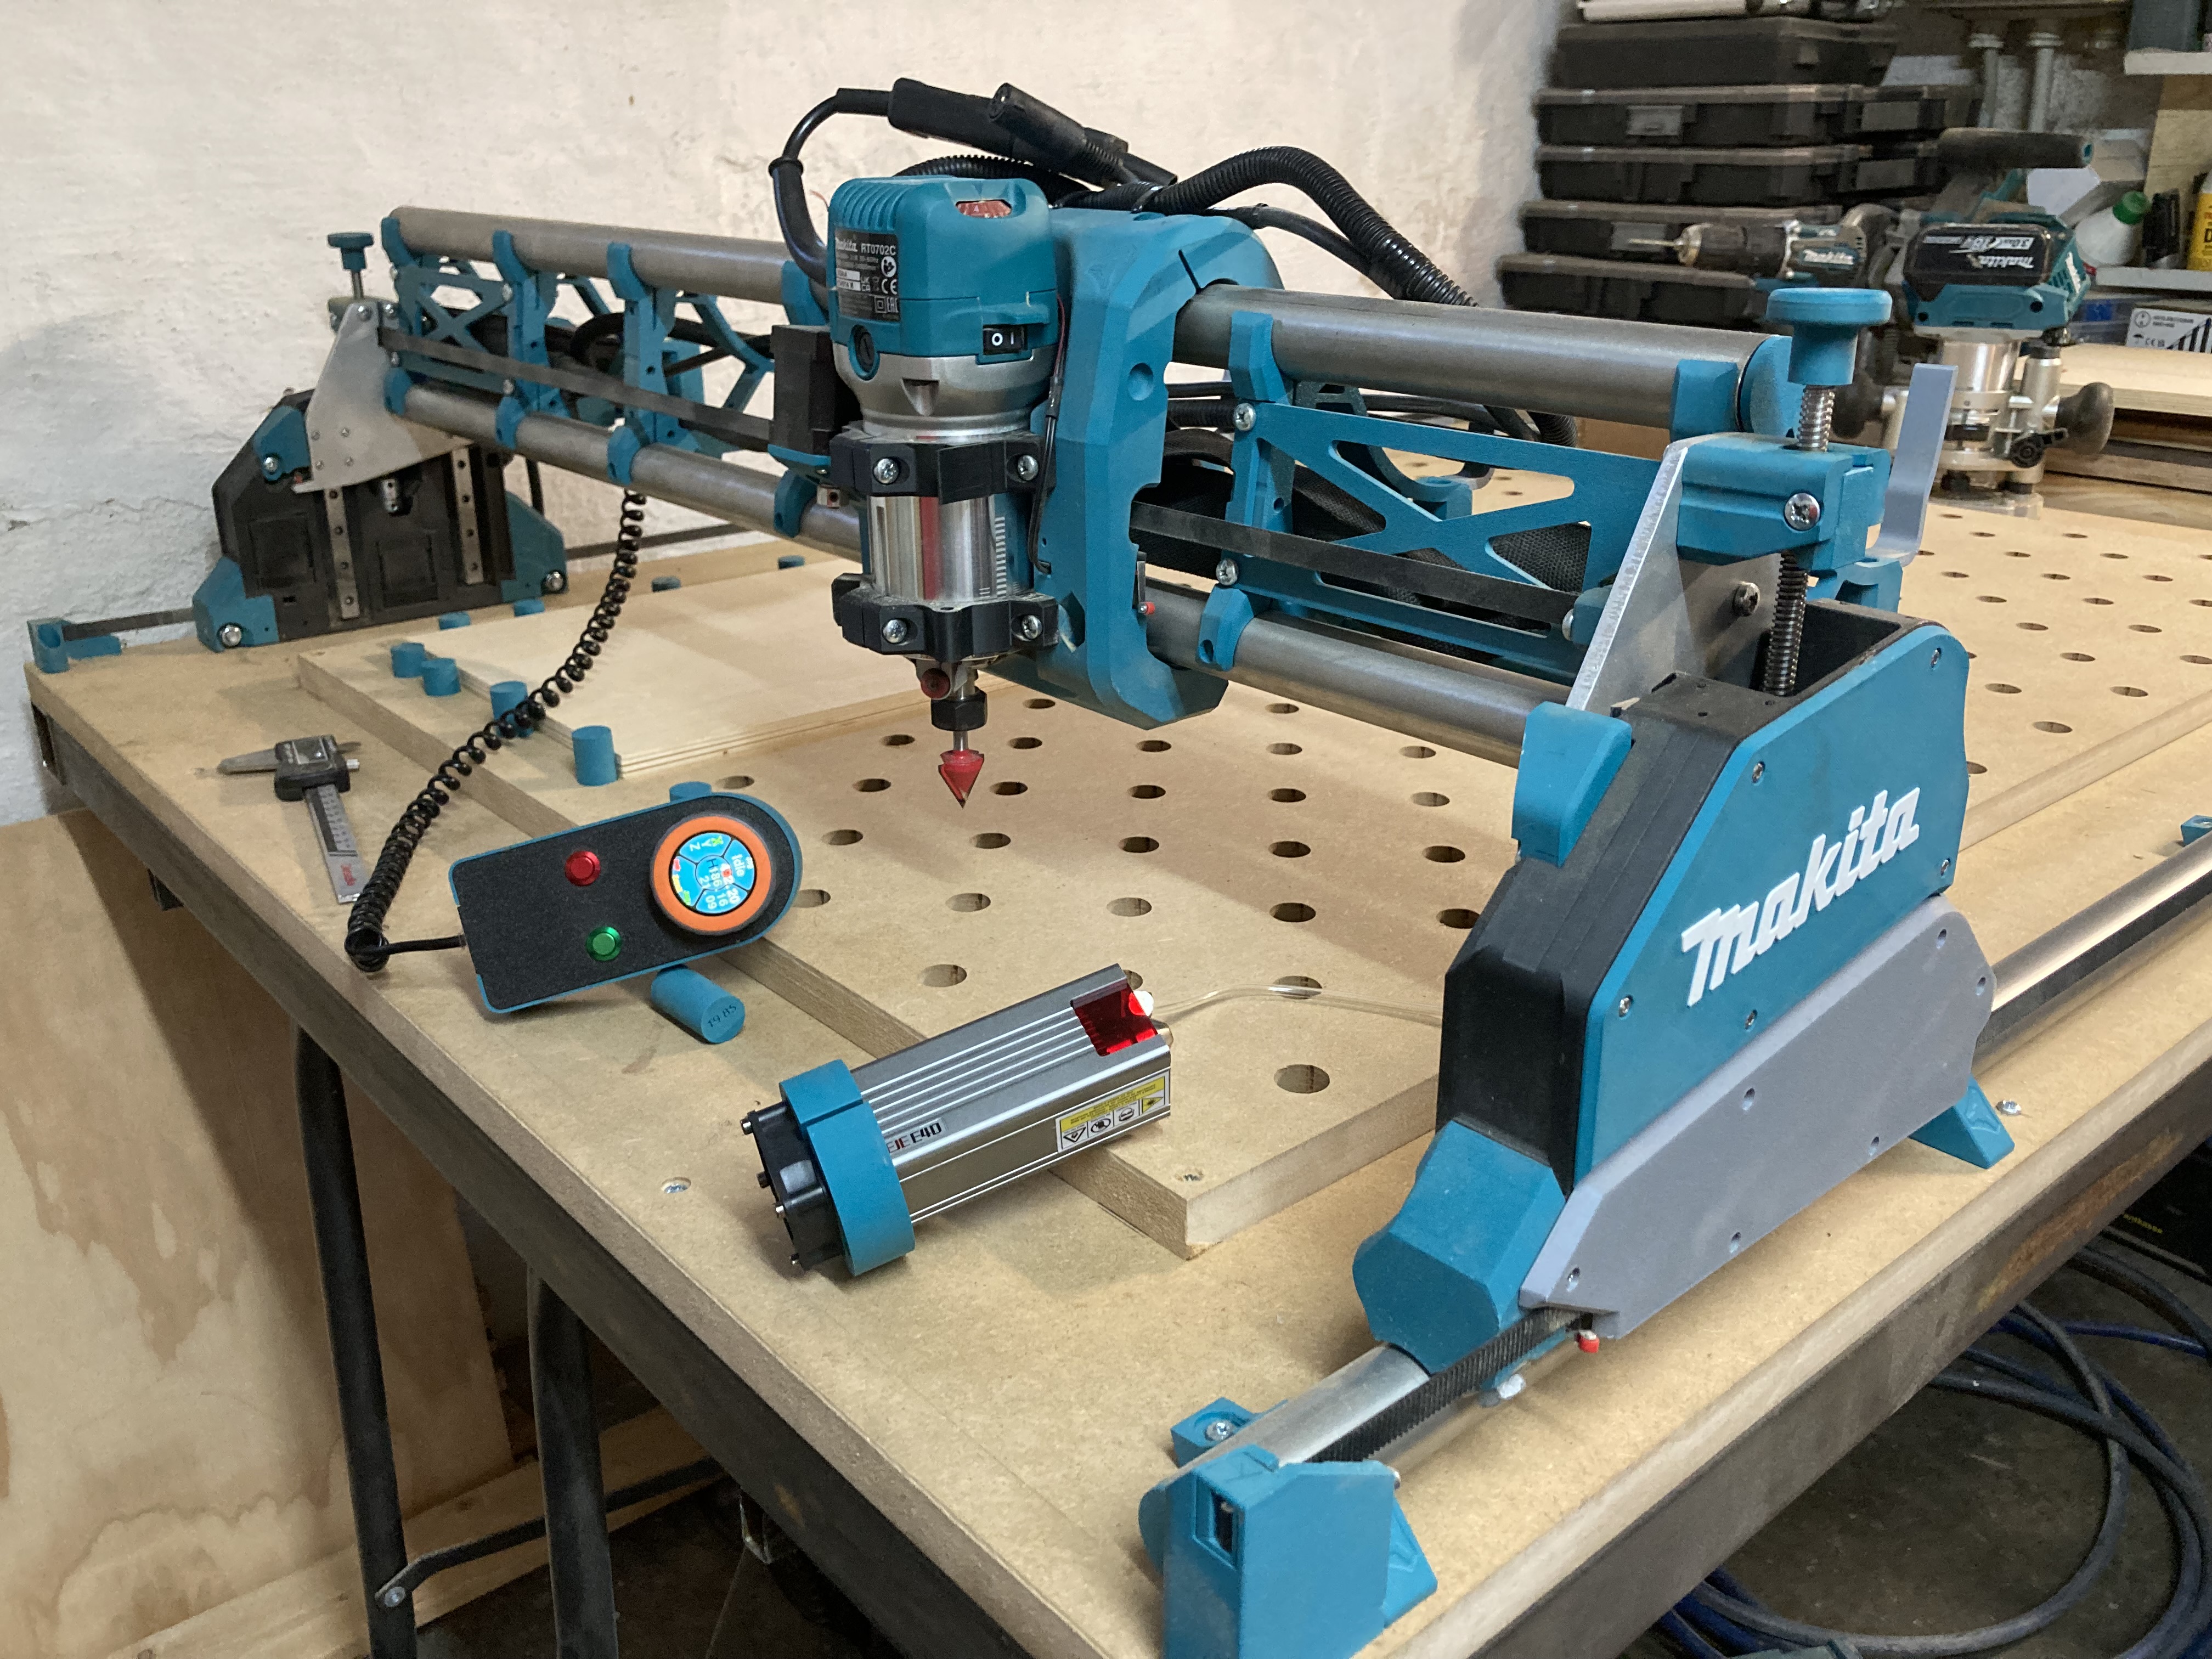
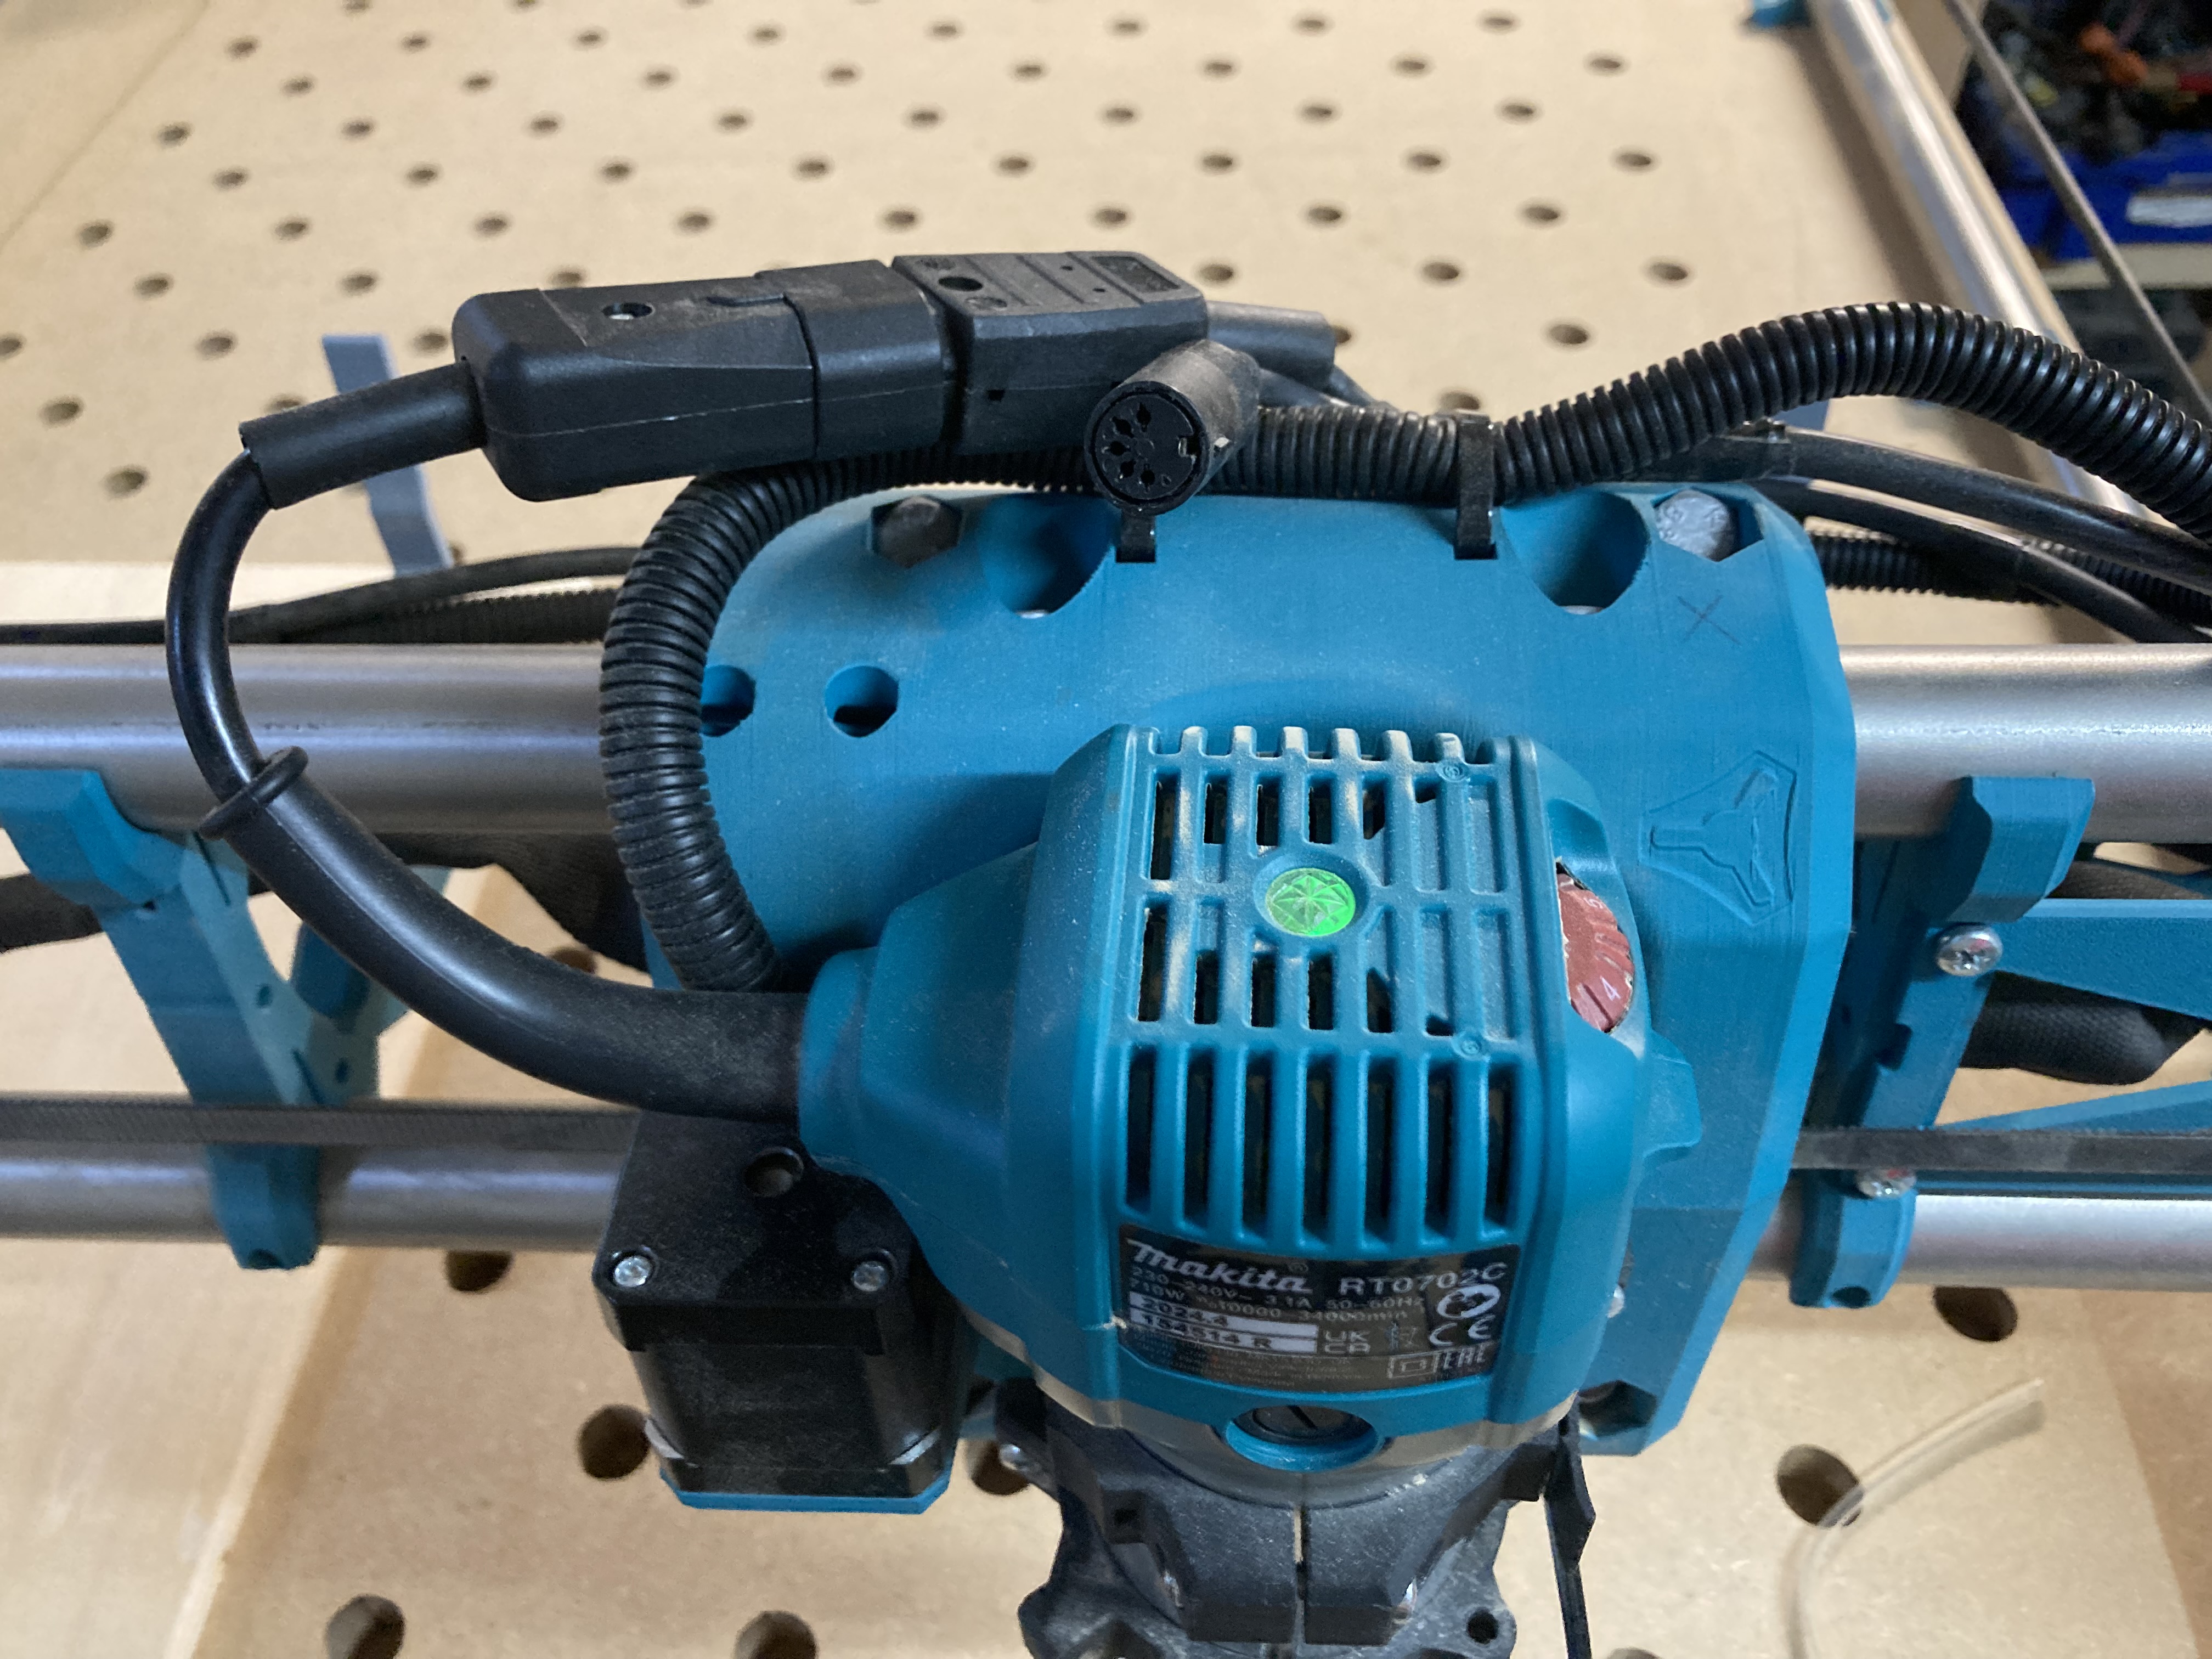
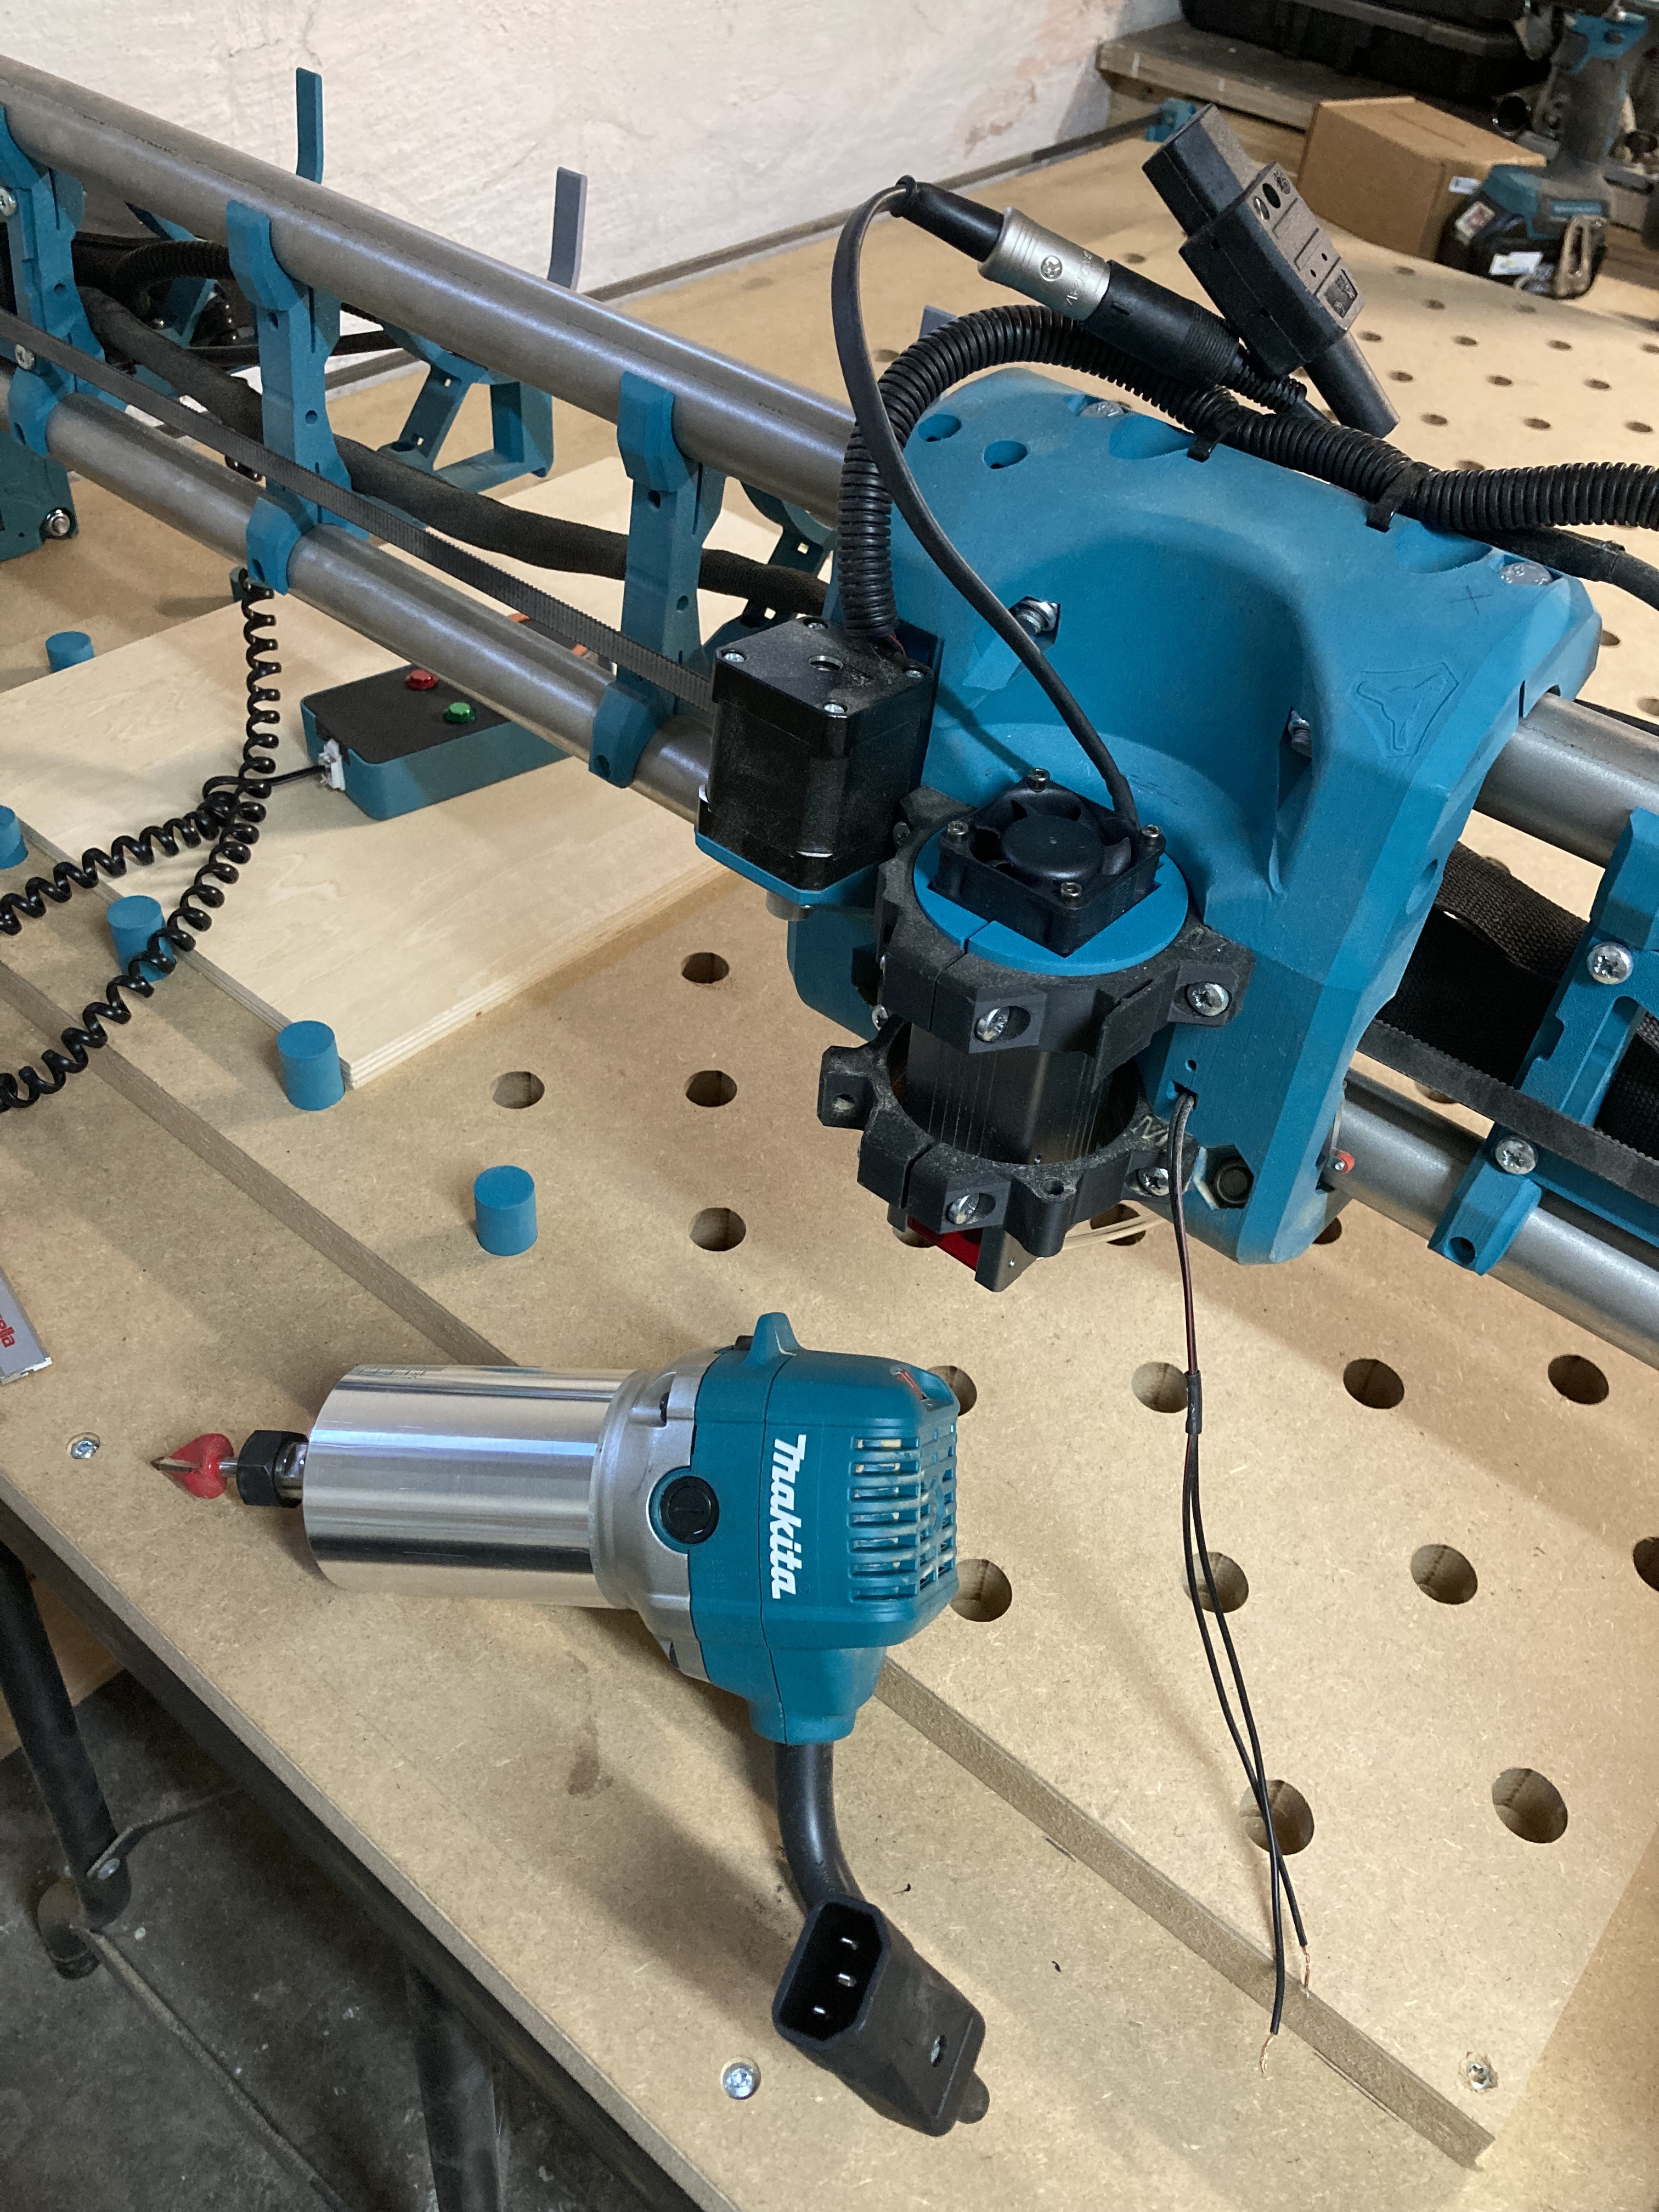
I just want to say thanks for this opportunity. 1,5 month ago I knew nothing about cnc, coding or anything related to electronics. I started buying a bambulab a1 to print out the pieces while I sucked up all information about cnc, fluid, gcode, lasers and grbl software. Now I have a fully functioning machine. I wish the available build info was more like an a-z instruction but that would have been too easy. I learned alot and read alot on forum searching for things I didn’t know about. If you have not guessed I like Makita tools. I made it easy to change from router to my Neje E40 laser in seconds. Changing between config takes longer.
29 Likes
congrats on your machine, the title implies you are having some issues?
Thanks didn’t realize that old topic wasn’t deleted ![]() changed it to a more correct one
changed it to a more correct one
1 Like
Very nice - love the look!
That’s a great color match.
That is an amazing color scheme! What are you going to do for the strut plates?
When you get it all done, I would love to use a picture in the docs.
This looks really great. Interesting that there seems to be exactly that colour. ![]()
Would not do that, because you are then officially advertising with another brand name. ![]()
Looks too good not to show it off. When Makita starts making CNC’s I will get more worried.
4 Likes
Maybe Makita would consider asking some questions on how to make their router even more capable as a spindle? Maybe even an ER11 version?
But I agree - this build is just too cool to keep it a secret.
5 Likes
Great looking build! What do you have planned for strut plates?
One bit of curiosity- your pendant looks like it’s routed/connected to the board and the way it’s connected leads me to believe you plan to connect/disconnect it regularly.
Be aware that ESD damage has been a problem for a few FluidDial pendants. If you use a pendant, the best practice for now is to leave it always connected and not to regularly plug and unplug it. Unplugging it and plugging it in while the system is powered is always a bad practice.
Wow great build. I like the connector plug solution you have for the router. Considering doing the same… But I stiull use mine for other router stuff. And I have not yet completed my build… Many years in the making now ![]() got it moving in x/z axis at latest today. So just a table and Y movement left
got it moving in x/z axis at latest today. So just a table and Y movement left ![]()
Amazing looking build man!
You’ve gotta link that filament for those of us running team blue gear.
3 Likes
Thanks and don’t ask me how I know. Luckily I used a generic ESP32 from ali when setting up the configs. Now running original esp for reliability.
Really nice build! More inspiration for me to get going on my own upgrade. ![]()
For strut plates i am thinking of 3mm alloy. Draw the struts with a pencil on the sheet of alloy in the cnc. Cut it with a jigsaw. Paint in etch primer and then laser engrave something fancy.
1 Like
The struts need to be pretty spot on, a jigsaw is probably not the right tool for that. Also, the holes need to be precise, or it’s going to make it worse. I wouldn’t dare to do it this way myself.
Maybe start with 5mm HDF, get used to the machine and then cut some from aluminium? ![]()
3 Likes
![]() I agree with philipp 100%. You have a wonderful machine that can easily handle the metal you want to cut. (and I want you to take some action shots!!!)
I agree with philipp 100%. You have a wonderful machine that can easily handle the metal you want to cut. (and I want you to take some action shots!!!)
2 Likes
I’ll do that instead, I hate alloy chips flying around so I need to sort my shop vac first. Thanks
1 Like
It sounds extreme that a printed machine can do this kind of work. 0.5 mill pr pass or so right ?
No you can go harder than that. Good place to start though…after you mill up some wood or plastic. Please do not start with metal.
My mounts include vac options.
1 Like