Now, for a little more detail about this process.
The key assumption is that one starts with an image file and wishes to create an STL file which is suitable for carving with the LR4/MPCNC. The critical step is the conversion from the image file to a new image file that incorporates depth information using a grey scale. Typically, darker tones are further away from the viewer while lighter tones are nearer.
Note that this is usually NOT just a simple greyscale conversion since the starting image normally does not contain any depth information. While it is possible to adjust a greyscale image so that the tones relate to depth, doing this manually can be a very tedious and time consuming process.
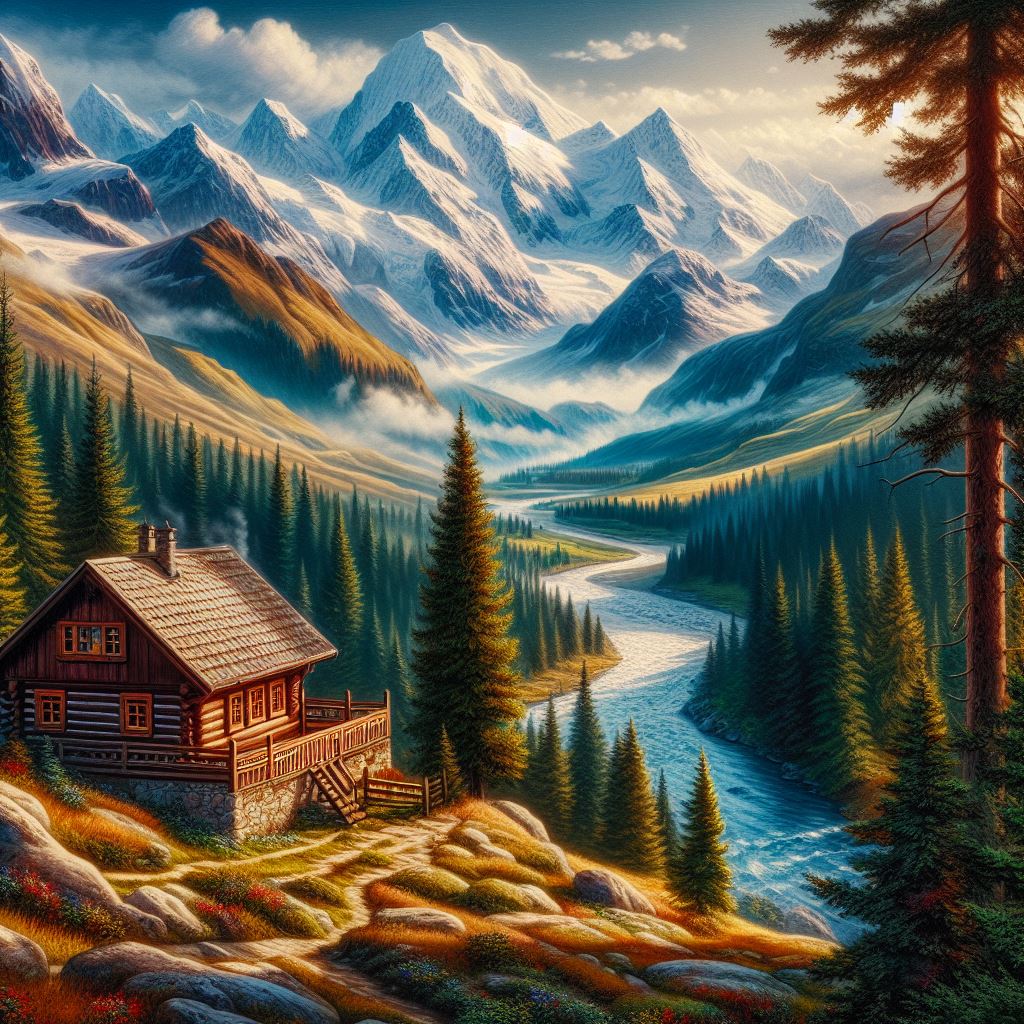
Consider this photograph, created using AI (probably ChatGPT)
If it simply converted to greyscale, the problem becomes immediately apparent:

The lighter mountains are actually the furthest away and the dark foreground is actually the closest. So simply using this image as a depth map would give a completely wrong result.
This is where the latest developments using AI make this problem more approachable. I’m not going to address all the various options, but two such possible tools are Depth-R and SculptOK.
Both of these tools use AI to help generate the depth information, and there are many parameters that can be adjusted to obtain optimal results.
Considering Depth-R first, here is the results of processing our mountain cabin photo:

Now, the darkest regions are those that are further away from the viewer, while the cabin and other foreground components are lighter, which is consistent with the actual depth information. (I am not skilled enough to adjust the greyscale within Depth R). An STL file can also be directly downloaded from Depth-R, which can then be fed into EstlCam or other CAM tool.
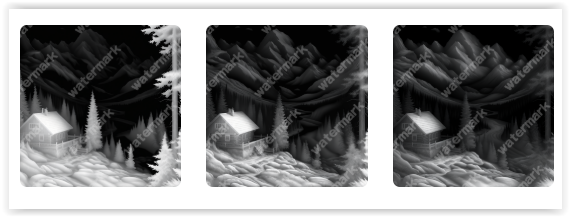
The second software tool, also using AI, is Sculptok. With this software, the image is just directly uploaded and can then be process using an AI engine to determine the depth information. Although this software must be rented, one can obtain “tokens” to run this analysis in various ways at little or no cost. The first step of the process is to “Draw” the image, which costs 2 tokens and generates three greyscale depth maps with varying degrees of detail and include watermarks which can be eliminated with tokens:
Again, the depth information now accurately reflects the original photo.
From here, an STL can be generated and downloaded with subsequent fabrication being done using whatever CAM platform you are using:
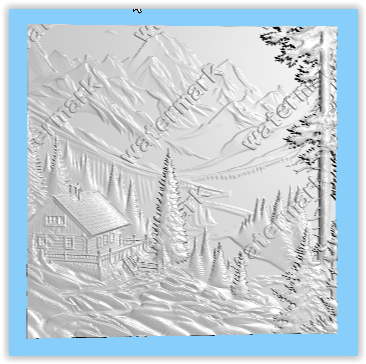
Above: 3D image created by SculptOK ready to download as STL or other 3D format.
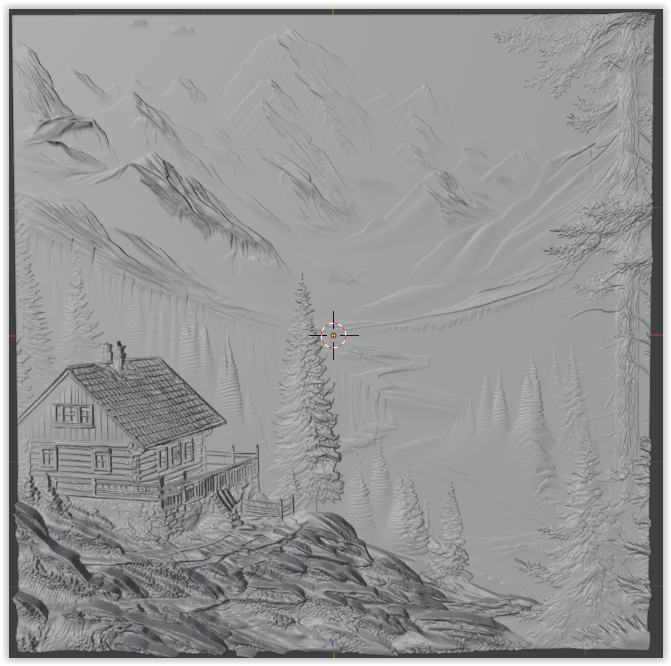
Although this method will often give suitable results, I personally prefer to use the Sculptok plugin for Blender. Here’s a link to a YouTube that explains how to do this:

In actual use, the procedure that is outlined in the video works quite well, even if one is unfamiliar with Blender. In this example, the original color photo was uploaded from Blender to Sculptok and the 3 grey scale images were then downloaded back to Blender, where the result can be manipulated by doing such things as changing the mesh size and smoothing some of the noise.
Below is the Blender file ready for download as STL:
An STL file can then be exported which can be used for the CAM. Here is a tool path for the finishing cut generated by Estlcam:

The result is similar to the one that was posted in the first message of this discussion. However, in that case, I didn’t use as much detail as in this version, but, they are both produced from the same image.