You need to new duet 5G. It has a cell phone modem to send you a tweet when the power goes out (I’m kidding).
2 Likes
1.5kw gas generator with an auto-start feature should be able to help you out during a power outage. You’d still want a small UPS for short-term power while the generator gets cranked up and running.
Seriously?? You built a motorbike??
That would be totally overkill for my application ![]() . In China, and especially in Shanghai, we have a very reliable power network so it’s been years since I haven’t experience a power outage. Plus getting fuel is not straightforward like it would be in other countries, here if you don’t have a car or a gas motorbike with a registered plate number they won’t give you gas. Guess they are afraid of you making molotov cocktails or whatever.
. In China, and especially in Shanghai, we have a very reliable power network so it’s been years since I haven’t experience a power outage. Plus getting fuel is not straightforward like it would be in other countries, here if you don’t have a car or a gas motorbike with a registered plate number they won’t give you gas. Guess they are afraid of you making molotov cocktails or whatever.
Also, by my rough calculations, I should be able to run the printer for around 10 hours using my motorbike’s battery (not using the heating bed, of course), which is more than I’d ever need. One other interesting thing is that since my battery features a full monitoring system, it would cut discharge to protect itself once depleted so that would be totally safe, and I could even have the readings of the instant power consumption of the printer on the motorbike’s dashboard as well as cumulated power consumption over time ![]()
Well I didn’t make the chassis but I built the electric powertrain, so maybe “mod it” would be a better word. That’s my daily driver now, works really well. Power is similar to a good 250cc sport bike or a low power 400cc, and it didn’t cost me much to build since most of the stuff I used was second hand (a bit less than 2000bucks in total including everything).
There’s the thread where I showed some of the build if you 're interested:)
5 Likes
That bike was awesome!
2 Likes
Energy required by heat bed during printing is far less after its startup. And you can improve it further by closing the printer + other insulation methods. Very thin and extremely flexible polycarbonate panels fitted on frame (with magnets maybe - anti-rattle and easy opening) might look good. They are super-resistant.
2 Likes
Yeah, but my heated bed works on 220V so that complicates things, I would need an inverter which are quite expensive in 72V versions, and I’d probably get a very low efficiency so not much working time. My guess would be 2-3 hours tops.
Doesn’t worth the hassle for an event which is very unlikely to happen anyway, since power black out here are extremely rare.
You’re right. But I am curious if you could still get enough heat to keep it warm with just 72VDC. You’d need some circuit to smoothly replace it. But it is basically a resistor after all.
1 Like
My math is a bit rusty, but if I did not make any mistake then the maximum power the heated bed would be able to deliver at 72V should be around 300W, instead of the 3000W it should be able to output at 220V.
I’m not sure 300W would be enough to keep the plate at 60degree C, given it’s large size.
P=IV
V=IR
I=V/R
P=V^2R
P/R = V^2
72^2/220^2=10%
So with the same R, 220VDC would be 10x more power than 72VDC. AC is magic, but I’m guessing its about right. Maybe off by 1.5x, but maybe in the wrong way?
Yeah, I came pretty much to the same conclusion. If I’m not mistaken 220V is the RMS voltage value, max voltage in a 220VAC grid being somewhere around 310V, so 220V is the value to be used in calculations.
So yeah, 10%.
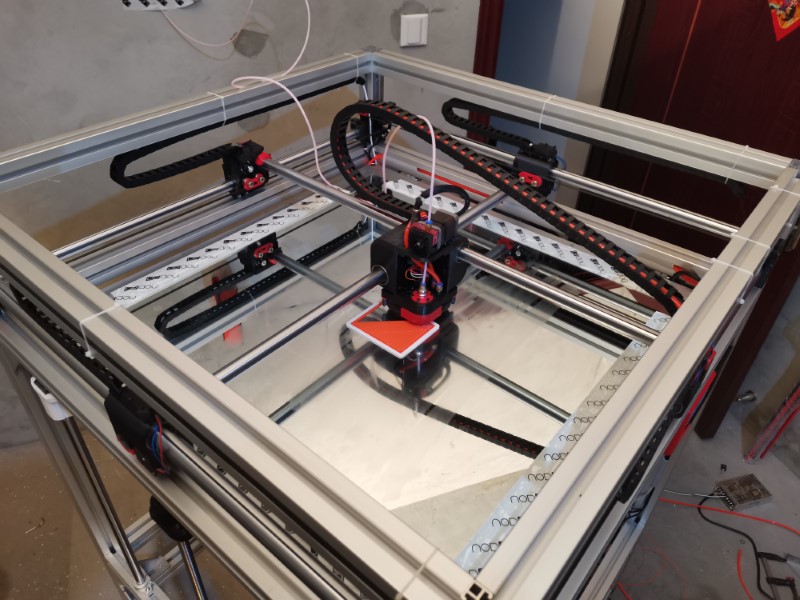
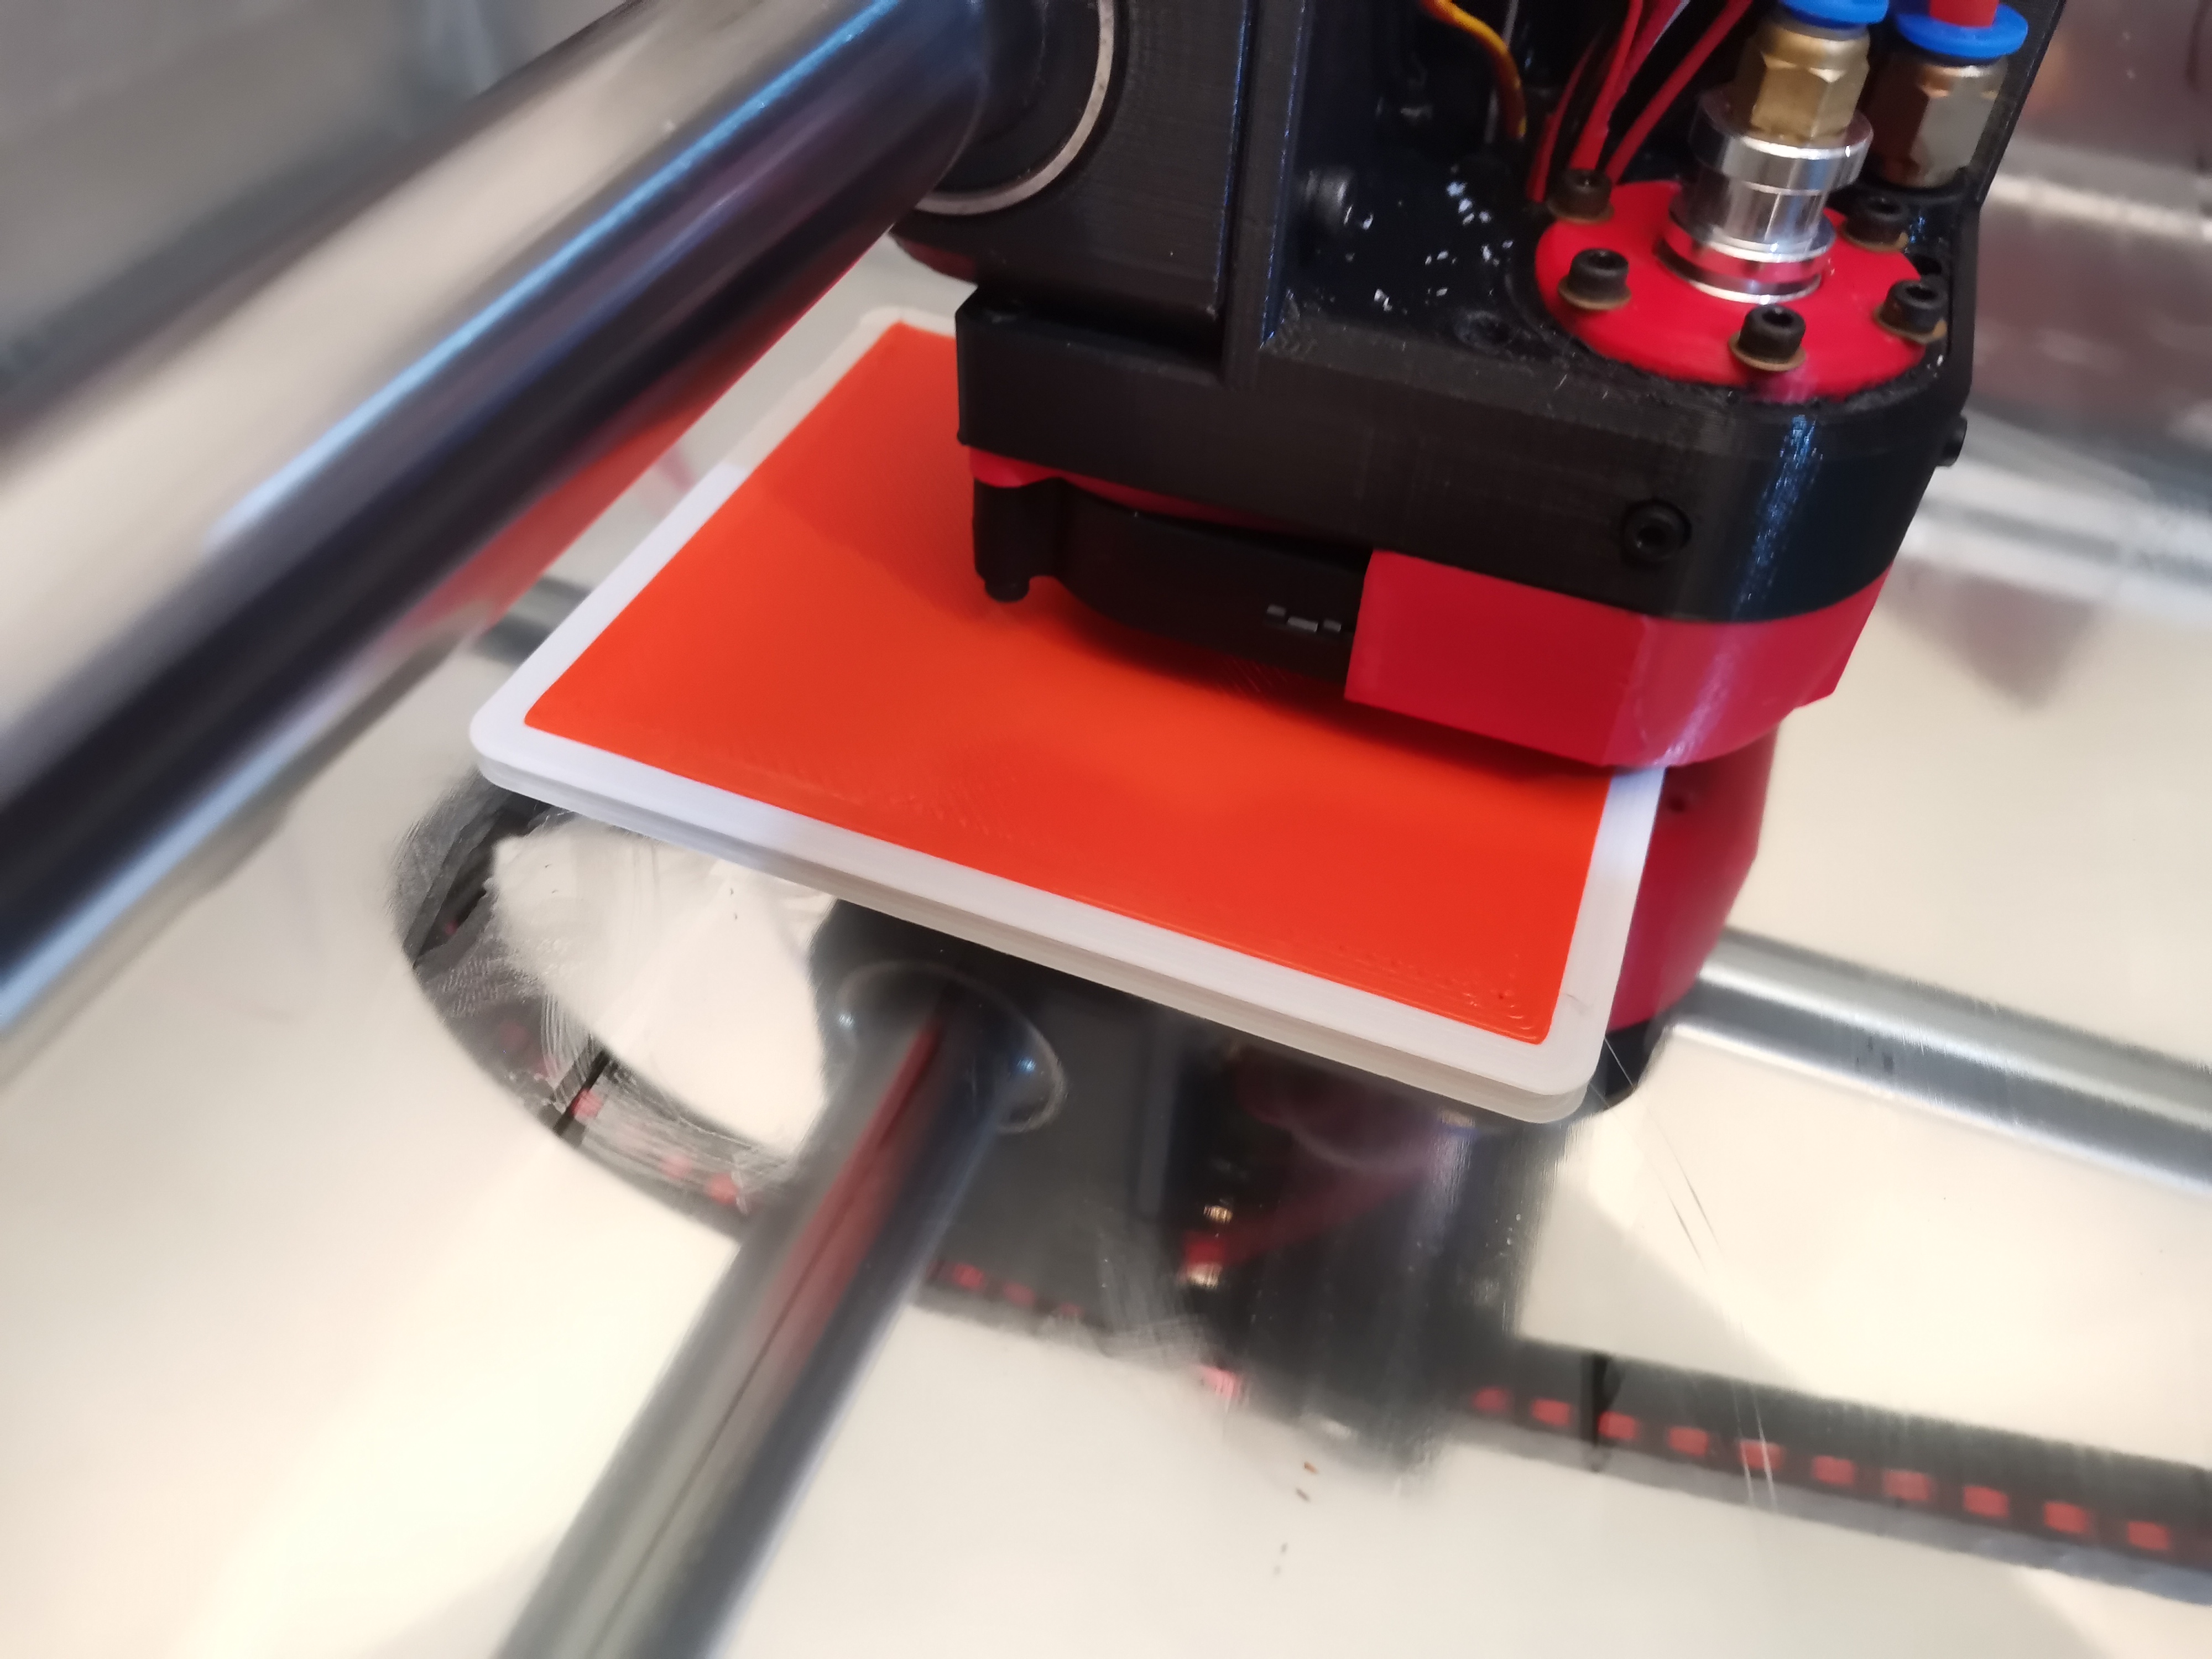
Anyway, on a side note, I made the first print attempt yesterday on the BOx, and everything seems to work fine so far! I haven’t installed the glass plate so It wasn’t sticking at all on the aluminum, but it was moving the right way while extruding something that looked like what was expected.
So I have nothing to show for yet, but it’ll be very, very soon.
First I had to tune up my slicer so I created a new printer profile. First attempt of printing was a weird fail, the print head was moving super slowly while the extruder motor was spining crazy fast. I solved it by chosing the option “5D Relative Extruder” in my slicer, which is weird because all my other printers are using absolute mode.
Anyway, it worked, Now I need to find a way to secure the glass plate on the bed, make a support for a filament spool and that should be enough for a first test print, yay!
By the way, the Duet Web interface is really great. You just slice your design the regular way with your slicer, save it somewhere on your computer’s hard disk drive, then you click on “upload and start”, Boom, it starts printing right away.
You can babystep if necessary, adjust speed, whatever. Also, if you lose the network connection it doesn’t matter since your print is instantly transfered onto the duet board sd card anyway. Great stuff.
Only thing I find a little bit disappointing is the touchscreen. It is real nice and high quality, but it could have a bit more functions, like for instance I haven’t seen a button to enable the part fan. Not a huge proble, but I think a bit of potential is wasted here since the screen interface isn’t used to its full potential. Also the skins colors aren’t too bad but they could look better. I wonder if there are some mods for it actually.
2 Likes
Your other printers aren’t running the duet, so maybe that’s why the relative extruder is needed. Or maybe there’s another setting in the duet. At any rate, with enormous prints, it might make a lot of sense to use relative, since you wouldn’t want to have to write out, parse, and then read in 100000.001mm and then 100000.002mm.
I use prusa slicer, and octoprint, and you can set it up to export directly to the printer, and there’s a checkmark to start it when it uploads. It’s the little things, really.
Do you have any blue painter’s tape? That would get you started (although you haven’t cut any corners yet, so why start now).
Have you figured out if the glass will fit in your freezer yet? 
1 Like
Ah yeah, good point, I haven’t thought about that.
Yeah Octoprint works very similarly so for you I guess it is a standard process. I was using Marlin and old ramps until now so that’s a whole new world to me ![]()
Though now that I think about it I did try octoprint when I build the DLP printer so I have no excuse…
I don’t unfortunately, I never used it, always been happy with the good ol’ glass+glue stick.
The glass plate should fit without any issue since I’ll reuse the one from my old MPCNC. ![]()
Not sure I understood correctly your last sentence with the freezer though. Is there some kind of printing technique involving a feezer that I’m not aware of?
I thought you were the one that told me if a print won’t come off, you just put it and the glass in the freezer and it pops right off.
1 Like
Oh, yeah haha 
Now most of the time I just put it under cold water which accomplishes the same thing but faster, so I guess I’ll need to dig a swimming pool instead.
4 Likes
If anyone else said that it would surely be sarcasm…when you say something crazy I wait for a new build thread to pop up.
10 Likes
In his case it will have stratified temperatures and a hot tub  to watch from
3 Likes
Silly Tim… The “hot tub” is the bath to dissolve the PVA supports…
3 Likes

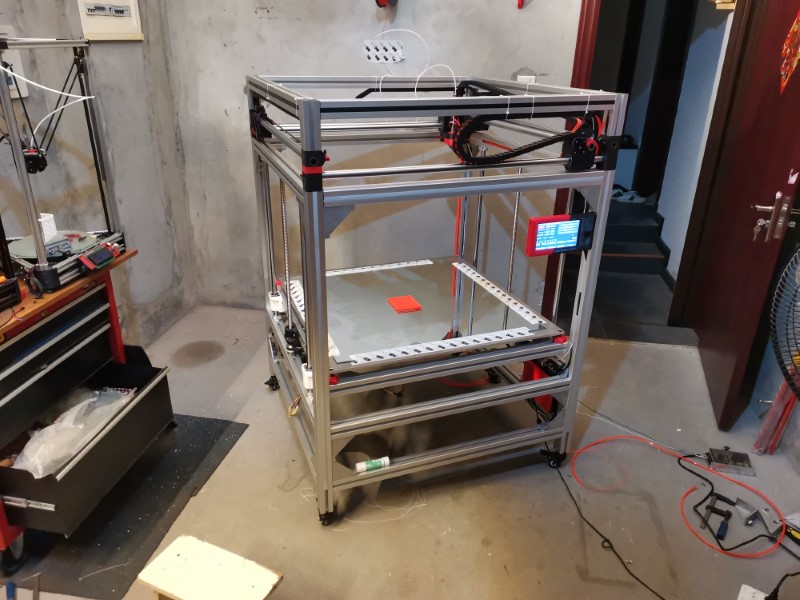
First actual test print yesterday… And great success!
I just attached my mirror temporary with tape, and lauched the print directly,
TaDaaaaaa…

First layer adhesion was poor because I was babystepping to find the correct offset, so I had warping which at some point became too important. I just killed the print before completion cuz I was afraid to damage something, the head started bumping into the corner a little. But it doesn’t matter, this part was just a test anyway, didn’t need it to get through.
So, first impressions:
-I didn’t see any water leaks and nothing melted aside from the filament, so the watercooling seems to work fine so far.
-Temperatures are super stable and extrusion seemed very consistent, I guess this might have to do with the full copper volcano heat block and the aerogel insulation, so that’s great
-The print head is far more rigid than before. So whenever it hits a blob of plastic it doesn’t deflect much, which is a bit more violent but leaves a much better finish on the outside layer. That was one of the goals I wanted to achieve so that’s great to see.
-I kept printing speeds slow, but I haven’t paid attention to my travel speeds… and well, they were pretty scary fast !
-Bed leveling worked fine, warping was just due to the first layer being too high, but it was pretty consistent
-Part cooling fans are really powerful and blow air at 360 degree around the nozzle so no blind spots, I think they will work well
-The printer is very silent only thing I can hear are the fans and the Z axis
-The printer frame is sturdy, but not as much as my wooden frame seemed to be. But I haven’t tightened the tubes down yet, all the corners are loose. Once tightened that will make a huge difference so I guess in the end it’ll be stiffer than the wooden one. Also my belts aren’t tightened either, they were very loose.
-The print itself was very clean for a first print, I didn’t see much artifacts despite many things not being tightened down.
A little video:

11 Likes
Made a few test prints this weekend.
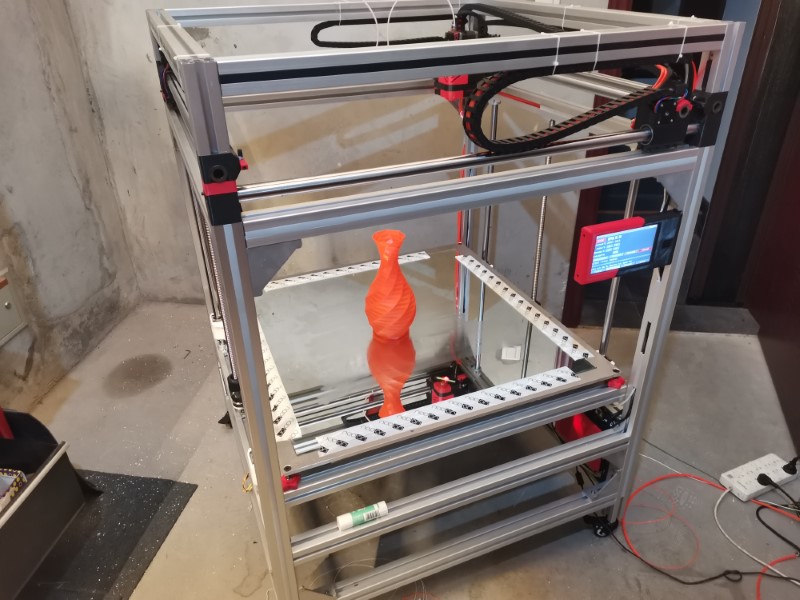
First one was a big vase, just to check that everything was working properly mechanically speaking (I was especially curious about how the Z axis would behave).
I upscaled the vase to 300mm height. Unfortunately I’m still using an old version of Kisslicer which doesn’t have the spiral vase function, and my extruder wasn’t tuned at all at that time so I’ve got lots of holes at the beginning of each line. But the point of this test wasn’t to get a watertight print anyway, so that doesn’t matter.
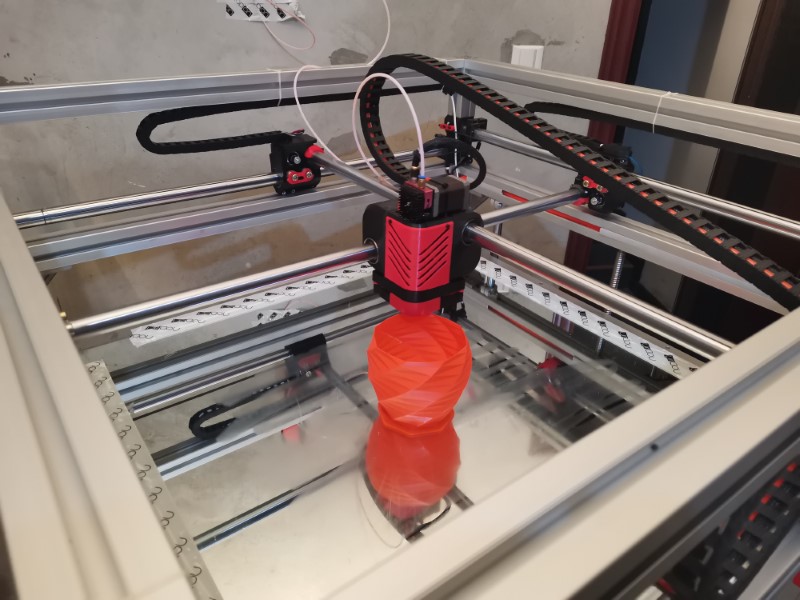
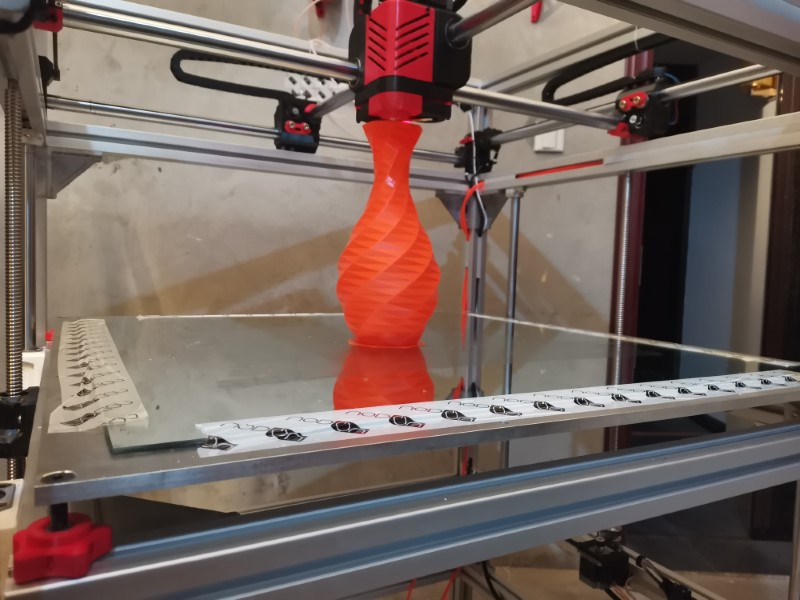
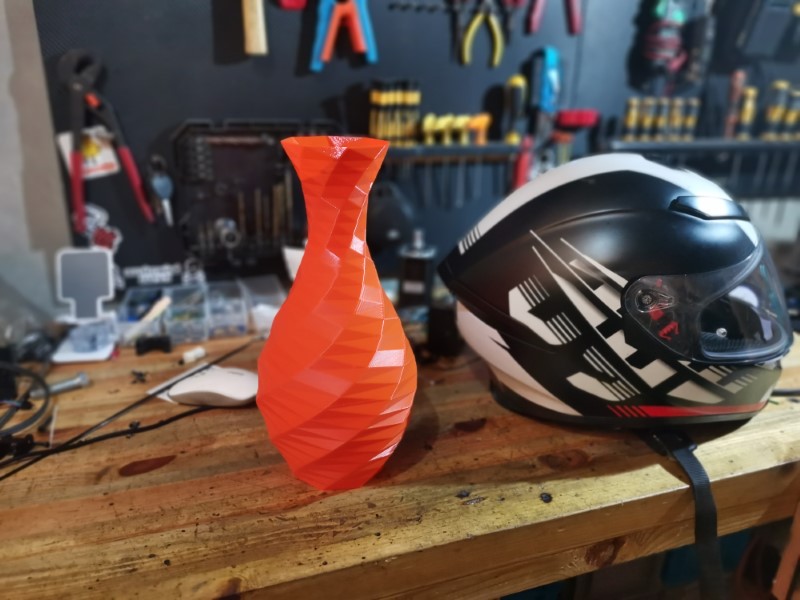
It took only 1 and a half hour to print, and I think the result is really great. Only issue I’ve spotted were the holes, obviously, and at some point the extruded filament didn’t have enough time to cool down since on the top of the print each layer was taking less than 4 seconds, so I lowered down the speed a little and everything went back to normal.
The Z is very consistent so that’s great, and I didn’t see much ringing or artifacts so that’s great news too.
And as a bonus it impressed the wife, so that’s a win too 
So, this was very successful.
I then calibrated a bit better my extruder, which was over extruding quite a bit, and tried to limit oozing by adjusting retractions, which is now much better but still a work in progress.
At that point, I was curious to see how it would compare already with my old MPCNC print quality, so I decided to launch an other big benchy (twice the size of a regular benchy), to compare it with the one I printed a few years ago. Red Benchy is the one I printed with my old MPCNC, orange has been printed with the BOx:
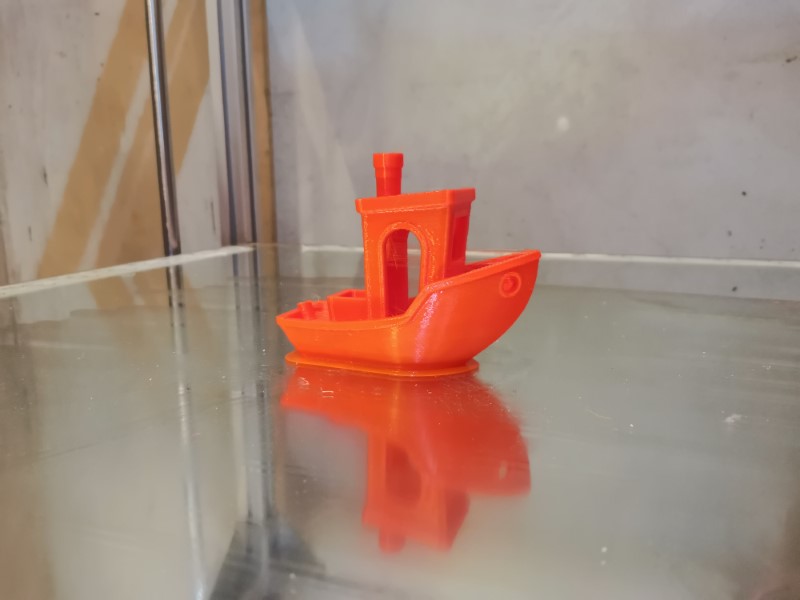
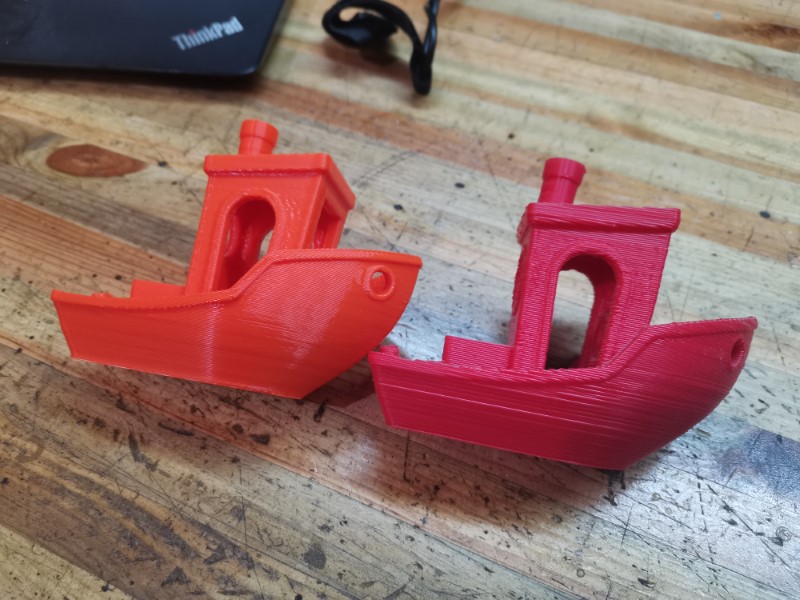
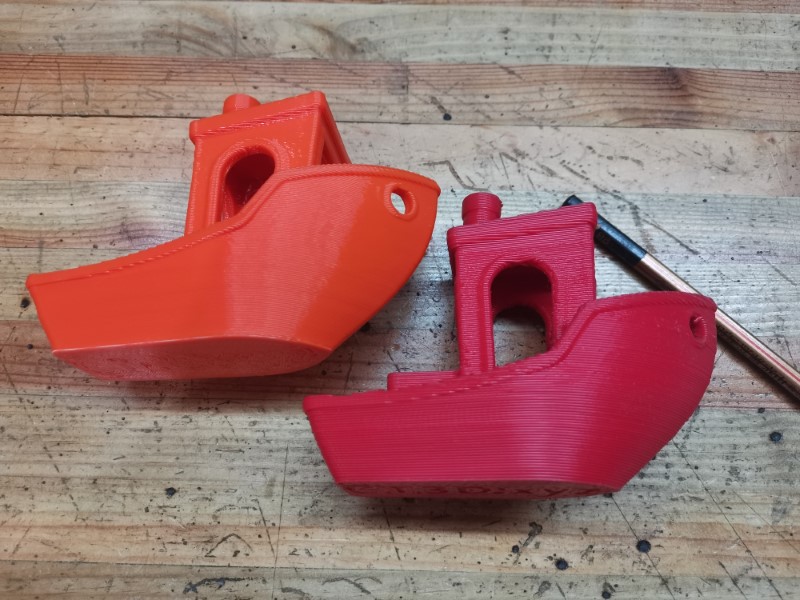
Well, it turned out amazing, that’s one of the very best benchy I ever got, it’s on par with the ones I get from my ultimaker !
One thing to be noted is that the red benchy was printed with a 1.2mm nozzle while the orange was printed in 0.8mm nozzle, so of course it is expected to be a bit better. But you can see that the hull is much cleaner on the orange one anyways.
In my opinion, all the remaining defects are due to the slicer settings. I need to tweak retraction and linear advance to get better path starts as well as better corners, but aside from this it works perfectly.
The fact that I got a better print quality at my second print attempt than whatever I was being able to obtain with my best settings on my previous rig is a great victory, shows that I haven’t gone through all that effort for nothing!
15 Likes