MPCNC Made In China: New Build!

Sorry this is not Fan-boy stuff, just my experience as a non tech kind of guy: - on the Prusa Mk3 with Prusament and PrusaSlicer, it’s not really any different to printing PLA. I routinely switch between PLA and PETG a couple of times per day without any hiccups, just need to tell the machine to use the “other” (stored) first layer Z setting.

I have tried cheaper I was going to say “lesser” quality, but I think “different” quality is a better description, and it all just seems to work once the initial Z adjustment is made. Curiously cheap PLA is more problematic.

I wonder if the generic PrusaSlicer settings will work, or if they really are dialled in to the company product?

1 Like

I believe Prusa spent a lot of time fine tuning their presets for many materials, so it makes sense that it would print well on their machines. I need to do the same, now I’m finally getting decent results but bridging and supports are still a bit of an issue.
But I’m getting there, slowing down the infill to the same speeds as the loops or even a little bit lower seems to do the trick just fine to solve most of the issues I had, now it did a few good prints (forgot to take pics though).

It’s a nice material once printed, very tough. I wish it was just a little bit stiffer to be perfect, but aside from that it’s real nice. I will use it often if I can sort out the brindging issues. I’ve seen some people achieving impressive bridging with PETG on youtube so that means it’s definitely achievable!

4 Likes

Hi guys,

A little experiement I made yesterday that could be interesting to share here: electroplating 3D prints!
First time I tried and it worked pretty nicely so I thought it would be interesting to share with yall.

Still working on making the final version of the little tractor for my nephew. Most of the parts are now printed either in ASA or in PETG and now I’m working on getting a cool finish. Almost everything will be painted, but for a few ones I thought it would be interesting to try electroplating.

The advantages are that it is tougher than paint, it slightly helps to strenghten the part, it looks like real metal (that’s because it is real metal!) and more importantly maybe, it feels like real metal when you touch it.

So for that I bought a few ready made plating solutions from a shop specialized in electroplating. I could have bought all the chemicals separately, but it was easier to buy the stuff already made by people who know what they are doing, and the cost was even cheaper. These baths can be reused many times so it worth it if you plate a lot of stuff.

Anyway, I first printed the test part with ASA on the BOx. It is the exhaust pipe of the tractor. I sanded it smooth, then applied some primer. I realized later I did a poor job at sanding it smooth, I would have gotten a much better result if I spent more time on it, lesson learned.
Then, I spray painted some conductive paint on it. This is the base on which the metal will later adhere to.

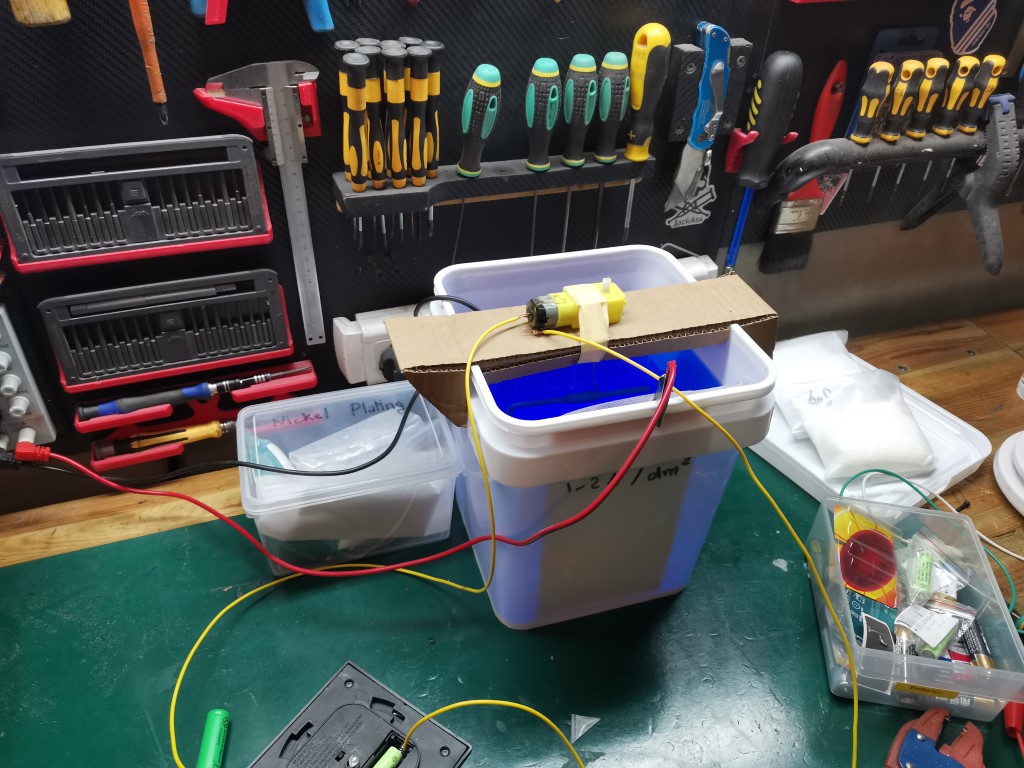
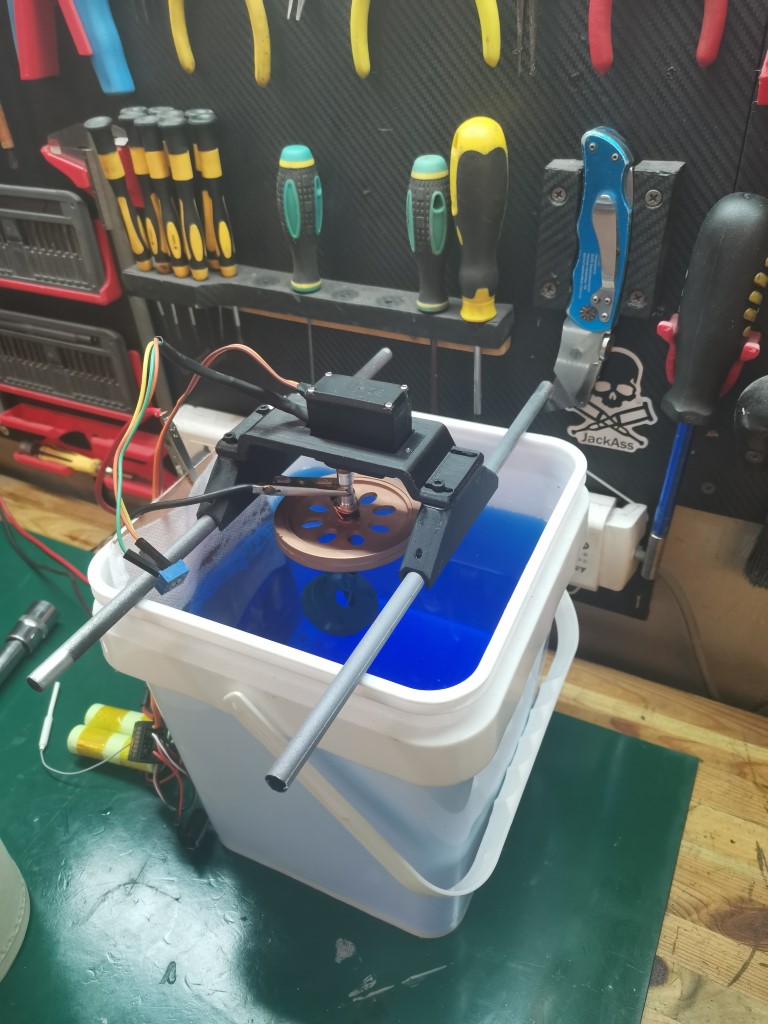
After that, I prepared the copper plating bath:

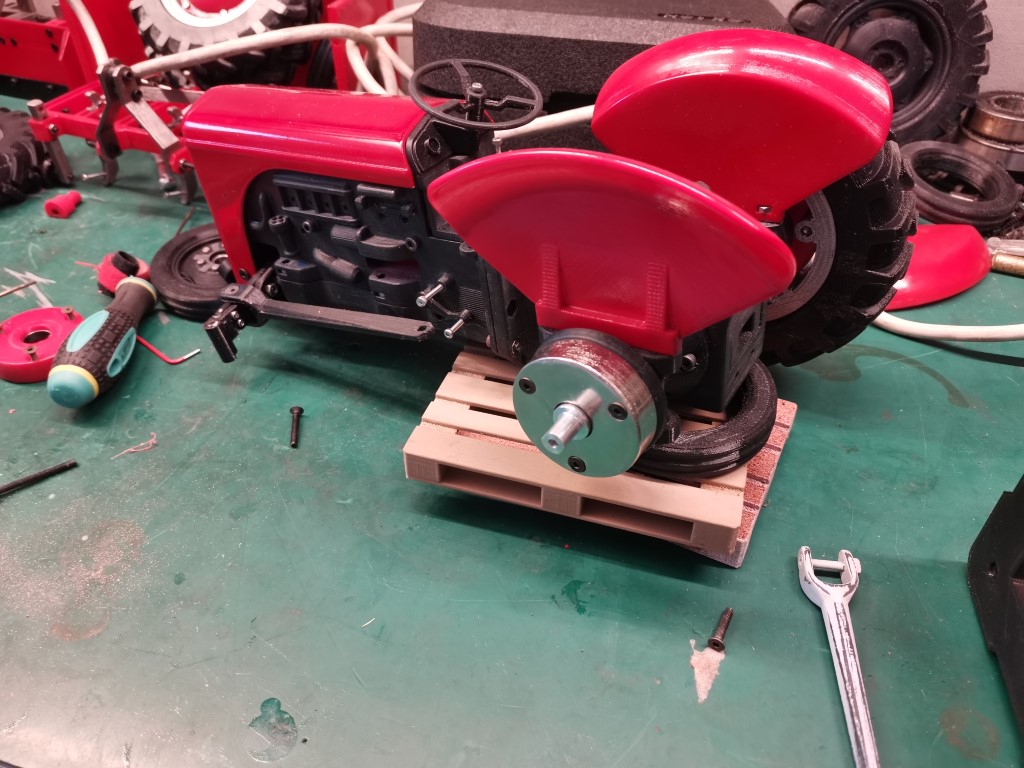
The part is attached to a little motor which turns it slowly, this way it gets plated more uniformly. The cathode is made of pure copper and the anode is the part itself. When a small electric current is applied the cathode dissolves in the bath and its ions then stick on the anode, progressively forming a metal layer. The longer it stays, the thicker it gets, but when it gets too thick it doesn’t stay smooth and uniform so you can’t easily make super thick coatings. You could, but it would take some sanding.

Anyway, it stayed in the bath for 30 minutes or so,

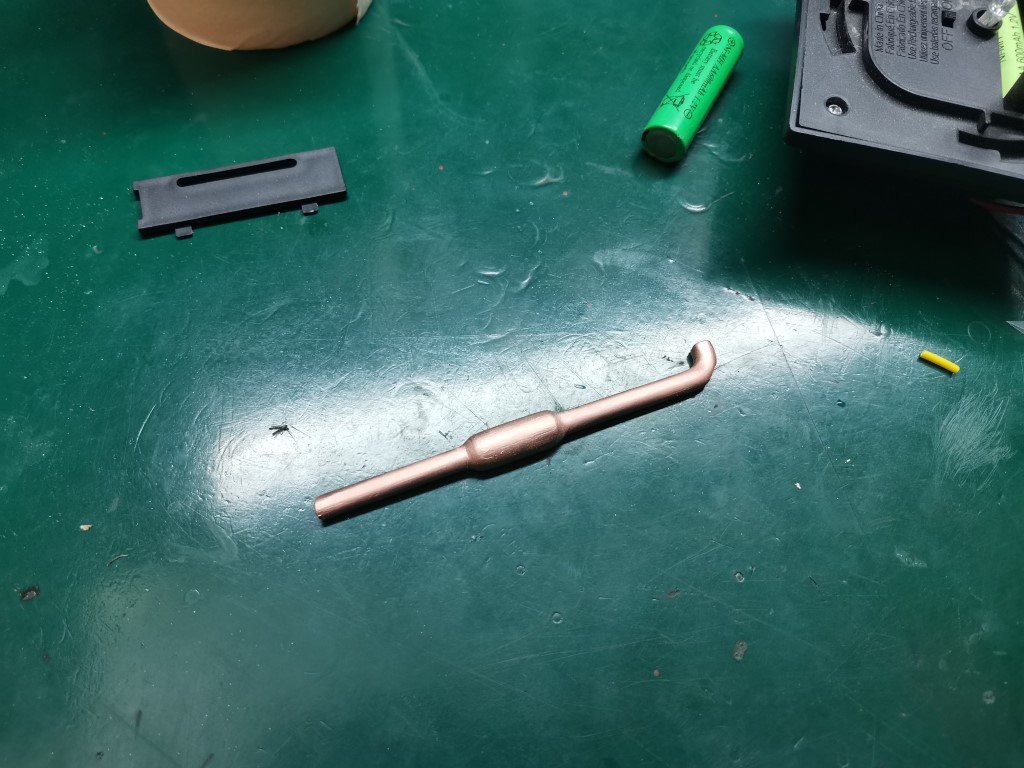
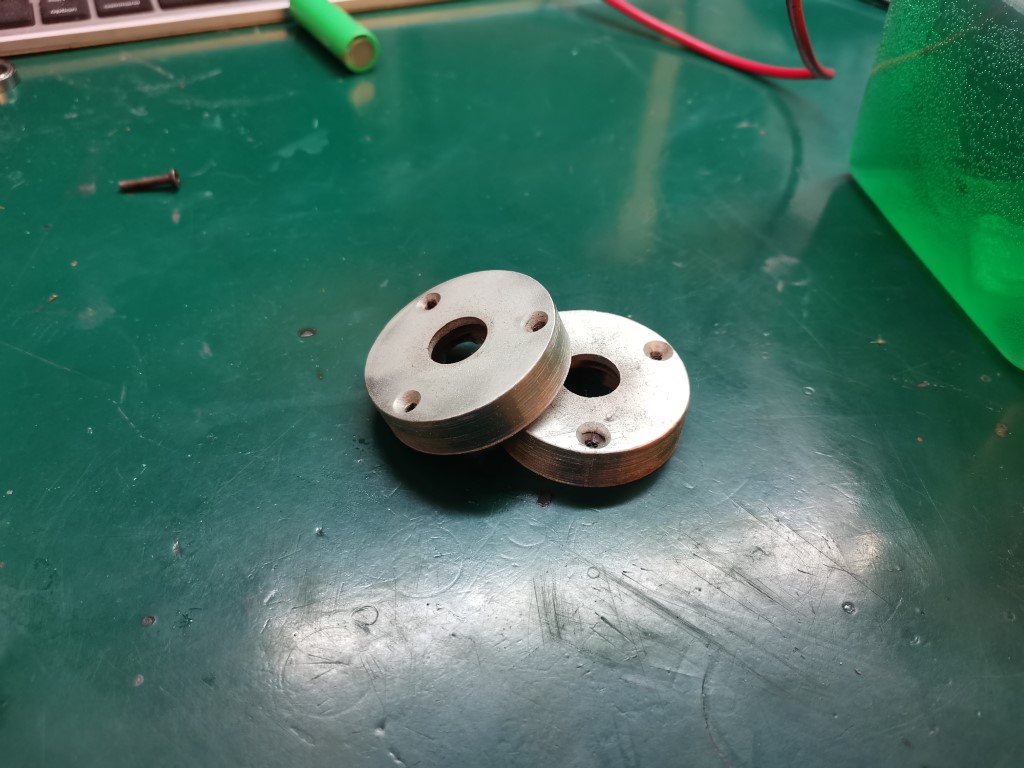
I then took the part off the vat and tadaaa:

The part is a little bit heavier, it feels just like real metal to the touch and there is good continuity when you check different spots with a multimeter (I didn’t get good continuity while doing the same test on the conductive paint, interestingly).

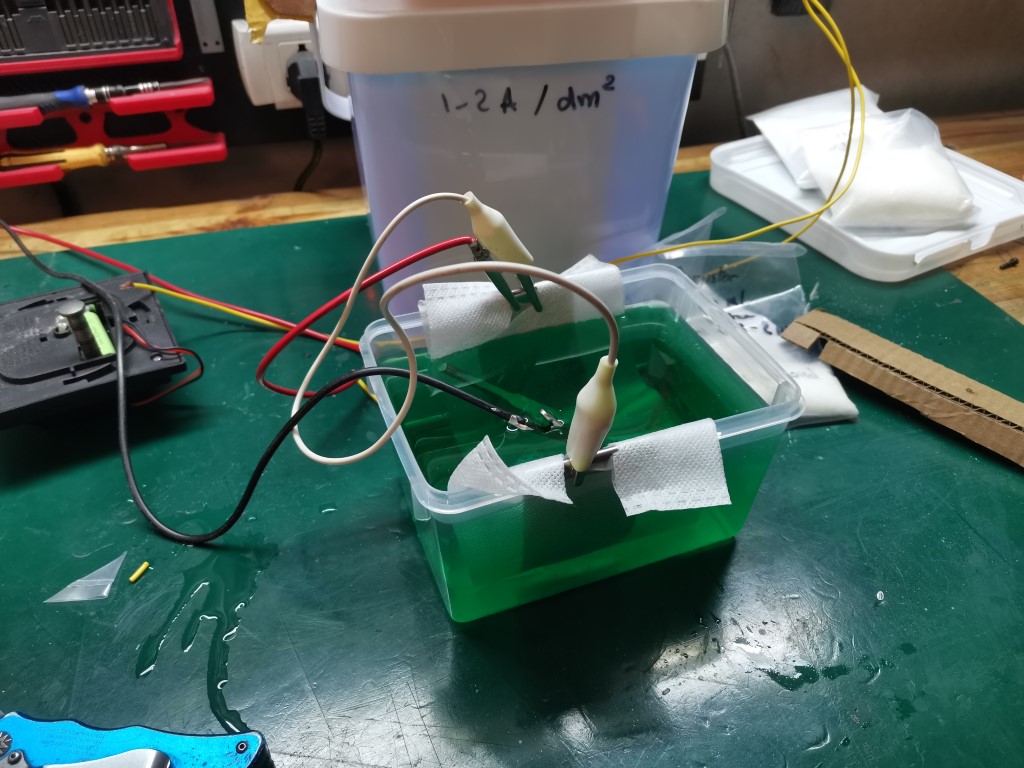
Next I degreased the part and prepared the nickel plating bath:

Nickel plating worked just the same, but I didn’t have a big enough container so this time I couldn’t have the part spinning.
I left the part here for a relatively short time, less than 5 minutes. I suppose I could have left it for longer, I’ll try and see next time.

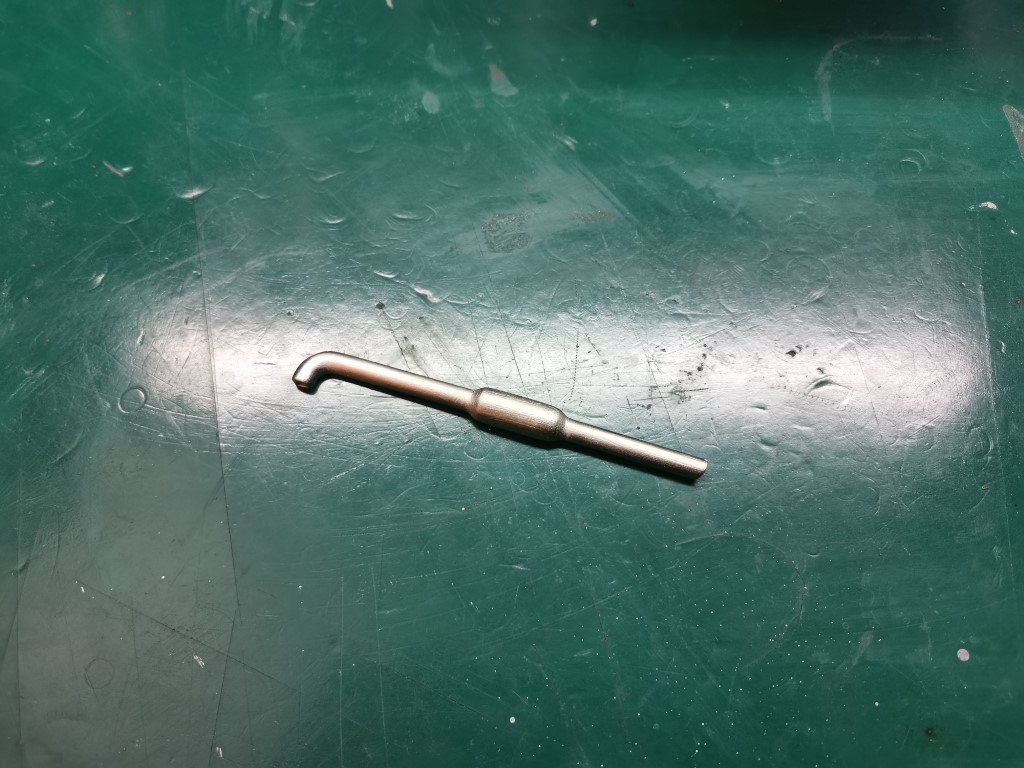
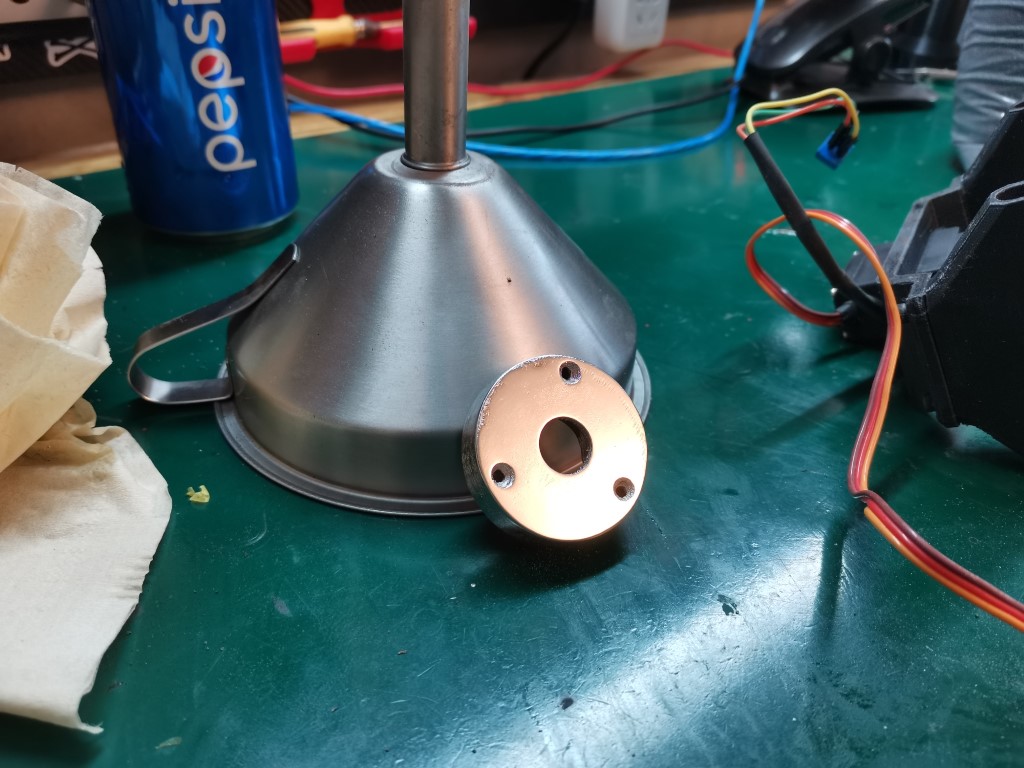
Anyway, I rinsed the part and here is how it looked:

Pretty cool eh?
I really enjoyed this process, it wasn’t difficult at all. I think I’ll use it a lot from now on.

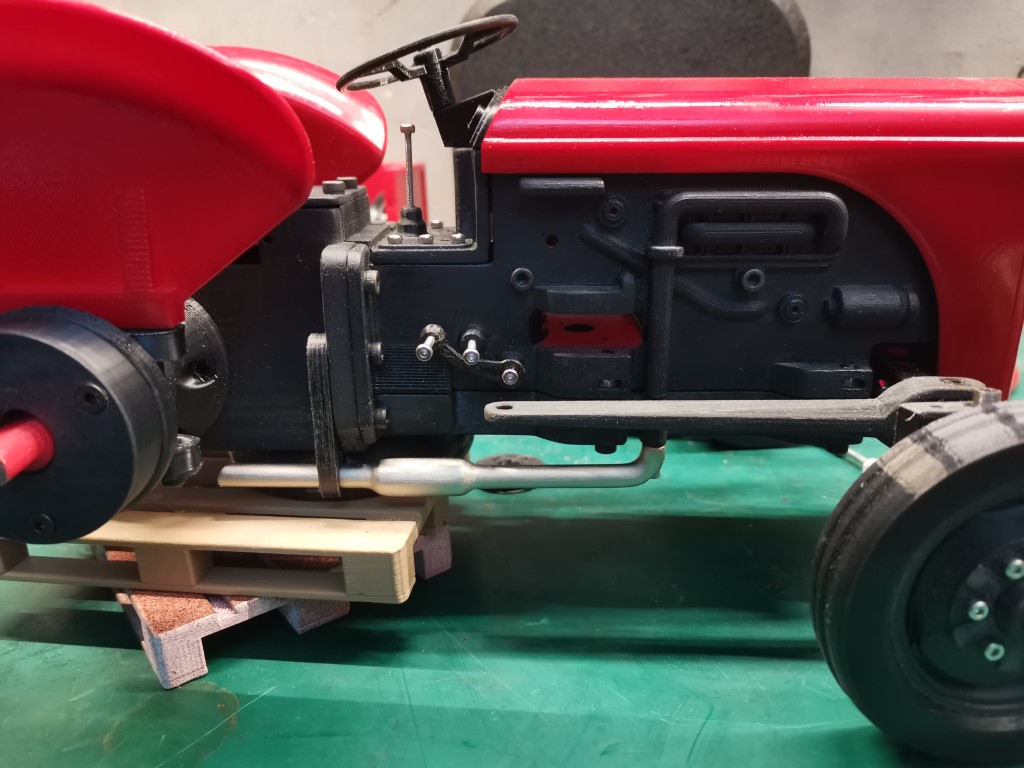
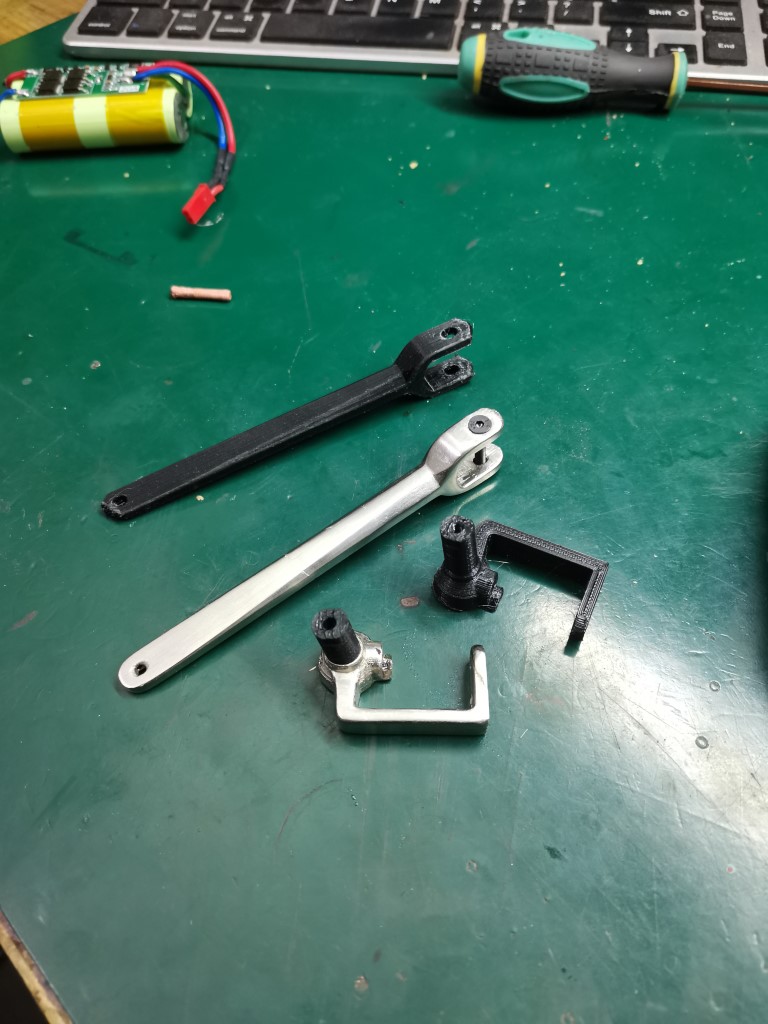
Installed it on the tractor, it’s a small detail that no one will probably notice but I think it’s cool. What I like most is how it really feels like metal to the touch, only the weight tells you that there’s something unusual about it.
I’ll do the same for all the front suspension parts.

10 Likes

That is really cool! I have zinc plated a few things (not plastic) and it’s a lot of fun - oh well another thing on my list of things I’d like to do one day.

2 Likes

That looks really nice. I’ve been considering getting stuff for plating. I have a few projects that I painted that I think would been nice to plate.

1 Like

Really cool! Plating 3D prints keep popping up on youtube and it is enticing. I’m glad to see someone else having success because I’m not sure how much to trust on youtube.

Just last week I have started trying my hand at filling with bondo spot putty and sanding and painting for 3D prints to not look like 3D prints. Slowly working my way up on aesthetics and seeing this I might try plating too.

4 Likes

That’s a really clean result! Good job!

1 Like

That’s very satisfying - I worry about durability, but so far have had absolutely no adhesion issues.
My experience is that the easier the sanding the more you are likely to keep going for a perfect job - so:
First coat - plastic primer
Next 20 ( :smiley: ) - spray primer-filler or high build filler sanded in between

I think I have a cheaper easier to sand and easier to work, brushable alternative now which dries almost instantly - Zinsser Grey Bulls Eye 1-2-3 Undercoat Primer-Sealer Stain Blocker. I haven’t completed anything with it but it looks promising.

When everything is almost perfect - just do the final small touch ups with the spot putty, then a final filler coat.

Or maybe we should just buy a group owned resin printer and save all the hassle? :thinking:

3 Likes

Yeah sanding is the real hassle…
It’s actually the real hassle on almost every single project.

Actually what I found out over the years is that scraping works better and faster than sanding, so now I just use a scissor blade and scrape the surface until it gets smooth, then I sand a little bit to remove the few marks left by the blade. It is a lot faster this way and the results are actually better.

But it is not hassle free, so now I’m thinking about experimenting with rock tumblers. The idea would still be to scrape most of the print imperfections manually ( I don’t think there’s a way around that), but then use the tumbler to get closer to the final smooth finish.

I bought some corindon sand and also some crushed wallnut shells to experiment with it. I’ll build some kind of crude tumbler to experiment and see if this works as intended, so far the results I’ve seen on youtube weren’t super convincing but most of them were not scraping the part first, they just dropped the freshly printed part in the tumbler so maybe I’ll get better results by doing half of the job manually.

I wish we lived in a world were someone invented an automatic sanding machine. If Einstein focused on sanding instead of frivolous stuff like relativity we’d live in a much better world.

3 Likes

I saw some of this stuff on “Teaching Tech” and got some. Not cheap and postage from Australia!

https://monocure3d.com.au/product-category/incredafill/

Mike

3 Likes

I wanted to make this one but never got around doing it.

2 Likes

I’ve made several parts from ABS and used acetone vapour polishing on them. It works quite well and produces a nice smooth finish, and I think a stronger part, but … ABS.

I know there are finishing compounds to smooth FDM printed parts, and reinforce layer seams, but I’ve never bought them.

1 Like

Cool, looking really good!

I wonder if swapping the times (5min on the Cu and 30min on the Zn) would solve the roughness issue with the thicker plating?

1 Like

There are additives for plating baths that will provide a bright finish. Ask your supplier about brighteners and levelers. They can be tough to control over time, but if you are not reusing your bath for long periods of time, they can do amazing things.

1 Like

I haven’t tried that, but I suspect this would be the same.
Now I just solve the roughness with a thicker coat and then some sanding.

Yes, there was a little botttle of brightener that was included in my kit, I’m using it already :slight_smile:

Now I got a little bit more experience with the whole process and I’m starting to get decent results.
What I’ve done first was to build this little device using a servo that I modified for continuous rotation. This allows the part to have a more uniform coating and also it helps mixing the solution a little bit as well as getting rid of bubbles sticking on the part:

It works reasonably well, I just need to find a more practical way to power it since right now it’s running on batteries which isn’t ideal for long immersions.

Second attempt was a semi failure, I haven’t left the part long enough in the copper bath + I put some random current that turned out to be way too low.

So I sanded the plating off (was easy because it was really way too thin), then I started again. This time I tried to do it properly so I calculated the currents and I left it for 4 hours in the copper. It got a much thicker coating this time. Then I sanded the copper a bit smoother, and then finally I plated it with nickel.
This time the result was what I expected: a thick, solid coating with a smooth shiny finish!


The only reason why it’s not perfect is because I didn’t do a great job at sanding in the first place.

This success filled me with confidence, so I tried some harder parts.
This time I wanted to build a really thick and tough layer, the idea is to build a thick copper layer. Then filing/sanding the imperfection to get it as smooth as possible before the final nickel plating.
So This time I left the parts in the copper bath for around 12 hours.
The copper electrode fully disintegrated so I’ll have to get a new one, but this time the results were absolutely great:

You can actually see that the metal plated parts got a lot thicker than the original plastic ones. It is A LOT stronger too, I can bend the plastic one with ease, but I cant bend the plated one at all.
It is also quite heavy. Since copper is dense, it feels like the part is made of pure aluminum or zamak. It’s almost impossible now to distinguish it from a regular metal part.

What’s interesting about this technique also is that it is possible to select areas to be plated or not, just by masking when applying the conductive paint. That’s what I did on some areas so that the bearings can still fit on the axis, for example.

To me that’s a revolution, I think I will use this technique a lot. It’s the closest I ever got to actual metal 3D printing! Now I can make very strong parts that can possibly withstand heat or conduct electricity.
Best thing I’ve experimented with in a while.
Now I’m sold to this technique, so I’ll have to improve my setup. Bigger baths, more convenient ways to secure the parts, filtering, improving electrodes… A lot of stuff to do but it totally worth it.

If you guys planned on experimenting with this process then I suggest you go ahead and do it, it’s great!

9 Likes

Really appreciate the details you’re sharing about your experience. Curious if you’ve electroplated any printed parts with metals that are magnetic? Curious what kind of electromagnetic sensitivity can be achieved with electro plated parts.

1 Like

I haven’t thought of that, so far I only tried copper and nickel.
Next I planned to try chrome, because it is very resistant to corrosion. I’ll also check if there are any ferrous/magnetic materials, I’m not sure if this exists.

1 Like

Nickel is magnetic. Not as magnetic as iron or steel, but it is magnetic. There are techniques with plating to use magnets while plating to improve align the grain structure to improve magnetism. I worked on a project for a previous company where we made a miniature (MEMS) switch for a camera pill. When the pill was in the box, there was a magnet next to it to hold the switch open to save the battery. When you take the pill out, the switch closed and the camera and LED started. Then you swallow it and it takes pictures of your insides.

3 Likes

Don’t forget a heater. Mechanical agitation (moving the part while it is plating) also helps a lot in some cases.

2 Likes

I love the miniature pallets the tractor is resting on so it looks legit to scale.

6 Likes