MPCNC Made In China: New Build!

Haha, well I really wanted to solve this issue, it puzzled me the whole day so I didn’t want to go to sleep before solving it.
Yeah, I do have a job, actually almost two now (IT and recently my company also gave me lots of engineering tasks). But luckily I don’t have kids and I have a great wife who doesn’t mind me spending time in my workshop and even assists me buying all that stuff (buying hardware online always takes a surprizingly large amount of time). Also everything goes so fast in China that I guess I just took the same pace.

Anyway, I had to stop the print after maybe 45 minutes, but not because it failed, just because I was tired and I didn’t feel brave/stupd enough to let the printer run unmonitored overnight. The print did not have any issue so that’s real nice. Hopefully it’ll work this time.

I’ll try also to make the autopsy of the old wiring this weekend to see what has gone wrong. I checked the outside insulation yesterday and didn’t see anything special about it, seemed totally fine, no pinch, no nick, no nothing.

Thanks for your support guys, it’s real nice to see those kind comments :slight_smile:

7 Likes

Well it looks like the problem is solved, I didn’t have any issue with the motors so far.
Next step will be to install a filament sensor, because my last print failed cuz I ran out of filament… rookie mistake.

Best day of 2020, everything seems to work fine and more importantly perhaps System of a Down just released two new songs after 15 years of silence! :metal:

11 Likes

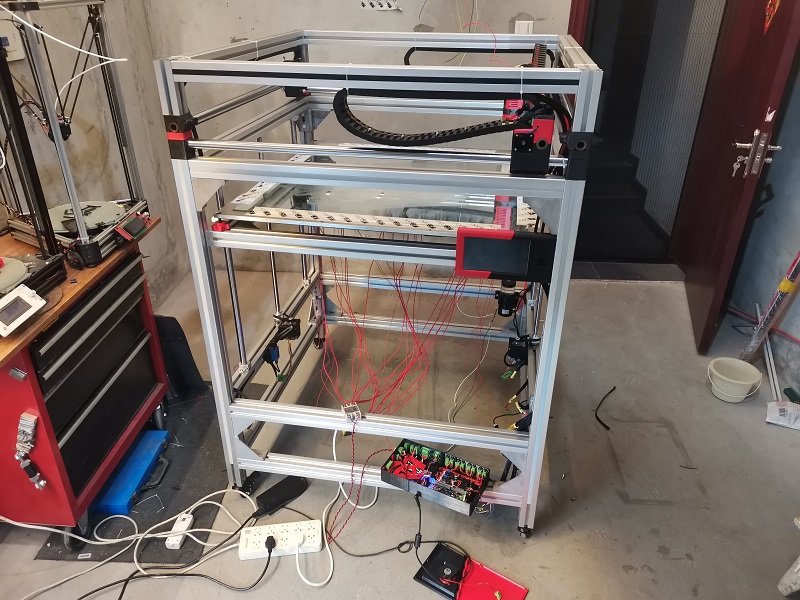
So, that was a nice and productive weekend. I printed almost one kilo of PLA with almost no issue.

Only real issue I had was because I was a little bit stupid: I changed all my wiring except for the extruder motor… well, obviously the same thing happened and I had extrusion cuts for half of a print.
So, I just replaced this wire and after everything went well after that!

Other issue I’ll have to address is the extruding system: as you guys said it’s not great and I had a few issues with it binding sometimes at the very beginning of some prints. And also it’s not really easy to maintain, each time I had an issue I had to remove the print head, disassemble stuff, reassemble, etc. Takes 5-10 minutes but it’s tedious.
So I’ll look into the other systems that were mentionned and later update a little my design to make it more maintenance friendly.

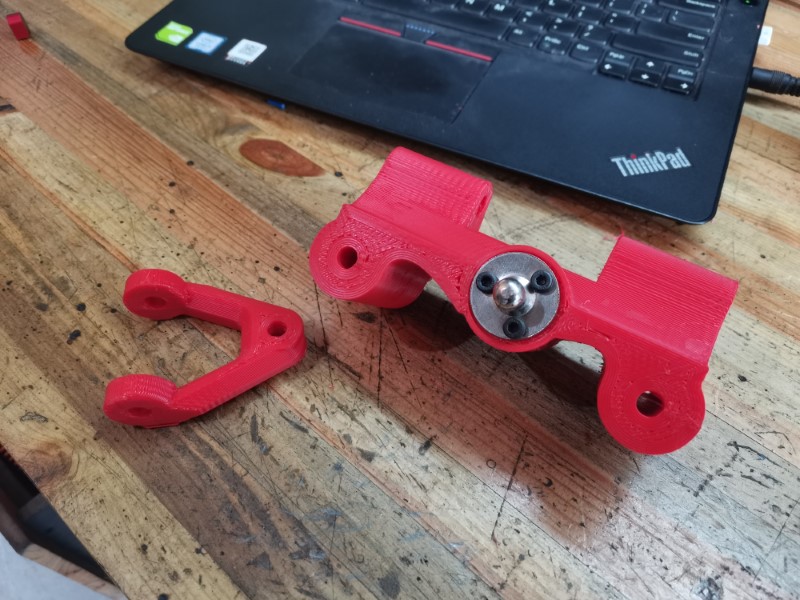
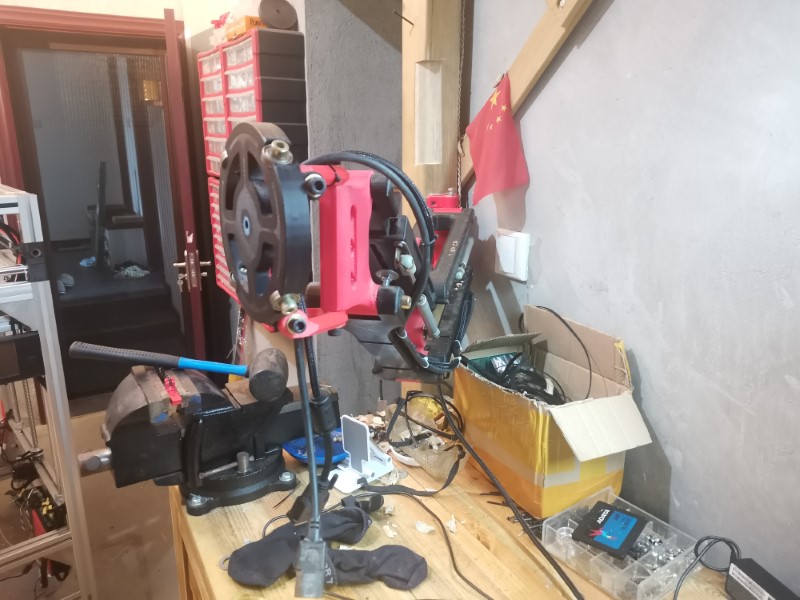
Anyway, I have designed and printed this articulated arm for my laptop a few years ago. But since then, some parts broke (because I printed them too weak, just two layers and 25% infill) and I don’t want to keep using my laptop in the workshop.
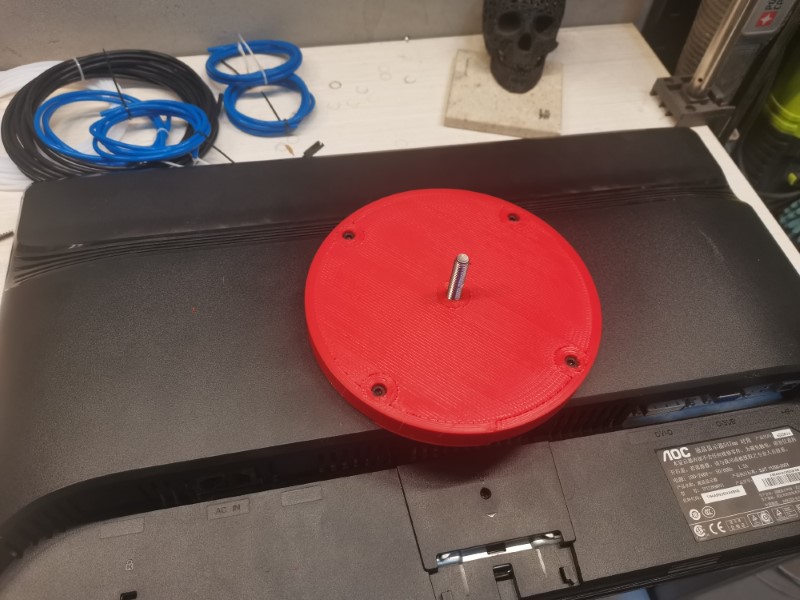
My plan was to use a fanless mini PC, because that’s perfect in a very dusty environment, and so I just needed to convert my arm from laptop support to screen support.

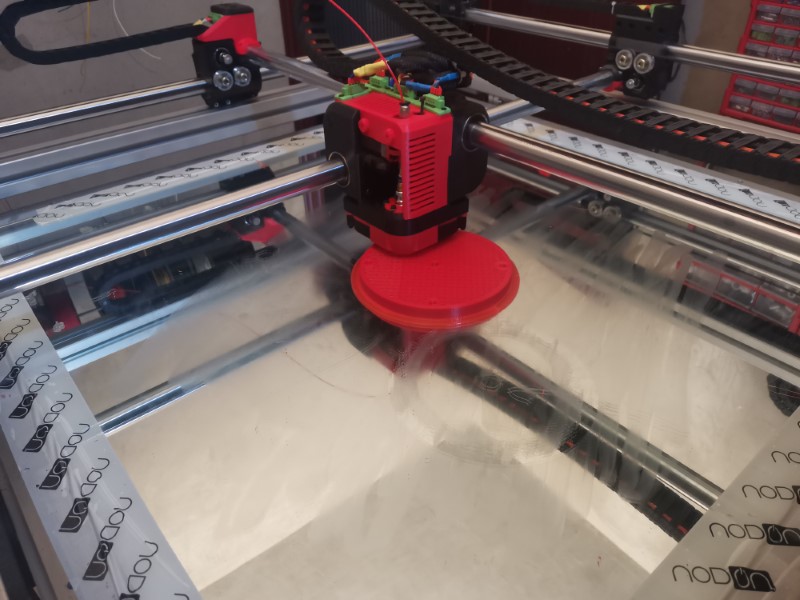
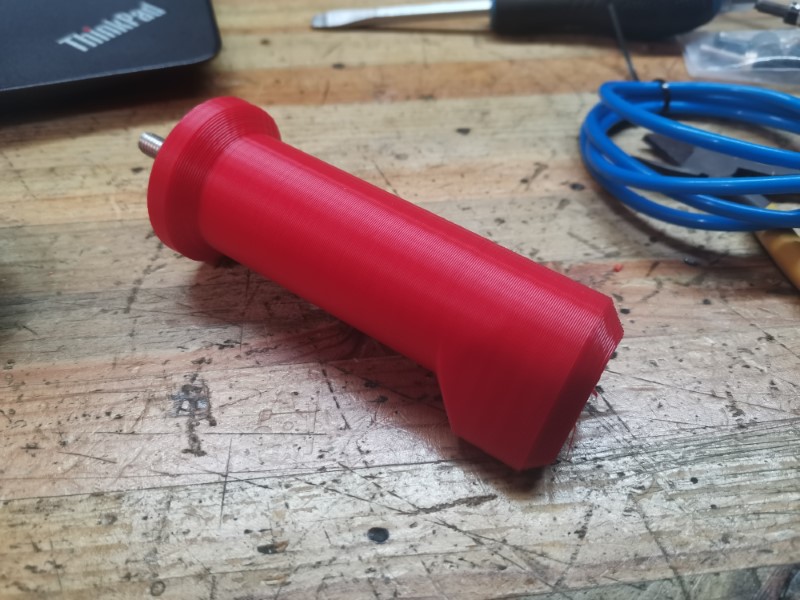
So I printed a few parts, this time with 6 perimeters and 50% infill so they are really, really stong:


I’ve got no visible Z wobbling, the layer consistency and alignment is perfect so that’s really great

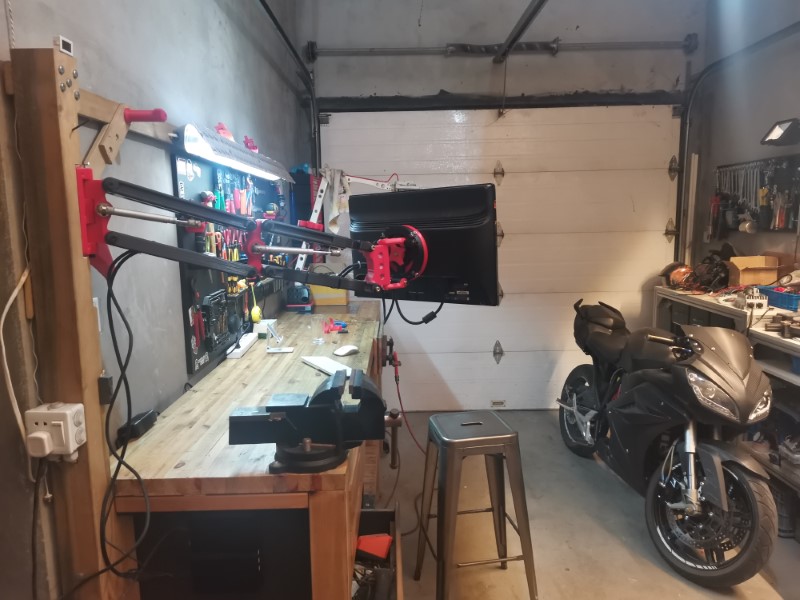
Then I put everthing back together:

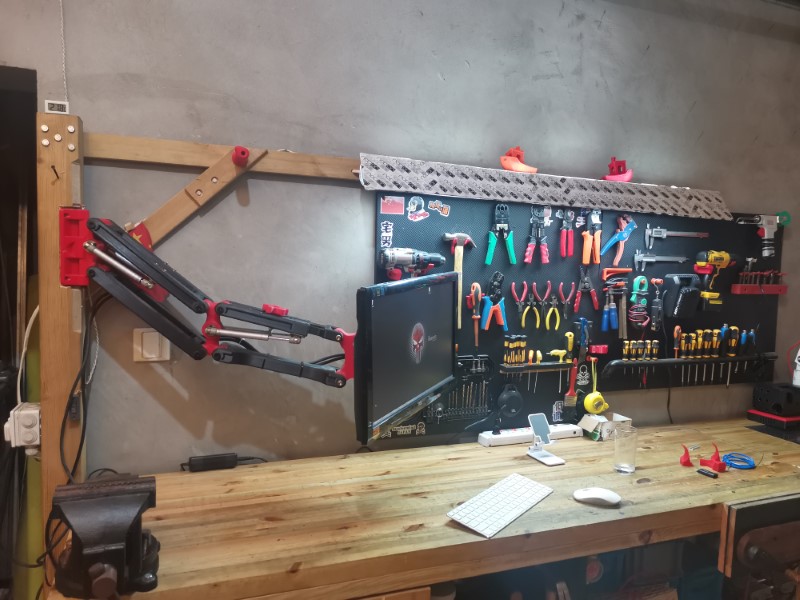
The screen can be oriented in any position and can even rotate so I can put it in portrait mode if I need to. Sometimes it’s useful for coding, even though I rarely code.

!

It can be extended quite far:


I can read my favorite forum while keeping an eye on my machine:

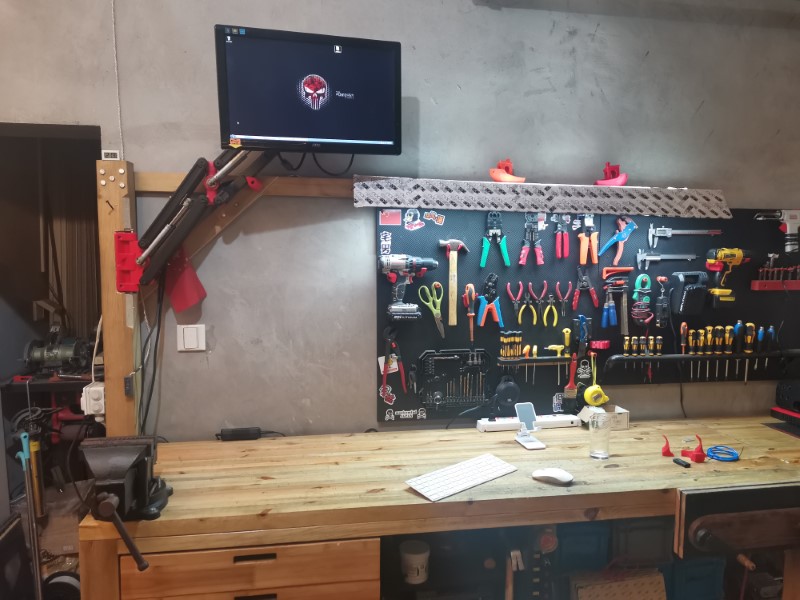
And when I don’t use it, I just park it on the high position, so that I have all the work surface available on my workbench.

Super happy with it, it looks great, it feels sturdy and it’s really convenient. The Mini PC works really well too. It’s not a very powerful one but since I’m using it mostly to remote desktop on my server, I have all the server’s power available and all I ask from the mini PC is to be able to start quickly, which it does in less than 15 secs thanks to its nvme disk. Also I won’t ever have to be afraid of dust and it’s entirely silent.

Anyway, the printer seems to work fine, a few little details to adjust but it’s really promising now.
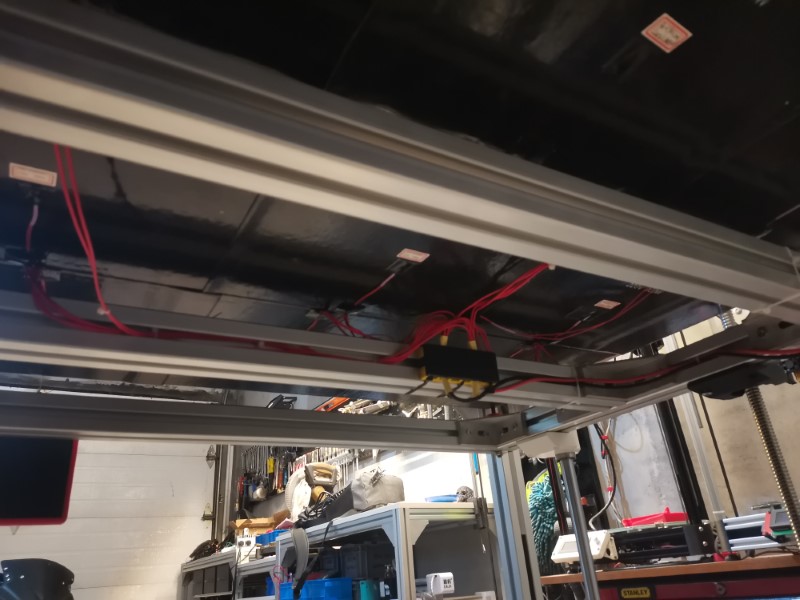
Also, I went insane all the way and got the Duet extension board… So I’ll have 5 more axis available to do even crazier stuff!

8 Likes

I’m interested in your screen arm design. Did you post the stls anywhere? Tried my hand a designing one a few years back but it was to wobbly for my tastes.

He makes it look so easy right?? I could totally do that stuff if I had the tools…

I didn’t release the 3Ds yet, but I’ll try to release those on thingiverse when I’ll find some time.
Thing is, most people can’t print that because you need a big printer. The biggest parts measure 350mm or so.

Also, a big nozzle is mandatory, because it helps a lot with strenght. But nowadays printers with such characteristics got more and more common, so why not.

2 Likes

i have a printer with a 350X350mm build area :smiley:

2 Likes

Five more axis?

Can time travel really be far off? :scream:

2 Likes

Ok then you can PM me and I’ll email you the files tomorrow if you want :slight_smile:

Yeah, the Duet has an extension board that allows to add five more axis!

I won’t work on that before maybe a few months, but the plan will be to put at least one more axis on the bed, maybe two (one for each corner) in order to be able to fully compensate for the tilt while getting even way more power (not that I need more power actually, the bed is plenty fast), and use the remaining axis for muliple material/color.

Right now I’m working on the Bed heating… Just done the first test and it seems to work really well.
Only issue I got is that some heating pads heat more than others, because they probably don’t have exactly the same resistance so the lazy pixies go wherever there’s less resistance, hence giving more power to some of the silicon pads. I don’t think it matters much, uneven heat is still much better than no heat at all!

It heats pretty fast, I think it reaches 40-50 degree in less than 5 minutes, I havent really measured yet.
Now it’s time to tidy up this mess.

are you using AC powered silicone heat pads? what size? if it becomes to much of an issue you could always use a separate MCU to manage the heat of each pad (or a break out board if your main board has enough I/O).

also are you planning on doing a tool changer or a multi material mod?

Yeah, 220V AC pads, 300 x 300 each, 300W each and nine of them in total.

I’d like to avoid having to build a complicated custom board to manage temps, so I’ll first try it this way and see how it goes. Unless someone knows something off the shelf that could manage this kind of application?

Not sure what I’ll do yet, first thing I really want to do is to have bed tilt compensation, then I tend to lean towards the multi material/multi color mod, because a tool changer takes space and I haven’t really accounted for that in my design in the first place. But both are doable so I’m not really decided yet.

i think for a low cost solution you would want to get somthing like this: https://www.amazon.com/dp/B07NP41Z9V/ref=sspa_dk_detail_5?psc=1&spLa=ZW5jcnlwdGVkUXVhbGlmaWVyPUExUlFRVVJTMlRWVDJRJmVuY3J5cHRlZElkPUExMDI2MjA2MVAwS1VOTkMzTzJQTSZlbmNyeXB0ZWRBZElkPUEwMzE5NzA5UlM1RUhXMTFGNzRNJndpZGdldE5hbWU9c3BfZGV0YWlsMiZhY3Rpb249Y2xpY2tSZWRpcmVjdCZkb05vdExvZ0NsaWNrPXRydWU=
then hack it to do what you want.

1 Like

The simplest would be to buy a stack of the Inkbird temperature controllers. One for each pad. But then you’d have to manually set the temperature before the print starts.

In reality, if you’re using an aluminum sheet as a heat spreader between the pads and the build plate, I can’t see where a hot spot shouldn’t dissipate across the plate. It might be 1 degree hotter or colder in places, but I think I usually adjust my heat plate in 5-10C increments. I don’t think a 1C difference will matter.

2 Likes

Actually I think I have much bigger differences than this, maybe 10 degree C or more. I’ll see if this is actually a problem later.

Now everything is wired and I just ran a first test print: only 4 minutes to reach 55 degree C from 20 degree C, this thing is fast!!

Almost the same time as a regular printer, even faster than some I used… but in this case it’s a roughly one square meter, 25 kilos plate :sweat_smile:
Only Issue I saw so far was that my extension chord got hot during the bed initial warm up, so I’ll have to find a beefier one, but i was expecting that so no biggie.

Bed adhesion seems to have improved, but I only ran a small print so I’ll see with a bigger one.
I’m very happy with that, apparently my calculations were spot on.

1 Like

My printer has the expansion board as well. We use it for three independent z steppers.

1 Like

That’s interesting, I was just wondering if I should go for 3 or 4 Z steppers?
In your experience, do you think there is any inconvenience with 3 steppers instead of 4 ?
Does it work well?

I’d surely prefer having just 3, that’s one less ball screw and one less motor to purchase, plus it frees one more axis to do whatever I’d like.

Meanwhile, I cleaned my bed’s wiring so now it’s all nice and hidden. Only things left are to add a earth wire for safety, and to design some kind of enclosure to hide the solid state relay as well as provide support for a mains plug.

Everything works just fine, the bed heats really fast, the temp sensor works and the relay doesn’t seem to heat (I went totally overkill and installed a 40Amps relay so I don’t think it will heat anytime soon).

Now the printer is almost entirely finished, just a few details to be done and then I’ll test, test and test again until I fix every single issue. The goal is to have it totally reliable, I want to be certain that everytime I hit print on this machine I will get a successful print without the need to stay around and babysit.

2 Likes

I don’t have experience, but 3 points define a plane. 4 is over constrained, so they may bind if one is trying to move and the other is stopping it.

4 Likes

That really makes sense actually, I haven’t thought of it that way!
Thanks Jeffe!

1 Like

In what concerns bed uniform heating, I would go to independent dimmable power module (PWM or cheaper ? but reliable) for each heat-pad. Once you calibrate them once (measuring individual resistance, power take or -at a higher level- IR thermal output ), assuming execution is rock solid -as I know it is in your case- the setup should remain stable for a very long time. You just have to check it ( yearly or something like that ) and not to be tempted to adjust them each time you have the impression that something goes wrong…Simpler is better :slight_smile: .
I really admire your build!

P.S. Central pad has much less heat losses due to air circulation. It takes air already heated from the other pads. The border ones have to compensate fresh air heating from below the bed and corner ones have twice the heat exchange “border” length versus middle pads.

1 Like

Like jeffe said, 3 to define a plain. We do true bed leveling, so before every print it probes the 4 corners, then trams the bed to the hotend.

1 Like