It is pretty big. I have been trying to win something at this level for over 20 years. Changed our tactics this year. It worked.
Was it bribery? Just kidding. Congratulations! An amazing achievement.
lol, I wish it was that easy! Random judges and blind tasting. This year was a bumper crop with over 10000 entries across 103 categories.
We have discovered that our beers sell great but don’t compete well. So we are using our smaller system to brew for competition specifically.
The same thing is done at most BBQ competitions. The competitors will crank up the big smoker to cook all the meat that’s required for feeding people, then they’ll run a smaller smoker with just the competition meat in it.
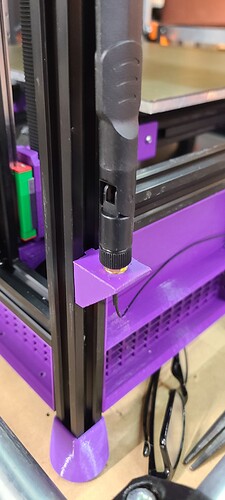
My machine made its first own part today. Mount for the external antenna for the CB1
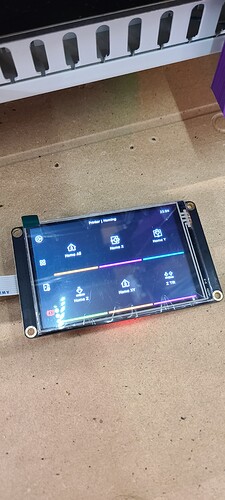
I also got the TFT35 SPI hooked up and running. Actually super easy. Had to uncomment one line in BoardEnv.txt and it came right up.
Hey @probrwr, able to share Klipper printer.cfg that’s working for your Manta M8P build? Am currently cobbling printer.cfg for my Octopus v1.1 based build, so pins will differ. Getting close, but guessing some of my settings are wrong/missing. Cheers!
@gpagnozzi thanks for sharing your Manta M8P based config earlier, was very helpful.
Happy to! Will putbit together when i get home tonight as long as the boss doesnt have anything else planned. Friday at the latest.
@azab2c Here is the file I have. You will need to change the pin mappings for your octopus I am sure.
MP3DPV4 Printer Config.zip (4.5 KB)
When I built my machine I used a 5 pack of motors. It seemed to work okay even though they were a little small. They were Stepperonline Motors and I have not had any issues before. My rationale was that with 3 Z motors I did not need the extra torque and CoreXY shouldn’t need as much either.
Lately I have been having issues with the XY motors skipping and I adjusted the current up. I think this actually caused the motors to fail and I broke down and bought larger motors over the weekend. I installed last night and they a quieter and work perfectly.
More to come
Happy with the belt tension with old and new steppers?
I appreciate learning about XY issues you’re running into and working through, cheers! This is my first CoreXY build, am unsure whether I have the right tension that isn’t too loose and skipping via slipping, or too stiff skipping via stalling, putting excess force on the belts, and excess cantilevering force on stepper shafts wearing them out.
Noticed some steppers with long enough shafts that the end can be captured.
Wider tensioner adjustment range, and easier way to insert/remove/tension belt at the carriage would be nice.
These are the ones I had:
STEPPERONLINE Nema 17 Stepper Motor Bipolar 1.5A 42Ncm 42x42x38mm 1.8deg 4 Wires with 1m Cable and Connector (5 Pack) Amazon.com
And these are the ones i replaced with:
STEPPERONLINE Nema 17 Stepper Motor Bipolar 2A 59Ncm(84oz.in) 48mm Body 4-Lead W/ 1m Cable and Connector Compatible with 3D Printer/CNC Amazon.com
The new ones are significantly more powerfull. I realized i have that size on my other two CoreXY machines (Hypercubes) and figured it was worth a shot.
As far as tension goes they dont need to be super tight. No droop and full tooth engagement is generally fine IMHO.
We have a bit more than 10mm of range, 5mm of movement, doubled because of the pulley.
I do strongly agree with the mounting of the belts sucking. I have tried a few things since these were released and nothing good yet. Next try is a small locking piece, trying not to add size or hardware.
Honestly a few extra bolts is not a big deal in my book. The belt mounting on the Hypercube is really nice. Won’t work exactly on the V4 as that printer has the belts on the same plane across the x axis. It seems that you should have plenty of meat in the carriage now to make a serrated locking block?
That adds 2 extra pieces 2 screws and 2 nuts to a part where every gram counts.
The reason I use pieces of belts instead of printer serrations is crappy printers so not print them good enough top lock a belt. I tried that before. The taper slot and belt pieces makes print quality a non issue.
I have no issues with cable ties!
LOL, I had forgotten that the original was that way. I printed an upgrade that allowed tension setting with a screw on the back of the carriage.
I moved all the tensioning to the steppers to lower the moving mass. We just need an easy anchor for 4 belt ends.
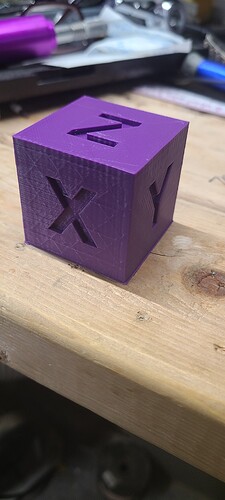
Was printing a 200% calibration cube the other night. It was sliced at 100mm/s. Towards the top 1/4 of it i started upping the feed rate. Pushed it to 150mm/s and i am hard pressed to see a difference in print quality.
I did discover that while to new motors CAN run at higher amps there is no reason to do it. Had the current set at 1.2 and had multiple skipped step failure. I believe it was due to heat on all of them i set it to 0.8 this morning and the big print is almost finished.
What I noticed was that at 150 it was reporting about 14.8mm3/s flow rate. According to Biqu the H2V2S Revo can push out 30 mm3/s. As i get the machine dialed in i am going to see how fast i can push it!
Depends on what you are going for but a larger nozzle pushes a lot more plastic without increasing the speed. 30mm3/s seems too high for both of those, must be a revo high flow nozzle.


