MP3DP v4 - Aza's build

OMG!!!

1 Like

Ugh. After feeling smug about using Teaching Tech’s Calibration Tool to tune your settings; Do remember to uncheck “Remove All Holes”, before you print ~8hrs worth of parts :man_facepalming:

Bummer, I wonder why that setting even exists. That can not be a common need.

1 Like

300x300x400

1 Like

Thanks for all the info!!!

1 Like

Wrote cutlist.py Fusion API Python script to query parameters and parts. Was curious how easy/hard querying bounding box for geometry dimensions would be. Wasn’t too bad, however…

Currently, most of the extrusion frame dimensions change if you edit User parameters, this is great. Unfortunately, the linear rail and a couple of mid extrusion frames are not updated correctly. Not a big deal, can easily workaround by using the 200mm^3 as a baseline, then just add to each dimension as needed for your build. Easy!
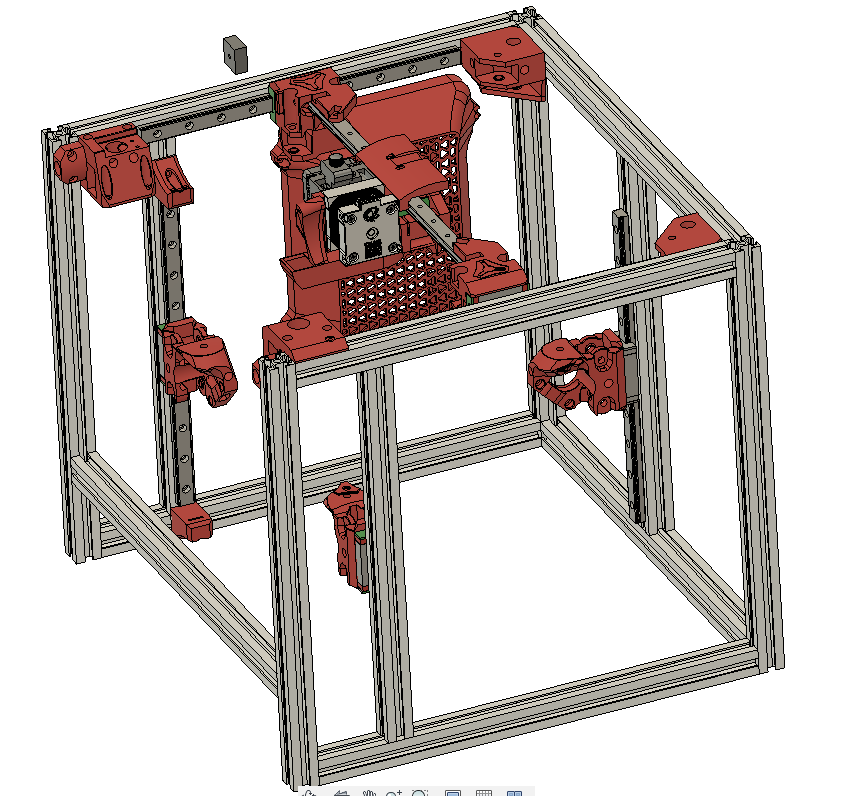
USER PARAMETERS:

  • Usable_Depth = 200mm
  • Usable_Height = 200mm
  • Usable_Width = 200mm

PARTS:

  • Frame X
    • Frame X Back Bottom 370mm
    • Frame X Back Top 370mm
    • Frame X Front Bottom 370mm
  • Frame Y
    • Frame Y Rail Bottom Left 345mm
    • Frame Y Rail Bottom Right 345mm
    • Frame Y Rail Top Left 345mm
    • Frame Y Rail Top Right 345mm
  • Frame Z
    • Frame Z Back Left 345mm
    • Frame Z Back Right 345mm
    • Frame Z Front Left 345mm
    • Frame Z Front Right 345mm
    • Frame Z Mid Left 305mm
    • Frame Z Mid Right 305mm
  • 1x MGN12 X Rail 300mm
  • 2x MGN12 Y Rail 250mm
  • 3x MGN12 Z Rail 250mm

(manually formatted a bit for easier reading)

Edit: Striked out wrong info in my original post. You can update model dimensions, there’s just some extra steps involving editing multiple files. See MP3DP v4 - V1 Engineering Documentation for details.

2 Likes

This is awesome. Would you mind to run it for 310 x 310mm print bed size?

Say…

  • Usable_Depth = 310mm
  • Usable_Height = 400mm
  • Usable_Width = 310mm

?

Short: Sure thing… Add 110mm to the X and Y values above. Add 200mm to the Z values above.

Long:

Sure thing… Problem is that the model doesn’t update correctly, and the script is merely reporting whatever the Geometry dimensions are… Looks like Linear rails, Mid Frame extrusion and Back bottom frame do not update correctly, at least for the current MP3DP v4 snapshot I’m looking at.

Not a big deal, not something we need fixed. We can just add to the values for the baseline 200mm^3 numbers.

e.g. if Usable Z 200mm has Frame Z Front Right 345mm then a Usable Z 400mm would have Frame Z Front Right 545mm

That help?

Edit: Striked out wrong info in my original post. Removed link to the video as well. You can update model dimensions, there’s just some extra steps involved to edit multiple files. See MP3DP v4 - V1 Engineering Documentation for details.

1 Like

Yes, that does help. Thanks.

If you update the parts, then update the assembly model, it works.

@DougJoseph because the MGN rails work out best for 25mm increments, I’d either go with 300mm for t he X and Y, or else bump it to 325. (If you’re cutting the MGN rail anyway, I suppose that you could still do 310, it will just be a bit weird for the hole spacing.)

2 Likes

The X dimension has to be in 25mm increments, or the X rails will not fit on the side blocks.

1 Like

Good to know, although I’m not sure what it means to update the parts!

OK, doing 325 instead of 310 should not be a problem. I guess it would mean the platform for the 310x310 print bed would have extra space on all sides.

Do you have a drawing for the z plate that connects to the Z motors?

I have updated the instructions, showing exactly how to make one that fits whatever bed you plan on using. Most beds have holes in different locations.

3 Likes

Thanks!

Thanks for taking time to update the docs, wasn’t expecting you’d have time for those.

I striked out the wrong info in my earlier posts. Didn’t realize we need to edit dimensions within the “Parameters” file, that’s great to know. I was wondering why I couldn’t edit dimensions within Favorite User parameters from within the MP3DP v4 file.

The big red arrows on MP3DP v4 - V1 Engineering Documentation help :slight_smile: Cheers!

Edit: I should have read Repeat v2 Topic more closely…

2 Likes

It just takes soooo long to do. I love that something is finally done though. I got all my MP3DP parts cut out today so maybe I will have some more time for that before Rmmrf, we’ll see I still have the rest of the build and hopefully a LR3 to finish and pack up.

3 Likes

the purpose of this post in this thread is to ask for some clarity on the baseplate holder hopefully as an informational addition to the information above for those of us interested in correctly sizing a 3d print heated bed to be put on a somewhat custom plate inside the MP3DP. What material should the plate be made of and is there a recommended size or size overage for the desired effective print area?

@vicious1, your useable print plate area is 200x200 for xy, what size heated plate did you put in there? 210x210, 235x235? your baseplate design instructions are well done.

@DougJoseph you asked for a 310x310 heated bed plate. Are you planning for 300x300 useable print area?

@supraguy building a 250x250, what size plate did you use?

azab2c (we are only allowed to mention 3 users in a post?) are you going stock on your build in this thread? And thank you for the time spent to link everything into one place! Your BOM list is very helpful as are the links to the other builds.

Yes, that’s the plan.

1 Like

Thanks for starting the baseplate/bed questions. Agree, will be helpful to know what sizes and parts people are going with.

Yep. Yep, mostly stock (e.g. Undecided on hotend). You’re welcome.

1 Like