MP3DP tuning with klipper

Probably something like this:

the tag line would be: “Let me ask the dumb questions, so you don’t have to.”

I’m out of time for a while to push on this tuning. I have a second machine I need to make work and get it off my work bench and then a few other projects that need to finish.

LOL I get that completely. I wanted to push more tuning on mine but I needed to get these other parts printed so I held up where I was. AFAIK all those are done now finally lol. Its printing its own parts now and an adapter plate for my CR10S Pro to mount the old hemera up to it. Wanted that out of ASA So while this is still in the chamber I put the blue back in it and let it print that and 2 new Y carriages for the V4 see if that’s what is pulling mine out of whack. I sure hope so cause I have no idea where to look next LOL.

  • first layer height: 0.35
  • walls: 2
  • Z_offset: 3.775 (unchanged → distance between BL touch trigger and nozzle)
  • using pre-stored mesh maps of bed at specific temperatures via macro calls based on temperature

Ok, ran another one at 50 mm (double the size of the other) just to see if the lines were showing anything interesting.
Quick takeaways:
→ a temperature tower should help, the bridging sucks on this roll right now.
→ there aren’t as pronounced of wavy lines in X, none in y so either the pully tilt fixed it or the lube helped with bearing noise
→ layer height should likely be reduced for better feature fidelity
→ there is some skew
→ bottom layer needs more squish

X: 49.75
Y: 49.93
Z: 49.97 at smoothest, 50.26 at roughest

X0Y0 → X1Y1: 69.28
X1Y0 → X0Y1: 69.88

quality photos:


Bottom and top need some work.

  • Top needs temperature bridge tower

  • Bottom is base layer height adjustment

1 Like

This picture is concerning, do you know what happened here?

That is the top layer and I think it means the temperature is wrong for effective bridging, which is why it needs a temperature tower.

1 Like

Look what came today!


Asa, more petg, and an adxl345 for shaping.

1 Like

Those graphs from the shaping really are a cool thing! I cant wait to see what the difference is after I change a few parts out and run it again. Hopefully the belt shaper part wont tell me I have a mechanical problem anymore LOL

1 Like

Got the 345 strapped on, printed a temp tower:

Picked the second bridge which was 235 (down from 240)

Made the adjustment and printed another 50 mm cube… sort of:

Sometimes a valid question is whether or not owning one of these is a good idea.

2 Likes

They can sure be frustrating sometimes. But don’t worry you will get it. Have you tried bringing you layer height down some?

What is the best way to bring the layer height down without rebooting in klipper? Does anyone have a macro on their display to bump the offset and save without dropping the bed and restarting?
image

I’ll look into this when I’m not melting off the big blob of goo on the extruder… again.

you can adjust your Z step as the first layer is going down on a print. Then after the print you can save config. You should have it in your end_print to lower the bed all the way down, so when you save config your bed will already be down so no issue.

Also you can go through the probe_calibrate and accept then just lower the bed down before you type save_config

What I meant here is the layer height you set in the slicer for your print. Try bringing it down to .3 or even .25 and run a test print. Yes it will take a little longer but I think you might see a lot better result

I tried the probe calibrate and the nozzle crashed the next time after it saved, so something isn’t right with that macro. I have manually adjusted the Z_offset only since that time and changed the first layer height. When the first layer thickness matches the first layer height and has sufficient squish, then the z_offset is correct, but maybe that approach could be modified to make it so it is easier to modify.

With the rail mount change, it is likely best to redo all the first layer offsets again. Since the hot end is coming apart here in the next week, it will all need to be recalibrated.

I only ever had that happen once and when I ran it again everything was good. I’m not sure what the quirk was with it but that was the only time I ever had trouble

Tuning update. I read the docs again and again on skew and kept getting a parse error for the skew xy command. Added the = in there and it rejected it. Apparently you cannot set skew in the printer.cfg, you must do it via the terminal as a separate, one-time addition, then save the profile. Once you have a saved profile, then you can load it and use it in your .cfg file. My notes are below in case anyone wants to try it:

  1. to enable skew correction, add the following section to your printer.cfg file
    [skew_correction]
    There will be no other lines in that section. it could go at the very top or at the very end.

  2. Print a cube or square for an axis of interest
    i printed a flat-walled cal square box with 2 base and 0 top layers and 1 side layer in vase mode 20 mm high and measured XY plane
    if adding YZ or XZ plane, the cube should be the same height as the width and depth

  3. measure the printed cube. Laying flat it will look like this

image
(image credit: Skew correction - Klipper documentation)
where AB is Y print axis and AD is X print axis when in the printing position still stuck to the plate (label it)
could print with AB as Z and AD as Y or X so a total of 3 prints or do it as one print…

  1. record the lengths like below for a 100 mm open cube

Length AC = 139.23
Length BD = 140.49
Length AD = 99.3

  1. in the console enter the following commands one by one but use your measured values for AC, BD, AD
   SET_SKEW XY=139.23,140.49,99.3 
   CALC_MEASURED_SKEW AC=139.23 BD=140.49 AD=99.3

the second one is optional, just gives an idea of how far off it is

response from system: Calculated Skew: -0.009009 radians, -0.52 degrees

  1. in console enter the following
    SKEW_PROFILE SAVE=my_skew_profile

response from system:
Skew Correction state has been saved to profile [my_skew_profile]
for the current session. The SAVE_CONFIG command will
update the printer config file and restart the printer.

  1. enter in the console
SAVE_CONFIG

system then restarts

If you make the following macros:

######################################
# Skew Correction
######################################


[gcode_macro SKEW_ON]
gcode:
   SKEW_PROFILE LOAD=my_skew_profile
  
[gcode_macro SKEW_OFF]
gcode:
  SET_SKEW CLEAR=1

then at the end of your START_PRINT after leveling and the purge line, call SKEW_ON
and in the END_PRINT call SKEW_OFF

2 Likes

Ok back to klipper and tuning: this is more of a setup question: another is asking about homing to z max and there is an unresolved issue with Ernest (my v4) that has to do with homing and home position that is somewhat bothersome.

scenario:

system is off and is recently powered on. system is told to home from the touch screen and it does x, then y, then z and the bed stays at the point of the bltouch retraction. No problems so far.

  • Option A: If told to print, it rehomes as part of teh start sequence, runs through the tilt process and prints. All is good. At the end of the print, the bed lowers to zmax of 395 mm and things are still good.

  • Option B: if told to rehome then the x and y home, and z home fails because the bed is not far enough enough away from the z for the probe to fully extend and then retrigger

Attempted solution to option B → set Z offset of 5 mm or 10 mm. after homing ,the z bed spaces so the bltouch probe has plenty of space to redeploy and trigger

The complication of the z offset is that when you first start up the printer and the bed is on the lower stops, it tries to lower 5 mm before it homes and the belts skip every time now…

So it seems the choice is loud skipping before every home when the bed is at the bottom if the motors have been disabled, the option of only homing once and then manually moving the bed or the bed has to crash in order to restart.

There has to be a better way I’m not thinking of. Any thoughts?

This z move before home question is not answered. Partial points is turning off zhop, but then the original problem exists. The solution would be to manually drive z down if the system is zeroed or put in some macro logic.

Latest tuning efforts have yielded the following:


The color is close enough?

Print settings
50% infill
0.28 mm layer height
4 walls
0.65 mm width
First layer 0.3mm
First layer speed 30 mm/s
First layer temp 215
Print speed 60 mm/s
Print temp 208
Print time 6 hrs

Now this is the best printer I’ve ever used, but I believe it can go head to head with my boys new Bambu with continued improvements.

From a klipper tuning standpoint there are two more things of interest to me:

  1. One more gadget to implement: the acceleration sensor.
  2. How does one go about tripling print speed? It seems there is an opportunity here to save some time and with #1 to help, can be achieved.
  3. Bonus points: ERCF addition

“Do Ellis’ tuning” is my next step… ?

1 Like

TLDR: get rid of the output power model section in the klipper examples.
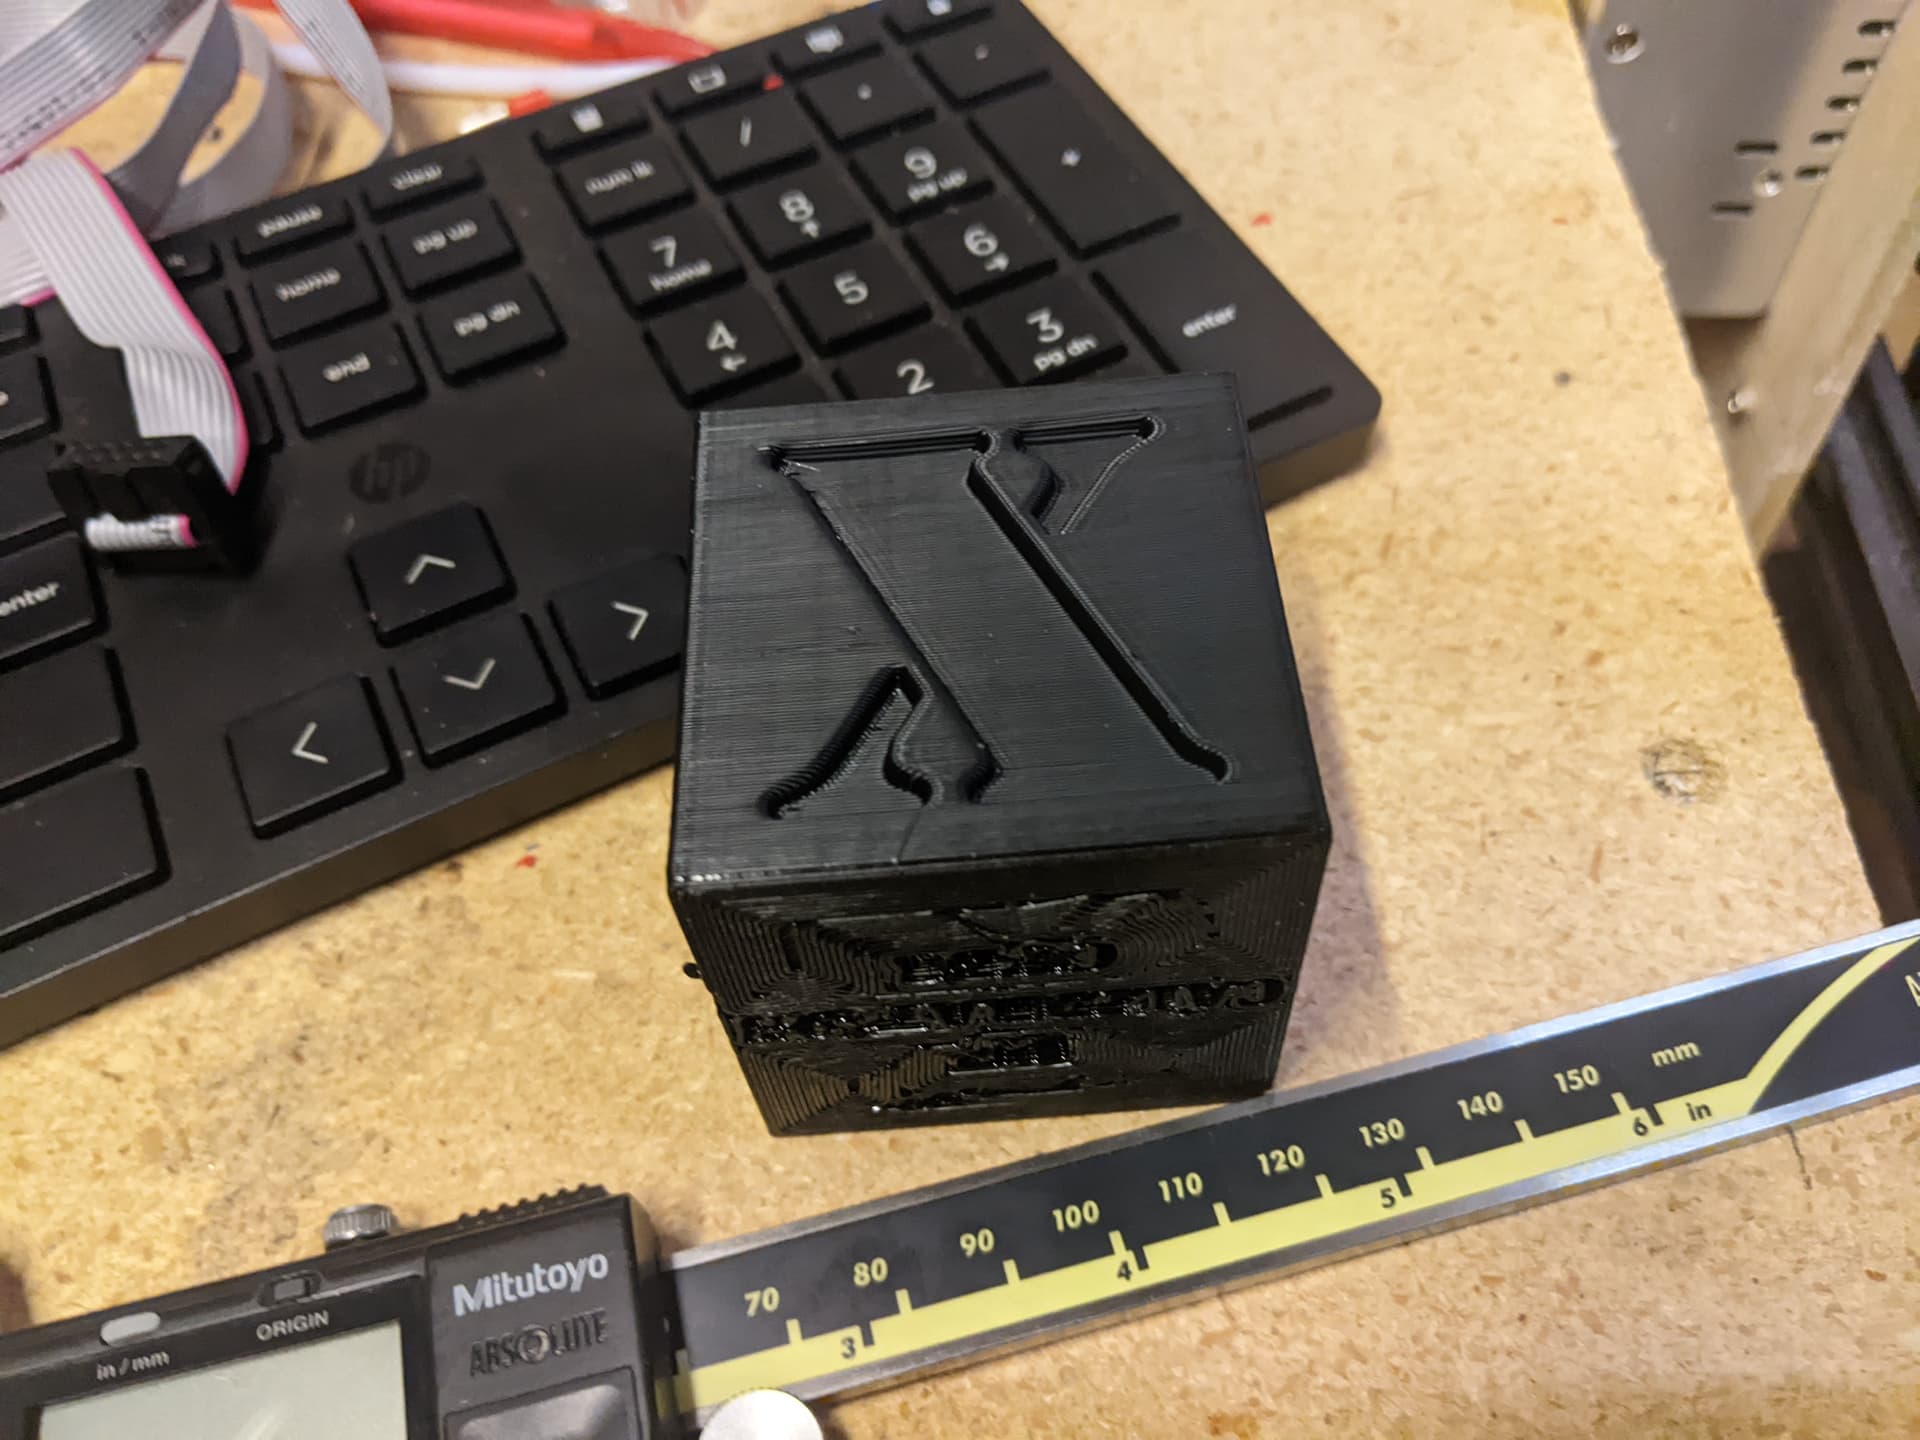
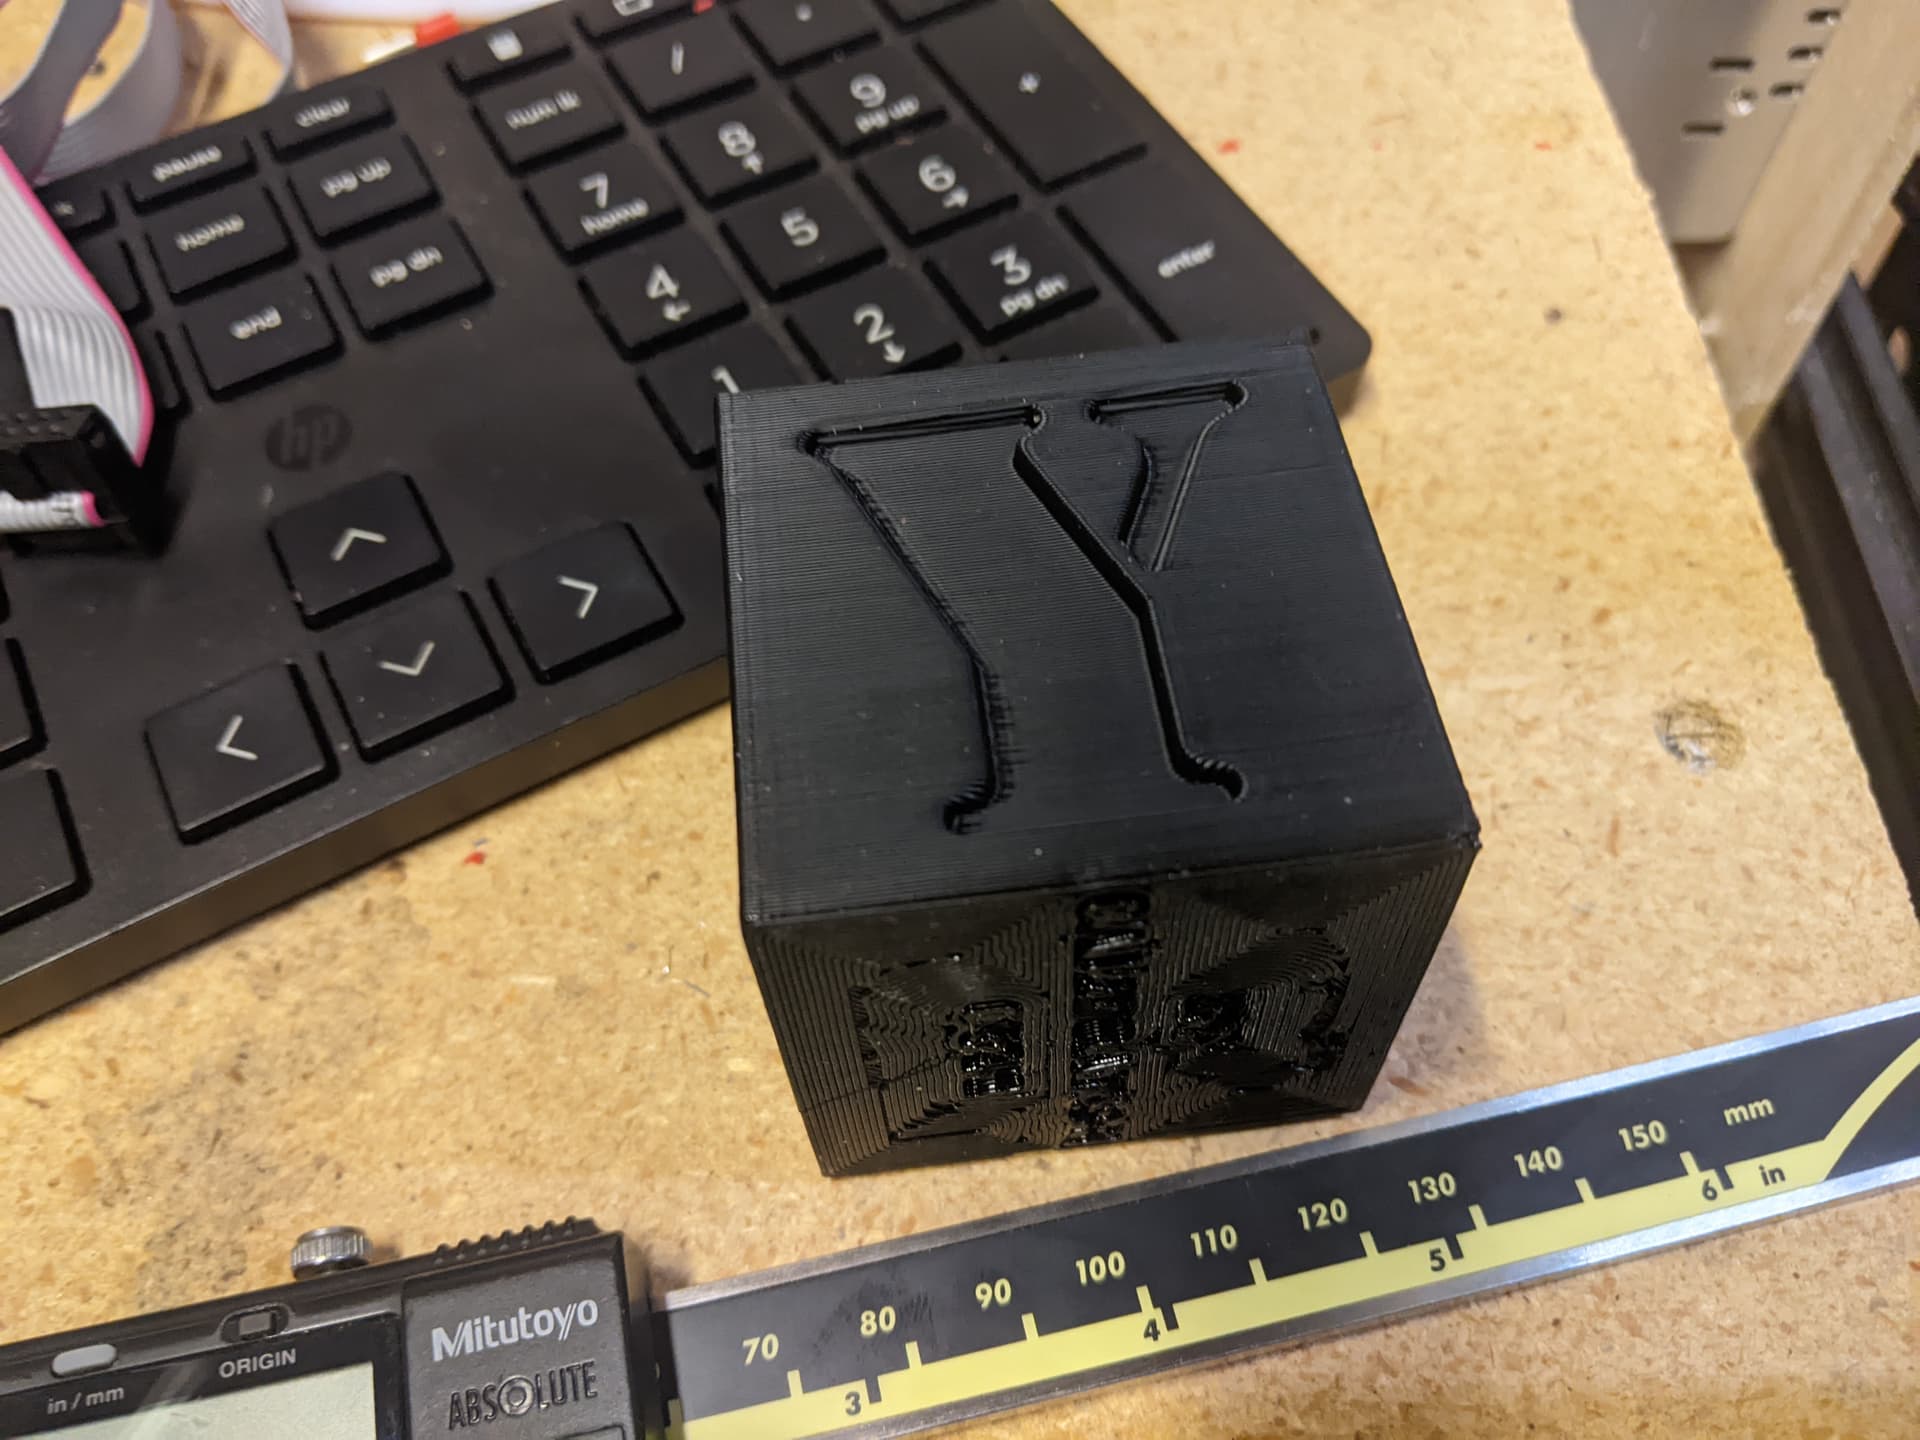
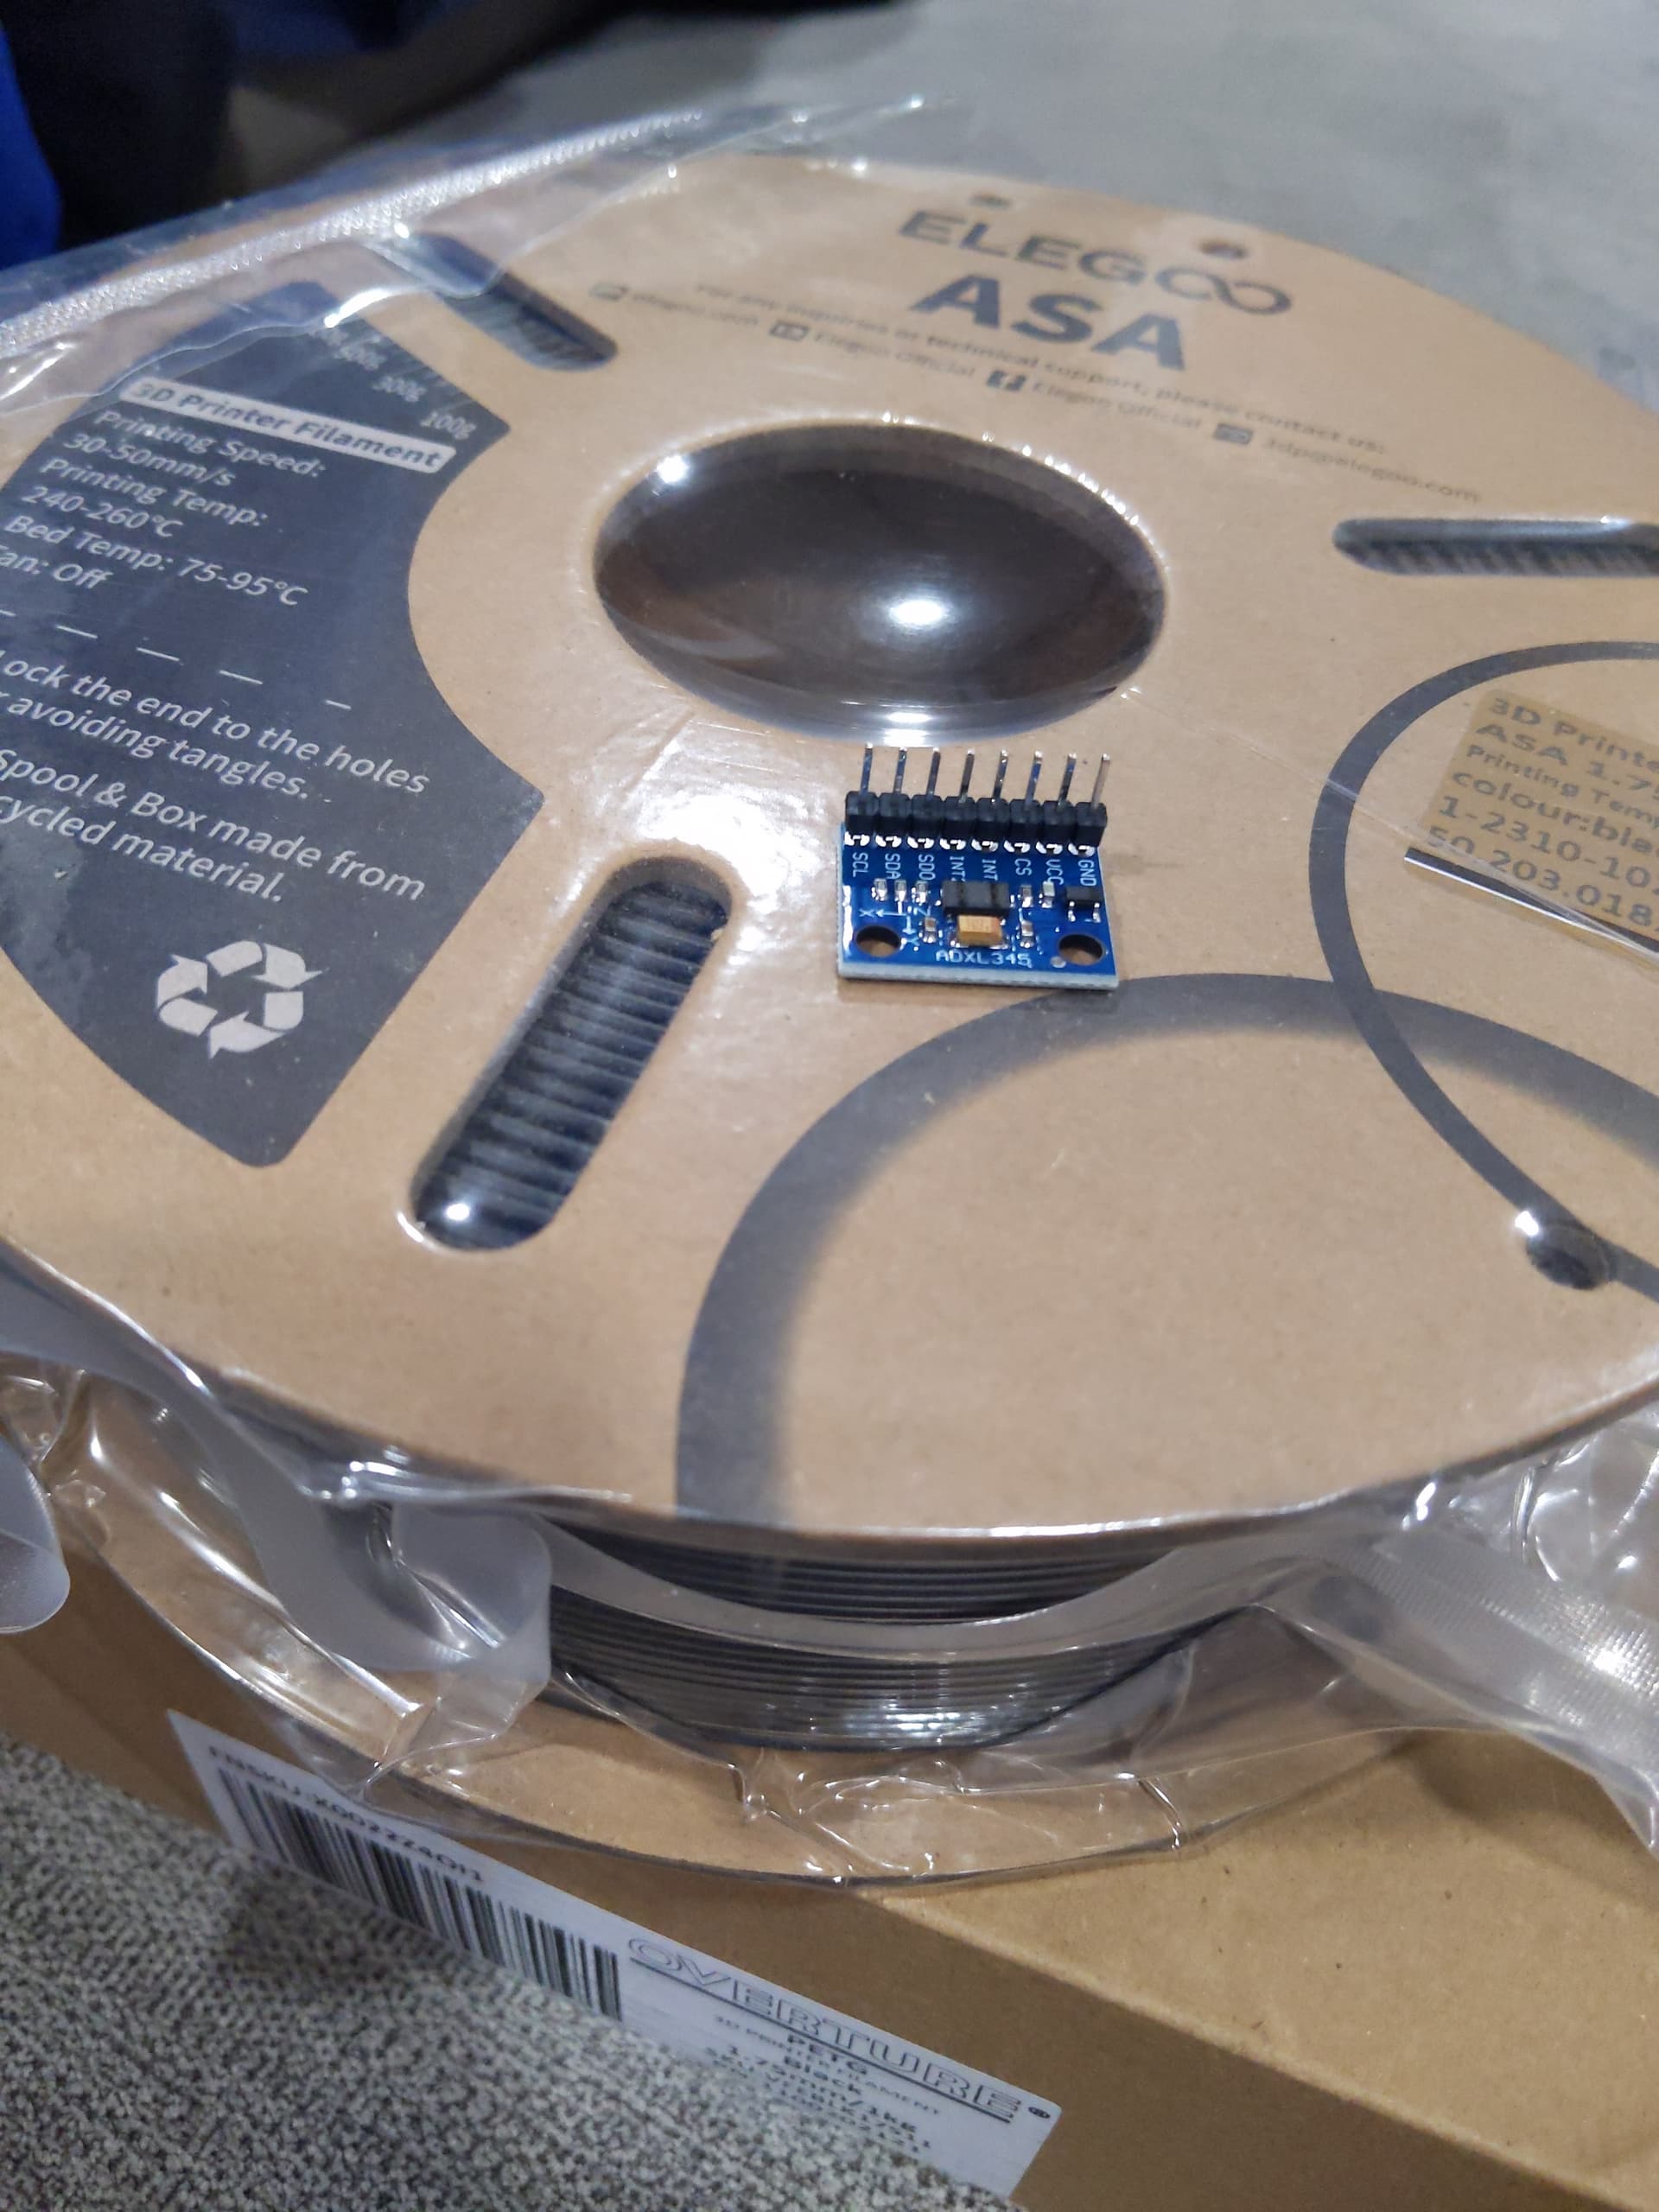
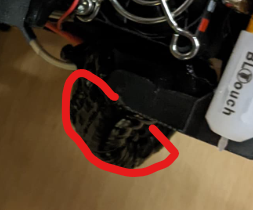
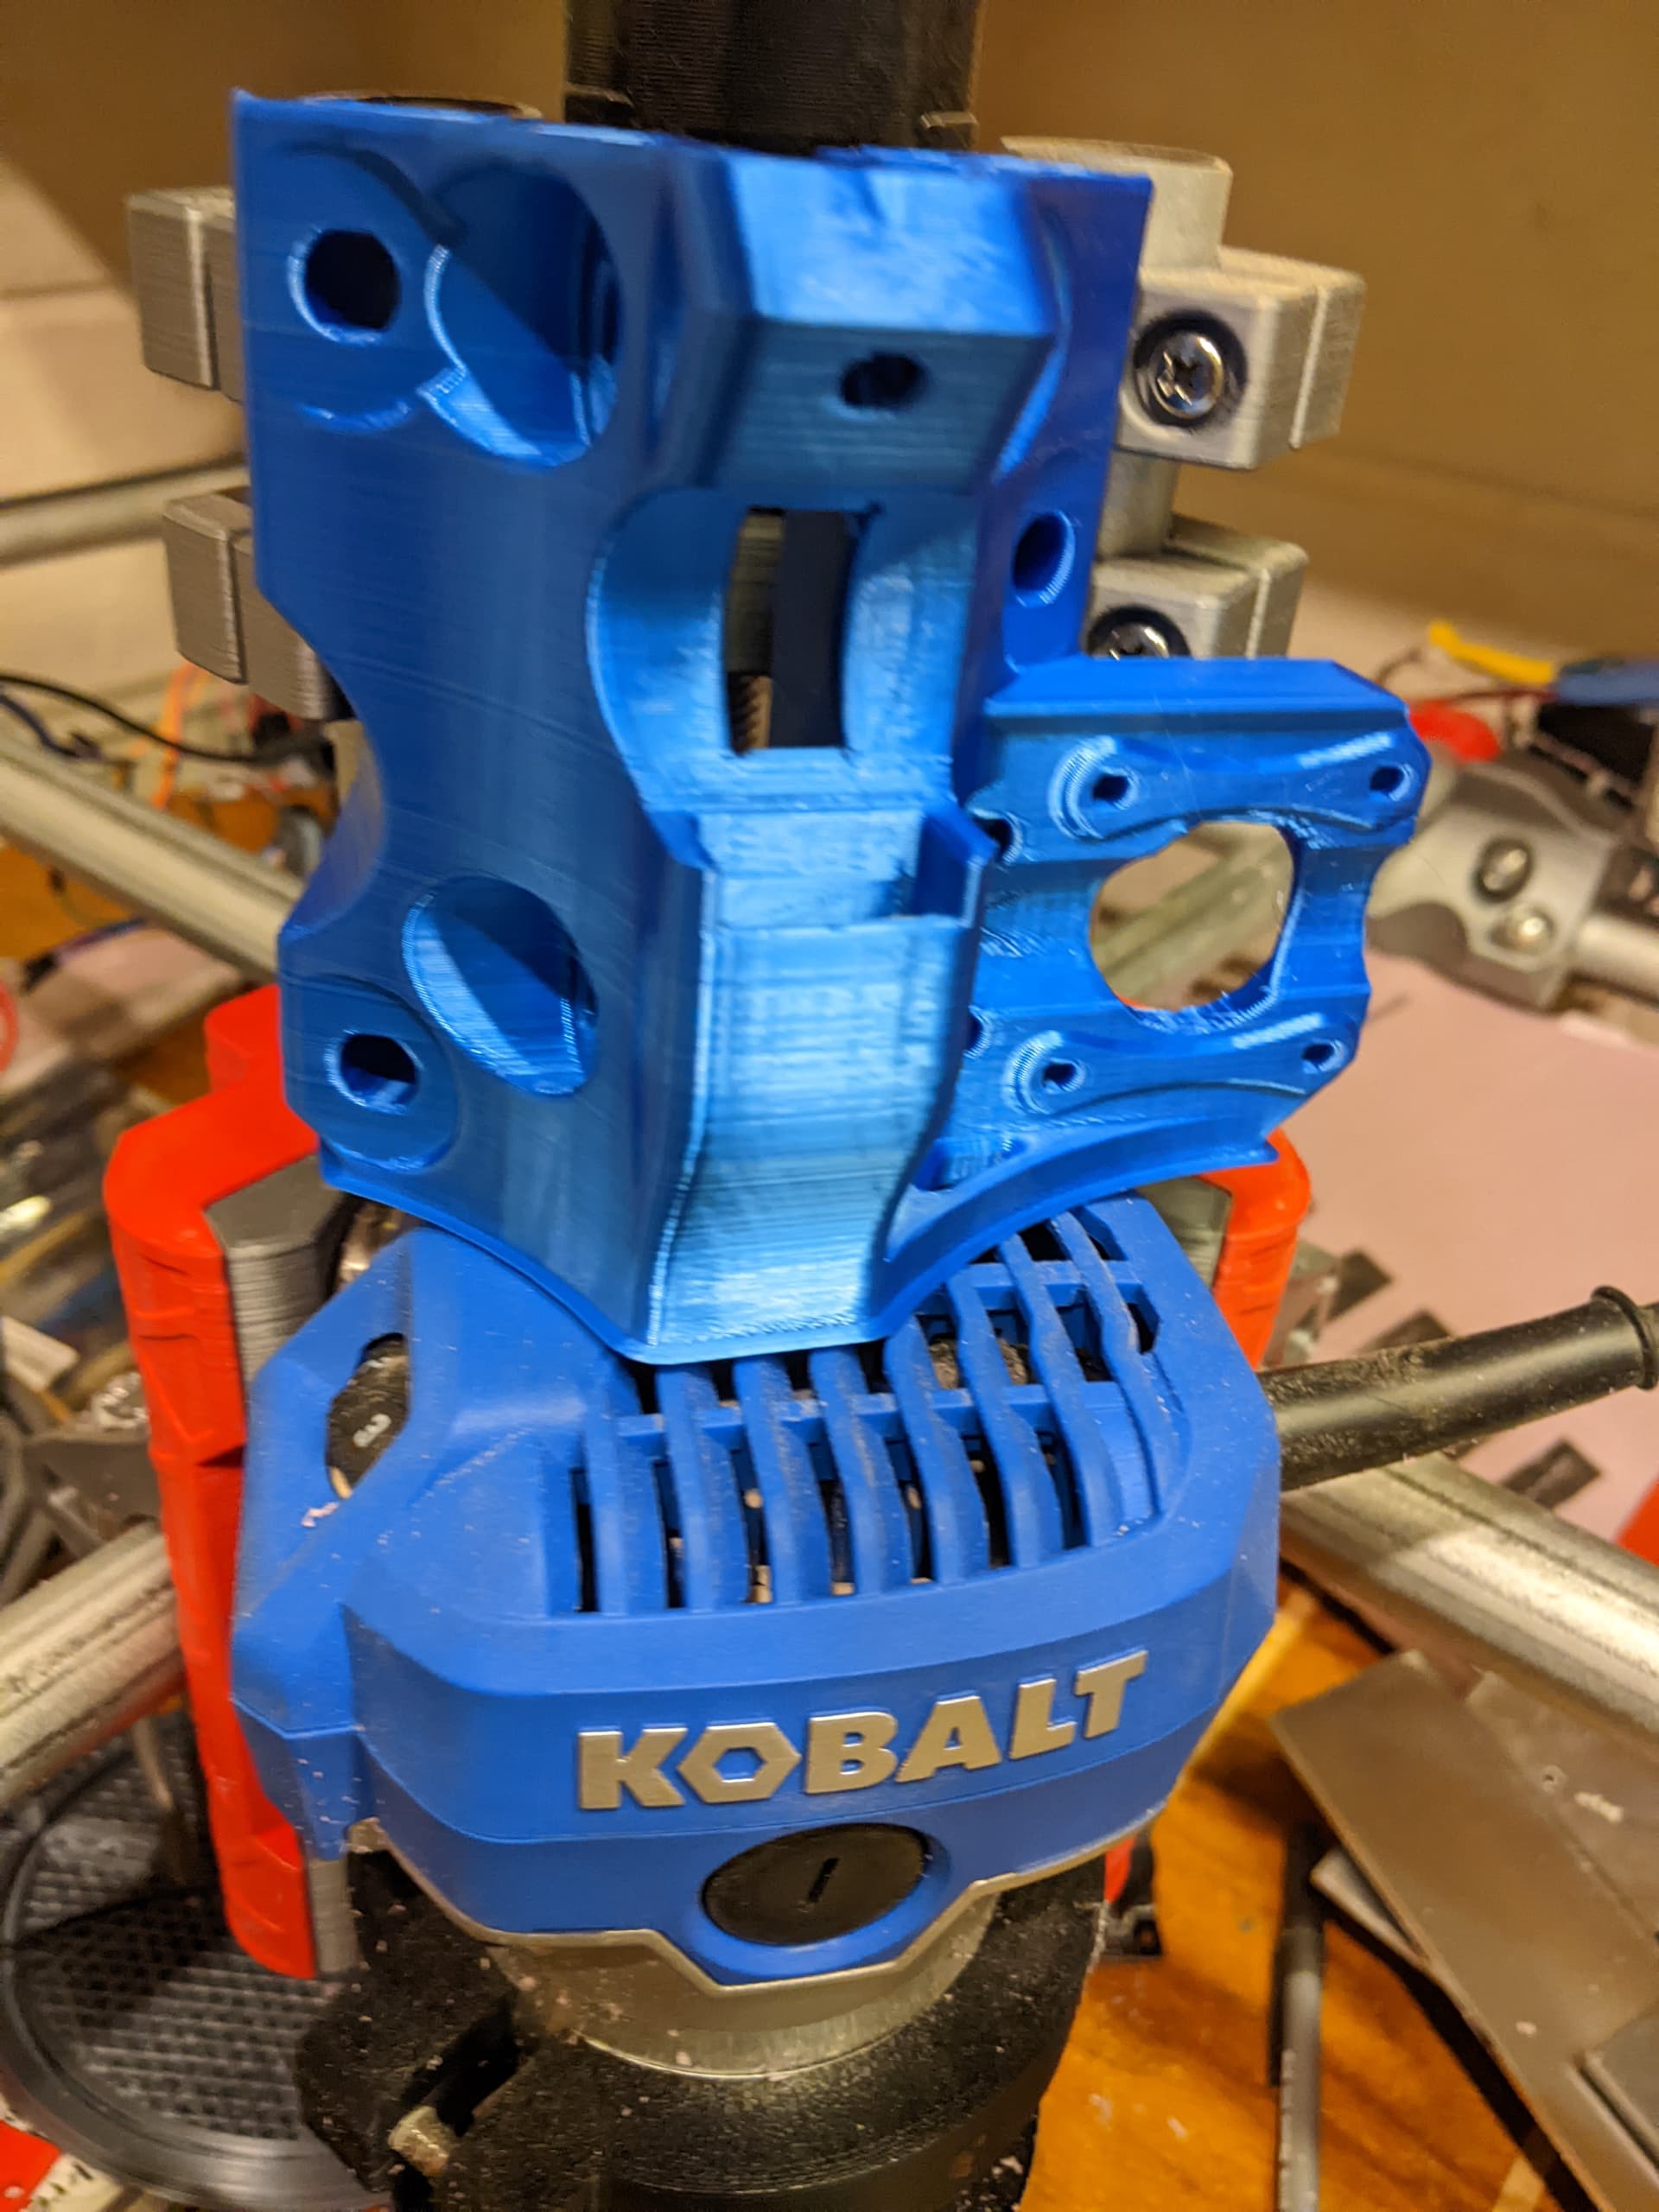
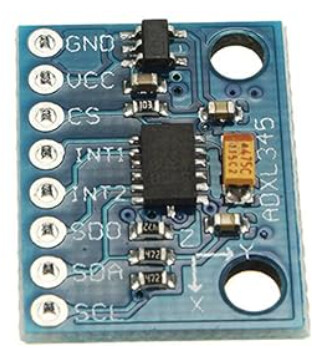
I have an adxl345
image
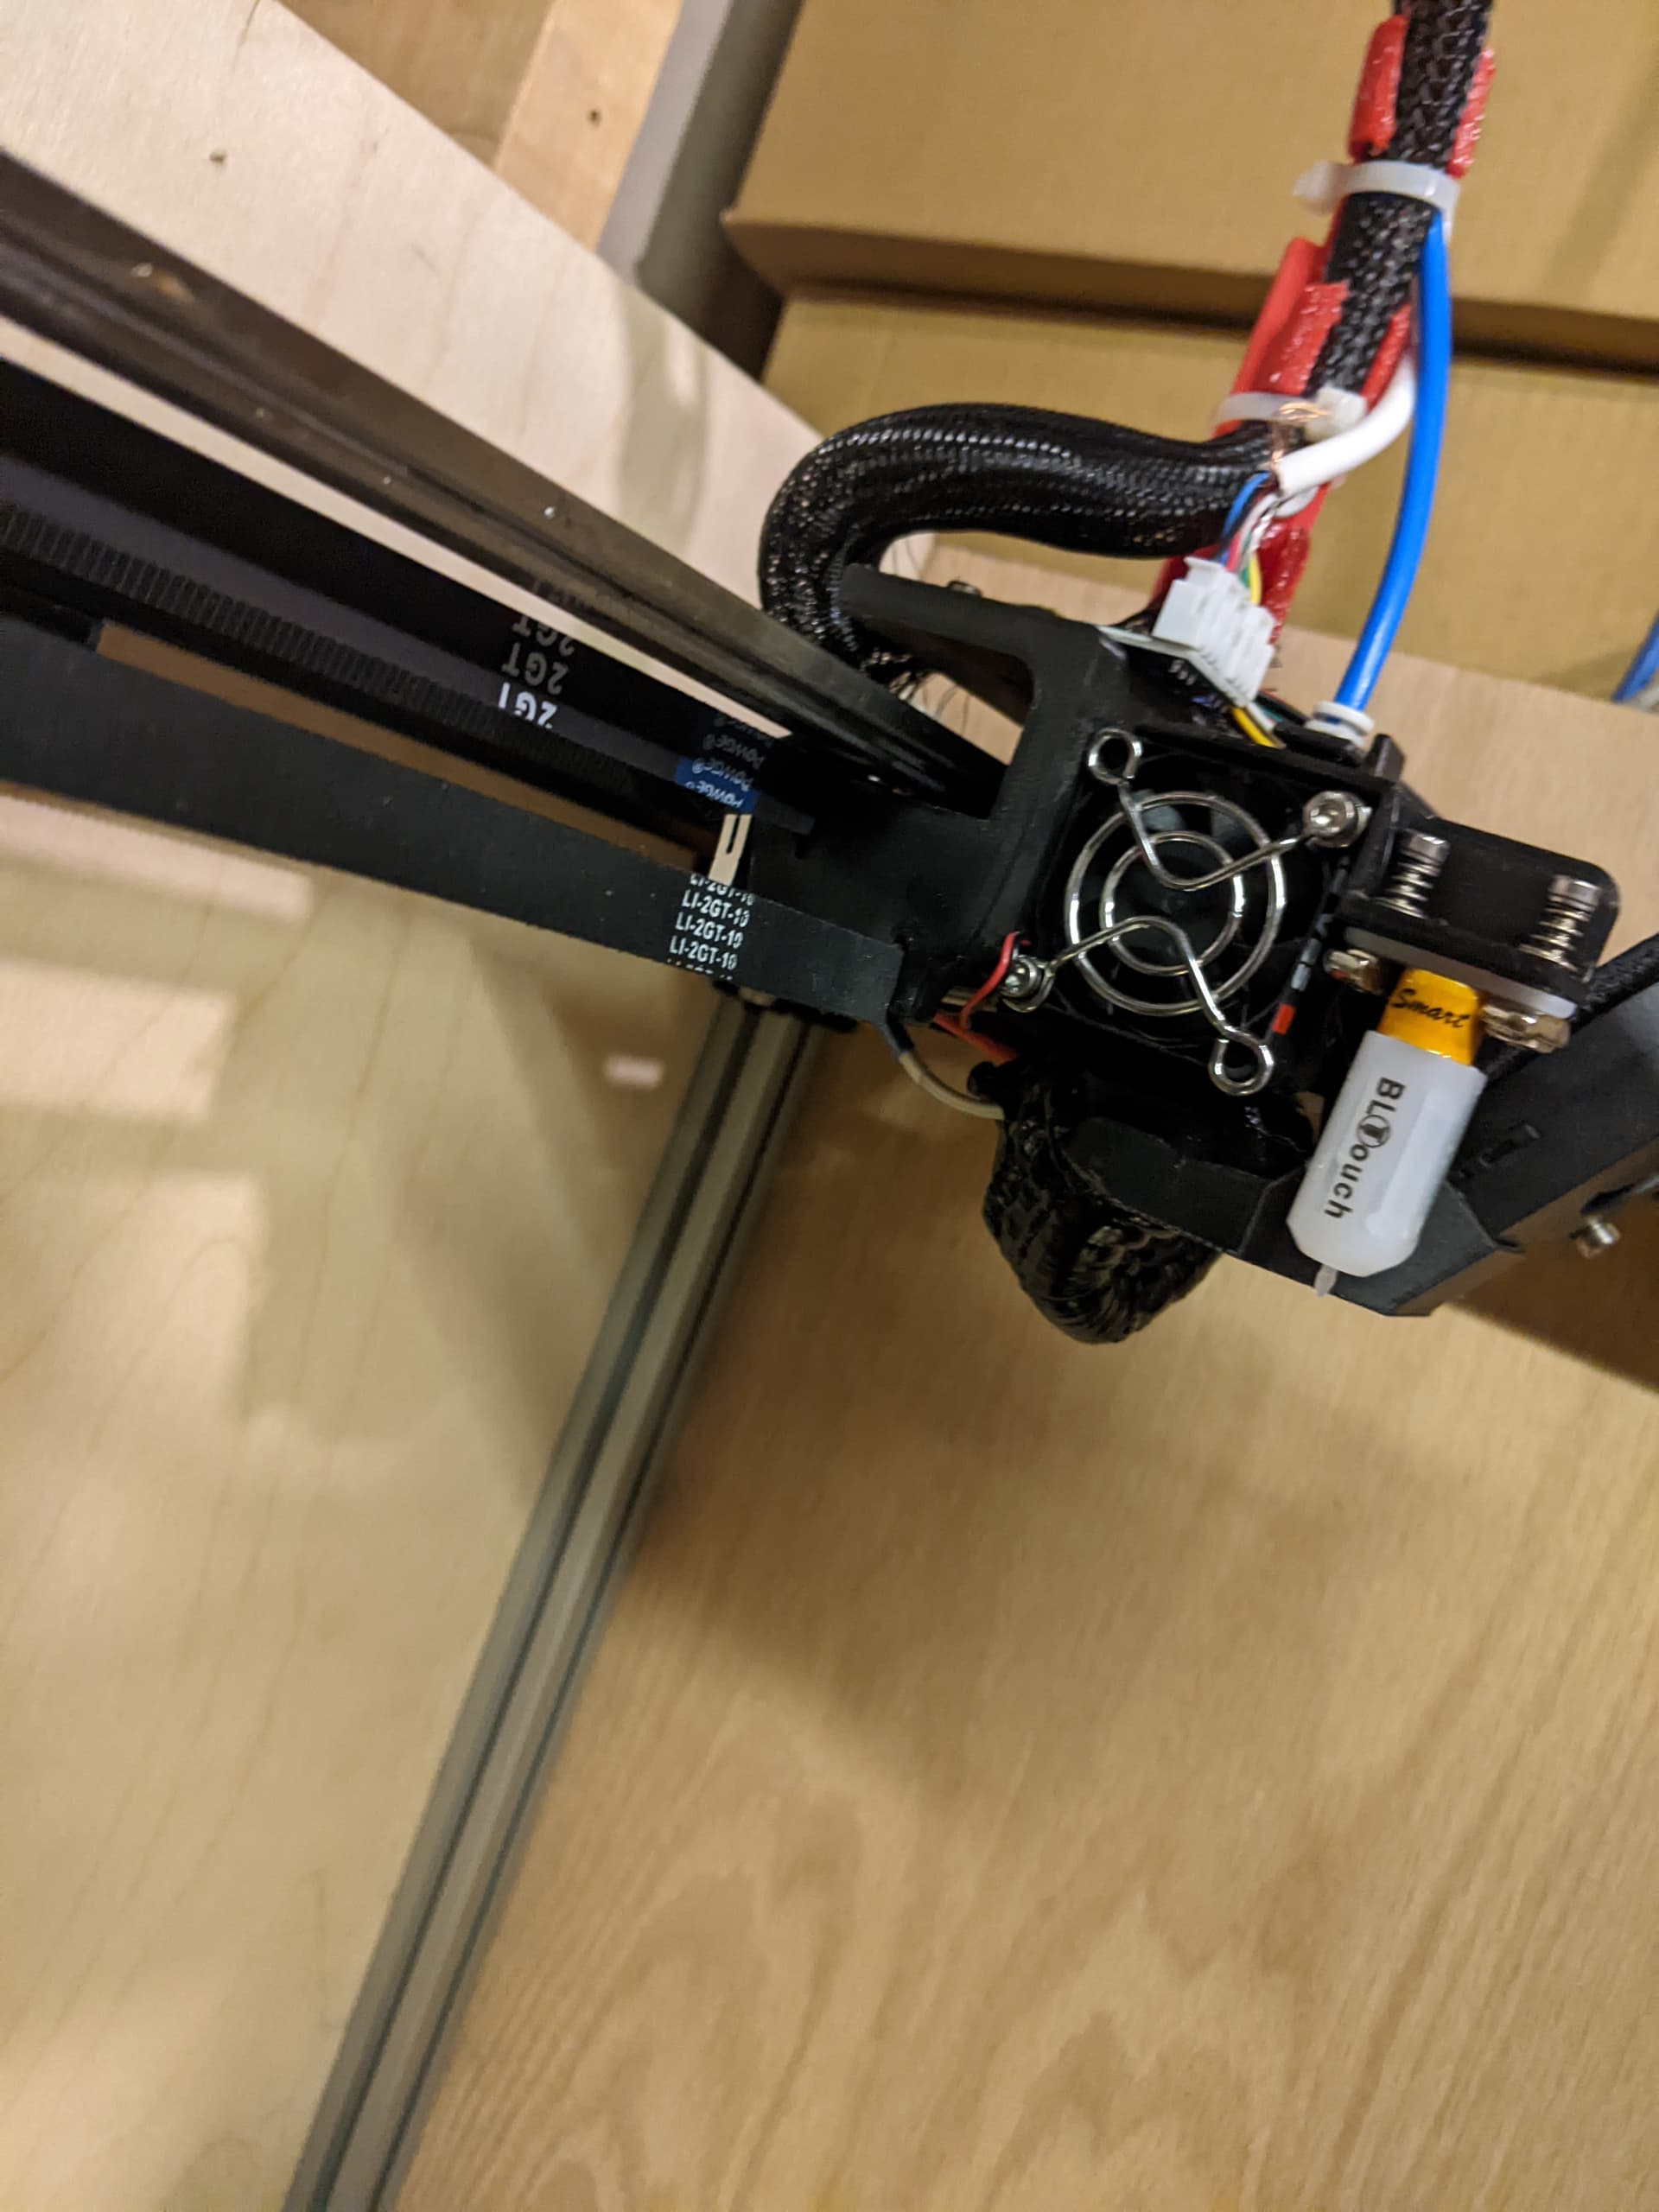
It is mounted above the hot end on the core and the X arrow and y arrow match the machine directions.
added

import adxl345.cfg

to printer.cfg.
adxl345.cfg is:

[mcu adxl]
# Change <mySerial> to whatever you found above. For example,
# usb-Klipper_rp2040_E661640843545B2E-if00
serial: /dev/serial/by-id/usb-Klipper_rp2040_E66038B713615530-if00

[adxl345]
cs_pin: adxl:gpio1
spi_bus: spi0a
#i2c_mcu: pico
#i2c_bus: i2c0a

axes_map: x,z,y

[resonance_tester]
accel_chip: adxl345
probe_points:
    # Somewhere slightly above the middle of your print bed
    150, 150, 390

[output_pin power_mode] # Improve power stability
pin: adxl:gpio23

It is wired to a raspberry pi pico, which is connected to the klipper raspberry pi via USB. Not using rpi gpio because display is in the way. The 345 in klipper is set to communicate via spi:

klipper reports:
image

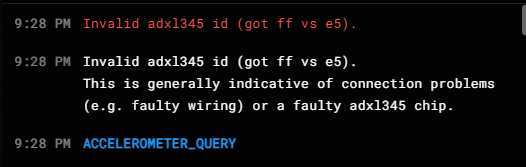
which means something is wired wrong. The sensor is good because it streamed data on a different pico with circuitpython minutes before connecting it to Ernest, but it was communicating via i2c. It is possible that this chip has the SDO line pulled low to force it to communicate I2C. Need to get a meter on that line to see. The klipper error messages are not very helpful. The config file has been adjusted and the wiring verified… not sure what else to do here.

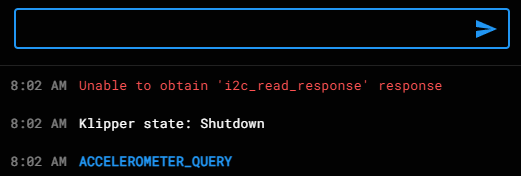
Another available option is an mpu6050 that communicates I2C (now “supported” by klipper), but the cfg syntax is wanting and the only example is the mpu9250, though they are all family chips in the mpu line, so it is implied that they communicate the same, but that is not explicitly stated. There is no valid [mpu6050] section allowed in klipper. [mpu9250] is allowed, but when running the ACCLEROMETER_QUERY, the system halts:
image

image

mpu6050 is called from printer.cfg so it can be easily commented out as one line and not a section. The mpu6050.cfg file:

[mcu pico]
# Change <mySerial> to whatever you found above. For example,
# usb-Klipper_rp2040_E661640843545B2E-if00
serial: /dev/serial/by-id/usb-Klipper_rp2040_E661640843363B24-if00

[mpu9250]  # because mpu6050 is an invalid section
i2c_mcu: pico
i2c_bus: i2c0a
i2c_address: 104 #online docs say address is 0x68, but this is sometimes not needed.  It doesn't work with or without.

axes_map: x,z,y

[resonance_tester]
accel_chip: mpu9250
probe_points:
    # Somewhere slightly above the middle of your print bed
    150, 150, 390

[output_pin power_mode] # Improve power stability
pin: pico:gpio23 # this is a copy artifact.  The pico doesn't have a gpio23 labeled.

Any suggestions? I’ll probably query the klipper message board on this one. It could be something simple as is often the case. As I was typing this, one thing on the preview to the right stuck out:

so I tried it by commenting that line out:
image

1 Like

Ran the shake tune belt vibration test last night… First test ever. I’ll post the plot in a later edit. What stood out was the belt flapping when that resonance hit and then the filament lever went nuts shaking. Not sure what to make of that. Sounded cool though.

Did you do the belt tune with the gates motorcycle tuner first?

I put a rubber band on mine. I could hear it clicking all day and that test really shook it. Poor design choice on that part for sure.

This one test was the first tune test I have ever run on anything other than like a temp or retraction tower. This is a whole new world. Printers to me have been like toasters… push the button and go. Not so anymore.

1 Like