IDK how I missed this thread before, been doing a lot of klipper tuning the last few days, its actually fun and pretty easy with klipper.
Your pully does look like its leaning. That real odd. Was the printer you printed these parts on tuned in? wonder if it was just a bad print and it being off like that is what’s causing the belt to ride up and down?
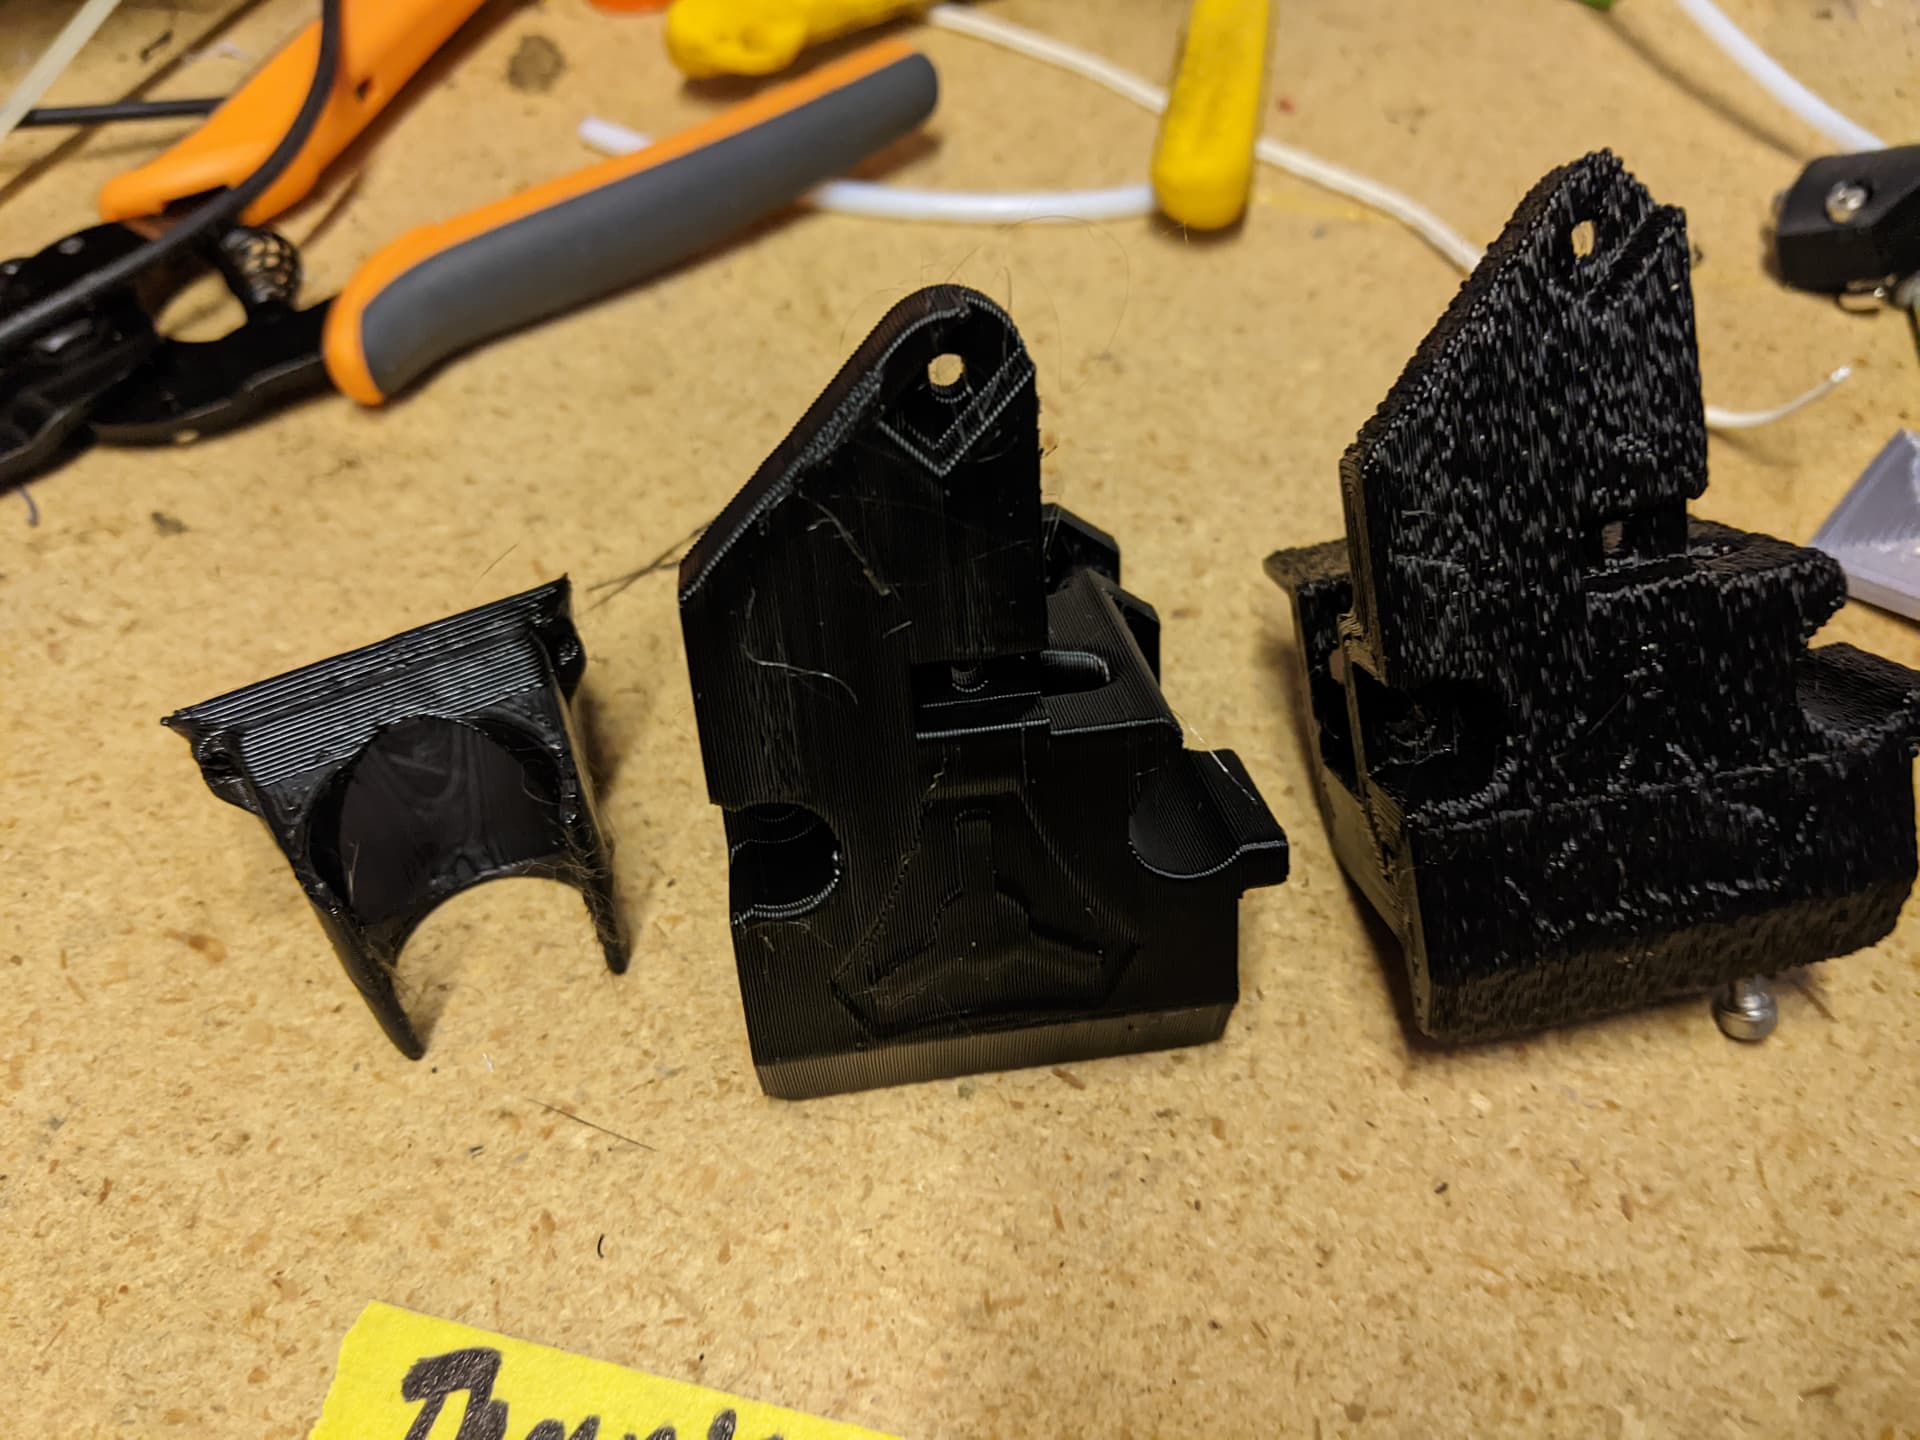
I was afraid of that lean being real. In running a large perimeter skirt, the belt on the left motor pulley stays pretty much centered. The belt only rides up on that pulley.
In the time I slowly built my v4, my neighbor built a voron 2.4 (in like a week) and he ABS printed all the black and orange parts for the v4 as a way to test and tune his build. Many of them he printed twice. It is possible some may be off a bit. I can probably get him to print another and taking that part off would make it easy to clean and regrease the x trolley/carriage part.
Might not be a bad idea. That lean cant be good. And printed on a brand new build in the testing phase it makes sense why it could be off. Are your prints good? if so might just print it yourself lol
I was just thinking that. I guess I could print it out of PETG, but I’ve never printed ABS and don’t have it set up to do that yet… but hopefully soon.
My V4 is printing ASA right now. FINALLY got it dialed in and sticking real nice thanks to Ryan’s help. Its possible. And no heated chamber, but I do have it in a soft enclosure to keep the drafts off of it.
I have 2 of the 4 sides paneled and there is no heater vent in my basement cave where the printer sits, but it is cold down there… wonder if it could print ASA or it’d need an “amazon” enclosure that @jeffeb3 talks about making.
I may try the PETG because I have that in black… I bet you know how much I’m looking forward to putting the belts back on the trolley.
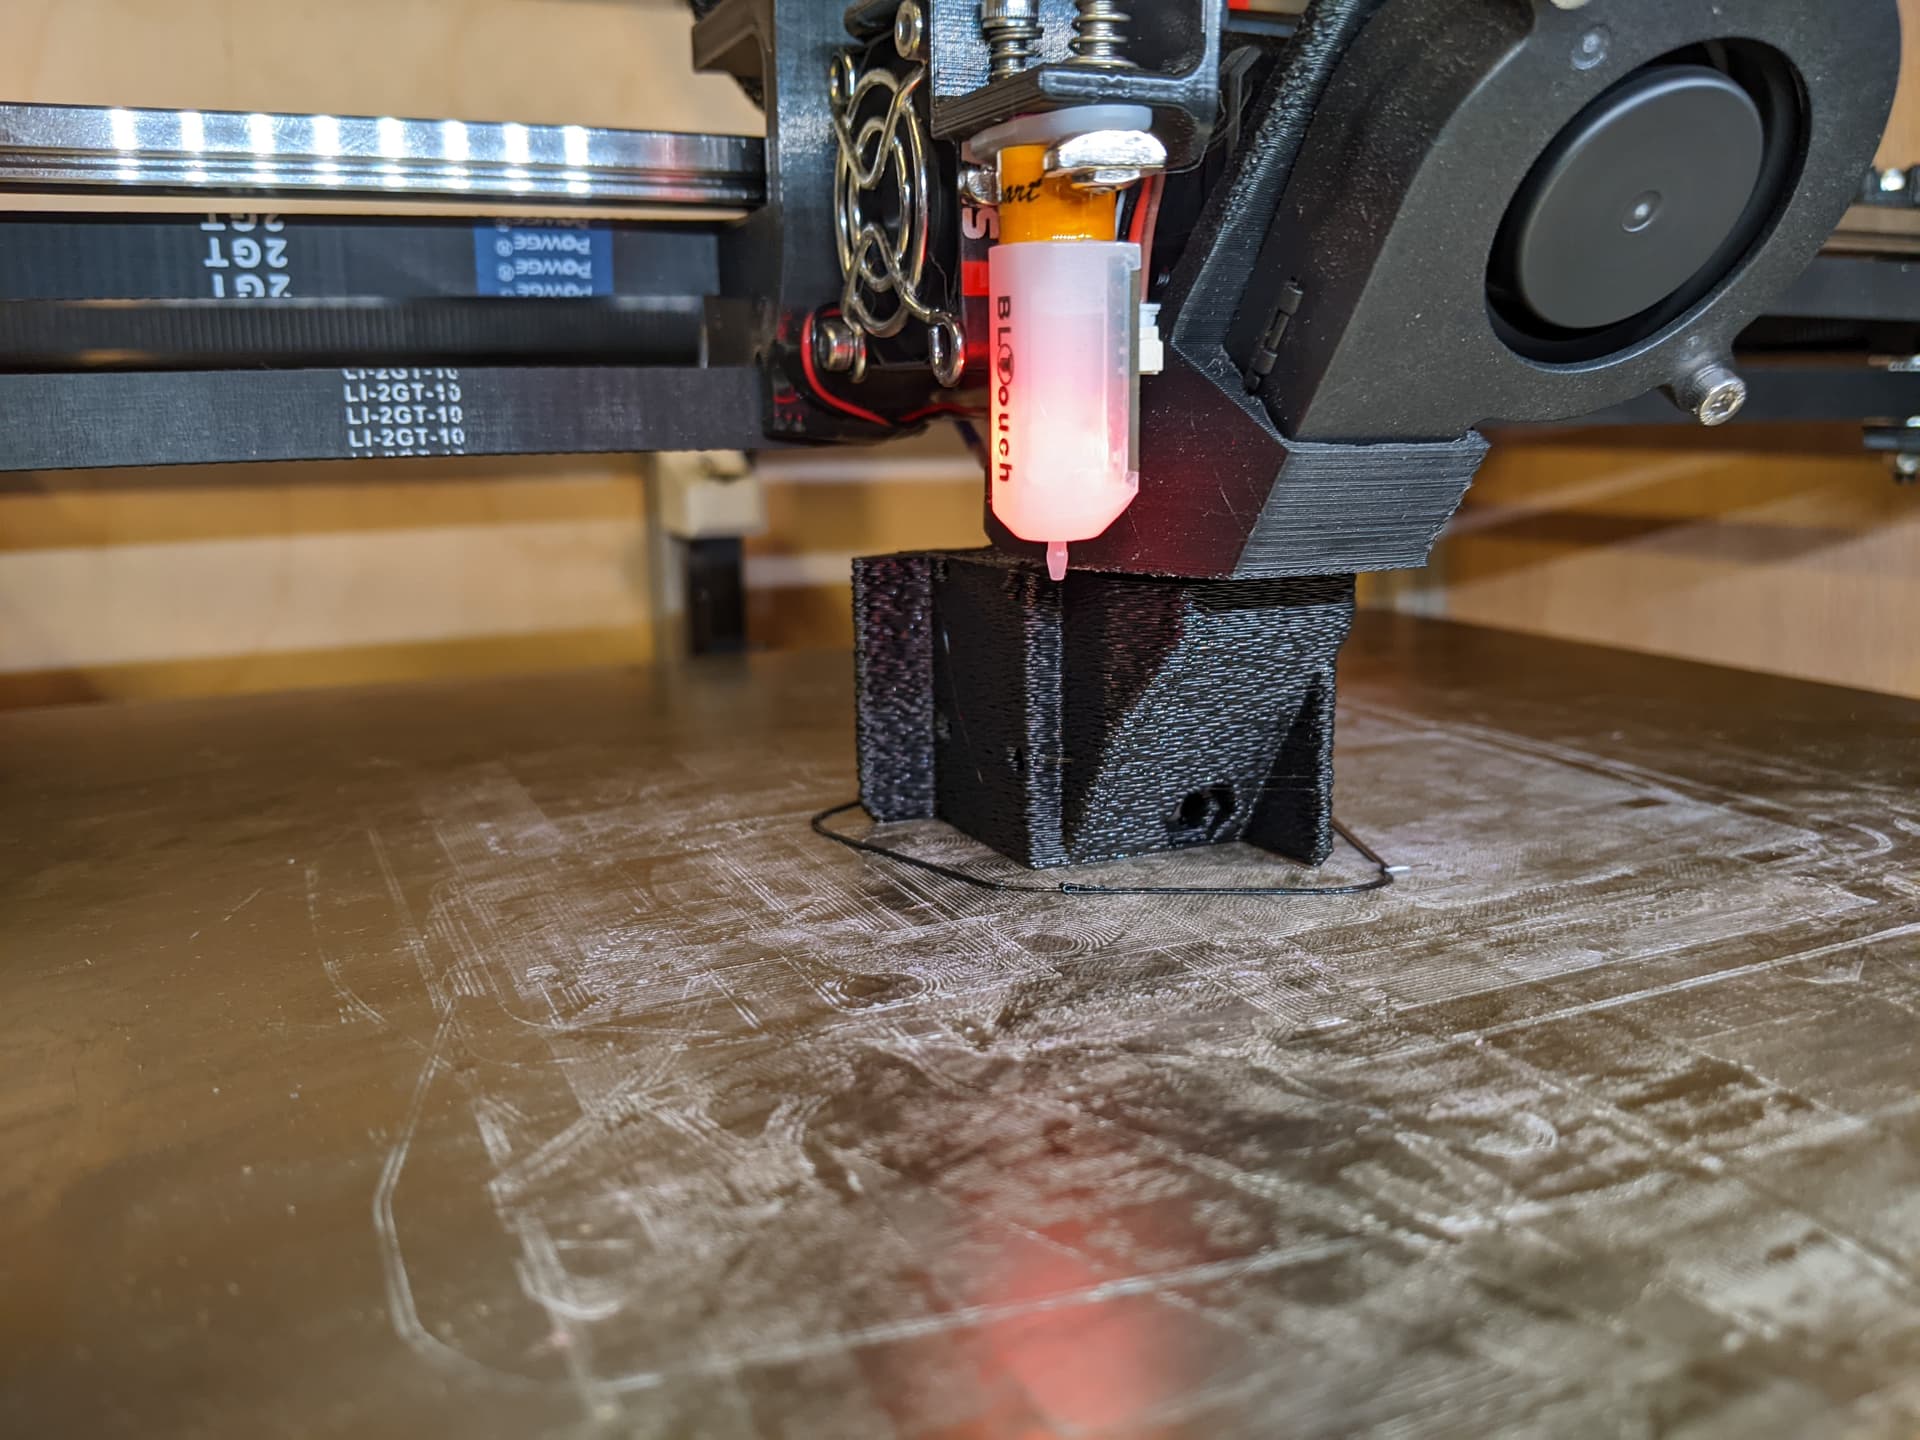
I was starting to think I was going to need to heat it because I was having adhesion issues. But Ryan suggested adding a brim, bam that solved it all. not a single lift since then and not even using glue stick anymore.
I spent all this time getting the base layer dialed in and then switched filaments and it is different. I think I’m going to try the PET and reprint that part…
Klipper has a bed offset available on the touch screen built in, but when I tried useing it, it jacked up the offset royally and crashed the next time it tried to go to 0 on z… Haven’t really dug into that one. It seems crazy to print a layer, change the z_offset (in printer.cfg), save and crash the bed, reboot board, rehome, retilt, and then reprint only to do it again - and to think I was getting impatient with the delta printer waiting for it to go up and down each time I reset the z offset…
One thing to check is your accels on Z. I had that problem after I upped the Accels on XY. I didnt realize I was upping it on everything. Z lost steps and messed up my first layer bad. First reaction was to mess with Z offset. Then I started the print over and I heard it and knew. Had to go in and add a line for separate Z acceleration.
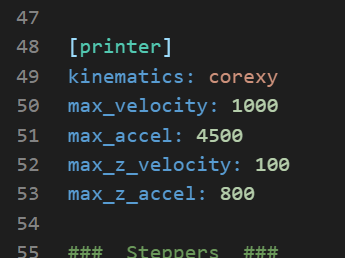
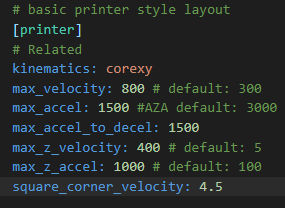
this was what I had. Max z_accel was 100 though and that was wrong. I did a tuning test and there is progressively worse ghosting above 1500 acceleration.
I probably should start a new whole forum called basic idiot questions with orob…
so I need to replace the left X rail holder, but I can’t get behind the rail to get the last screw on the y rail trolley/carriage/ whatever it is called. See printed item above to see what needs to be installed.
Status so far:
removed X rail screws on left piece: rail won’t come out - fits loose enough to move a little, but tight enough it won’t come out
removed 3 of 4 y trolley screws, cant reach 4th with rail in the way
Removed X rail screws on right piece for more movement: rail still won’t come out
The idiot question: Is removing the Y rails required to get the Y carriage off the left side?
Not at all an idiot question. From what I remember putting mine together the second time and I have the CAD pulled up right now. If you have all 4 screws out of the X rail you should be able to bring one Y carriage forward and the other one back and get the X rail to pivot out of the carriages on both sides. Hopefully that makes some kind of sense lol. I want to say it was back with the right one and front with the left but I could be wrong and it might not even matter. But I do remember having to go opposite directions with them