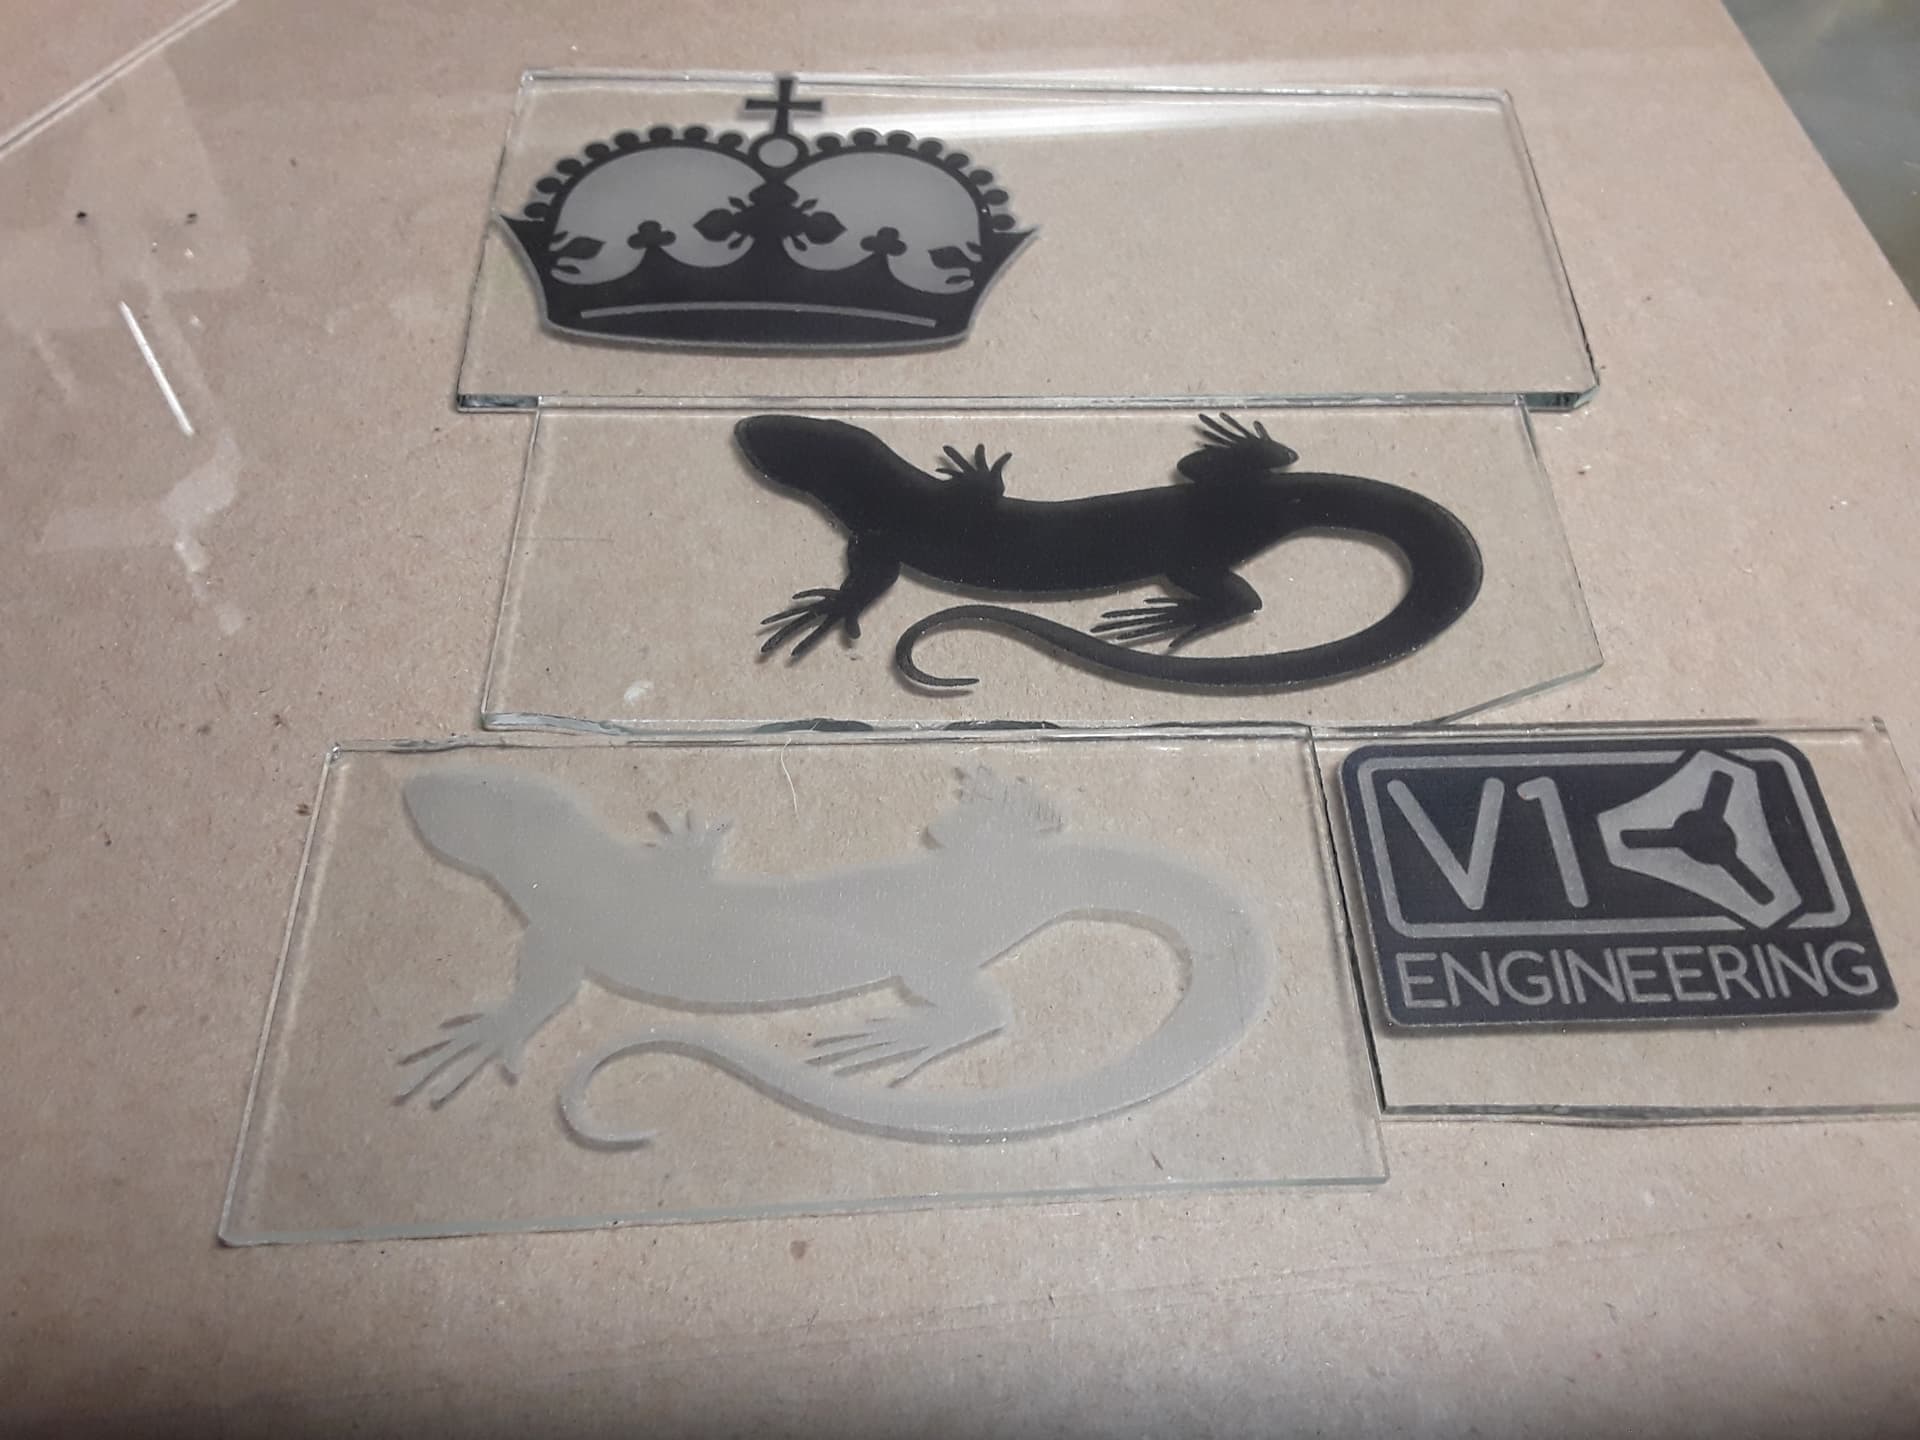
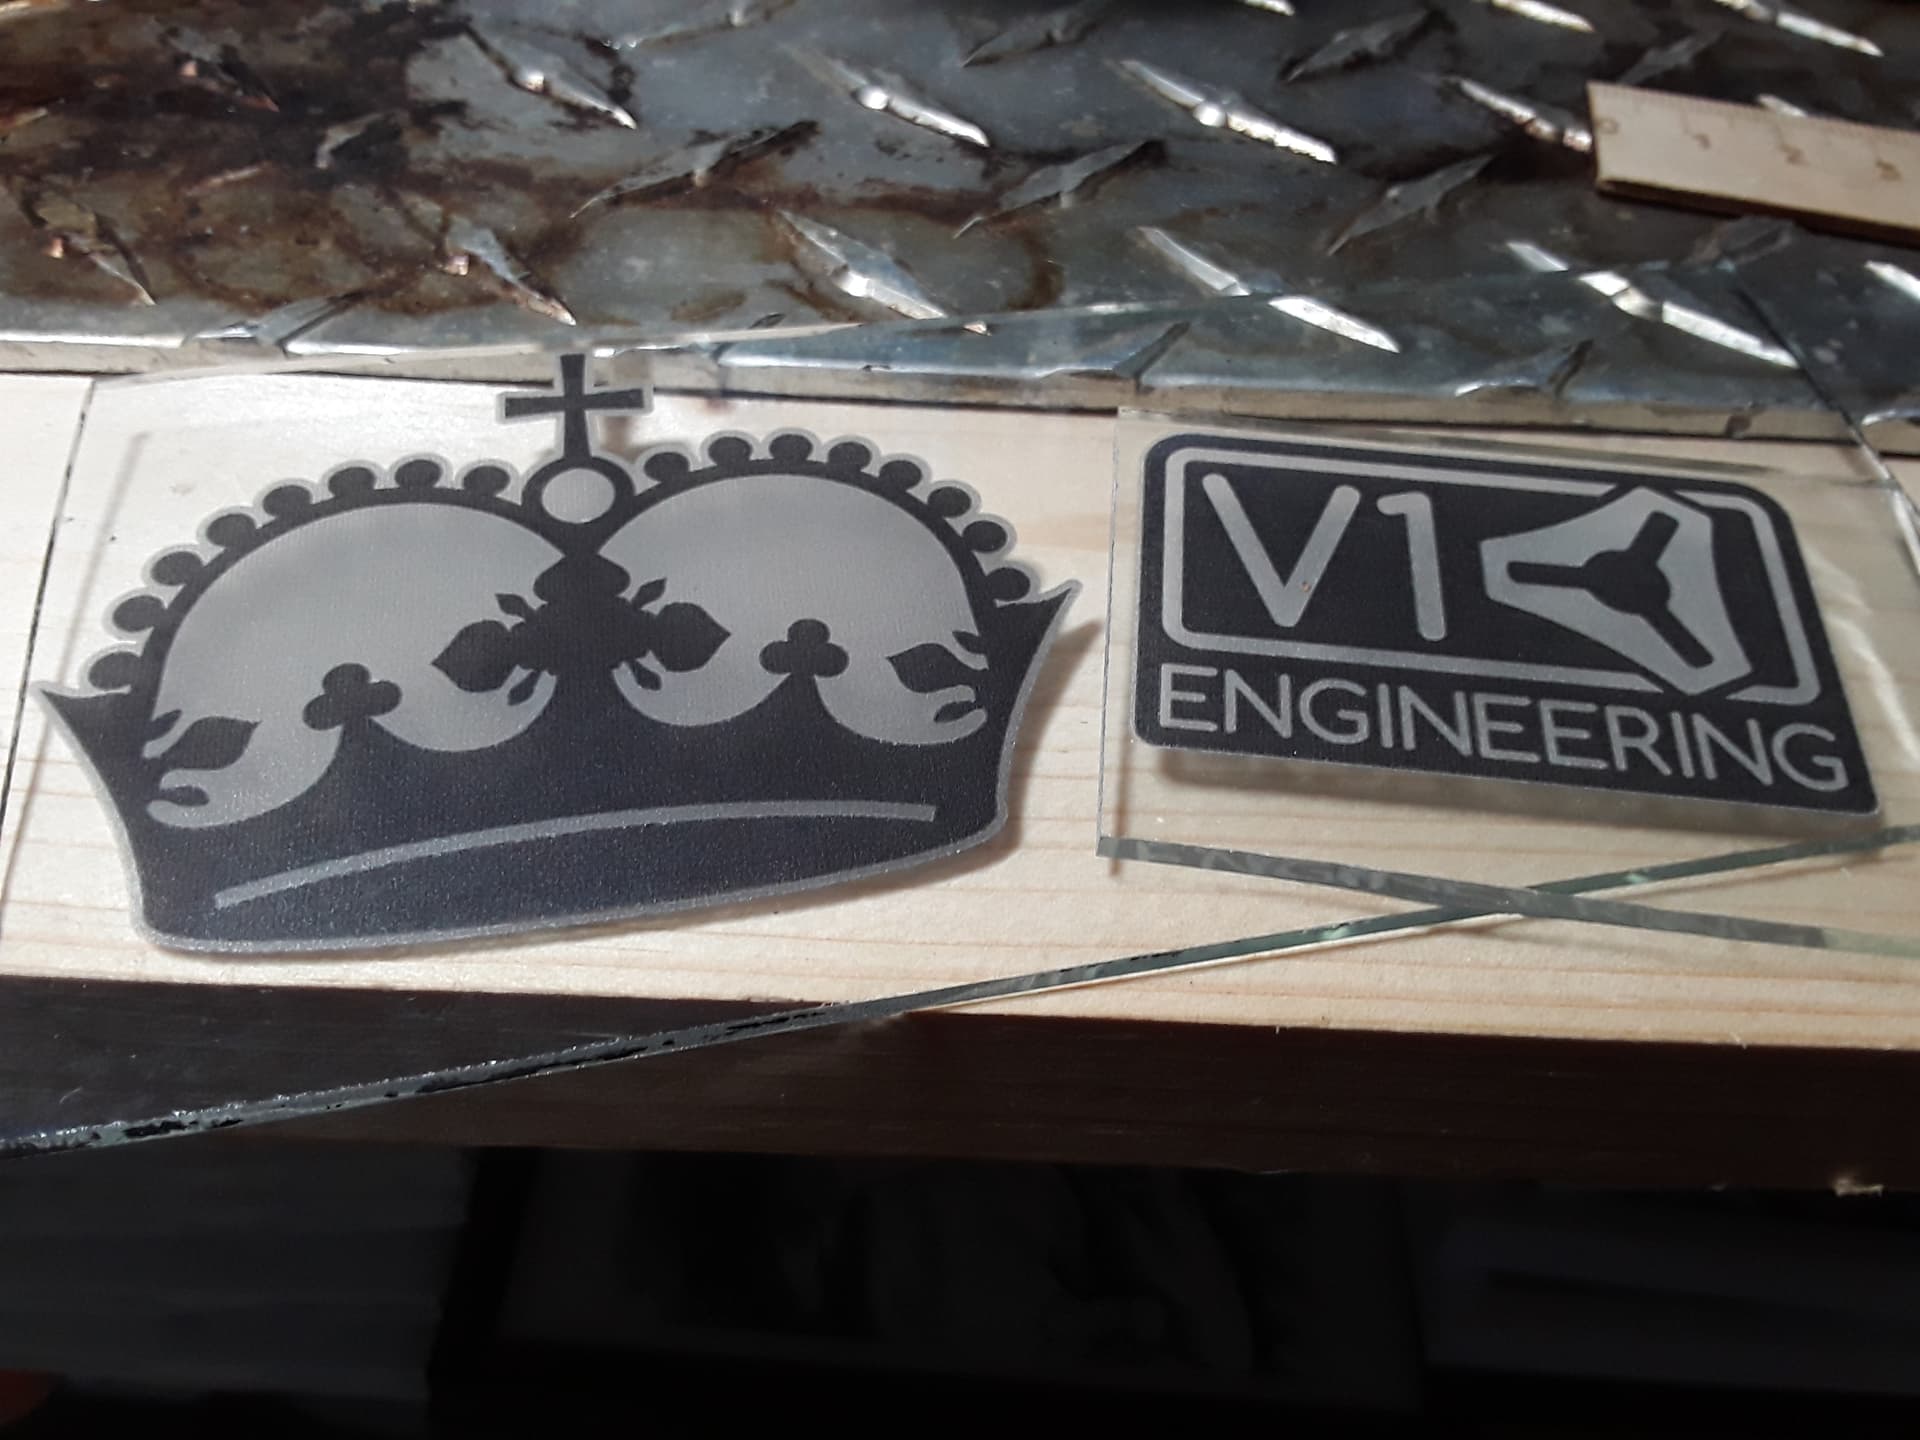
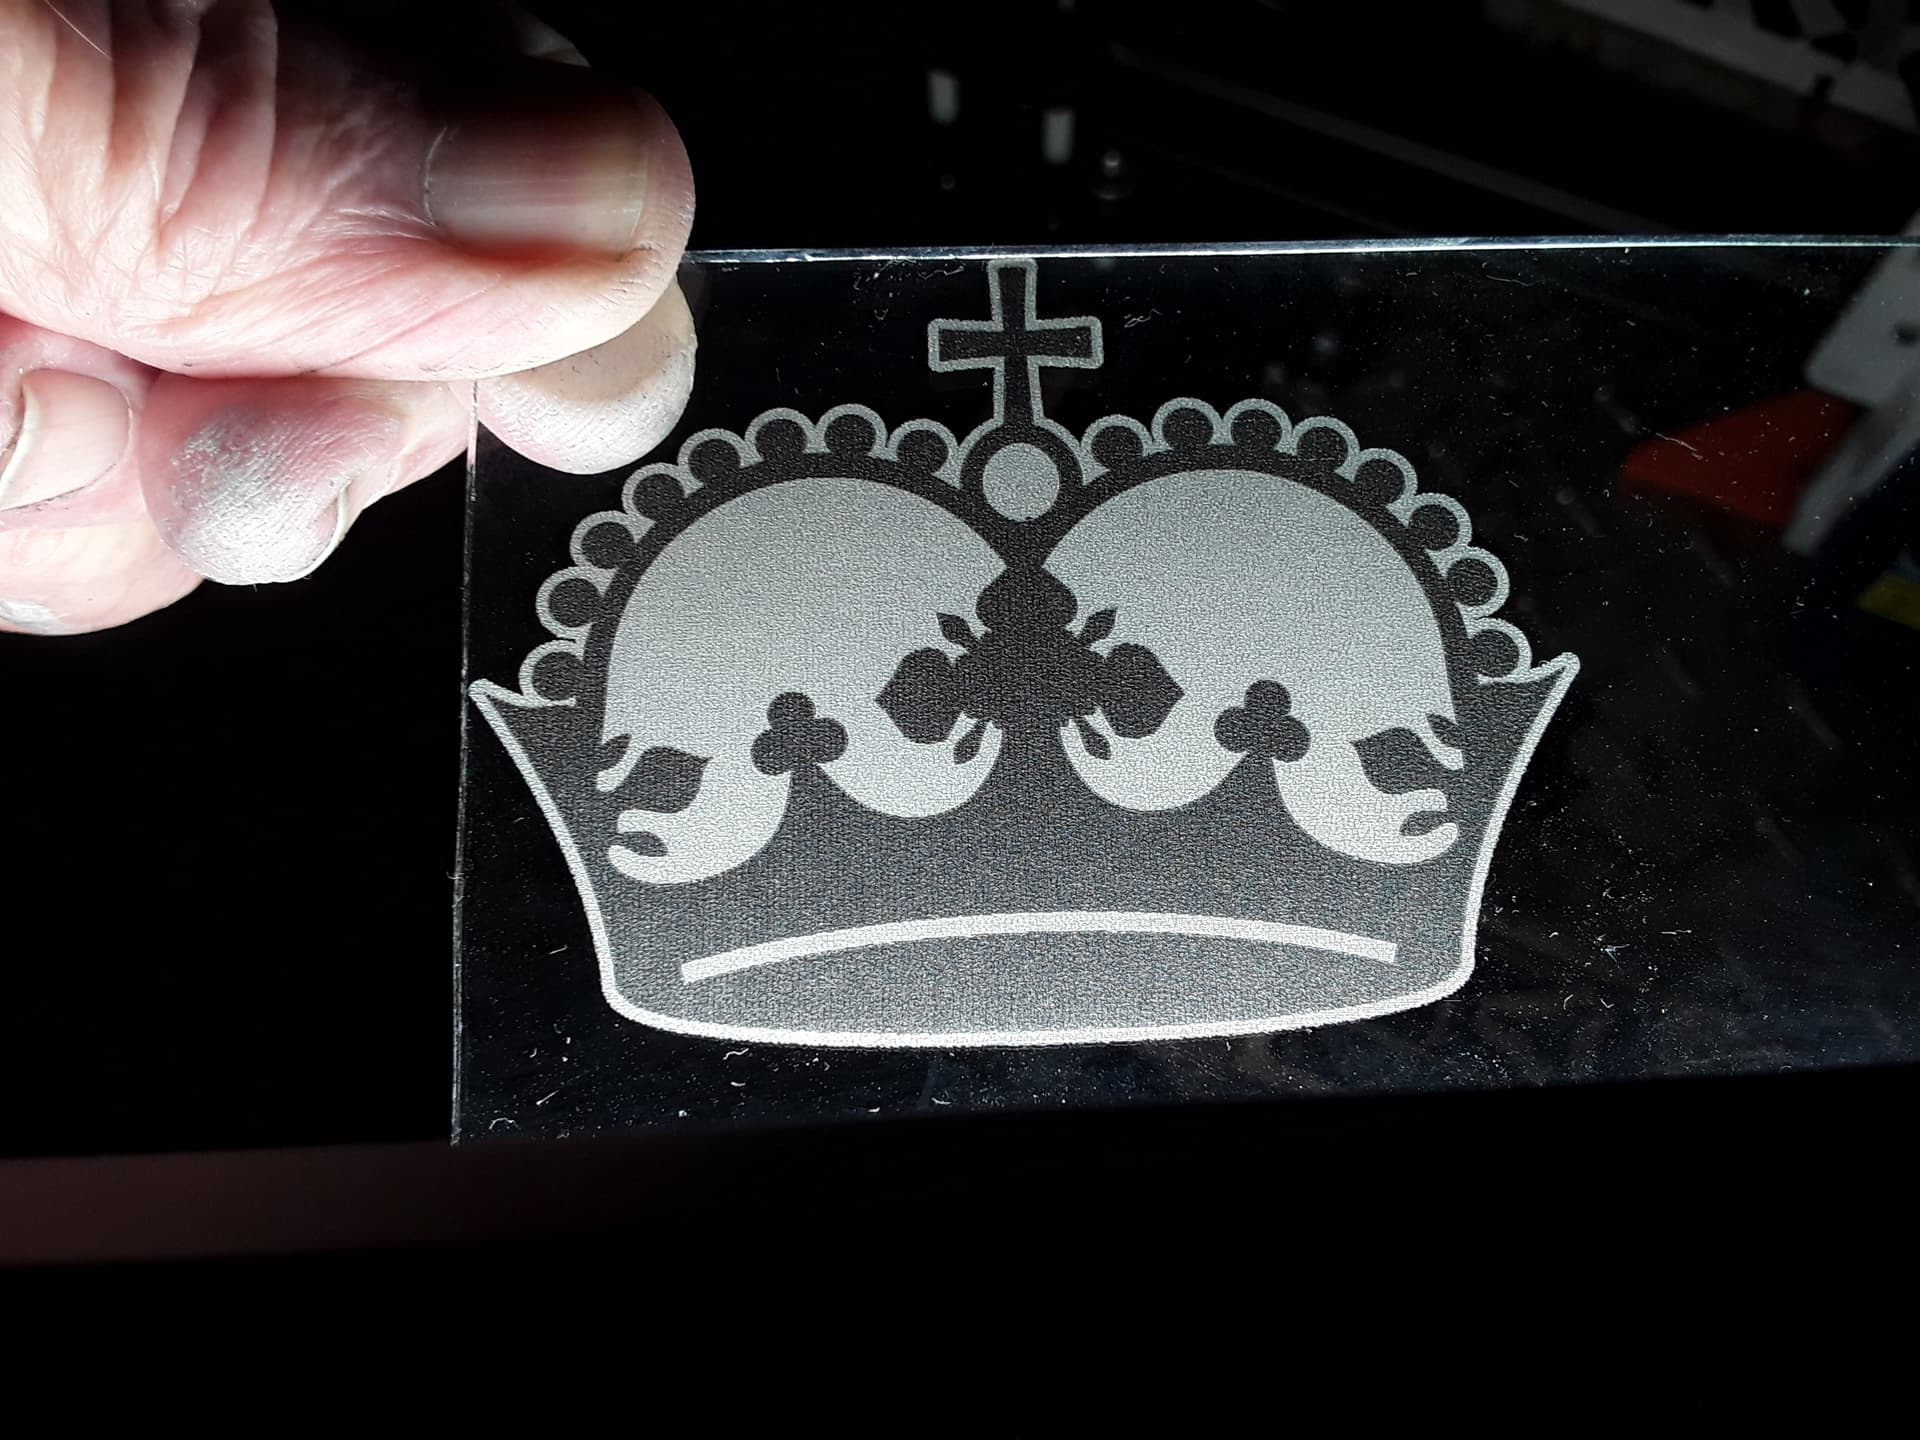
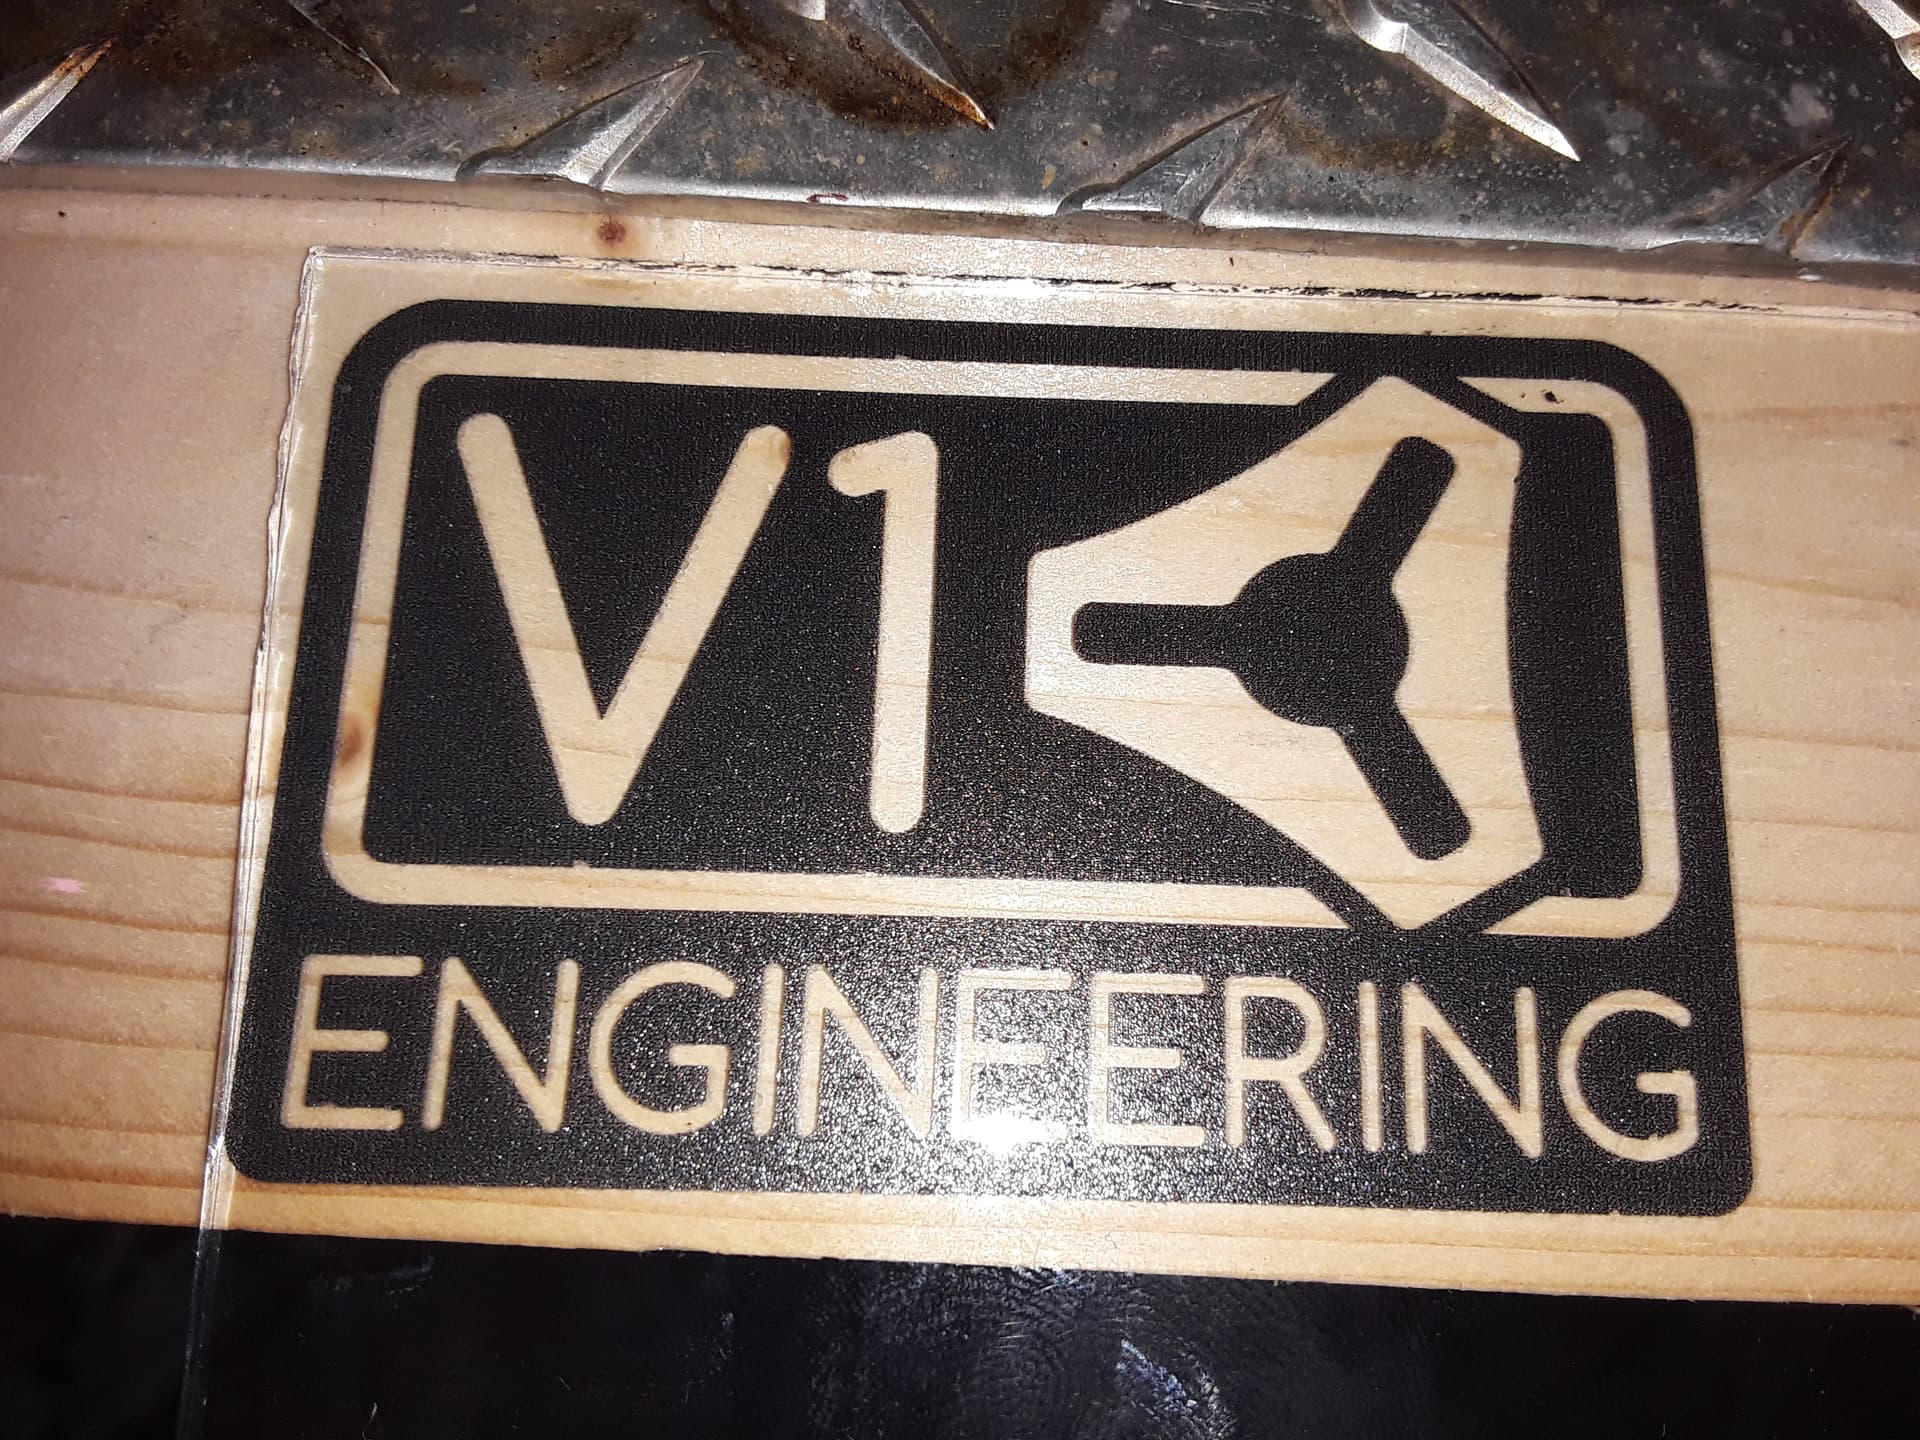
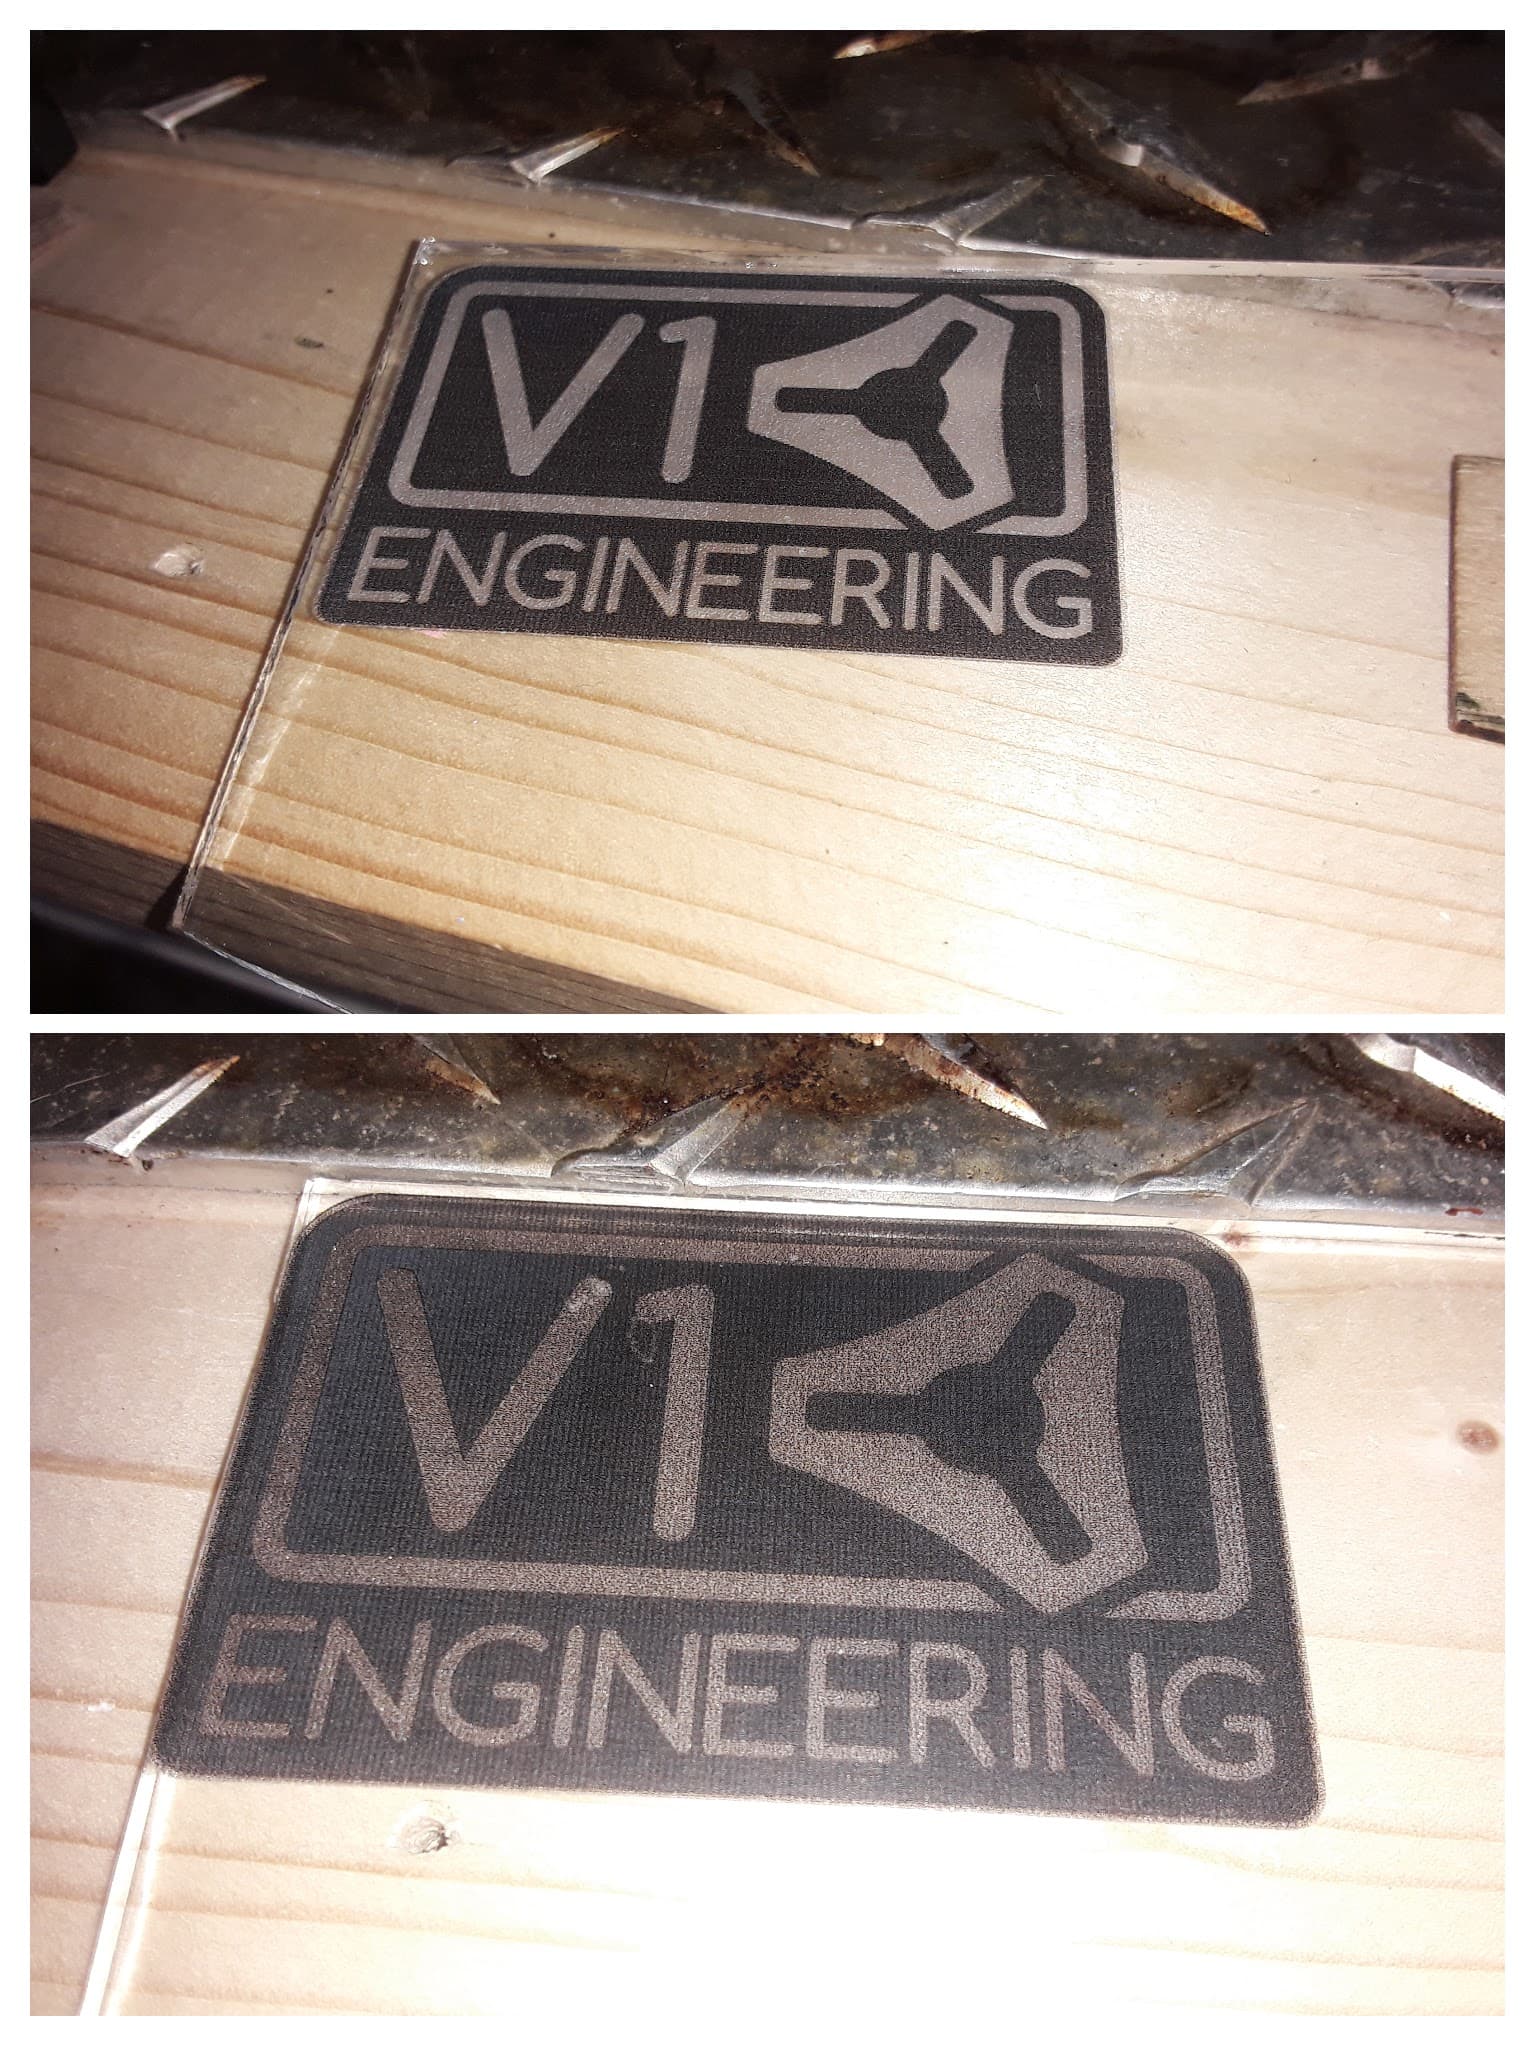
I heard somewhere that this crazy V1 outfit has some weird obsession with a crown… go figure. From what I can tell, it’s some kind of “rite of passage”… like maybe they won’t let you hang out with them in their silly forum… or, maybe they won’t believe you just saying that you’ve built the greatest/bestest machine ever. And some silly mantra about “no pics or it didn’t happen”, or somesuch.
So rather than fight it…
Black painted and lasered for the lighter, frosted areas…
Ok my next question is, “Does it work with grey scale?”
Essentially, what happens if you did a picture where there are shades of grey so the laser would hit the same spot with black and then later white paint?
Or do you need to make the image a black and white image only?
TBH I don’t do much grayscale… it’s too time-consuming IMHO to figure the max/min power for the range of grayshades for a given picture on a given material with a given laser.
Dithering an image seems far easier and approximates the shading well enough for the less-than-photo-perfect images I get on odd or organic materials. This image is the exact same NWT process above but using just the flat-white paint step… turns out black & white, with many shades of gray…
Can you put white on top of black or black on top of white? Your alignment is very good but I would think dithering would demand extreme alignment accuracy. If you can do one on top of the other, then alignment between the two processes is a non-issue.
I would think you would want white (from black paint) underneath, followed by black (from TiO2 paint) image on top. If black is underneath then the white might not show so well.
Jamie, I’m using Lightburn to create 2 complementary (opposite blacks/whites) gcode files from just one image… so , in the gcode, “registration” and the origin is the same in both files. And, because they are complementary, each file and process step is only acting on “virgin” glass and doesn’t effect glass previously etched. All that remains then, is to insure mechanical registration is as good as I can make it; i.e. top edge against the square and top-right corner against mechanical stop… and make sure not to bump the laser out of position.
Before realizing I had to have complementary files, I tried “positive/negative” image files, and managed to put “black over white” on one test. The result is a “textured black”…
I haven’t tried “white over black” yet, though I have thought about it. I’ve wondered if I might skip a paint step by putting down a solid black background (a blackened “fused”/smooth surface) normally… and then try to “ablate away” the white foreground image. It is a test I want to try…
I suspect it’s because the ablated material comes from the raised solid background layer rather than the glass body proper underneath, as it does with two-step, paint-on, processing.
Image (bottom) also seems “dimmer”/“duller” than one done normally (top)…
A bit surprised that it worked at all, this doesn’t really yield as nice a result IMO. Though the initial solid black background might have been better and “blacker”, the final image just doesn’t seem as bright and sharp to my eyes. And this would be a “show-stopper”, I suspect, for those who are looking to edge-light the image.
There are probably lots more things that could be done to test this process but I’m pretty satisfied I know why I’m seeing what I’m seeing. So I will probably do further tests only if the “spirit” moves me… the rest, I’ll leave as “an exercise for the reader”…
I’d never thought of that. I agree it’s not as crisp of a final result but I don’t see it as a total loss. Just another option to know about in case that’s what someone wanted.
Thanks for testing all this! It’s really cool to see what you’re coming up with!
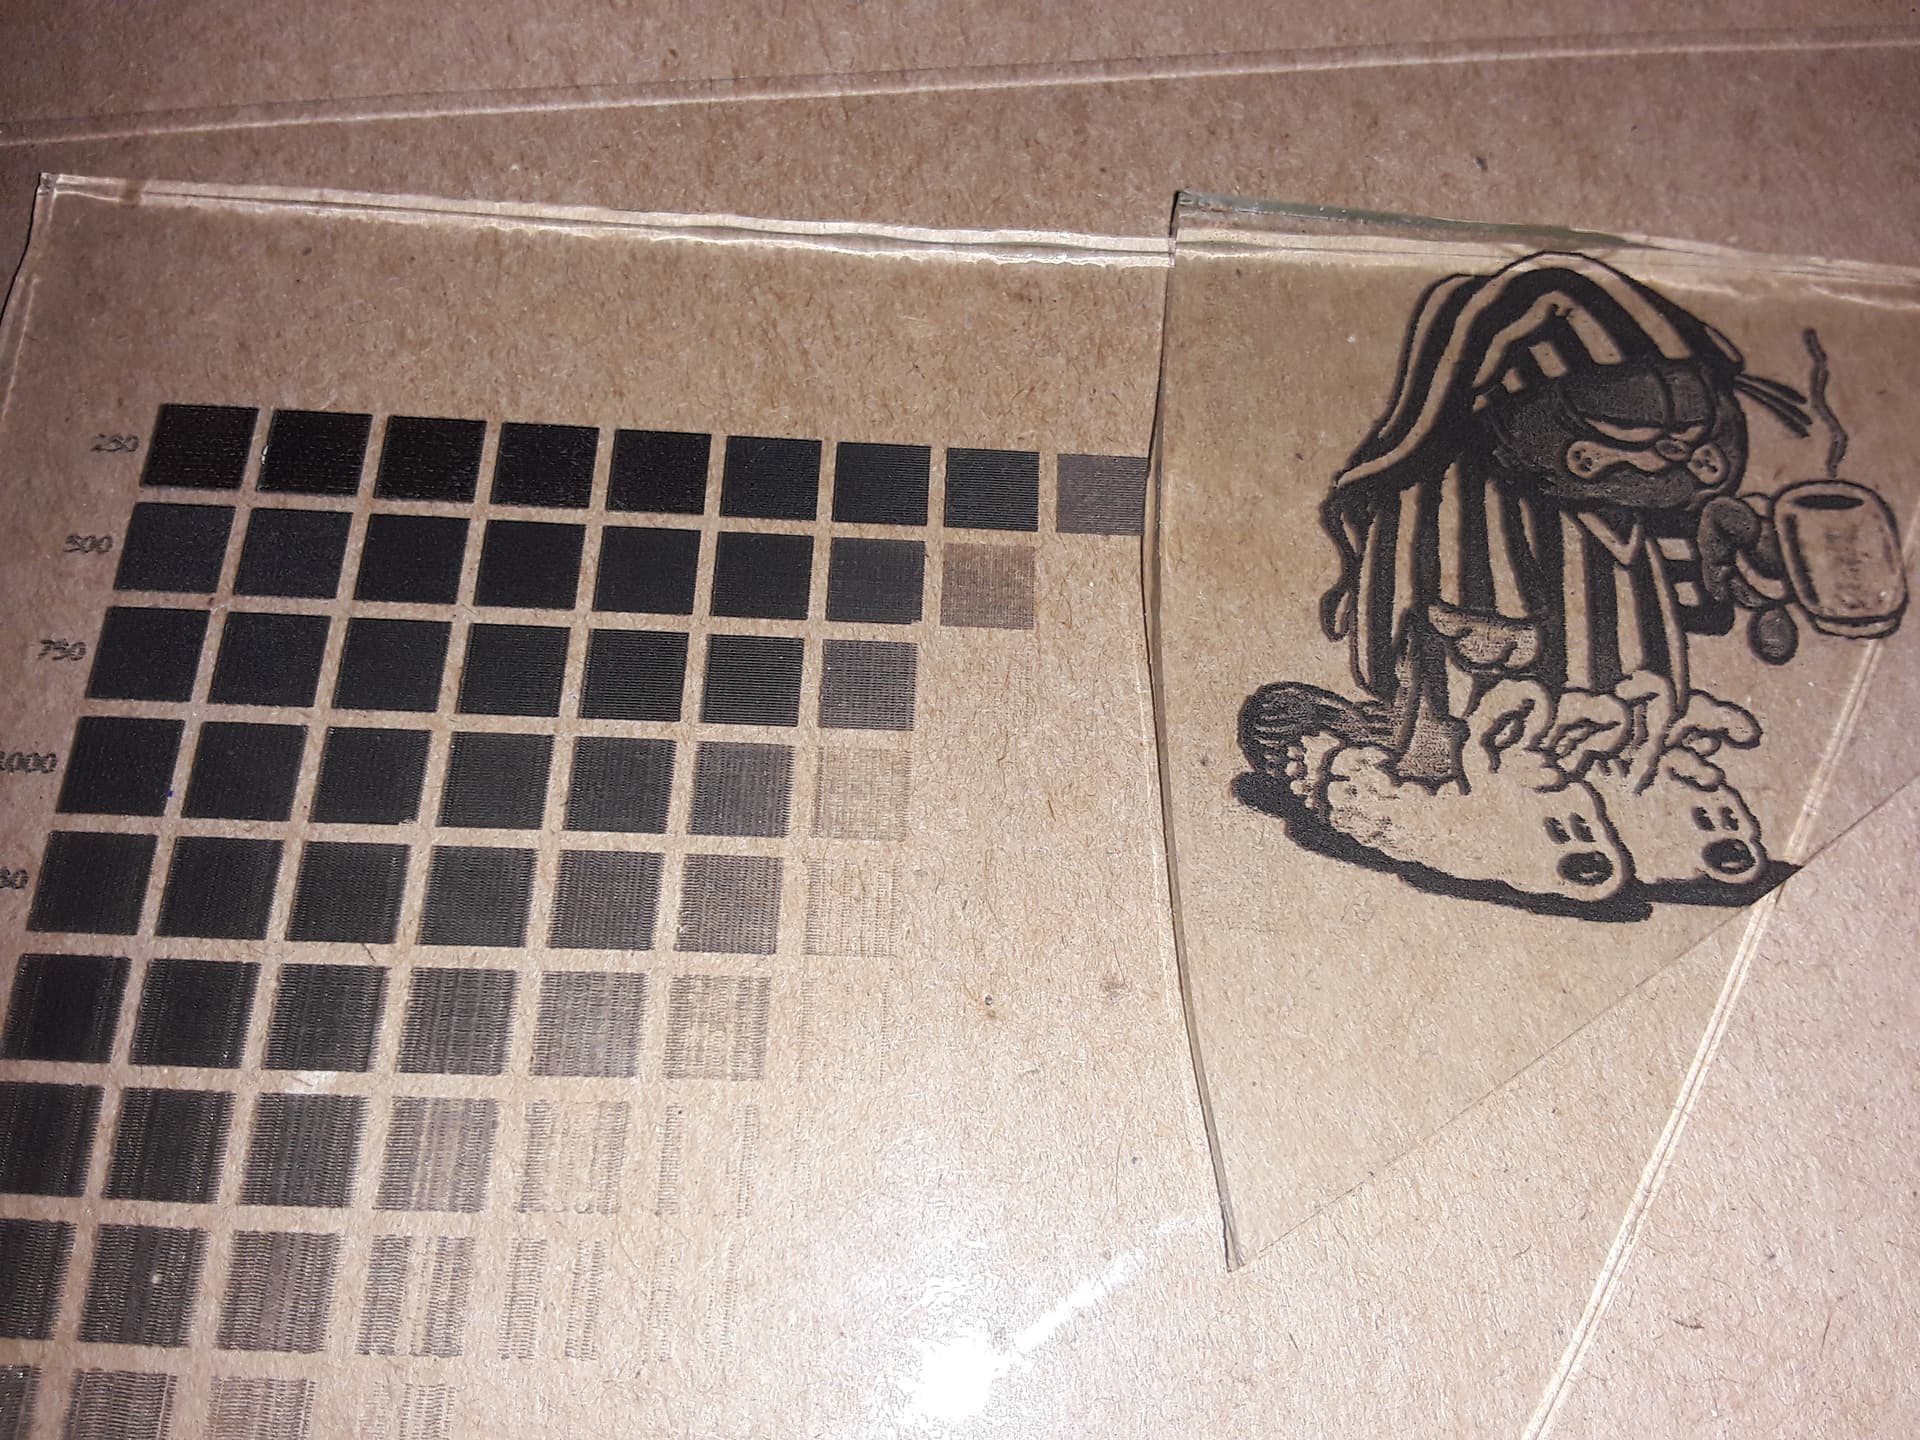
Yes, Tim. For my little 2.3W laser, I’ve been using 1000 mm/min, 90% power, 339 dpi, and Jarvis dither for almost everything on glass. I up the speed to 1500 mm/min for ceramic tile… all else the same.
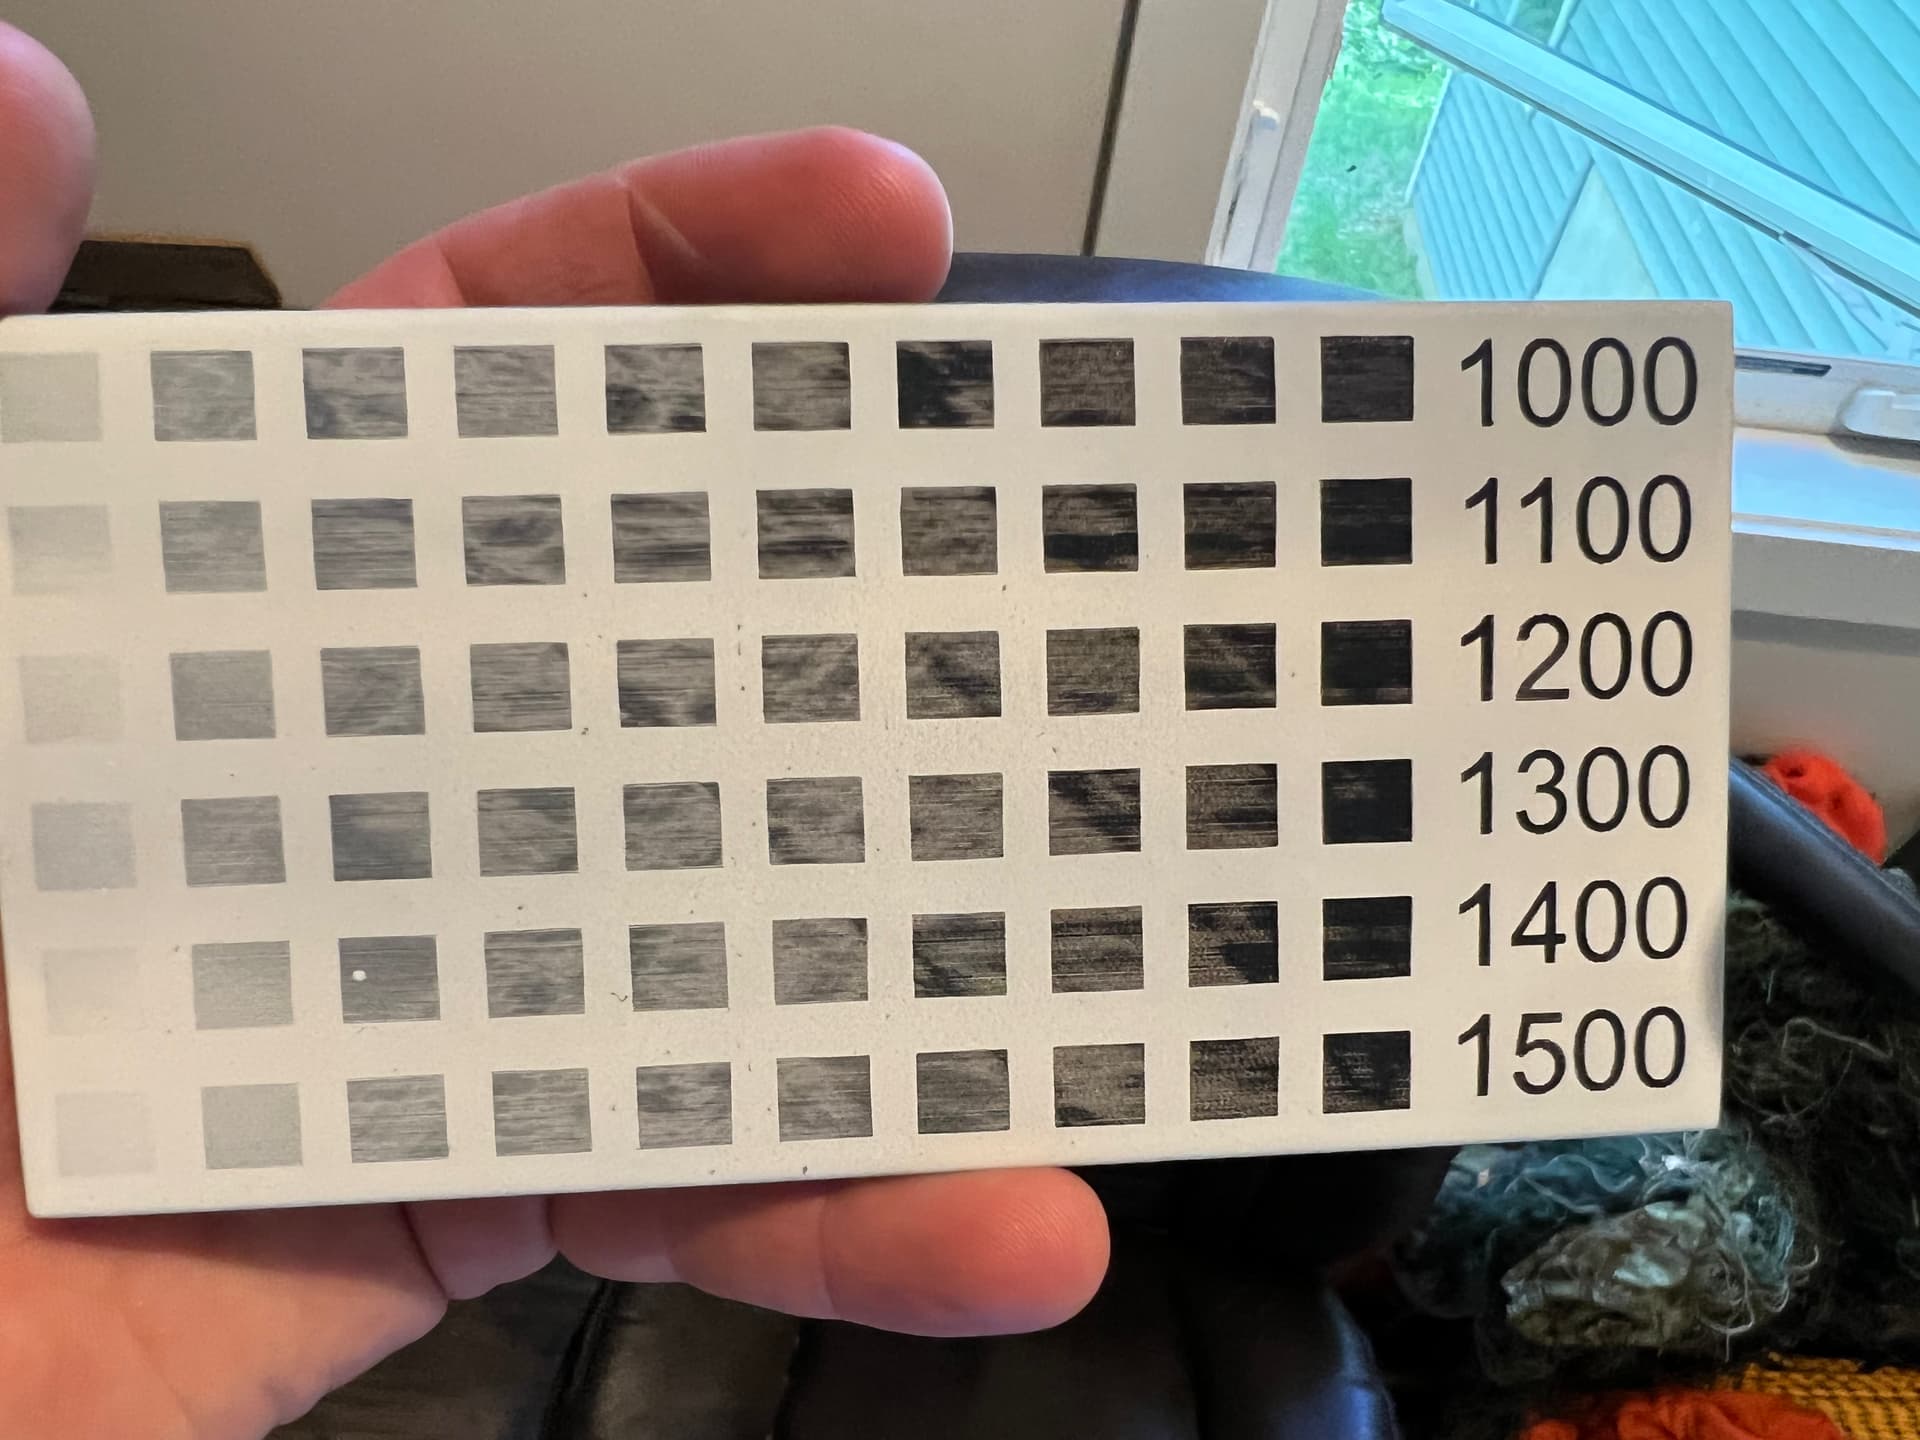
I think I’m looking at frosted glass with painted blue back? Then you painted with flat-white paint and lasered a speed/power matrix, ranging 1000-1500 mm/min and 10-100% power.
If so, it does make sense, I think. Consider this tile, painted flat white, lasered with a matrix, and then cleaned…
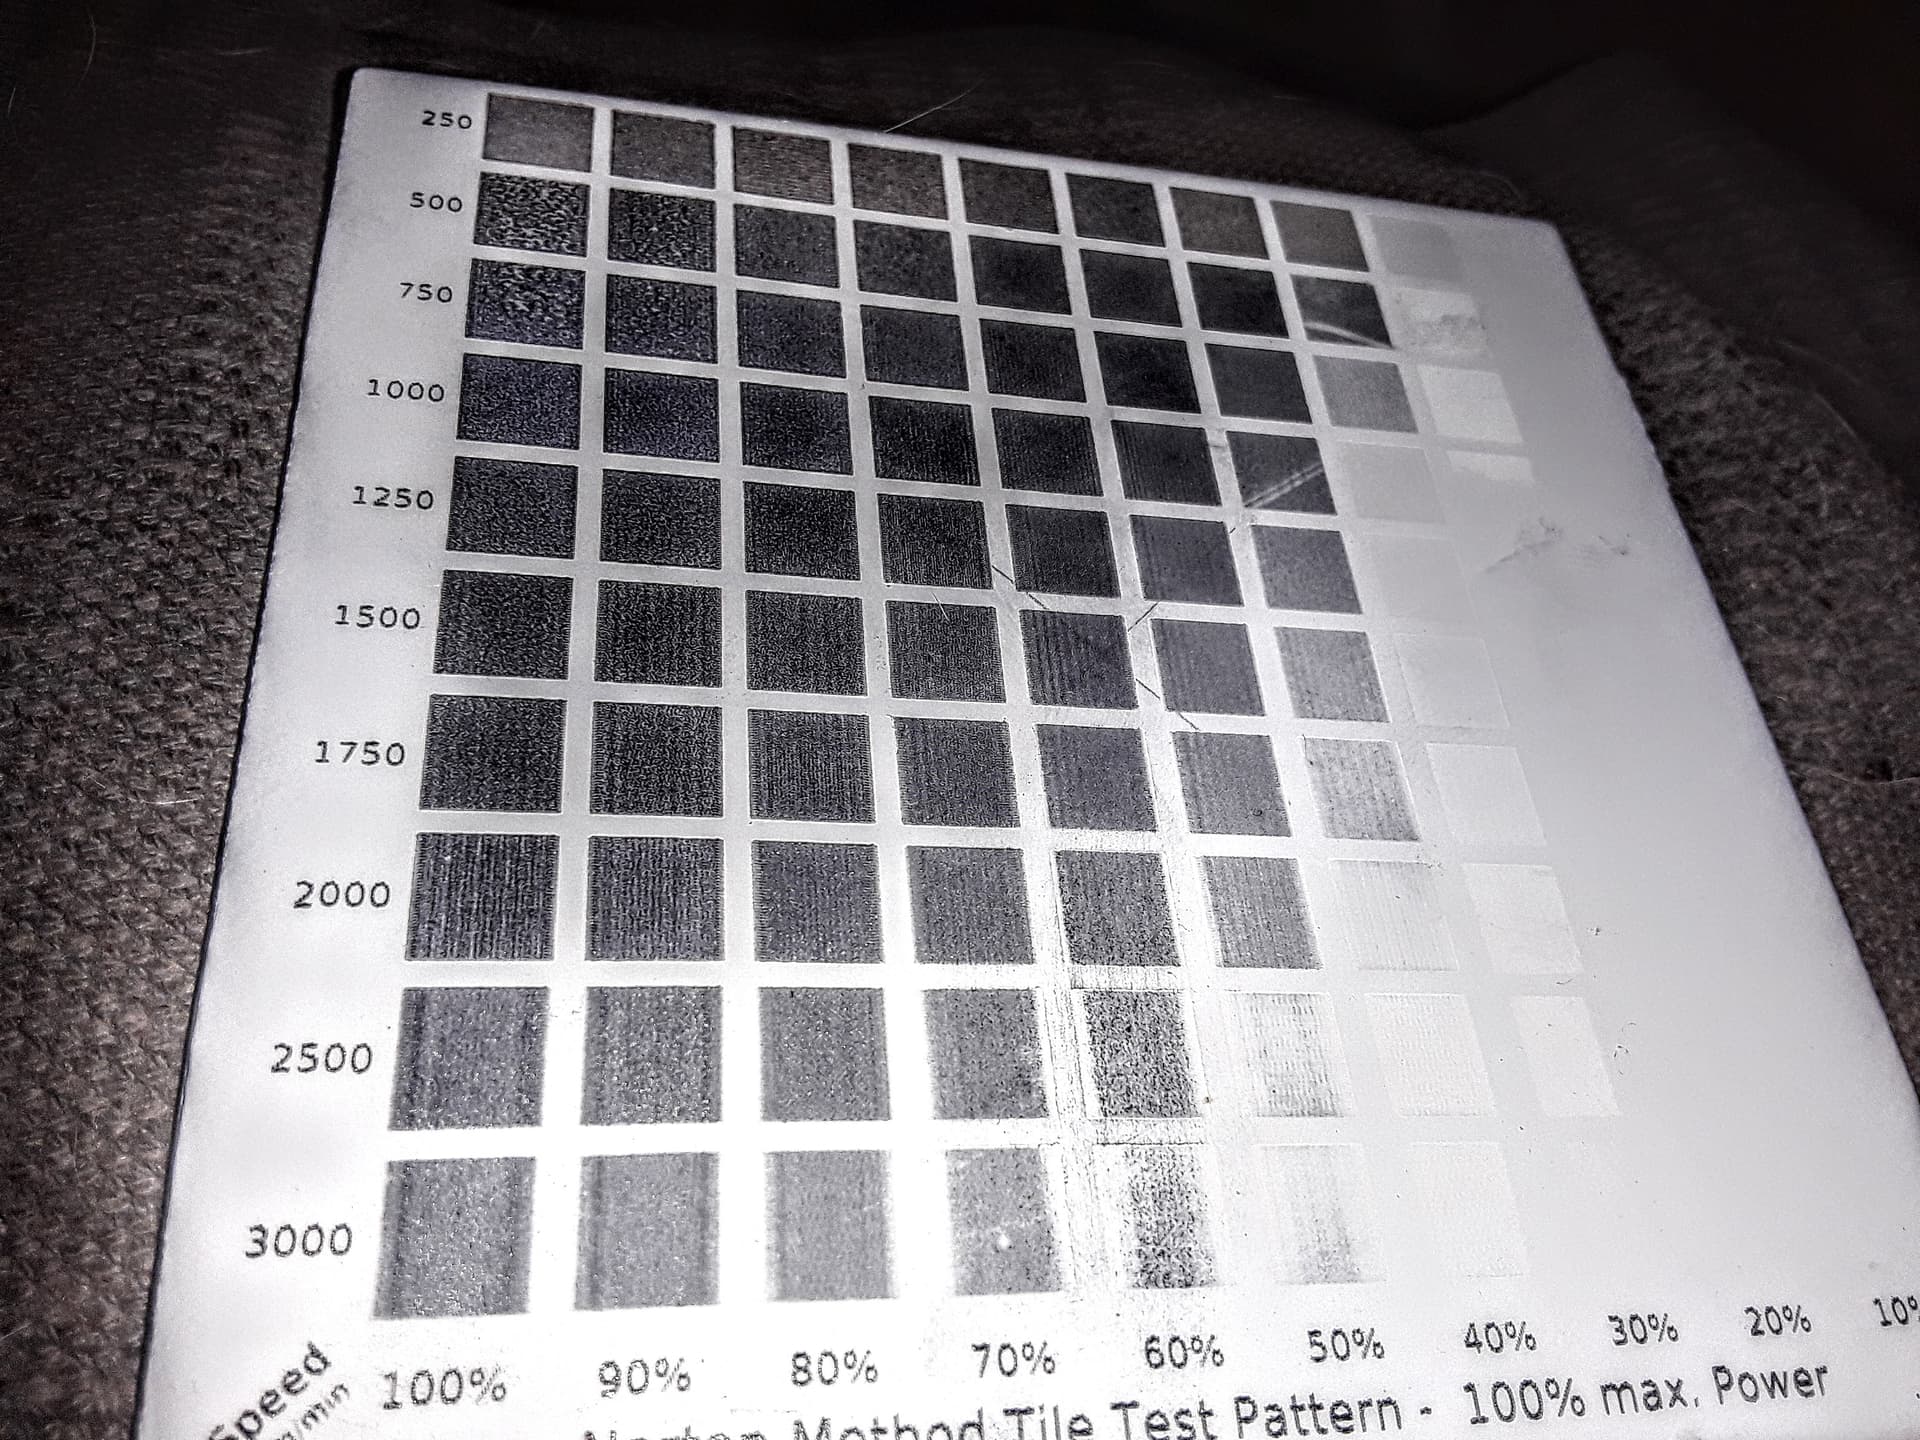
Flipped left to right to match the speed range of your matrix, and ignoring the absolute speed range (different lasers), the darker blocks are generally toward the higher-power range and the lighter blocks are in the lower power range. Also, oddly, there are some blocks in the lower power range that appear to simply be ablated, i.e. the glaze has been blasted away, leaving raw ceramic exposed. No real patterns here… but note there is a pretty extreme sensitivity to the power and speed used in closely-spaced blocks, especially near the lower-power end of the matrix.
Normally, this is not a big deal, if you are simply looking for the best and blackest black [remember, we’ve used flat-white paint (with TiO2) to get black] to use with dithered images. On this tile and with this laser, I’d pick maybe 1250-1500 mm/min and 90-100% power… and the rest of the matrix is of no interest; i.e. I was just looking for blackest black.
On your test piece and given the paint/laser/range you’ve used, I’d suspect you might pick 1200-1300 mm/min and 100% power to put the blackest dithered images on your frosted glass… and ignore all the other settings; i.e. your test piece has served its purpose. OTOH if you are looking for lighter images against the blue background I would use flat-black paint.
Note also, this might well explain why it’s near impossible to get a good grayscale image… there’s not a single speed line/row where a linear change in power results in a nice gradient from white to black.
I could be wrong but that’s the way I would interpret what your are seeing…
I’m going to put the next couple of posts here (where I’m “home”… ), copied from another forum thread, to preserve and consolidate information regarding my use of the NWT method and it’s “expansion” from ceramic tile to glass.
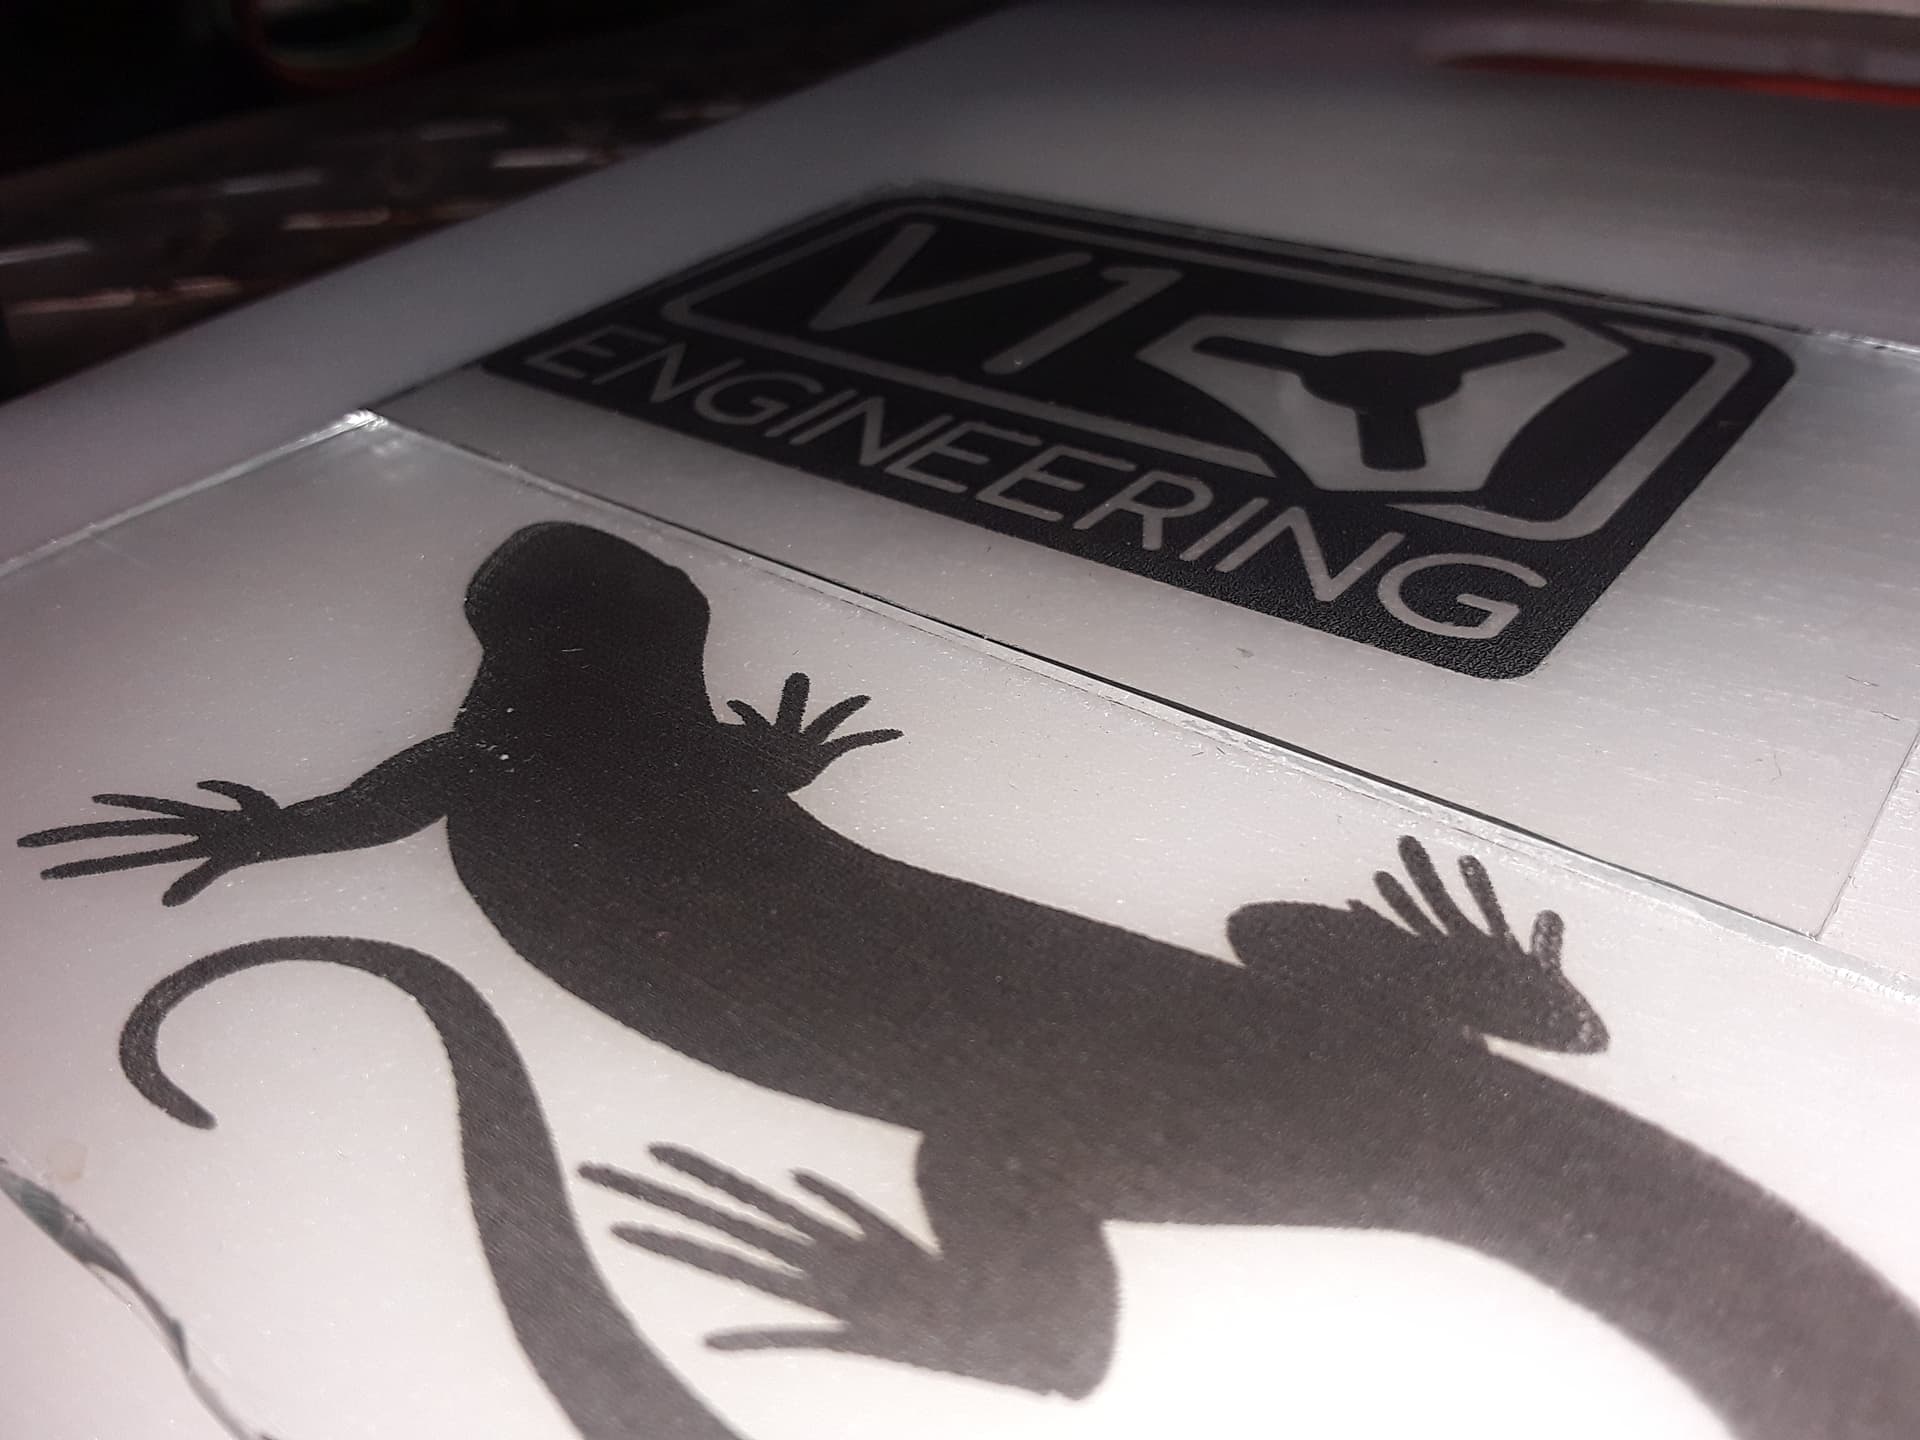
Transitioning to transparent glass was pretty painless once I had ceramic tile down… maybe just luck, I simply slowed down a bit to 1000 mm/min (from 1500 mm/min). Here, I’ve demonstrated the use of different paint/methods to get either black or white/frosted images… or even a combination of both. It actually worked quite nicely…
These pieces of glass are scraps from broken window panes taken from my great-grandmother’s little house from the 1940’s. No idea it’s composition… it’s just what they were using “way back when” in rural East Texas !
Questioned how I could use such “historically significant” glass for laser experiments vs something really “special”, I explained (as many of you already know) that… at nearly 76 years old and with deteriorating energy, mental acuity, and initiative, I’ve pretty much given up on ever doing nice “display quality” products. And the retired engineer in me is still far more interested in the production machines/processes themselves than what can be produced with them anyway. I live alone (daughter and family are next-door) in my grandparents’ old farmhouse and my great-grandmother’s “attached” little house has sat pretty much derelict – and target of only sporadic renovation attempts – over the past 40 years or so. It’s in pretty sad shape but the rotted window frames/sashes have been attended to enough to keep the house relatively weather-proof and water-tight. And, typical of a “farm mentality” where nothing ever truly gets “thrown away”, I don’'t have to do much digging around to find a few bits of broken glass to play with…
I finally got around to doing the power/speed matrix on transparent glass using two different lasers… left is Neje A40640 (~10W) dual-diode laser and right is my trusty Eleksmaker 2.3W unit. Both runs used the exact same gcode file and, given the power is specified in percentage, the 10W laser is putting out roughly 4X the power of the little 2.3W laser. Note the quality of the best blacks is IMO worse for the more powerful laser than for the lower-powered unit… and explains why I choose to use my little 2.3W laser for this kind of work
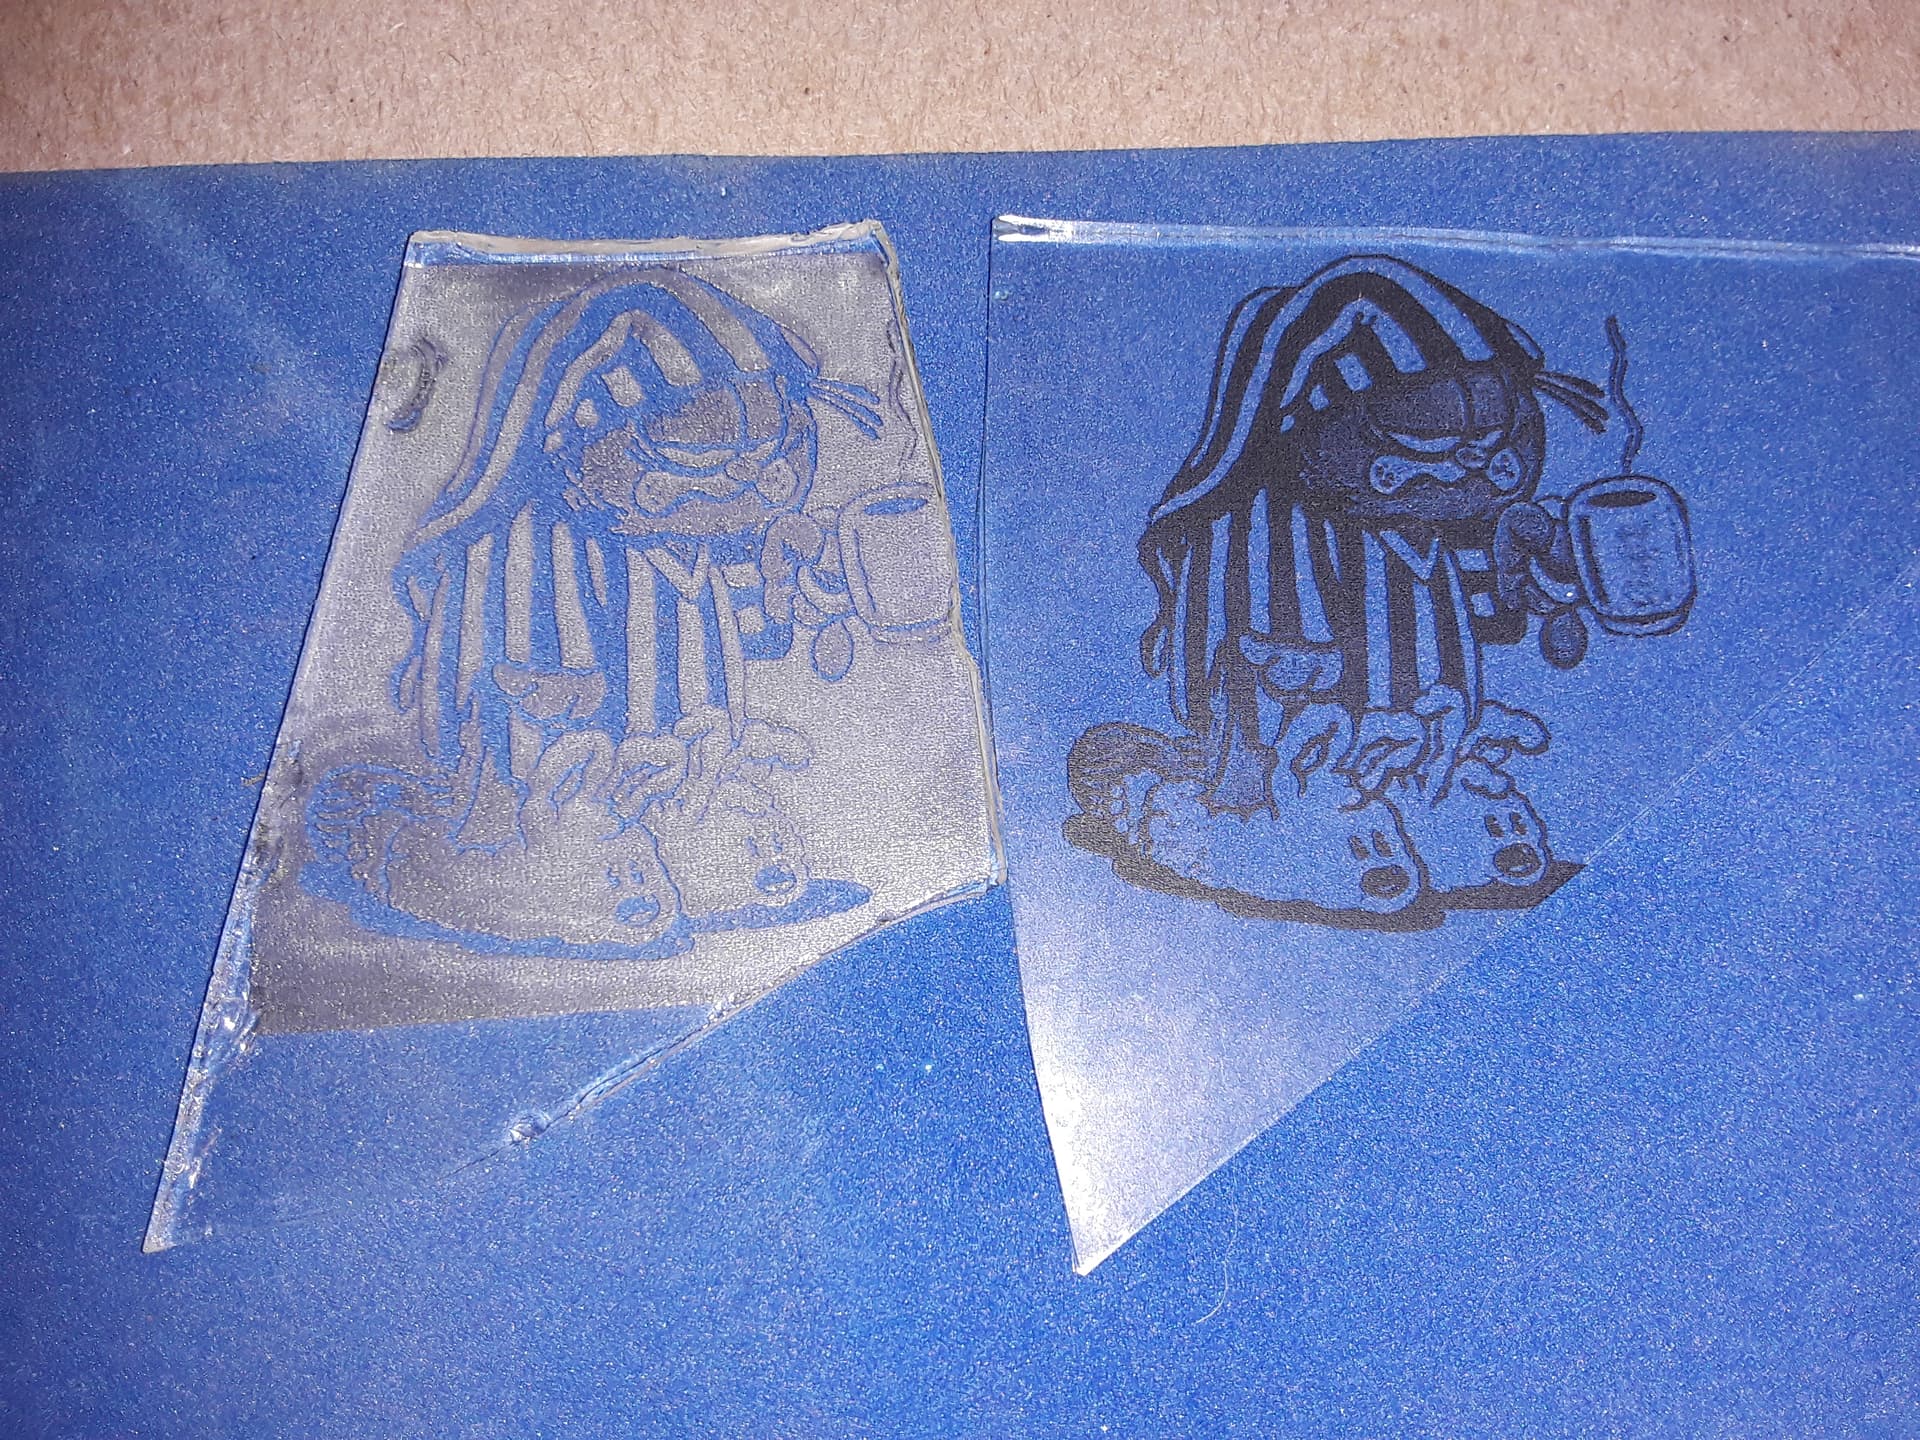
So, picking 1000 mm/min and 90% from the matrix, I engraved my buddy Garfield on a flat- white painted piece of scrap… and the result is a reasonably nice black image
Contrasting the frosted- white image (using black -painted glass) to the black image (using white -painted glass)… note the blue foam background shows through opposite parts of the images…
My take-away from this is that getting a good black image on transparent glass is not likely to happen by accident or hit-or-miss. Taking the time to engrave the power/speed matrix is almost a necessity to identify the speed and power to get the best image from your laser and the paint selected.
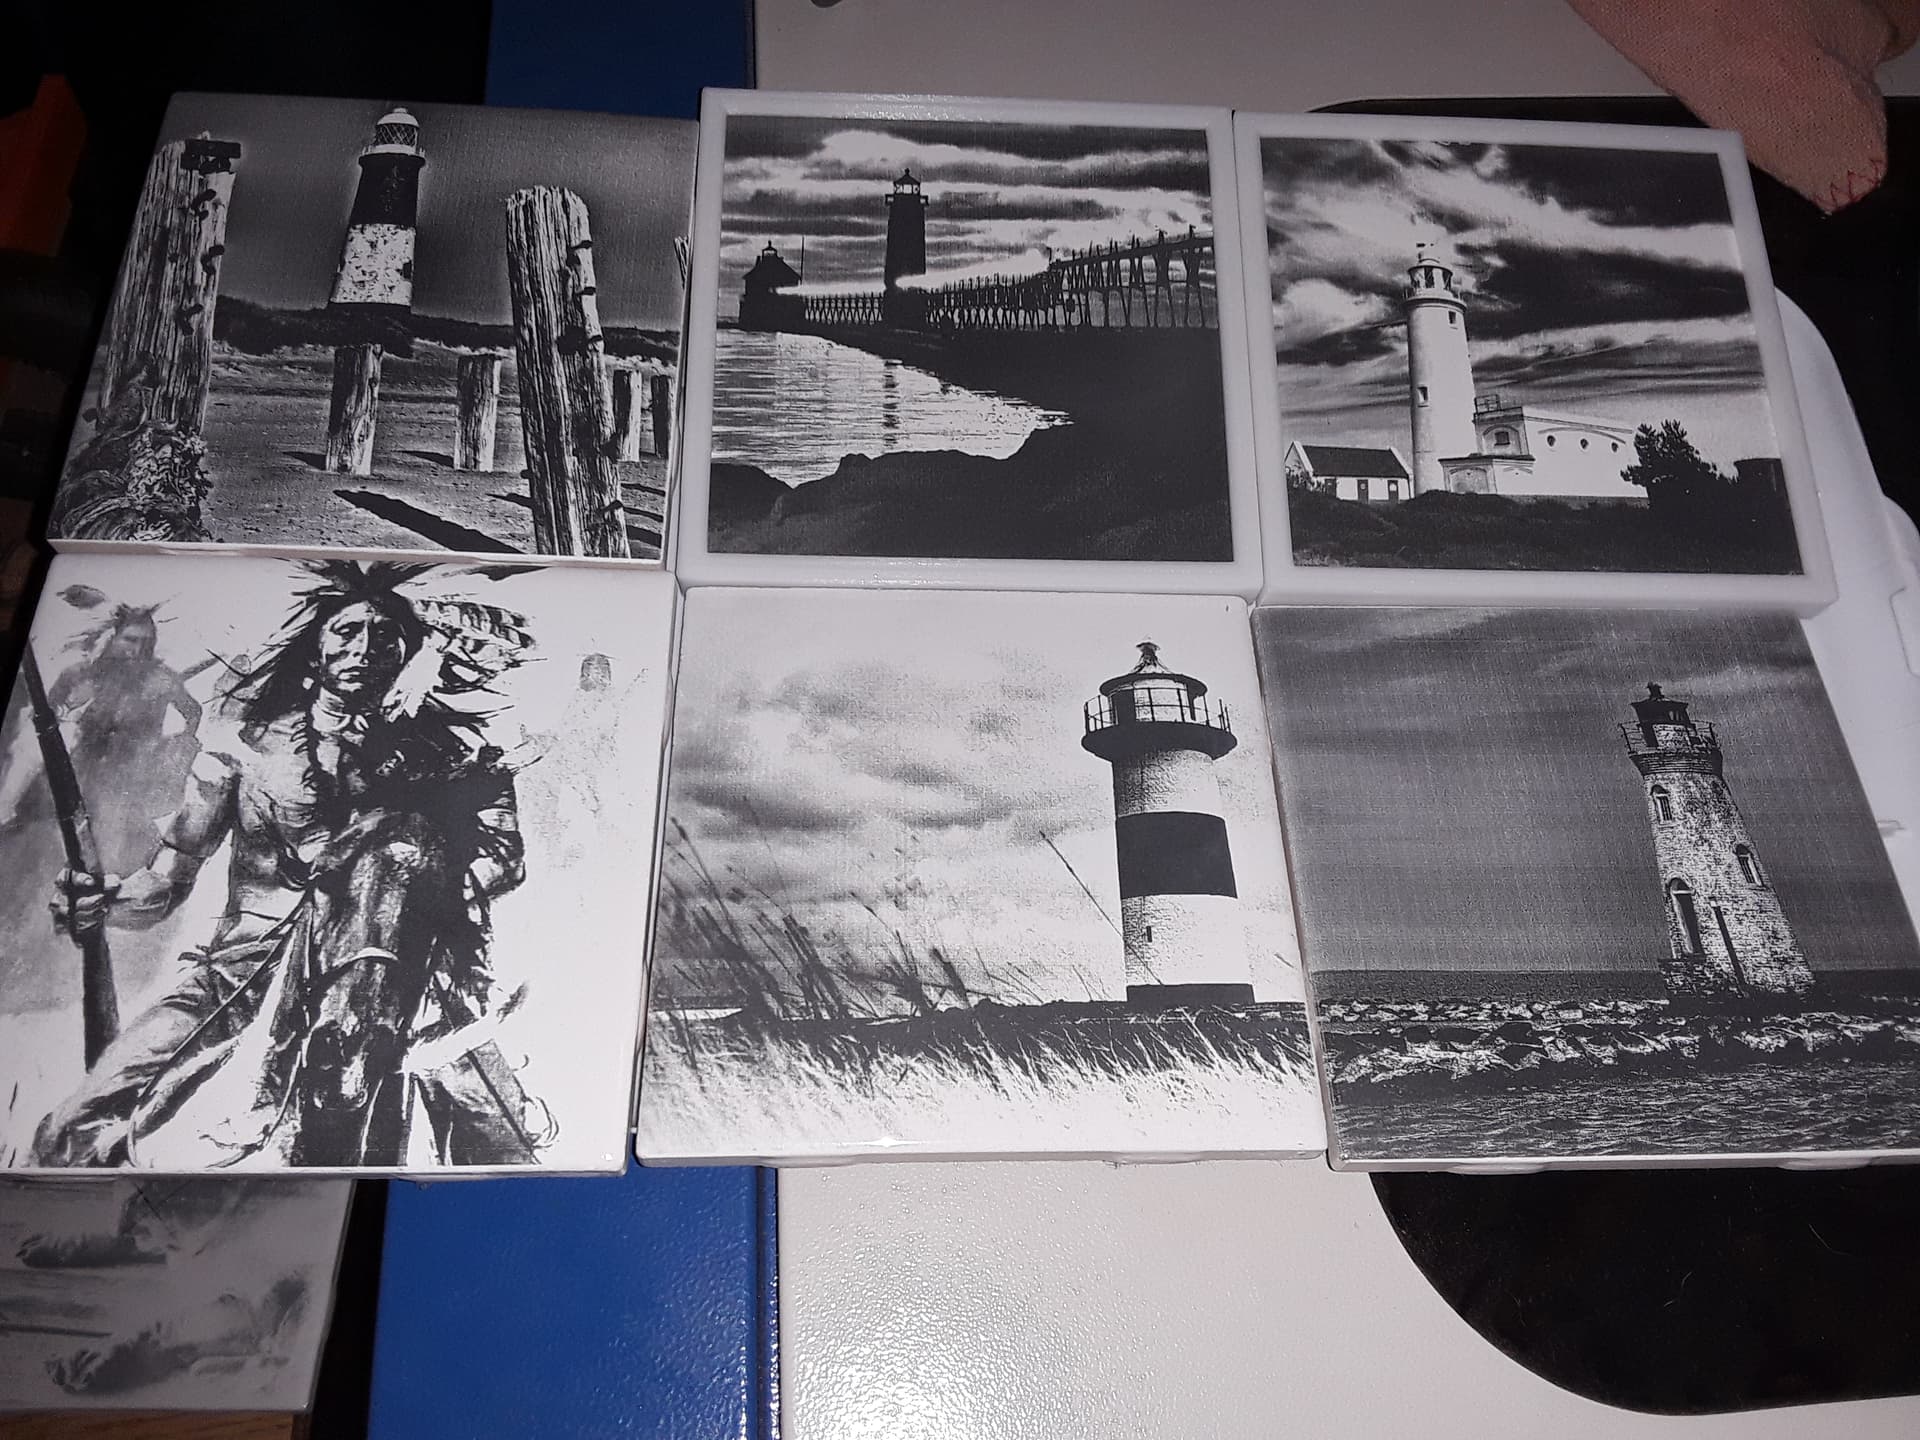
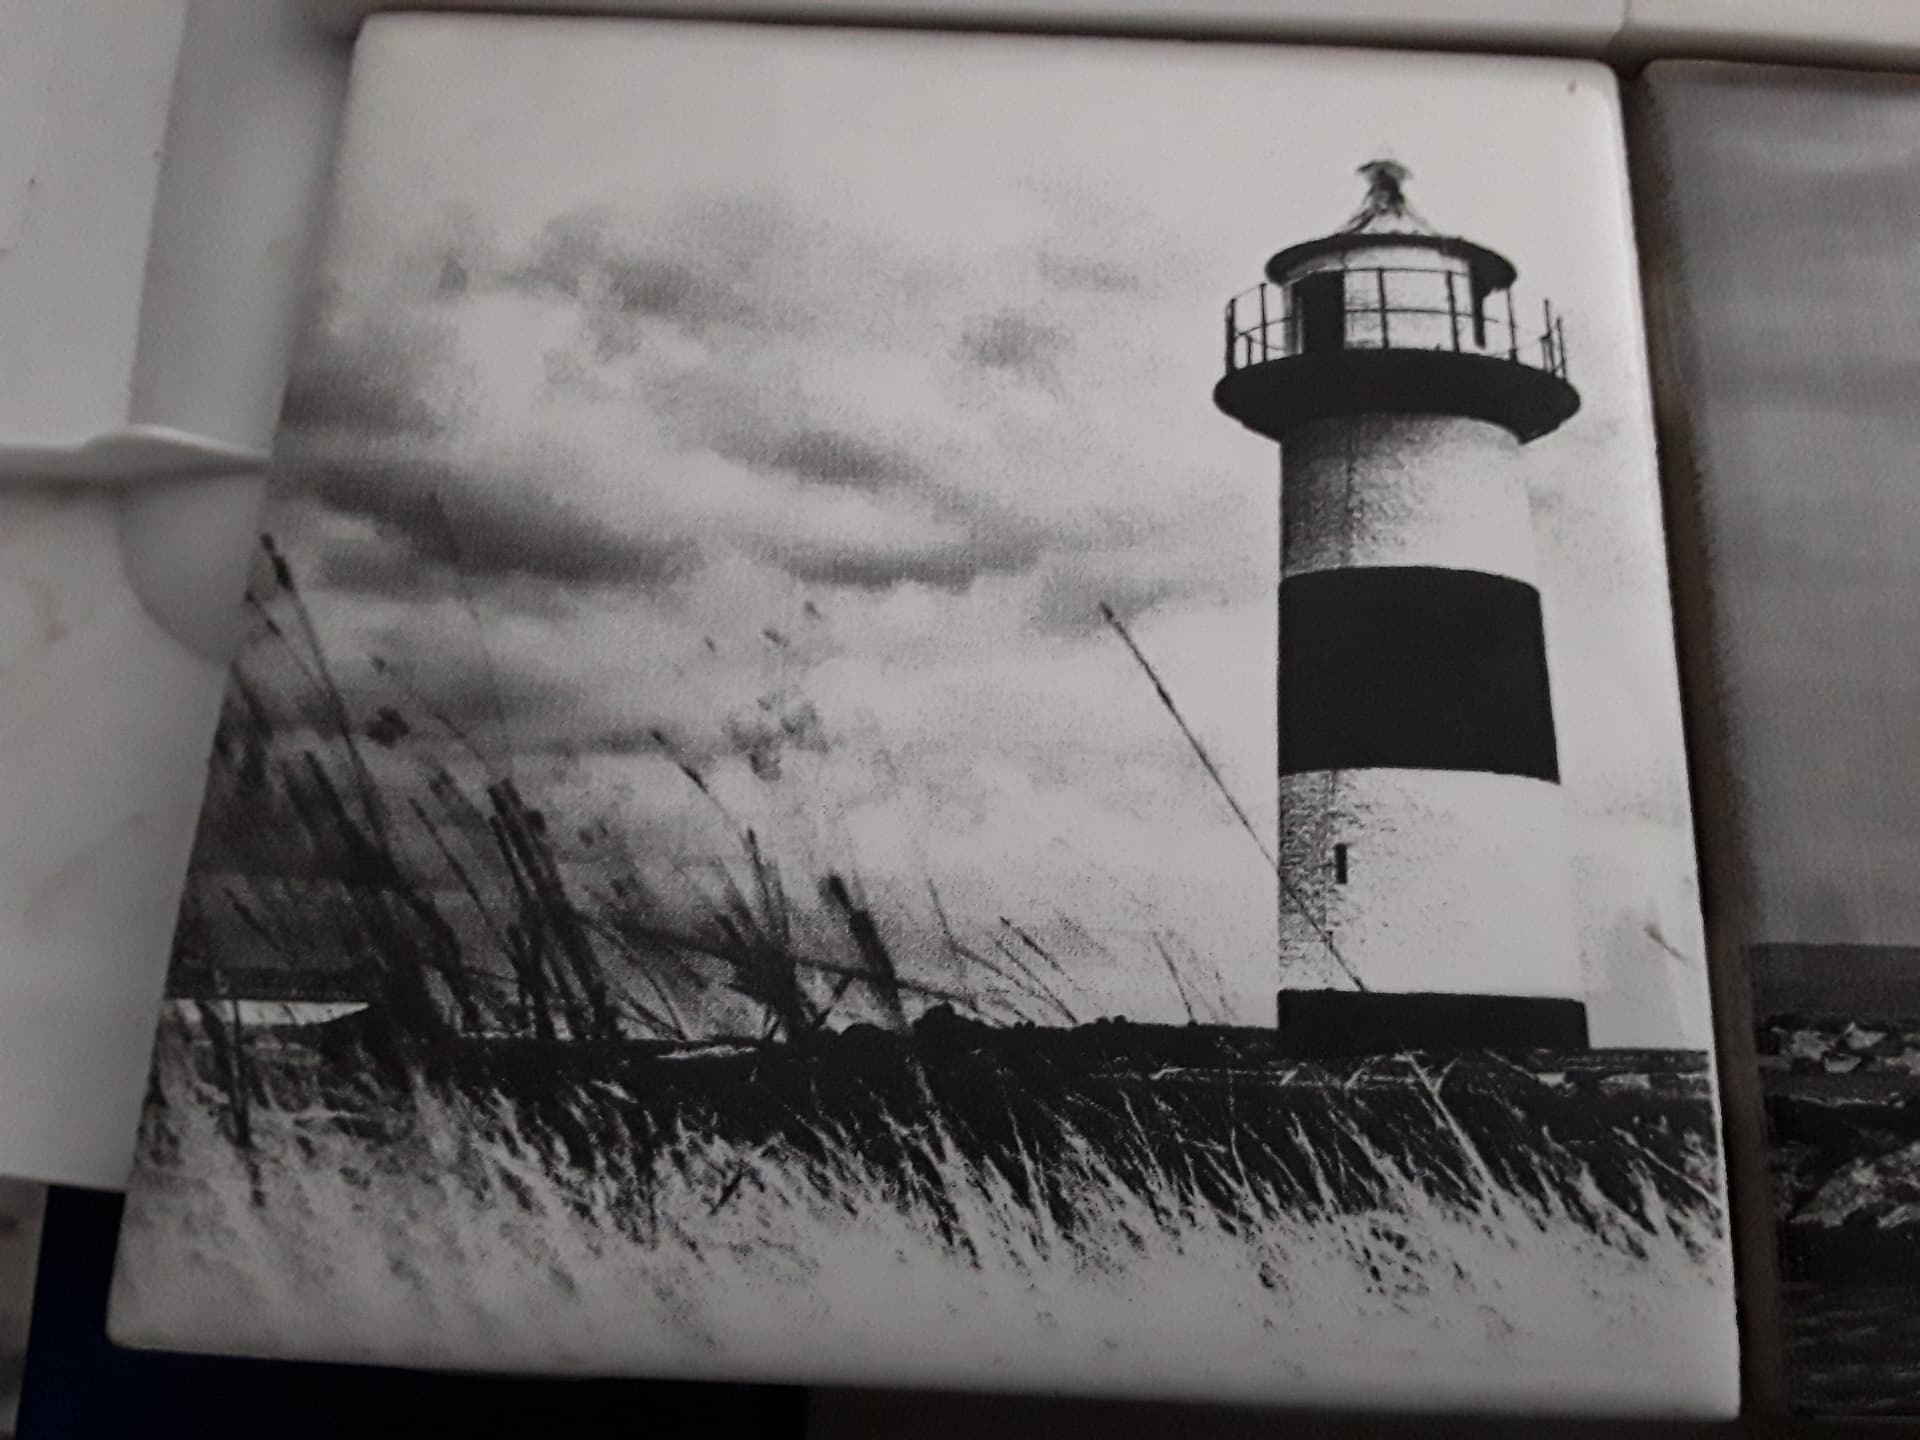
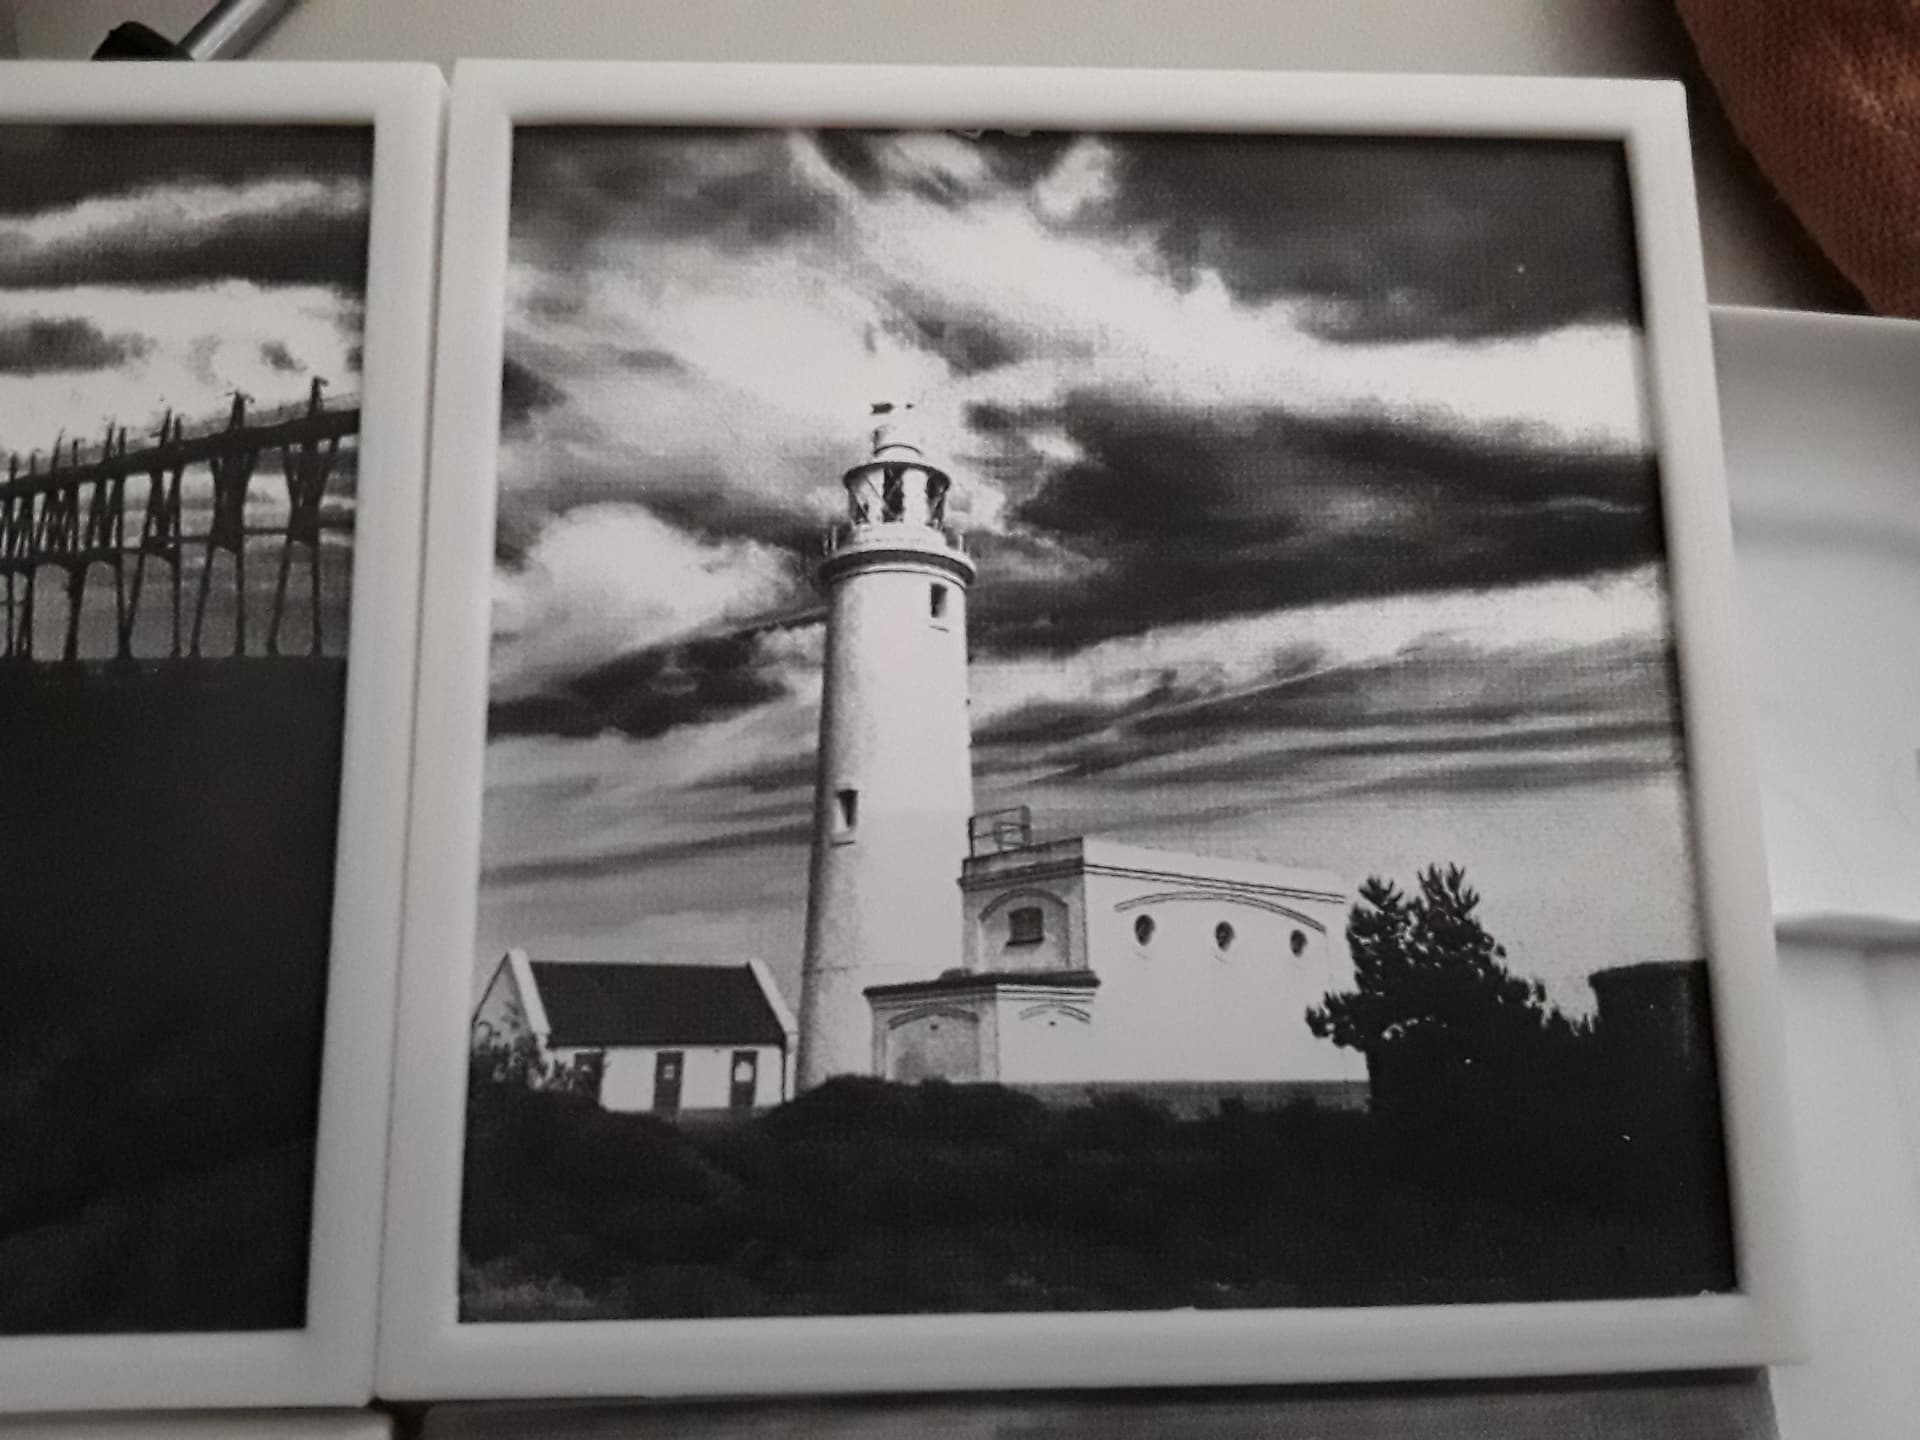
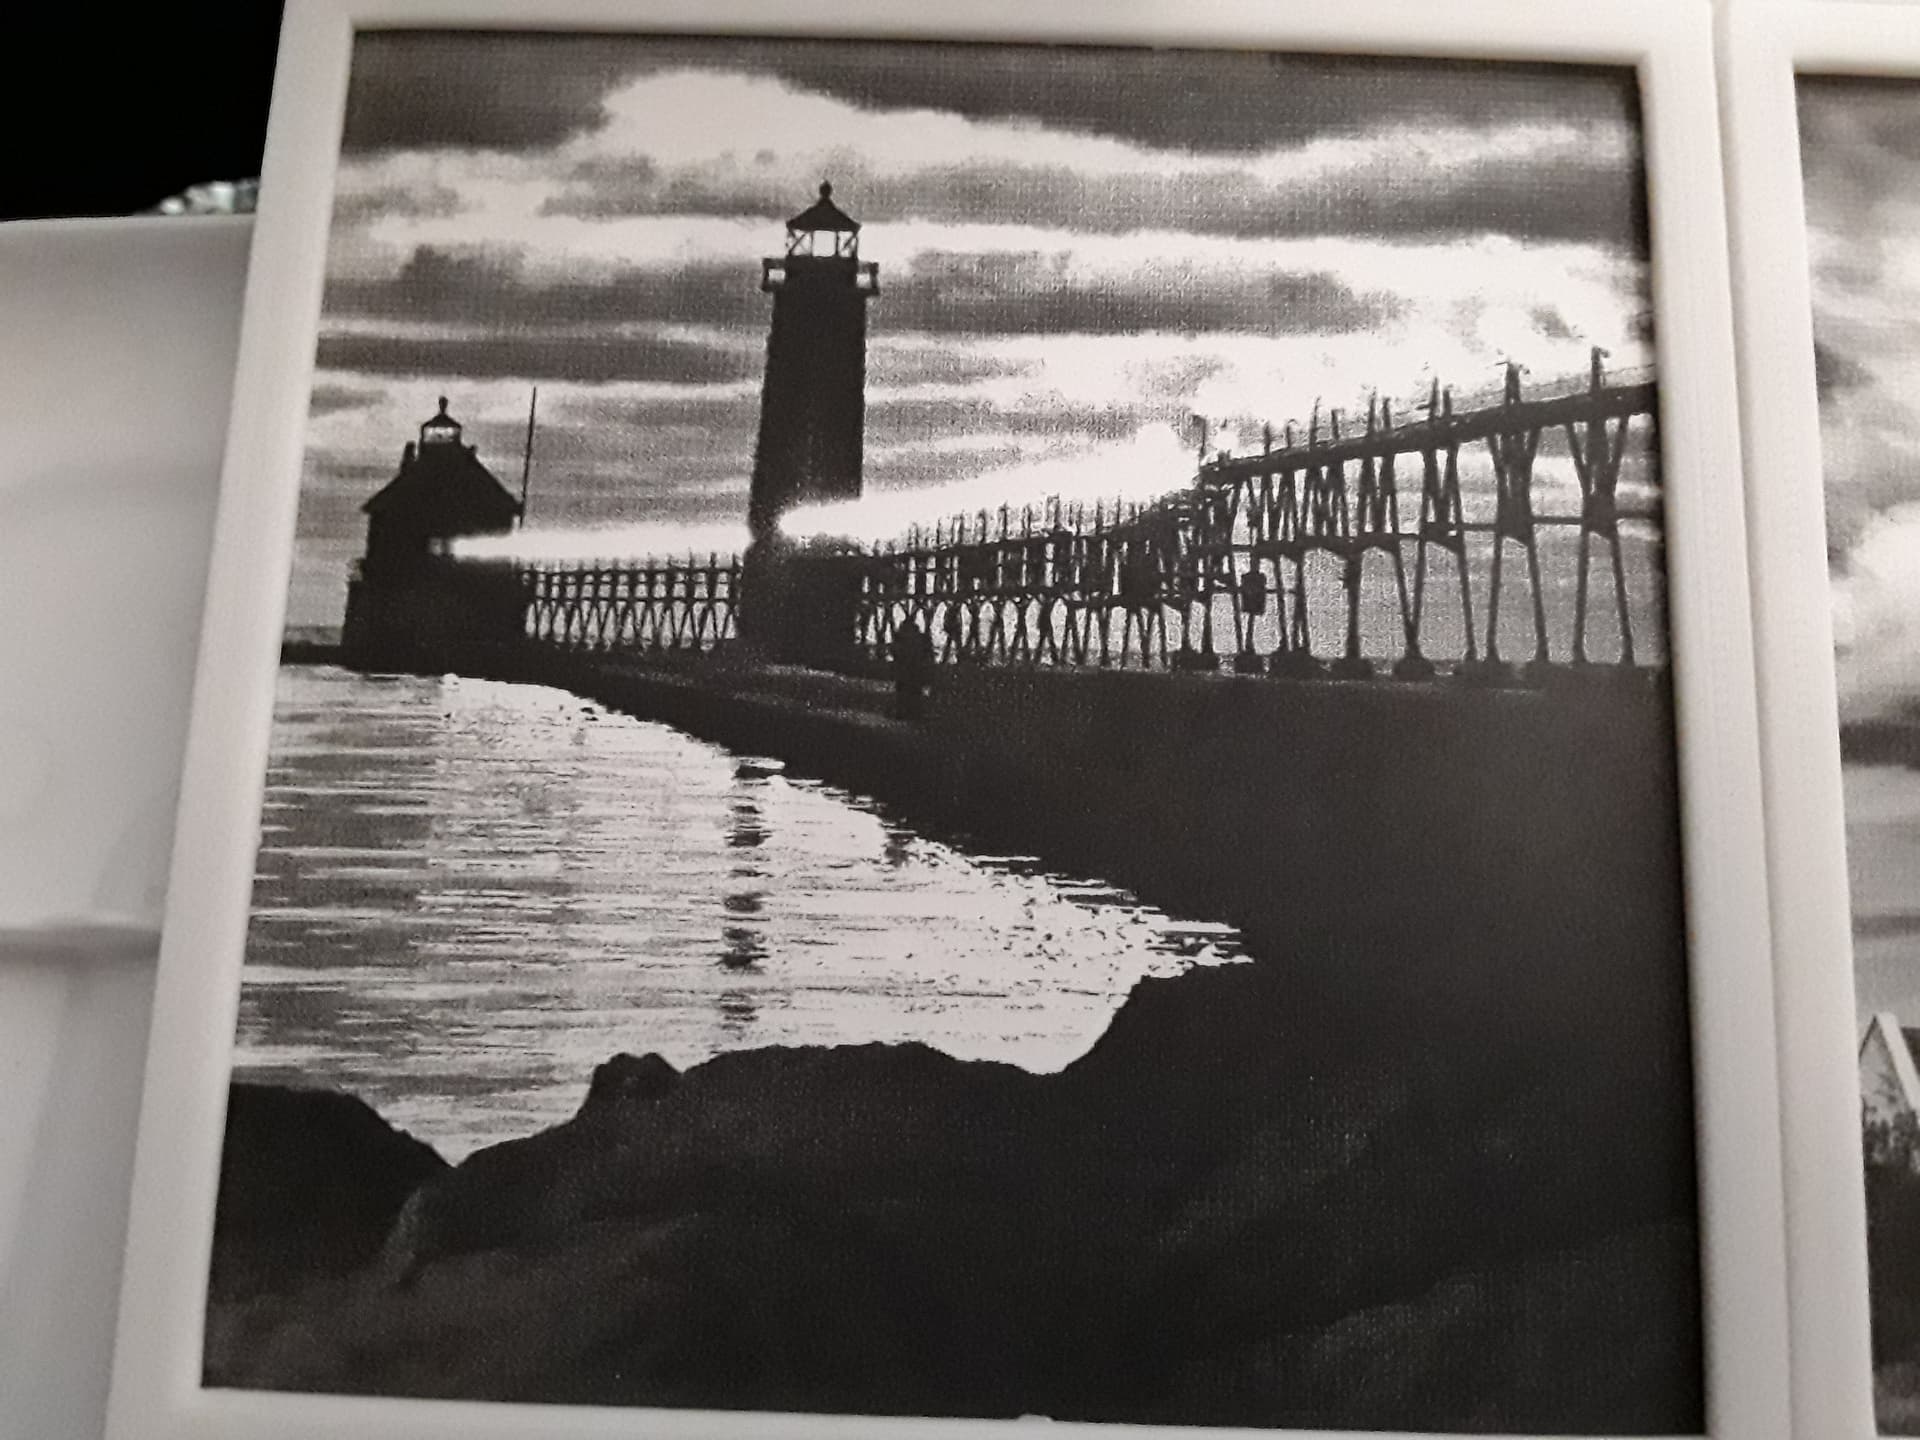
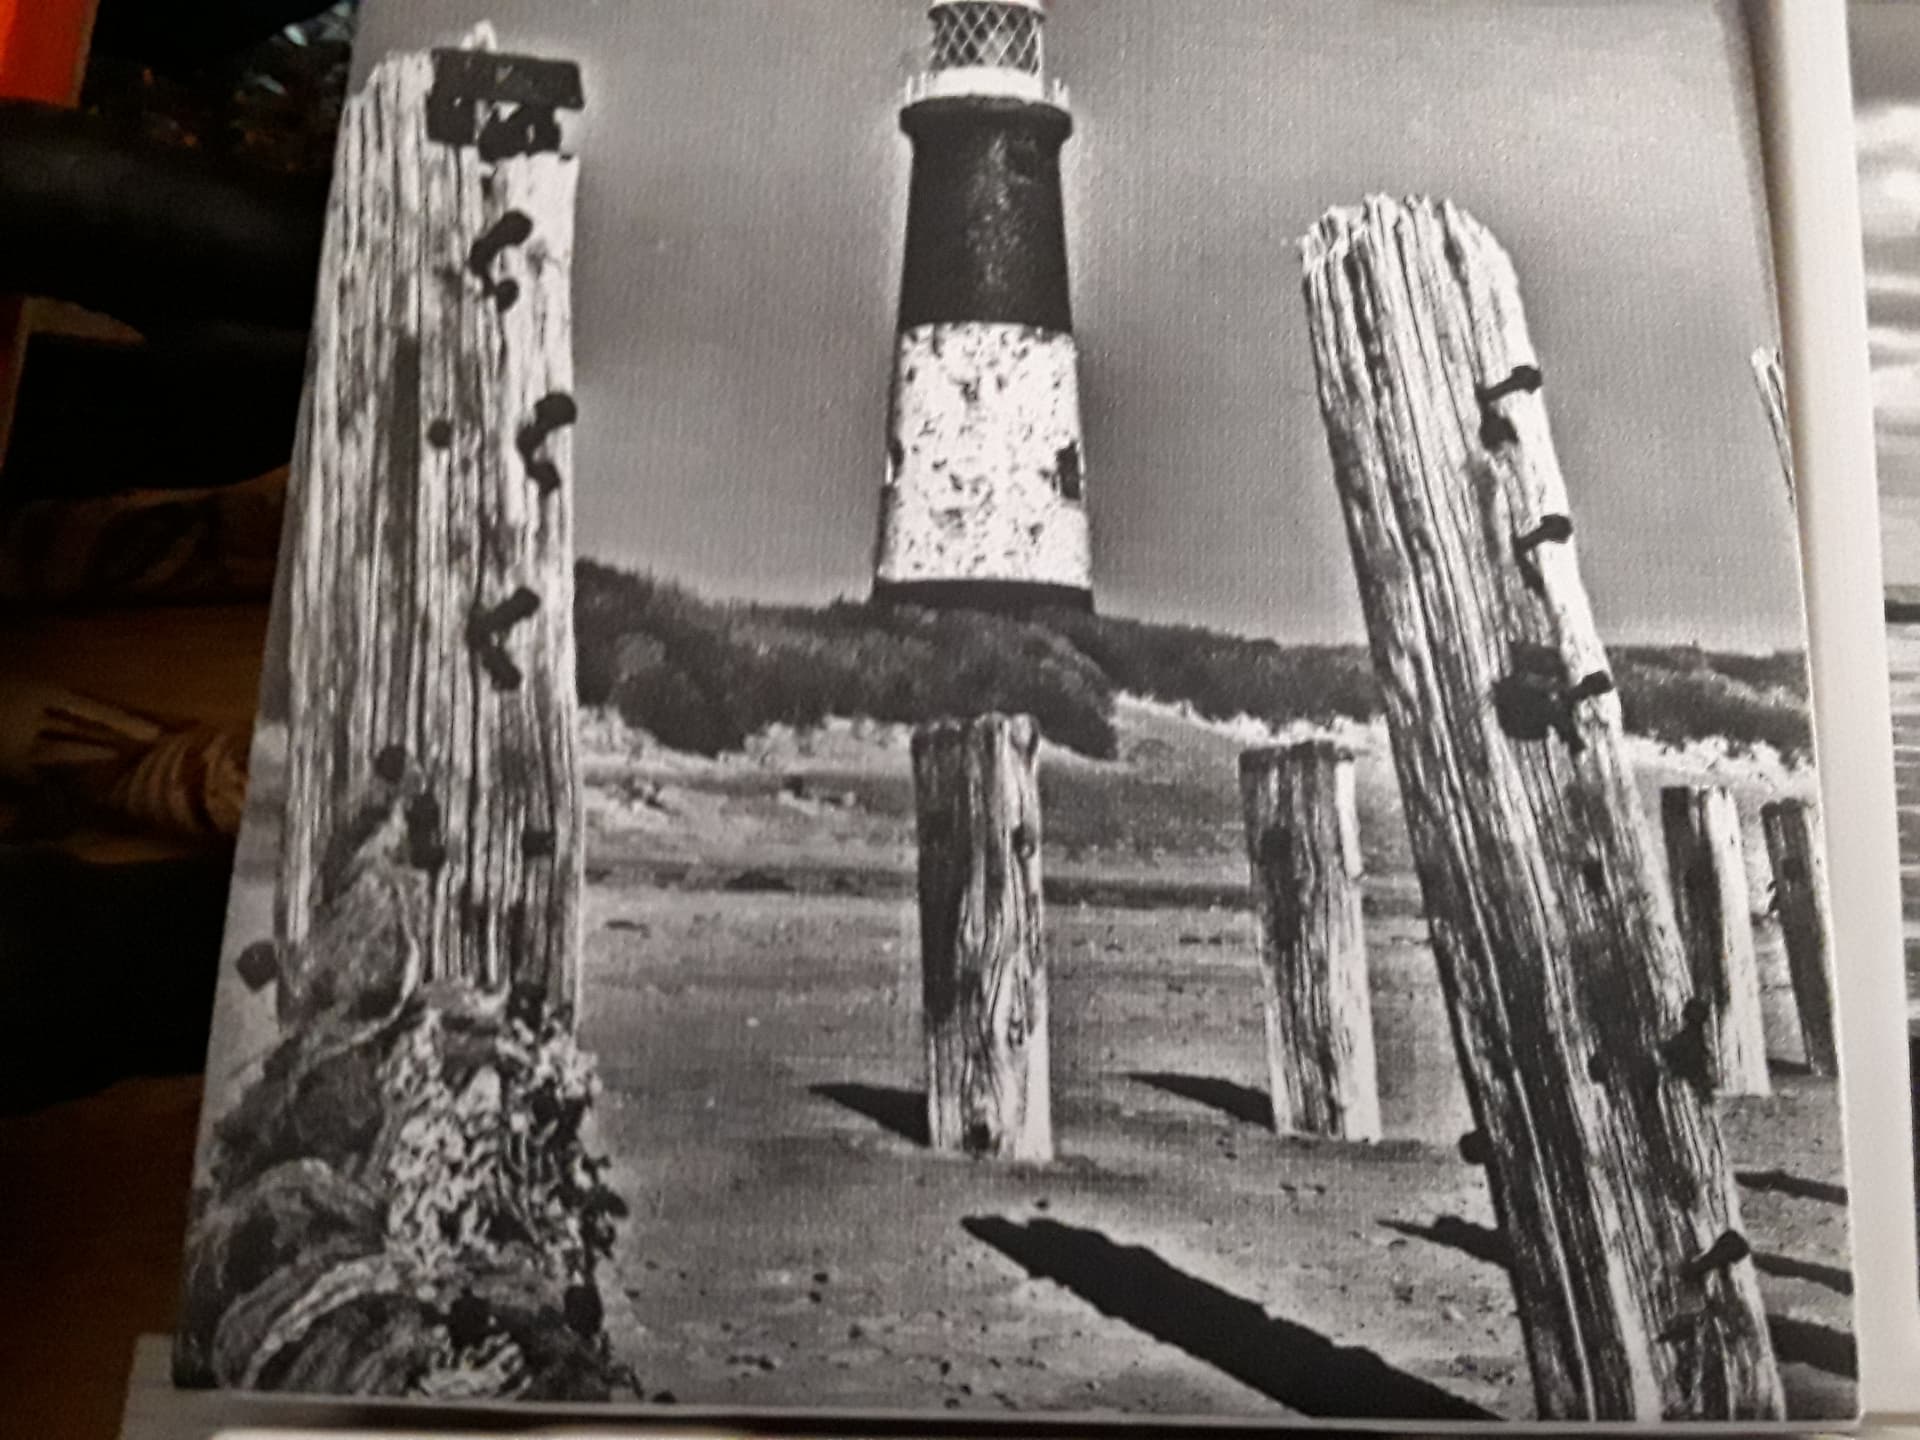
Nothing new really… friend is into lighthouses. Coasters? Stand-up photos?
Samo-same Eleksmaker 2.3W laser setup and LightBurn… 1500 mm/min, 90% power, 338 dpi, and Jarvis dither. NWT method with Krylon Colormaxx flat-white paint and acetone for cleanup. Little personal fan gently blowing across the worksurface to keep smoke from fouling the lens.
Just piddin’ around, trying to stay cool in the triple-digit Texas heat… what else we gonna do?


 ), copied from another forum thread, to preserve and consolidate information regarding my use of the NWT method and it’s “expansion” from ceramic tile to glass.