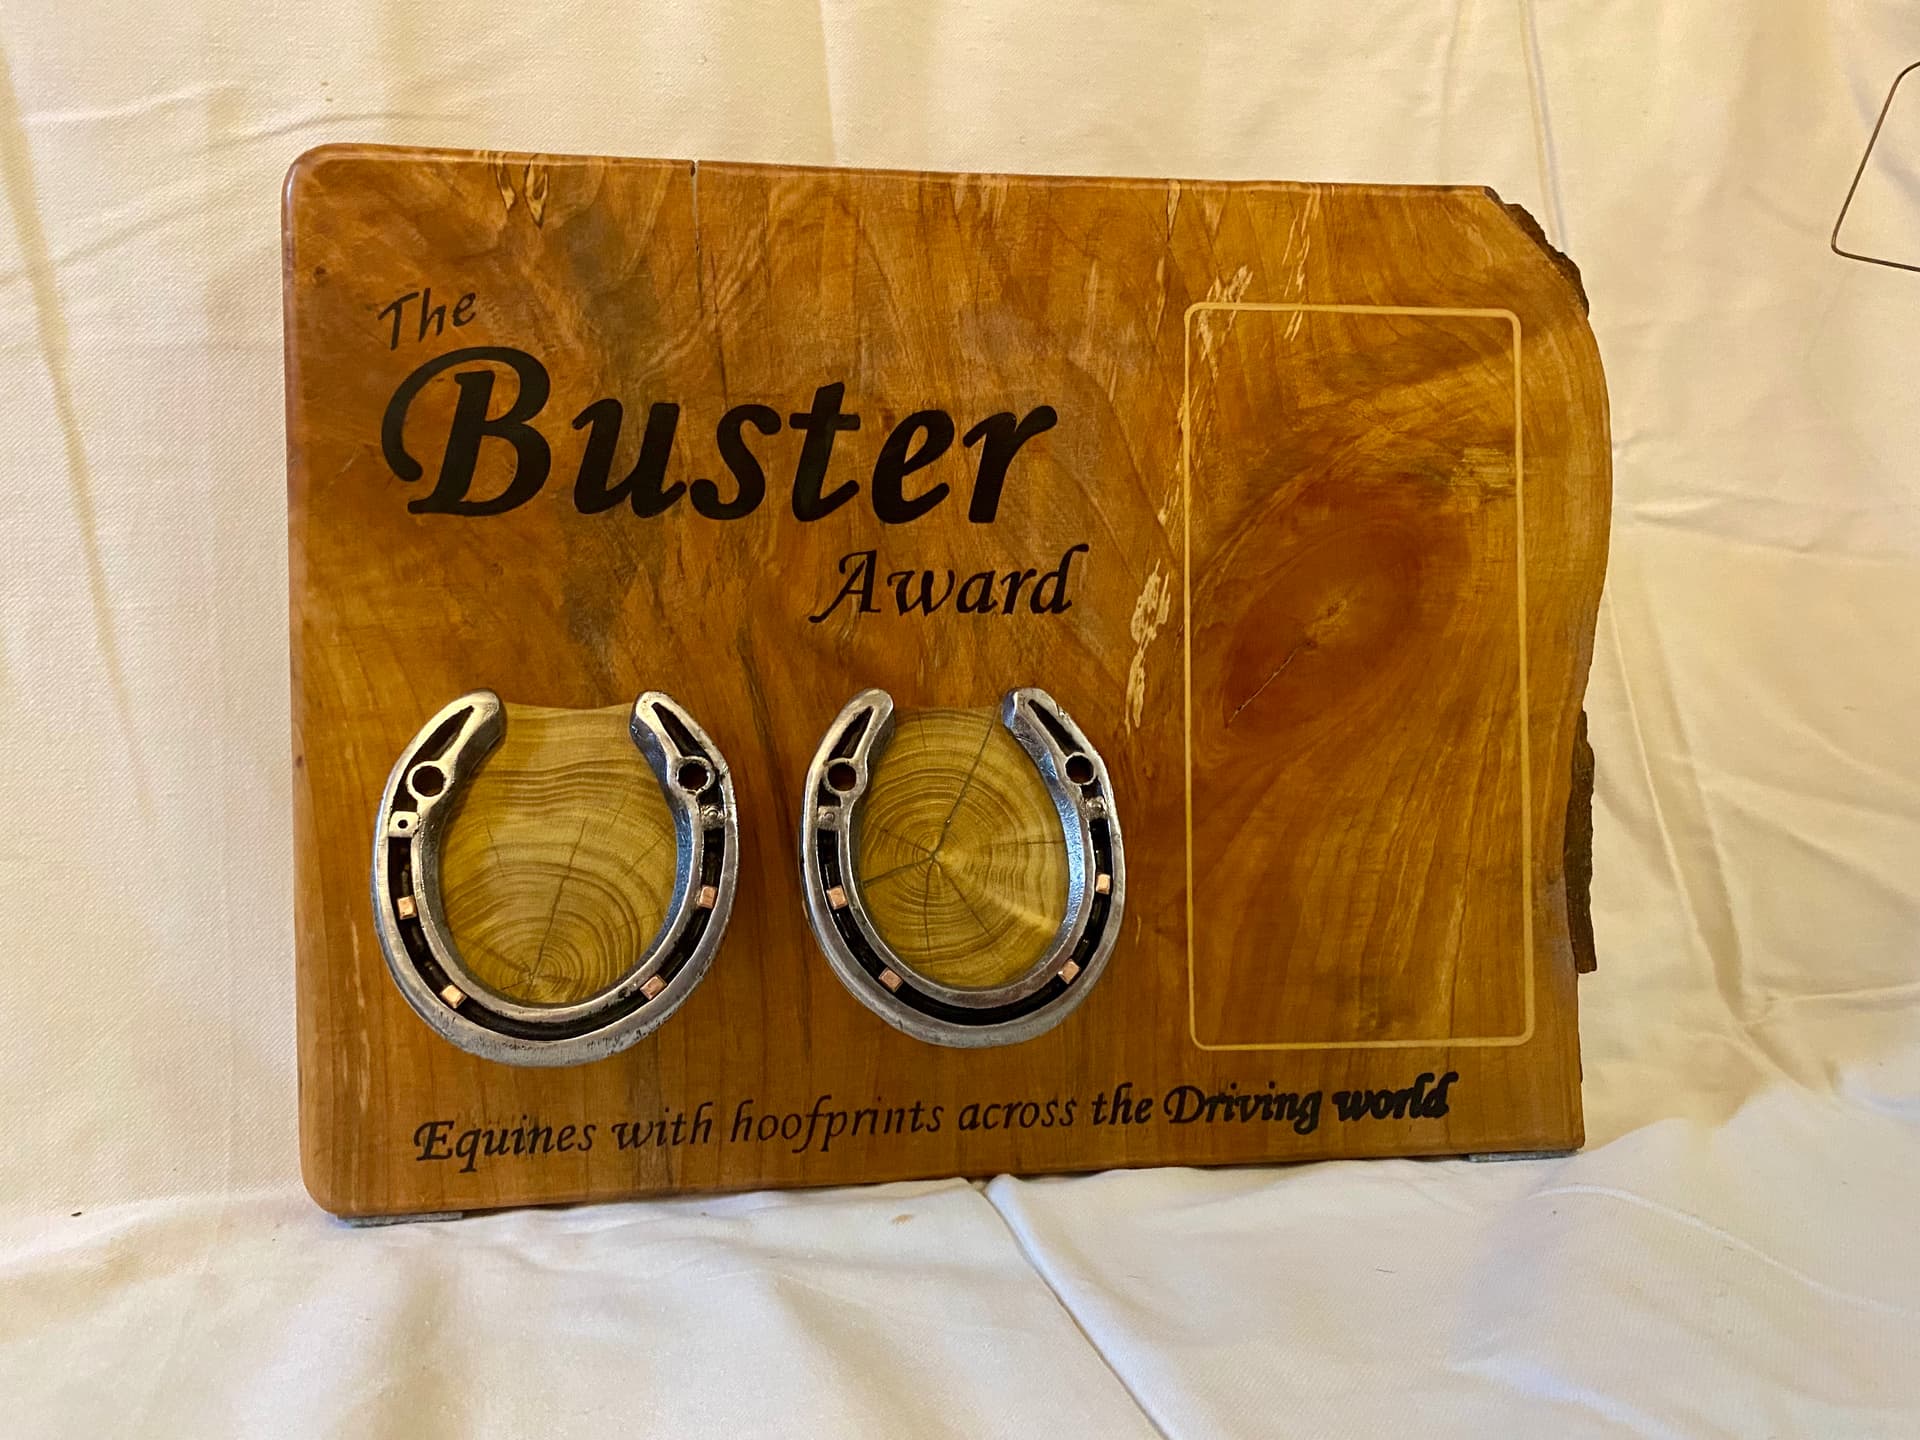
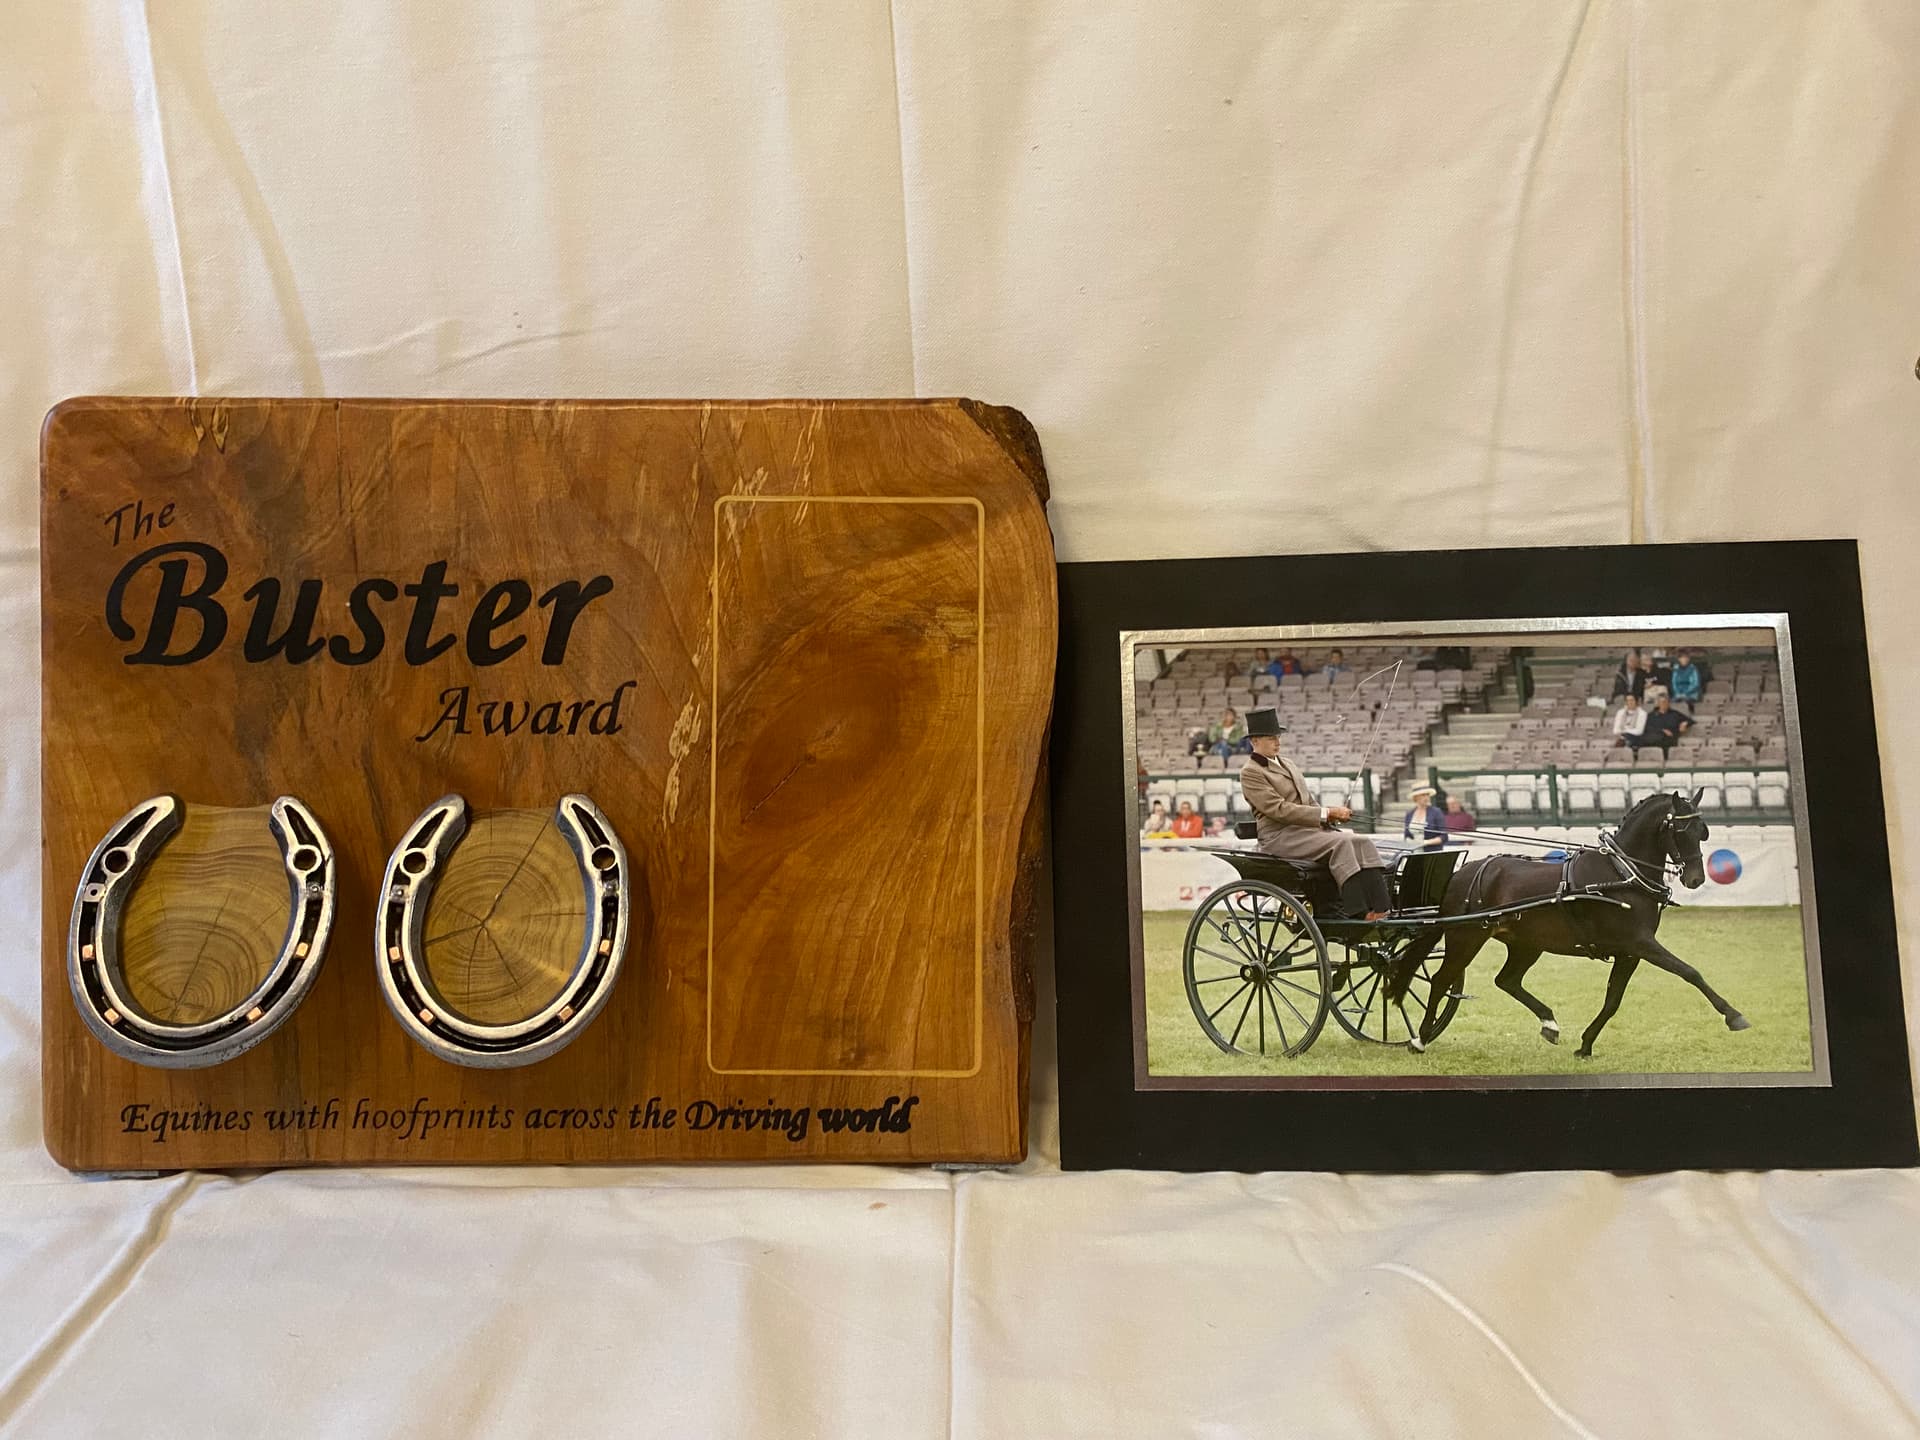
I was asked to create a memorial trophy for a pony who made an outstanding contribution herein the UK to the sport of carriage driving. Not only did he teach hundreds of people (kids to the elderly, and people of all abilities and disabilities) to drive via driving lessons with my mother, but he was also my competition pony growing up so I really wanted to make this a meaningful award. He passed away this year, and we wanted his legacy to be remembered in a way that celebrated other horses and ponies that also add so much to the sport for so many people.
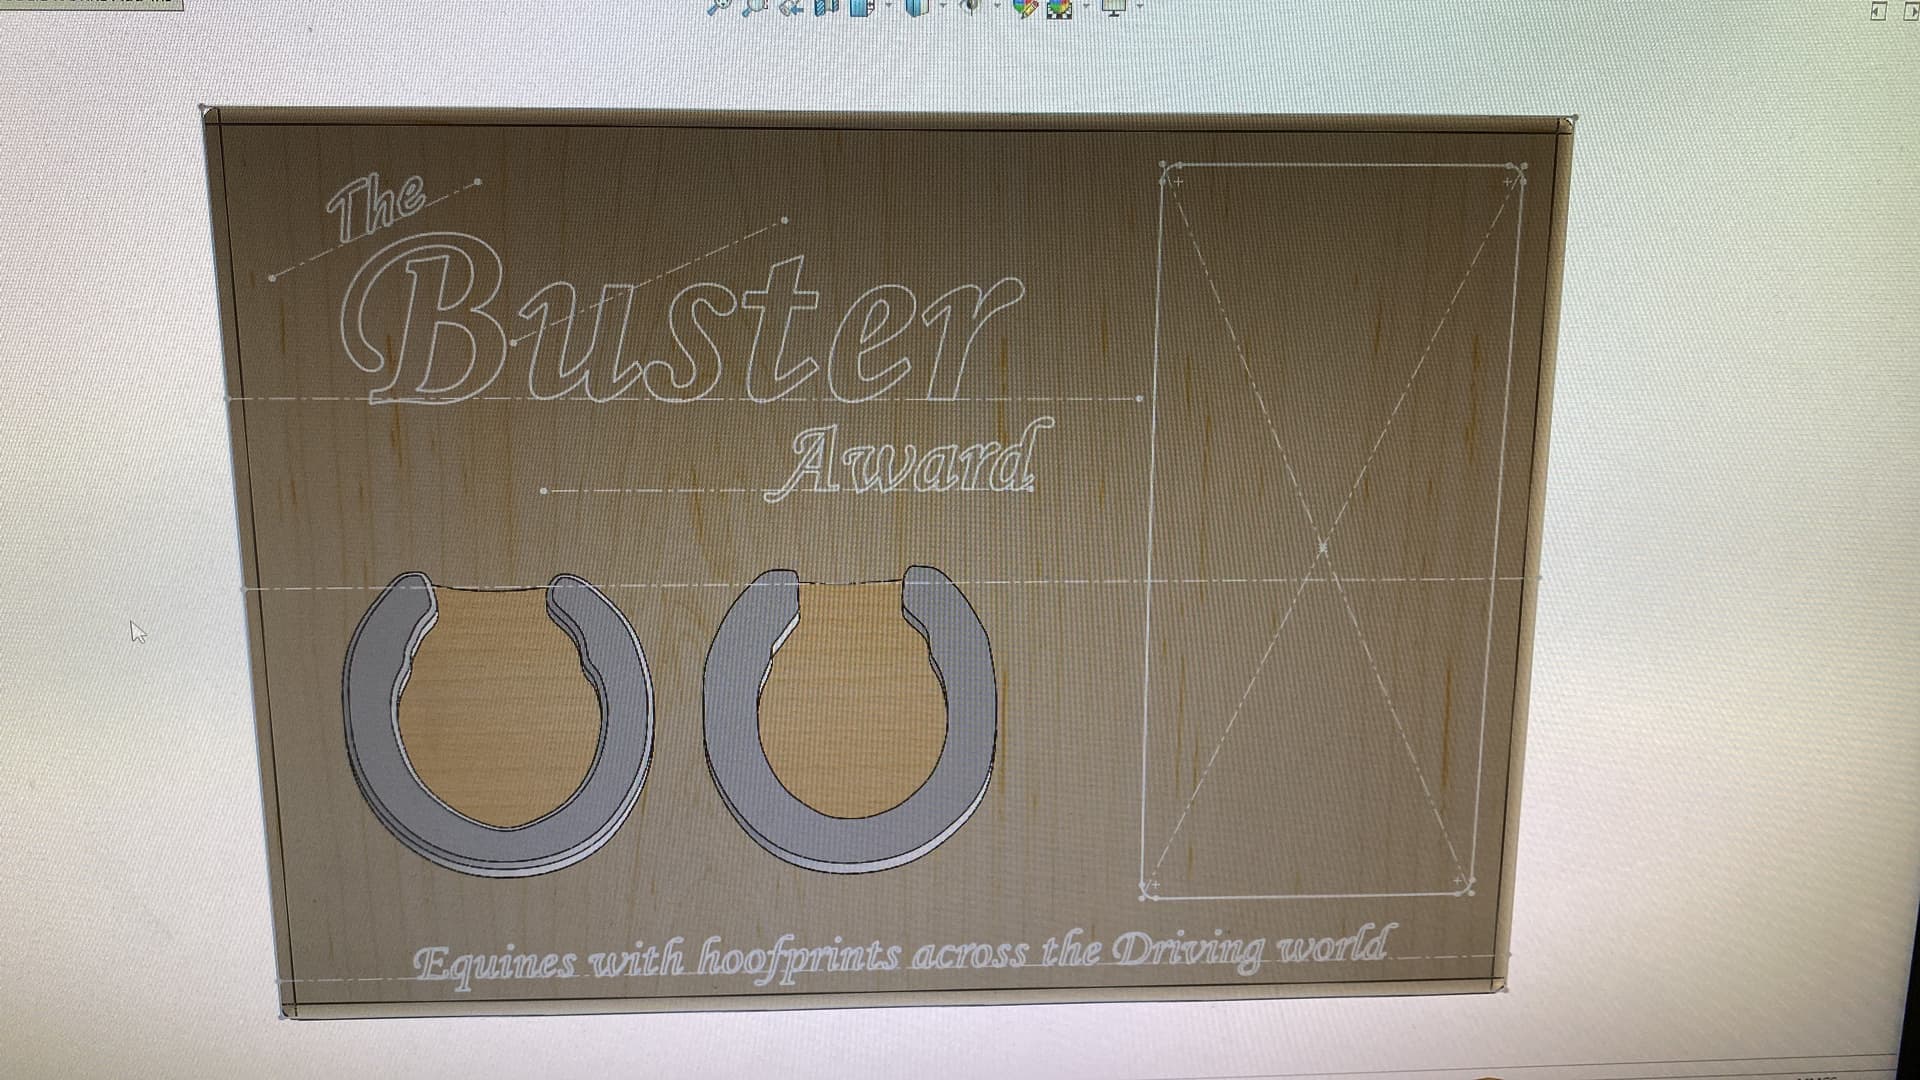
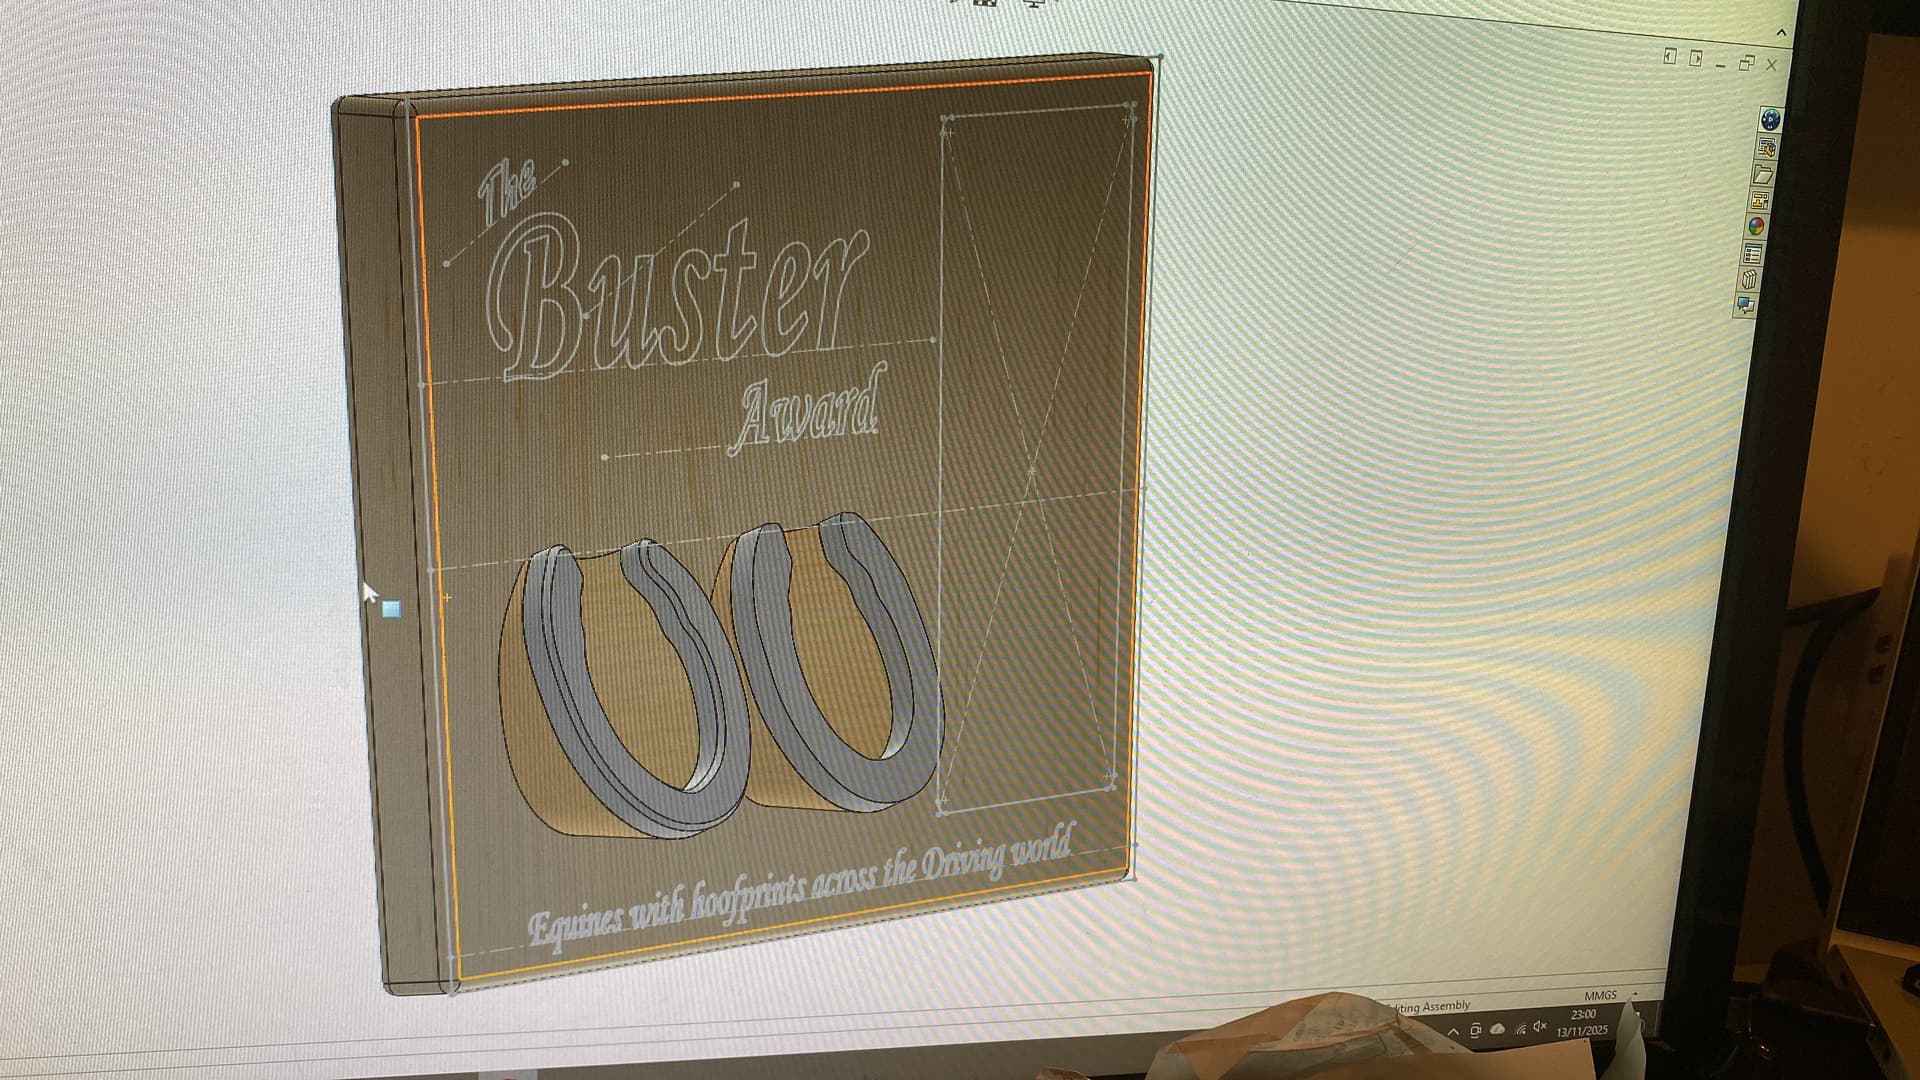
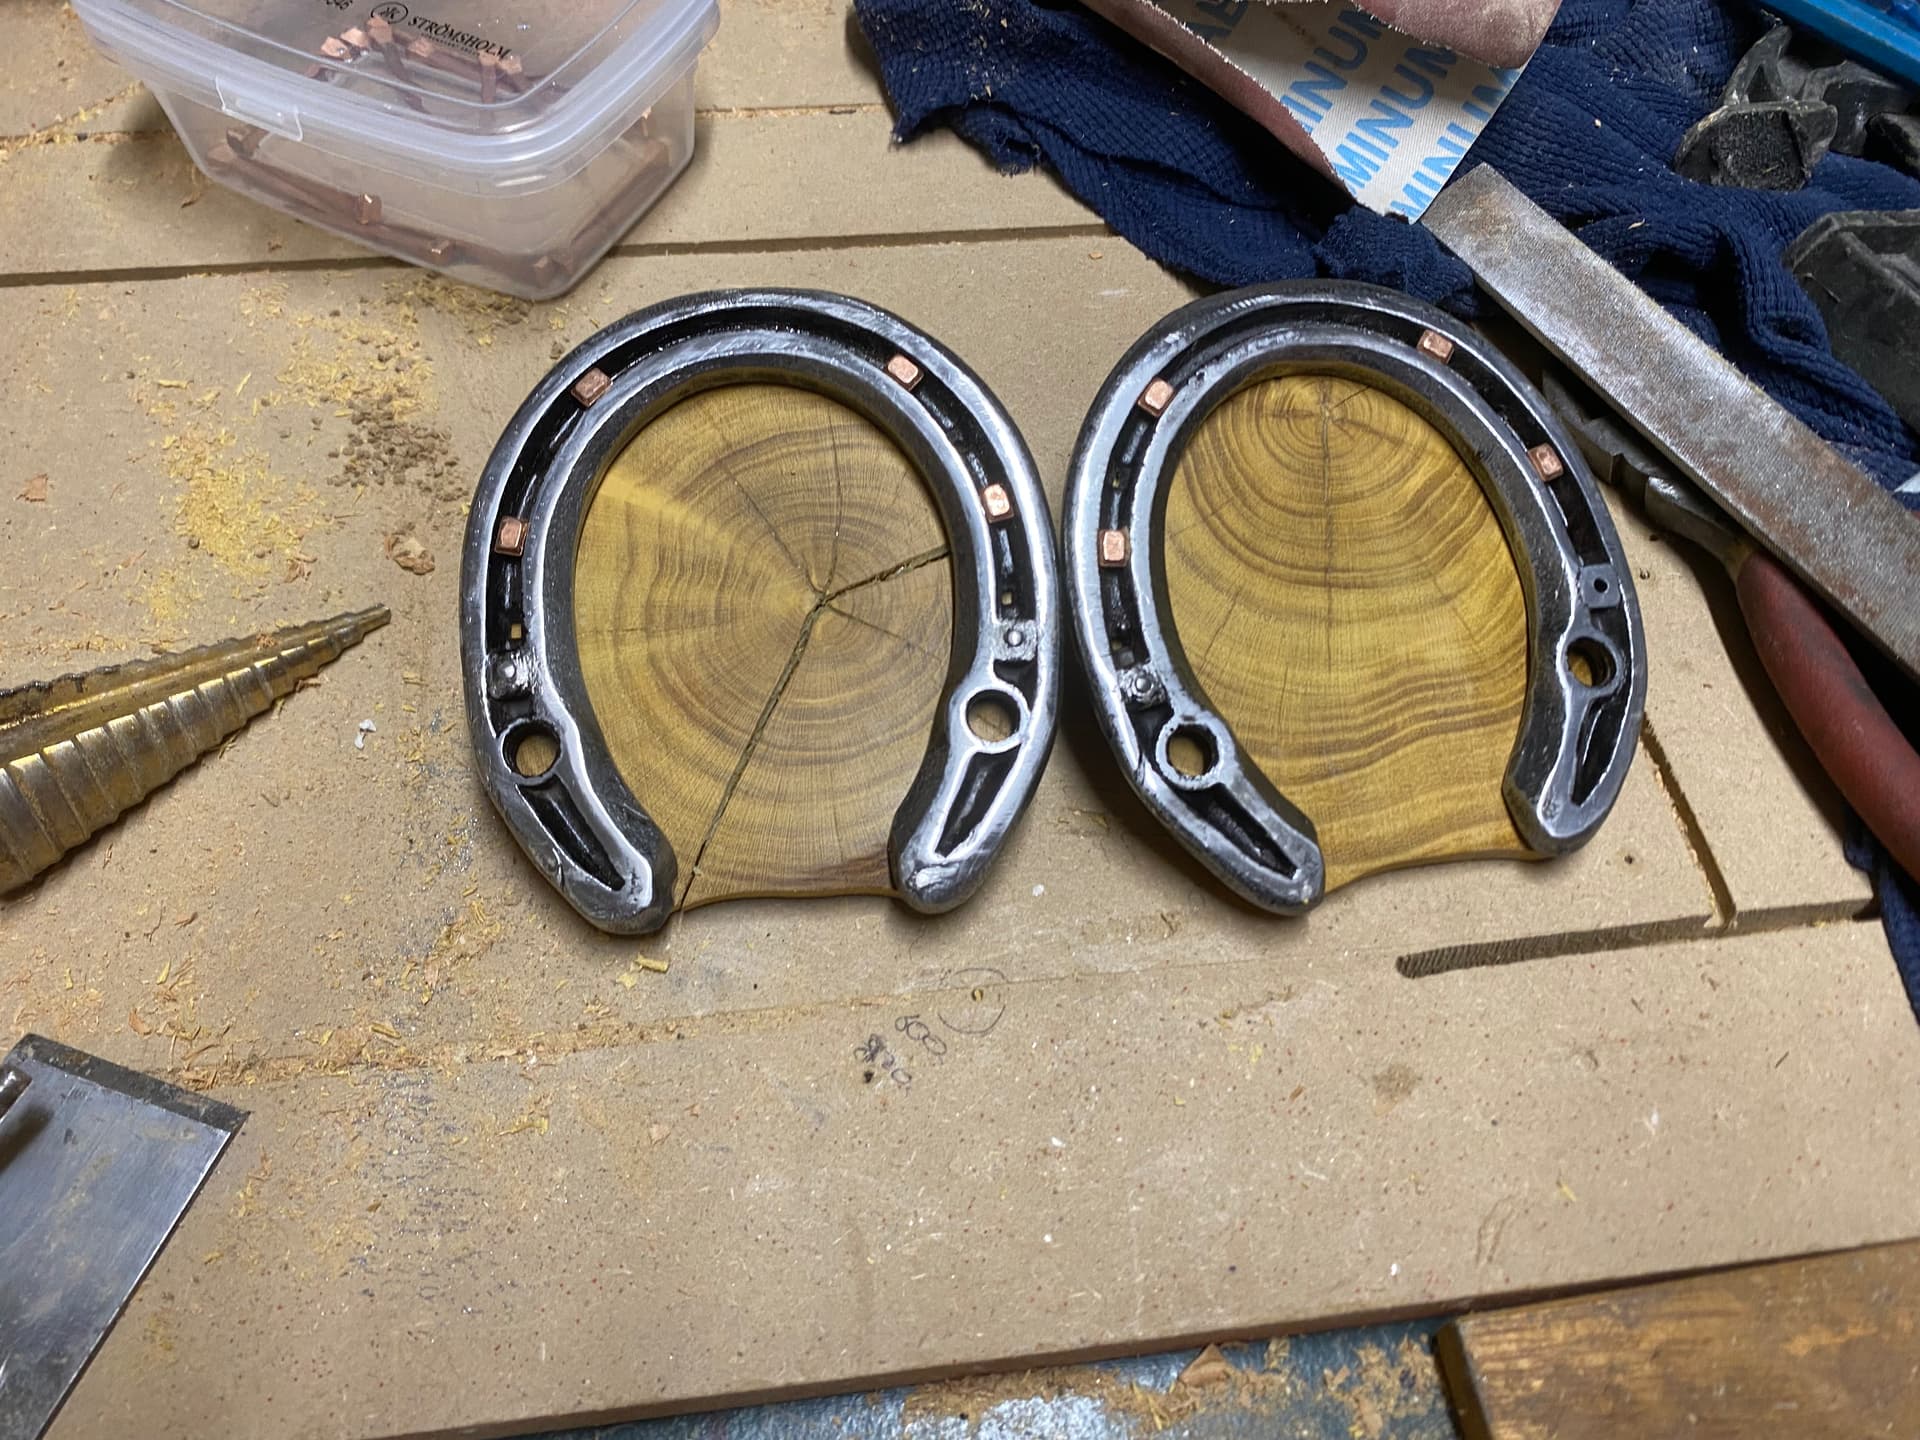
We had his last set of shoes, so I wanted to create something that was directly linked to Buster via his shoes. This led to the idea of them being mounted on a presentation board, with the end result being what you see below.
from a cnc perspective this was a series of firsts for me:
1st 3d carve, 1st 3d carve based on a photocopier scan of the profile I wanted (the shoe)
1st real engraving on a big scale.
1st resin pour
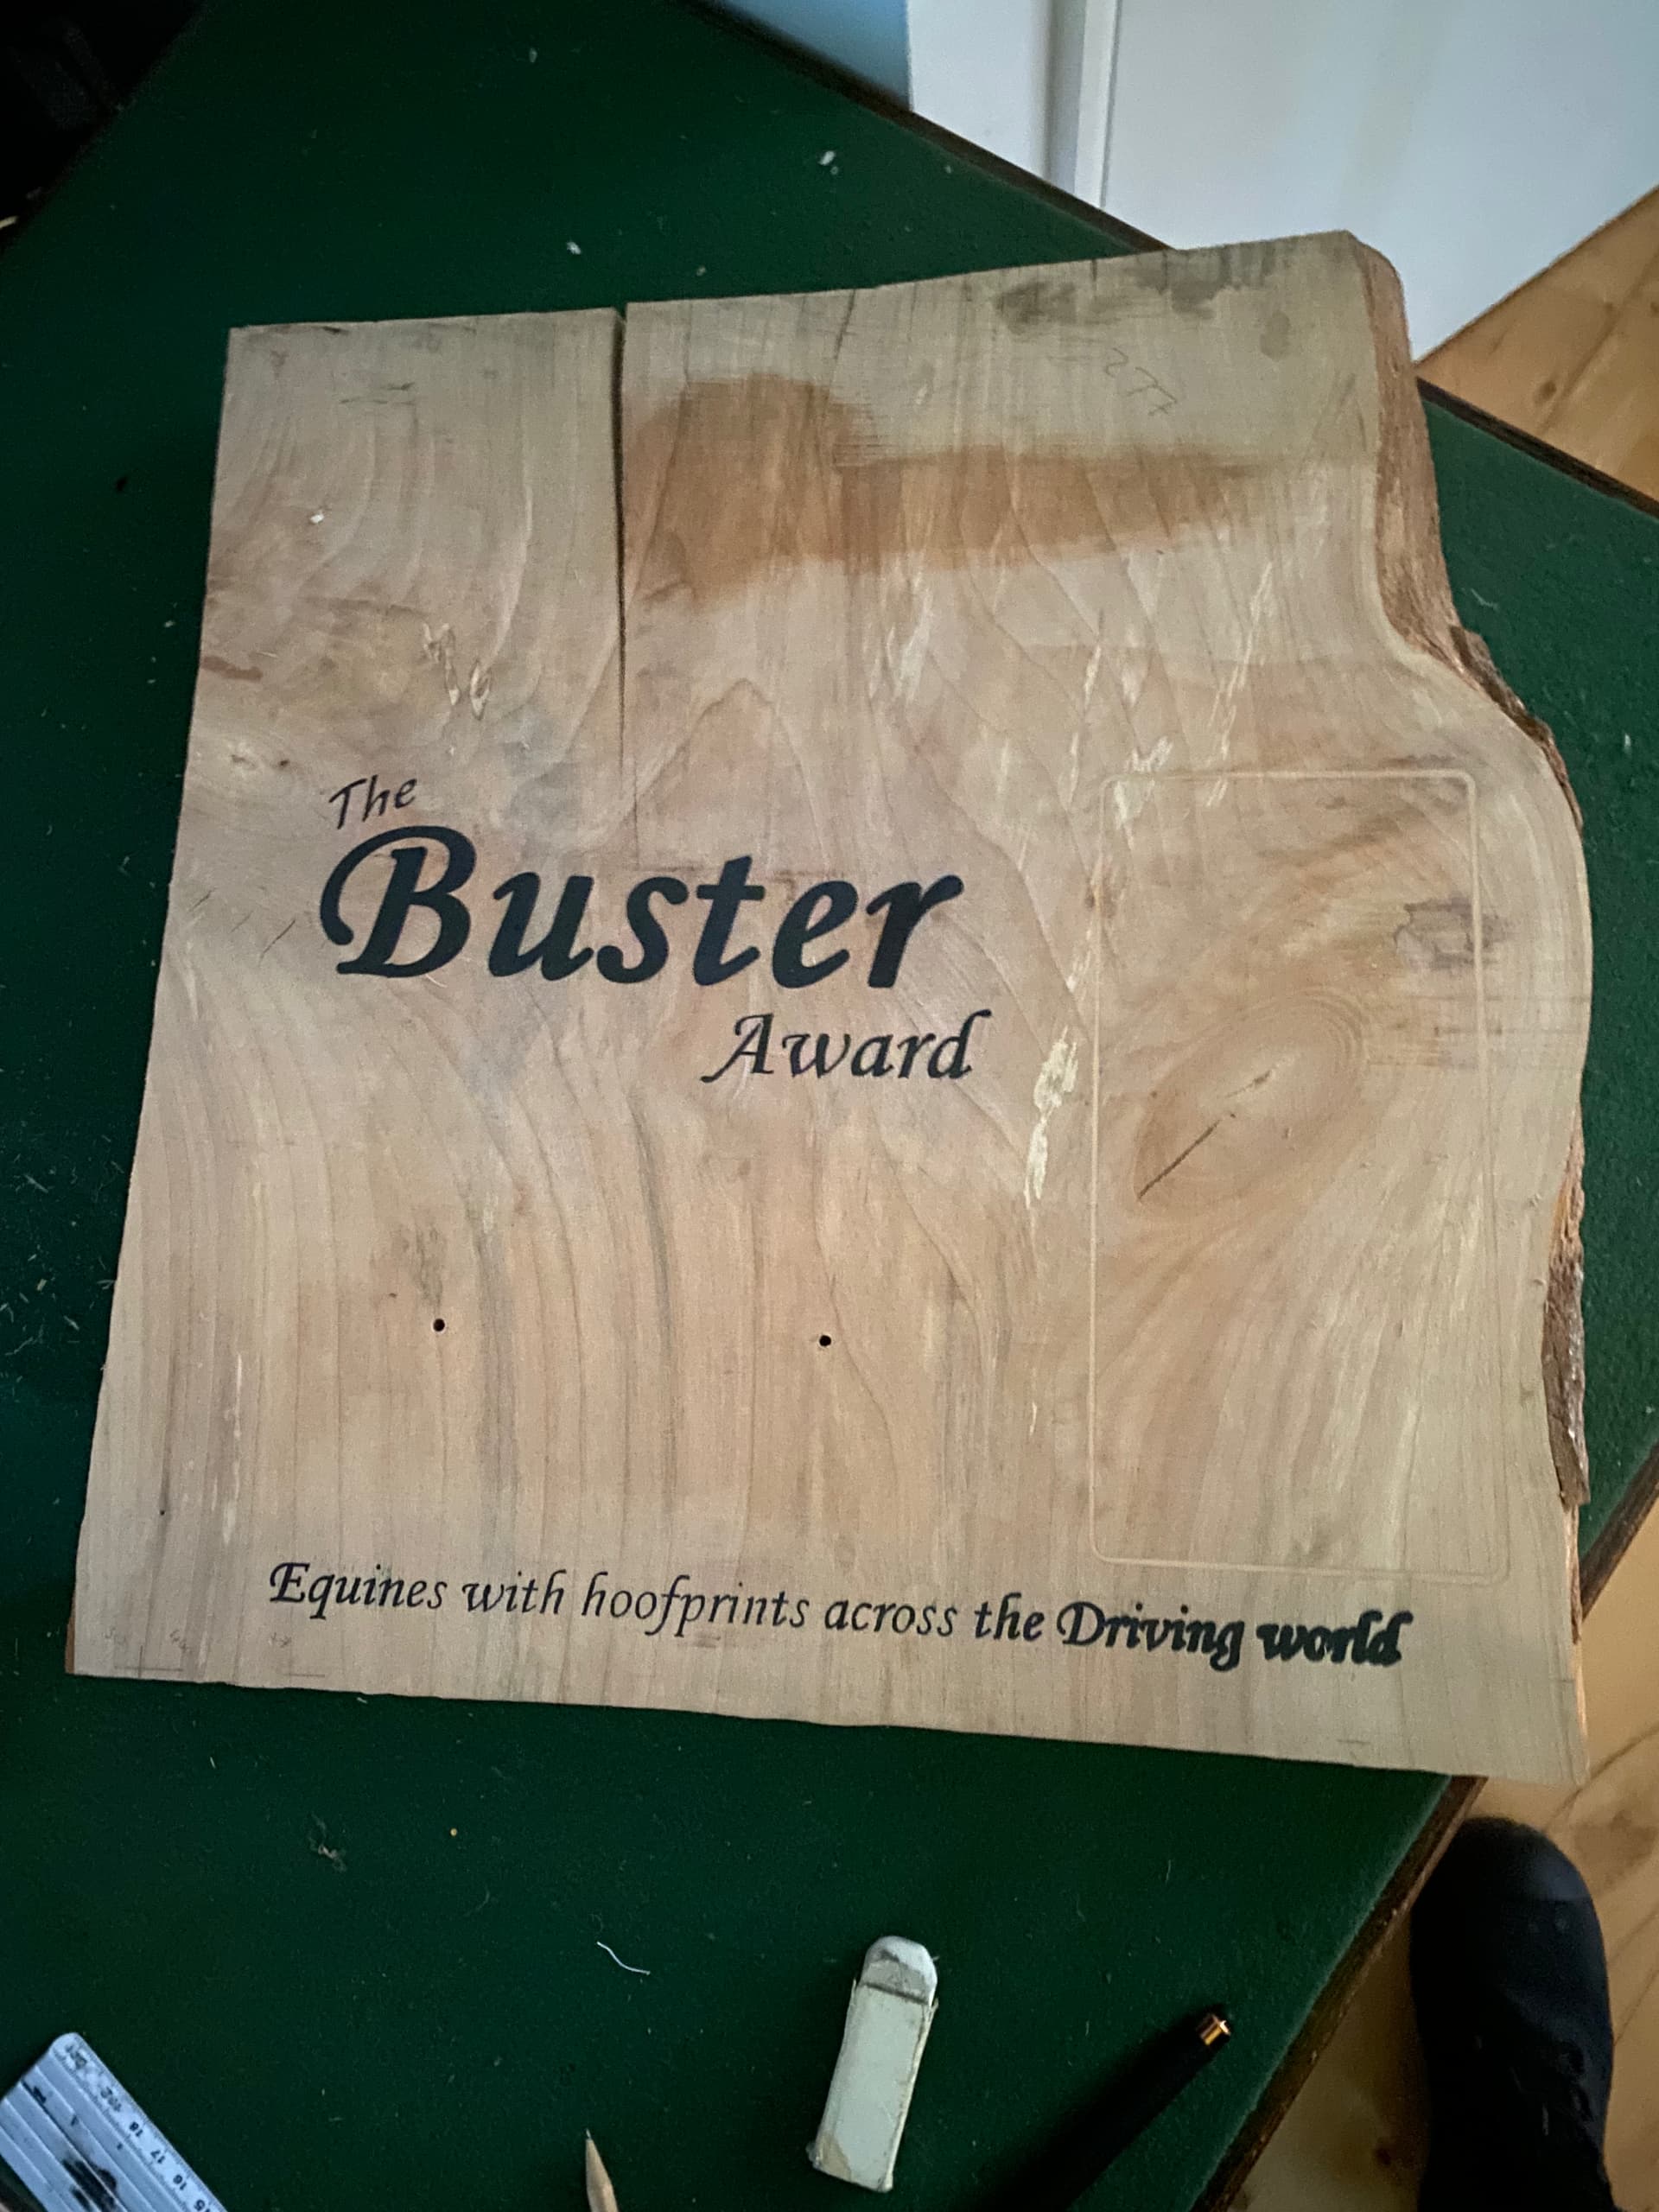
The board is Alder, and was rough sawn when I got it, I wanted to keep the live edge, but wasn’t confident in the tramming of my lr2, or spoilboard flatness. As such I got it roughly smooth with a belt sander and had at it with the engraving. It came out surprisingly well and in raised areas actually did me a favour as it made the key words “bold”.
For the first resin pour I had researched on the forum, and clearcoated the engraving first, then set to with the dyed epoxy - used a bead of hot glue gun as a barrier. This worked well and it sanded back almost perfect - heatgun did a great job of dealing the bubbles!
Once sanded up I attempted to part out the board on 3sides, leaving a live edge. Unfortunately my long bed mill was blunter thank I thought, and I managed to snap it halt way through, but luckily no damage done and so skill saw and belt sander to the rescue. Quick roundover with the trim router, and then danish oil and beeswax
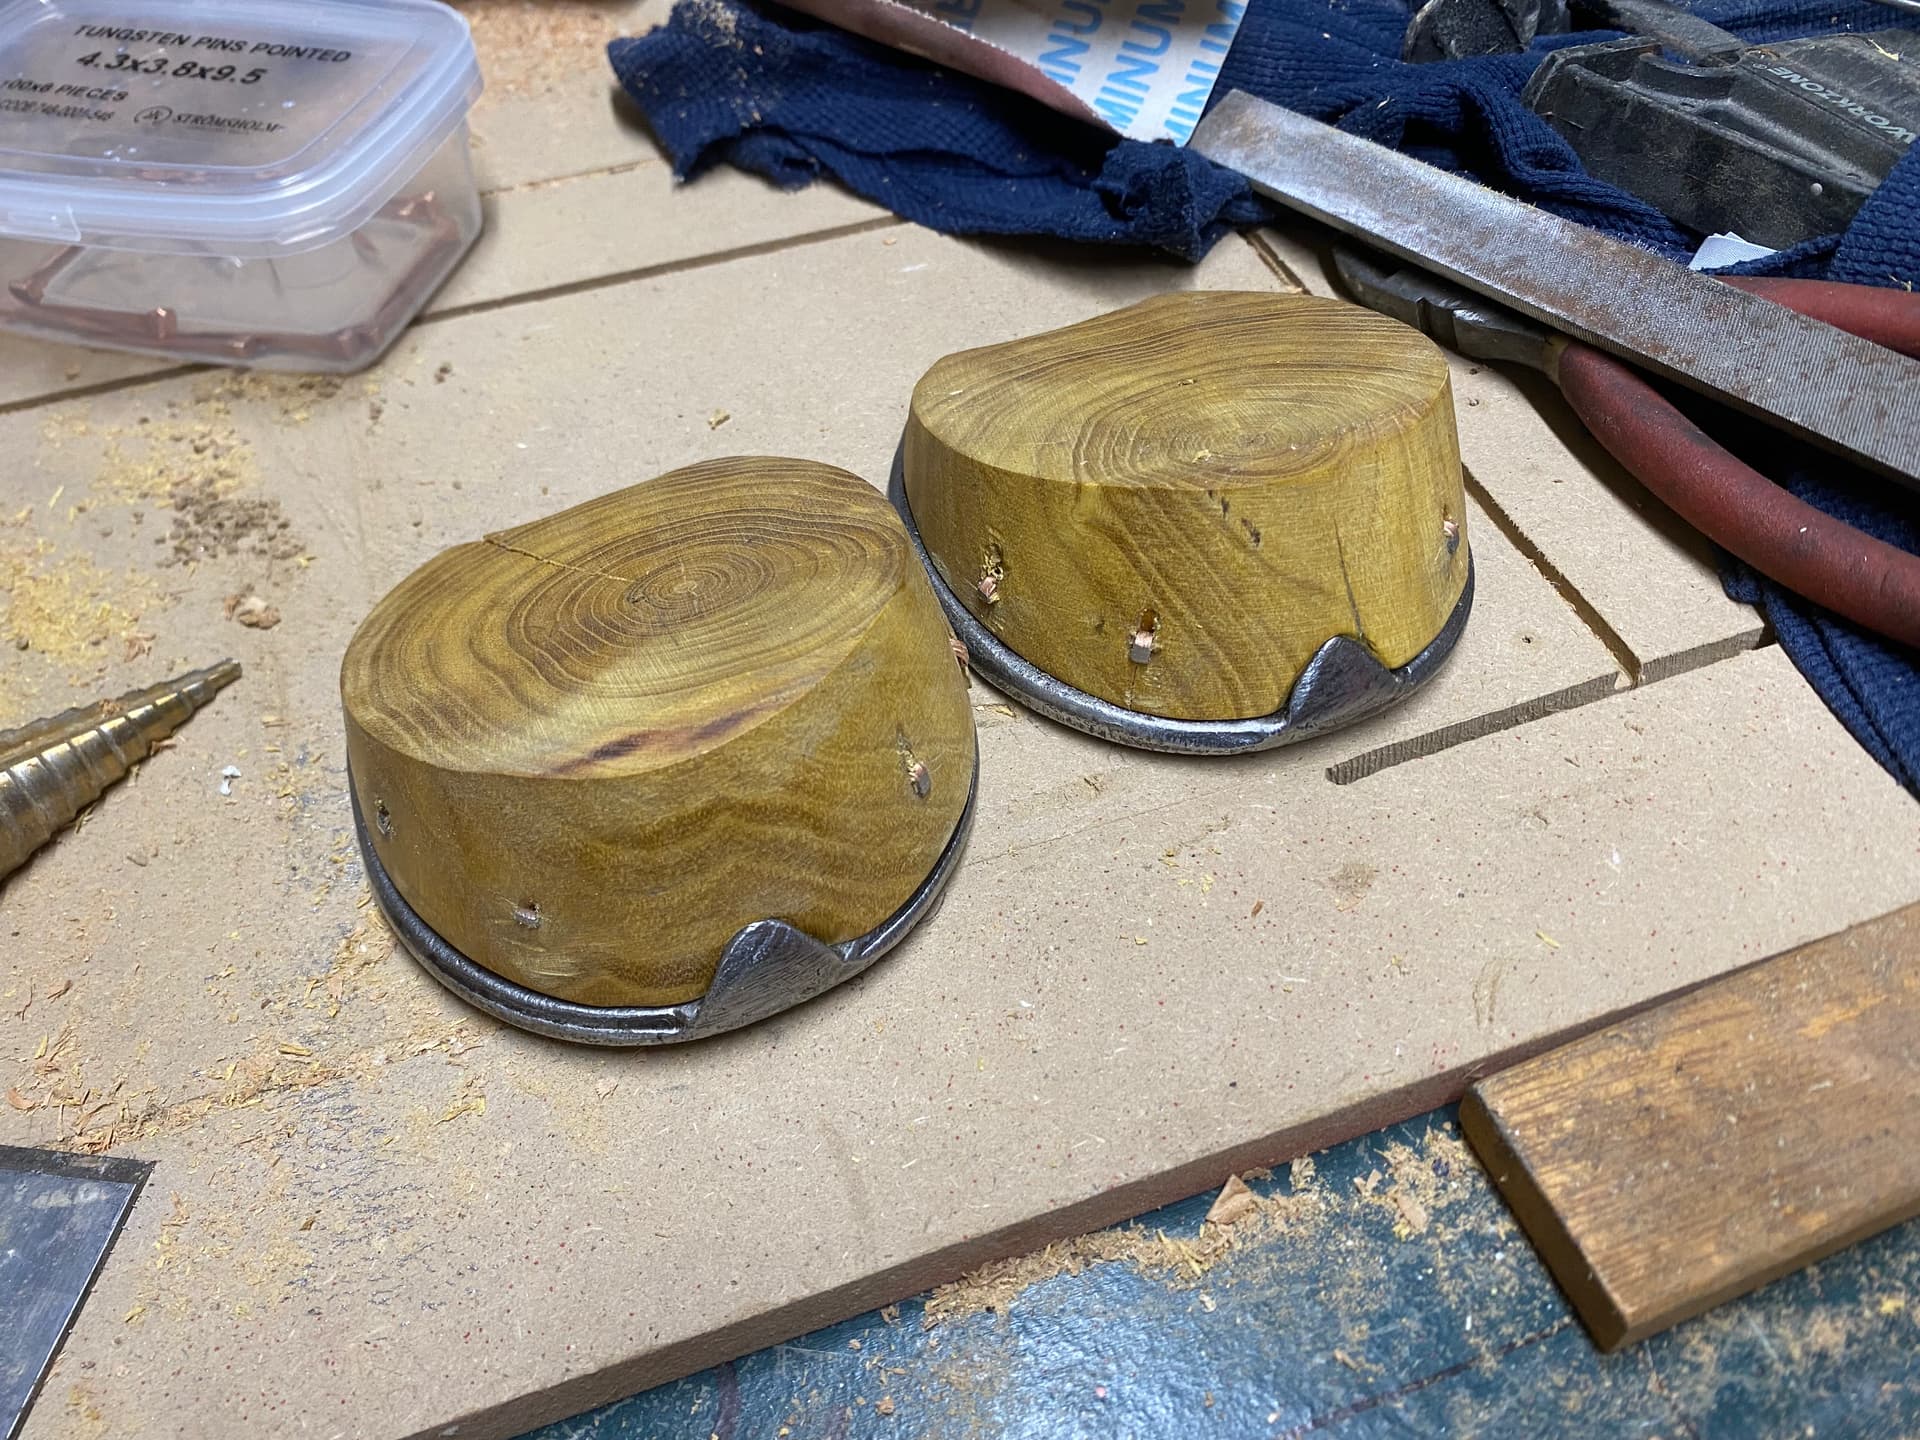
The hooves were mullberry, which after a foam insulation trial were rouged out with a 2flute 4mm upcut. I then used the belt sander again to create the actual hoof shape - much quicker than a finishing pass! Holes drilled for the copper nails, and the polished and lacquered shoes were then nailed on and trimmed up and clenches knocked in.
hooves were held on by screws from behind, and with a pair of furniture feet pads, it stands up perfectly!
It was all a last minute rush, and only got finished 4hours before it was awarded!