Here is my take at a modified bed plate. The bed I ordered has mounting holes on a 210mm square so thats what I went by. Should be able to cut it out this weekend and test fit it.
3 Likes
lol. Done, posted a build pic of the Repeat, too.
Unsurprisingly, looks a lot like mine.
I did find that with mine, I can get the BLTouch probe to about 6mm from the back edge, but closer than that, and it can result in some interesting noises… Of course I have those 450mm Y rails, and with the 310mm square build plate, I get about 66mm of extra space in the front where the nozzle completely misses the bed. I was planning to add a nozzle wiper there, but haven’t done it yet.
1 Like
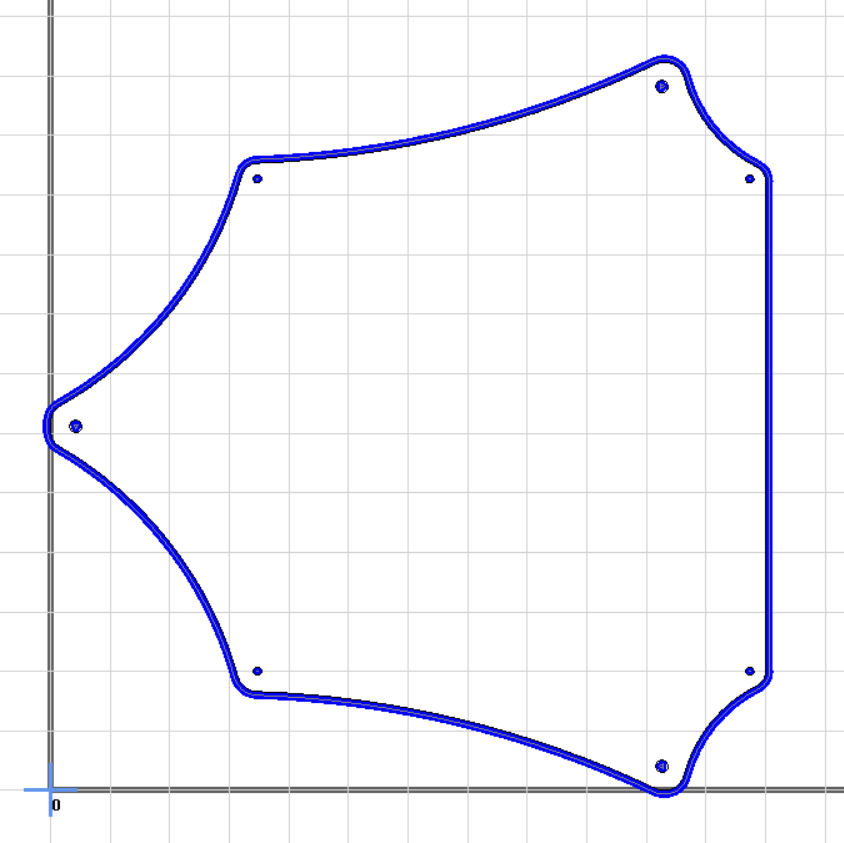
I was thinking something like this for a 300ish build area:
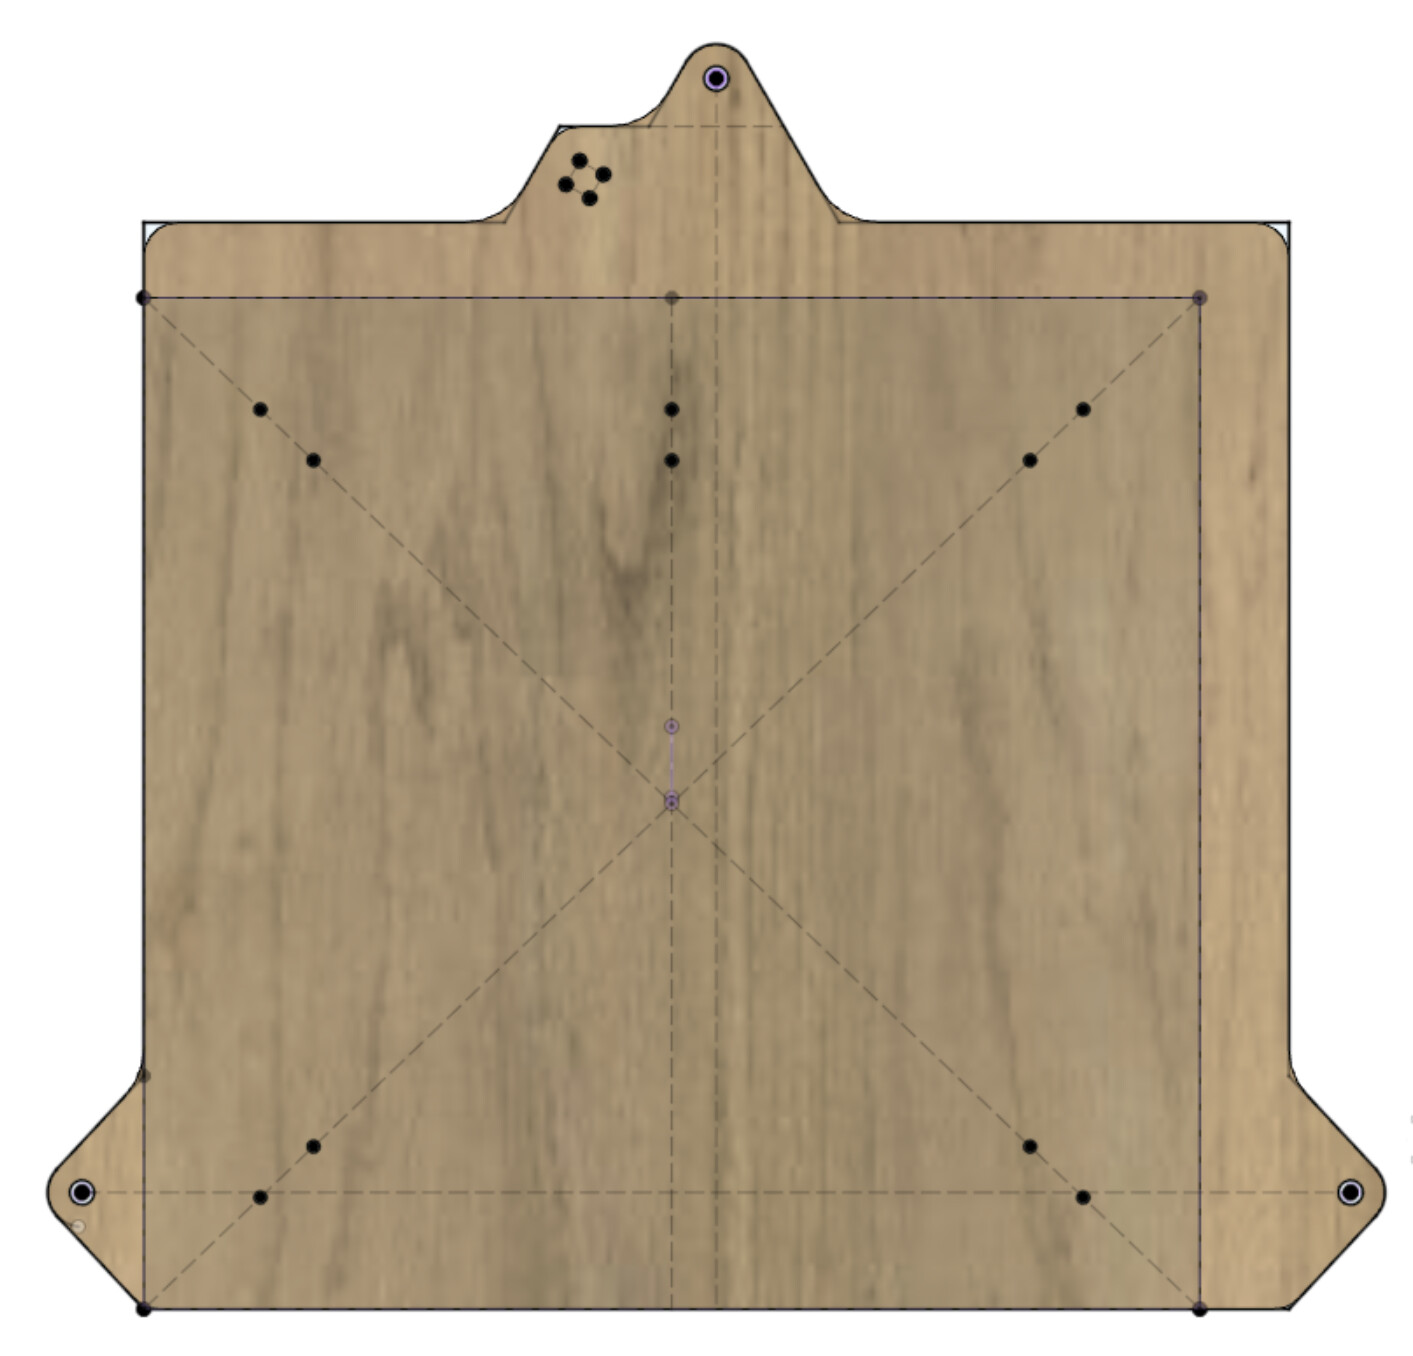
The mount pattern includes 240mm & 209mm 4-point & 3-point holes.
It is offset from the centerline because with the Hemera, the nozzle is offset.
I was going to leave the platform squarish and bigger than the build area to allow for different tools which may have different offsets.
I don’t want it to be too heavy for the direct drive z belts, but it won’t be moving fast. I figure I could start adding lightening holes if need be.
On the Hemera mount, the BLTouch is about 36mm in front of the extruder nozzle. There is not much that can be done about that other than adding another 50mm to the Y-rails so it can reach the back edge. I figure extrapolating out 10% ought to be okay - especially if it is close to level.
You are definitely motivating me!
I’ve got my printed parts made and 1/2" birch plywood in hand. I guess it is time to place an order for the electronics, belts/pulleys and rails and start making chips.
5 Likes

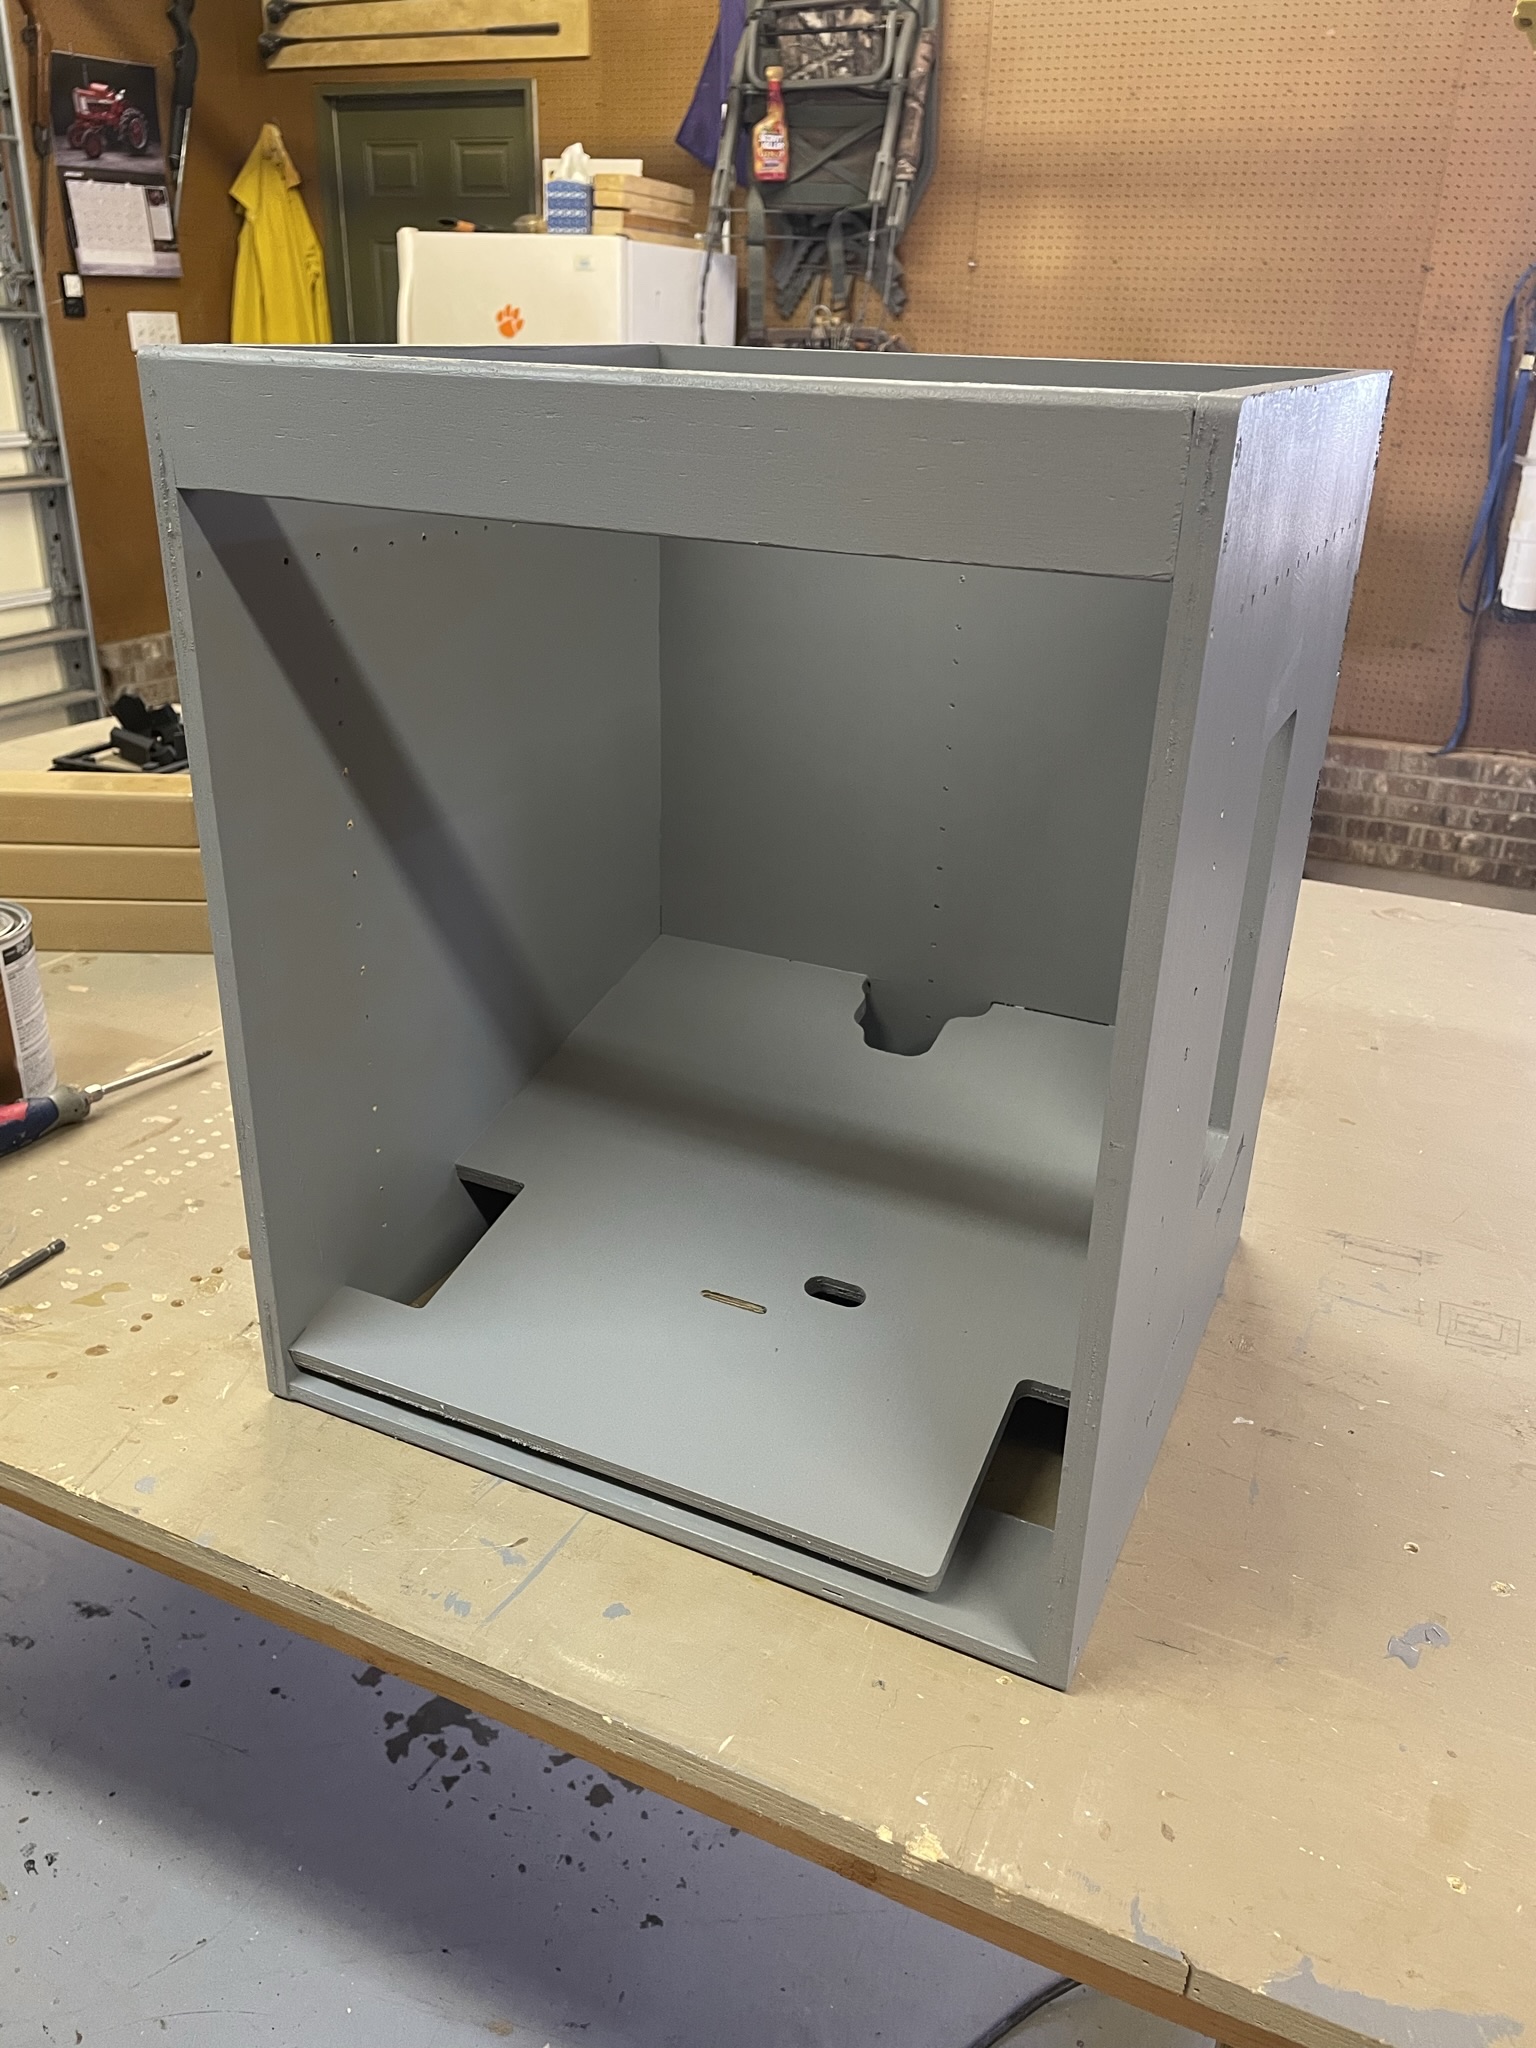
I really enjoy painting when I don’t have to do any of the steps! Looks great.
3 Likes
Has this ever happened to anyone else… I got an amazon delivery (the heated bed for the printer) at 10:45pm last night. All lights inside and outside the house were off, everyone is in bed, and the delivery lady walks up our porch and rings our doorbell. We have a Ring doorbell so i was able to see who it was and when she heard the ring doorbell go off she turned around and said “Amazon Delivery!”
Craziest thing. Does Amazon not set a max time that they can’t deliver past?
1 Like
Never seen one that late, I have had UPS at about 9pm I think.
Amazon around here rarely rings the door bell. I walk out the door and nearly step on a package all the time.
1 Like
I do recommend getting a Ring doorbell or some type of doorbell with a camera. It really helps notify me when I receive packages and such.
2 Likes
The latest we ever got any Amazon delivery was around 10 PM, like Ryan said, they never ring the doorbell unless you have setup delivery instructions… Our UPS delivery guy always ring the doorbell.
I constantly have to set the door bell to “sleep” every time my son is playing outside the garage door and I’m at work, the ring door bell notify me every 2 min… so fricking anoying
Nah. My UPS guy is the only one that rings the doorbell and it is only while the kid is napping.
4 Likes
If I had a dollar for every time I’ve caught the UPS guy (or got it on camera) with the “sorry we missed you” tag already filled out and no box in his hand…
4 Likes
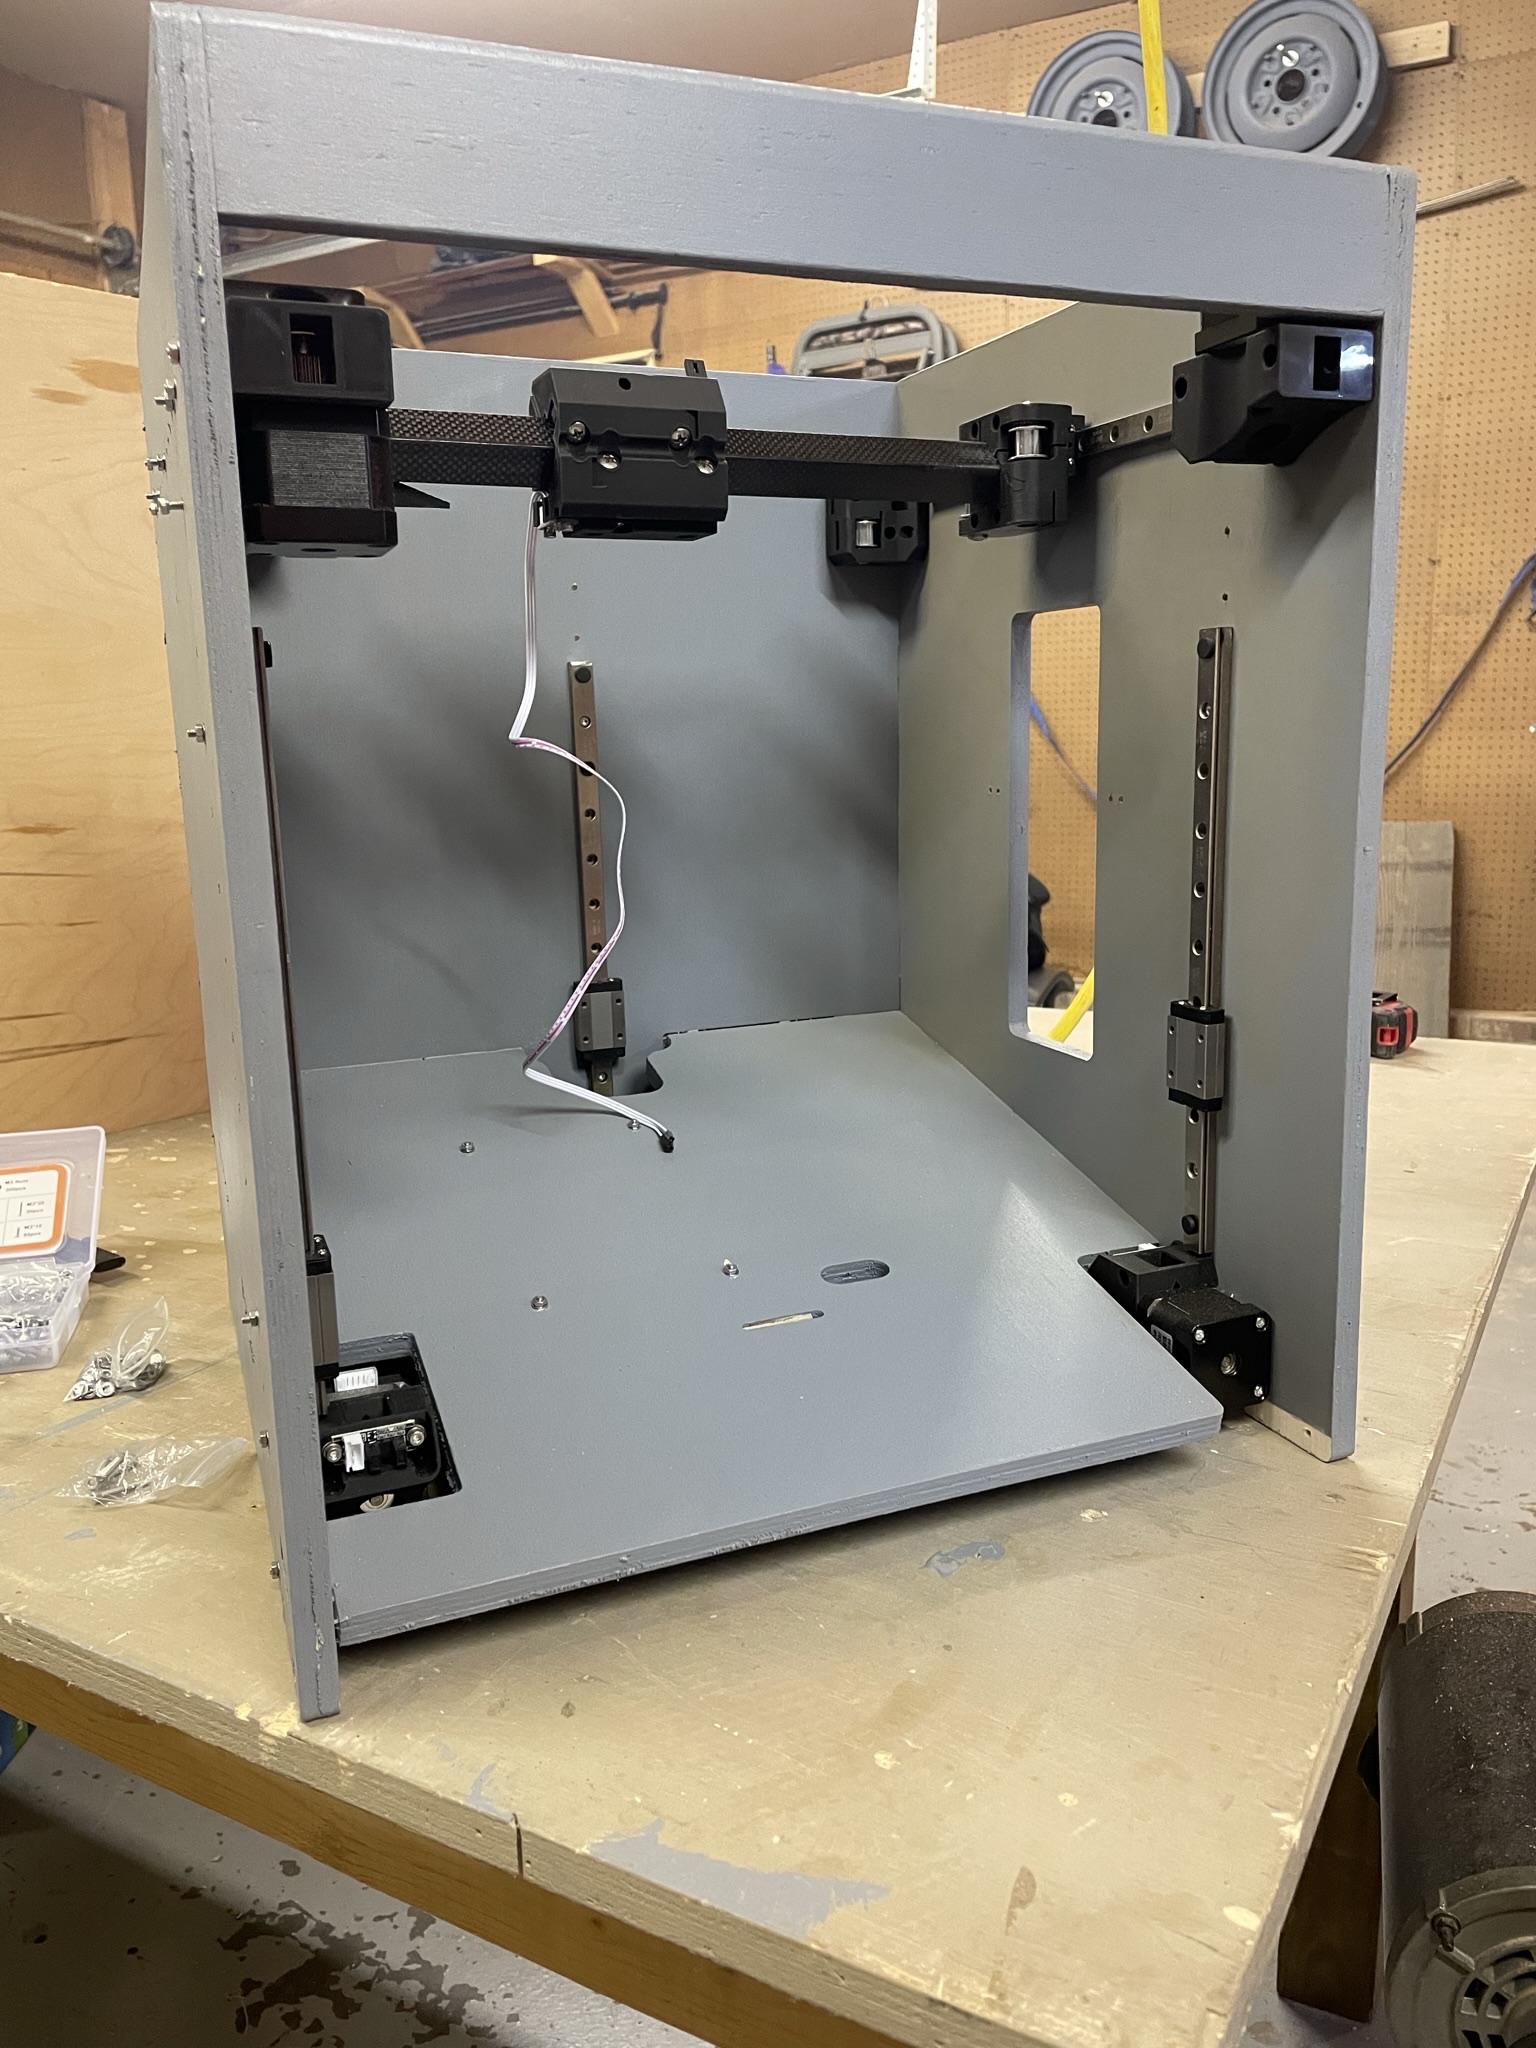
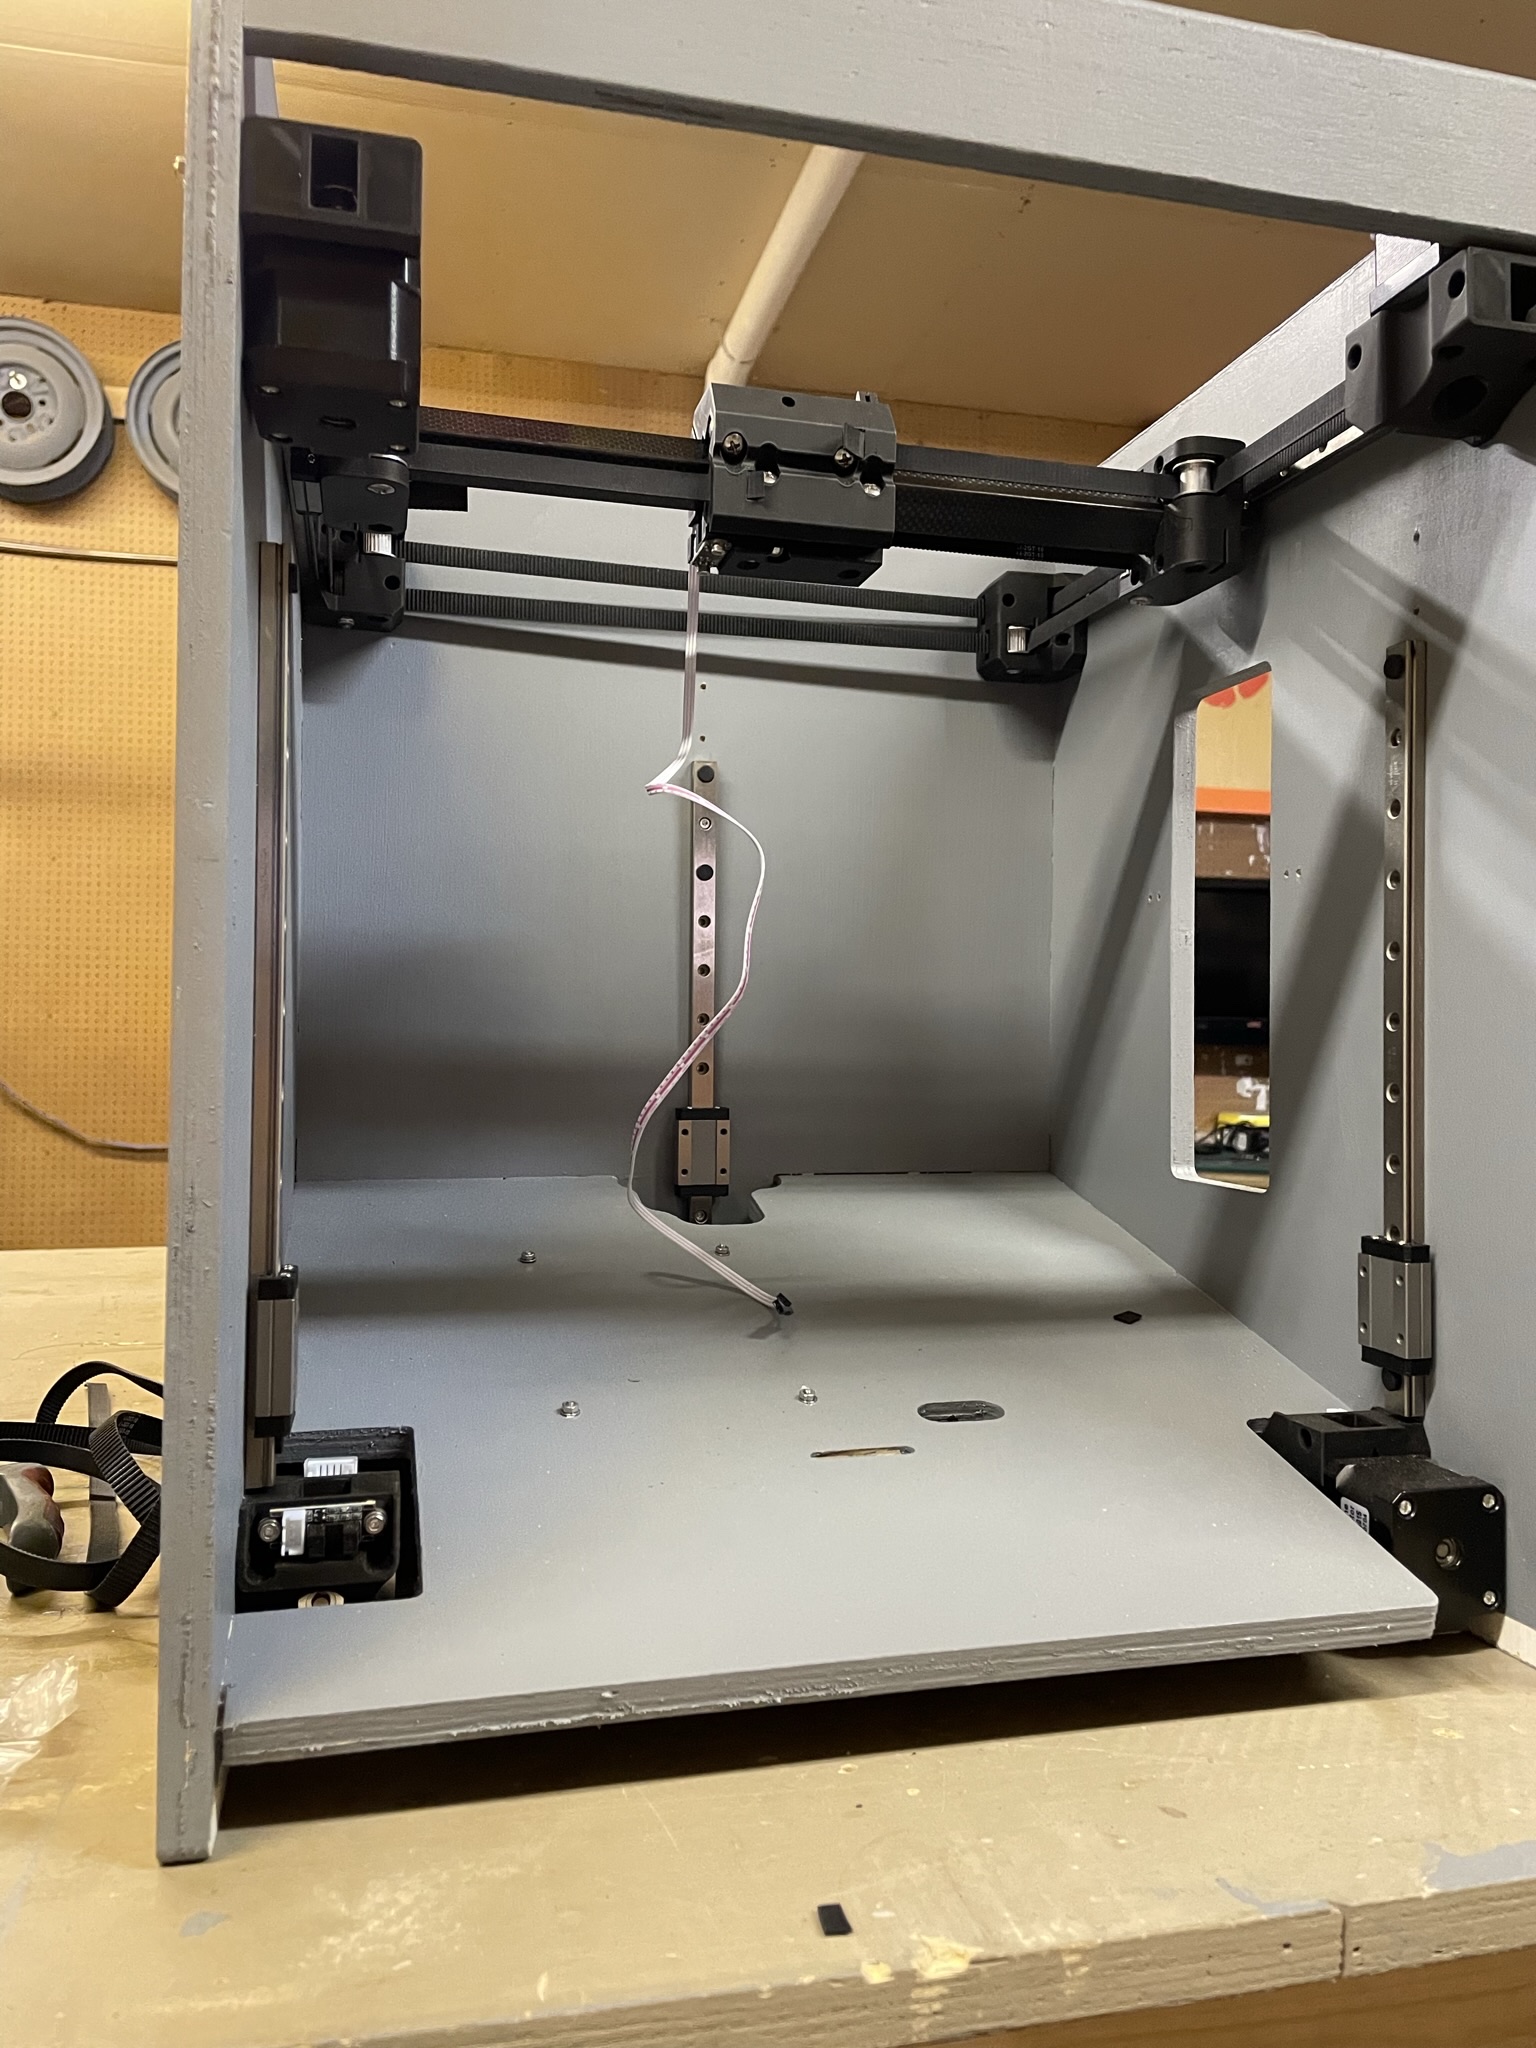
CF tube came early so some progress was made. Motors installed. Rails installed. X and Y installed. I believe I have everything I need to finish this thing up. The bed plate, BL touch, power supply, Hemera, are all accounted for. All that’s left is put everything in and hope I have sufficient wiring to wire it up.
On that note, what are you all using to wire up the optical endstops that are out of reach when using the wire that came with the endstops? I am able to cut and solder extension cables, but I would rather not go through those tedious steps if not needed.
Anyway, here’s where I am at right now.

4 Likes
I have various solutions.
2 of the endstops, the wires were actually longer than required, those have the extra bundled up now.
I made a M-M adapter for the wire on the furthest stop, and am using 2 of the provided wires there. For the other 2, I made up custom wires (And one is still just a little shorter than I’d like) using the JST connectors so that it plugs into the SKR Pro and the endstop.
The stops that I’m using look like the ones from the V1 shop, but they were sourced from China, and I needed to swap the pins on the motherboard end, because they were in the wrong order.
4 Likes
I also had to extend wires, including all the wires coming from the Hub ( heat cartridge, thermistor, fans and so on…) I end up soldering most of them just the stepper motor that I use a jst cable extention.
1 Like
You mean you haven’t invented wireless endstops yet? Slacker.
Ok, so Li-po powered ESP-01s connected at each end-stop. All meshed to an ESP8266 with relay outputs to the control board endstop inputs.
No need to complicate things…
1 Like
I was thinking LOS infrared beam. You could just have the end stop turn a LED on and then have a opto-sensor on the other end trigger the board. Use different colored LEDs and it’d be a disco during the homing sequence.
3 Likes
More progress last night. I was able to get the XY belted up as well as 1/3 of the Z axis assemblies. So far everything moves as it should.
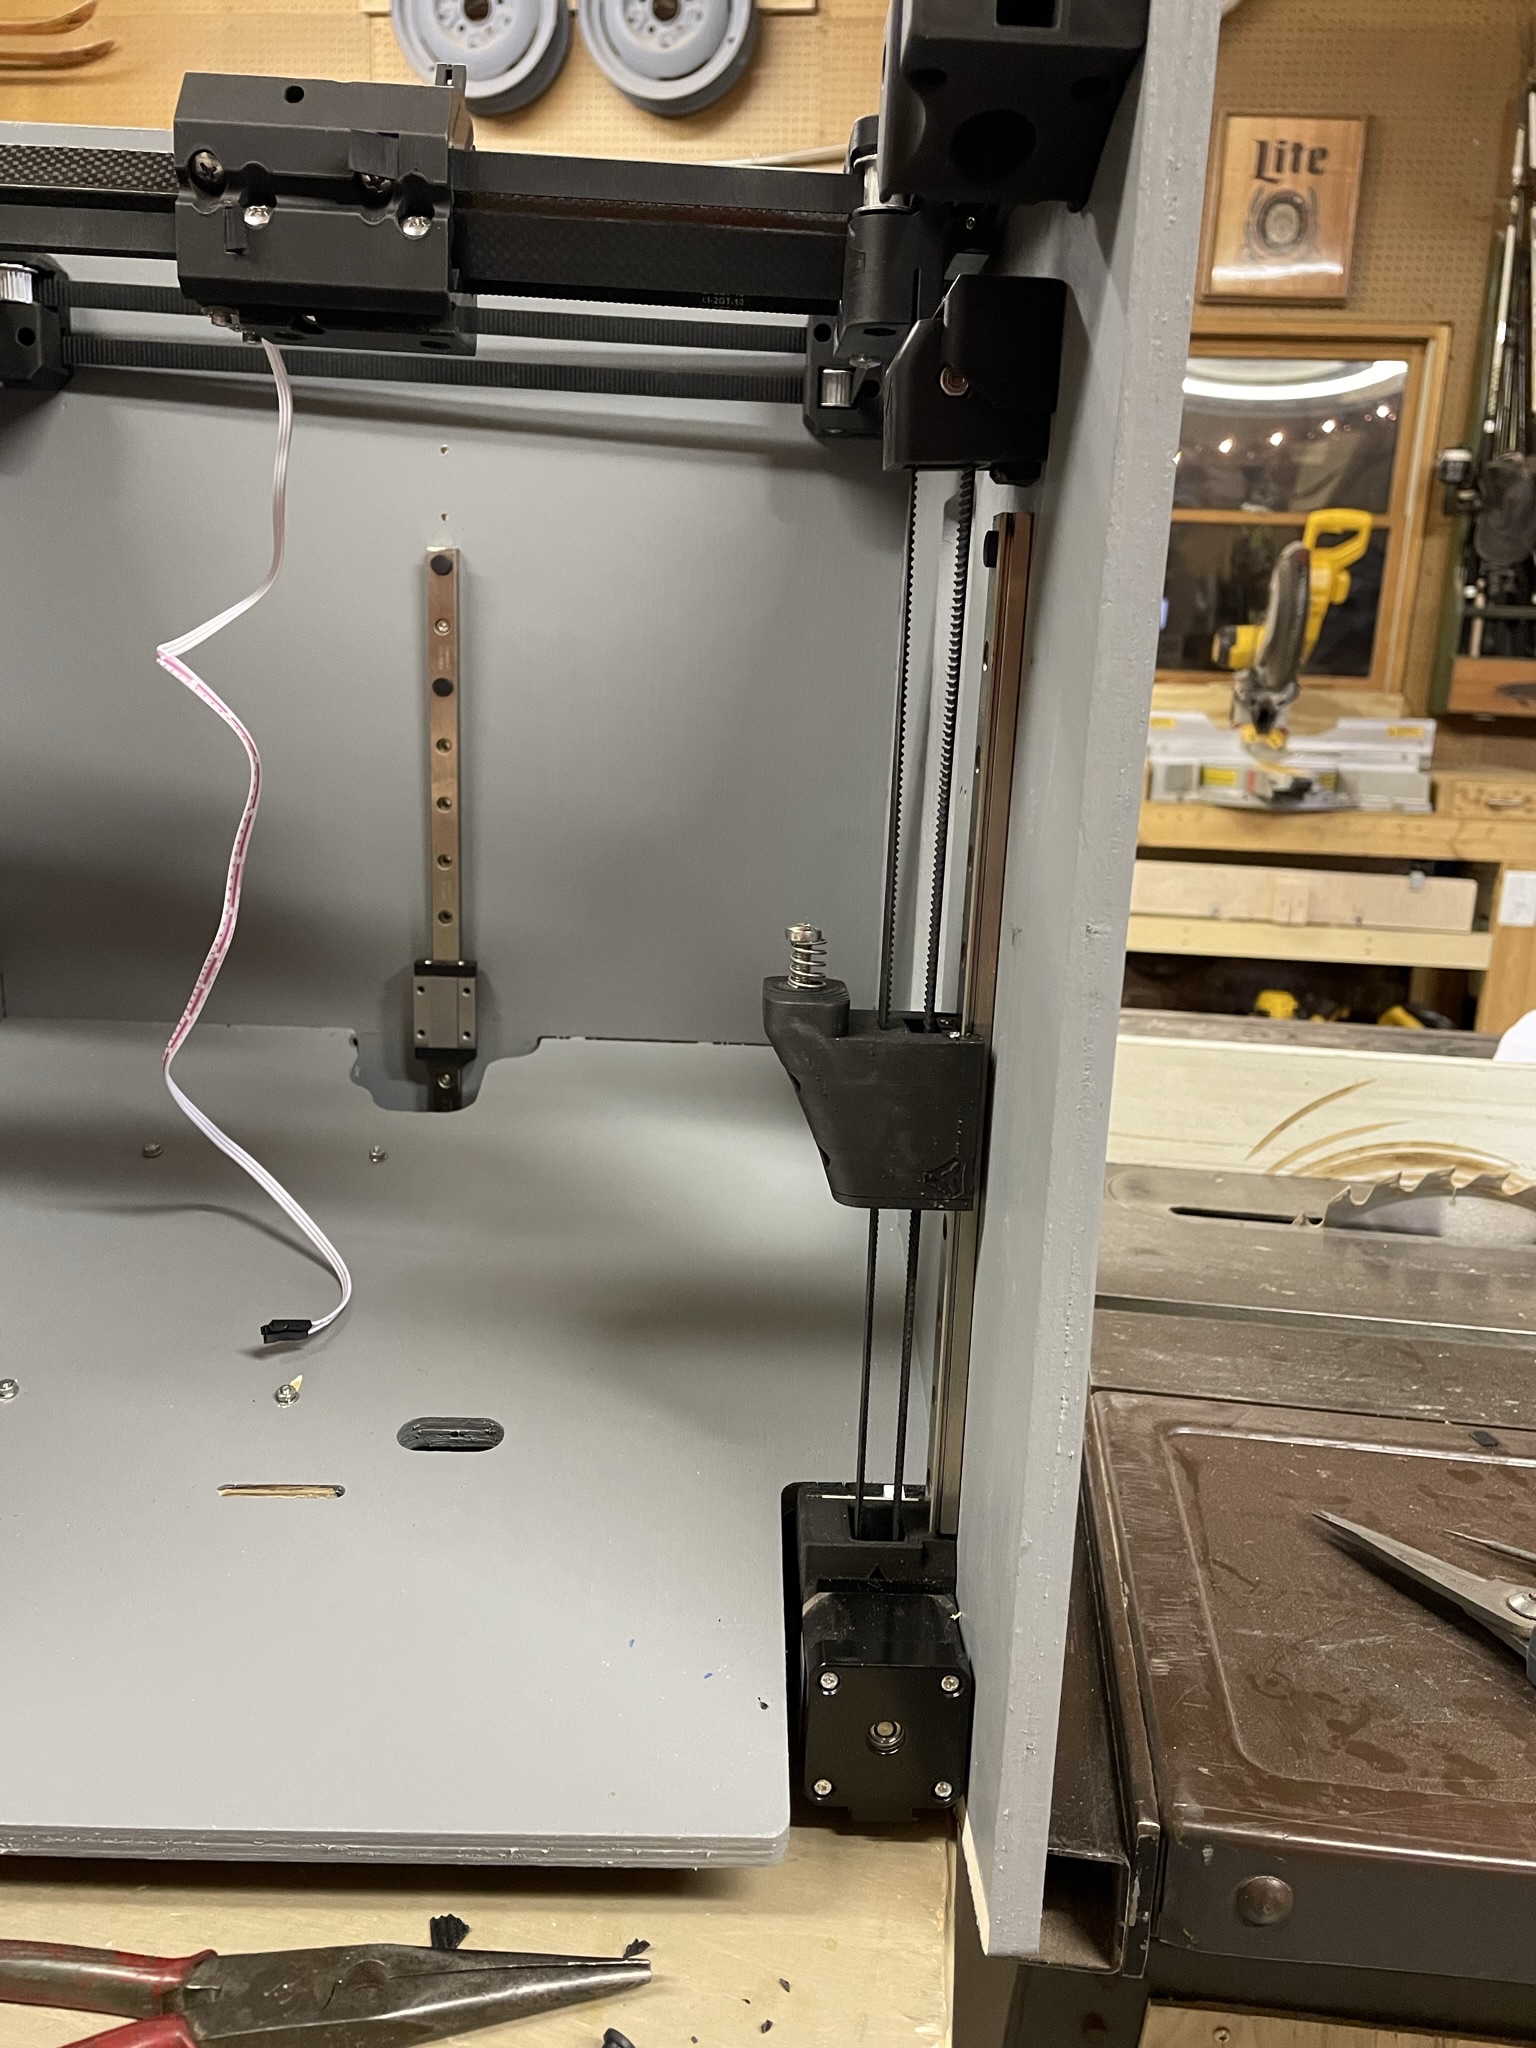
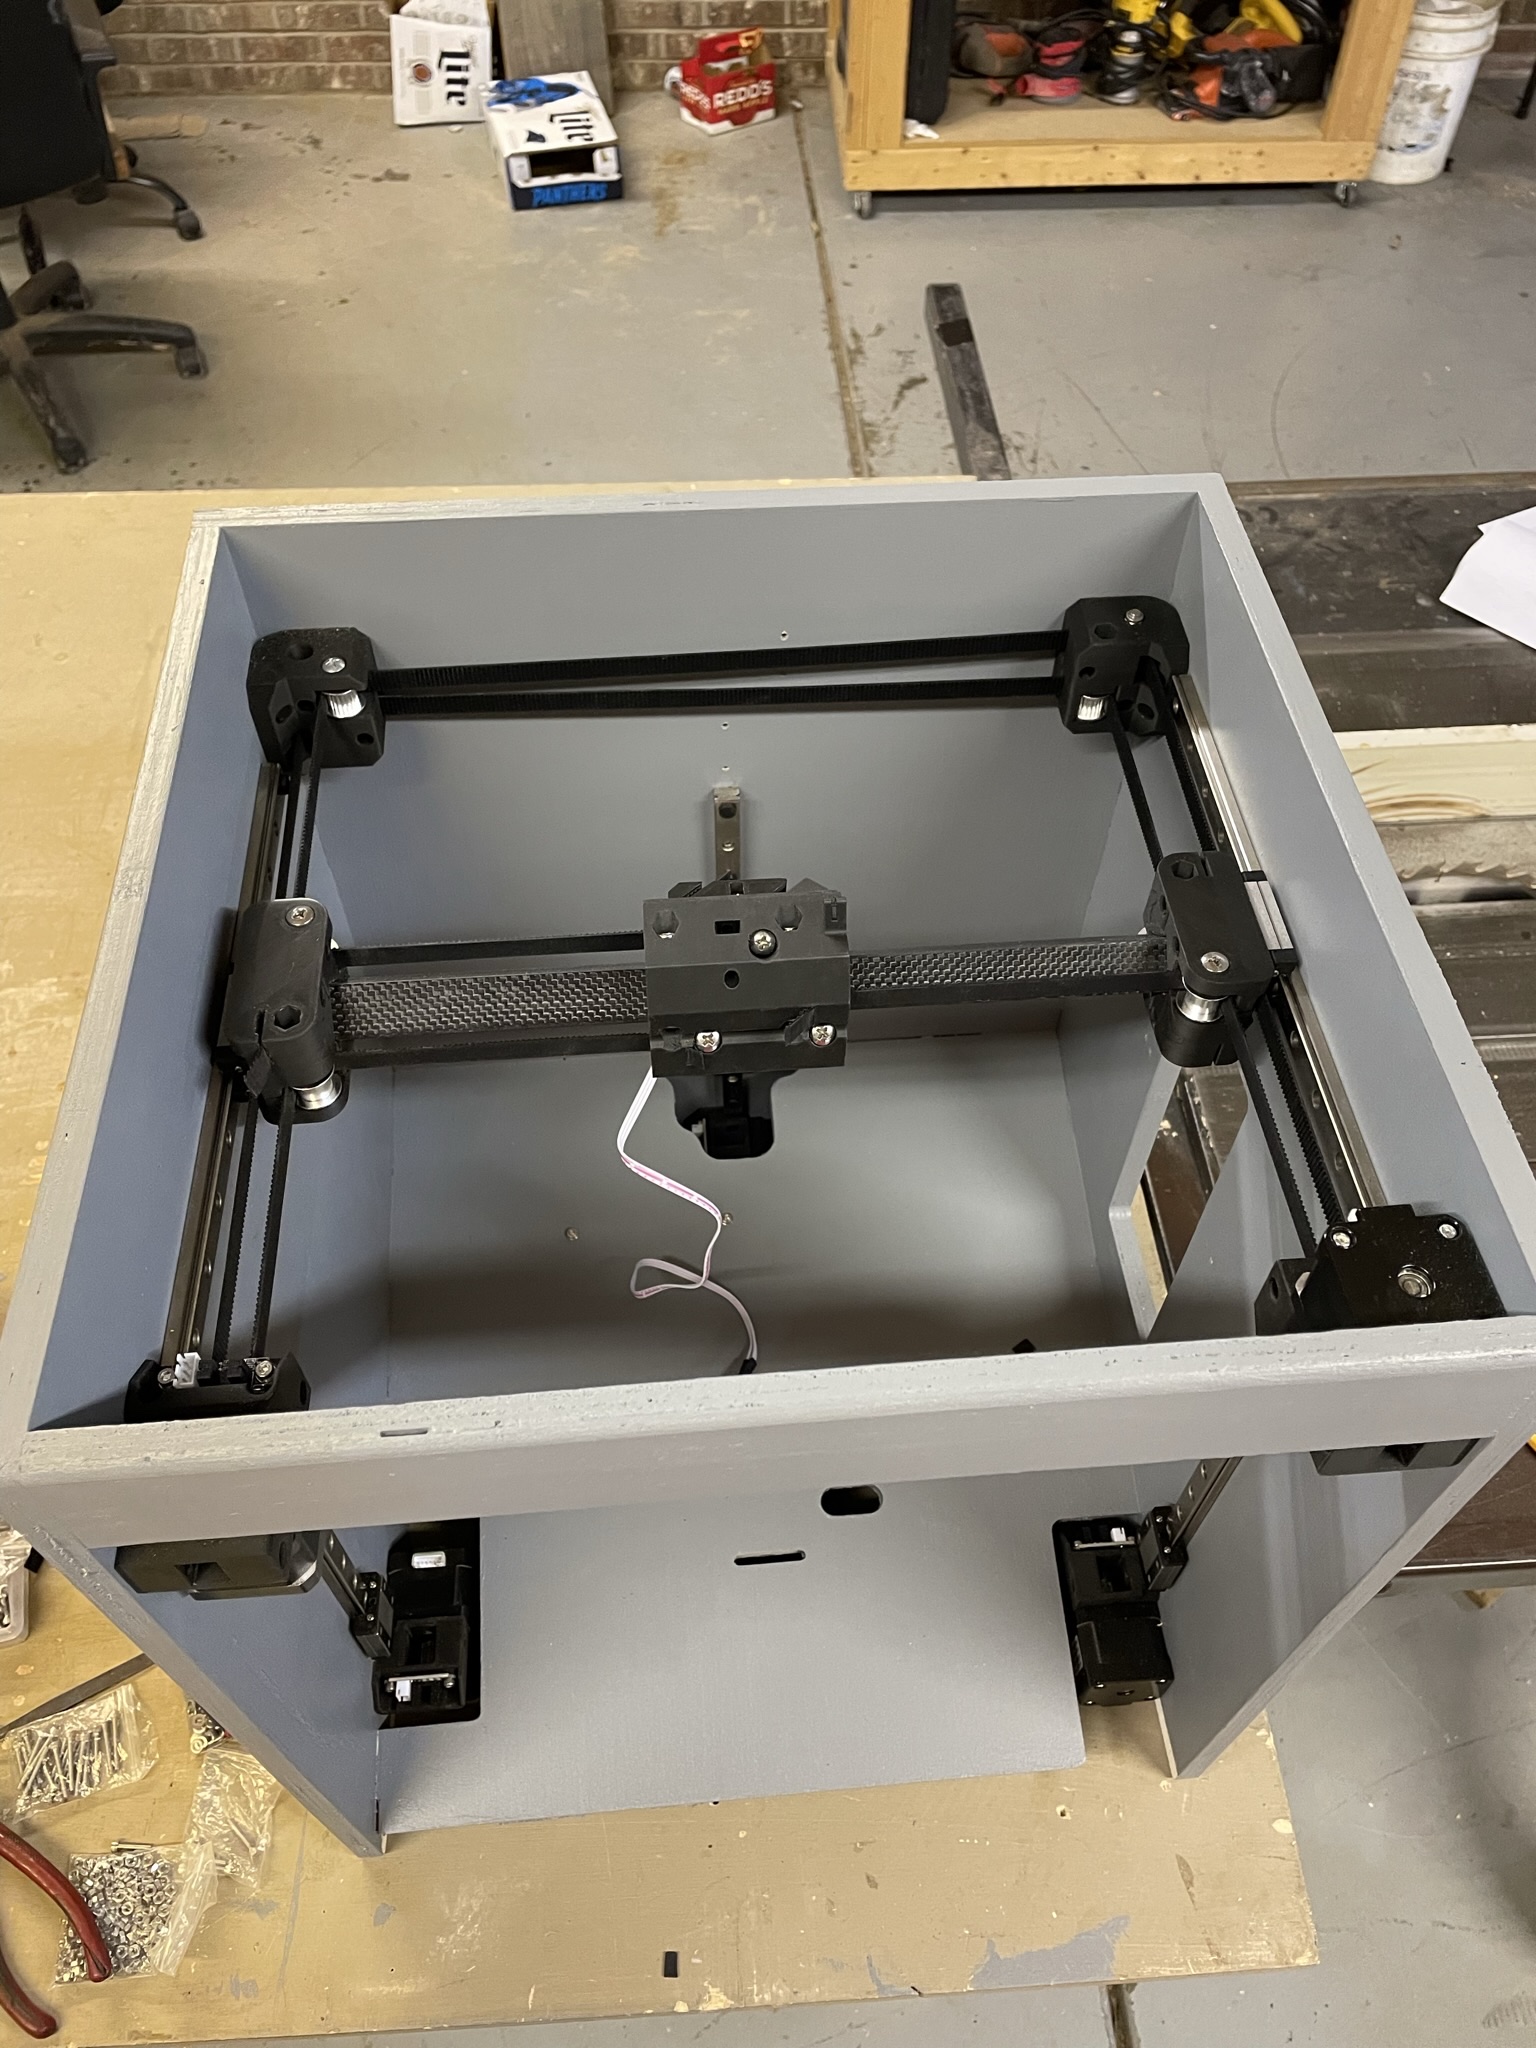
2 Likes
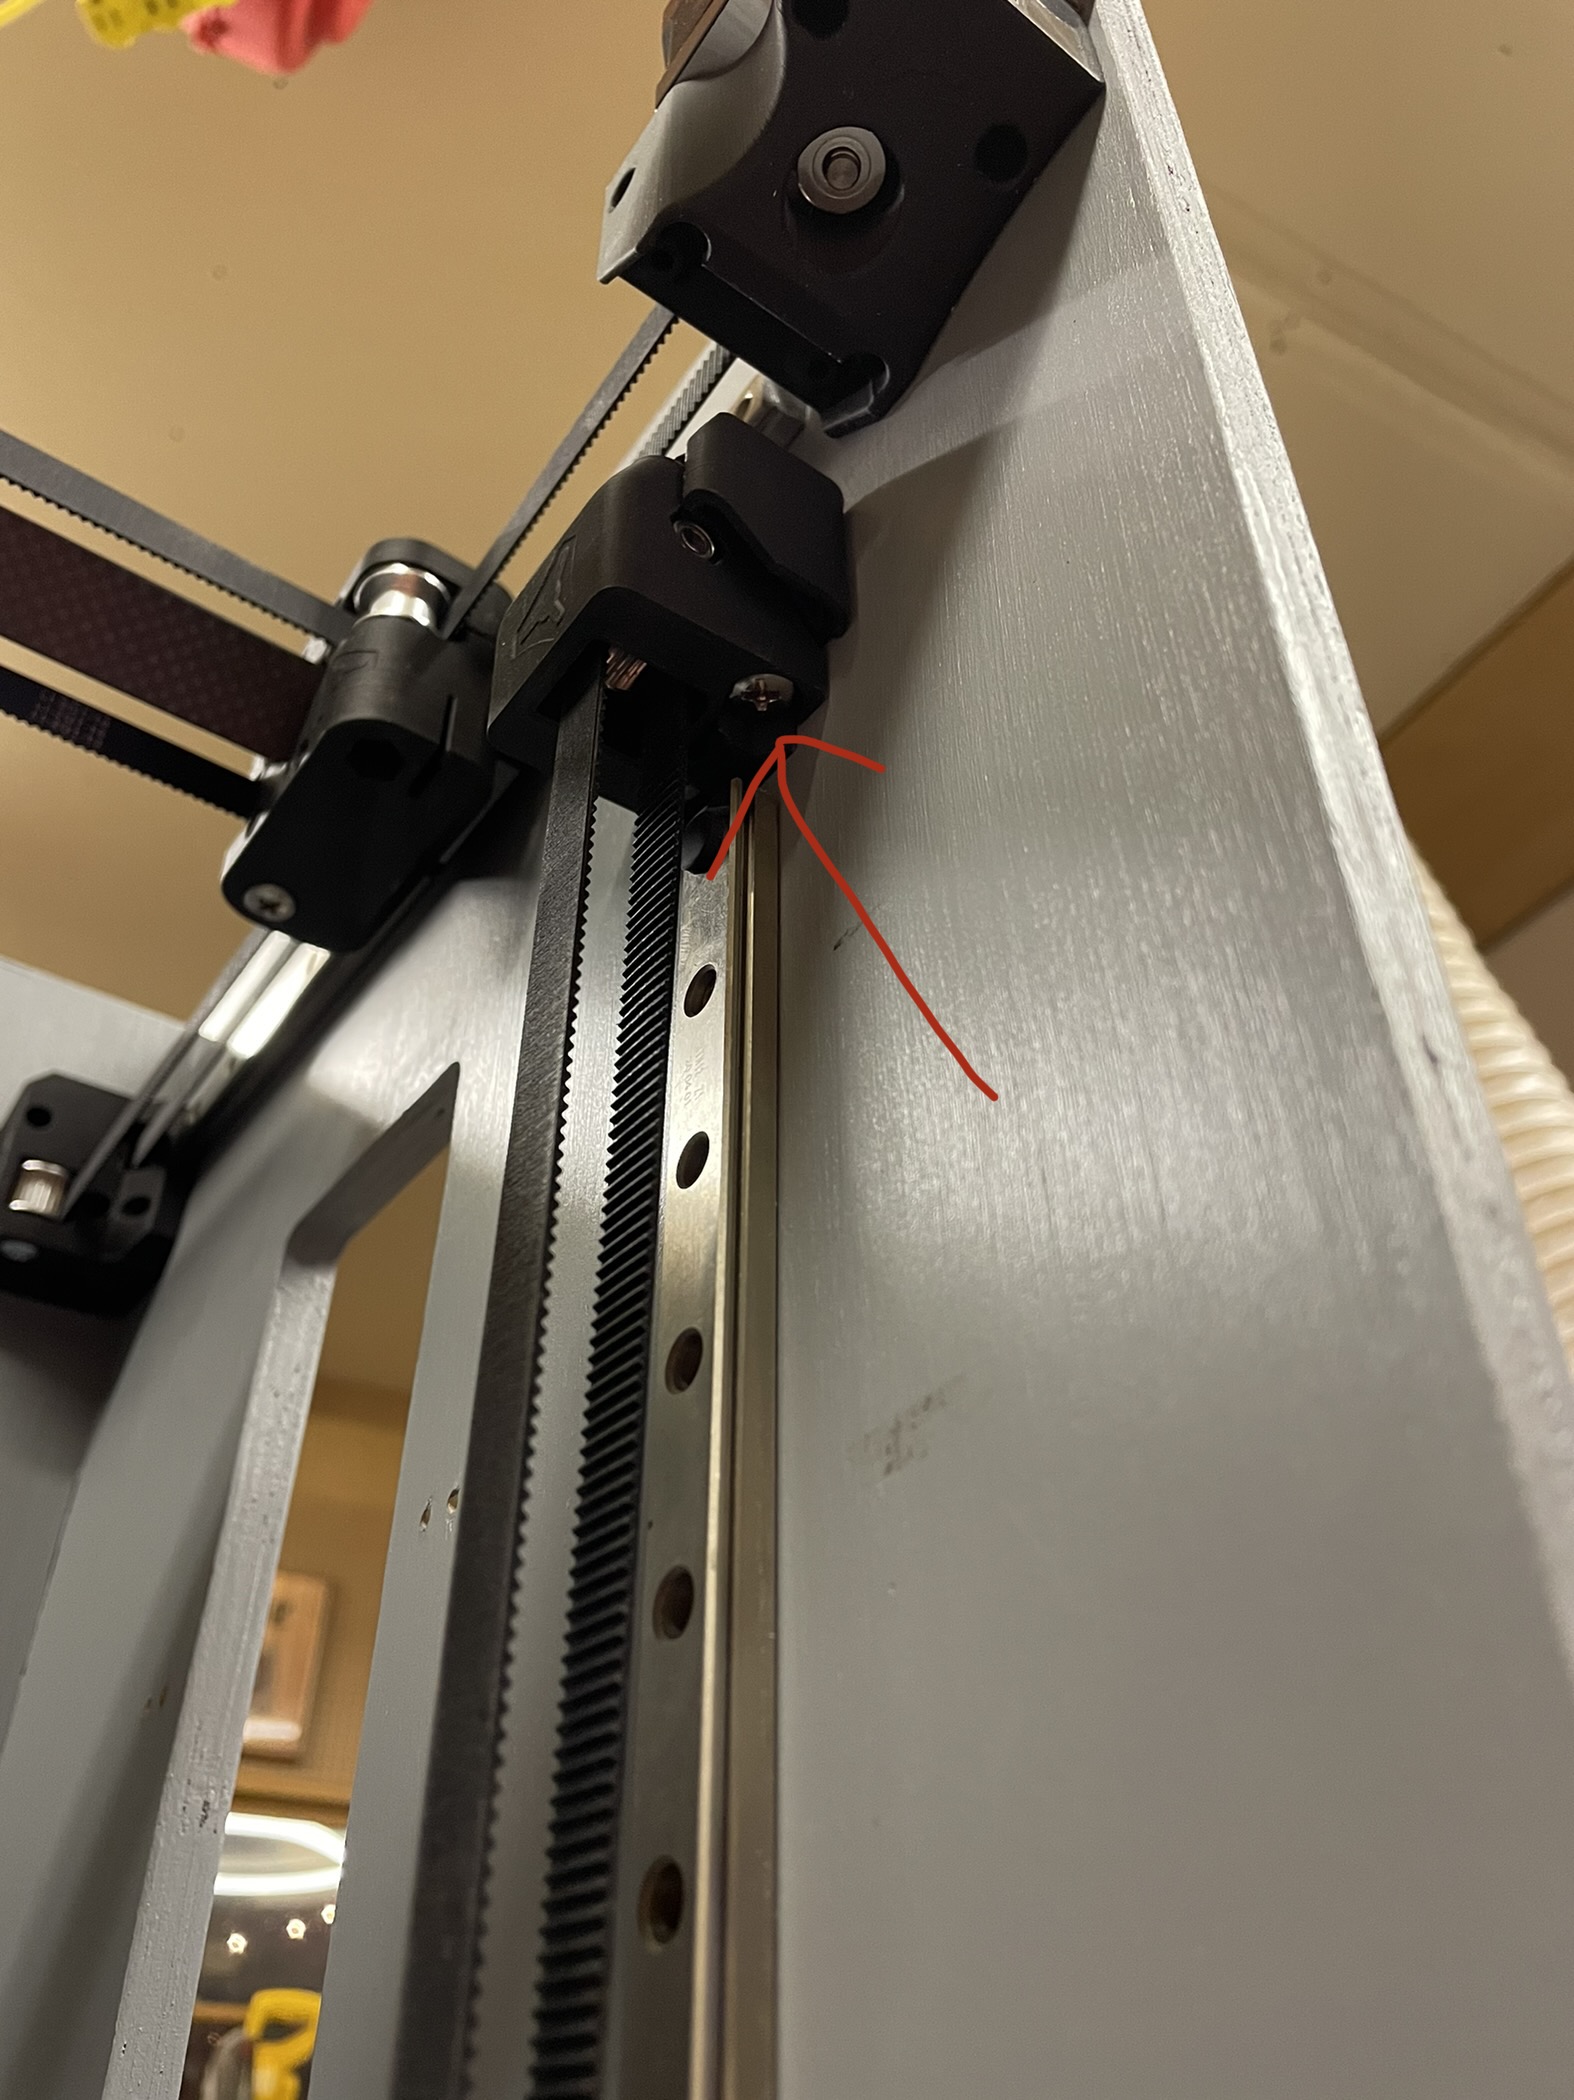
So now let me talk about my struggles. The screws for tightening the z axis belt are probably the most challenging screws to turn i’ve ever encountered. You can see the mark on the inside wall where I am trying to turn the screw driver right up against the wall. One of those angled drill bits would be a big help here.
Another challenge, which I am curious if everyone else struggles with, is the nylon nuts spinning inside the printed parts. I do take the time to prethread all of the nylon nuts, but I will still get some that start to spin and once they spin once, ITS OVER.
But in the end I am able to get it all together and working and that’s all that matters!
I use an average to slightly longer standard Phillips screwdriver with a #2 tip on the Z screws. With the Z sliders all the way down, I have not really had an issue. Let me take a look at mine again. Originally I did have the screw heads facing up but the Left upper rails got in the way and if you had a lid on it you would not be able to get to them.
Which nuts started spinning? I believe I have them all fully captured, so long as they are fully seated the part should break before they spin, except the tool mount, and belt tensioners.
I am wondering if it is a nylock thing, maybe regular nuts would be better. I did find on the tool mount nut, once, that it started to cross thread. So I backed out and started again, and it went in much better the next time.
1 Like