
Well the second attempt of the strut brace had by far better results. The torsion box design was a god sent. Thank you so very much @DougJoseph. After taking a number of measurements I abandoned the idea of surfacing the spoil board. Even thought it was cut out on a very uneven bench, once constructed very flat. I am investigating ideas and designs for holding materials in place other than screwing the stcok to the spoil board. Now to cut the next 2 strut braces and sadly, they will not have the Hello Kitty design. I am not confident enough for engraving just yet. Ill get the orignal brace design cut, painted and installed and then work on making the LR3 workhorse a piece of art
Well the second attempt of the strut brace had by far better results. The torsion box design was a god sent. Thank you so very much @DougJoseph. After taking a number of measurements I abandoned the idea of surfacing the spoil board. Even thought it was cut out on a very uneven bench, once constructed very flat. I am investigating ideas and designs for holding materials in place other than screwing the stcok to the spoil board. Now to cut the next 2 strut braces and sadly, they will not have the Hello Kitty design. I am not confident enough for engraving just yet. Ill get the orignal brace design cut, painted and installed and then work on making the LR3 workhorse a piece of art
2 Likes
You are welcome, and thanks for the kind words, and for posting updates, and for including pics! Exciting to see it come to life!
1 Like
I have many many hours on my machine and still haven’t surfaced the spoil board. Sure I cut a little deeper into the spoil board when cutting out a part sometimes, but meh that’s what it’s there for.
When you want to do fancy engraving and mm matter, then maybe it is worth revisiting. Even the occasionally engrave has come out fine and hasn’t made me think about it yet.
1 Like
Hello everybody!!
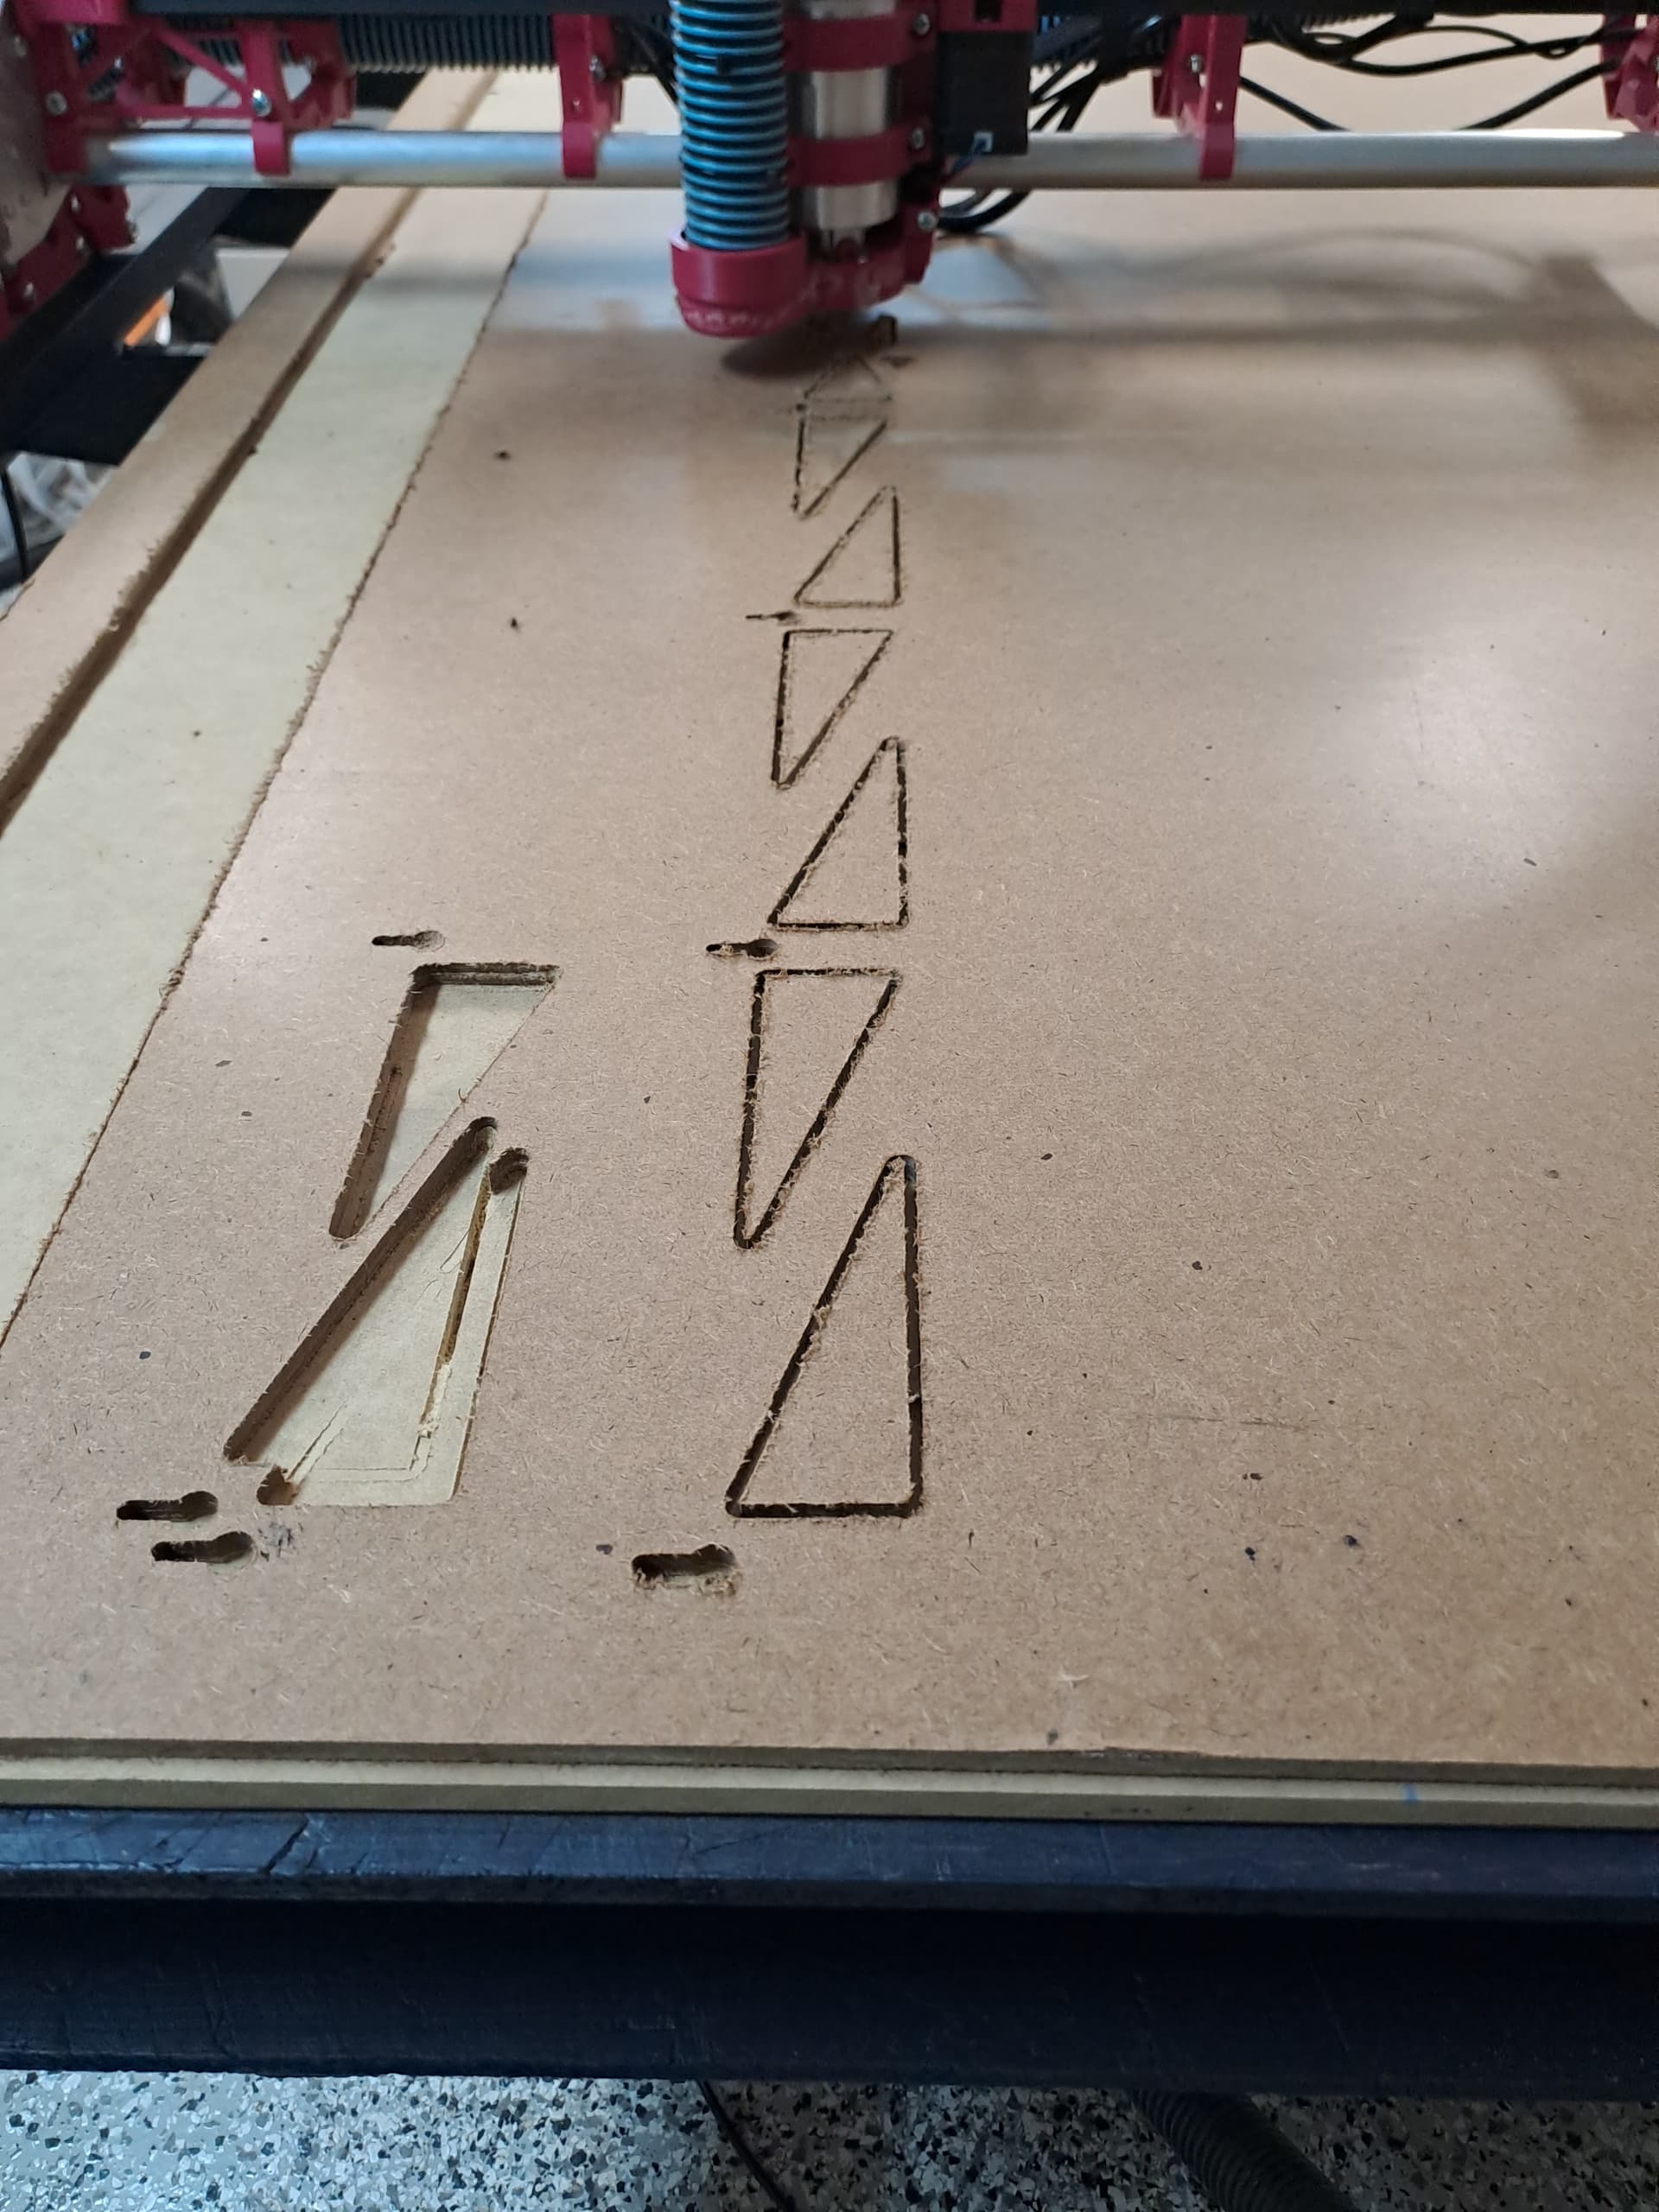
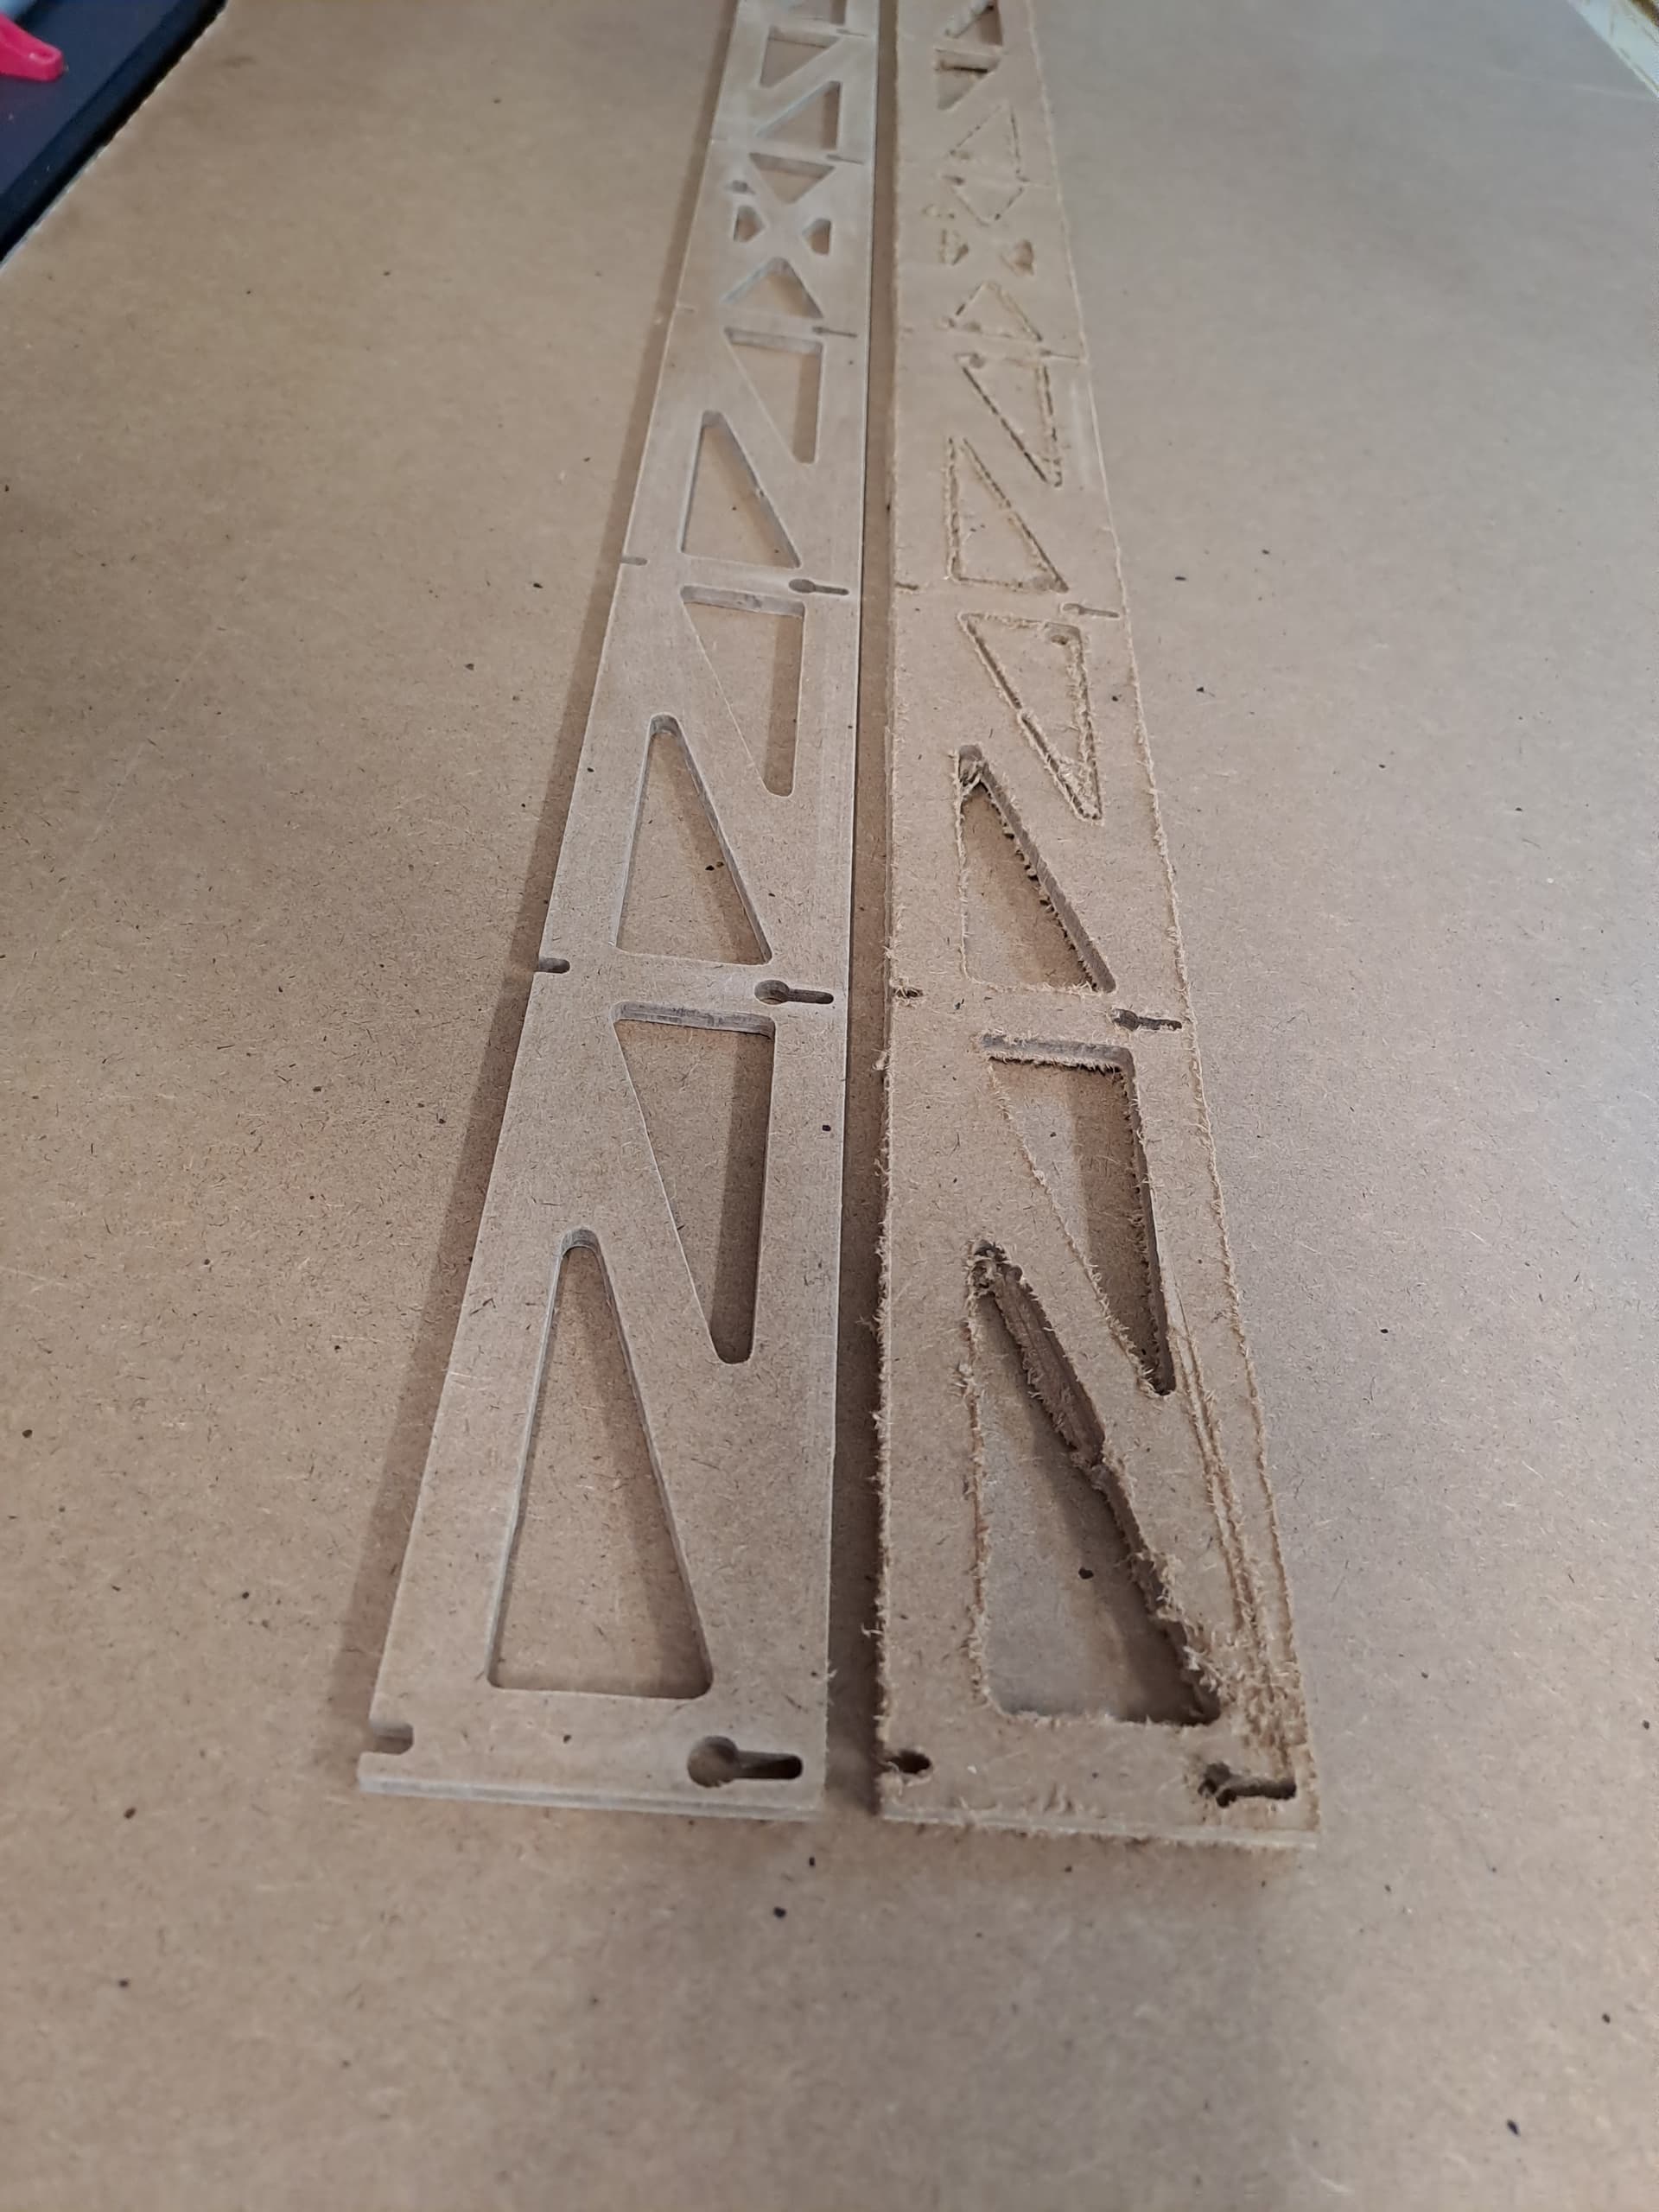
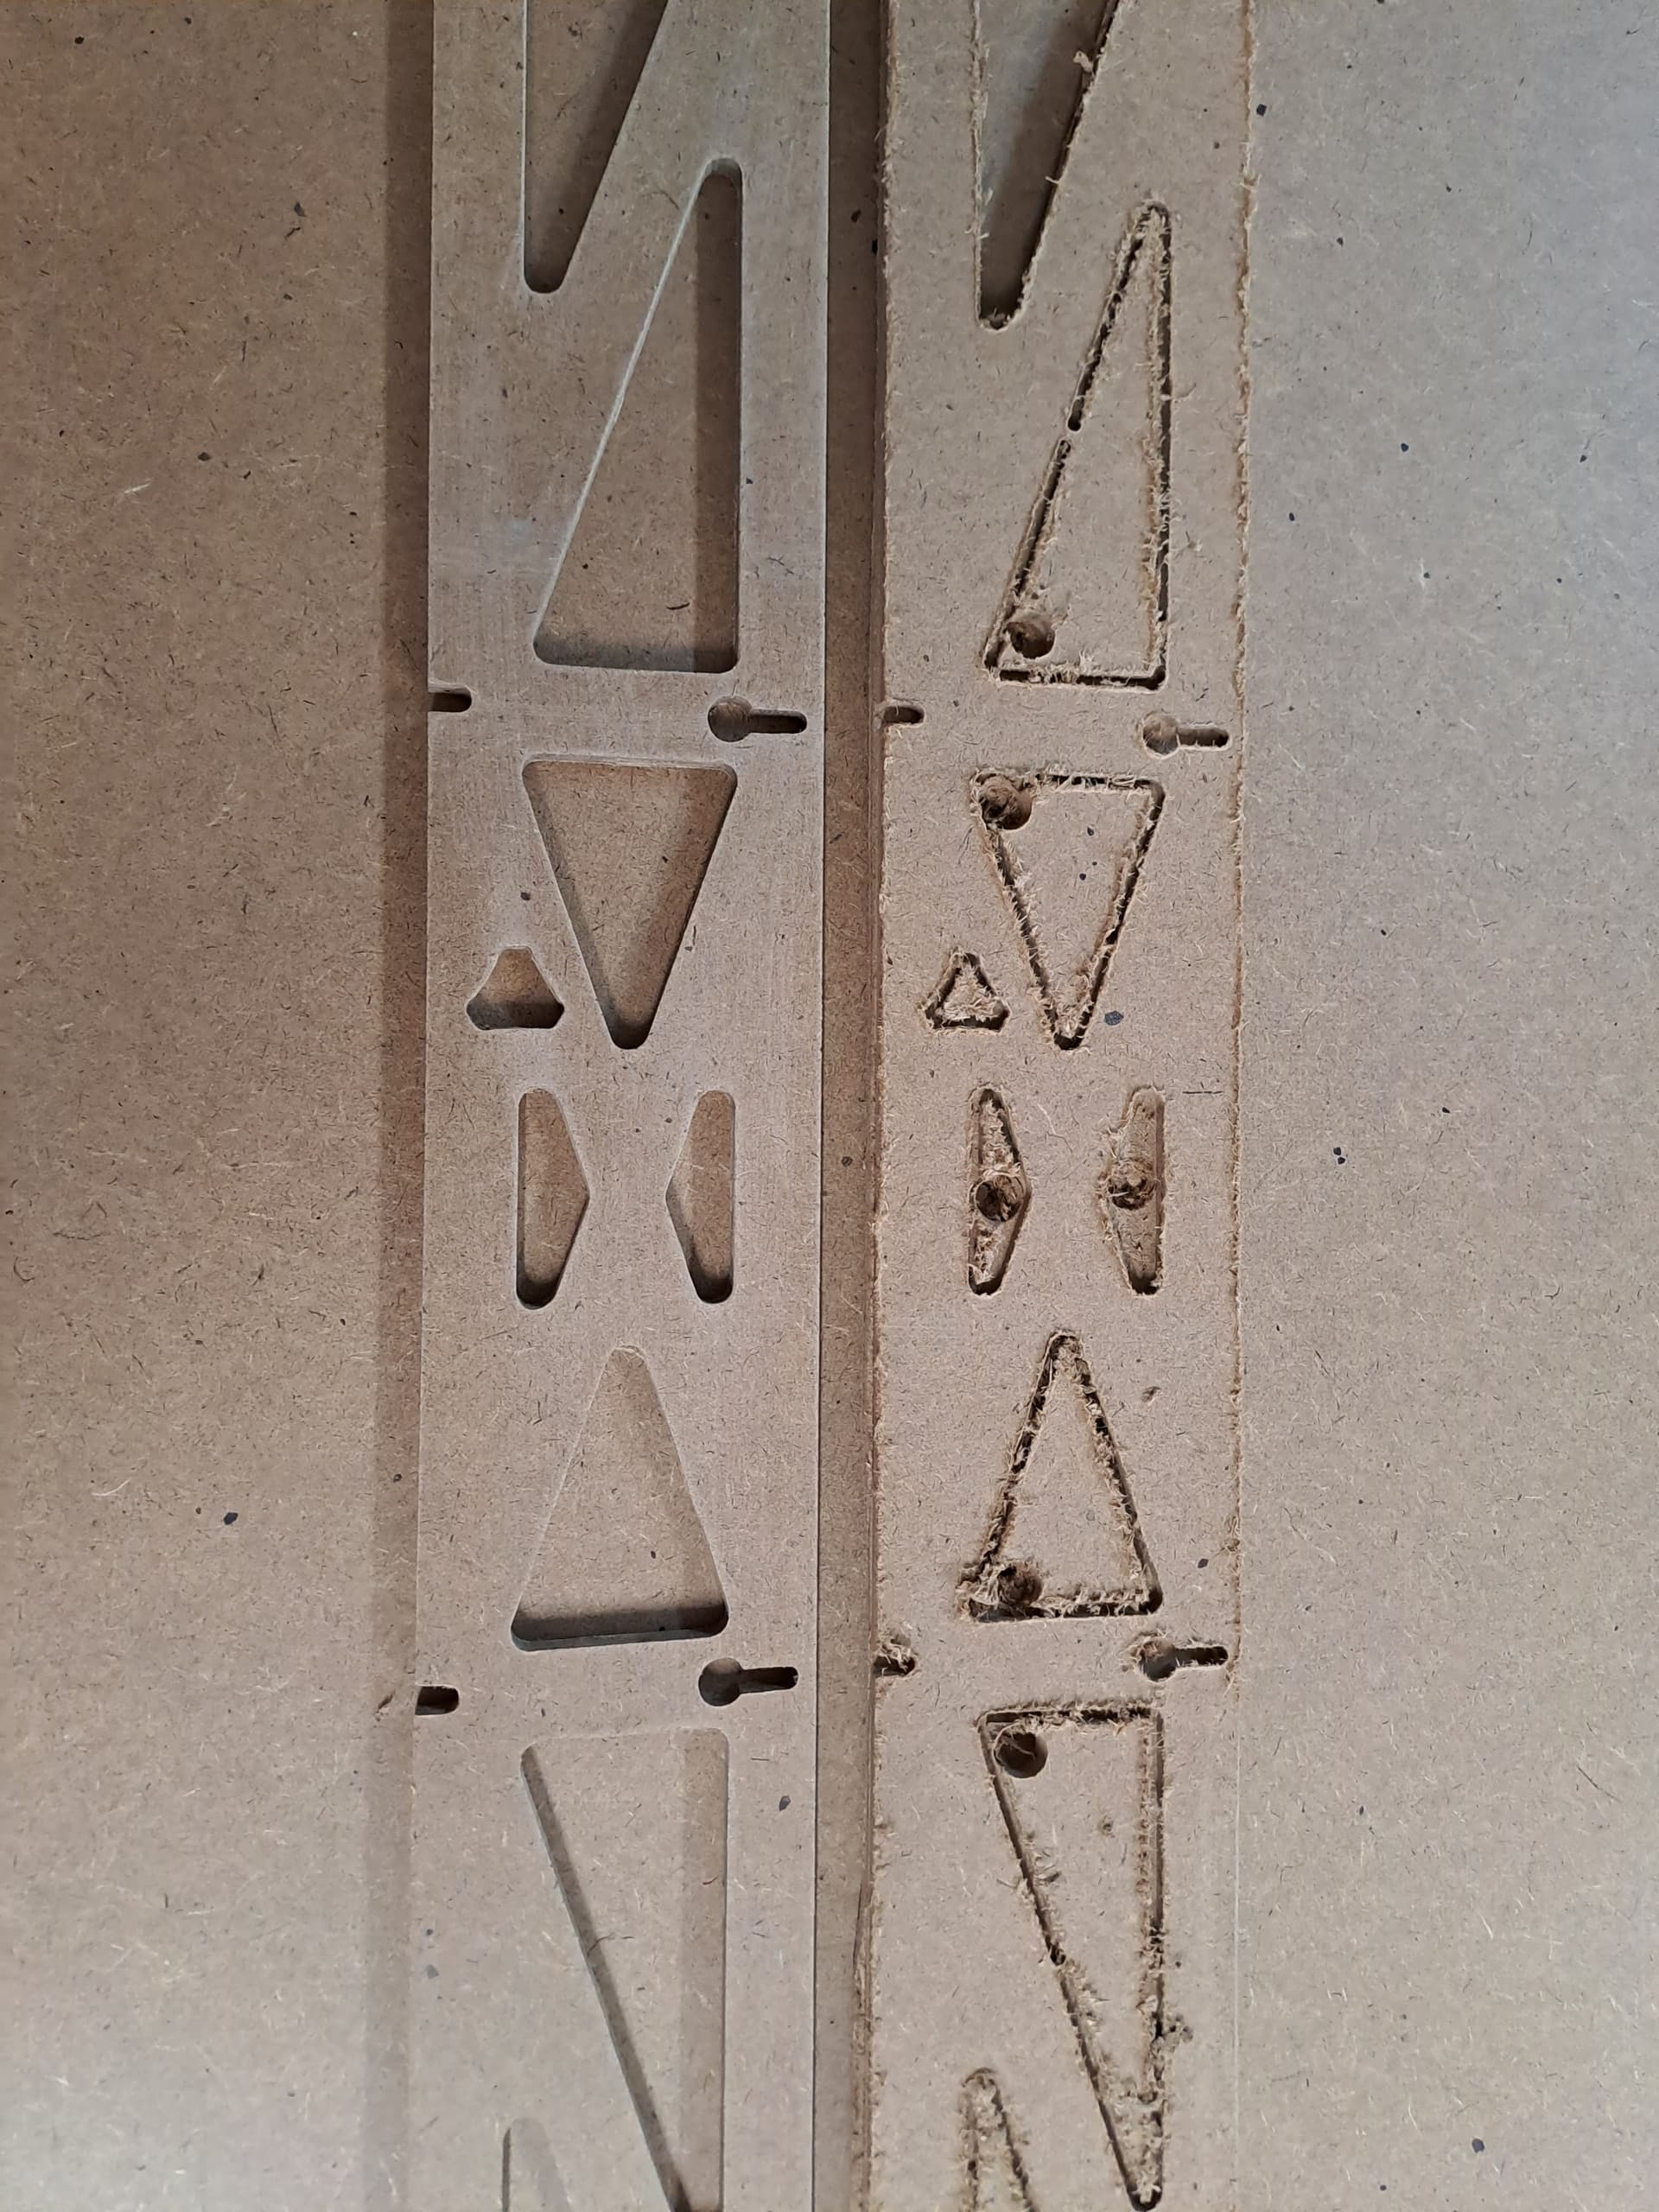
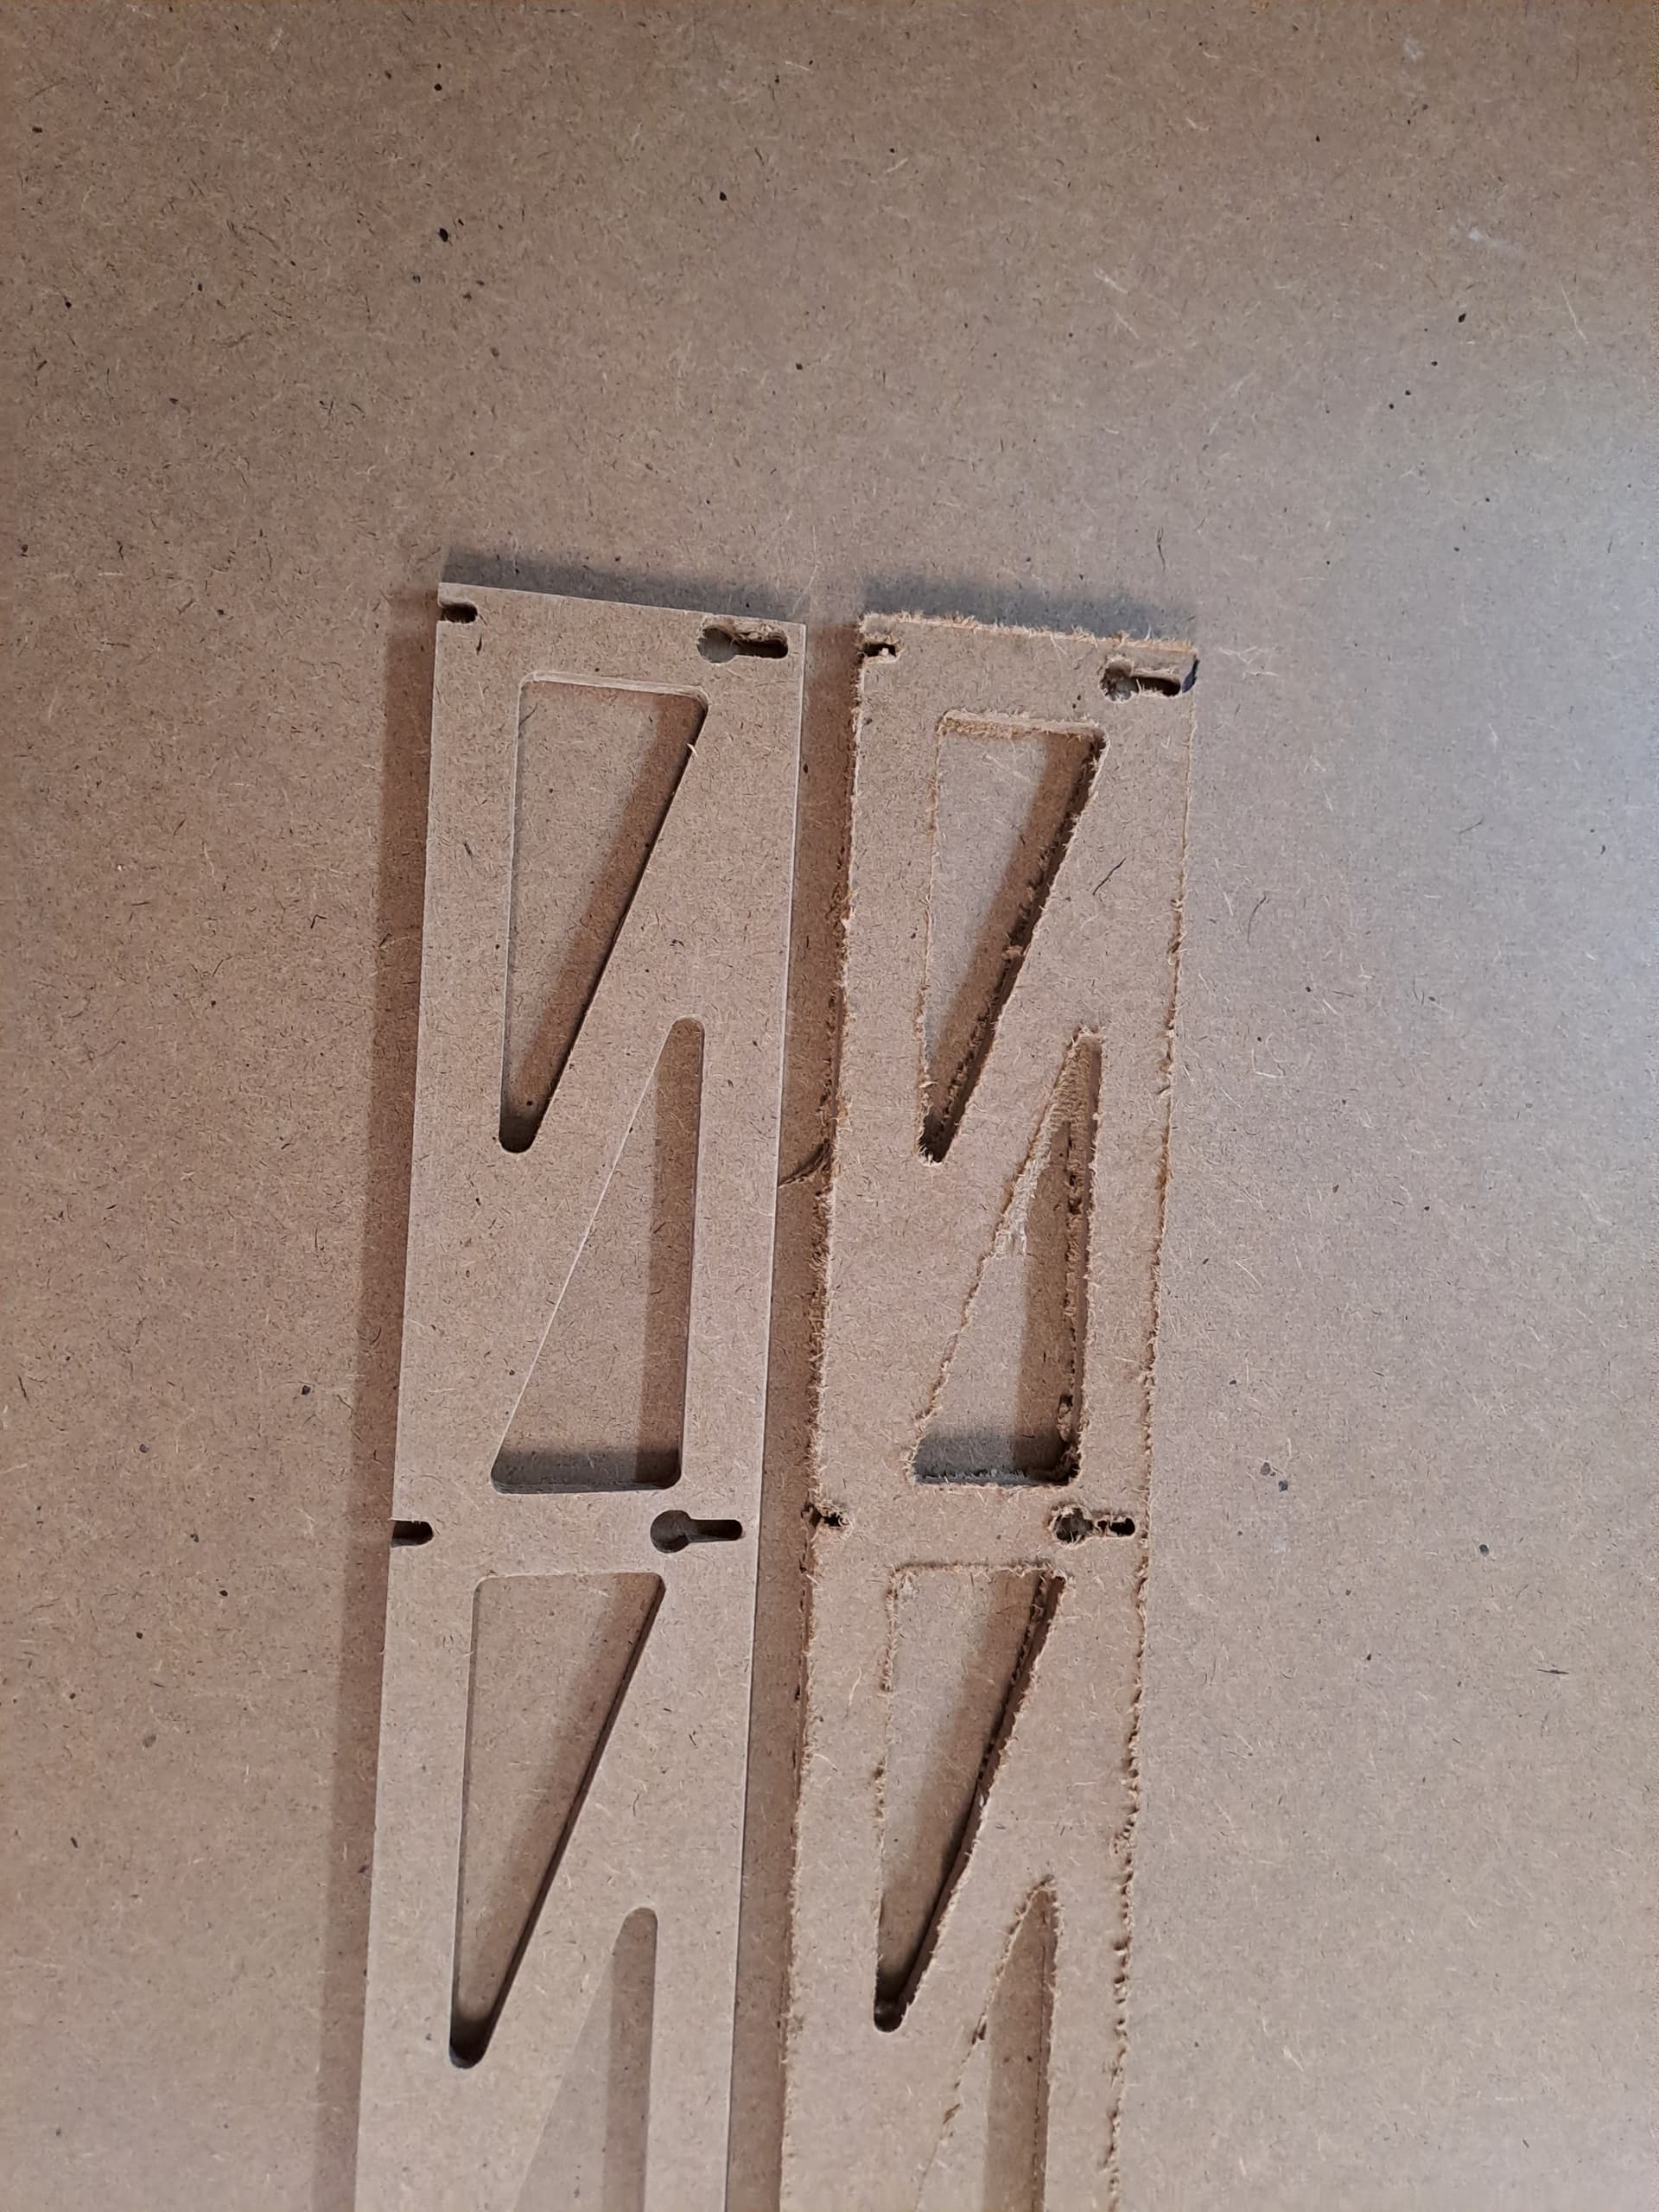
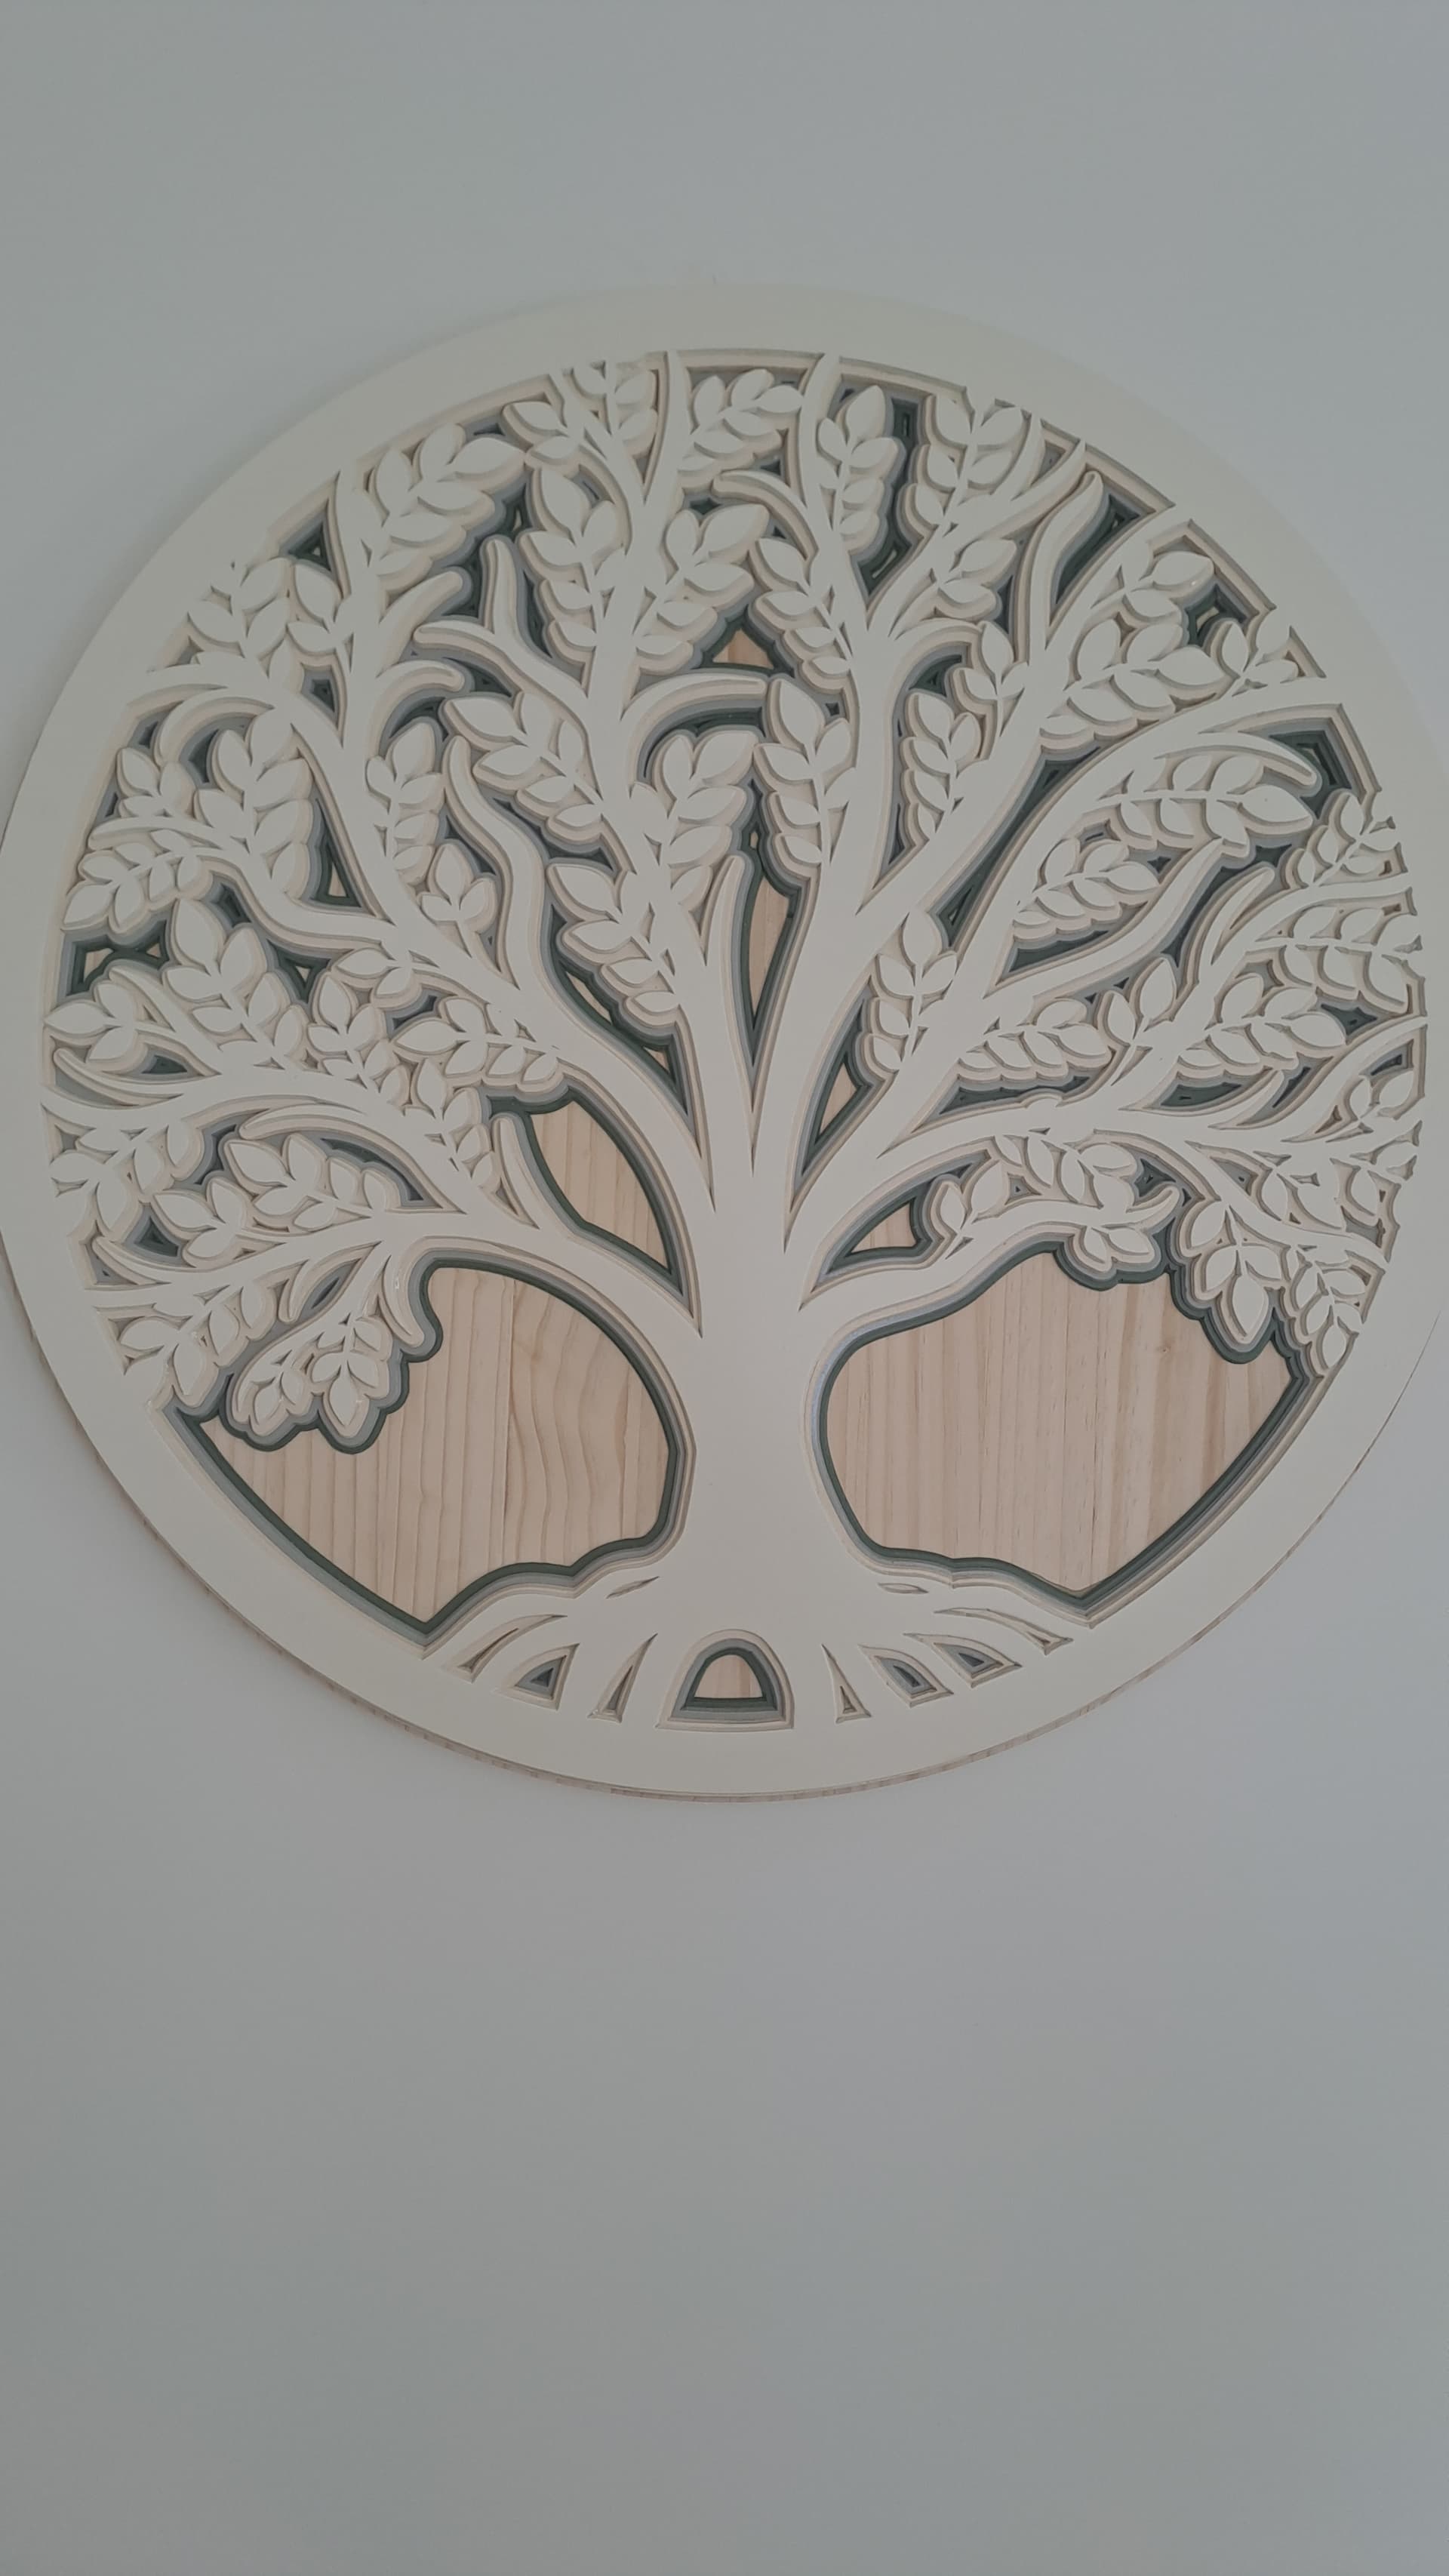
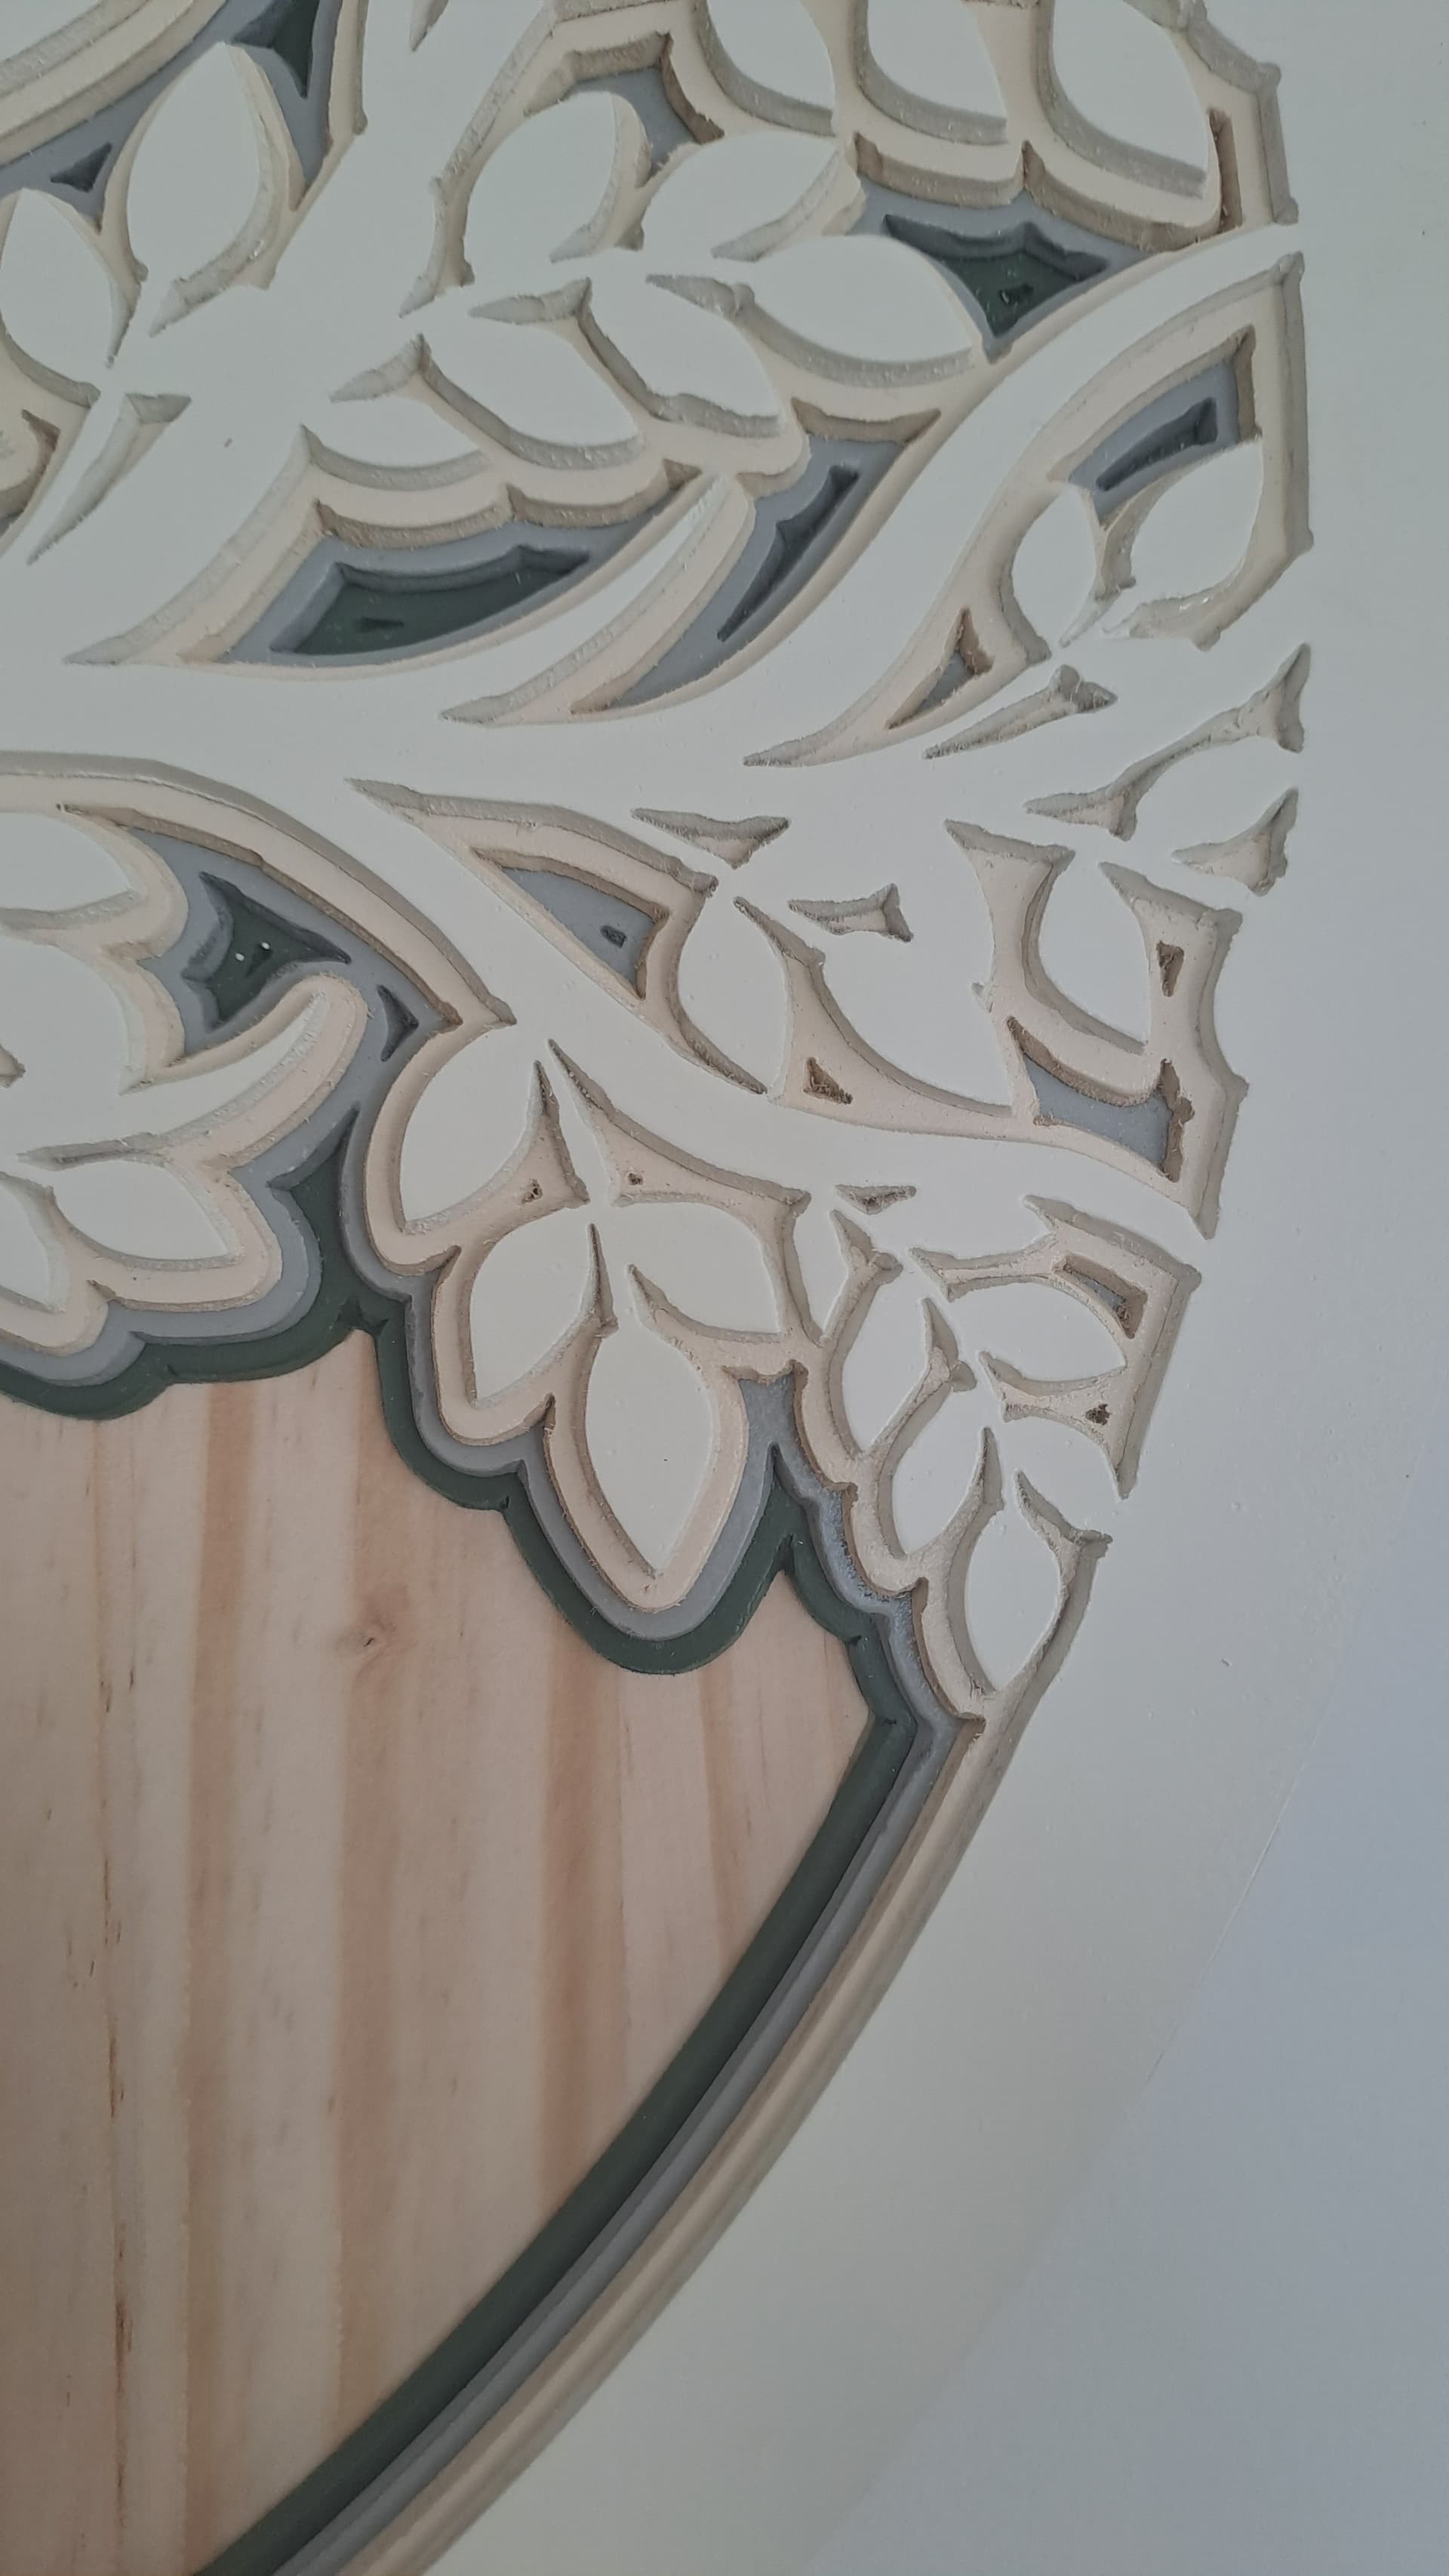
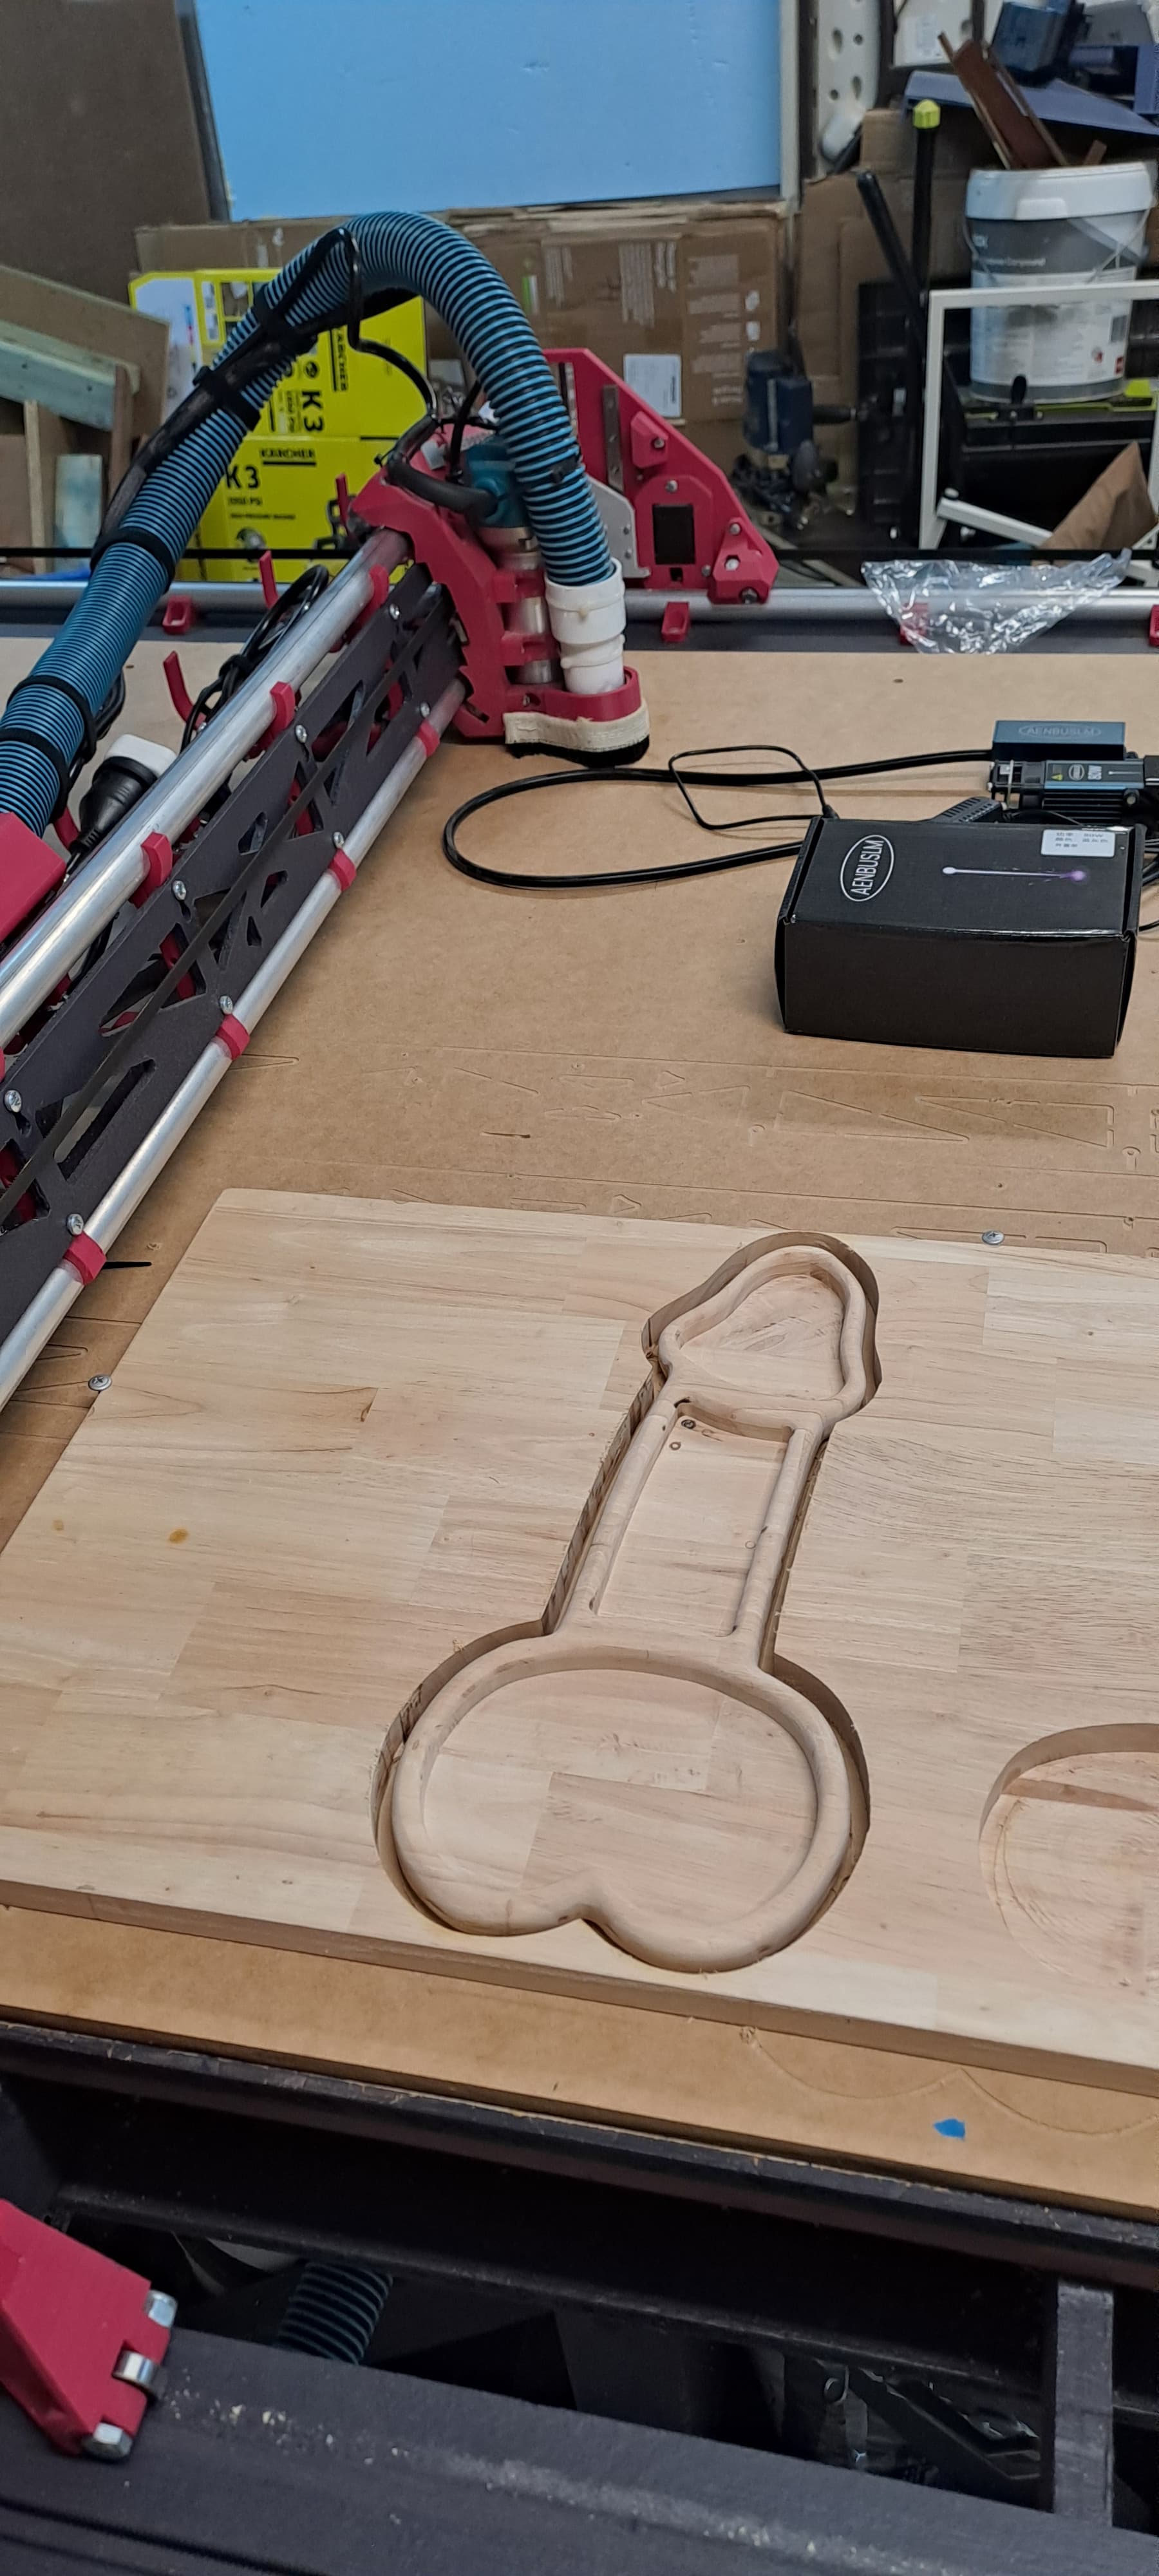
So it has been a while since I have posted. Have made a few things but always too eager to get it done and forget to record or take pics. I have been interested in the 3D stecil/stacked wall art. I spent some time getting my head arround inkscape and working with svg file. I then chose a tree of life design for a wall haning piece. I cut the 4 layers out of 3mm MDF. Was fiarly clean finish to teh cutting with the 1/8" 30 degree v bit and with a light sanding took the edges off. but when I tried to spray prime for paint with 2k its furred up hugely. Spent way more time snading and prepping than I wanted to. So i finished it offf with 4 colours of the wifes chosing and then cut out a backing board for wall mounting out of FJ pine slab. After mounting it I was straight onto the fourm to find out all i could about lasers!!
Update: Photos.

4 Likes
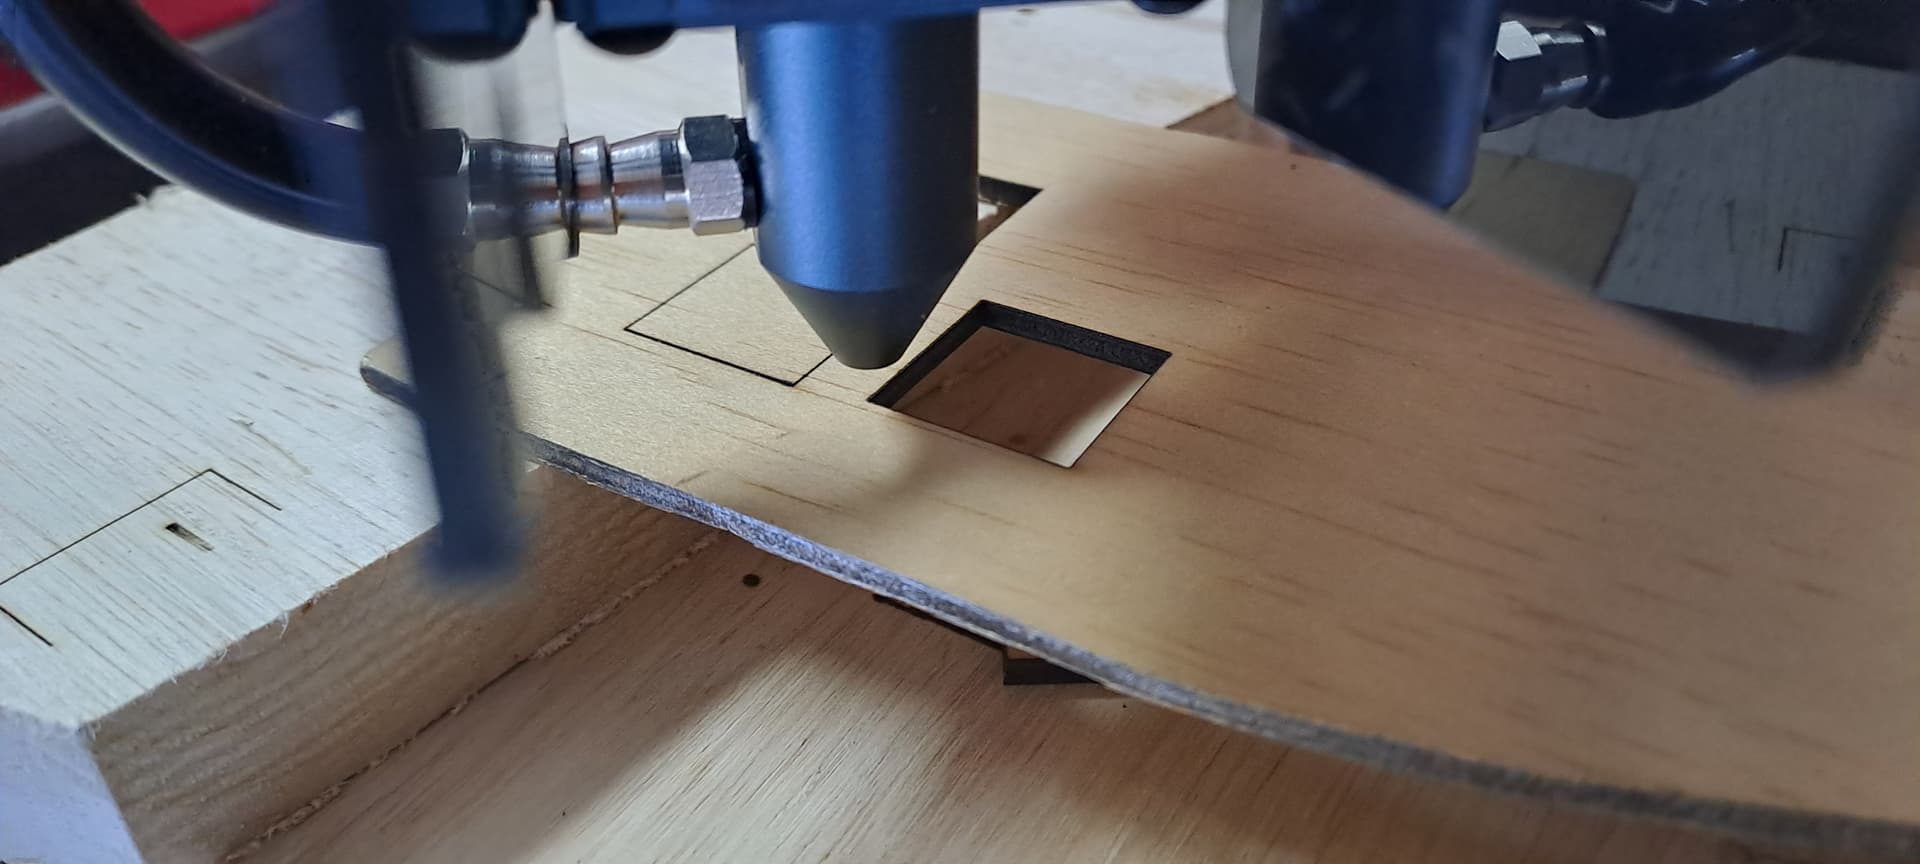
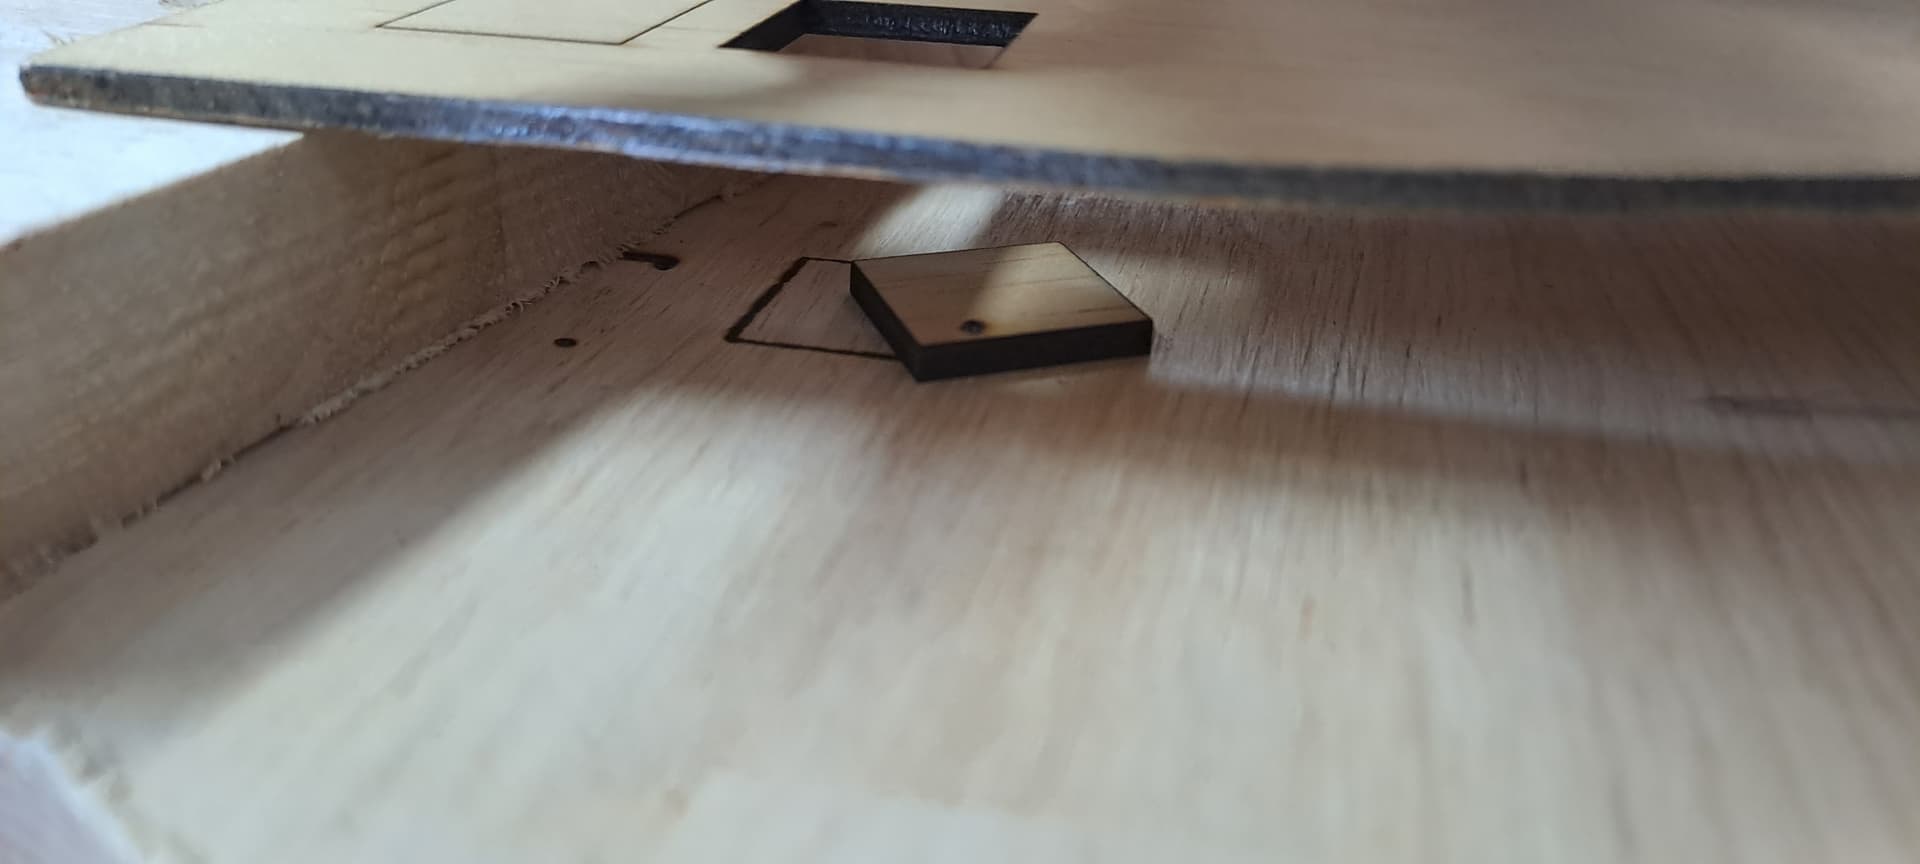
So, I had to modify the top of the LR3 table. In building the torsion box and working out which materials I could source locally, and wanting to have a 1 piece running board meant using a thicker flooring board, I also might have went with a thinner OSB and/or MDf spoil board, I inadvertantly created the issue of the gantry bottoming out before the cmaller bits could cut all th eway through the work piece. To get the MDF cut for the tree of life work pirece I had to use a 17mm plyboard to move the work piece higher. To rectify this I have now used some leftover 19mm spotted gum to lift the top OSB and spoil board.
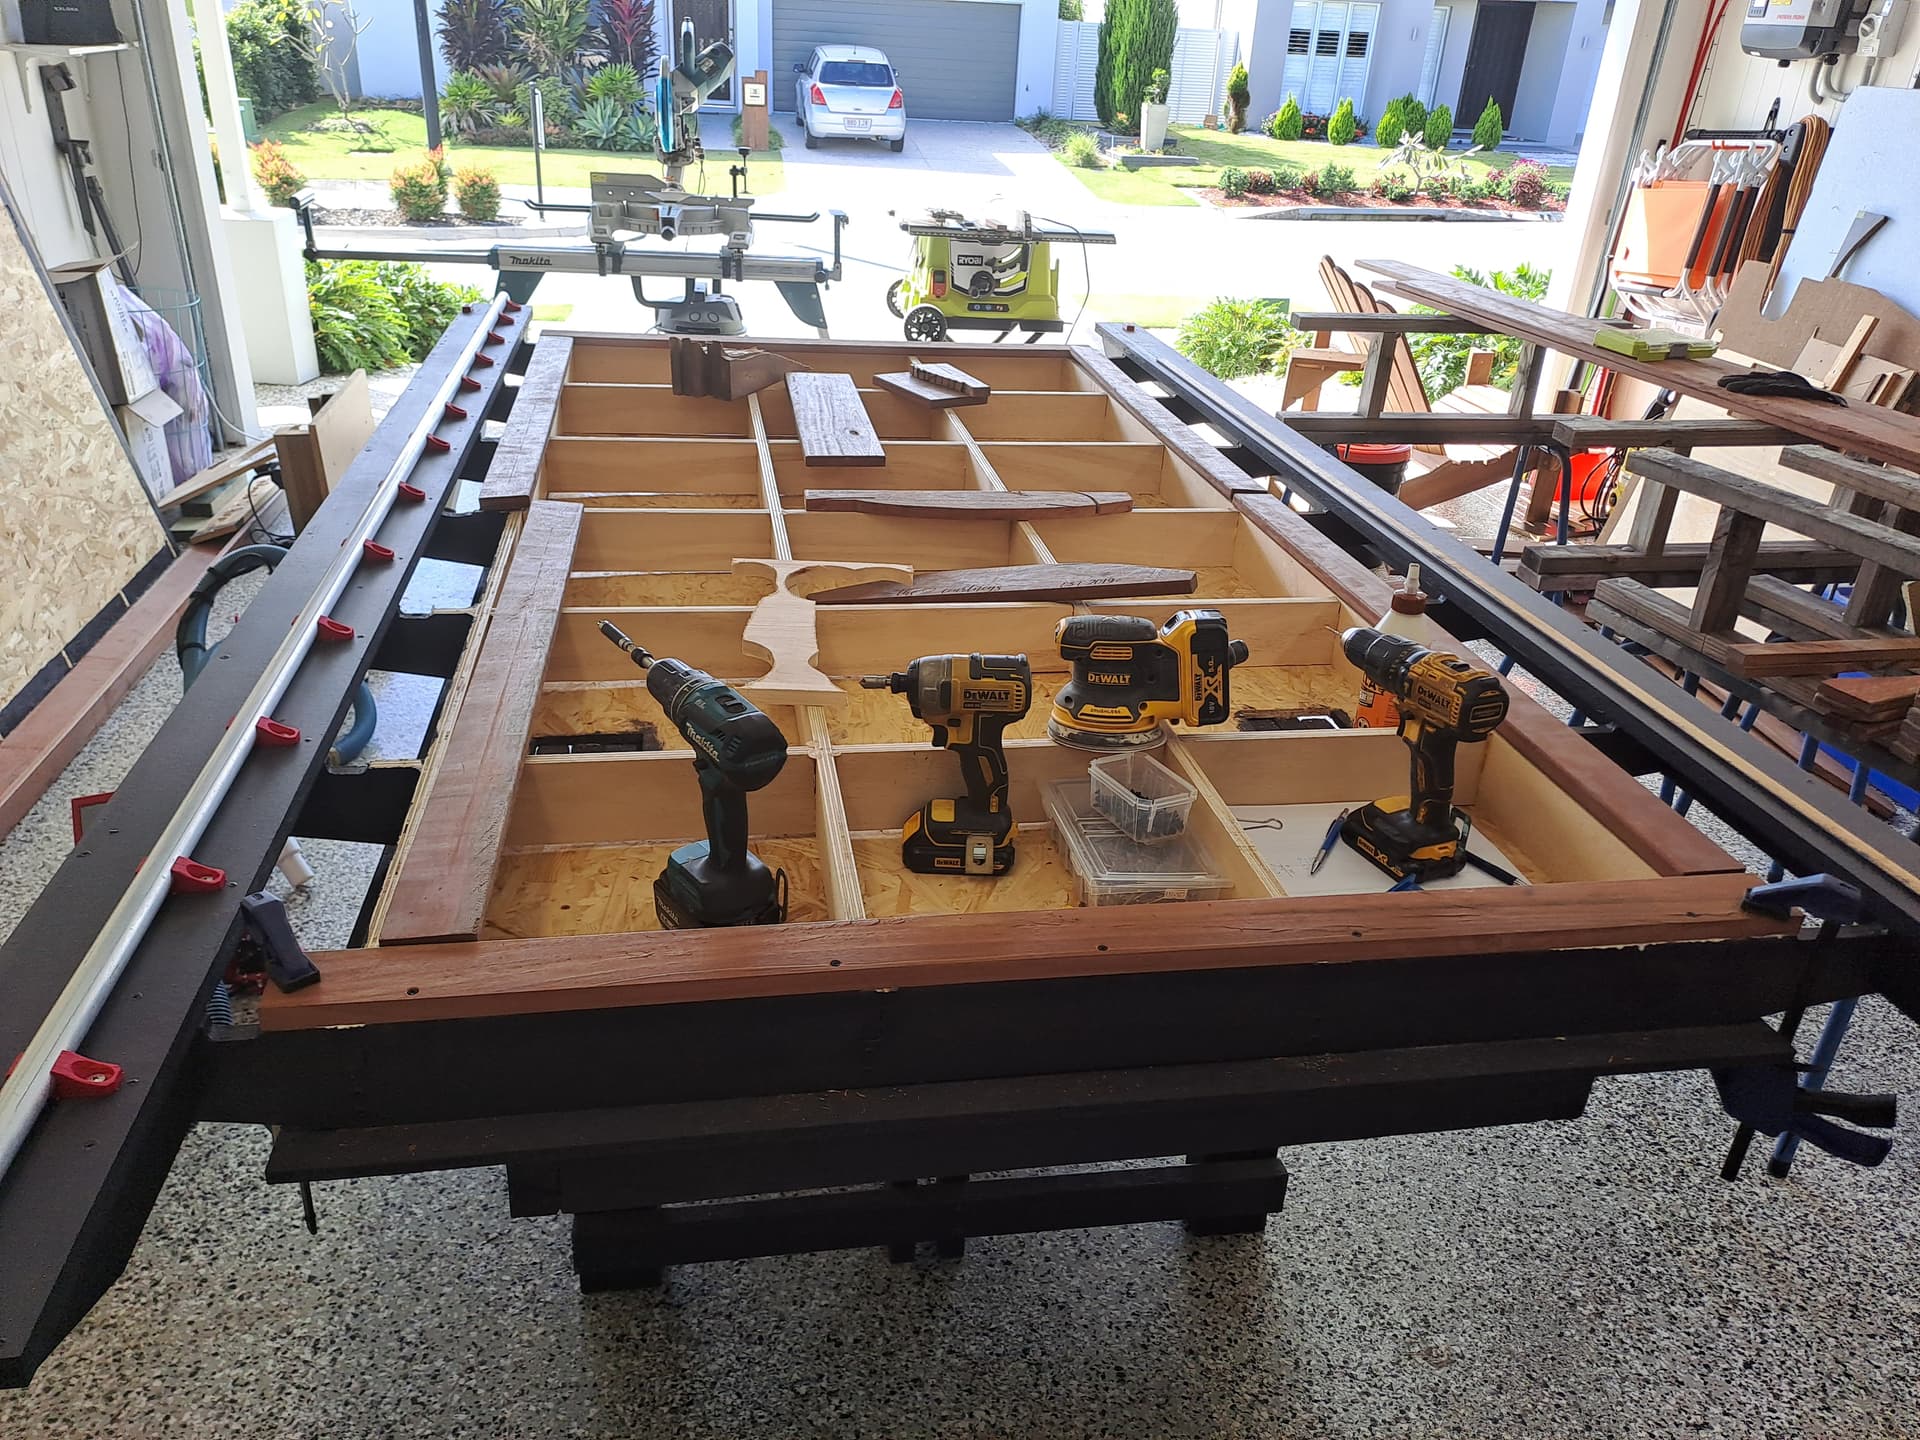
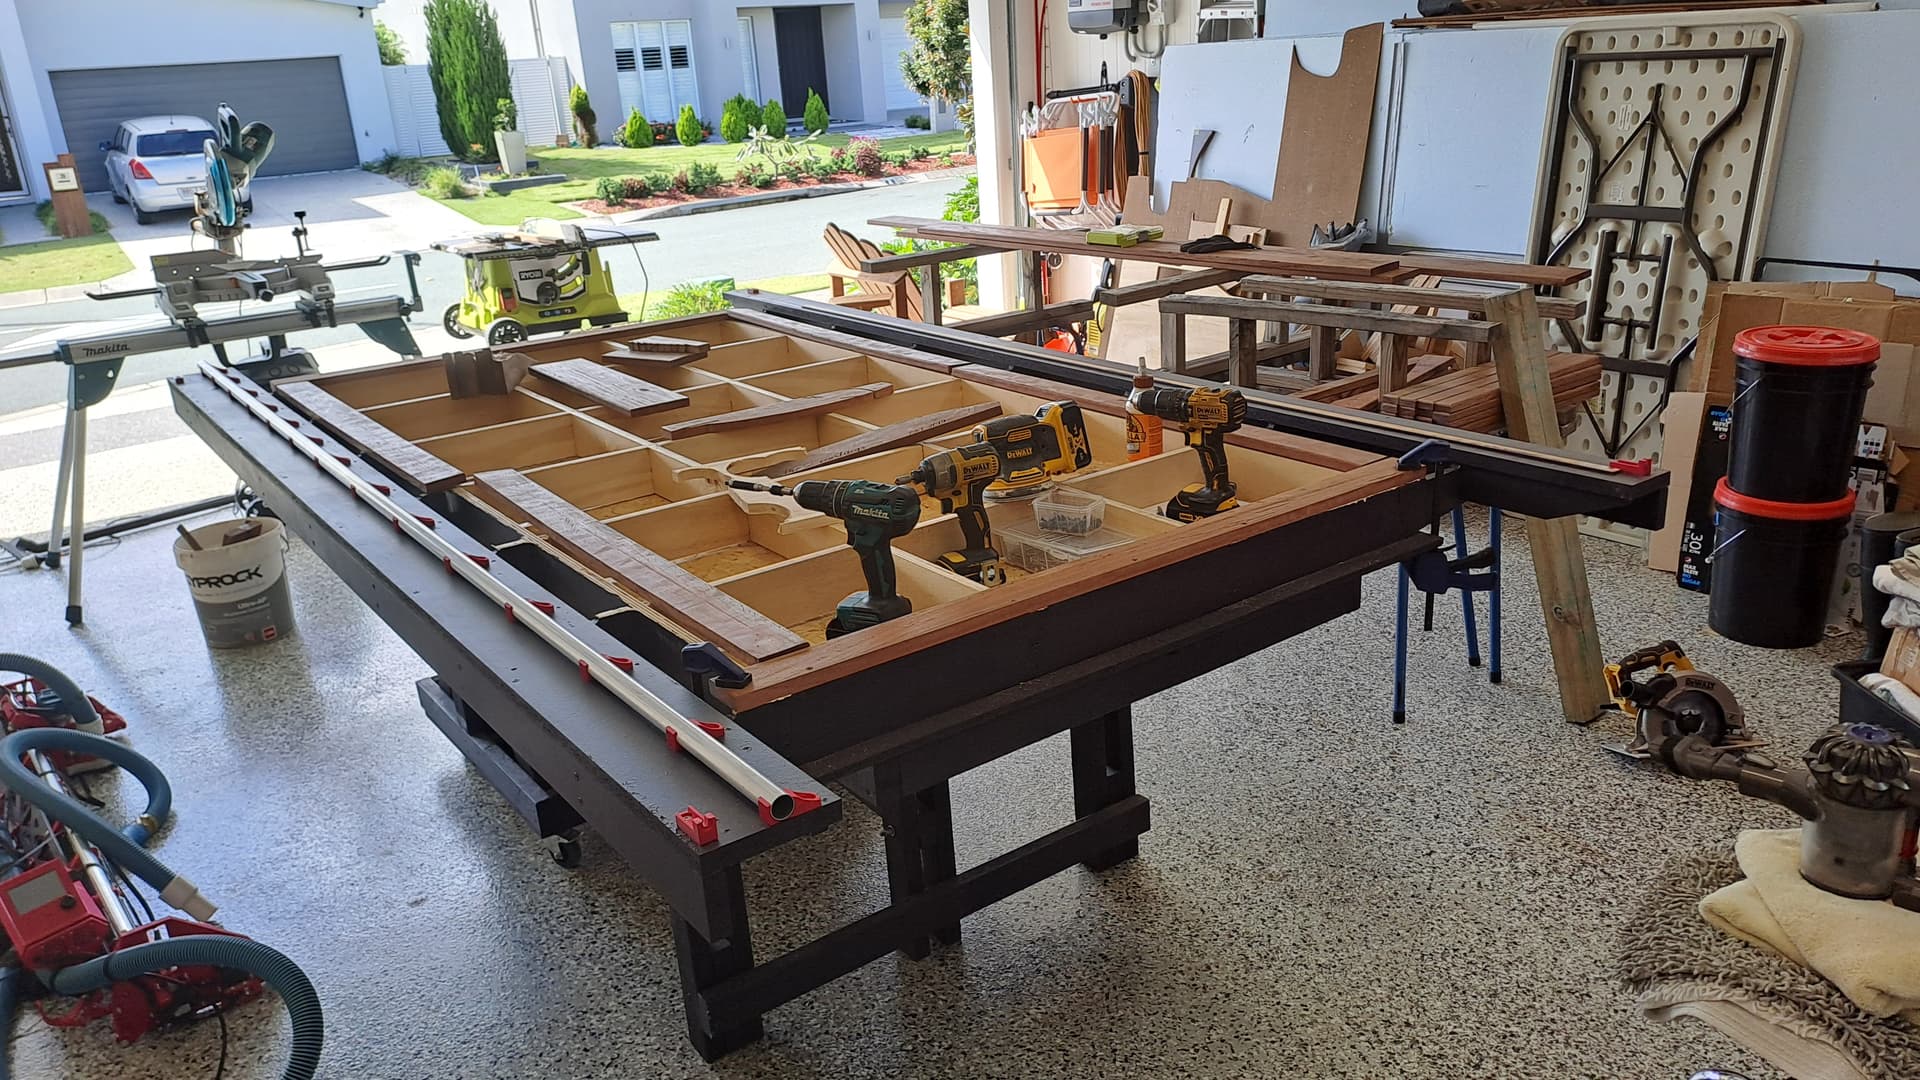
Now there is no clearance and the bottom of the LR Core hits the spoil board so now all cutting bits can reach the spoil board. Now… back to sourcing a laser and more reading.
4 Likes
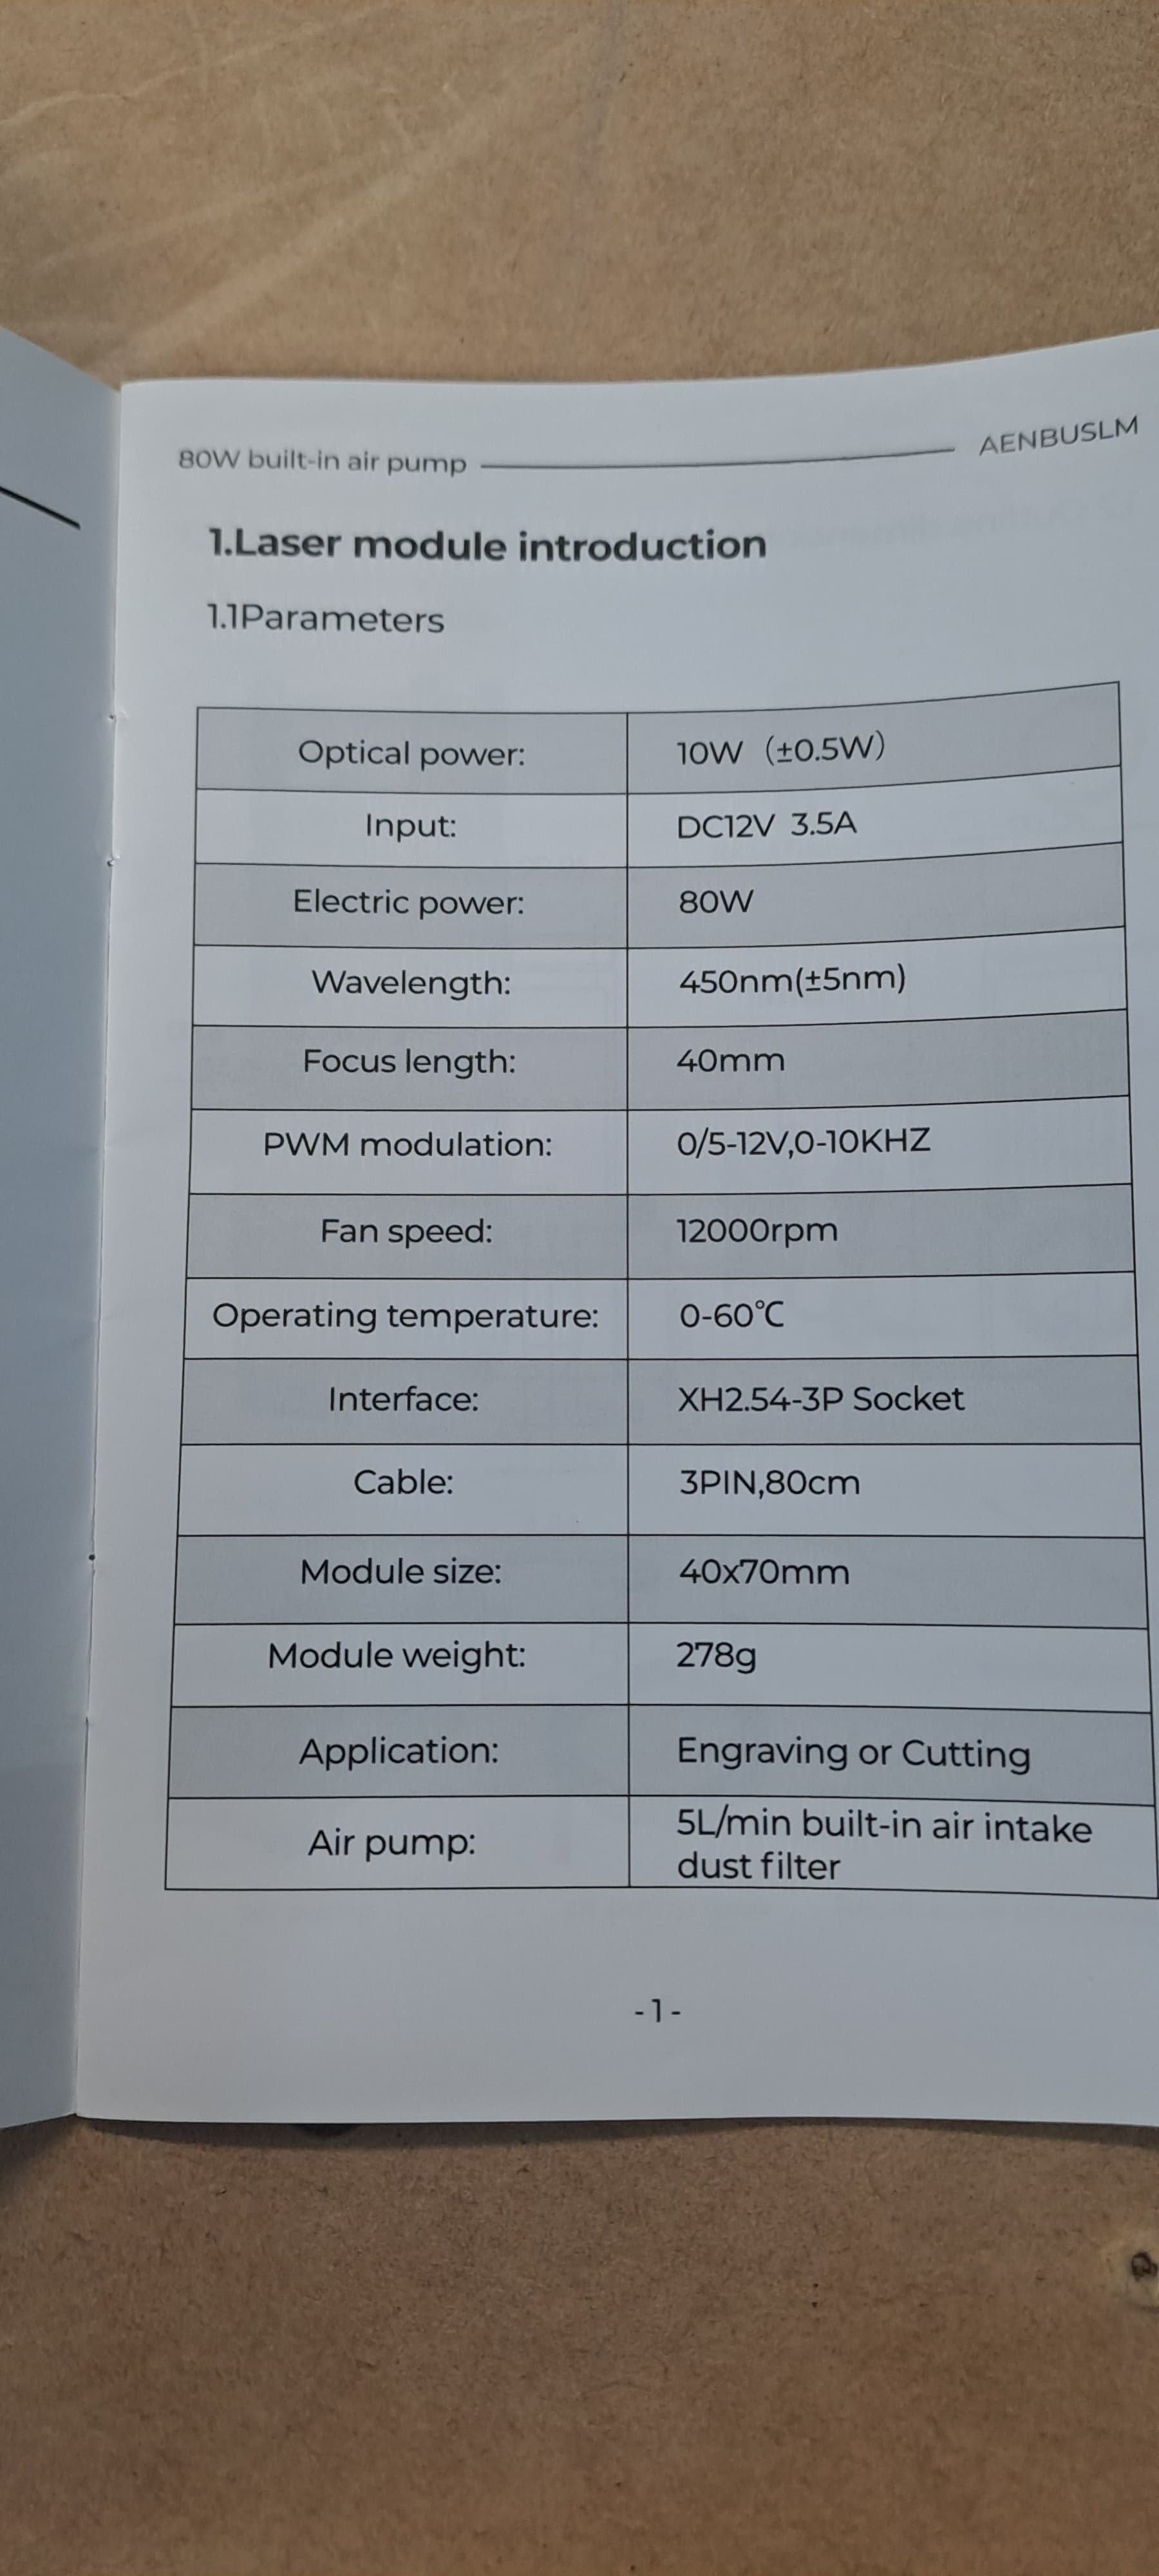
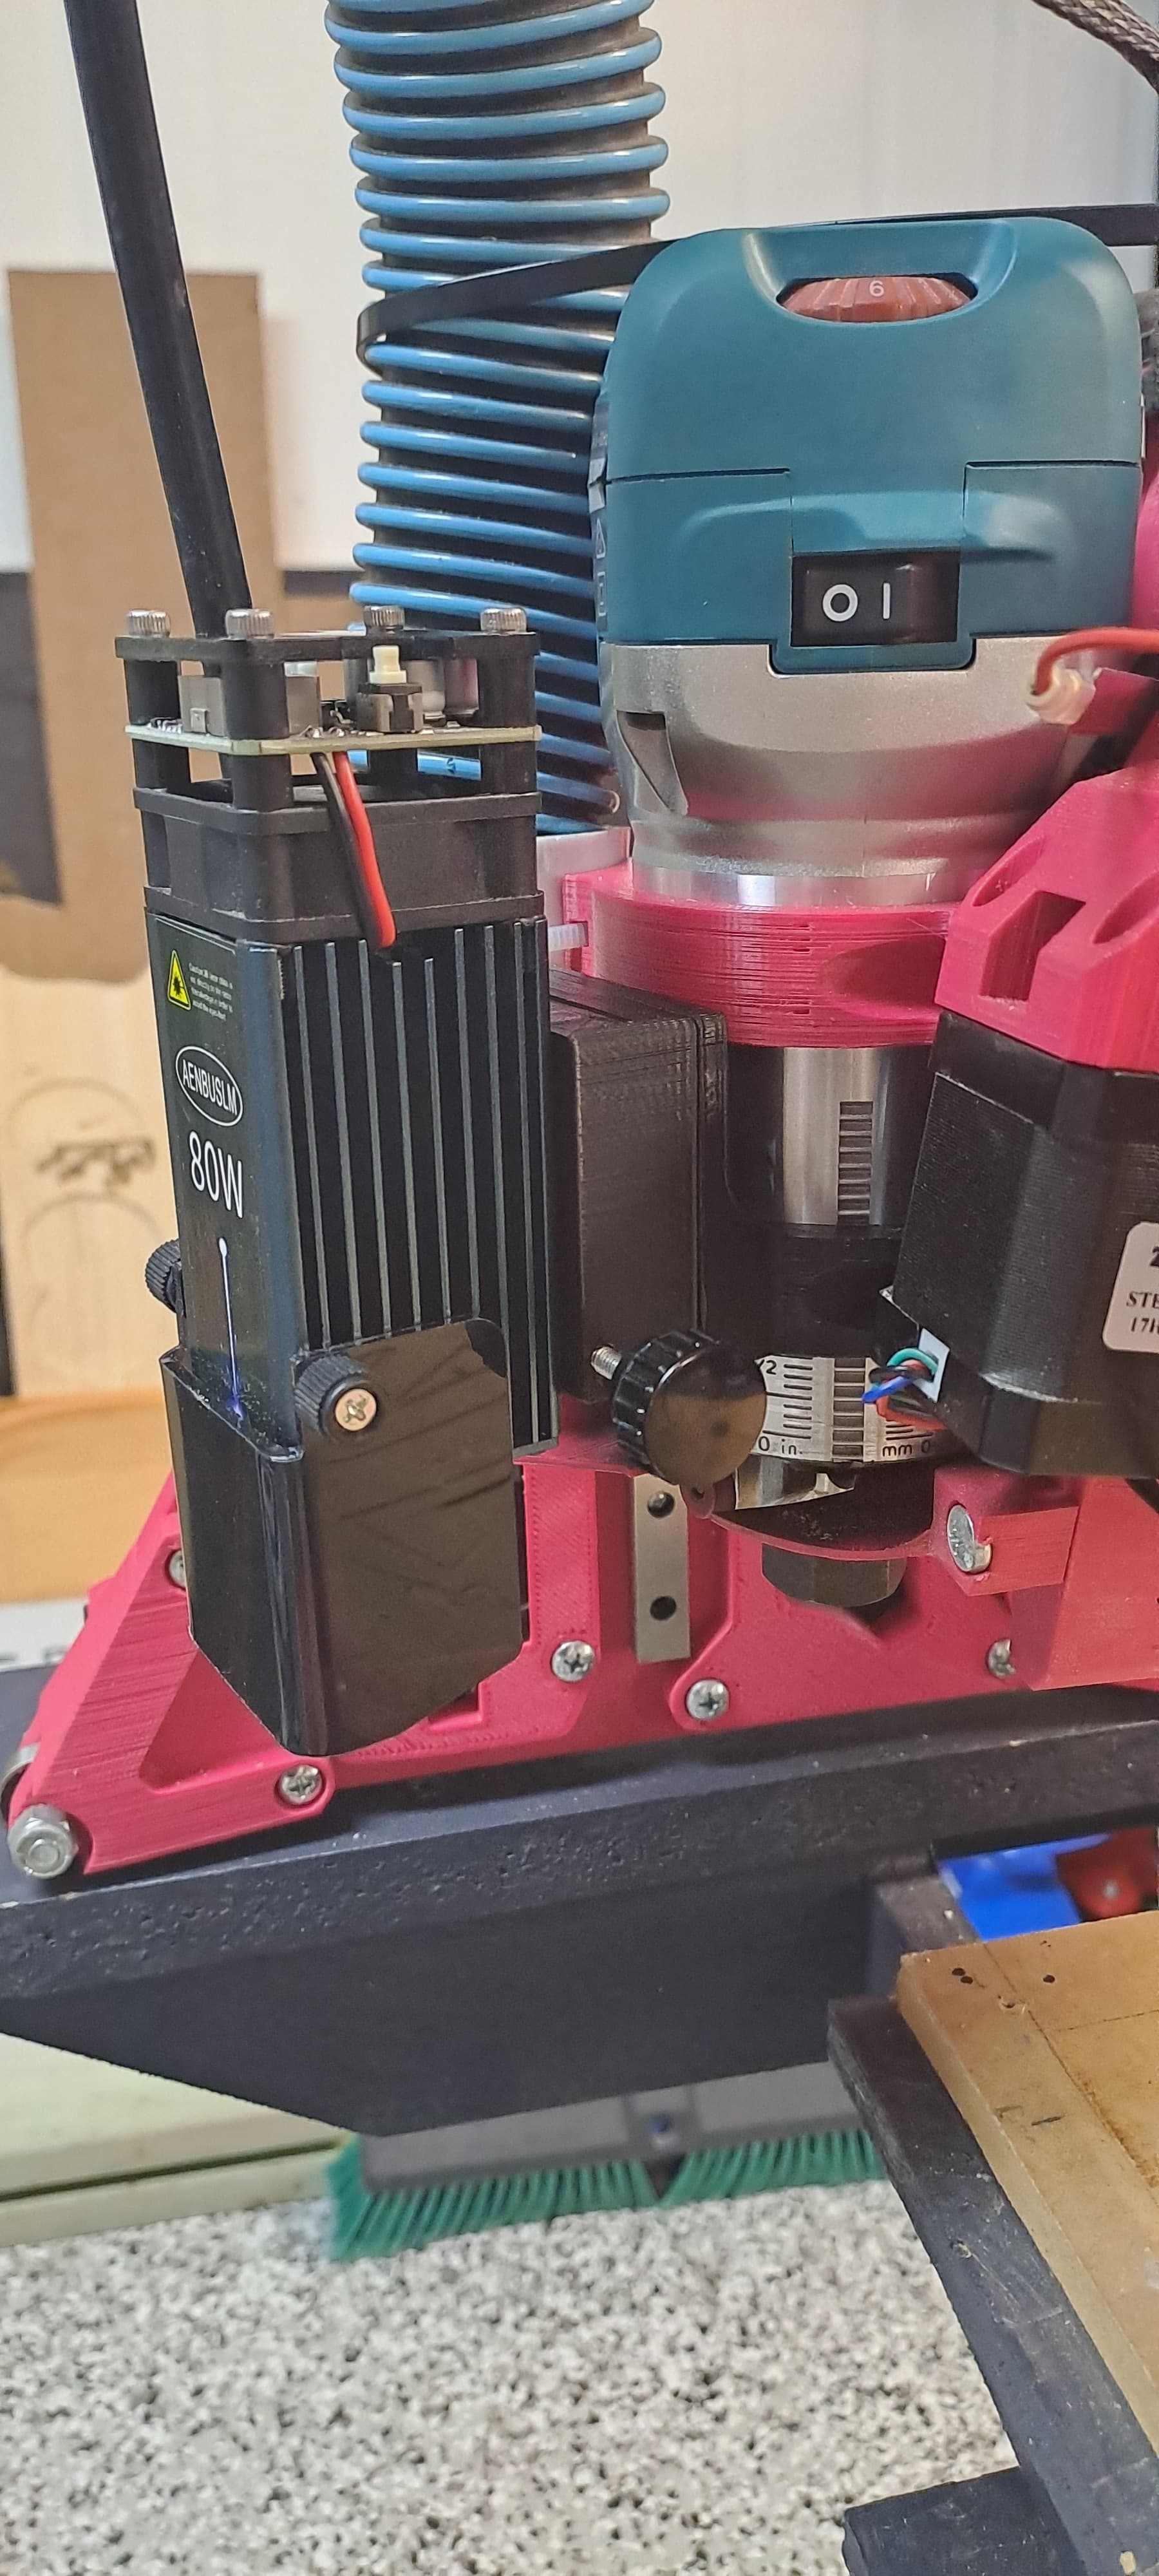
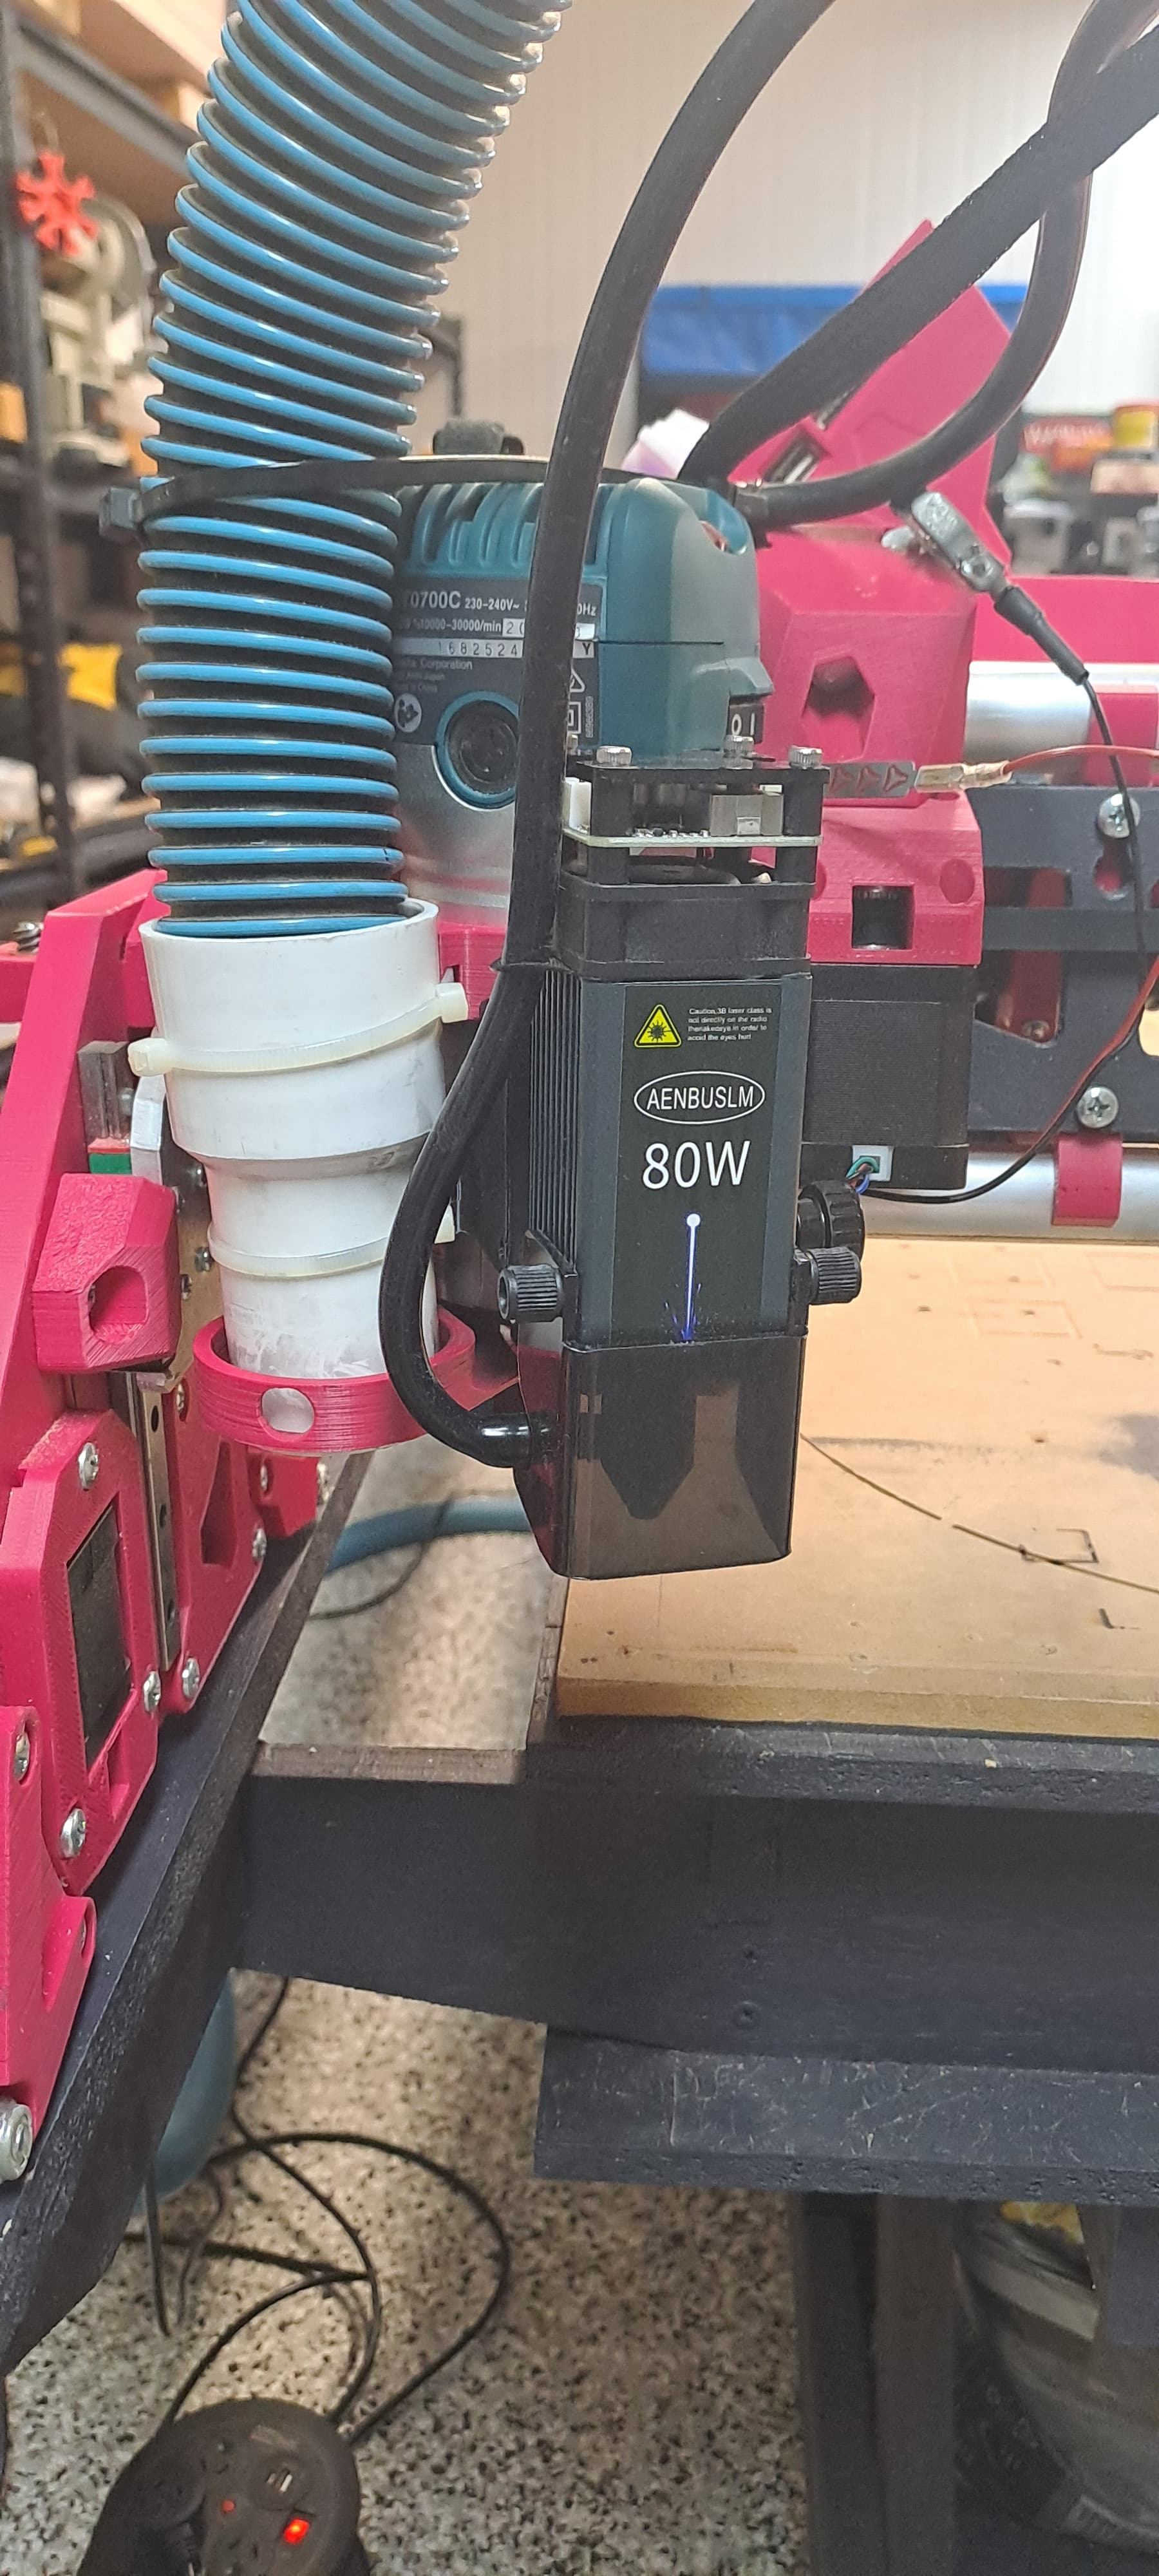
Well 2 moths has flown by and I have not been able to get around to sorting out the newly aquired laser for Magenta Dreams.
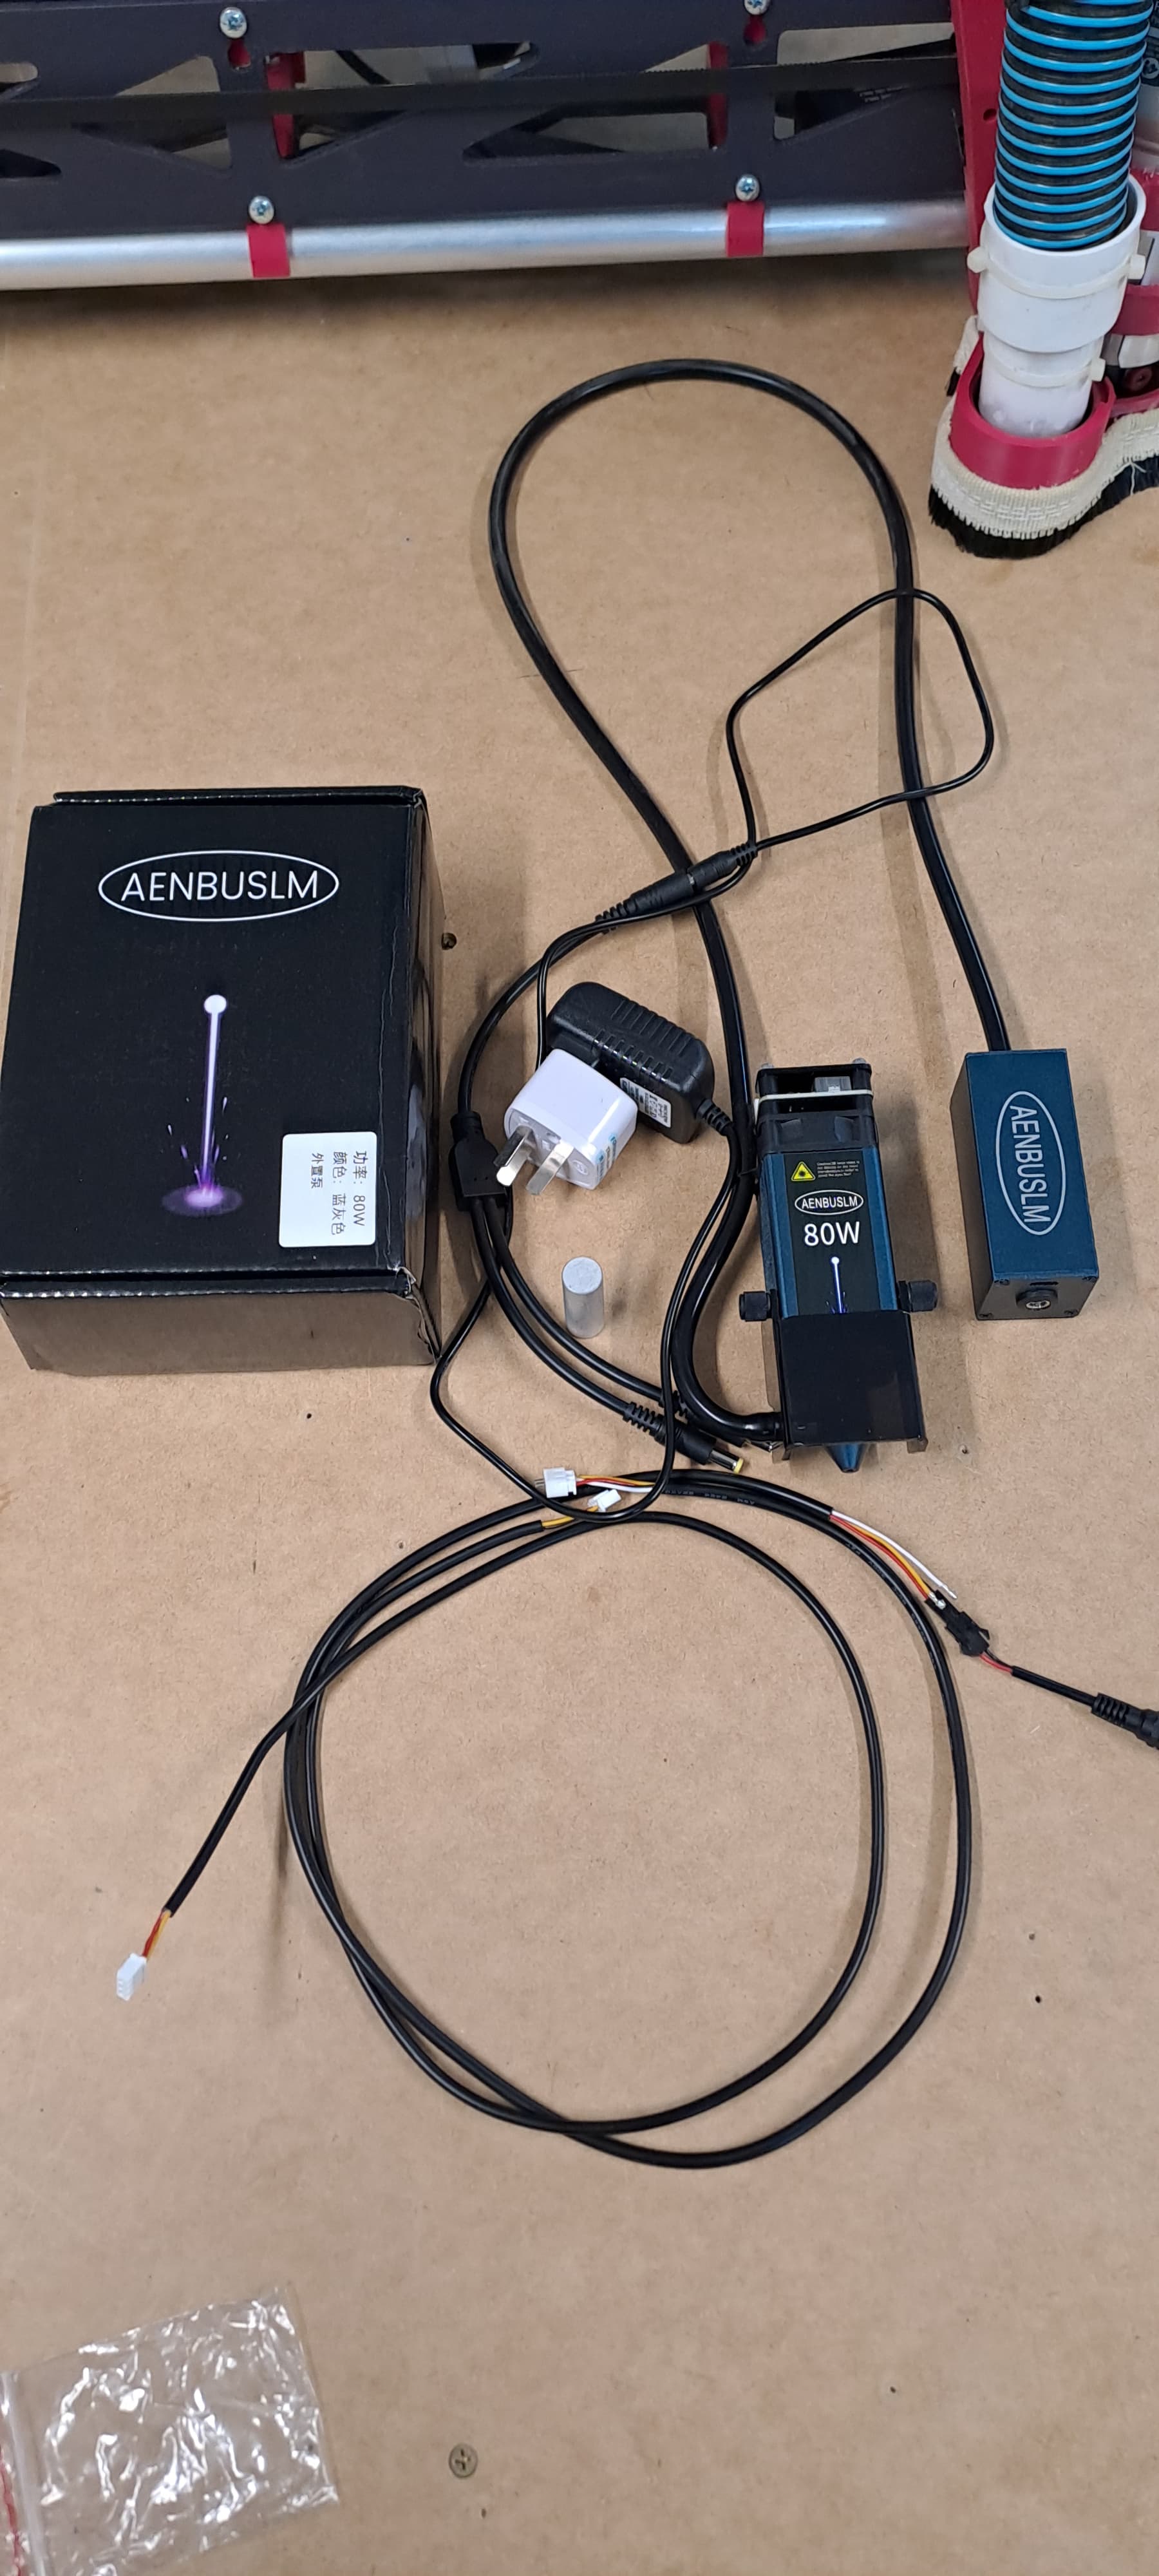
The laser kit is from Aliexpress; 84.0€ 29% OFF|AENBUSLM 40w 80w laser gravur kopf 450nm blaulicht laser modul cnc lasers chneide maschine diy graveur holz bearbeitungs werkzeuge| | - AliExpress
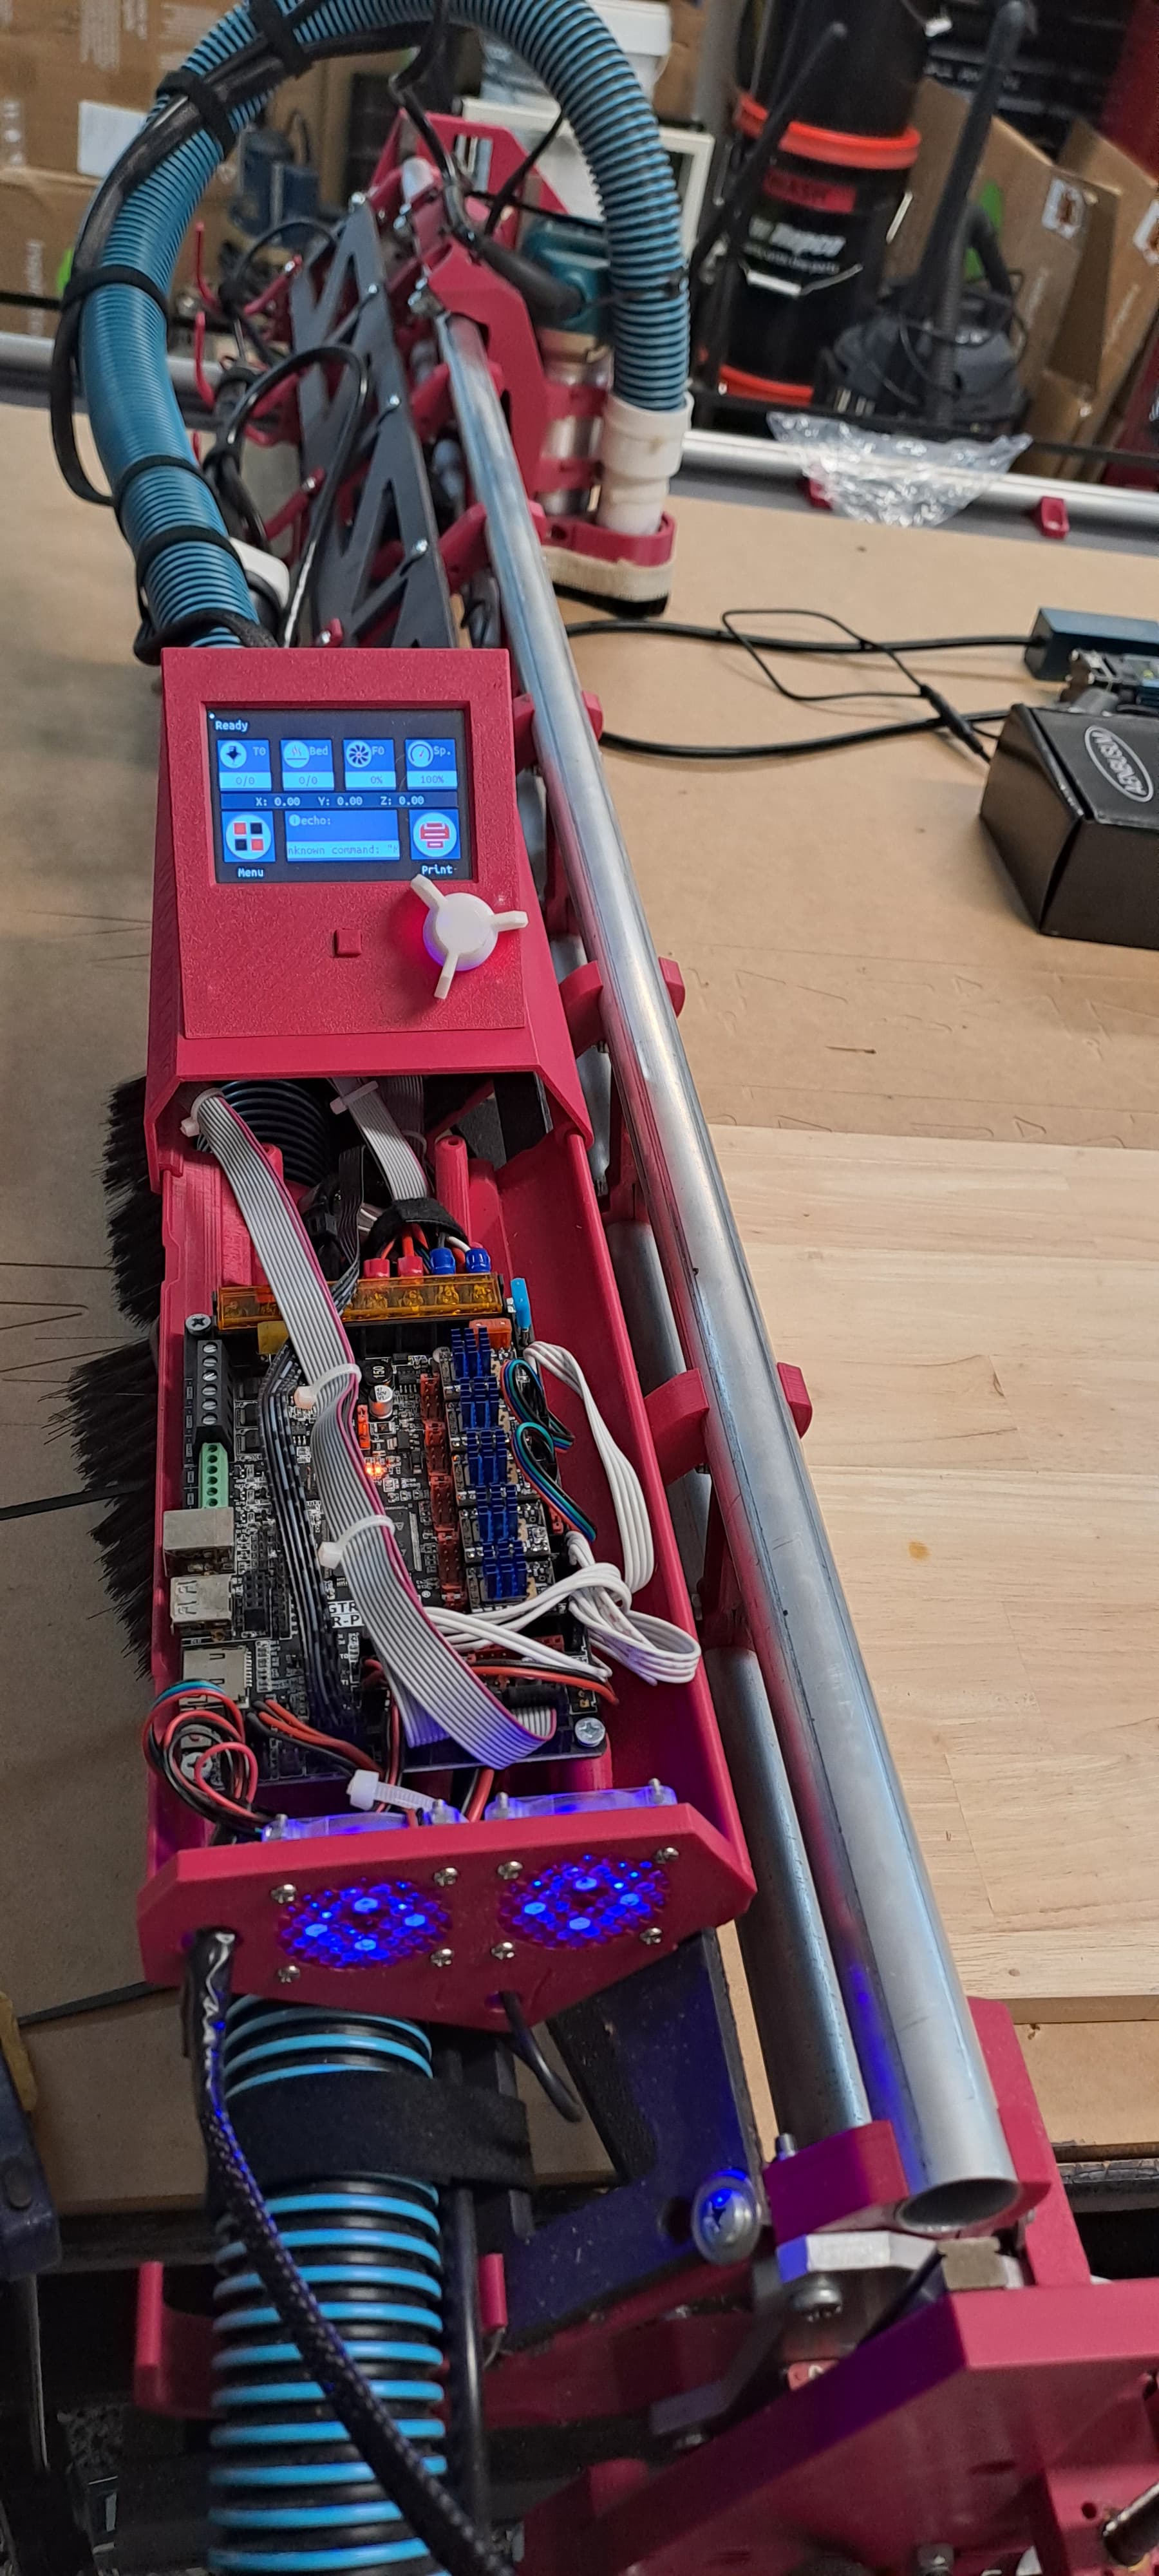
will be interested in getting new mounts/attachements to the LR Core, but… I am waiting for parts for the new addition in the 3D printer corner. The old i3 was not cutting it anymore with exessive z wobble. The plywood frame required constant tightening.
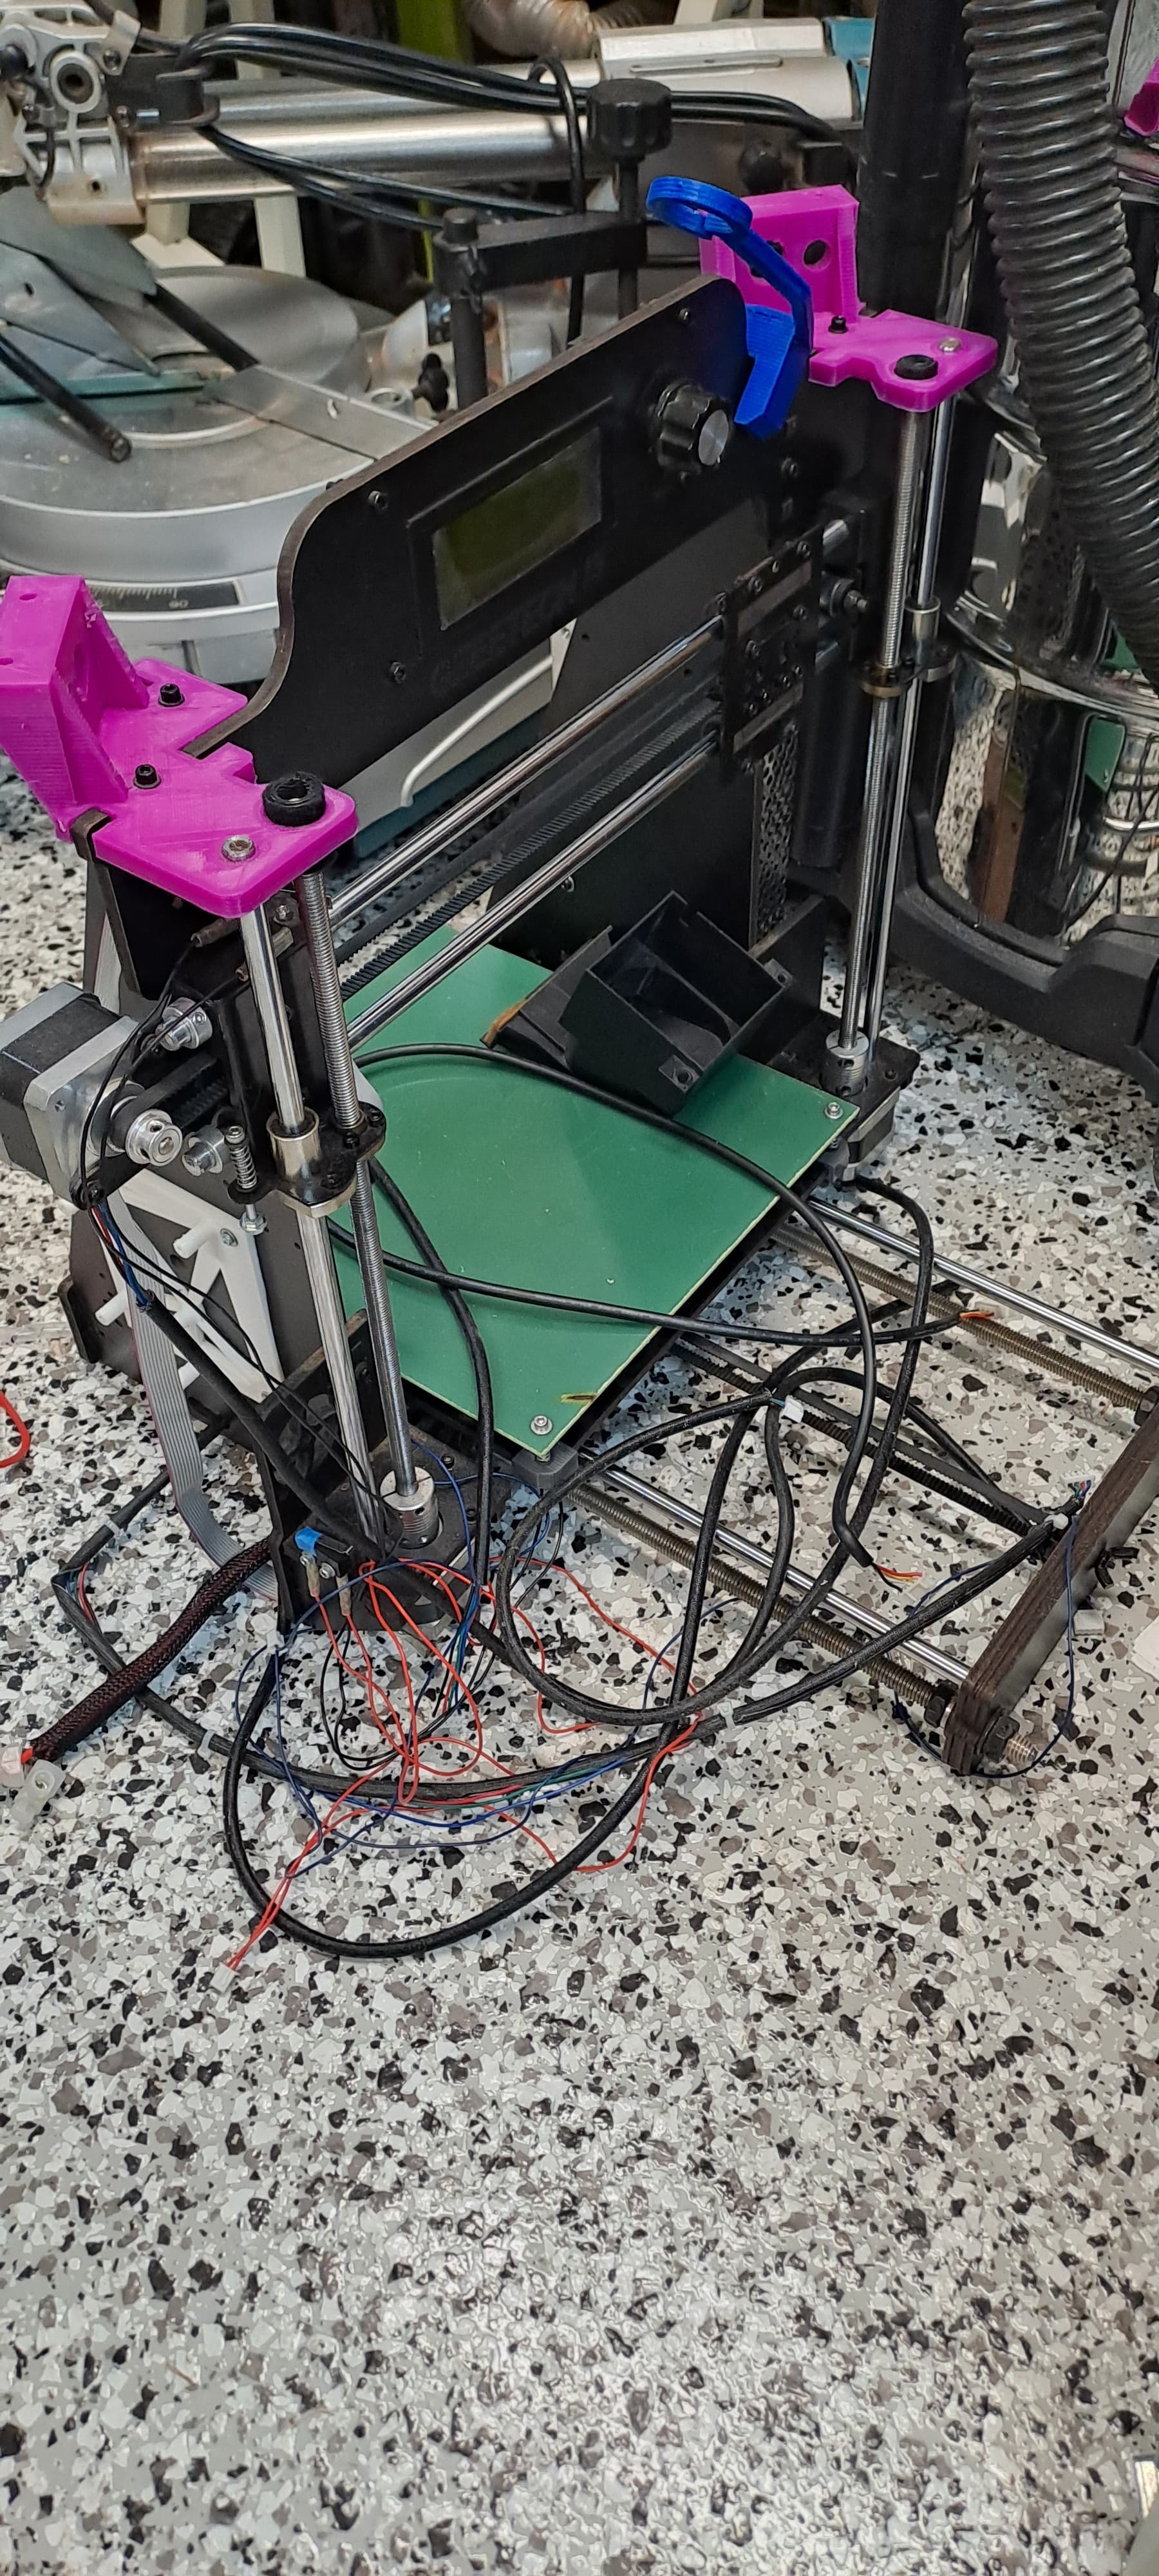
Cue a broken and robbed T-Rex 2+. With its massive 400x400x700mm build area I have spent time and $$$ to get electroincis and bits for it to run now and later be converted to a corexy idex ratrig v-core 4 bashkit.
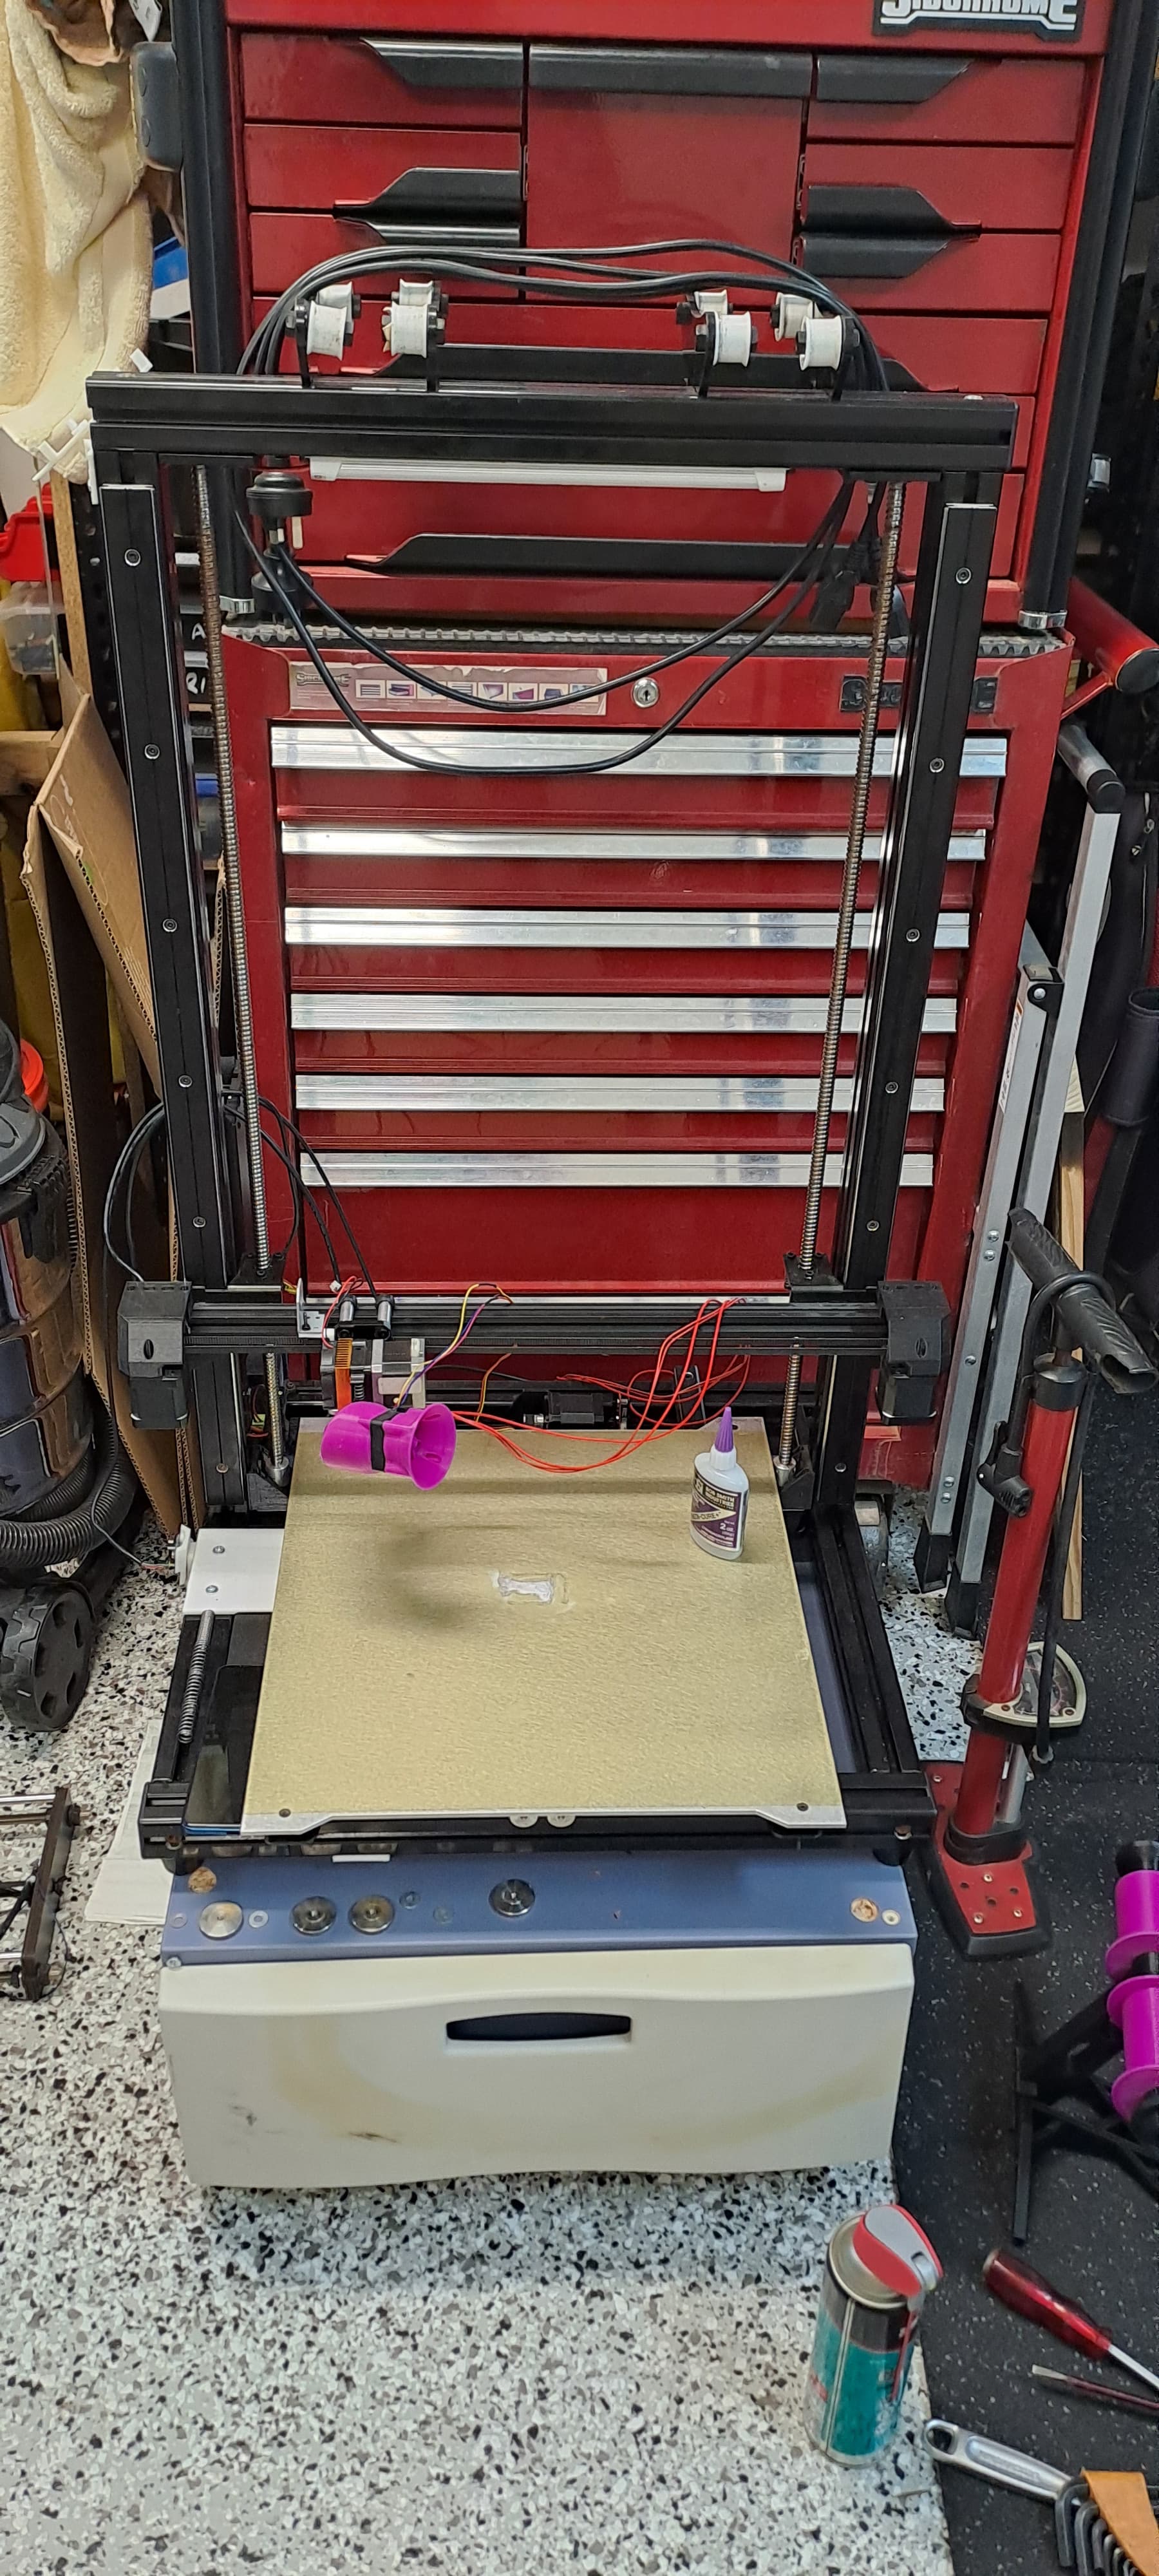
Once those parts arrive from the slow boat, the minimal T-Rex will be fixed and calibrated, then onto the mounts for the LR3 Laser and then making smoke in place of dust for a change. But until then a lot of the wive’s frinds and work collegues seem to either love these charcuterie boards or the love embarring the people they gift them to. Either way it is keeping the cobwebs off Magenta Dreams.
4 Likes
Well had my first go of hooking up the laser to the laptop for lightburn. Was some success. Followed the lightburn tutorial videos

Need to do some more forum searching.
1 Like
OK, so I have found some posts/threads to start working on getting the laser up and working properly.
Laser Specs:
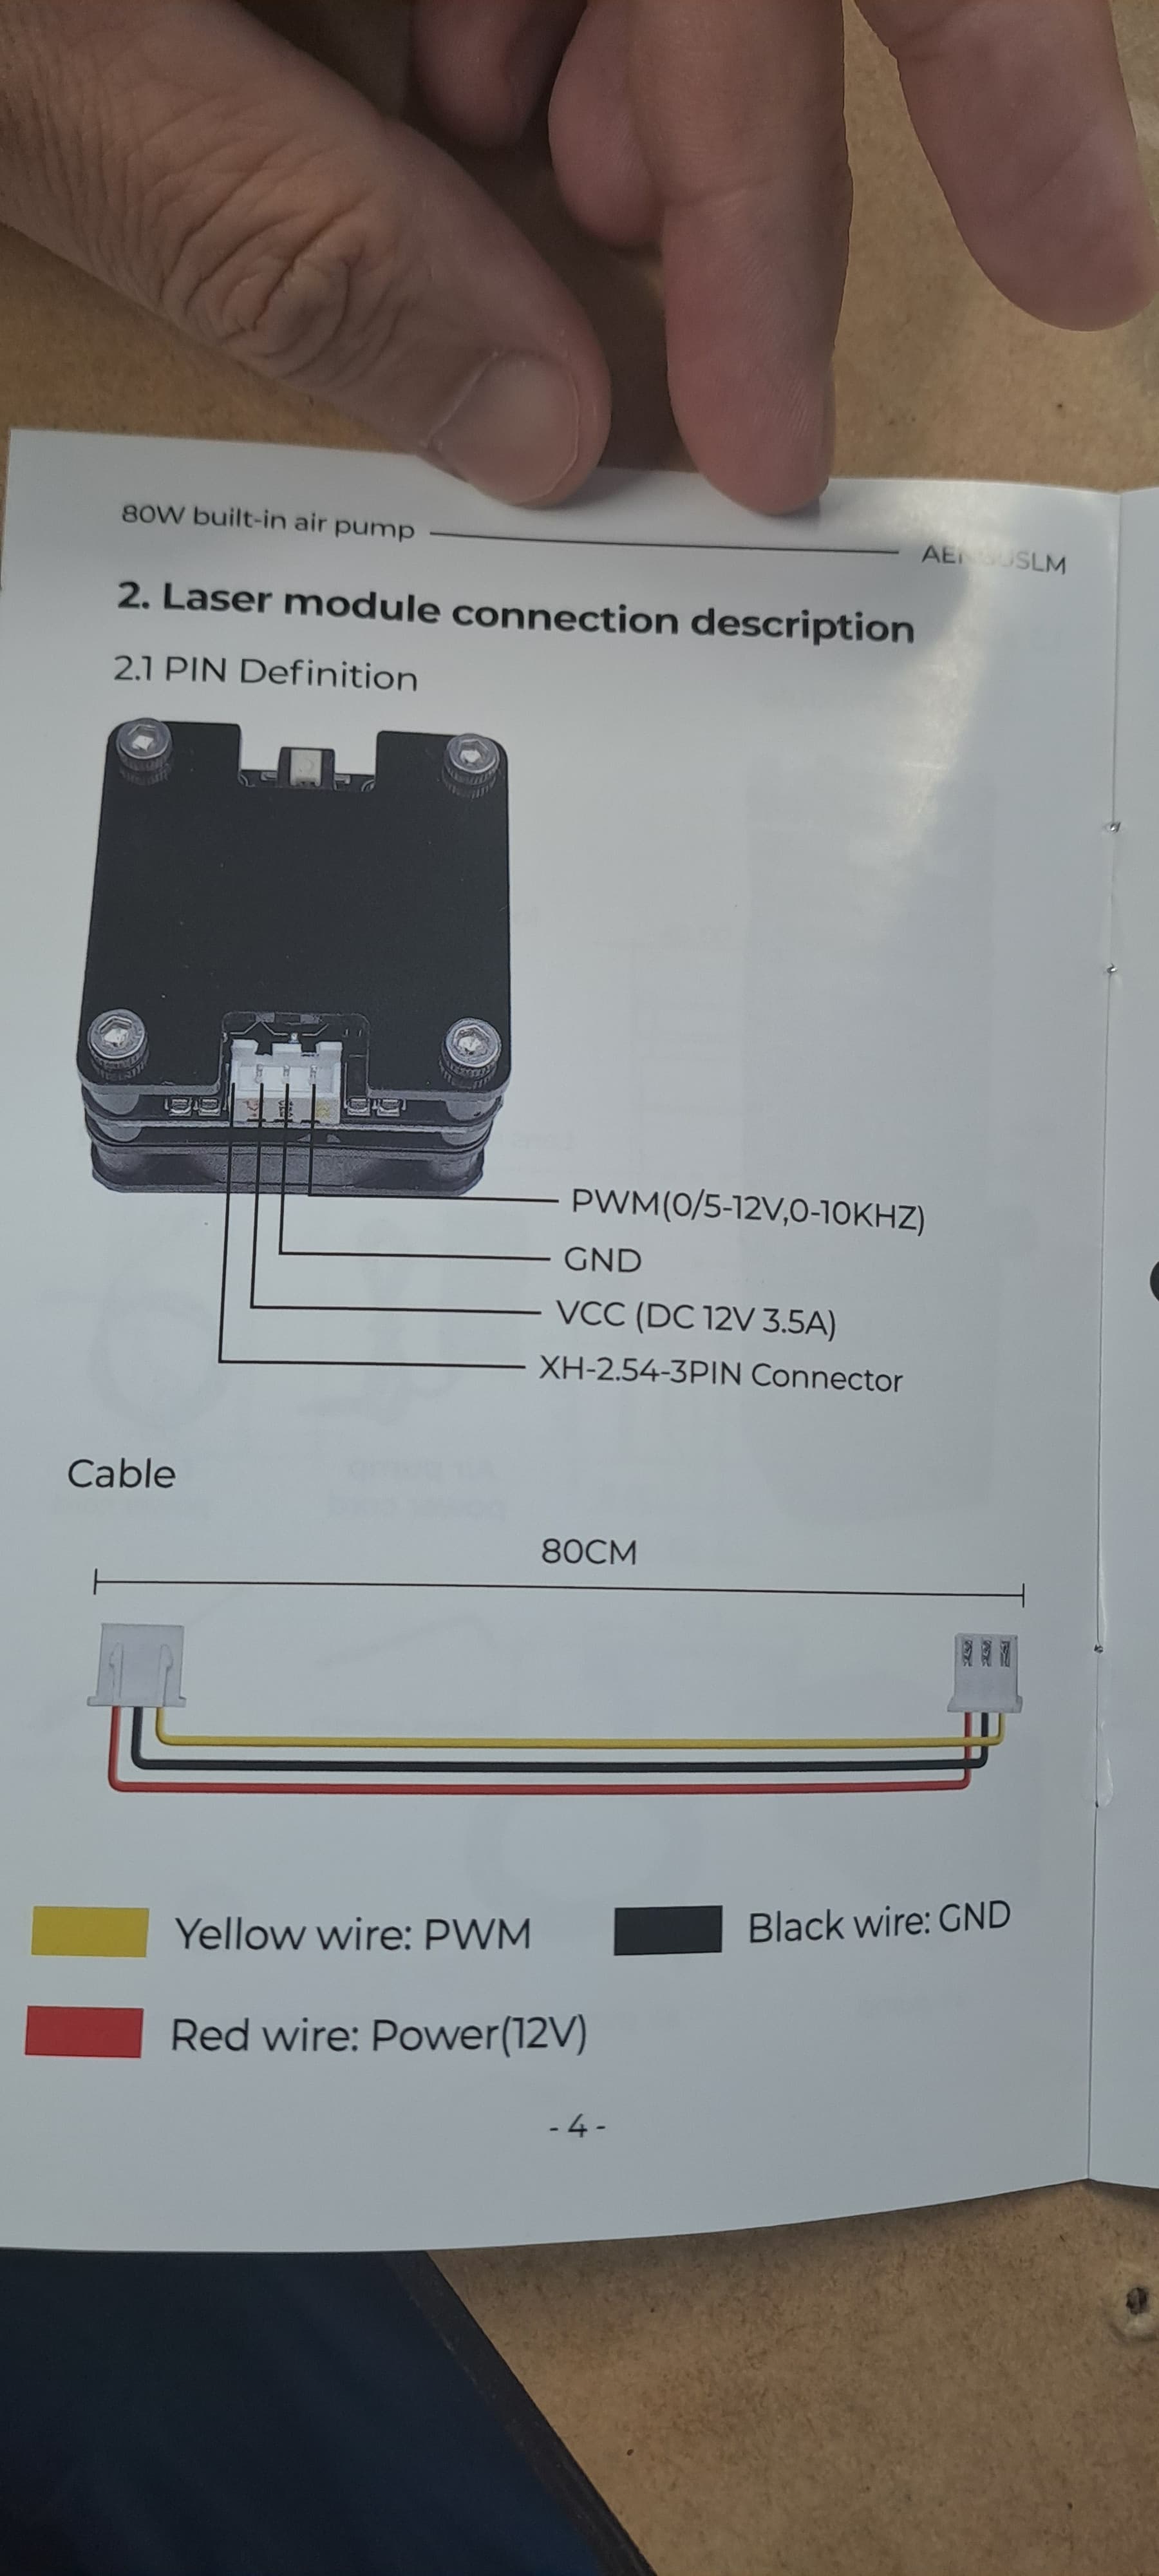
And plugged into the SKR Pro V1.2
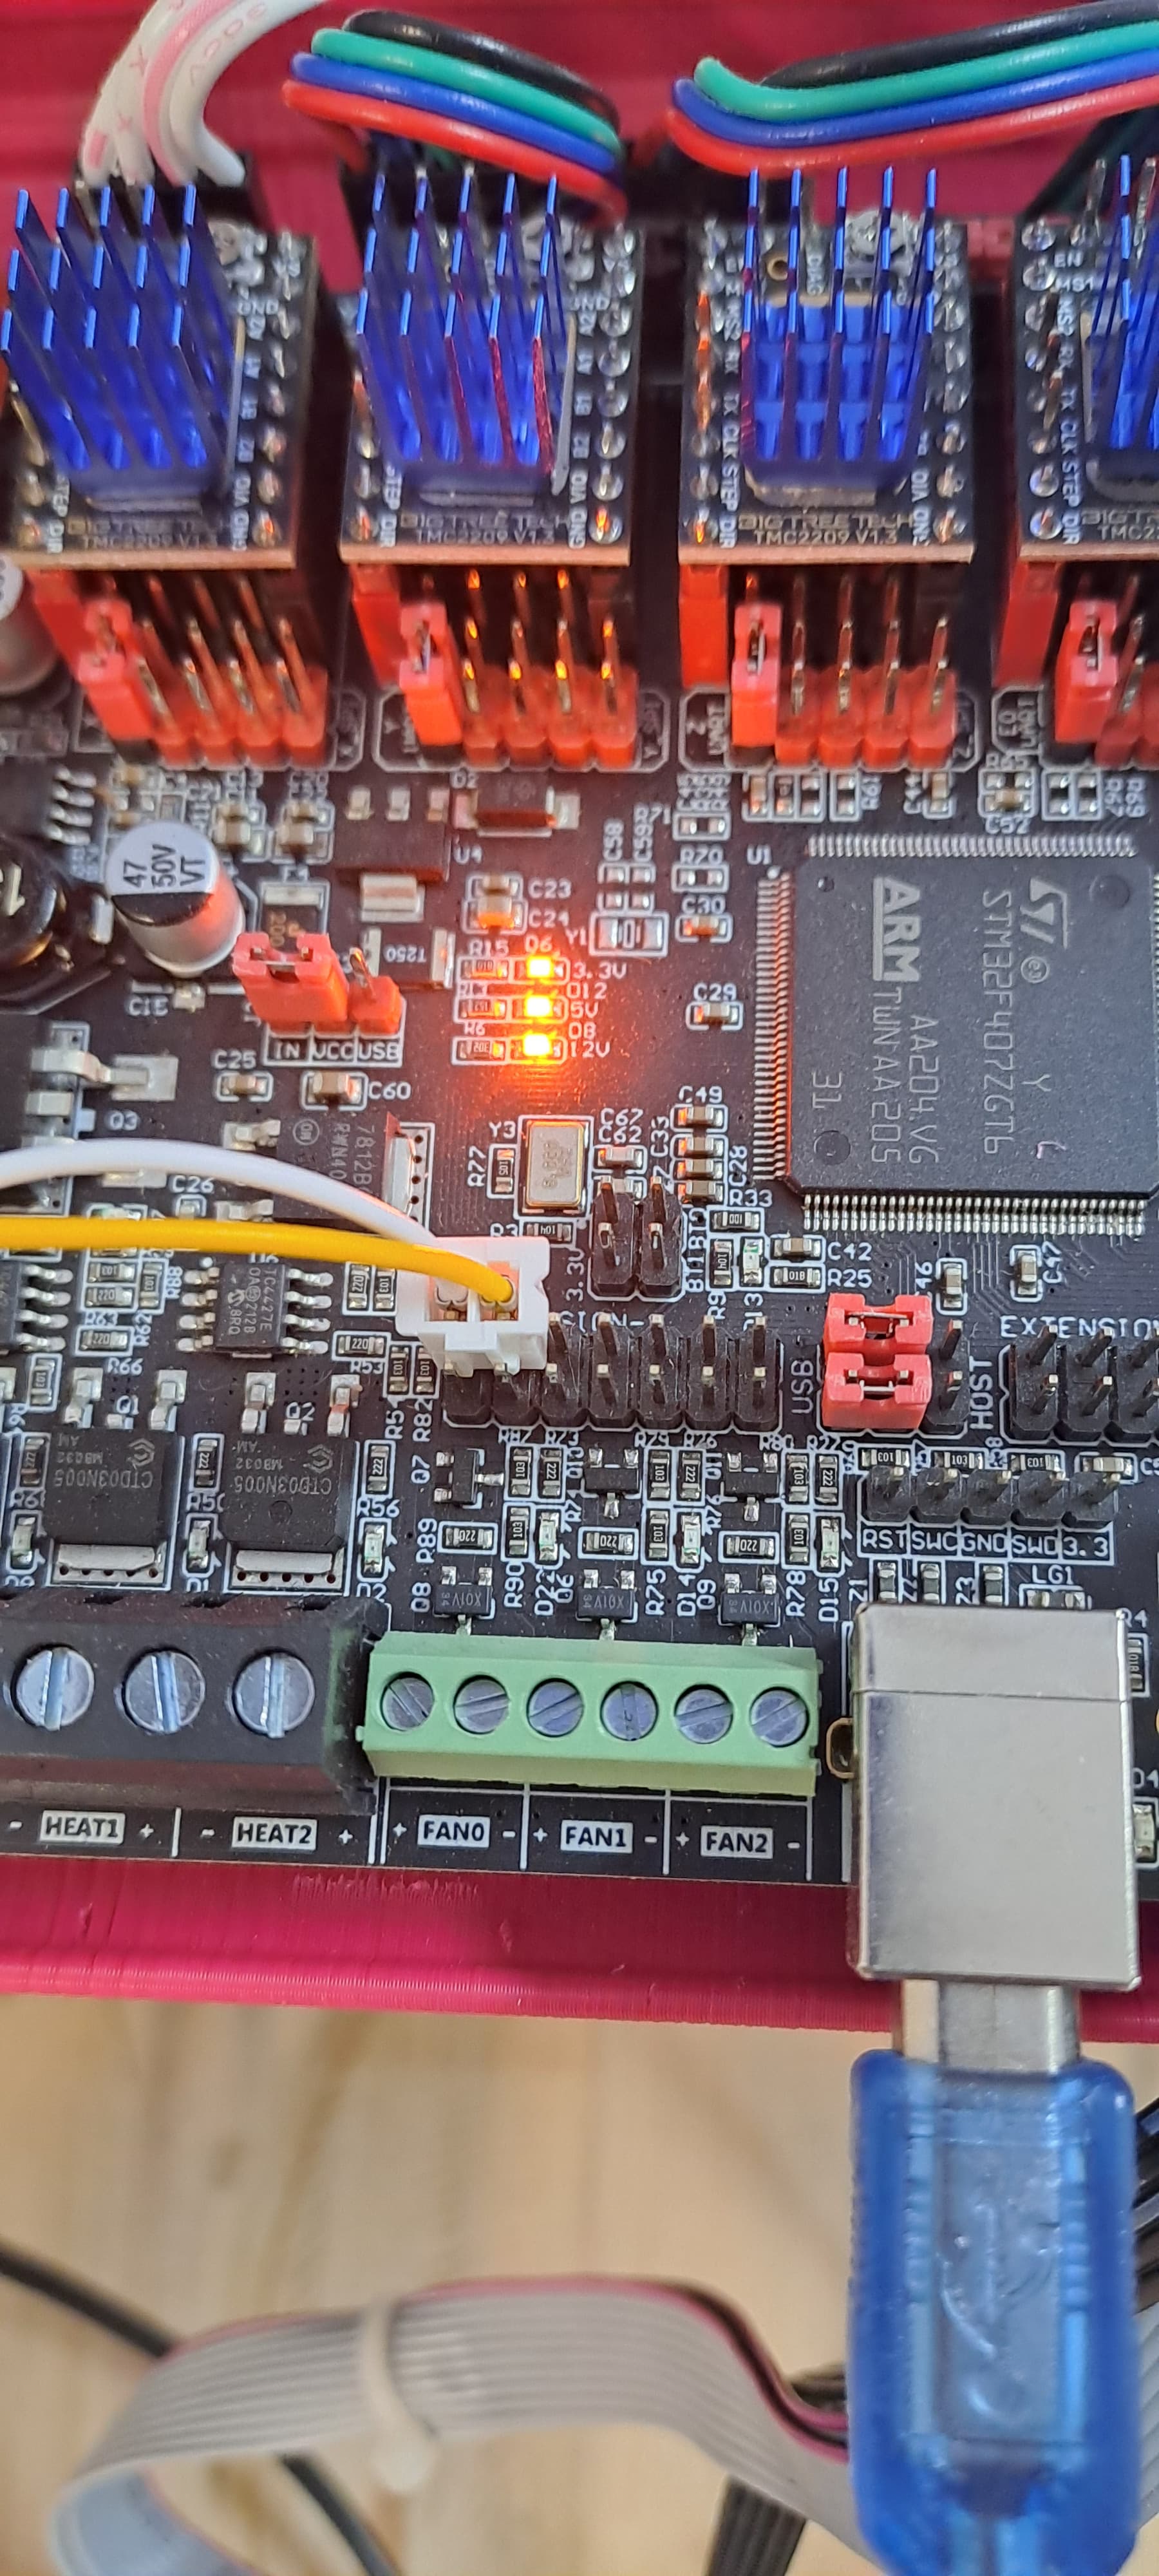
I have found that Ronald had the same issue with light burn so thankful for his thread and experience.
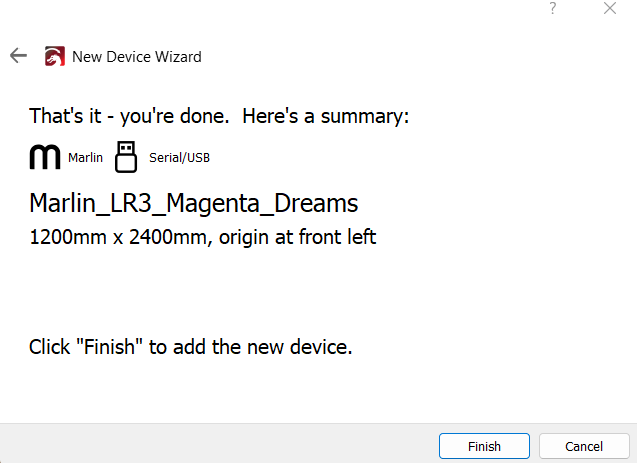
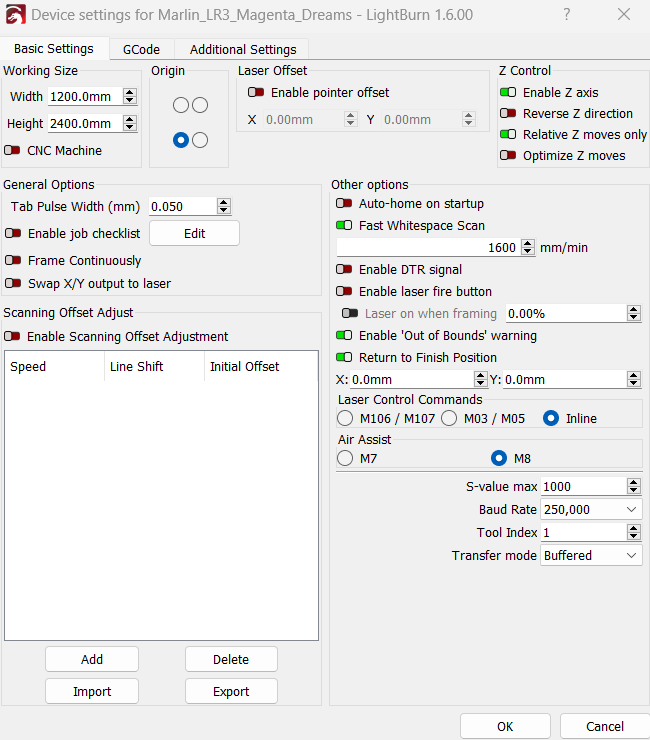
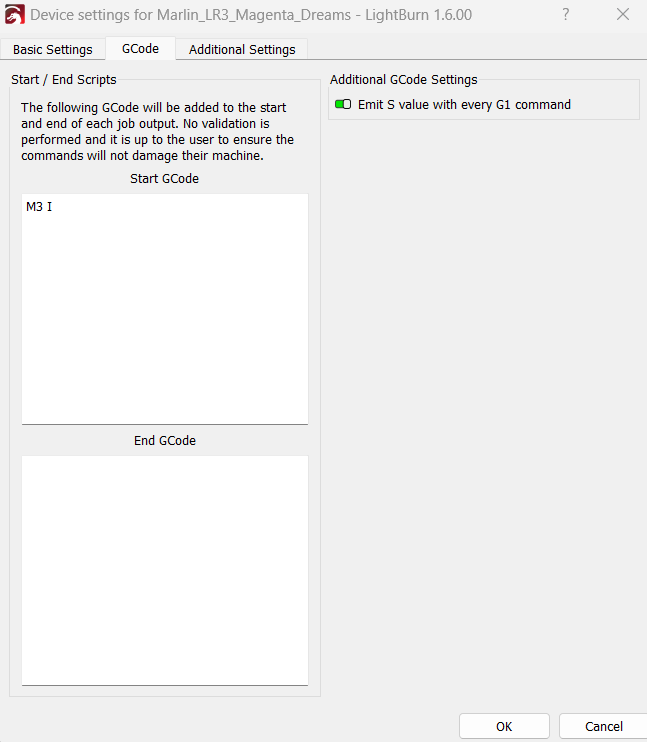
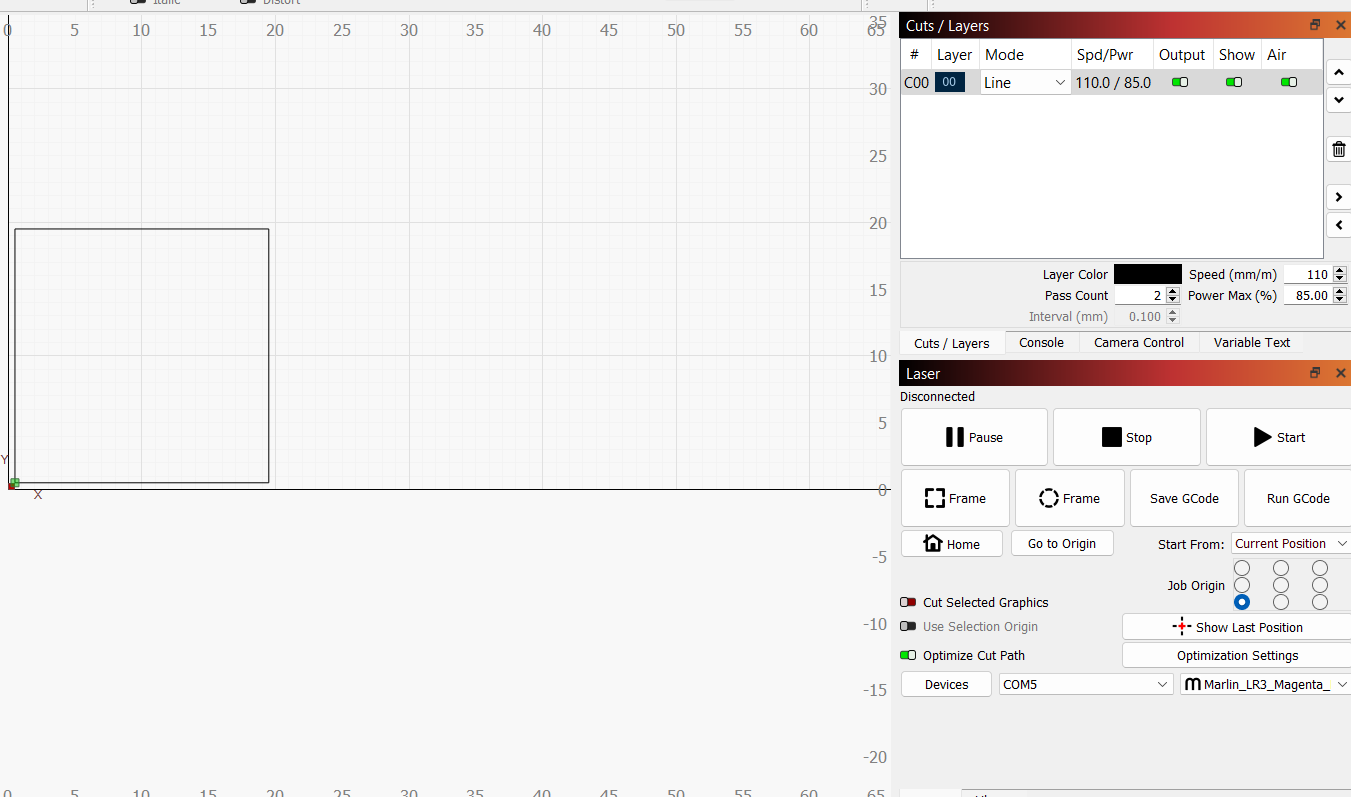
So, I set up my device as a Marlin, shown below. I exported the gcode after following the comments from the above thread. Commands are “Inline” and I made the S factor 1000 and Fast Whitespace Scan to 1600mm/min. Gcode script to include M3 I at the start.
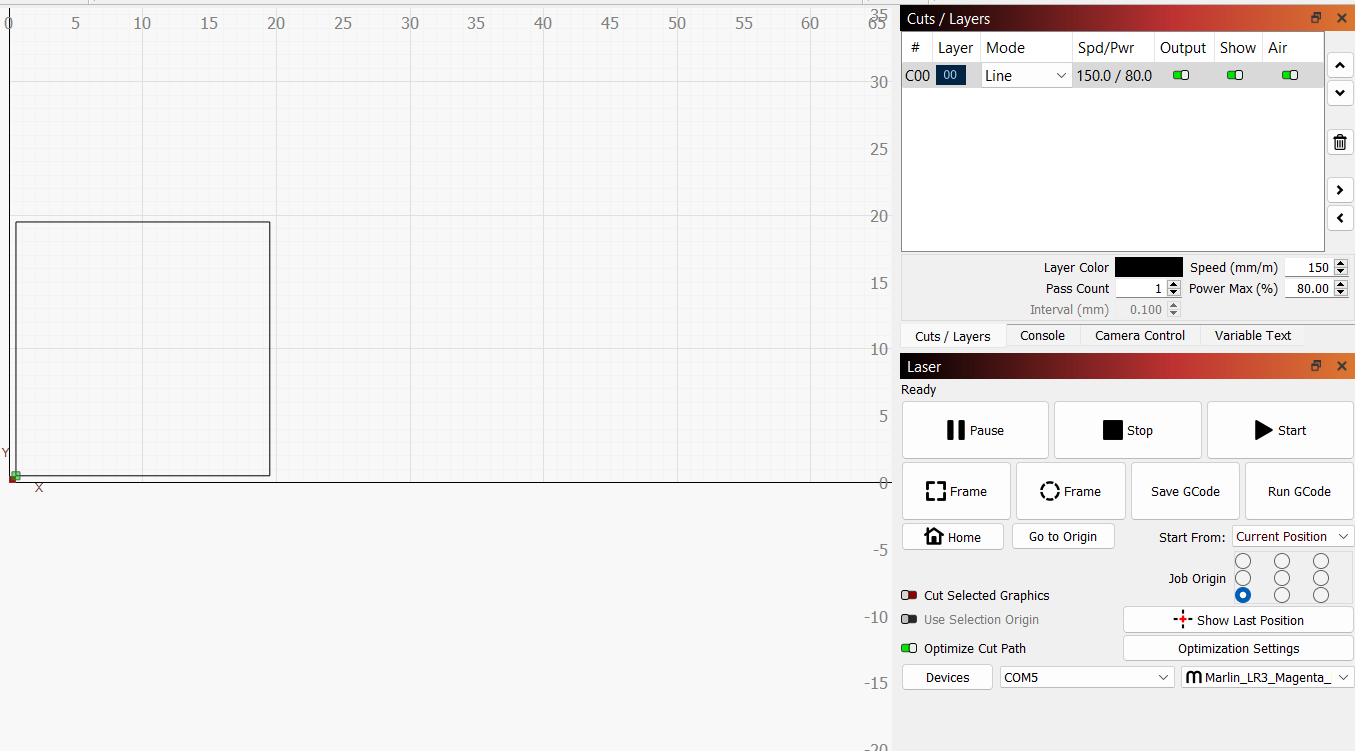
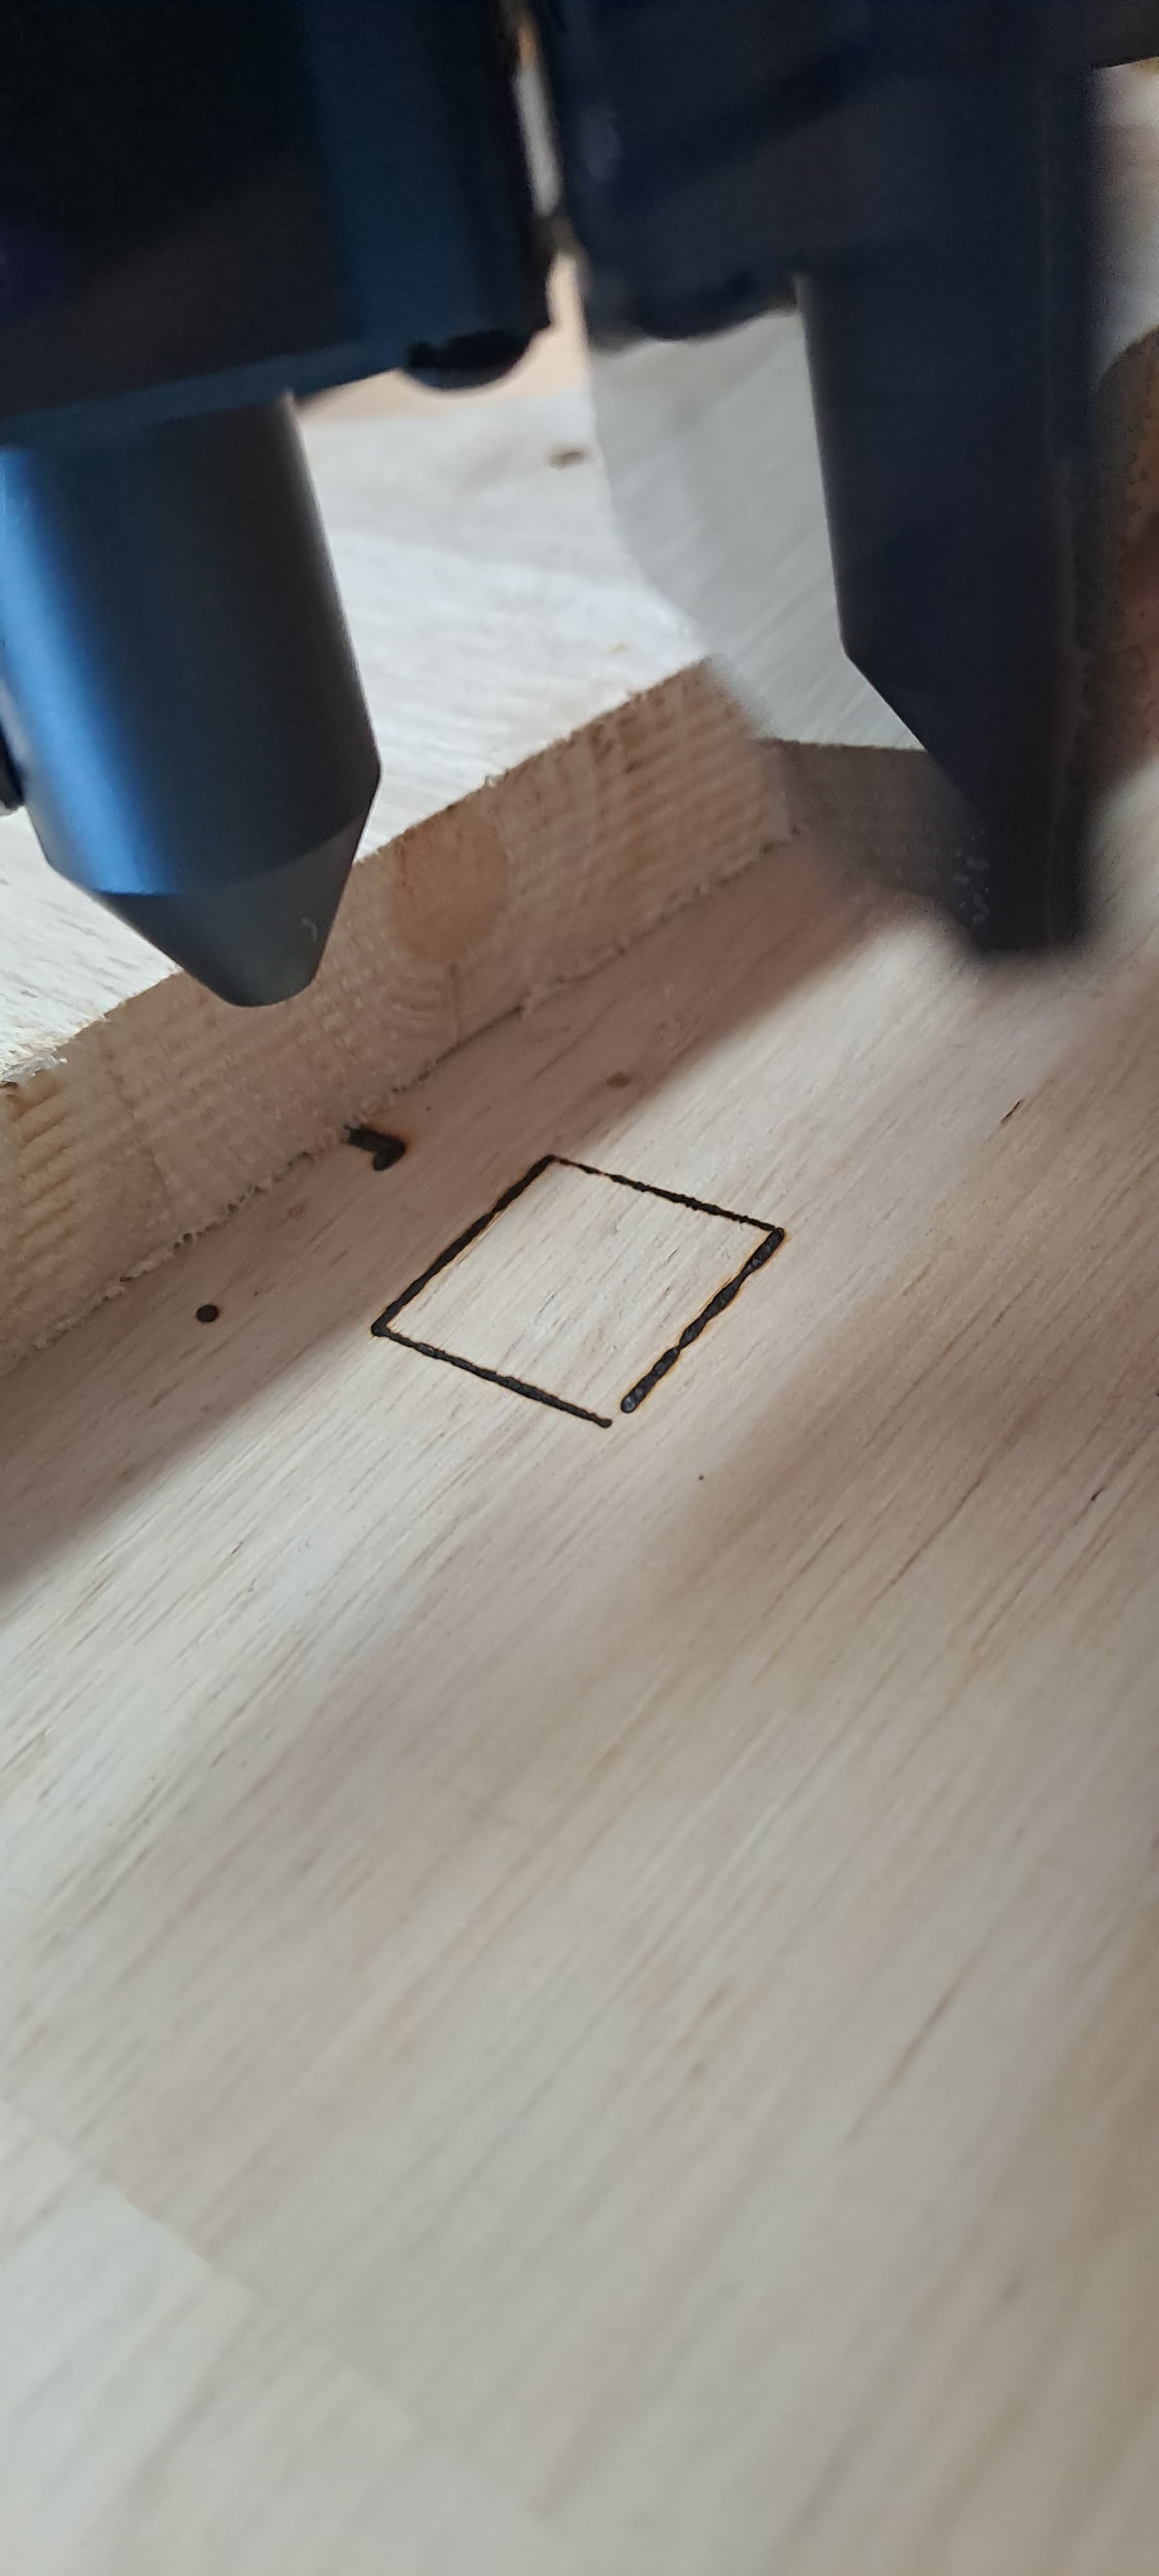
I drew a simple square to cut out with the below settings. I saved the Gcode as per below and plug the SD card into the TFT for printing.
Trial.gcode (322 Bytes)
; LightBurn 1.6.00
; Marlin device profile, current position
; Bounds: X0 Y0 to X19 Y19
;USER START SCRIPT
M3 I
;USER START SCRIPT
G21
G91
; Cut @ 150 mm/min, 80% power
M8
M05
G0 X19 Y0 F1600
; Layer C00
G1 X-19F150 I S800
G1 Y19 I S800
G1 X19 I S800
G1 Y-19 I S800
M9
M05 P1
; return to starting pos
G0 X-19 Y0 F1600
Result
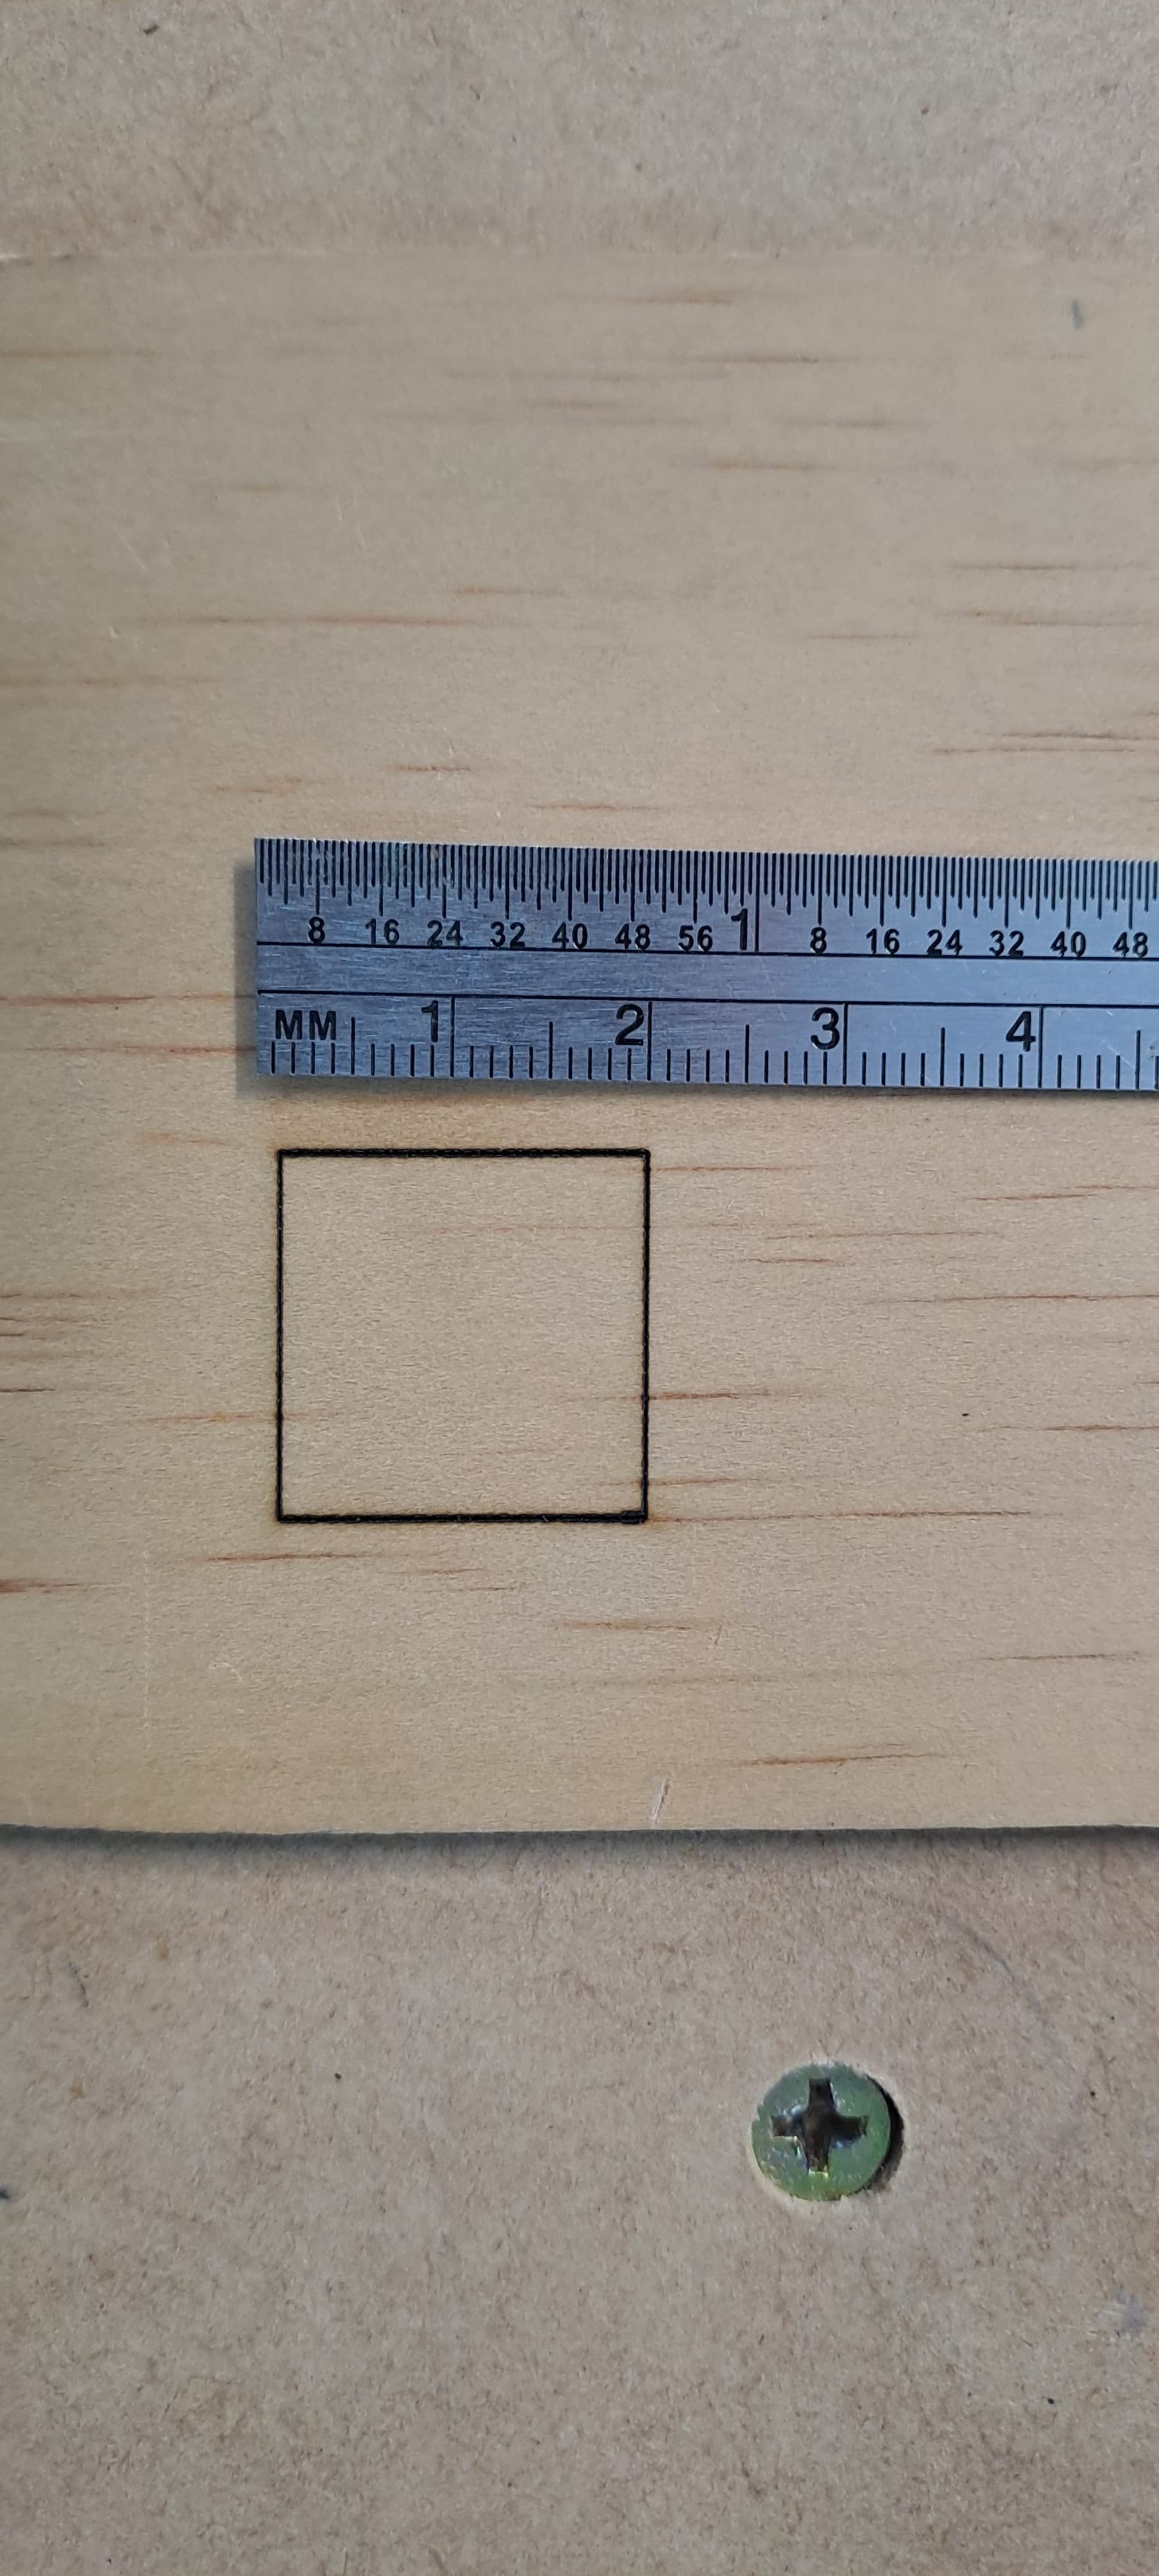
It did not cut through all the way. So I will try with 2 passes
Trial_2_passes.gcode (418 Bytes)
In the end I did 8 passes to almost cut through.
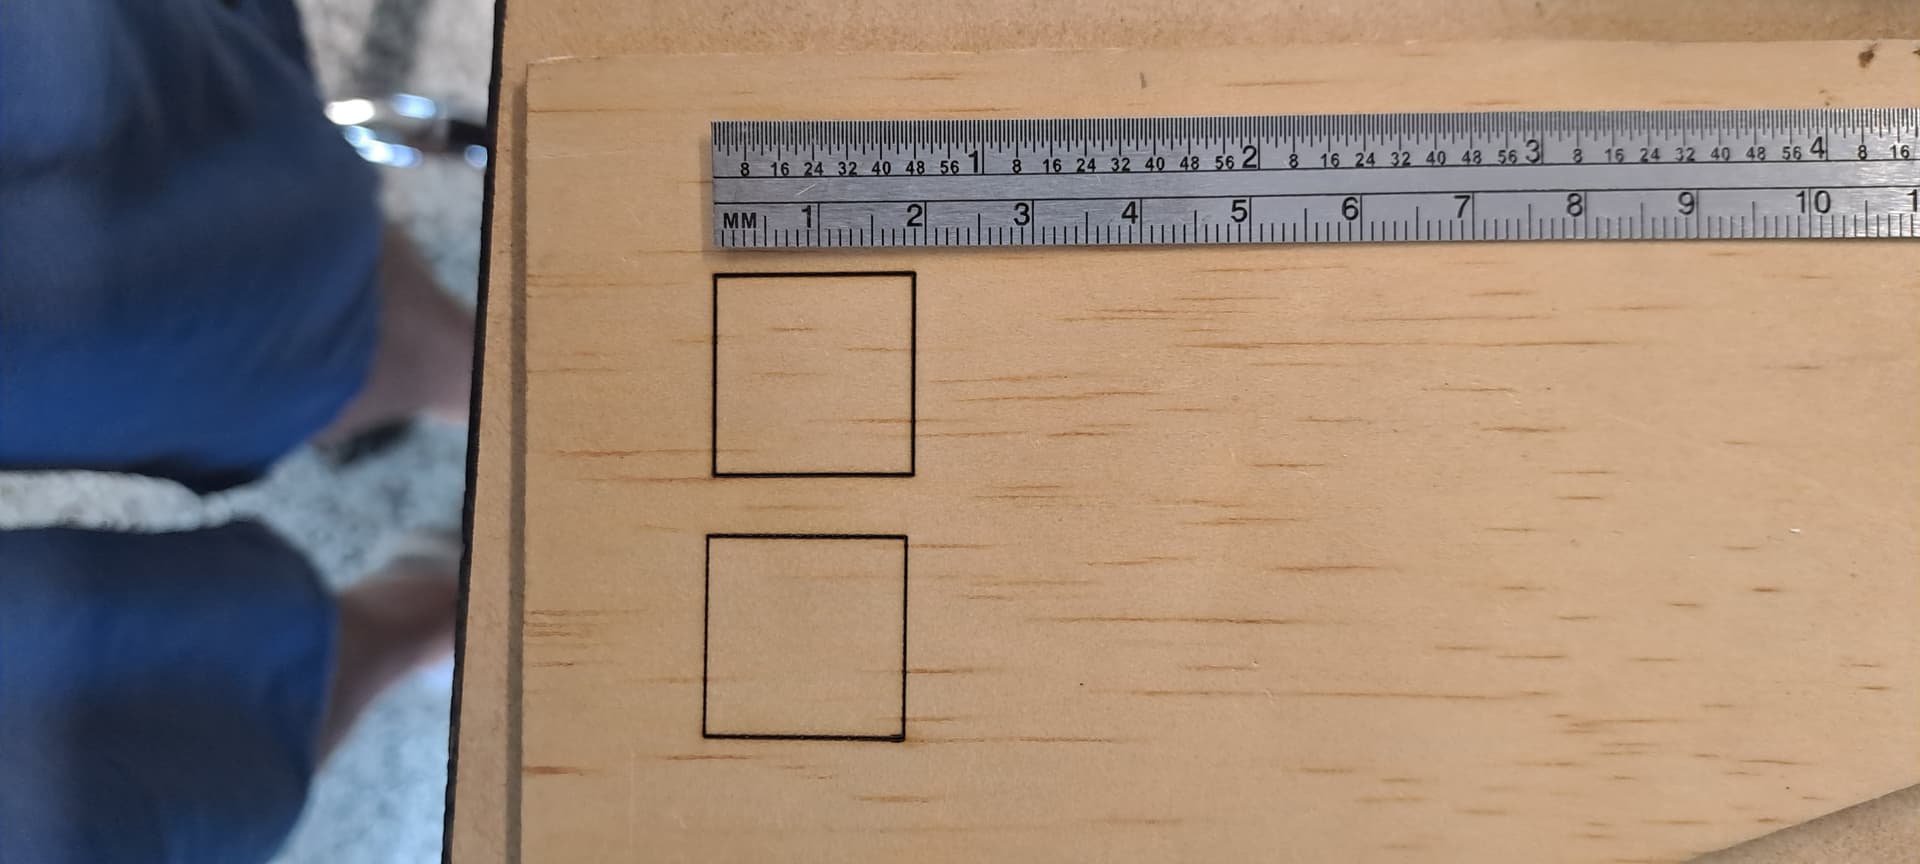
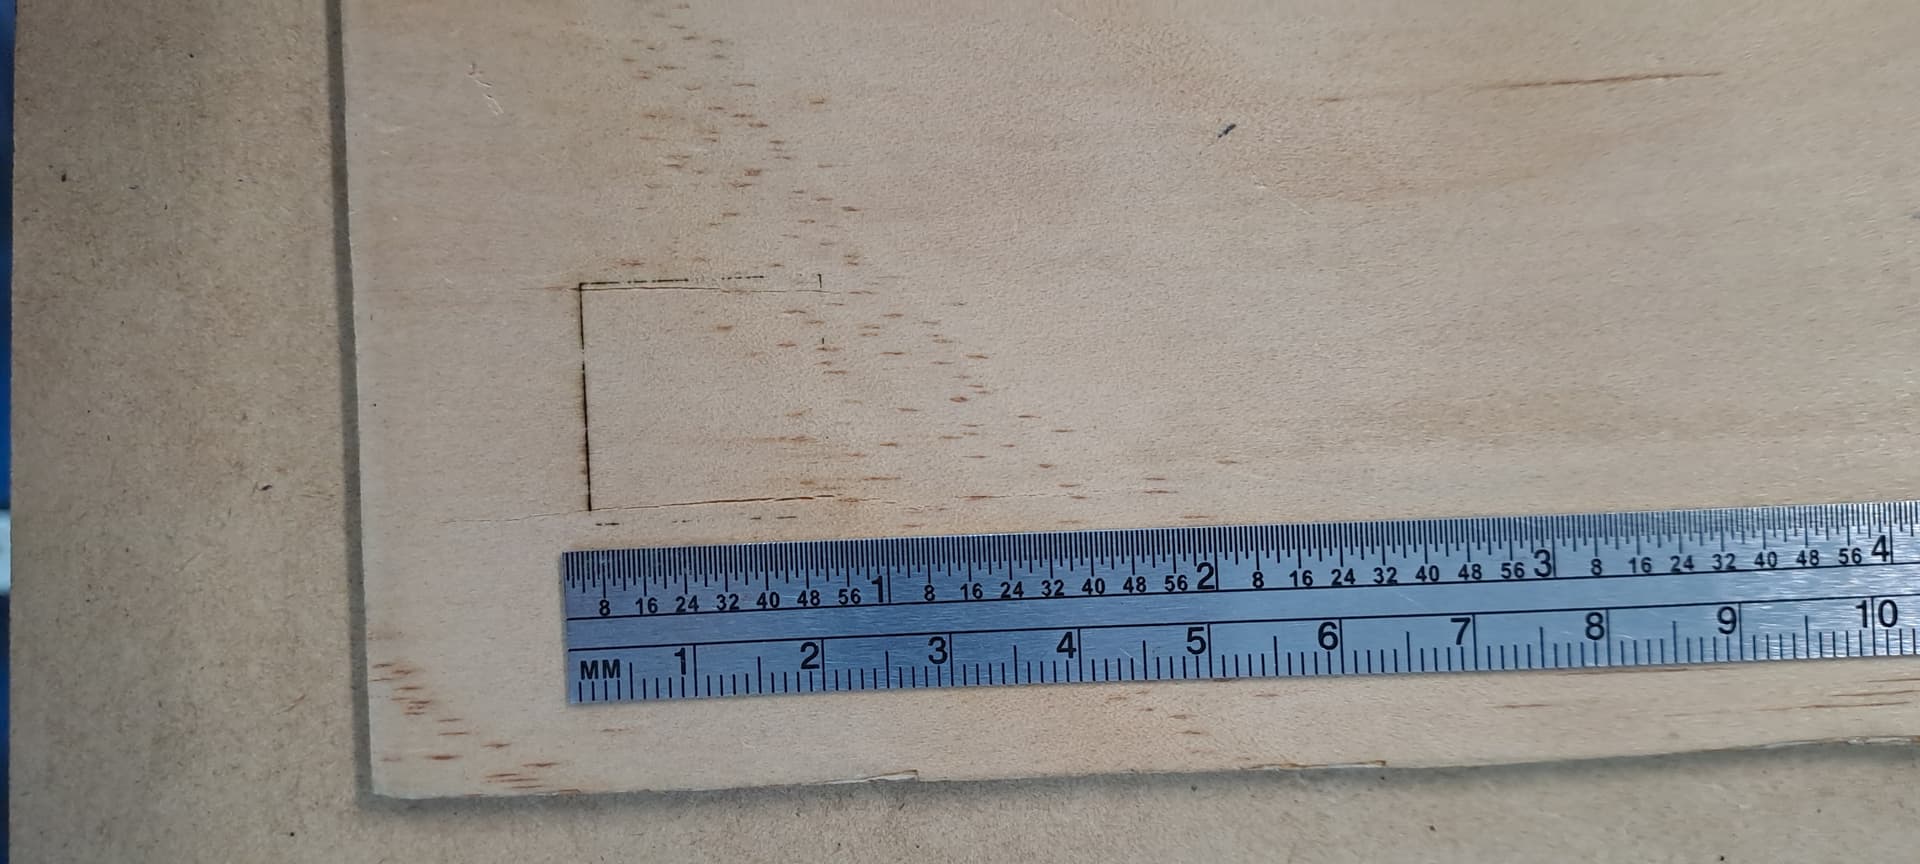

Next, I slowed the speed to 110mm and up the power to 85%. @ 2 Passes
Results: Instantly better, only 2 passes!!
Thats about all I can do for the day. Will definitely be doing some more exercises tomorrow now that I have been able to cut through.
Heading into watch the NRL, Broncs vs Sharks, should be a bit of a match as Origin was on Wednesday and some of the main stars are out.
It was very helpful for me to run the Material Test Generator in Lightburn when I first got my laser. It really helped me to understand how fast and what intensity to run the laser for different types of projects.
1 Like
Thats are great Idea @Britt. I will have a look in the Lightburn for it and give it a go
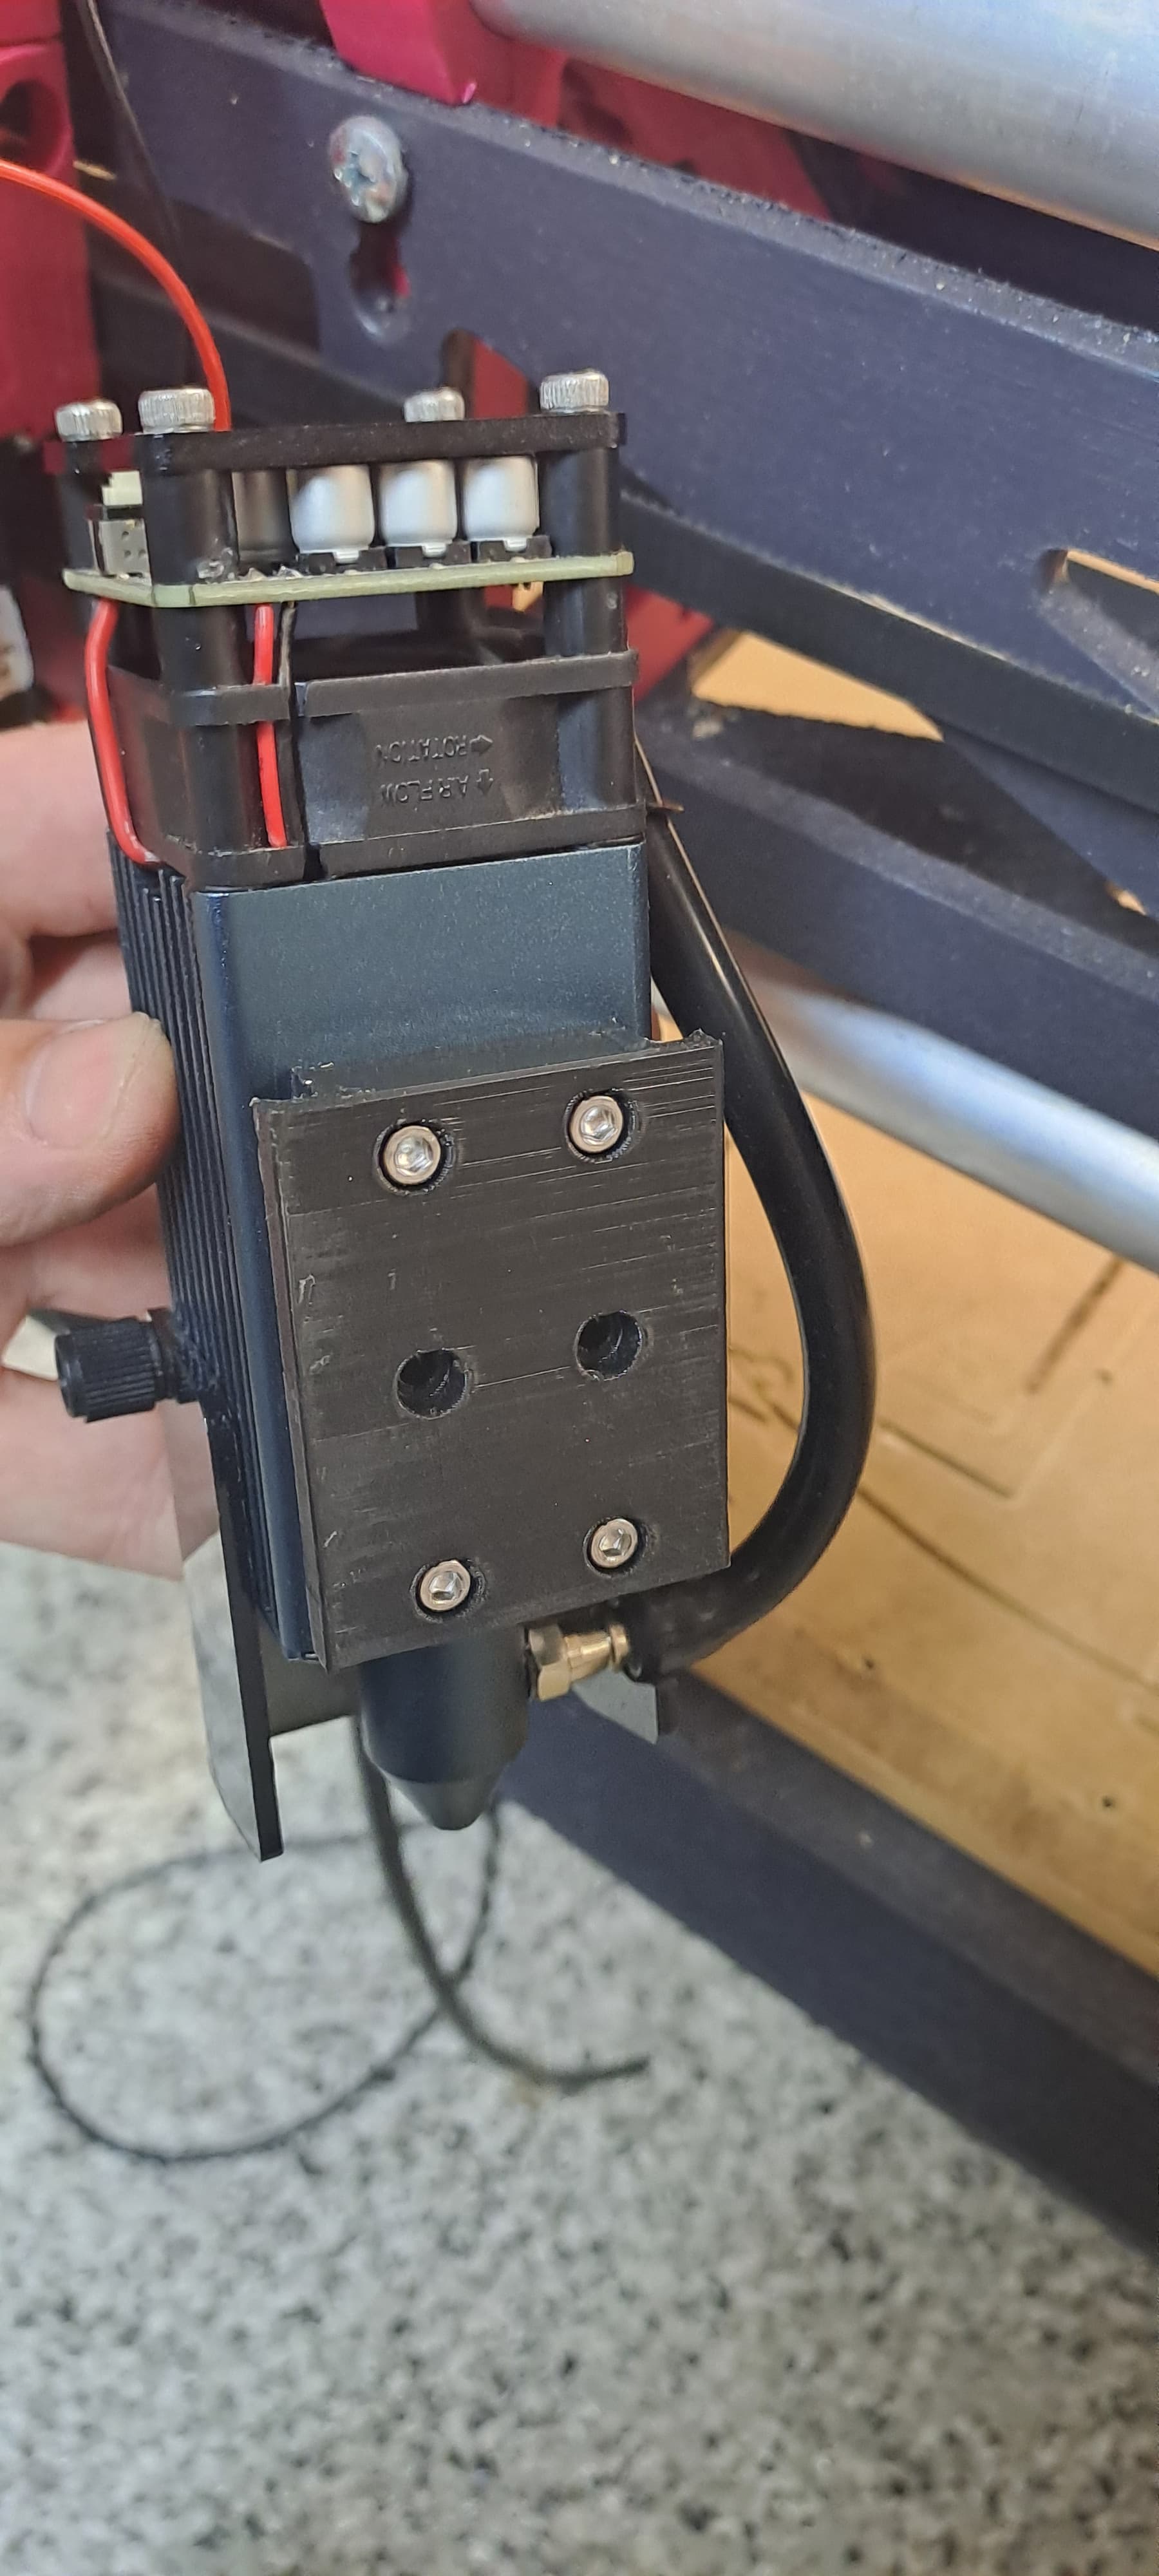
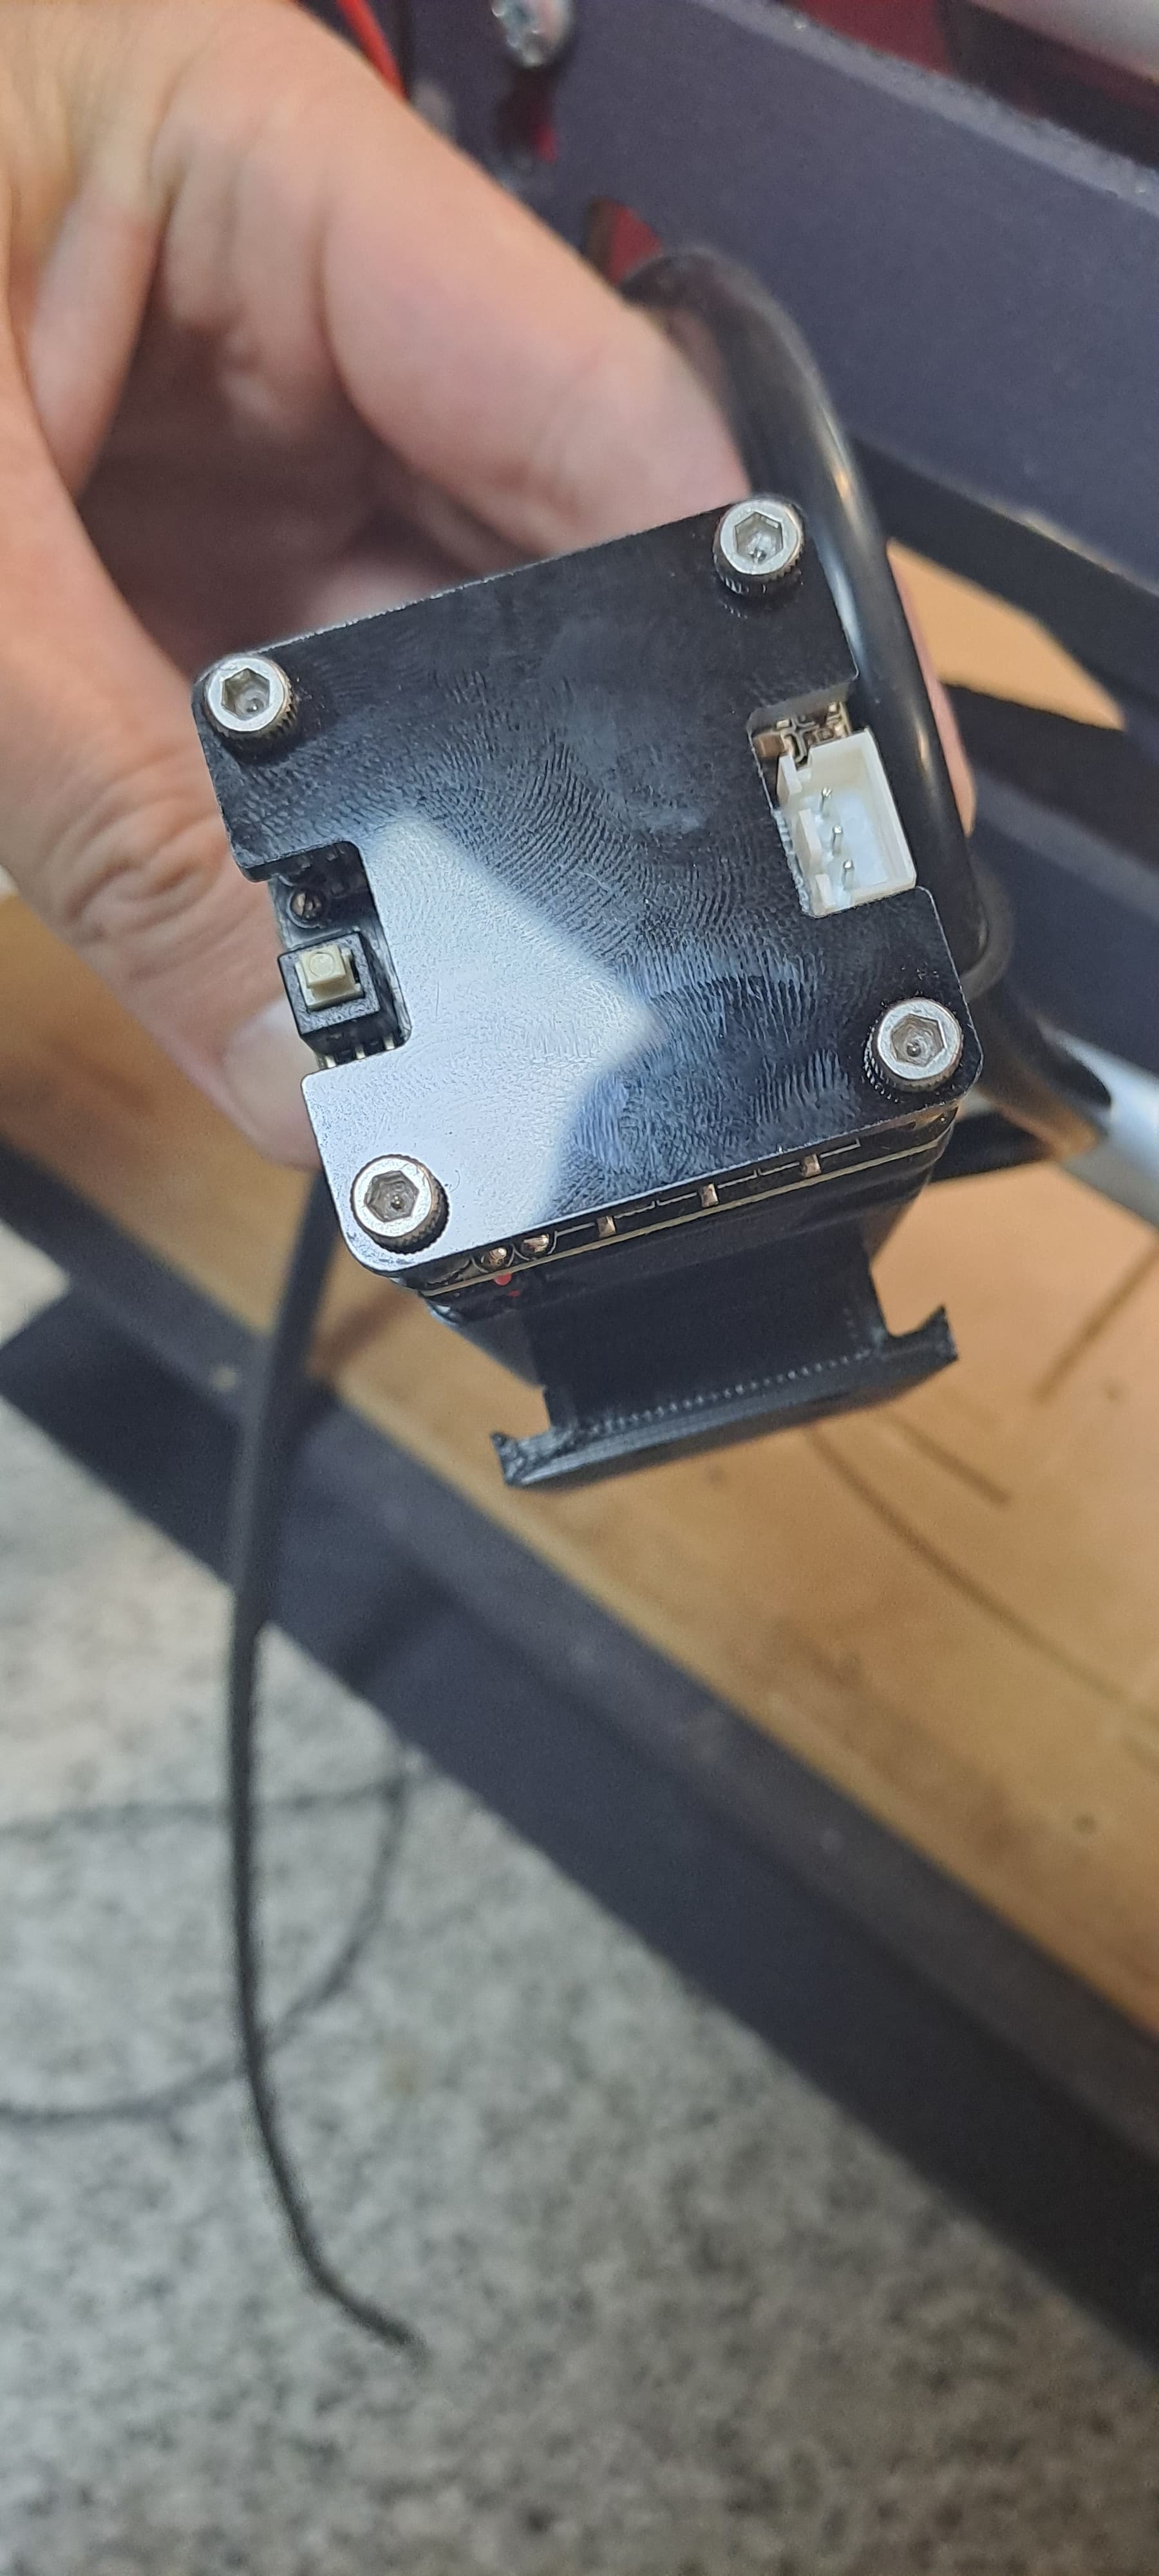
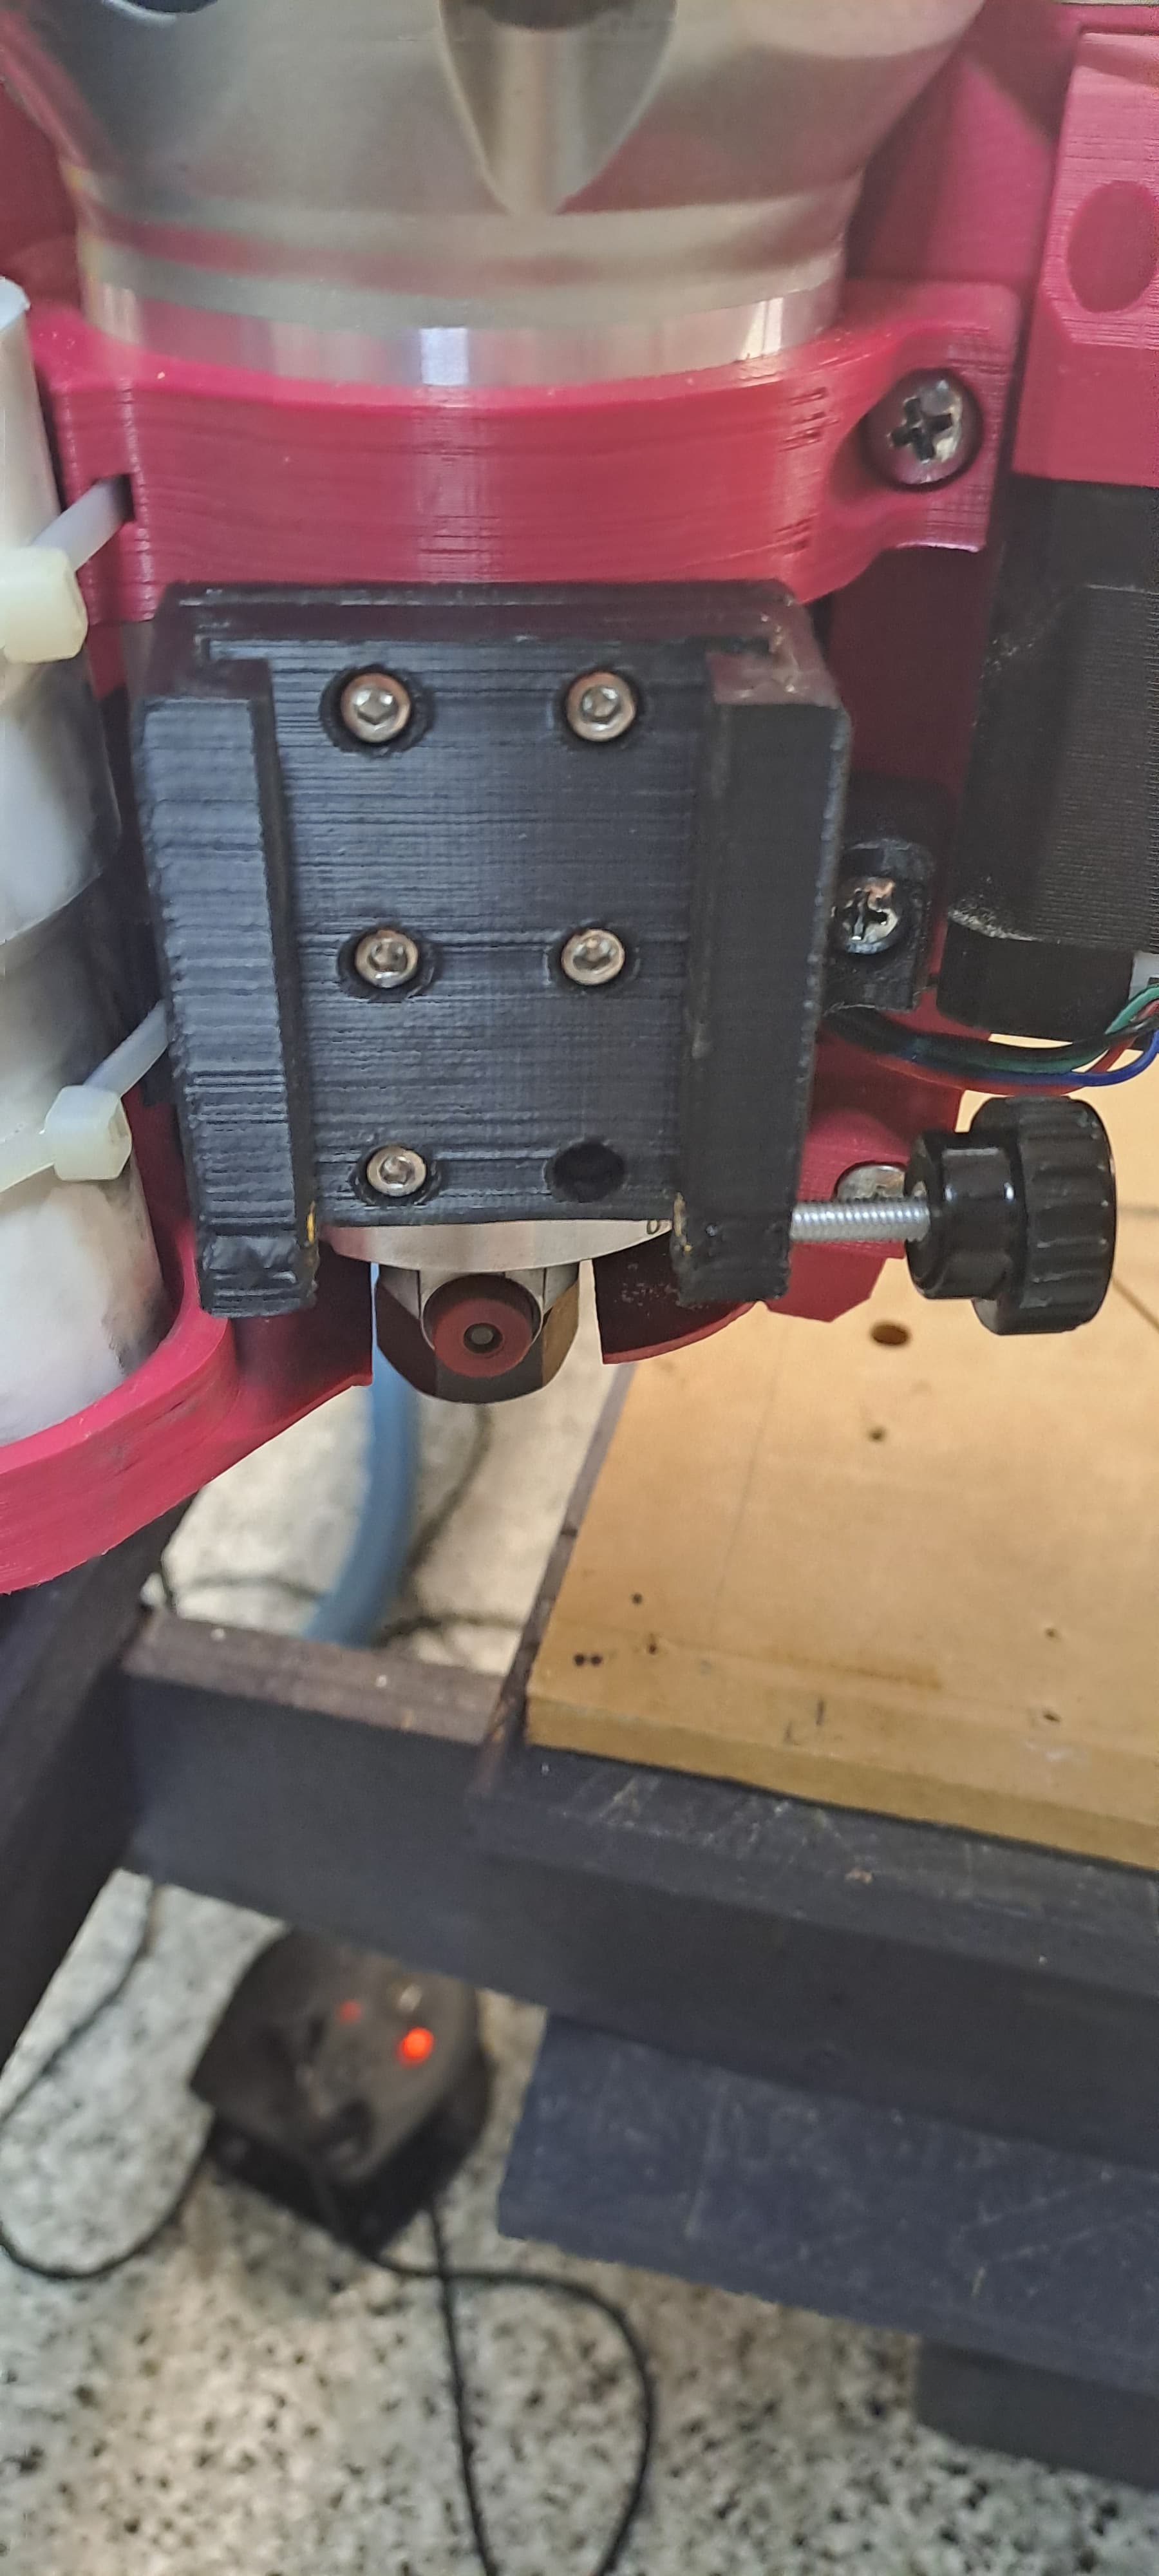
I have managed to print a new tool clamp that allows for a mount for the laser using Fabien T’s clamp.
https://www.printables.com/model/524247-lowrider-3-cnc-laser-mount-for-makita-holder/files
I designed my slide/mount in fusion and noticed the bolt holes for the laser lined up with those on the Makita tool clamp but I wanted to be able to lower and remove the laser easily. Files are below:
https://www.printables.com/model/980289-laser-slide-mount-for-lr3-makita-clamp/files
1 Like
Time to update this thread. I have neglected it for long enough. Time for the next iteration
Edit: update thread not wrap it up
4 Likes
Heck yeah!
1 Like
Excuse me but those new bits look more lilac than magenta.
But I’m still fully onboard ![]()
4 Likes
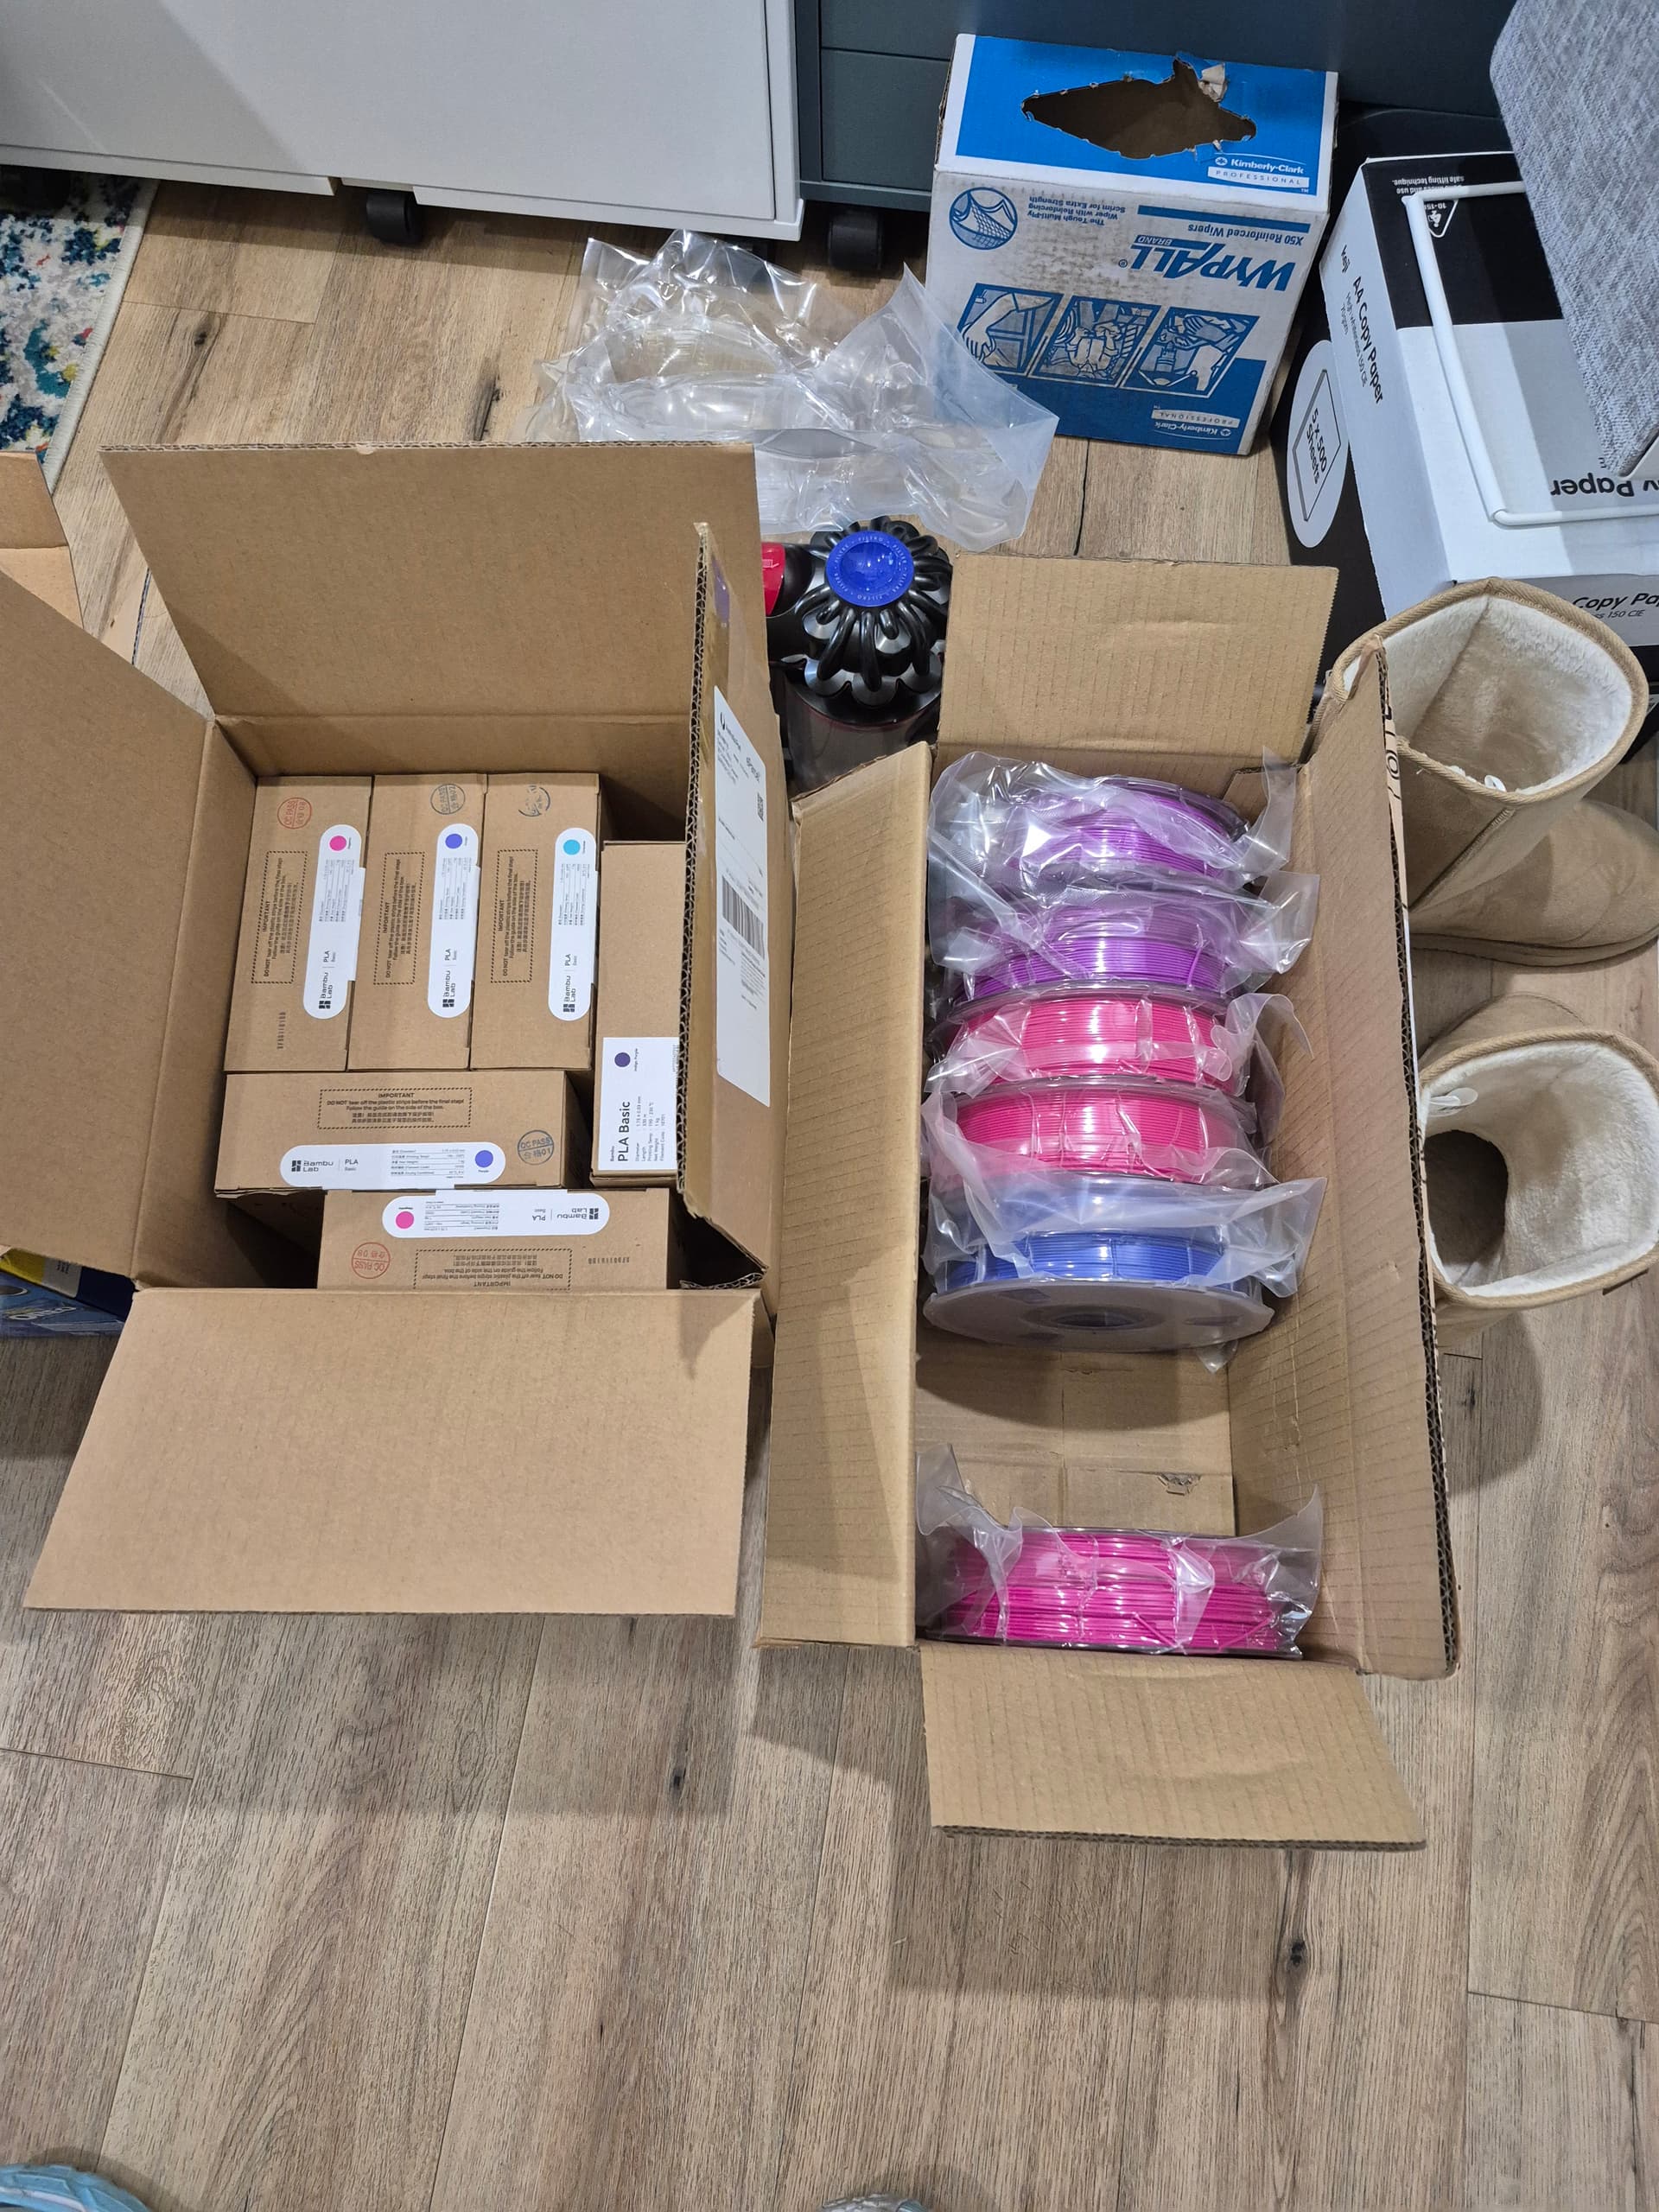
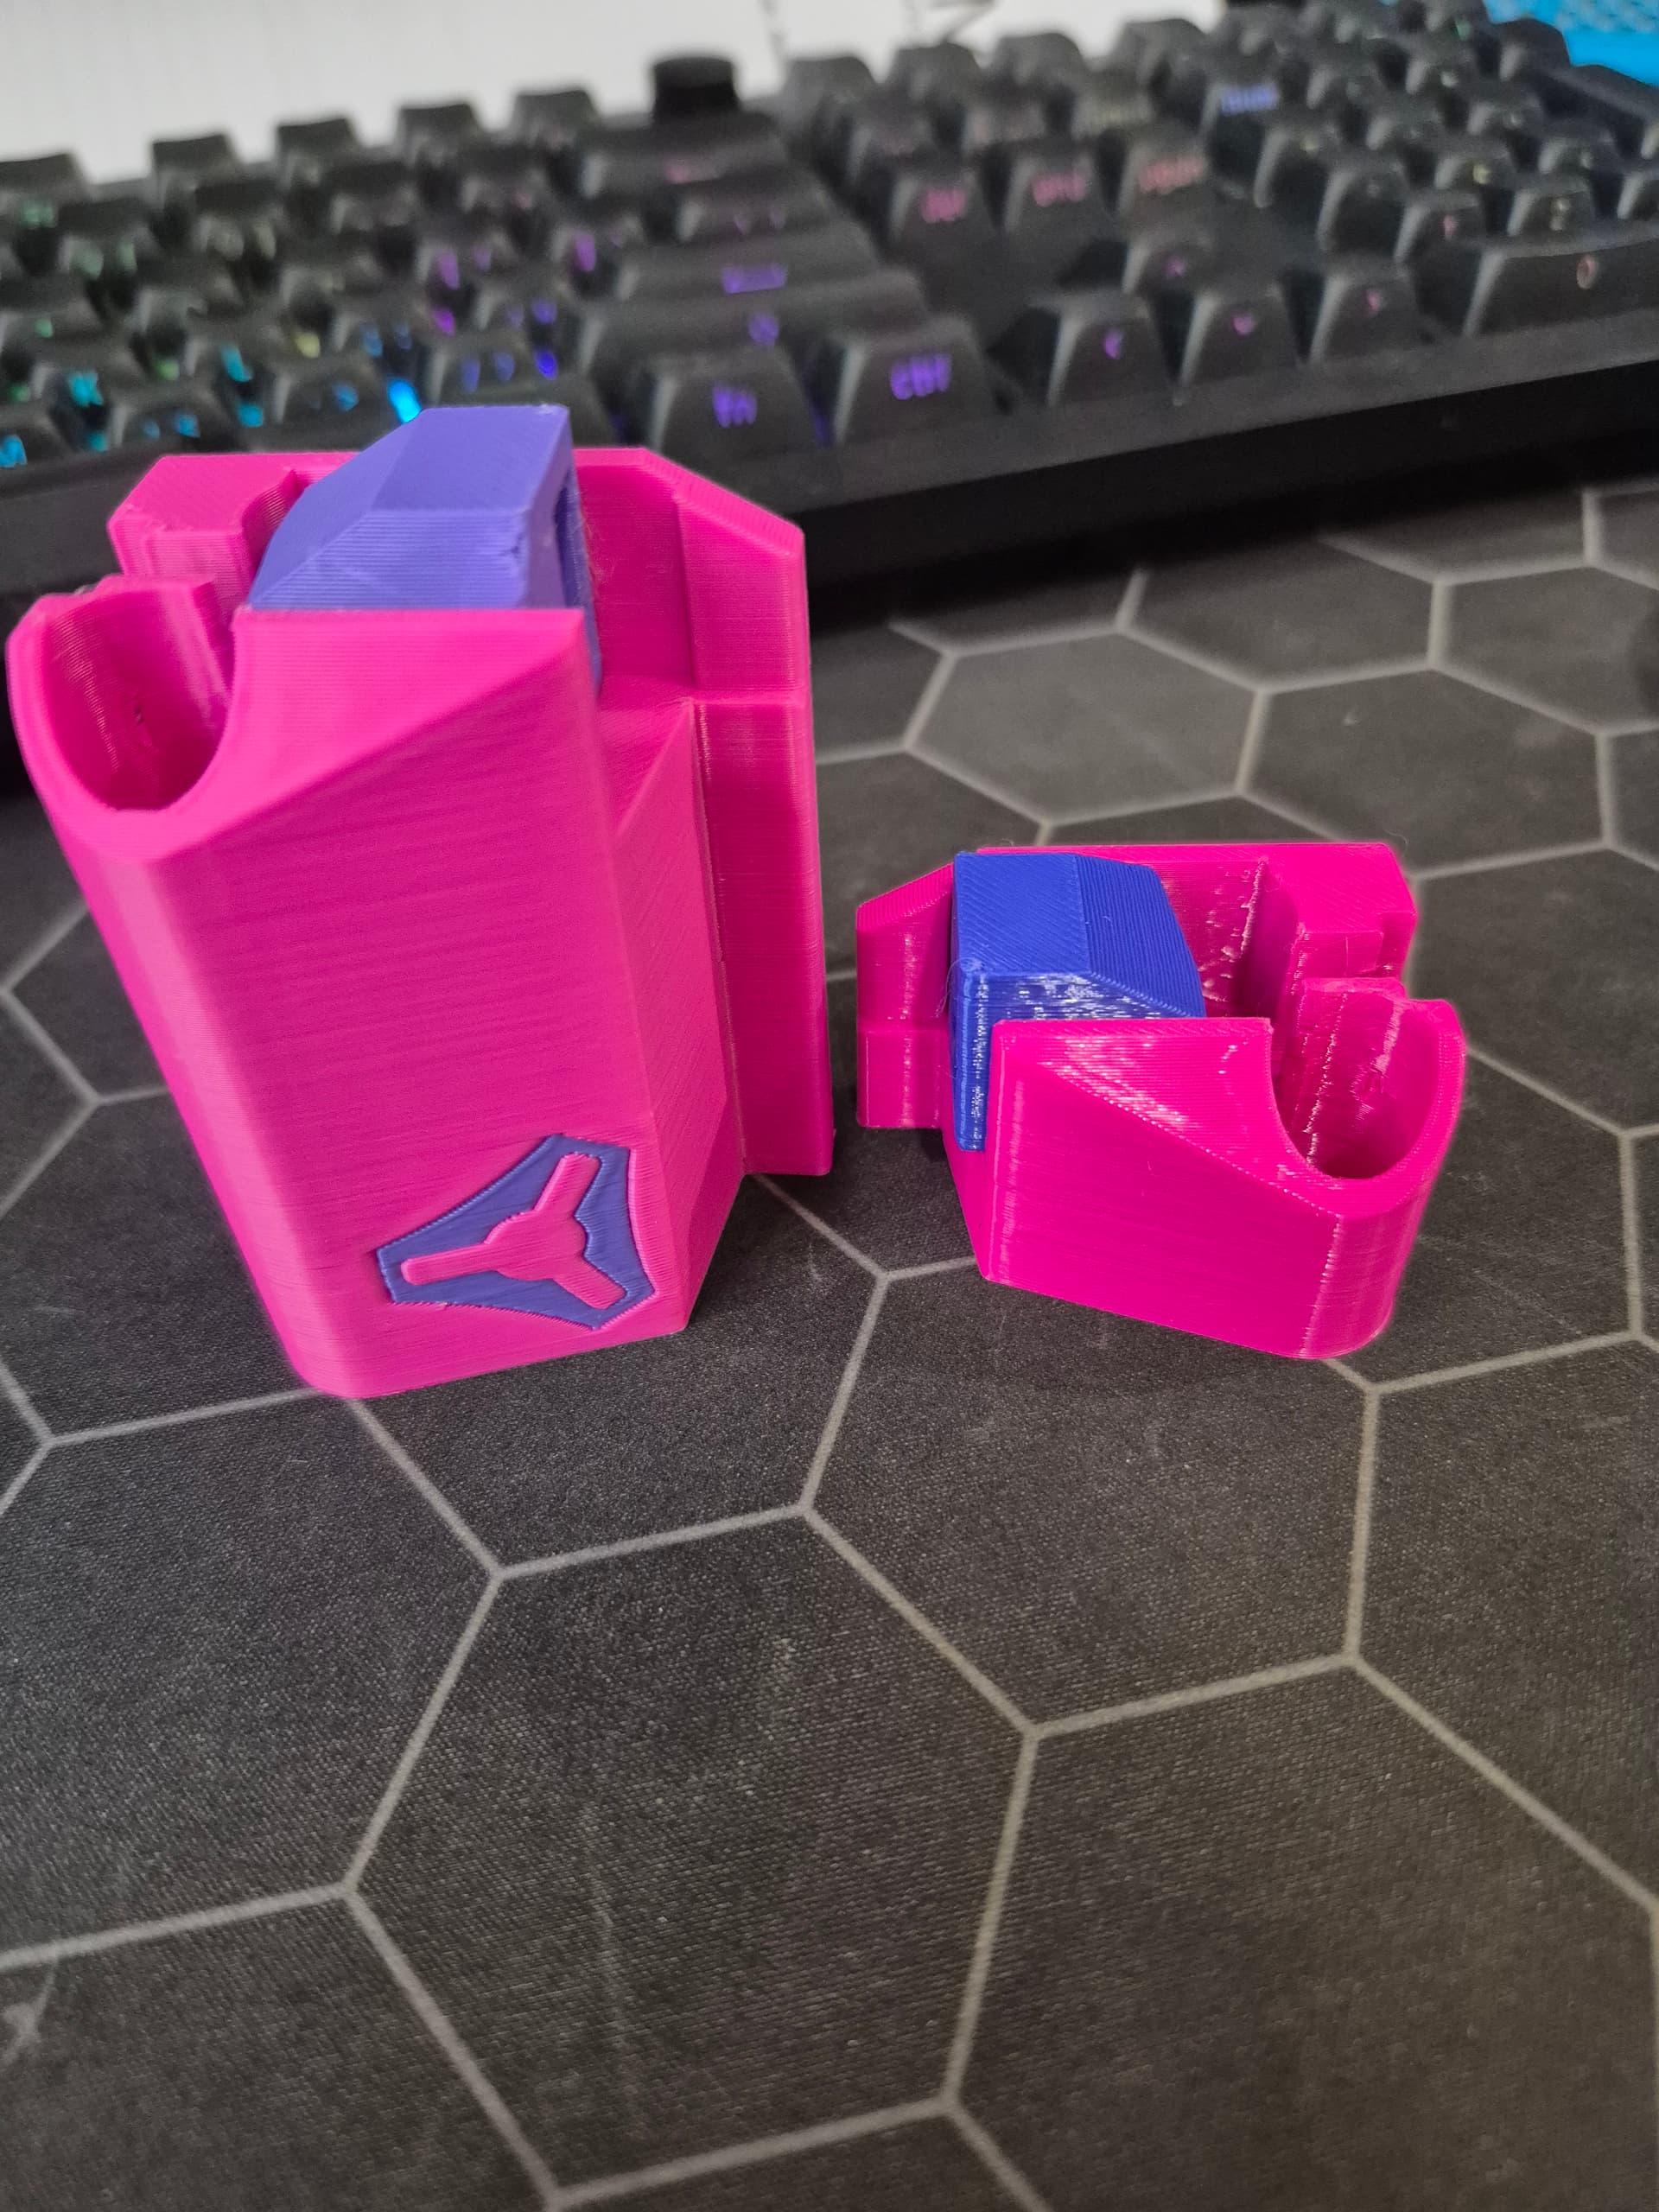
Magenta incoming lol. All other parts will be Magenta, well the BambuLabs definition of Magenta at least.
2 Likes
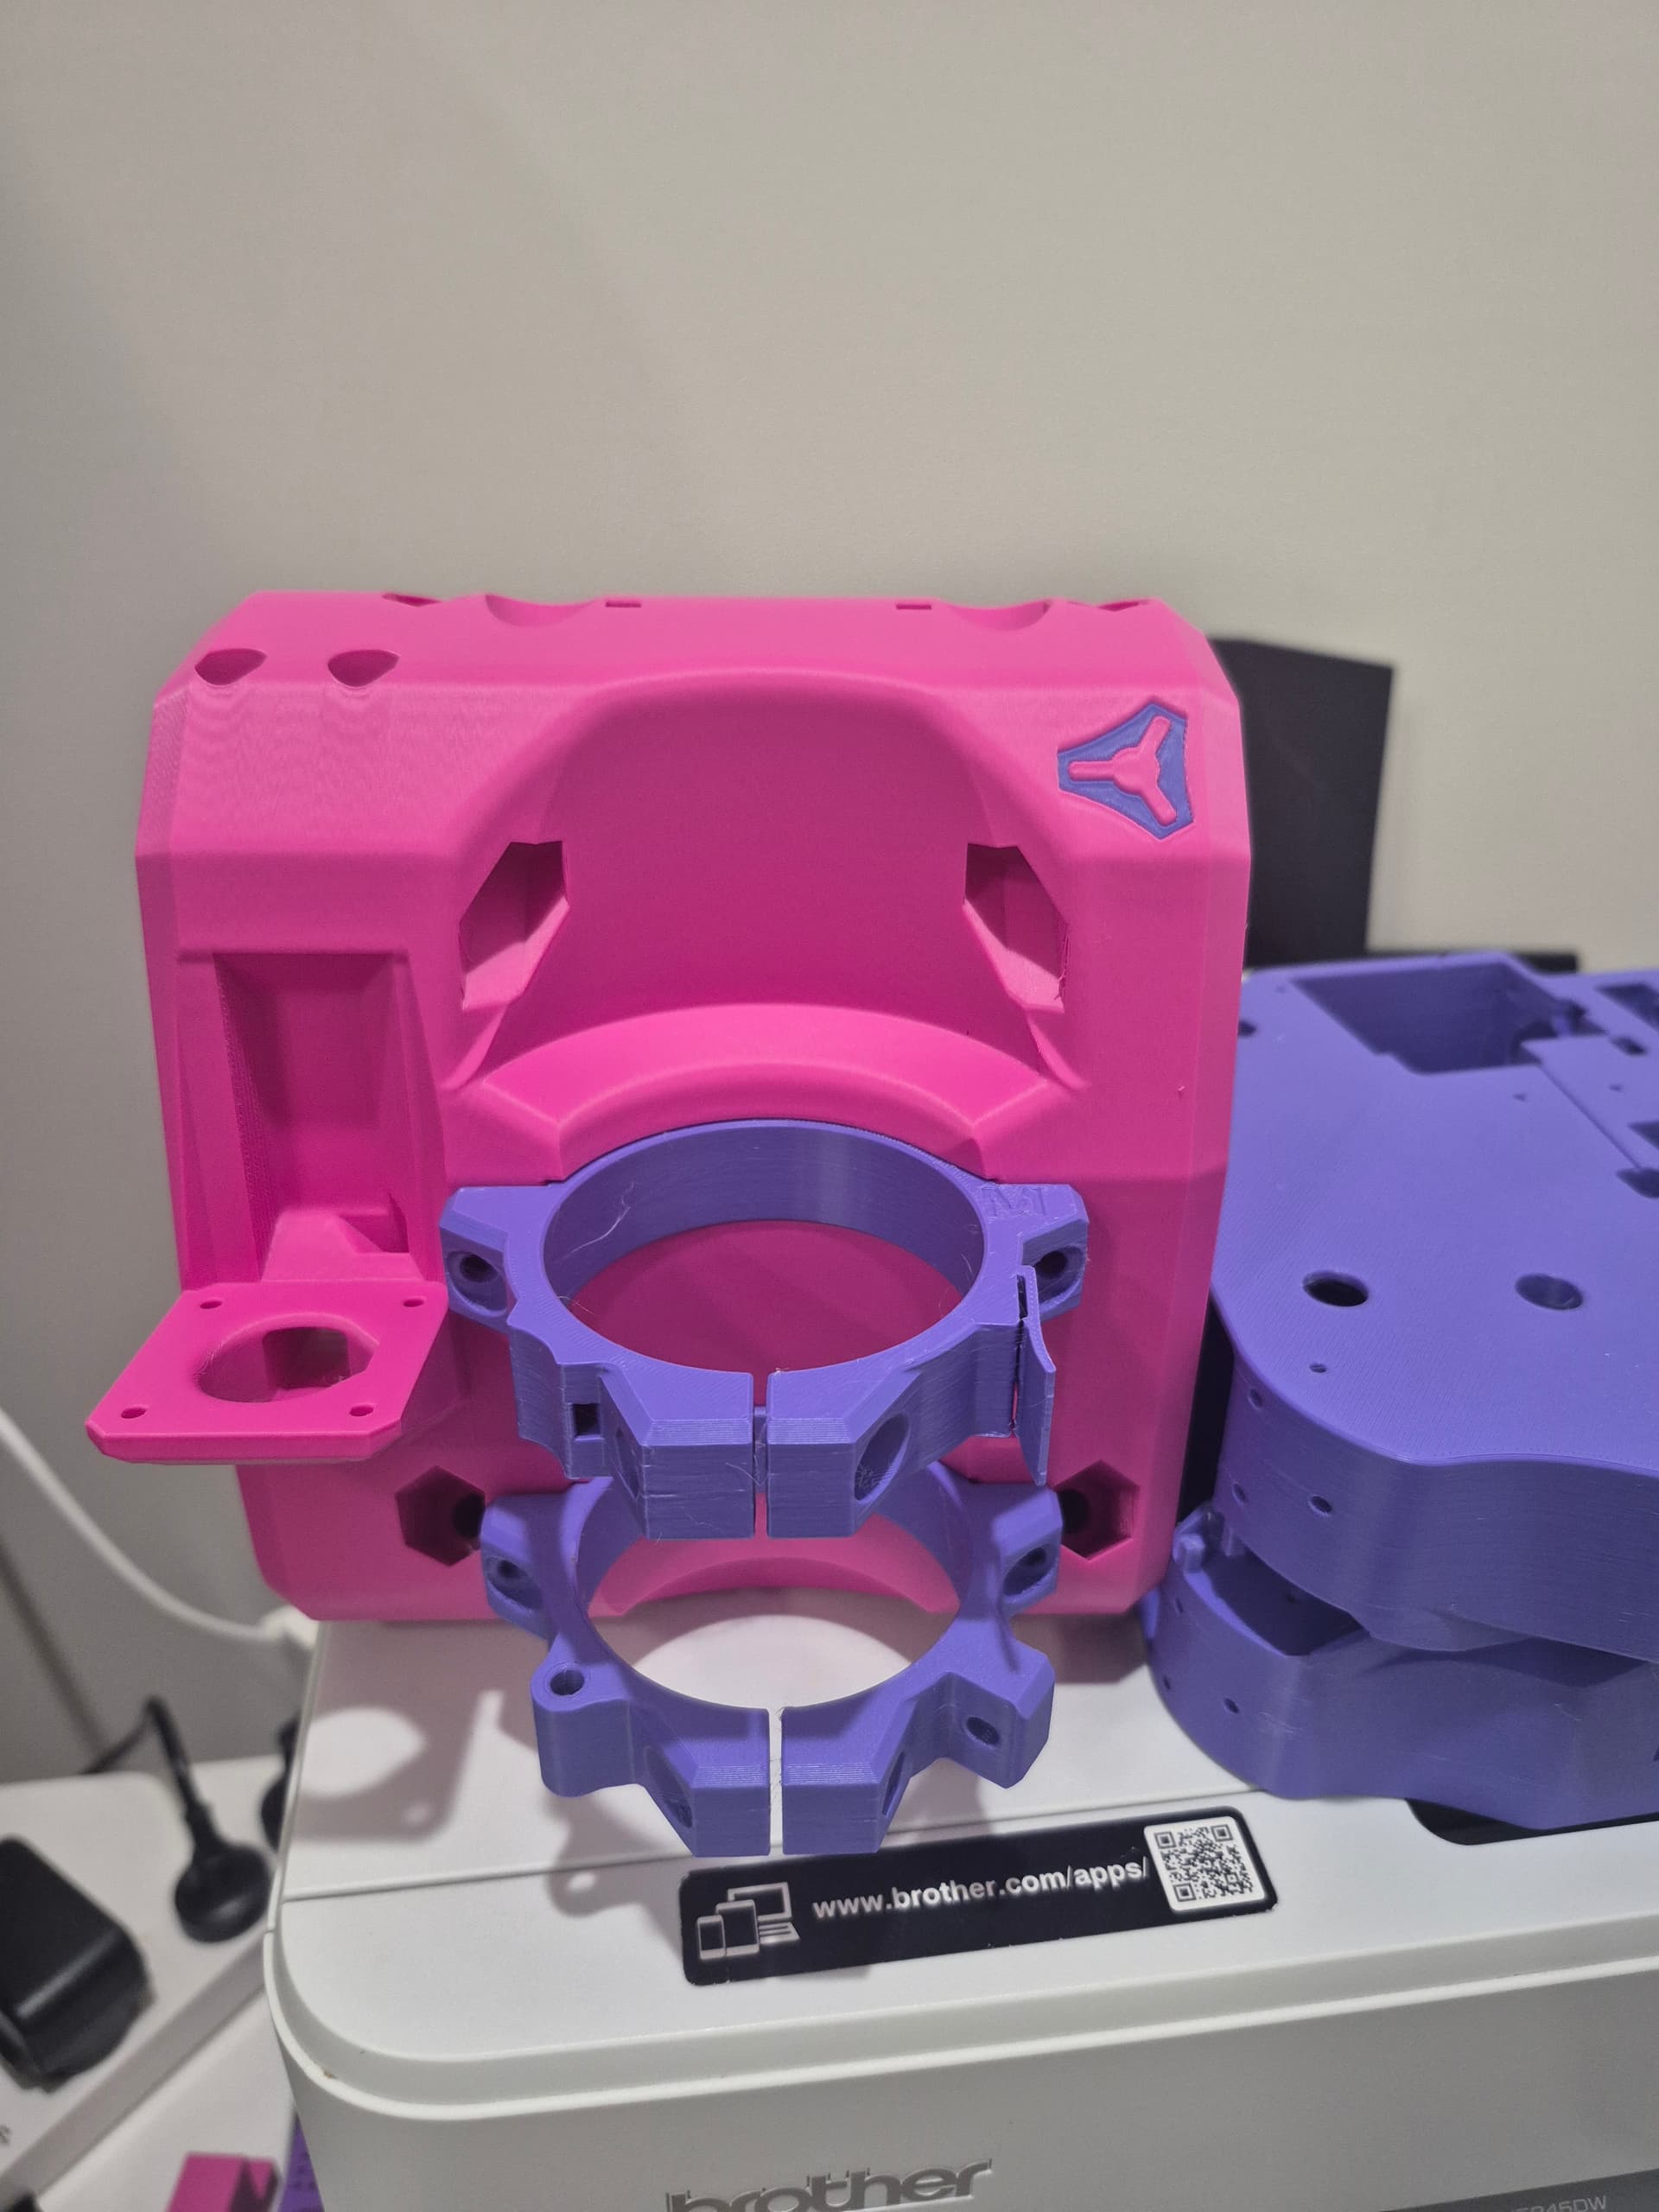
Ok, so i have just finished printing most of the part, only have the gantry struts and y clips left.
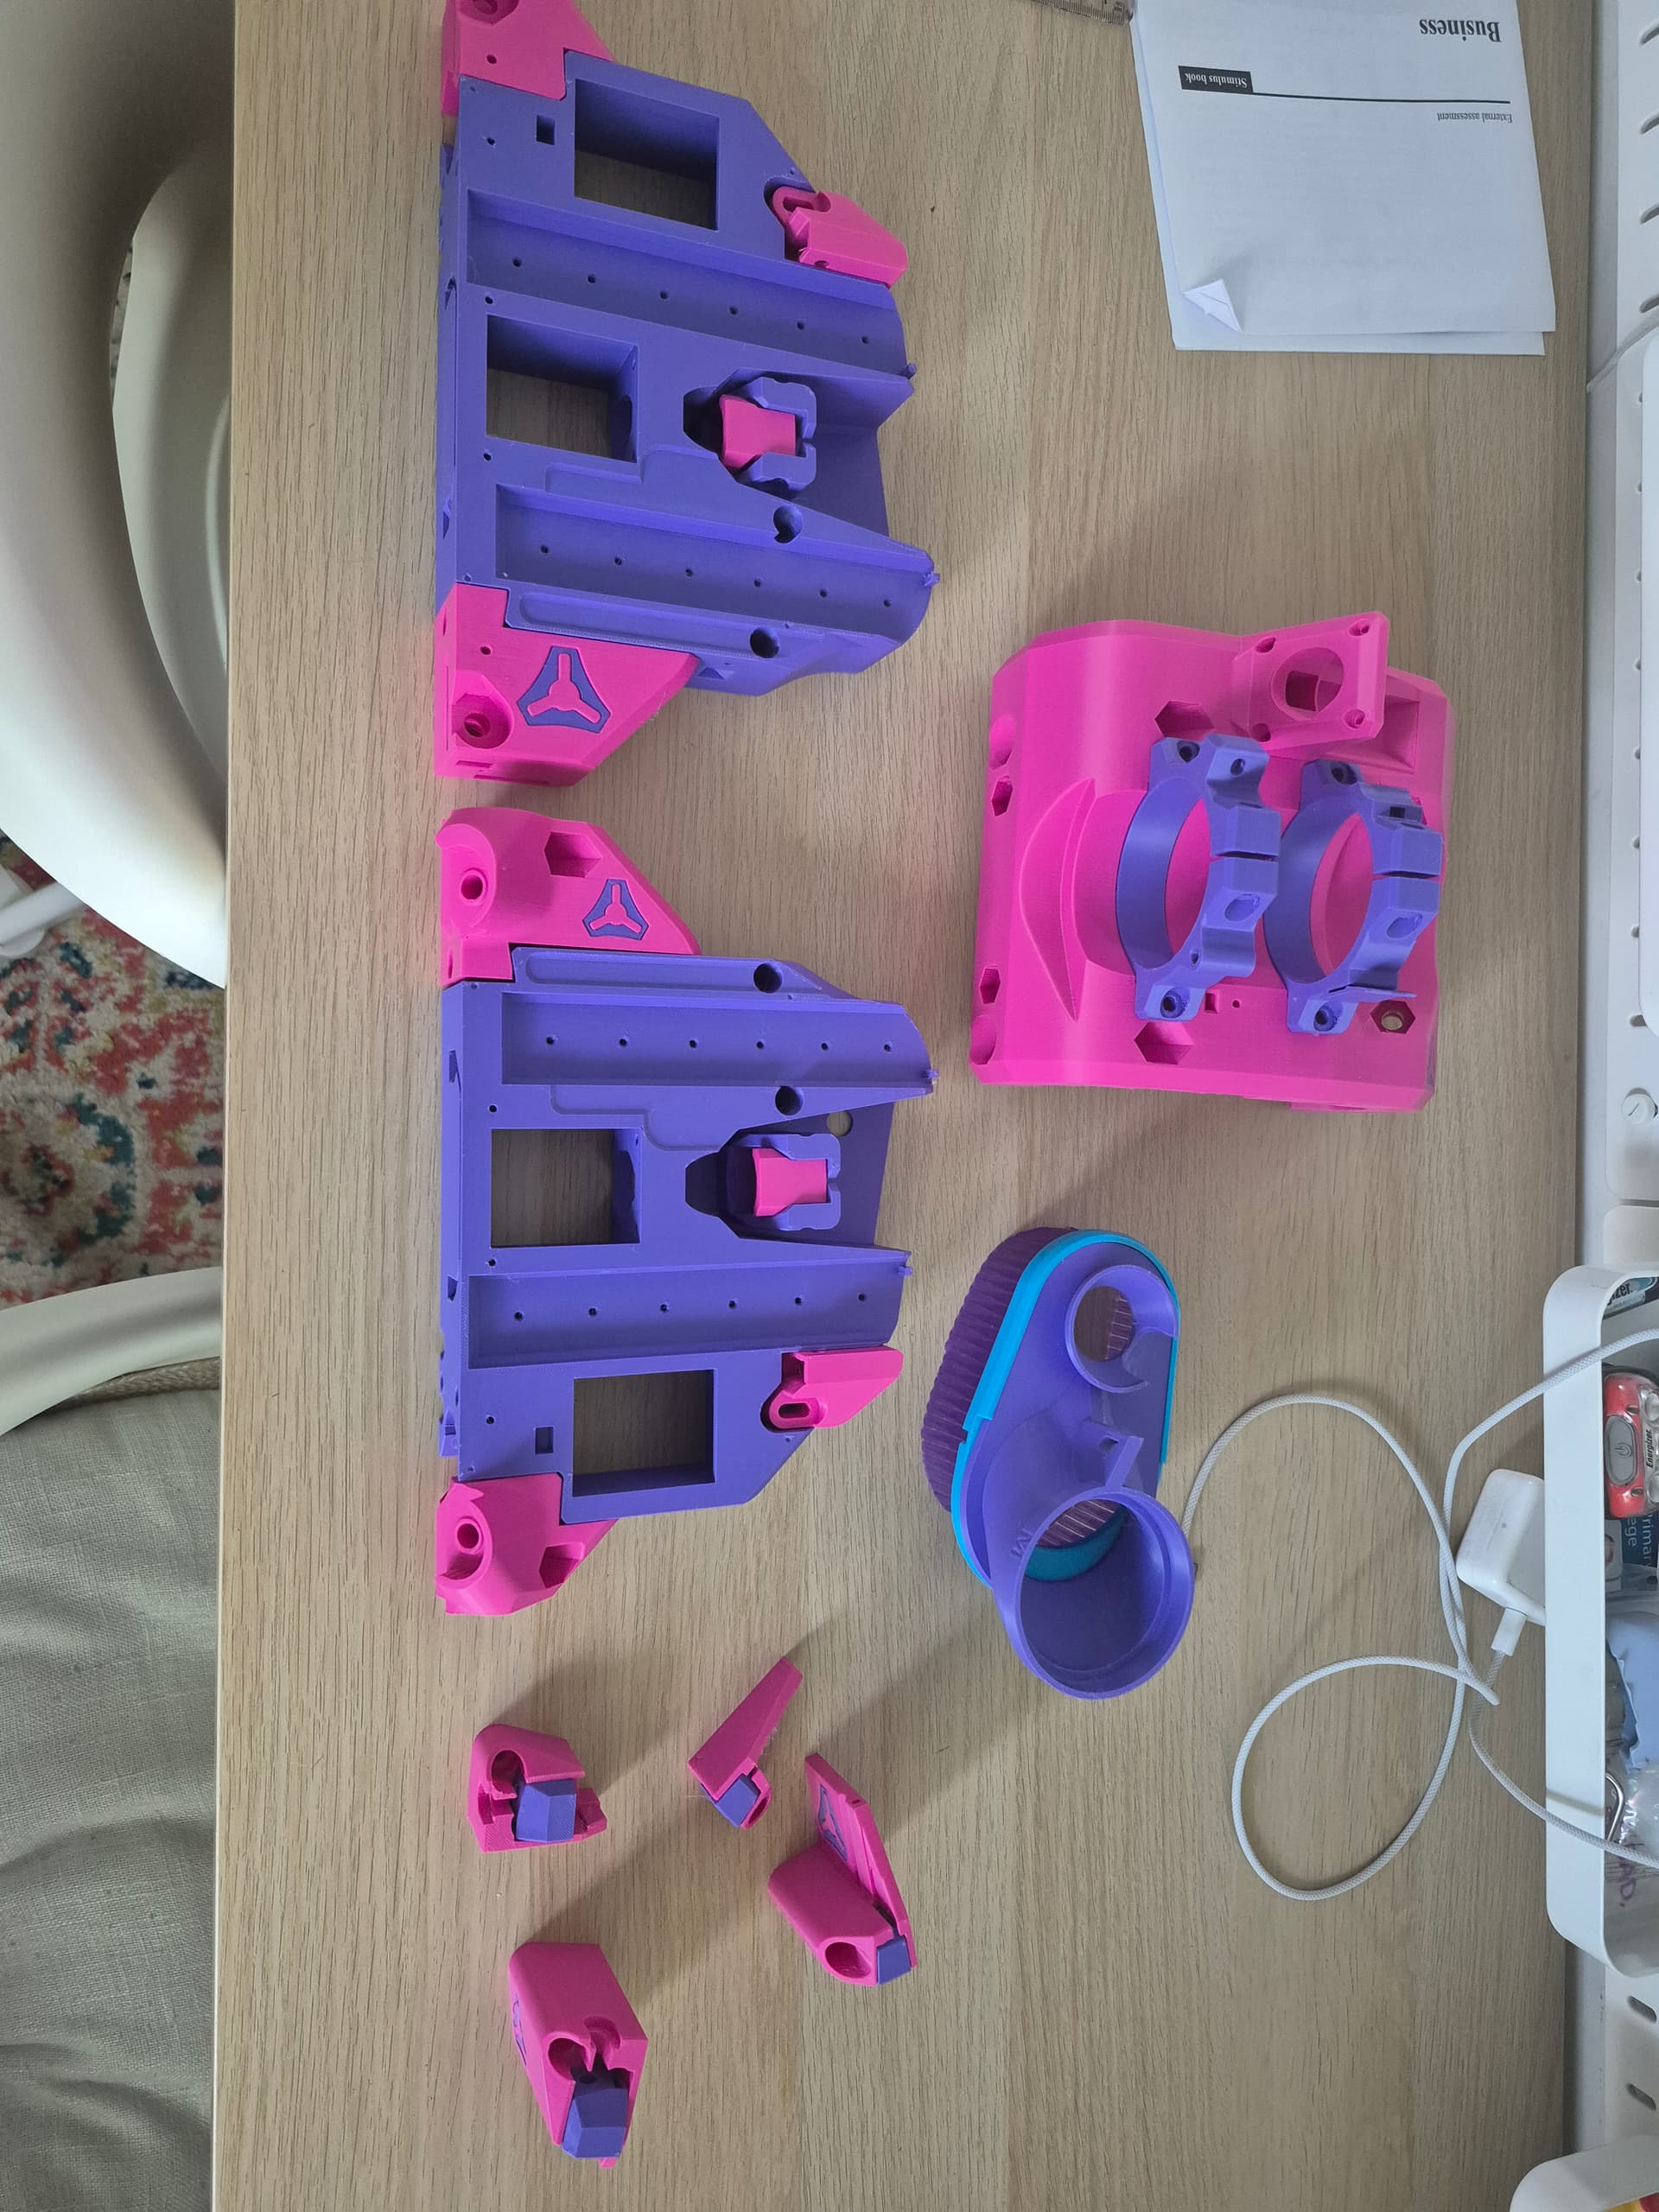
But, as mentioned by @Dreyfus there is more lilac than i wanted but my intention was to cover most of it with magenta peter plates. But as my wife and daughters pointed out, it reminded them of the tricycles they had as kids.

They thanked me for the trip down memory lane. I said thanks, now im looking for different filament
and also found for Petg to try also.
2 Likes
I’d drive a pink and purple LowRider… provided you don’t add lime green. Jimbo does NOT want anything to remind him of that children’s dinosaur that SHALL NOT BE NAMED.
4 Likes
6 Likes
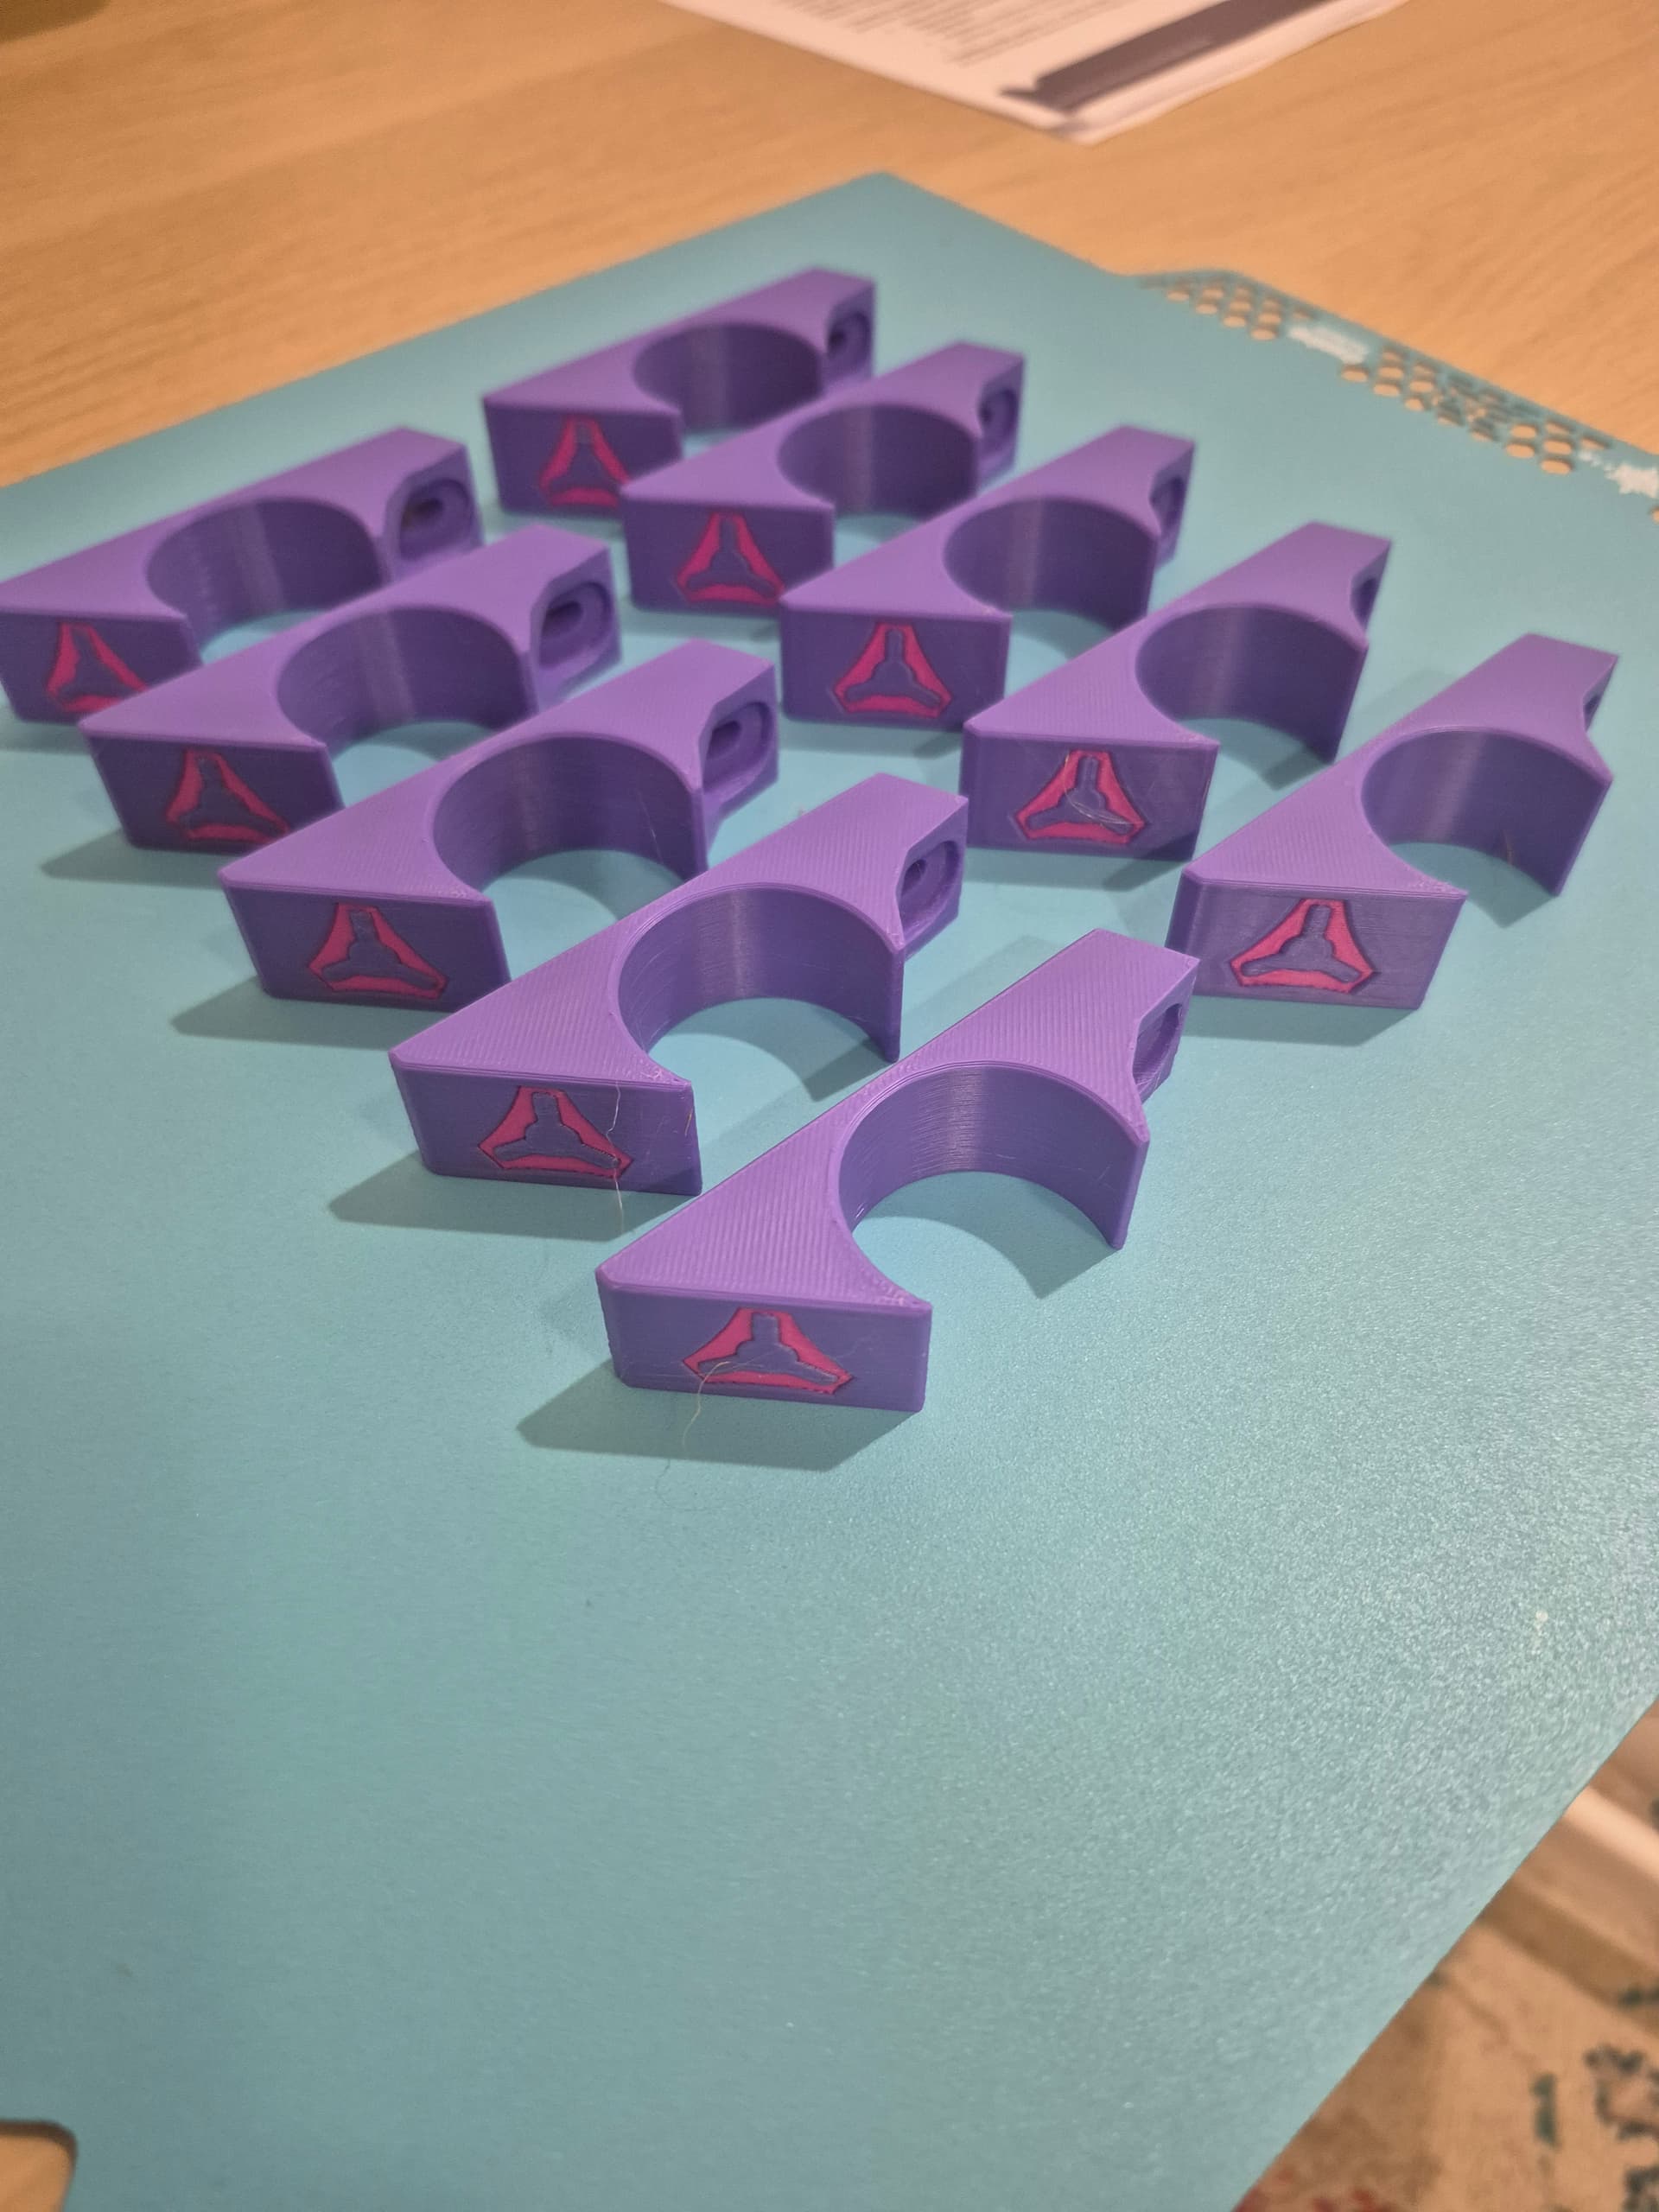
Y rail clips ready.
I have made the decision to move over to Fluidnc. So the transition to the version 4 will be delayed until I workout the requirements and get my head around the process.
2 Likes
Buy the Jackpot, connect the steppers and endstops, upload a file, hit “go”. Basically. ![]()
The CNC I built for a customer with a Jackpot really only took me 20 minutes to set up.
Today I finished building sideplates and core for a build with external steppers, one closed loop on X and the OpenCNCShield 2 Mini. It took me a few hours to get it going. The Jackpot really, really is plug and play, it’s incredibly well made.
3 Likes