Hello kitty strut plates ![]()
2 Likes
I was thinking more of cyberpunk or synthwaves. If I could get the triangle to be more v1ish, with permission of course. Have the dark background sorted.

3 Likes
Love it!
1 Like
Got a bit done today. Gantry put together with temporary struts and mounted the rail and the Y belts. In my eagerness I forgot to take progress pics but the days results are on show below. Next its checking firmware, homing process and more reading up on the next steps.

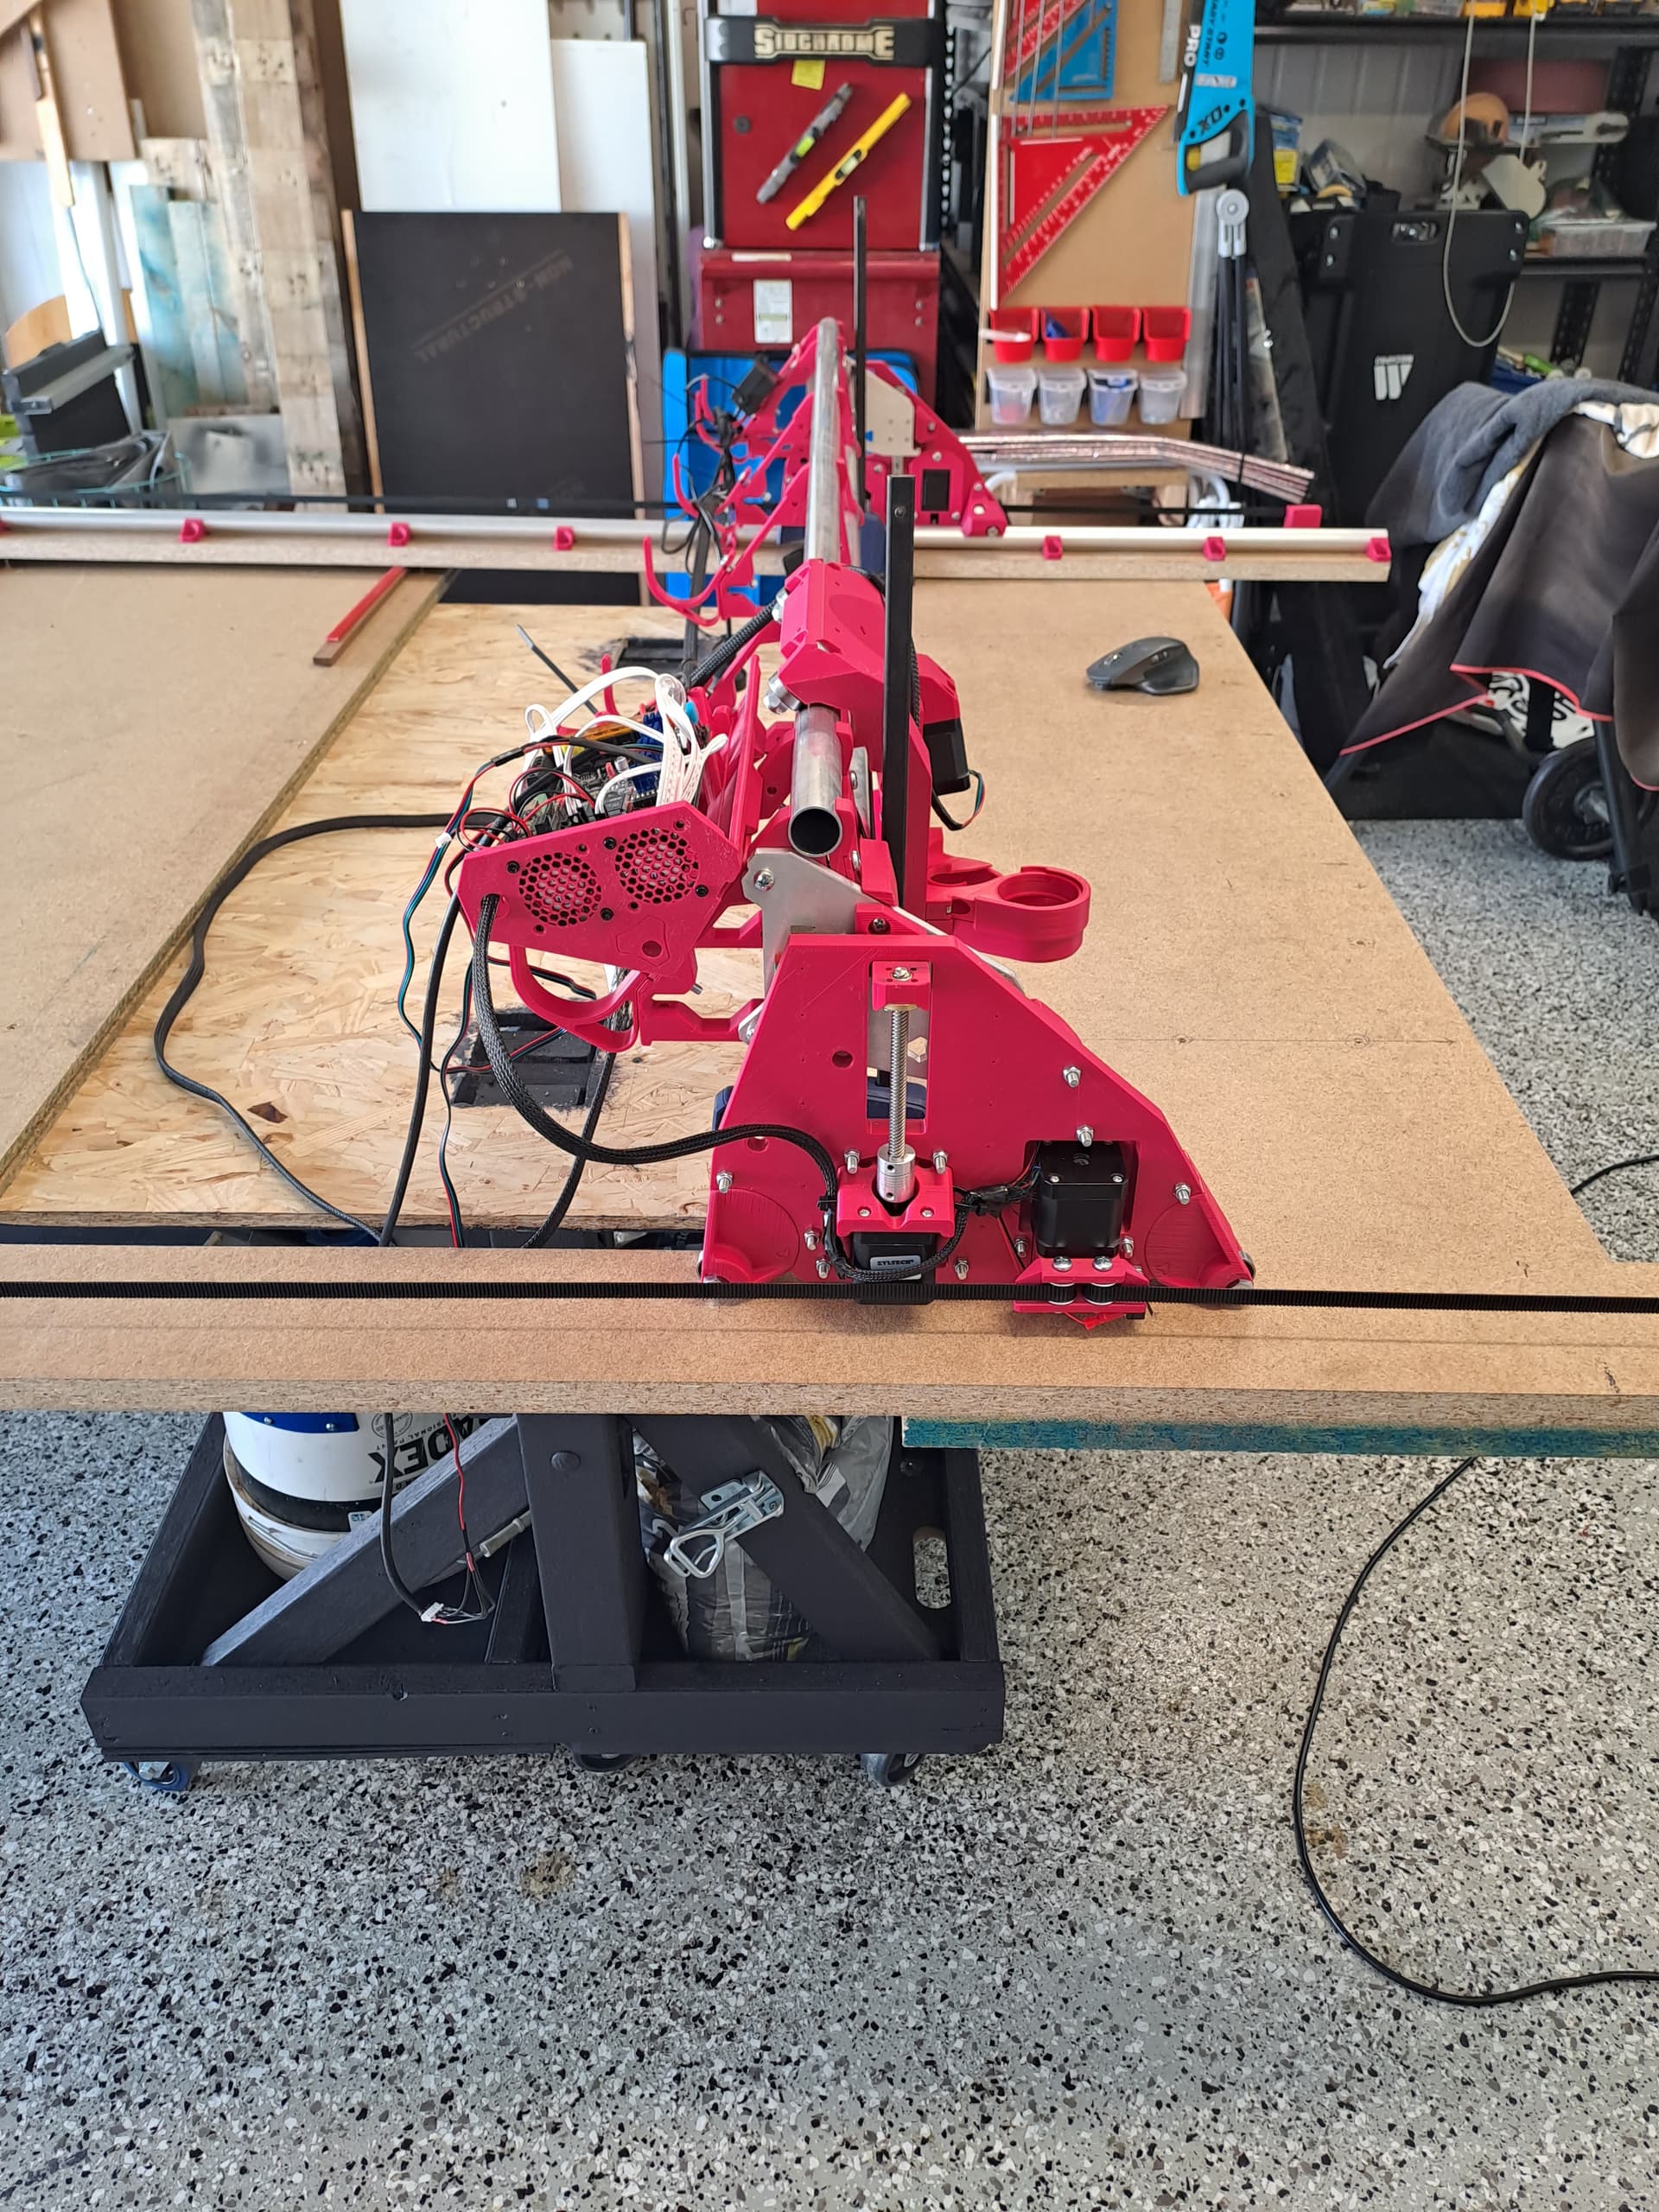


8 Likes
Nice use of the clamps!
3 Likes
That looks awesome!!!
1 Like
Looking great!
1 Like
Thanks guys! Excited to power it up and get the firmware all sorted and start giving commands. While I’m waiting for the gargae to be free again I am looking at strut designs.
^^^ Watch this space
I didn’t want to take the y belts off just yet and wasn’t keen on having it hang there over night. I am thinking that once the torision box is made and the Magenta Dreams is a Megenta Reality I will make a cover that foldup and supports the gantry while in the tilted up storage position and the folds down over the edge when is operating position.
The Telekom called, they are foxdevilswild you stole their magenta. ![]()
1 Like
@Sam_Tritto Did you see @DougJoseph strut design? It kind of fits your synthwaves / cyberpunk idea. Maybe you can find Magenta LEDs
3 Likes
NO!!! OMG thats a Winner!!! I will need to spend a bit of time and get that sorted.
I was quickly able to knock this example up. Probably use this one till I can sort out the awesome gantry lol. Just going to engrave it a bit rather than cut out.

5 Likes
Just gotta get a licensing deal with Sanrio!
2 Likes
Be sure to ask for the Hello Kitty Power Tool Division.
3 Likes
Just use RGB, can have any color you want LOL
2 Likes
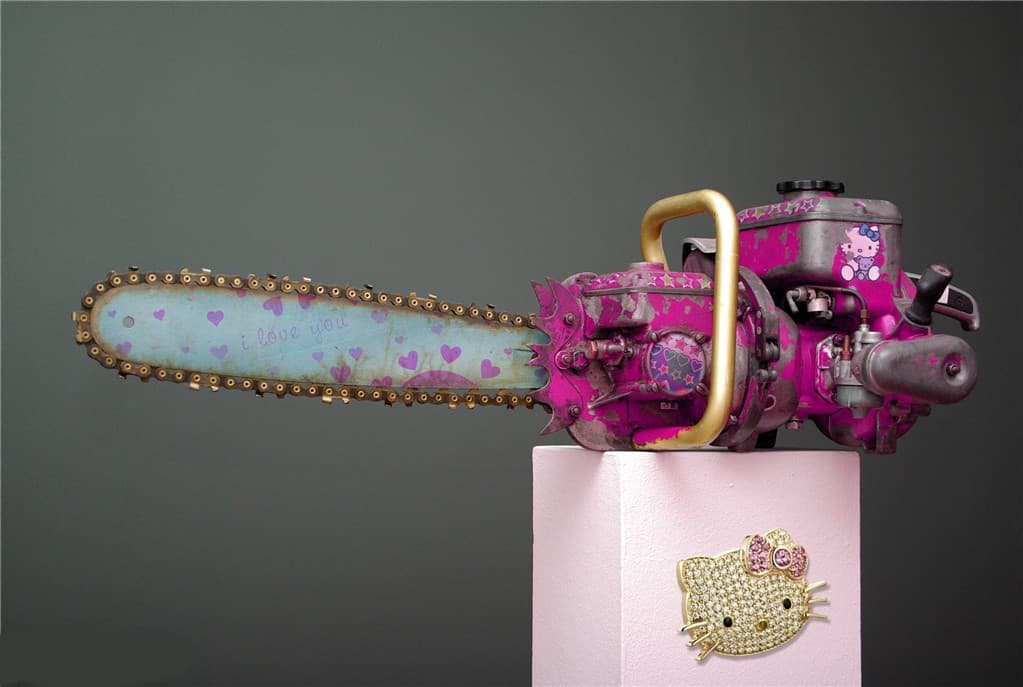
Thats full commitment there @Mcunn. Maybe not that extreme but inspo for sure.
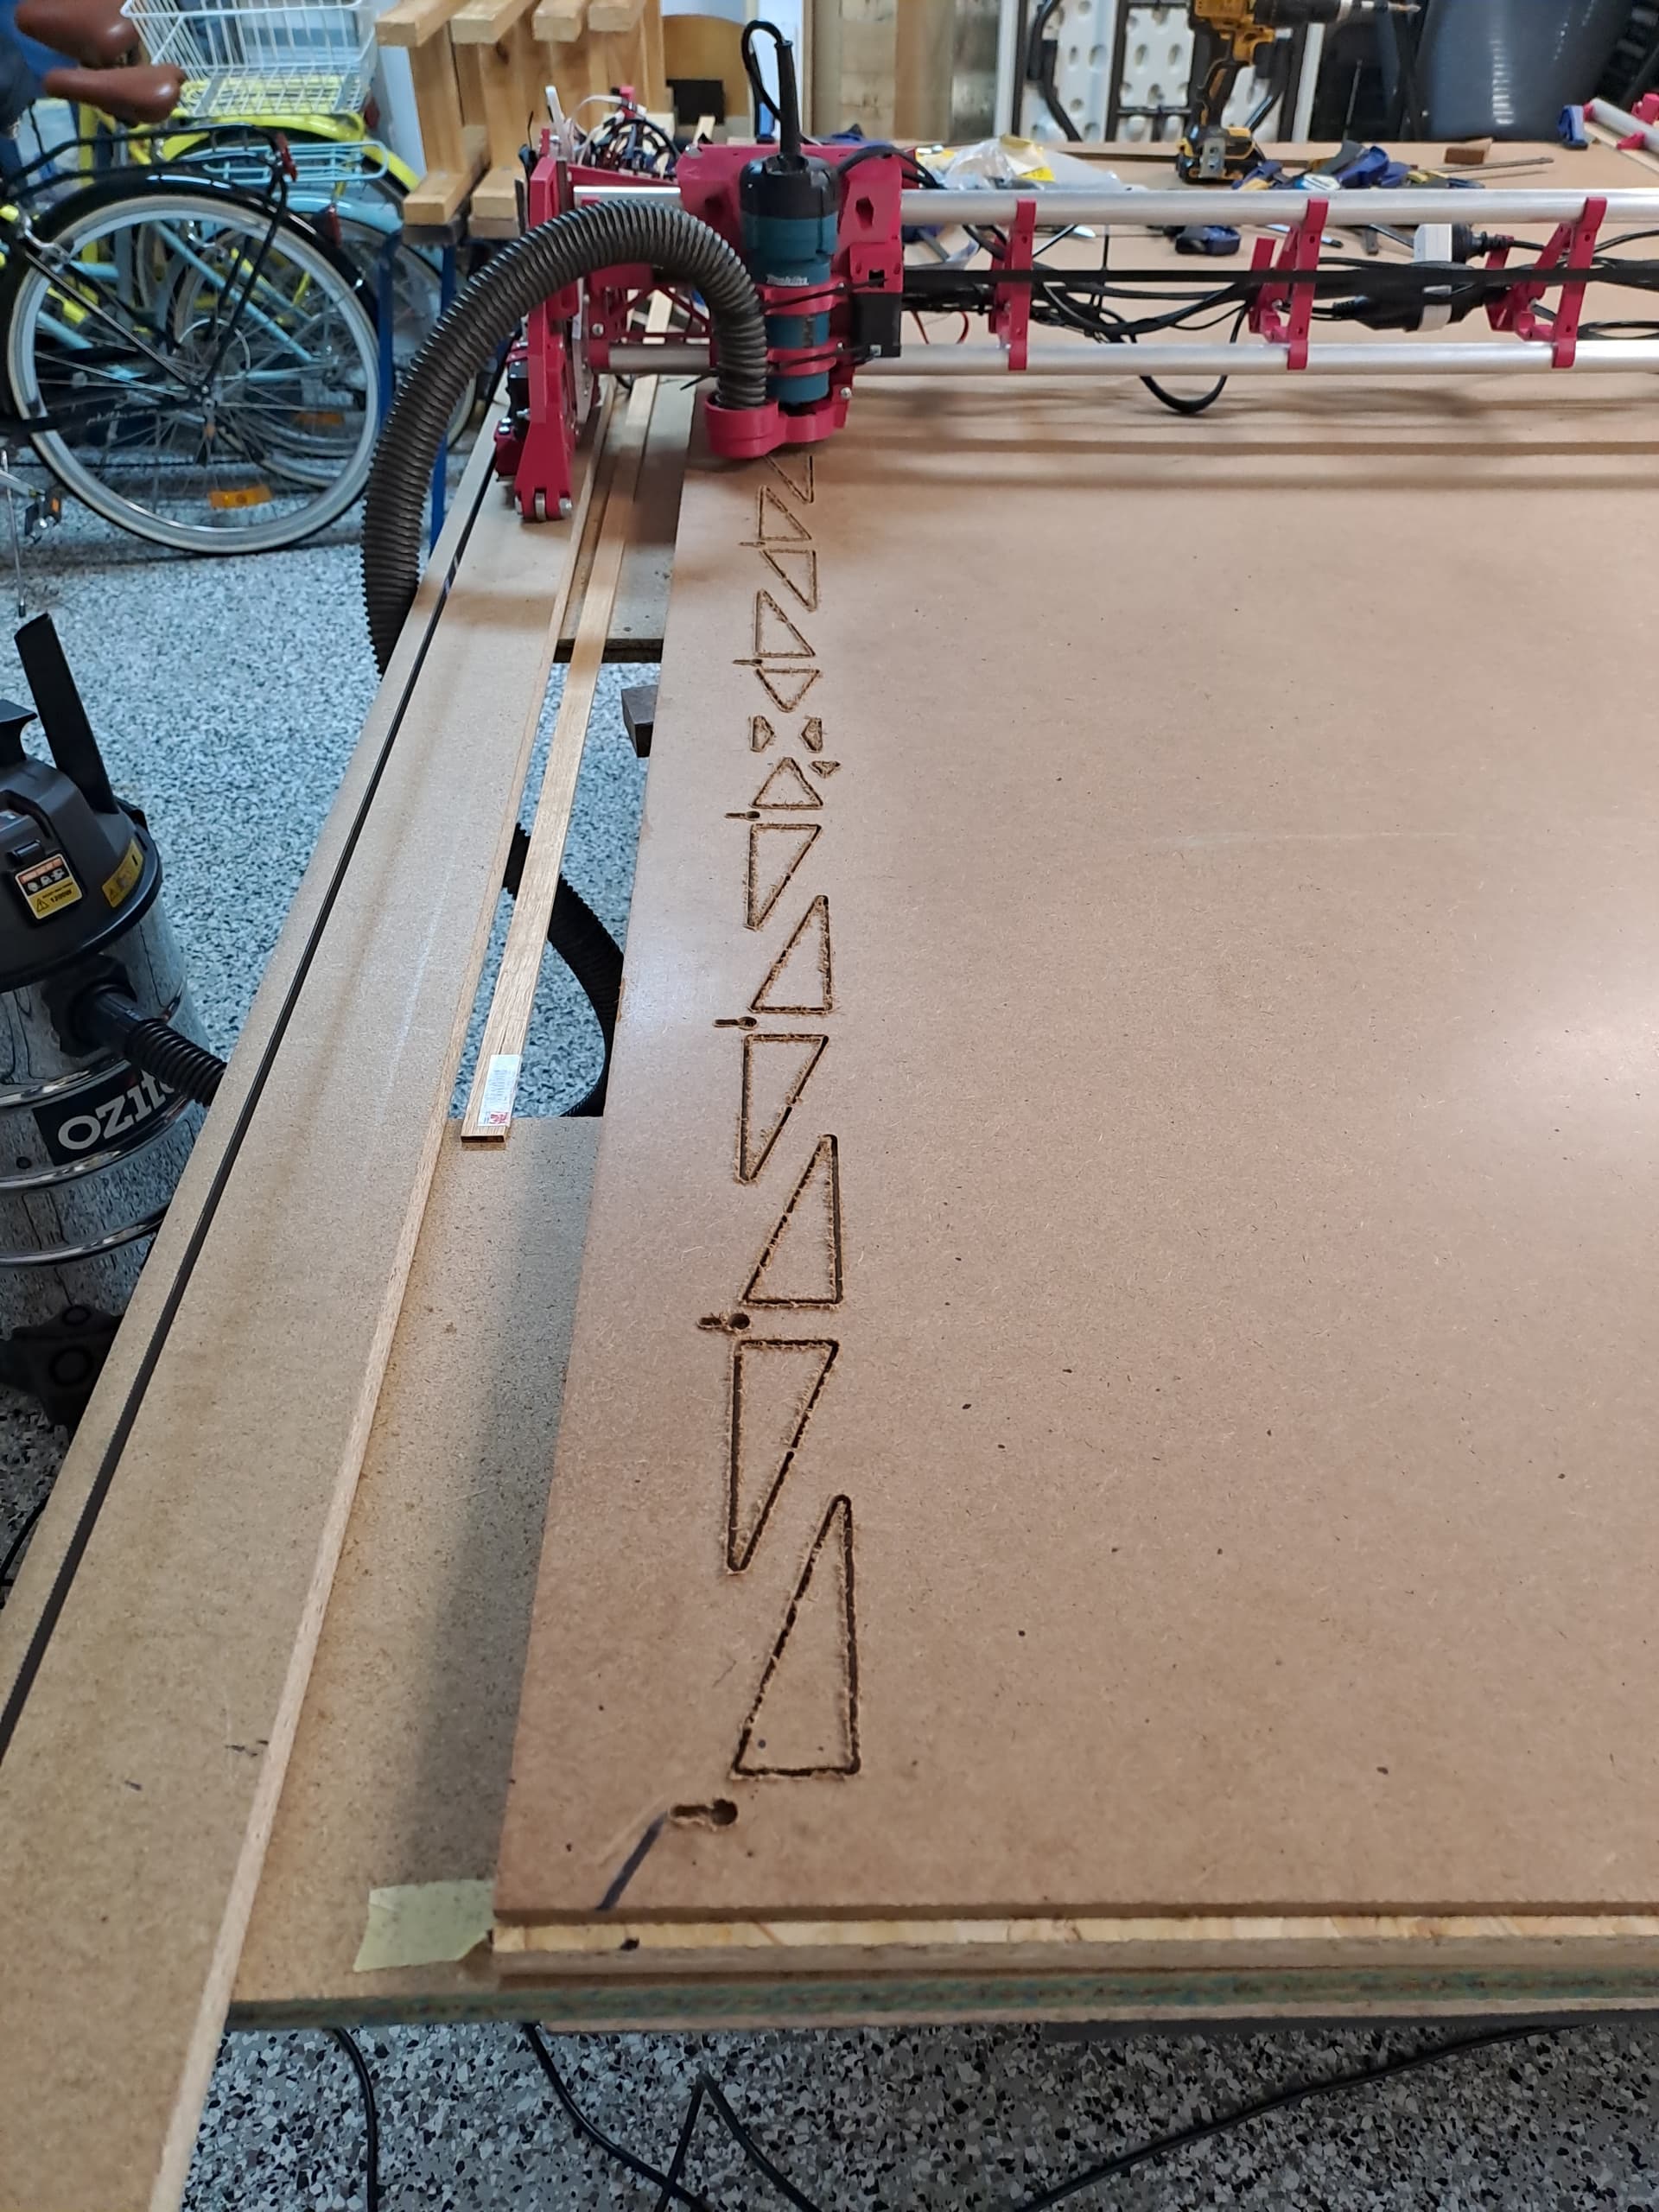
So working through the V1 documentation pages and moved onto the crown. I may have had the marker too close but the movements look to be good. I cant load the video at the moment from my mobile for some reason. Will work that out after the school run. Between work, kids and adulting, finding time to read up on this and apply is frustrating ![]()
![]()
![]()
![]()
![]()

I was on the milling basics page and trying to determine what I should have as the coding for the before and after pages in Estlcam. The screen shot and the coding don’t seem to match up and so I will try each to see what happens. I have been watching your vid @vicious1 on the workflow and the coding that I am running with just seems to want to Z dive straight away once I hit print rather than ask to touchplate. I home all axis, move to where I want to start the job, I am basing that point will be the Zero in Estlcam that I nominated. Anyway more reading up tonight and will have another search through the forums.
1 Like
I saw your pictures in the other thread: Don’t forget to secure the dupont connections with a bit of tape or some connectors. Those getting loose while cutting would be really bad.
1 Like
Make sure you are on the lowrider tab. there are different ones for the Primo
1 Like
Yes!, definitely don’t want that happening.
Yup, My mistake. Thank you for pointing that out.
Now that I have cleared that up. Todays progress…
3 Likes
Getting closer to having a flat table top. Working on cuting out the torsion box design @DougJoseph has. I have had a couple of sharp learning curves so its been a bit of a start and stop with some trial and error also. Happy with the progress and getting my head arround using Estlcam.
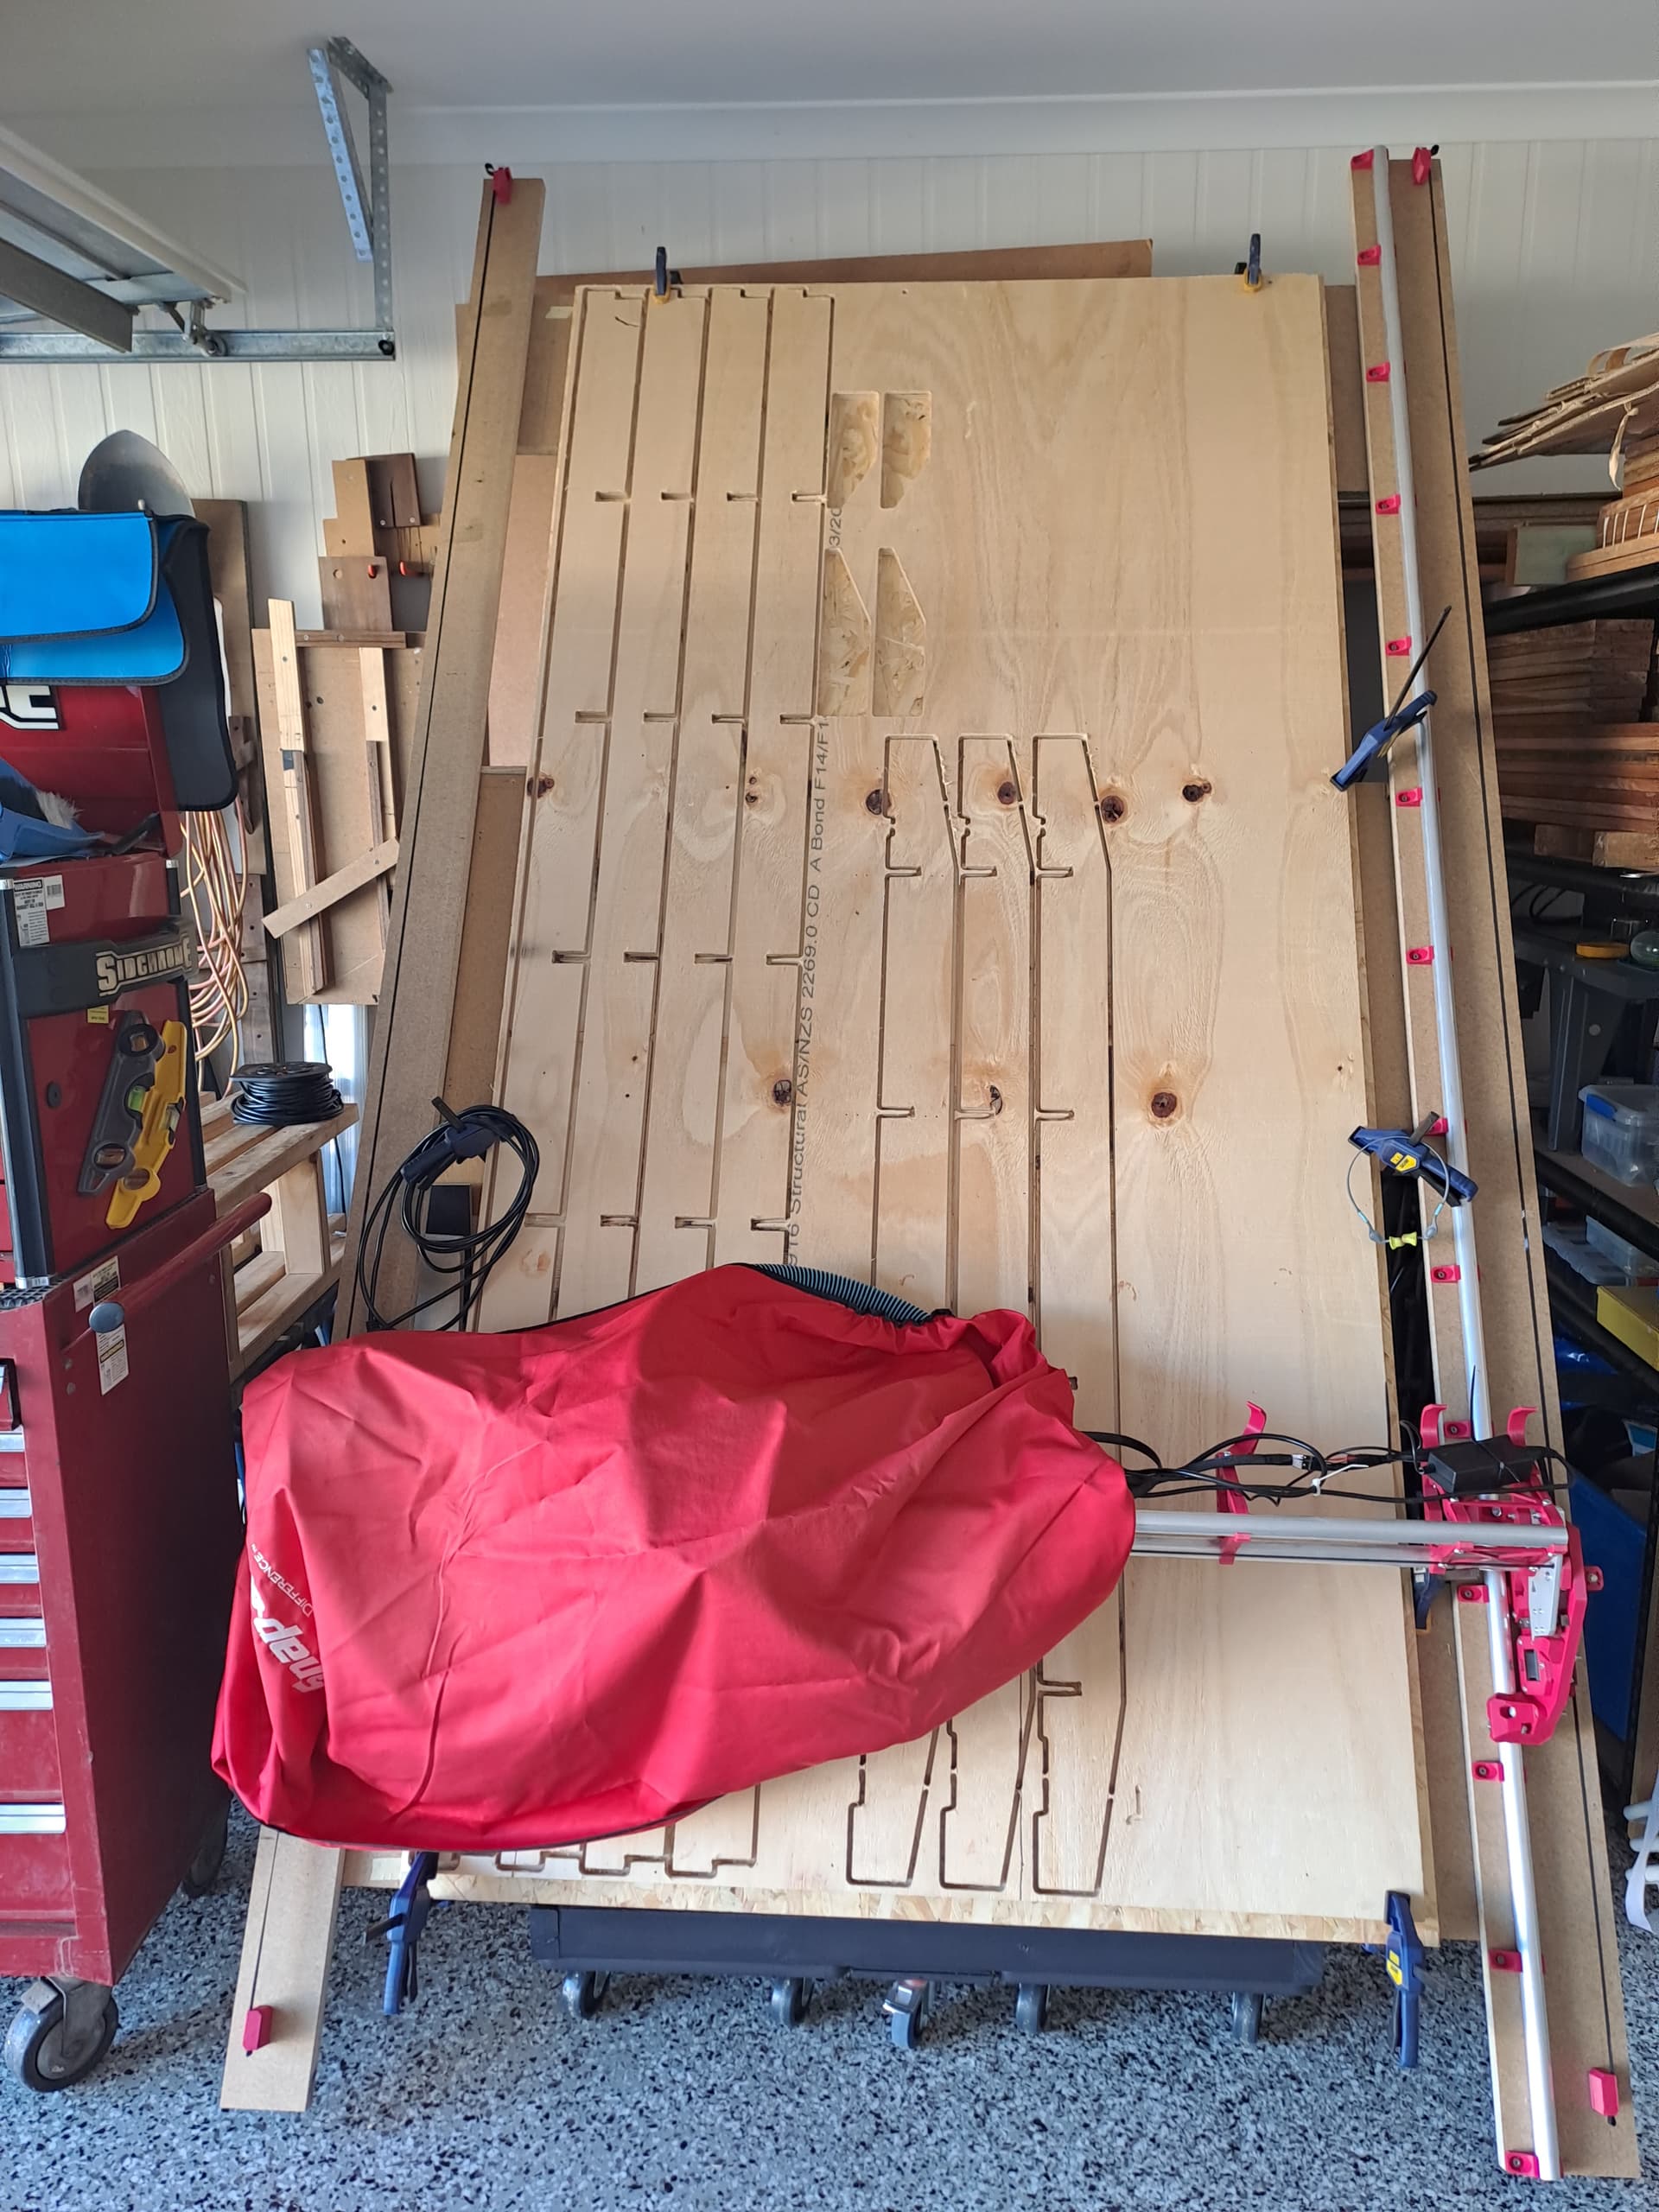
More progress tomorrow with hopefully a new torsion box assembly
4 Likes