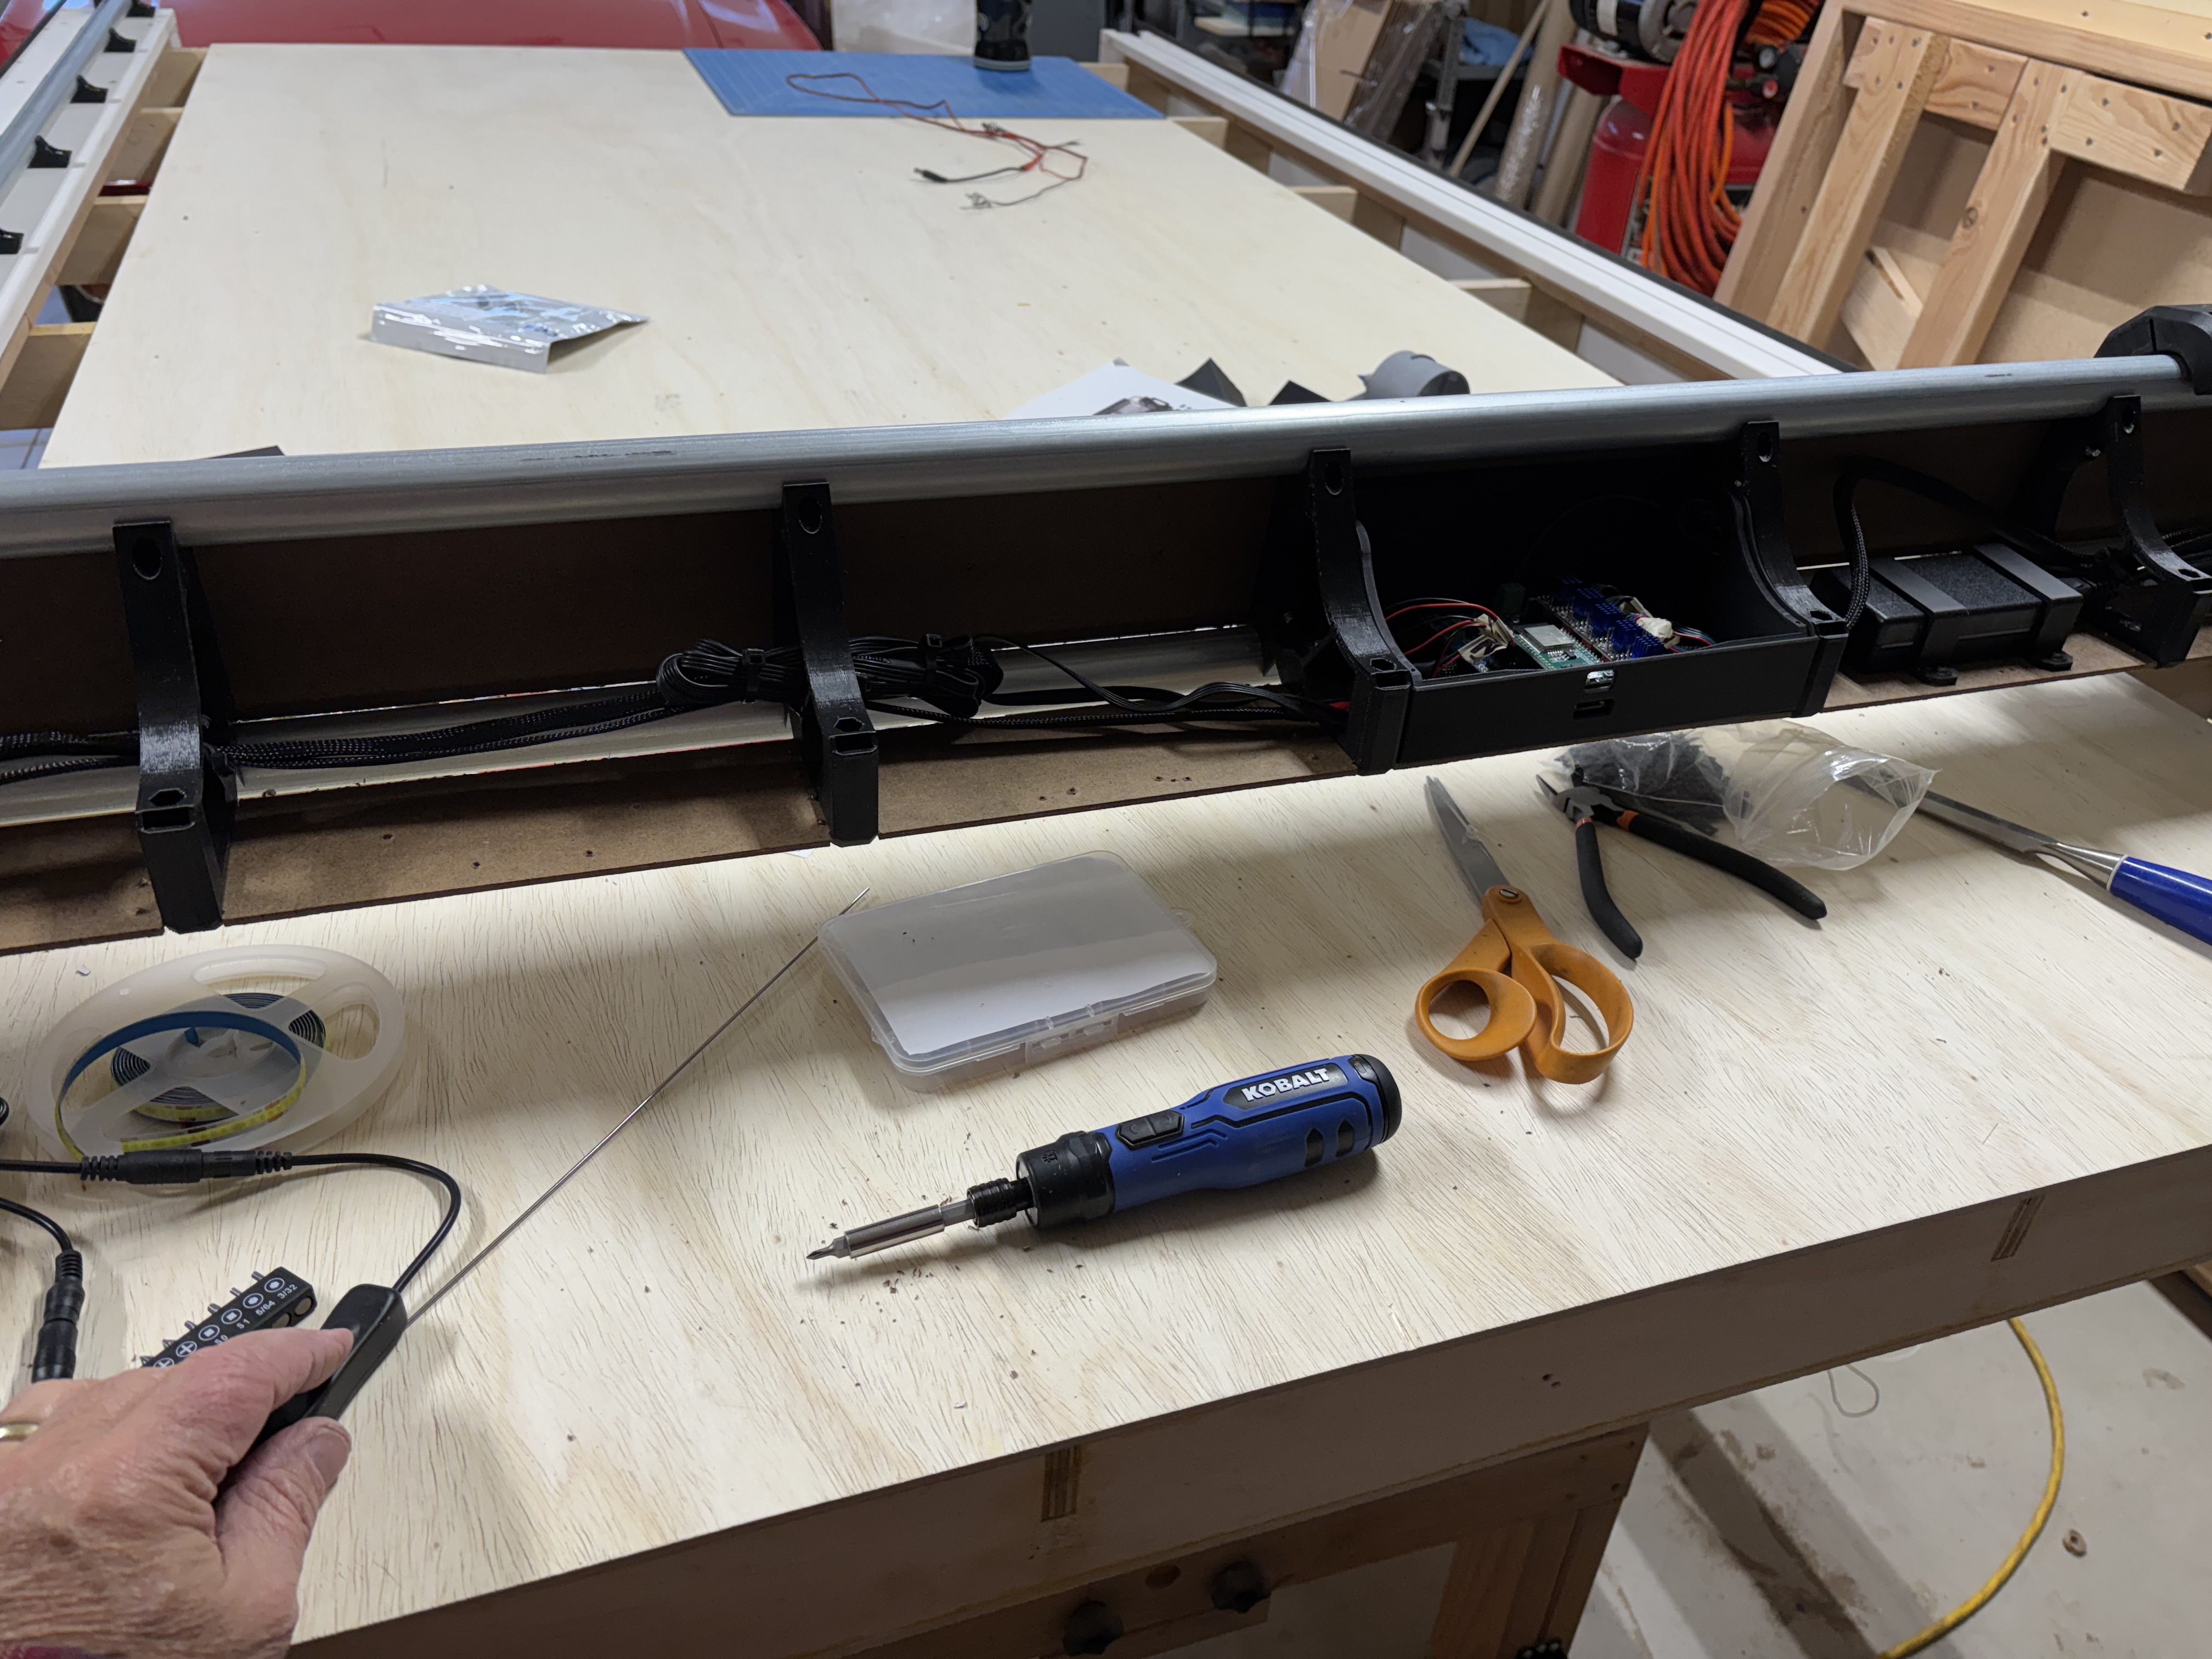
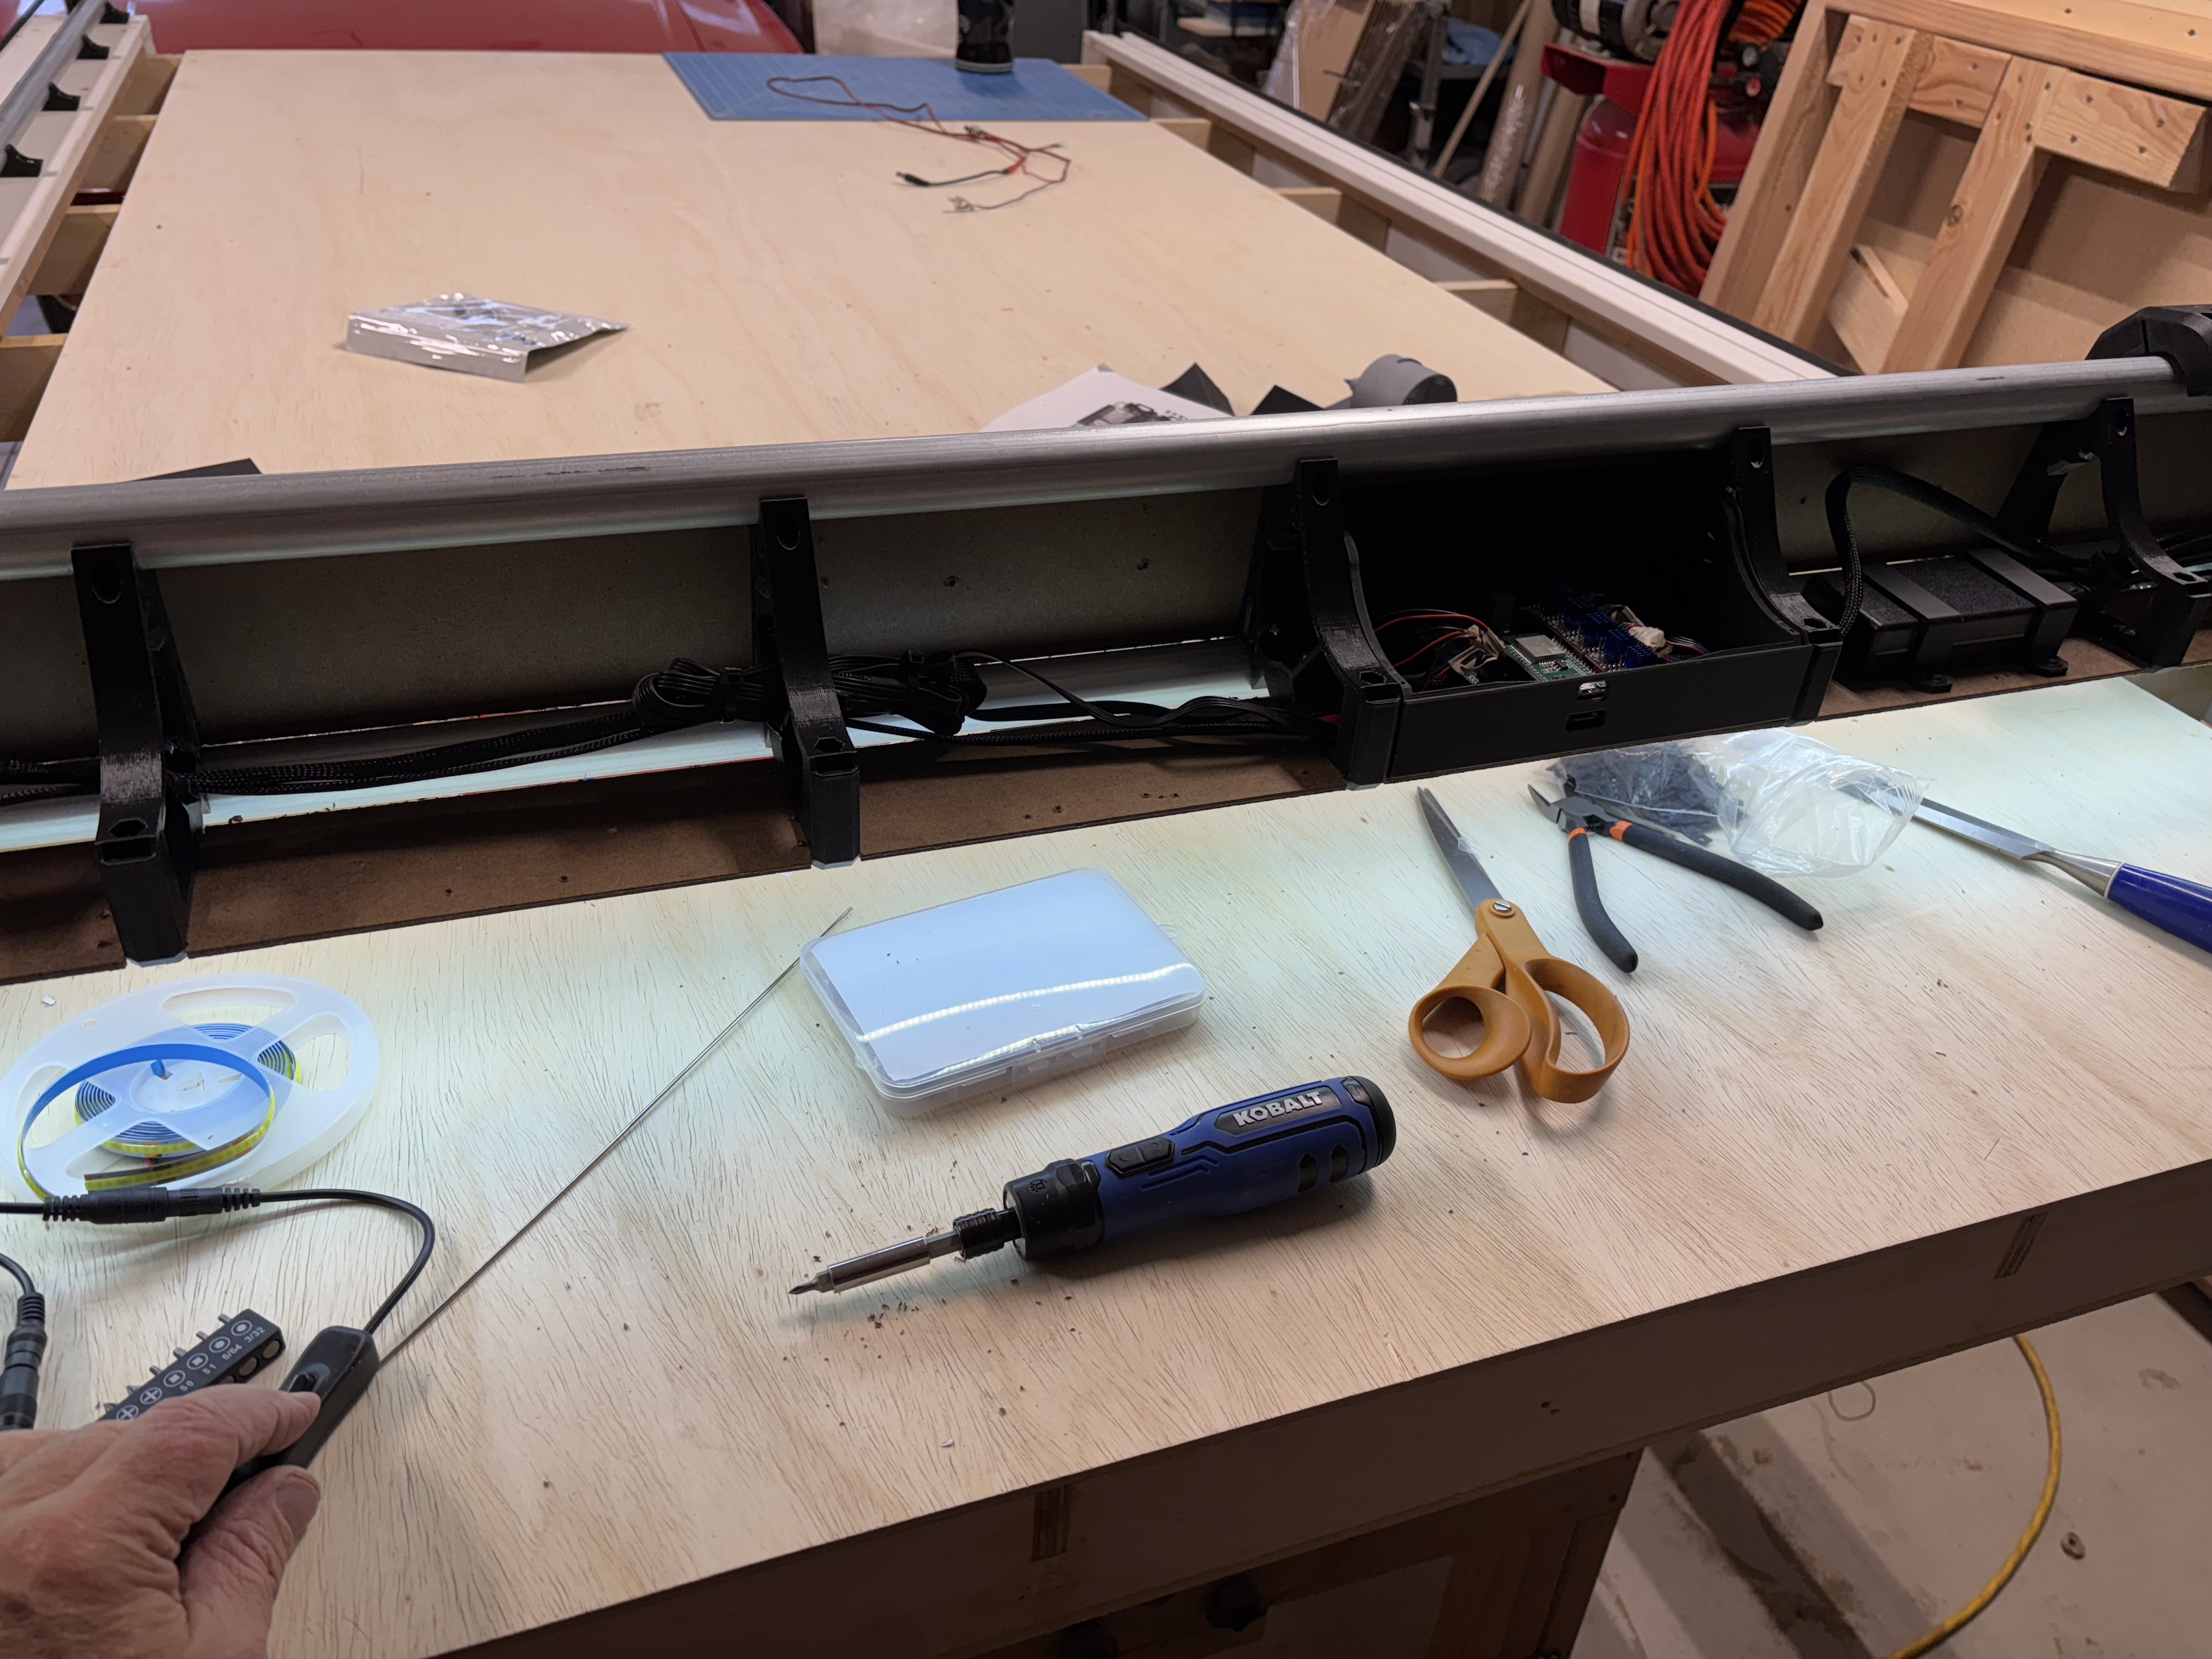
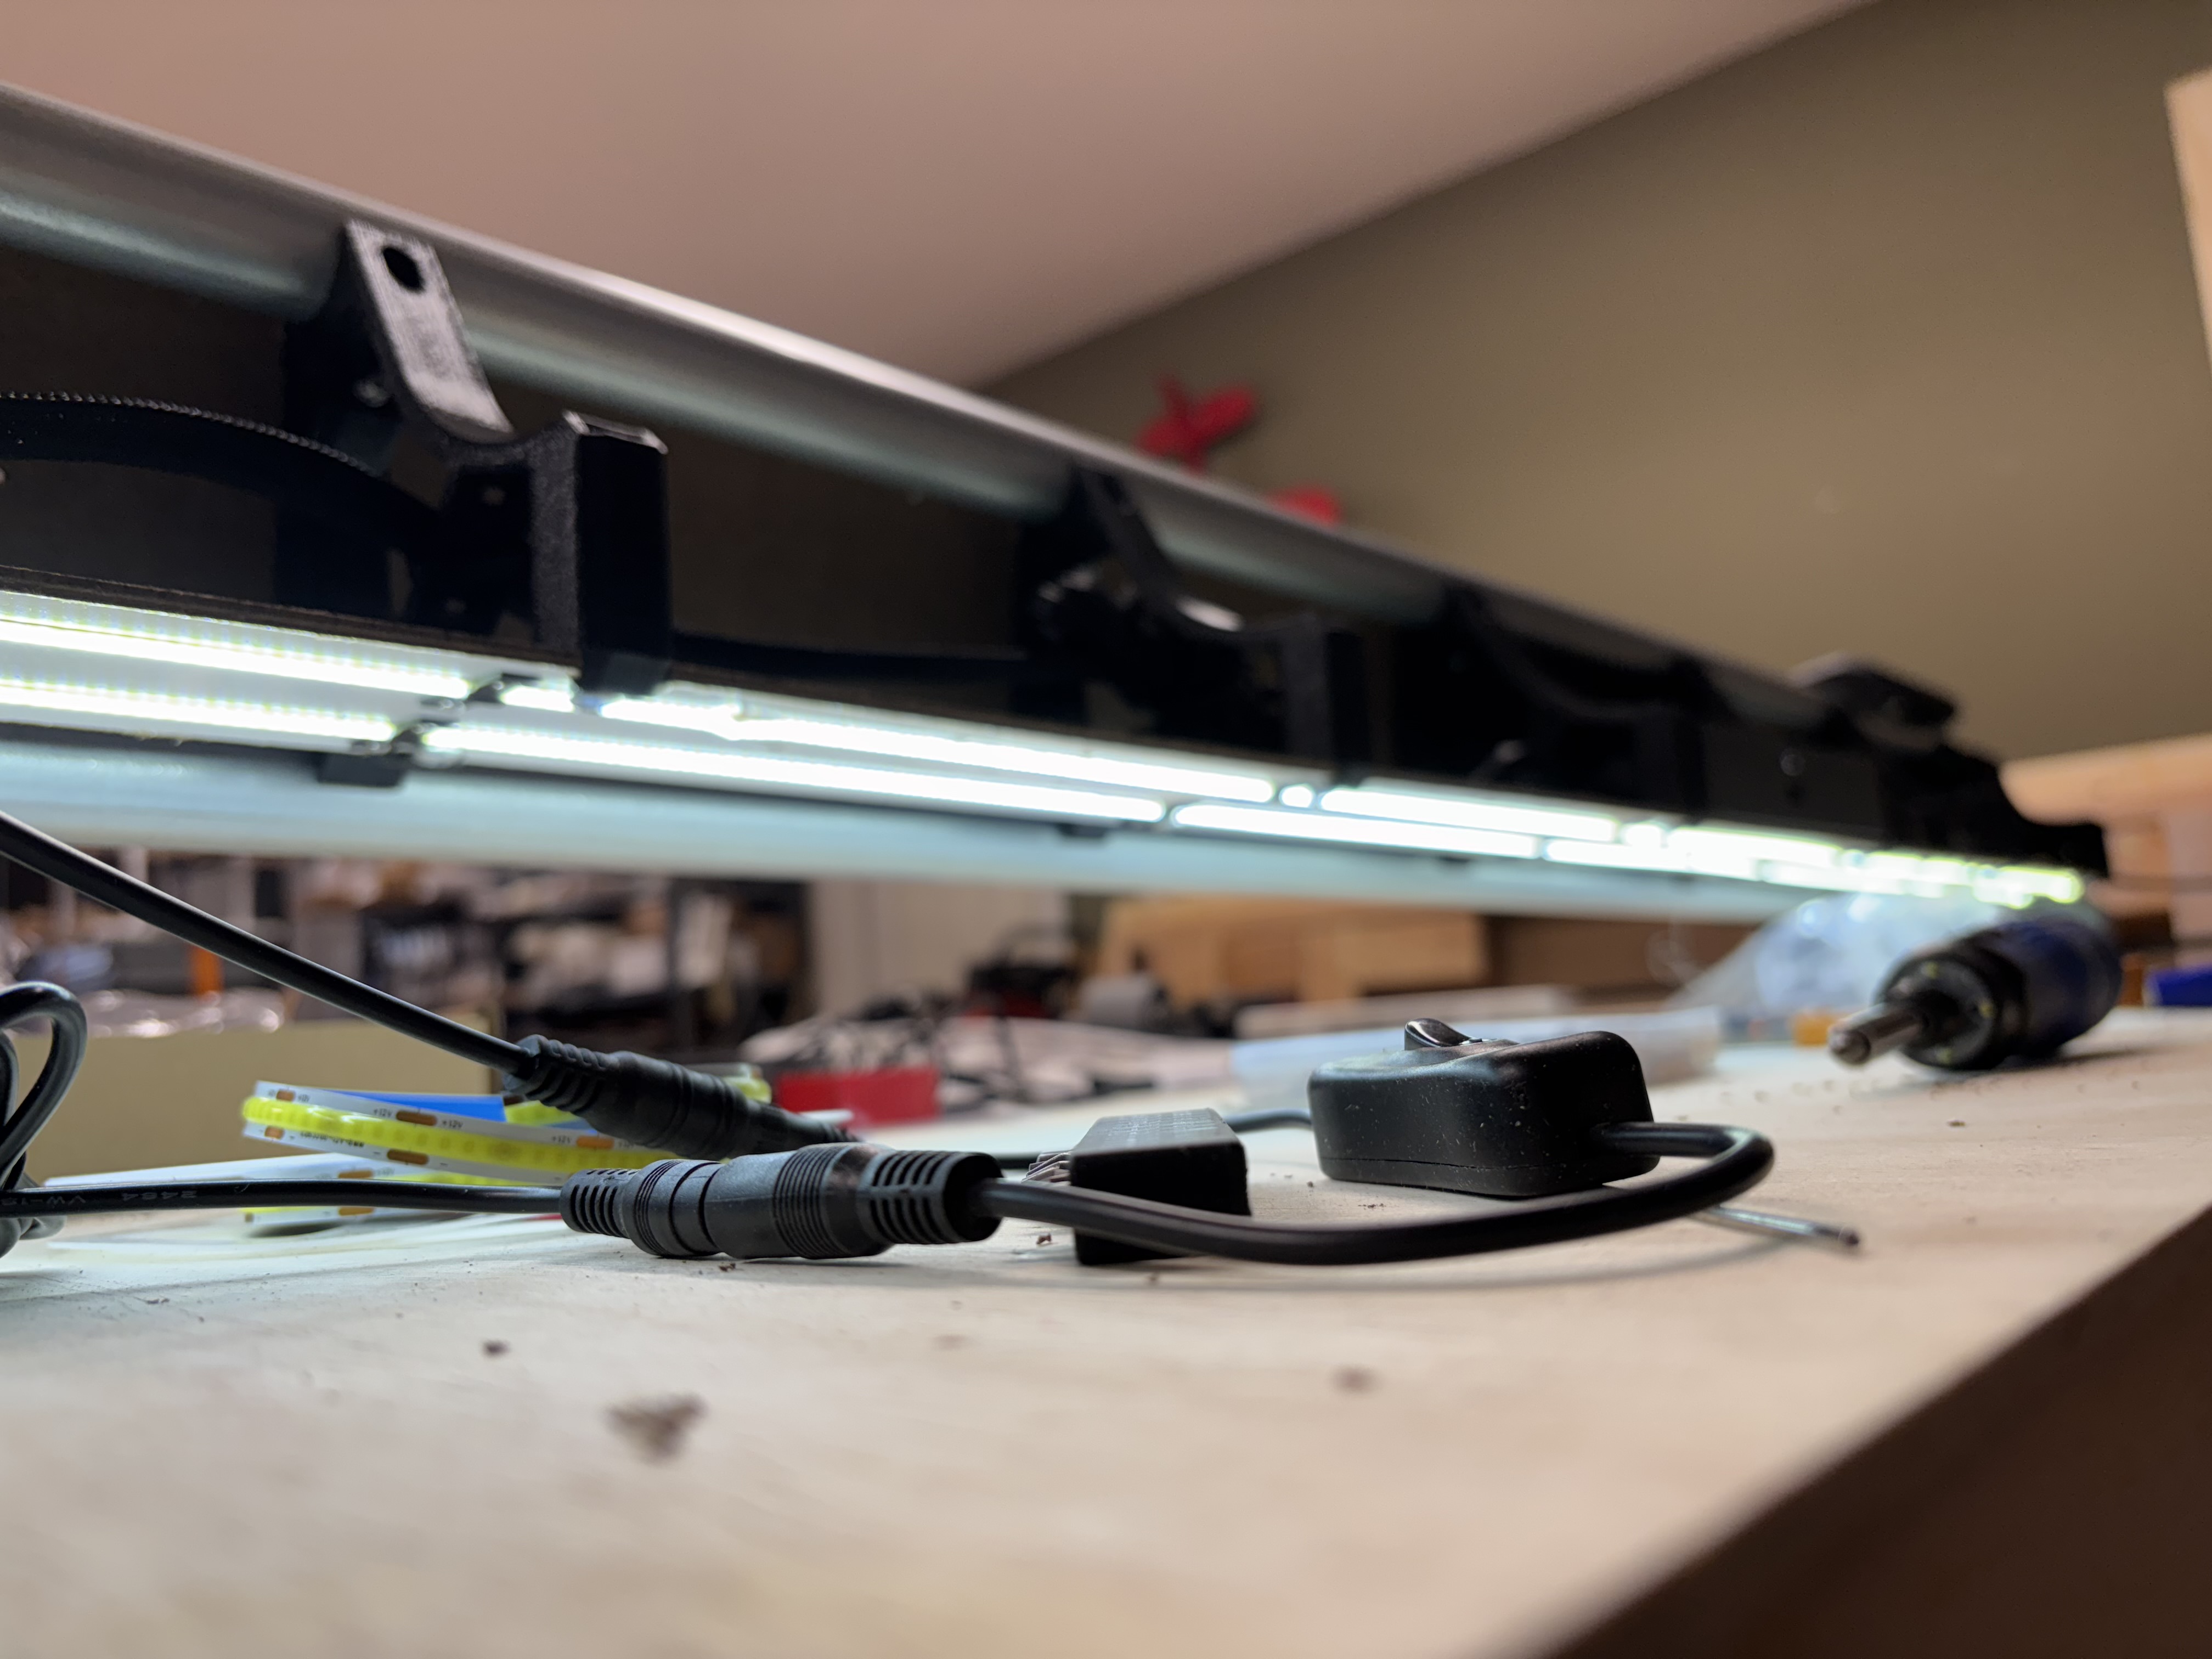
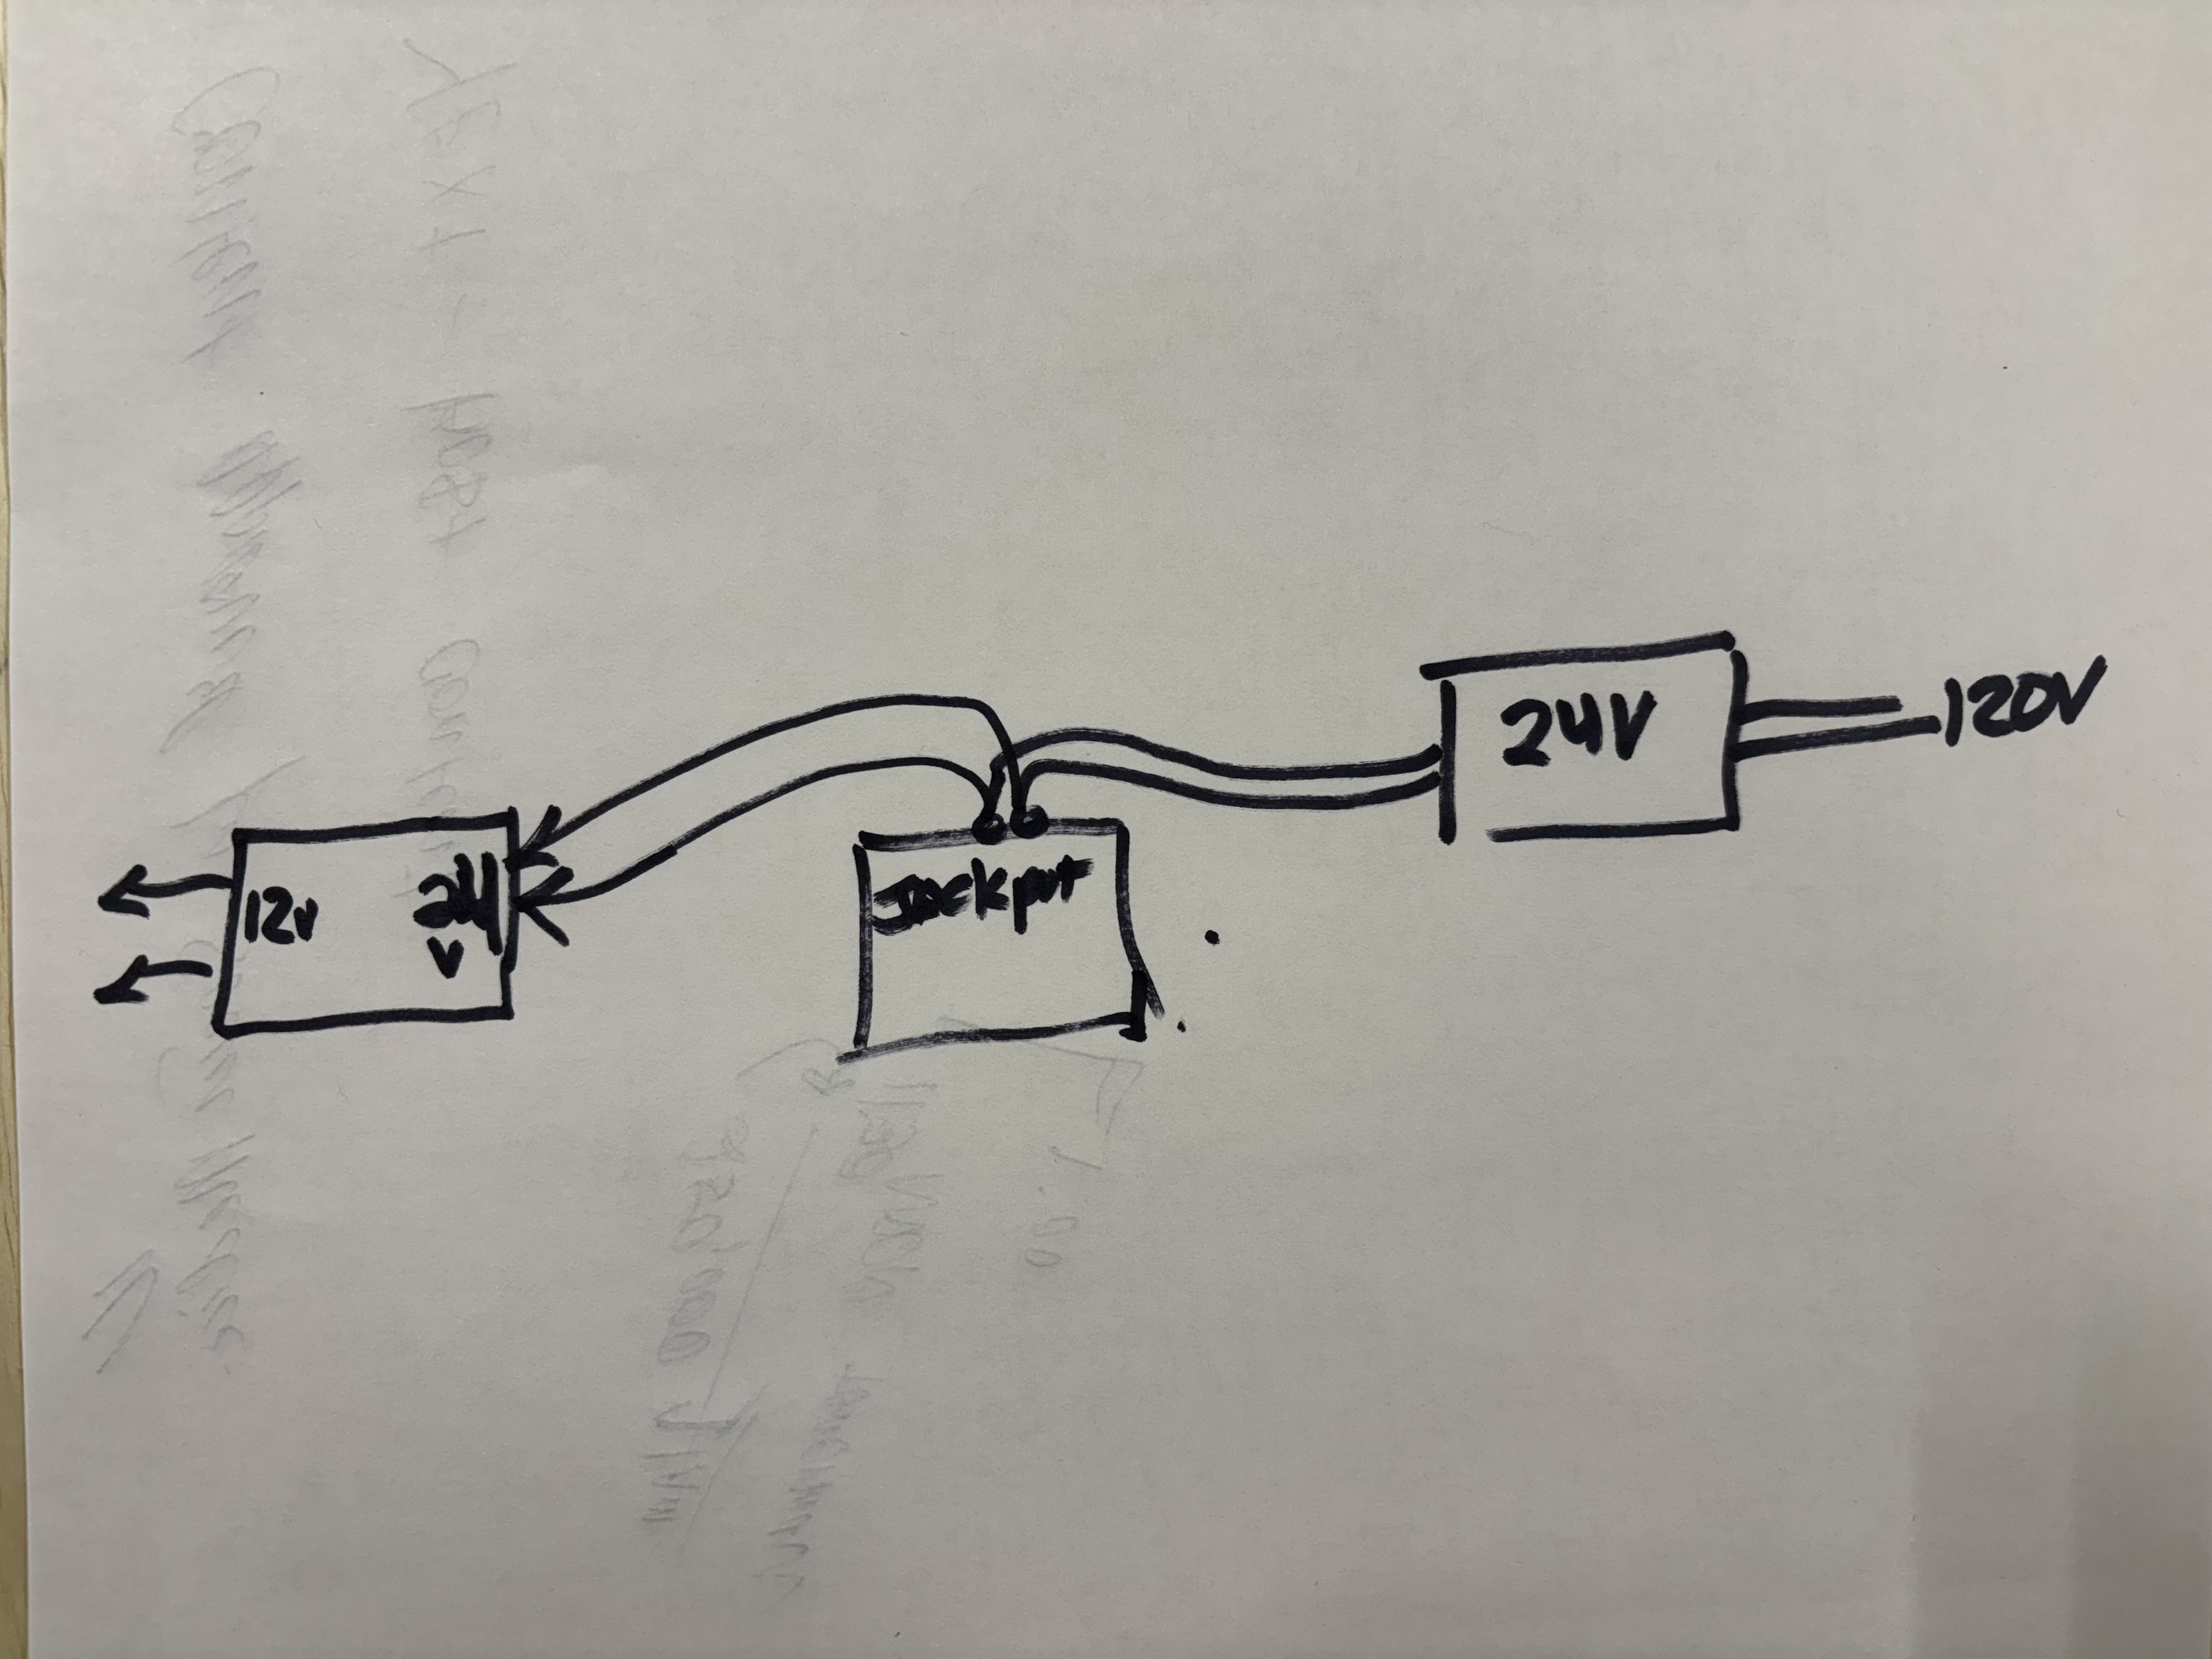
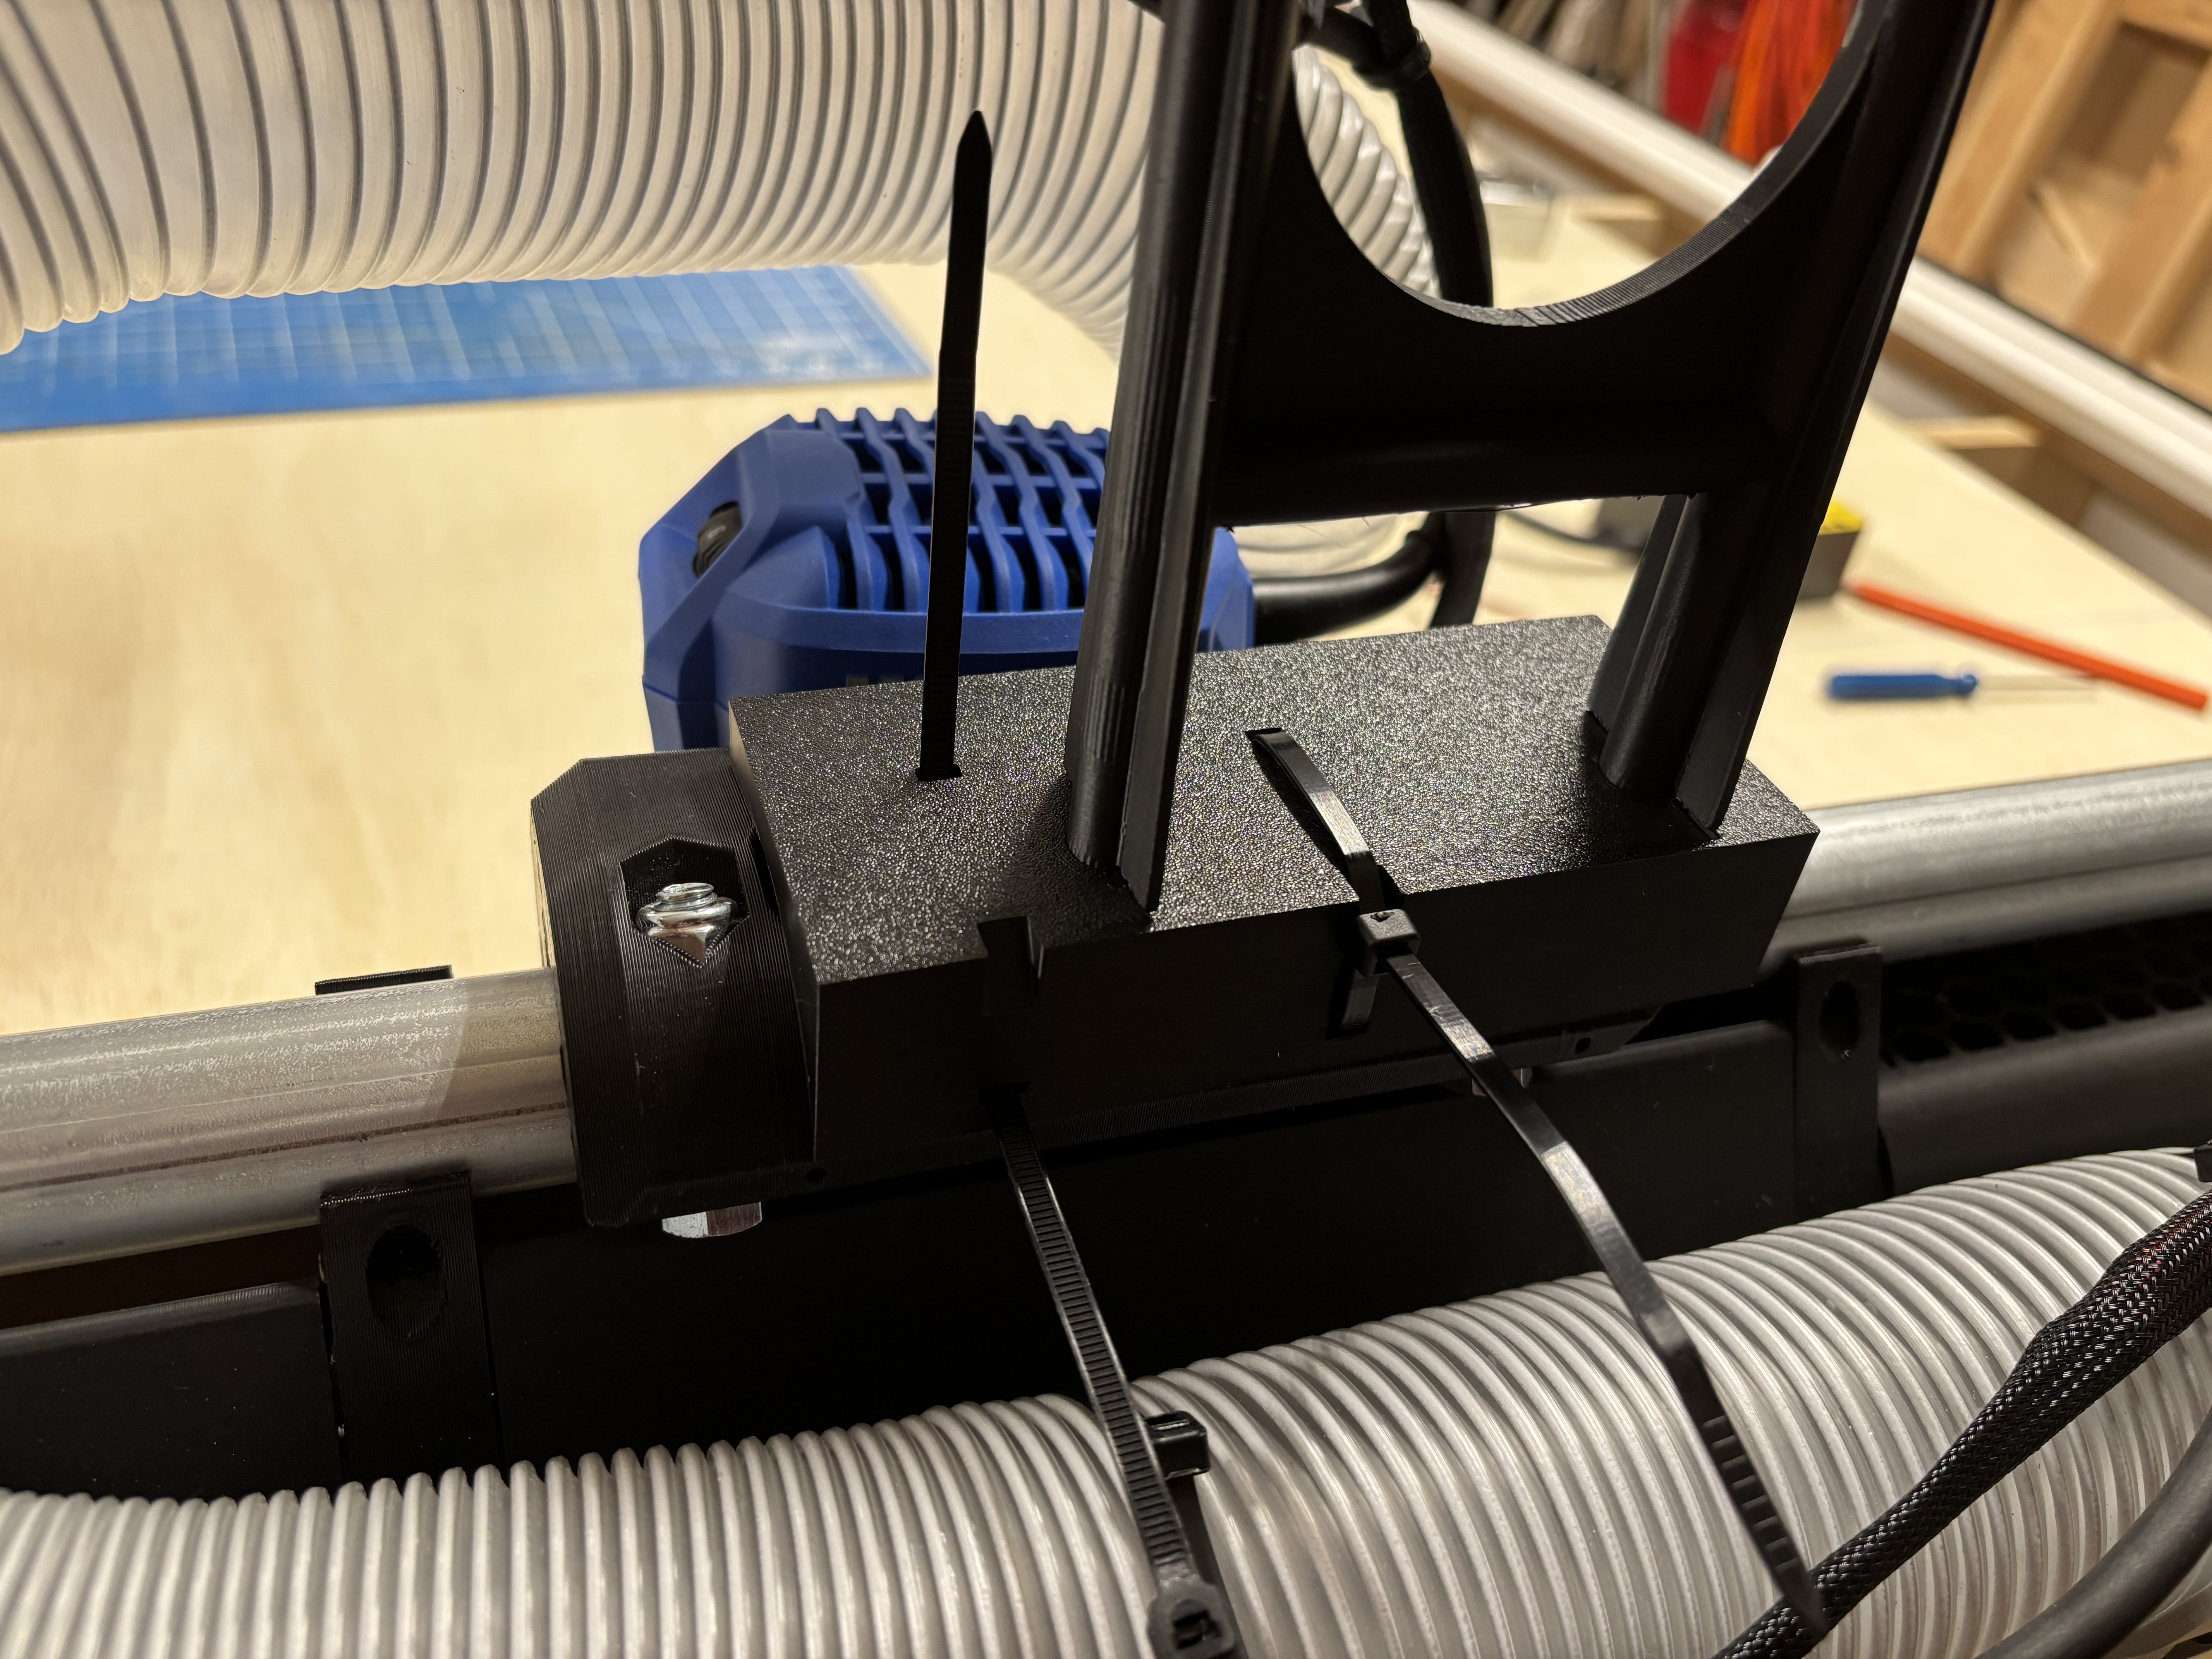
So while my wife is at work and I’m supposed to be packing for our trip, I managed to install the LED strip lights underneath the gantry as @DougJoseph did similarly on his LR four. Thank you, Doug for the little holder file. I think it turned out perfect, I wish I had opted for the 24 V LEDs instead of the 12 it would’ve saved a little extra wiring, but I do have a buck converter running around here so I’ll step down I’m hoping that robbing power for the LED strip from the 24 V input of the jackpot isn’t going to be crucial.
Looking good! I think the suggested route on powering the lights is to fork the power coming out of your AC-to-DC power supply, and send one side of the fork to the Jackpot and the other side of the fork to your buck converter. Then you’re not drawing from power that has had to pass through the control board, and whenever you turn on your LowRider, the lights will come on.
Back from Vacation. Hope y’all had a great New Year celebration.
I worked on running the wiring through wire looms and tidied up the board box. I had magnets holding Doug’s covers down nice… a big too nice so I removed them. I added LED lighting and a wireless RF switch for that. Also decided to run the router power cord along the dust collection hose but will shorten the chord to 6” off router (that way I can remove the router if need be without dealing with the long cord strapped with the 2.5” hose. The Jackpot power will plug into outlet, the router will plug into an RF relay that when ON will also start the dust collector. It’s about as ‘automated’ as I am capable of getting. I plan to operate the machine at the front with a removable desktop that will fasten to the front of the table to hold the RF on/off switches, the laptop and the mouse.
Once that is all tucked away, I plan on attaching the 3/4” MDF spoil board after squaring.
Thanks for the encouragement…. It came out just fine. A few straggly hairs underneath easily removed. I sent the mirror to the printer with a few trees just because I could and calling it a good night… so good night world.
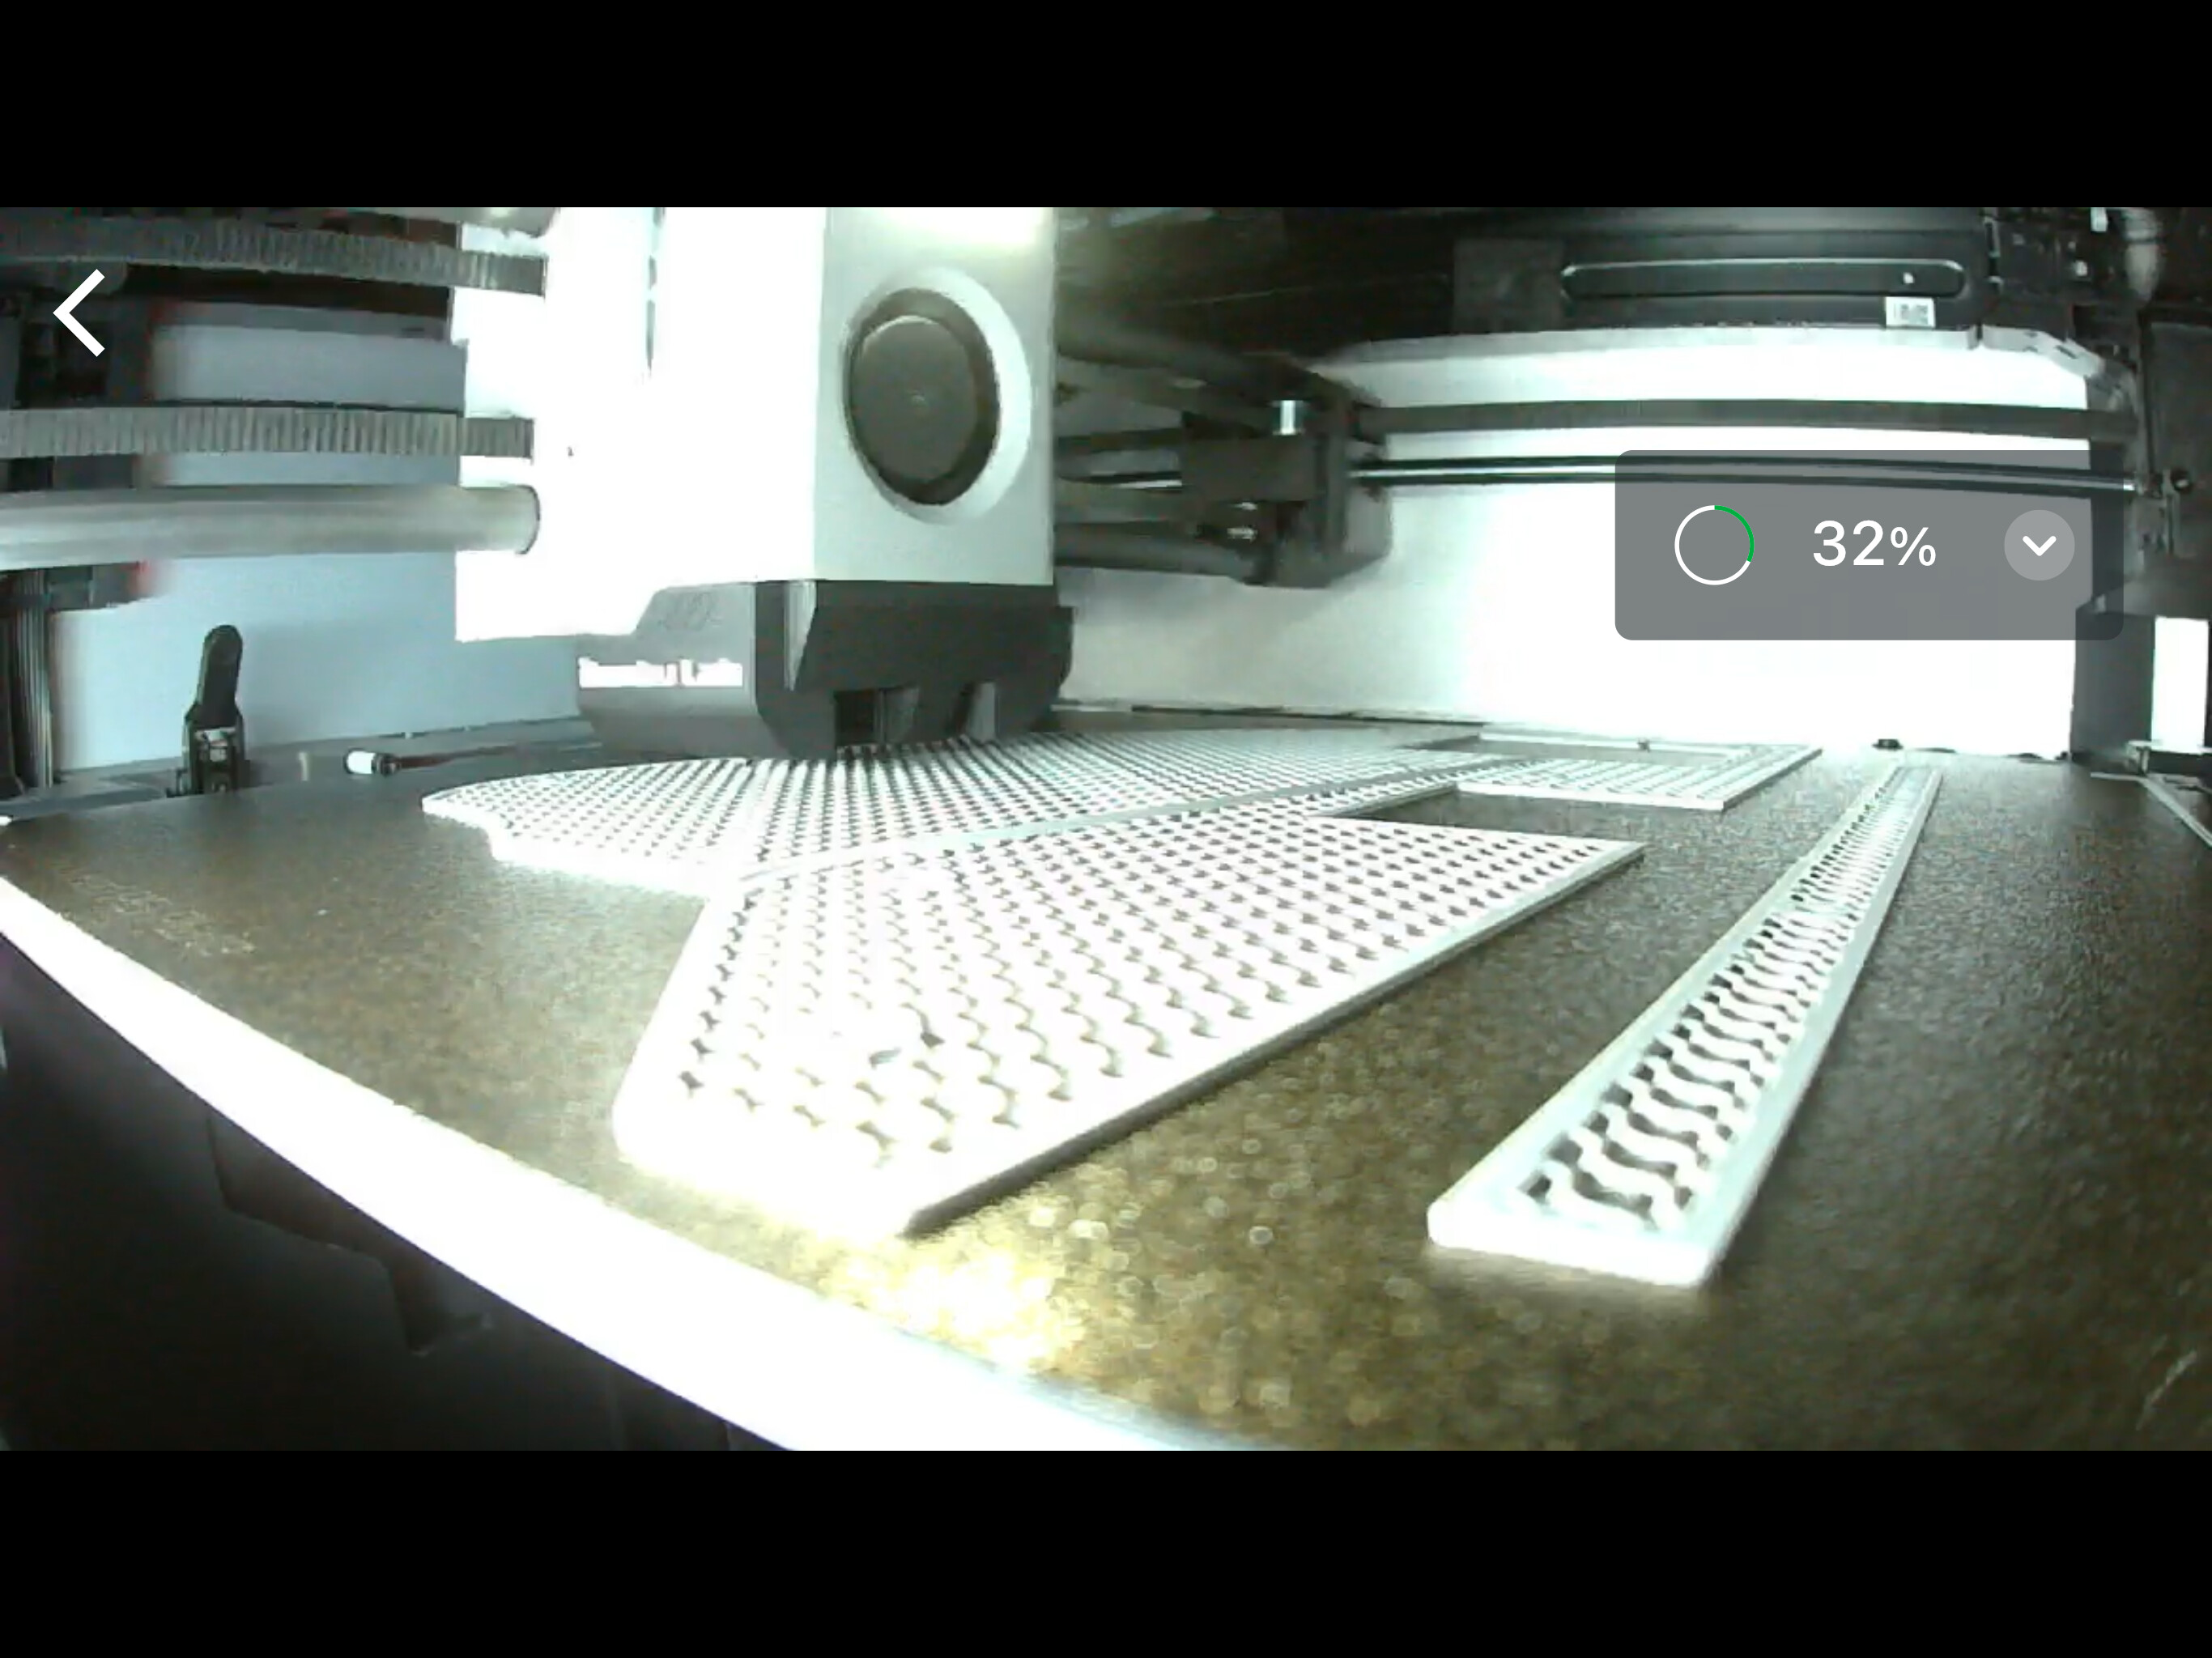
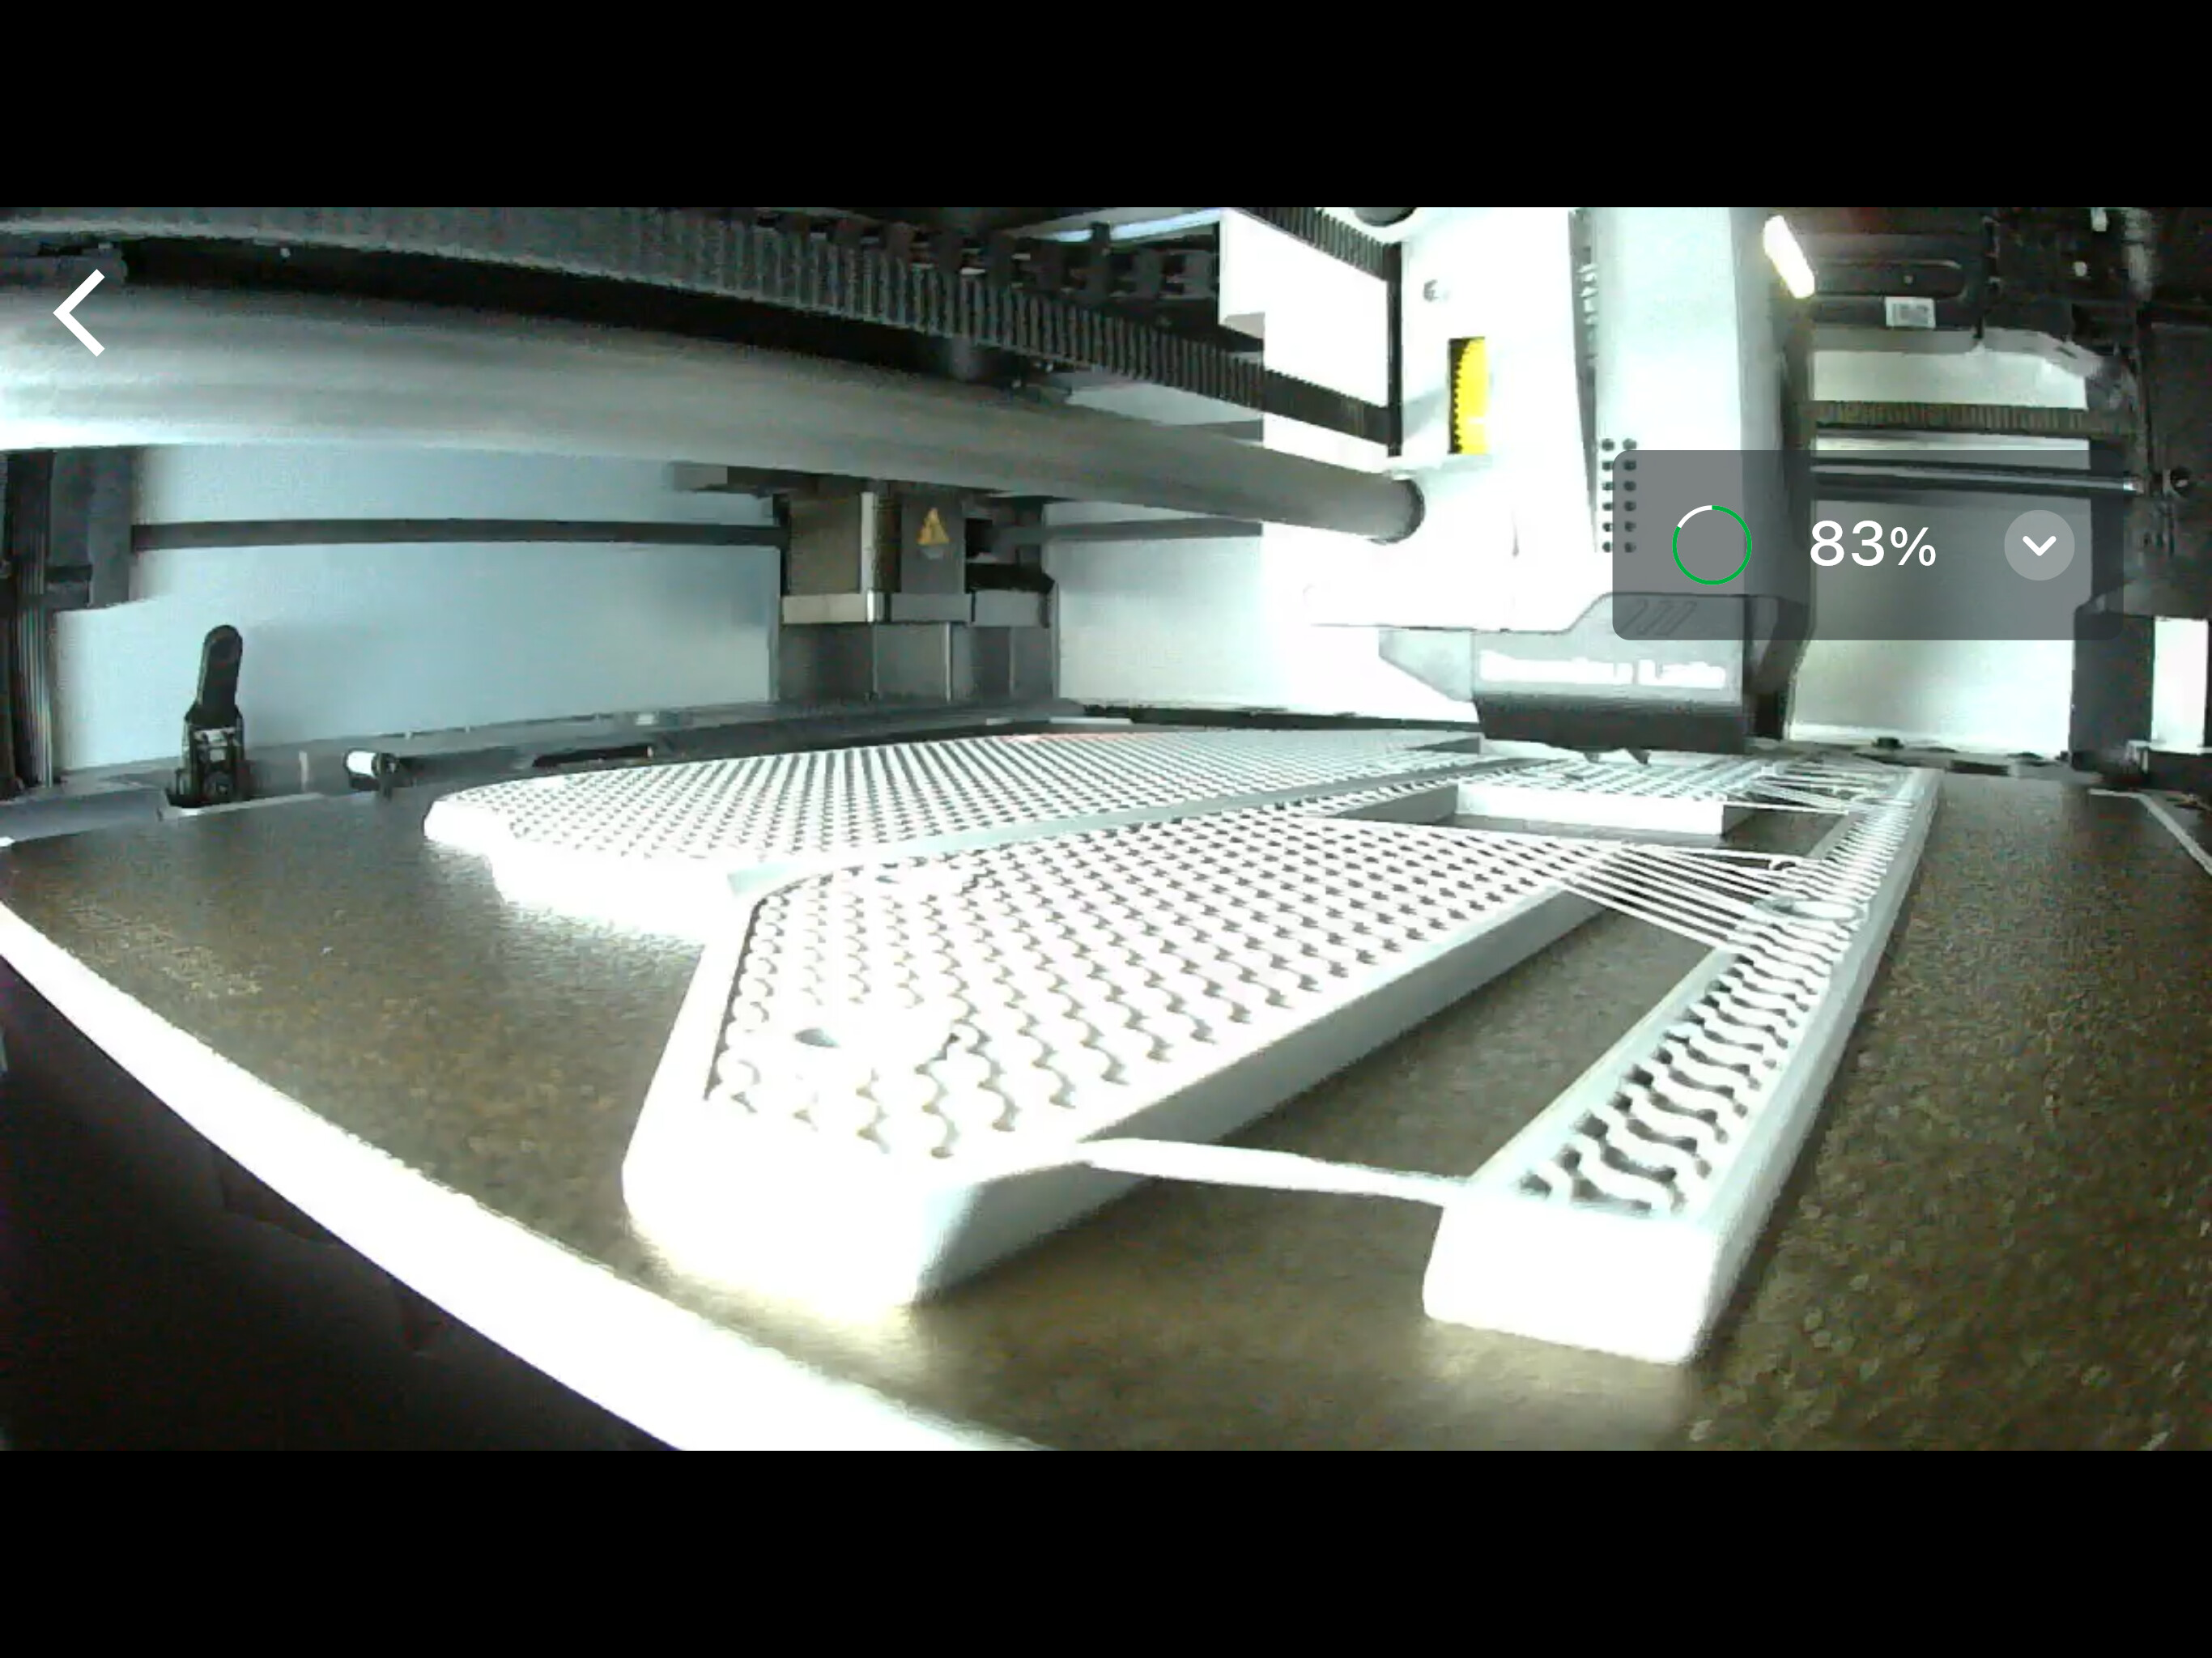
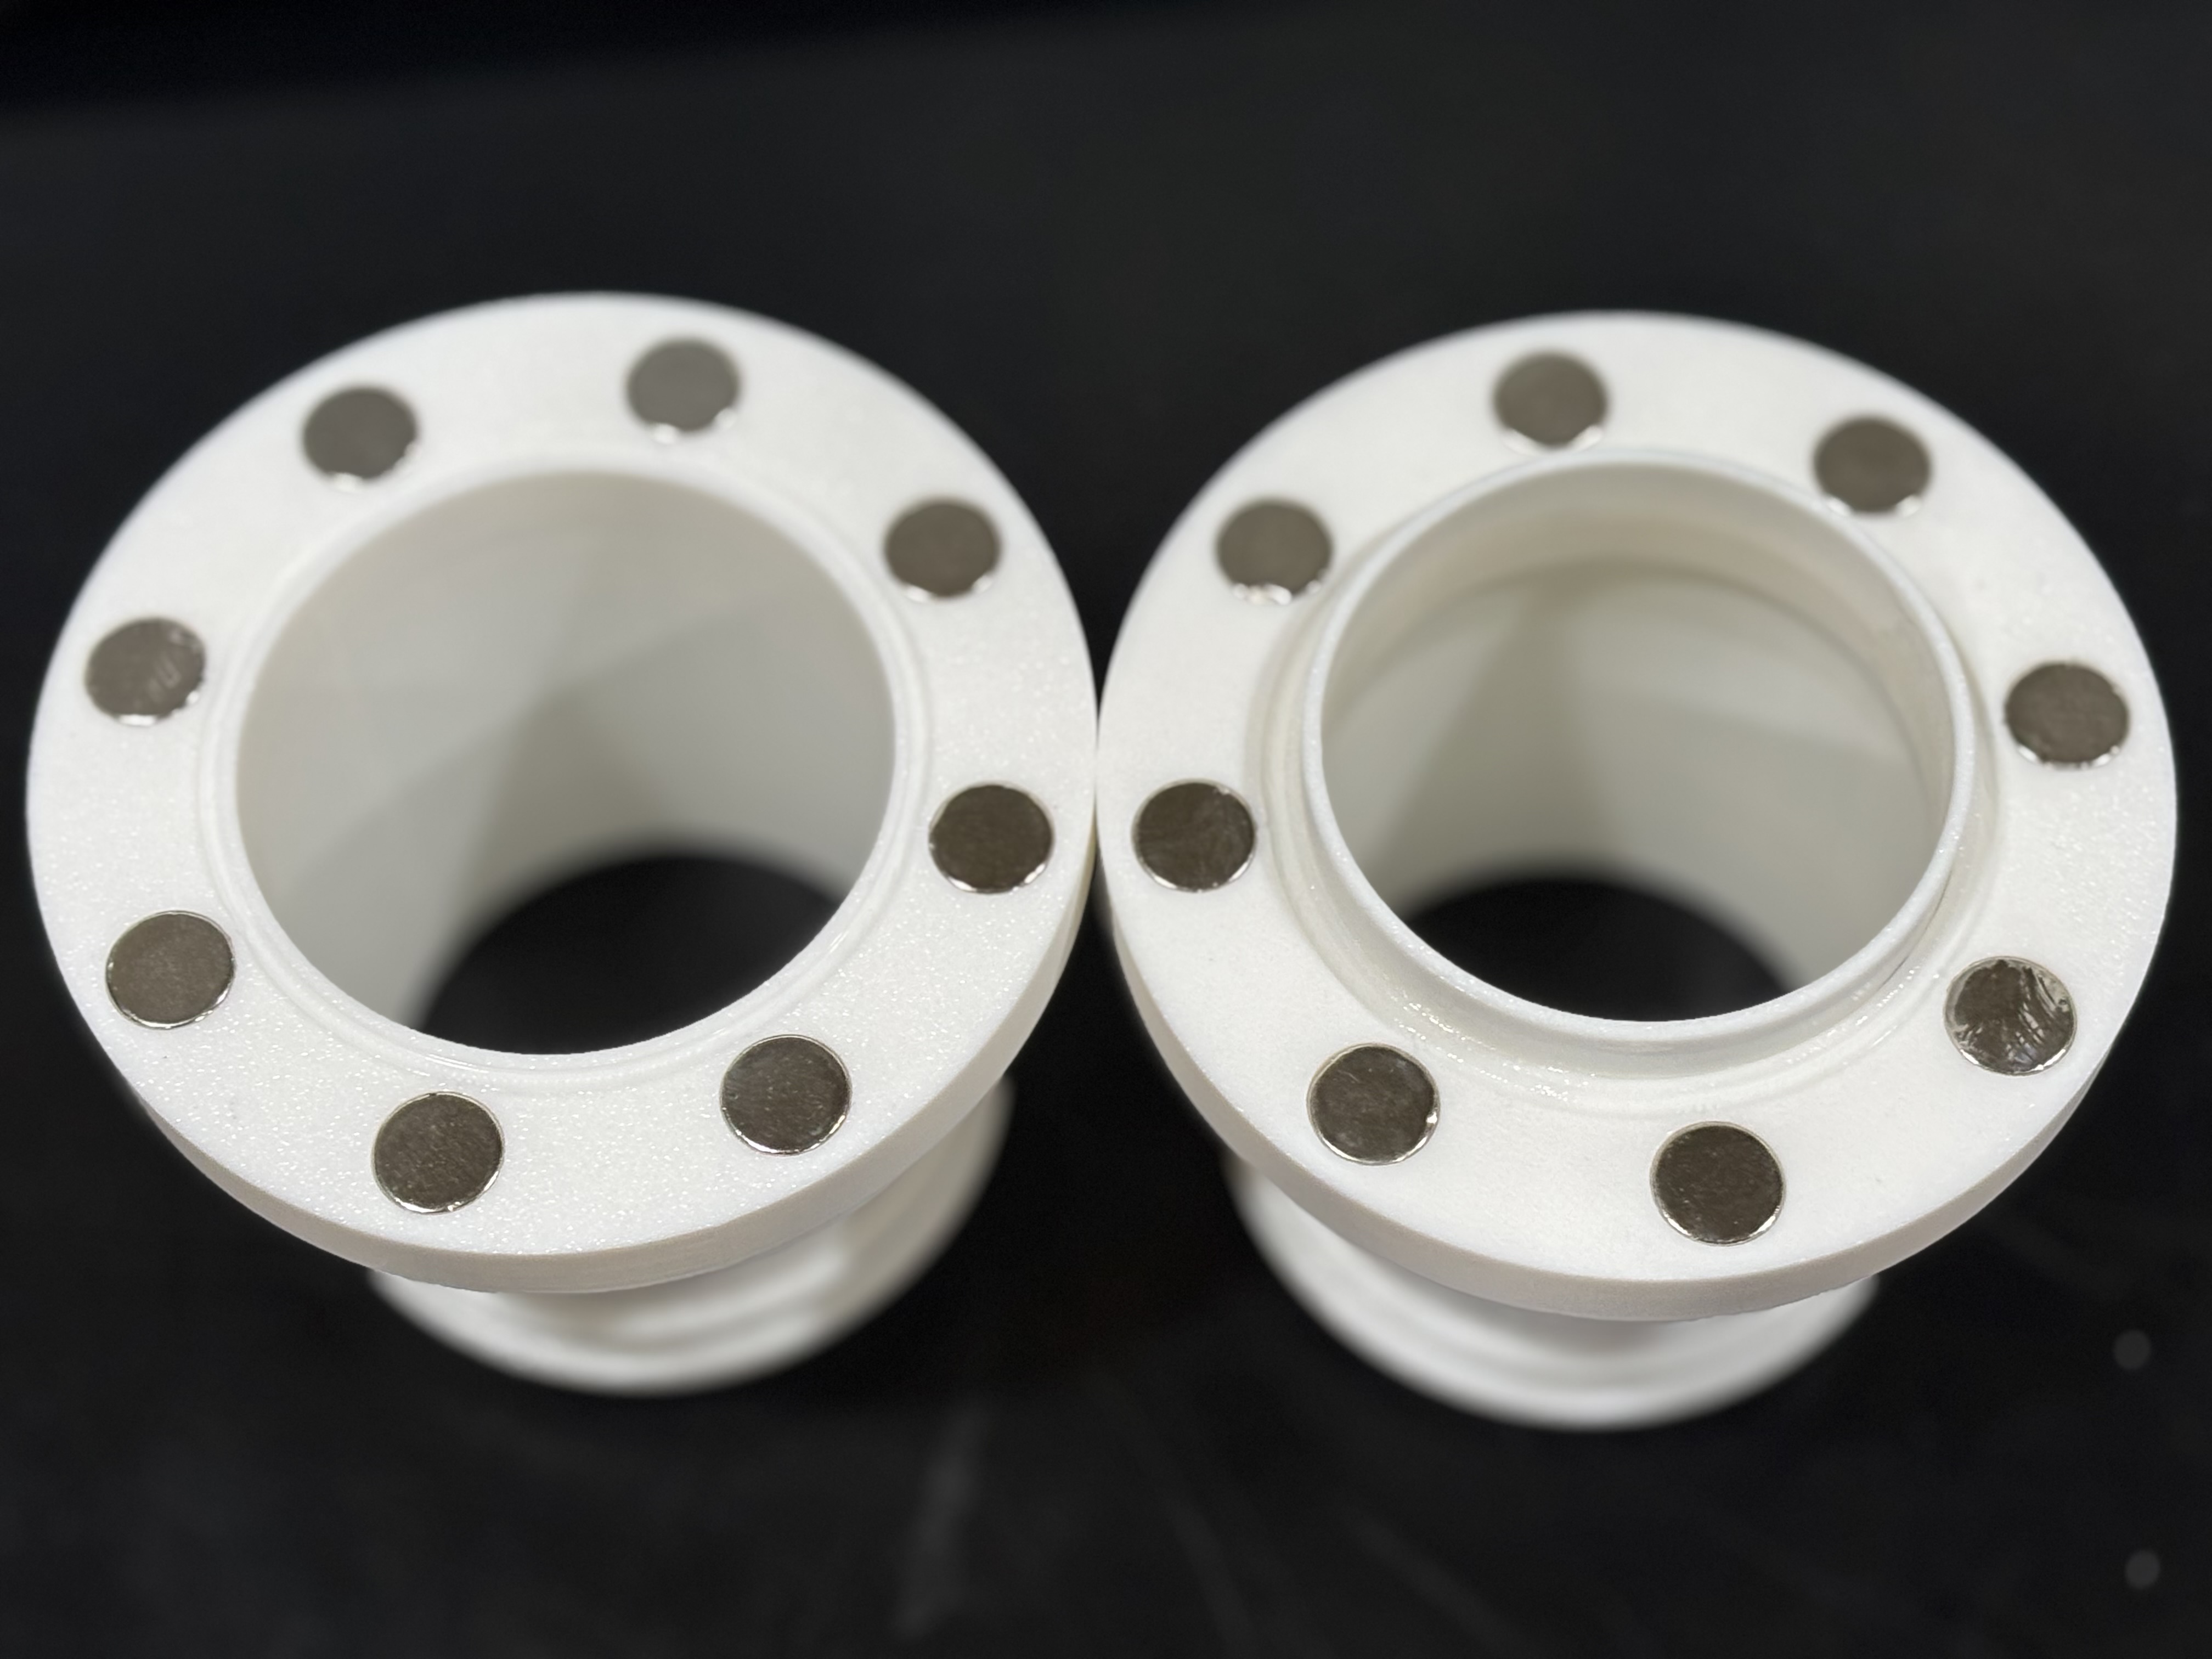
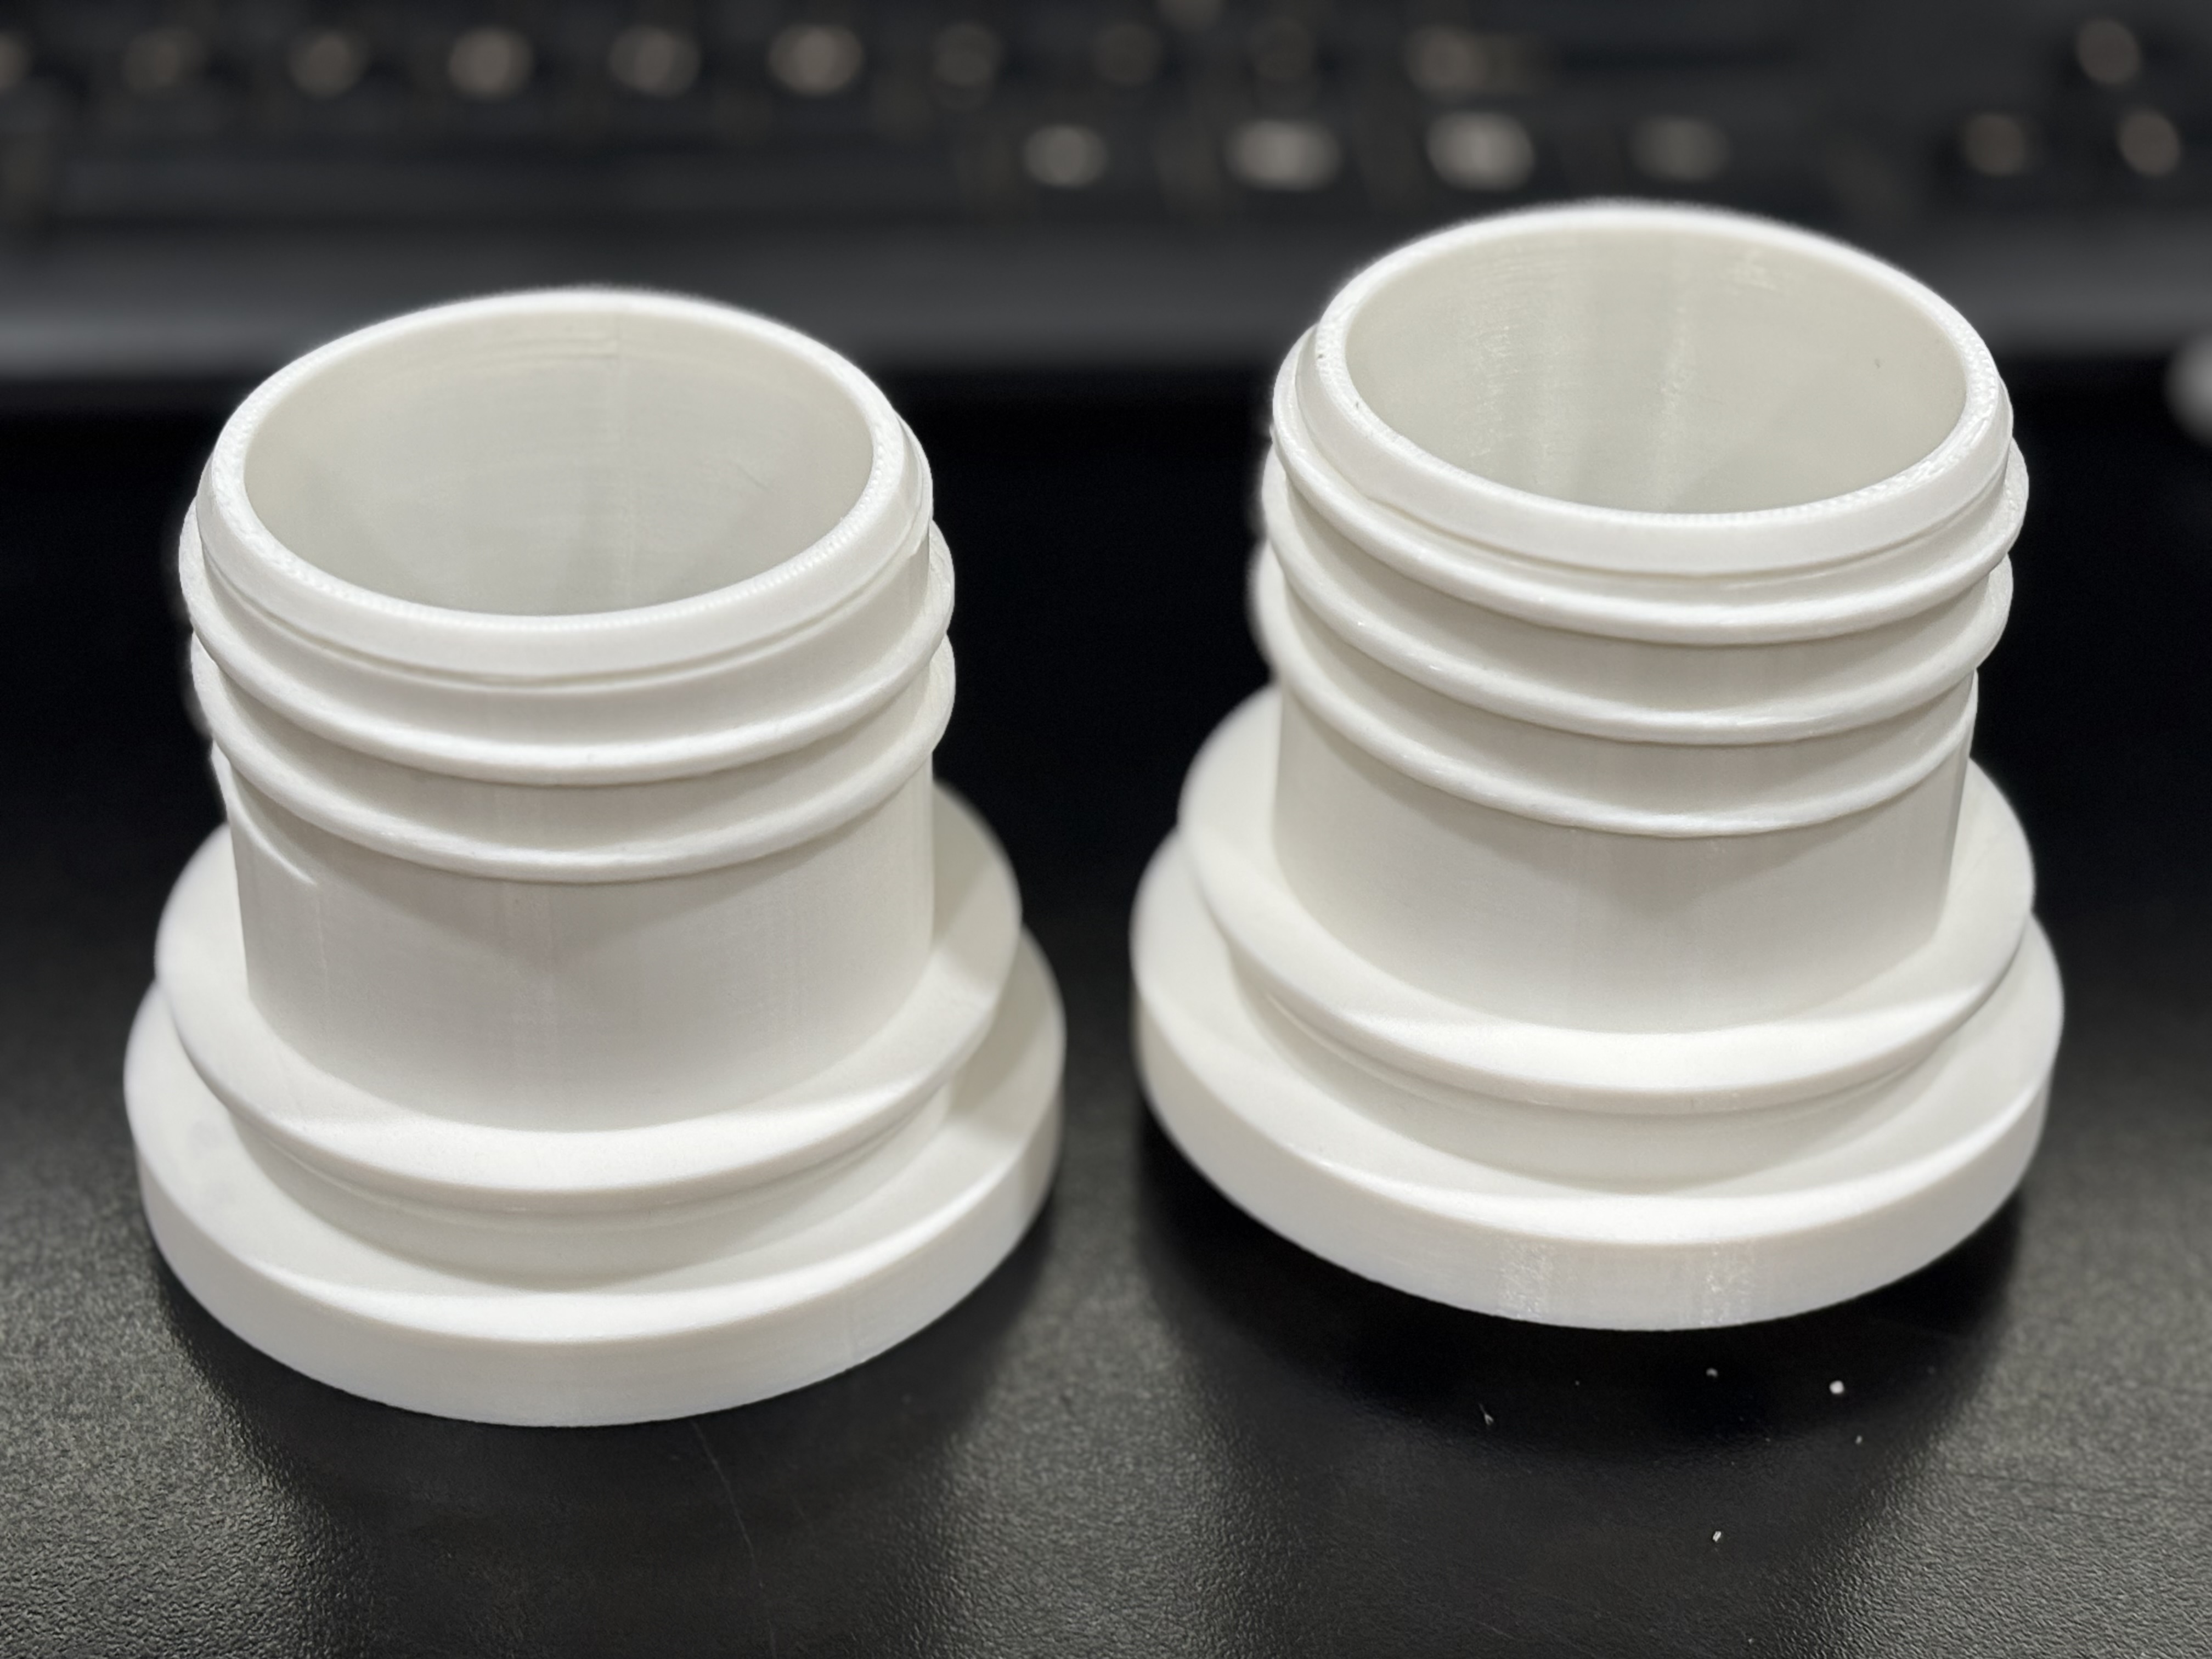
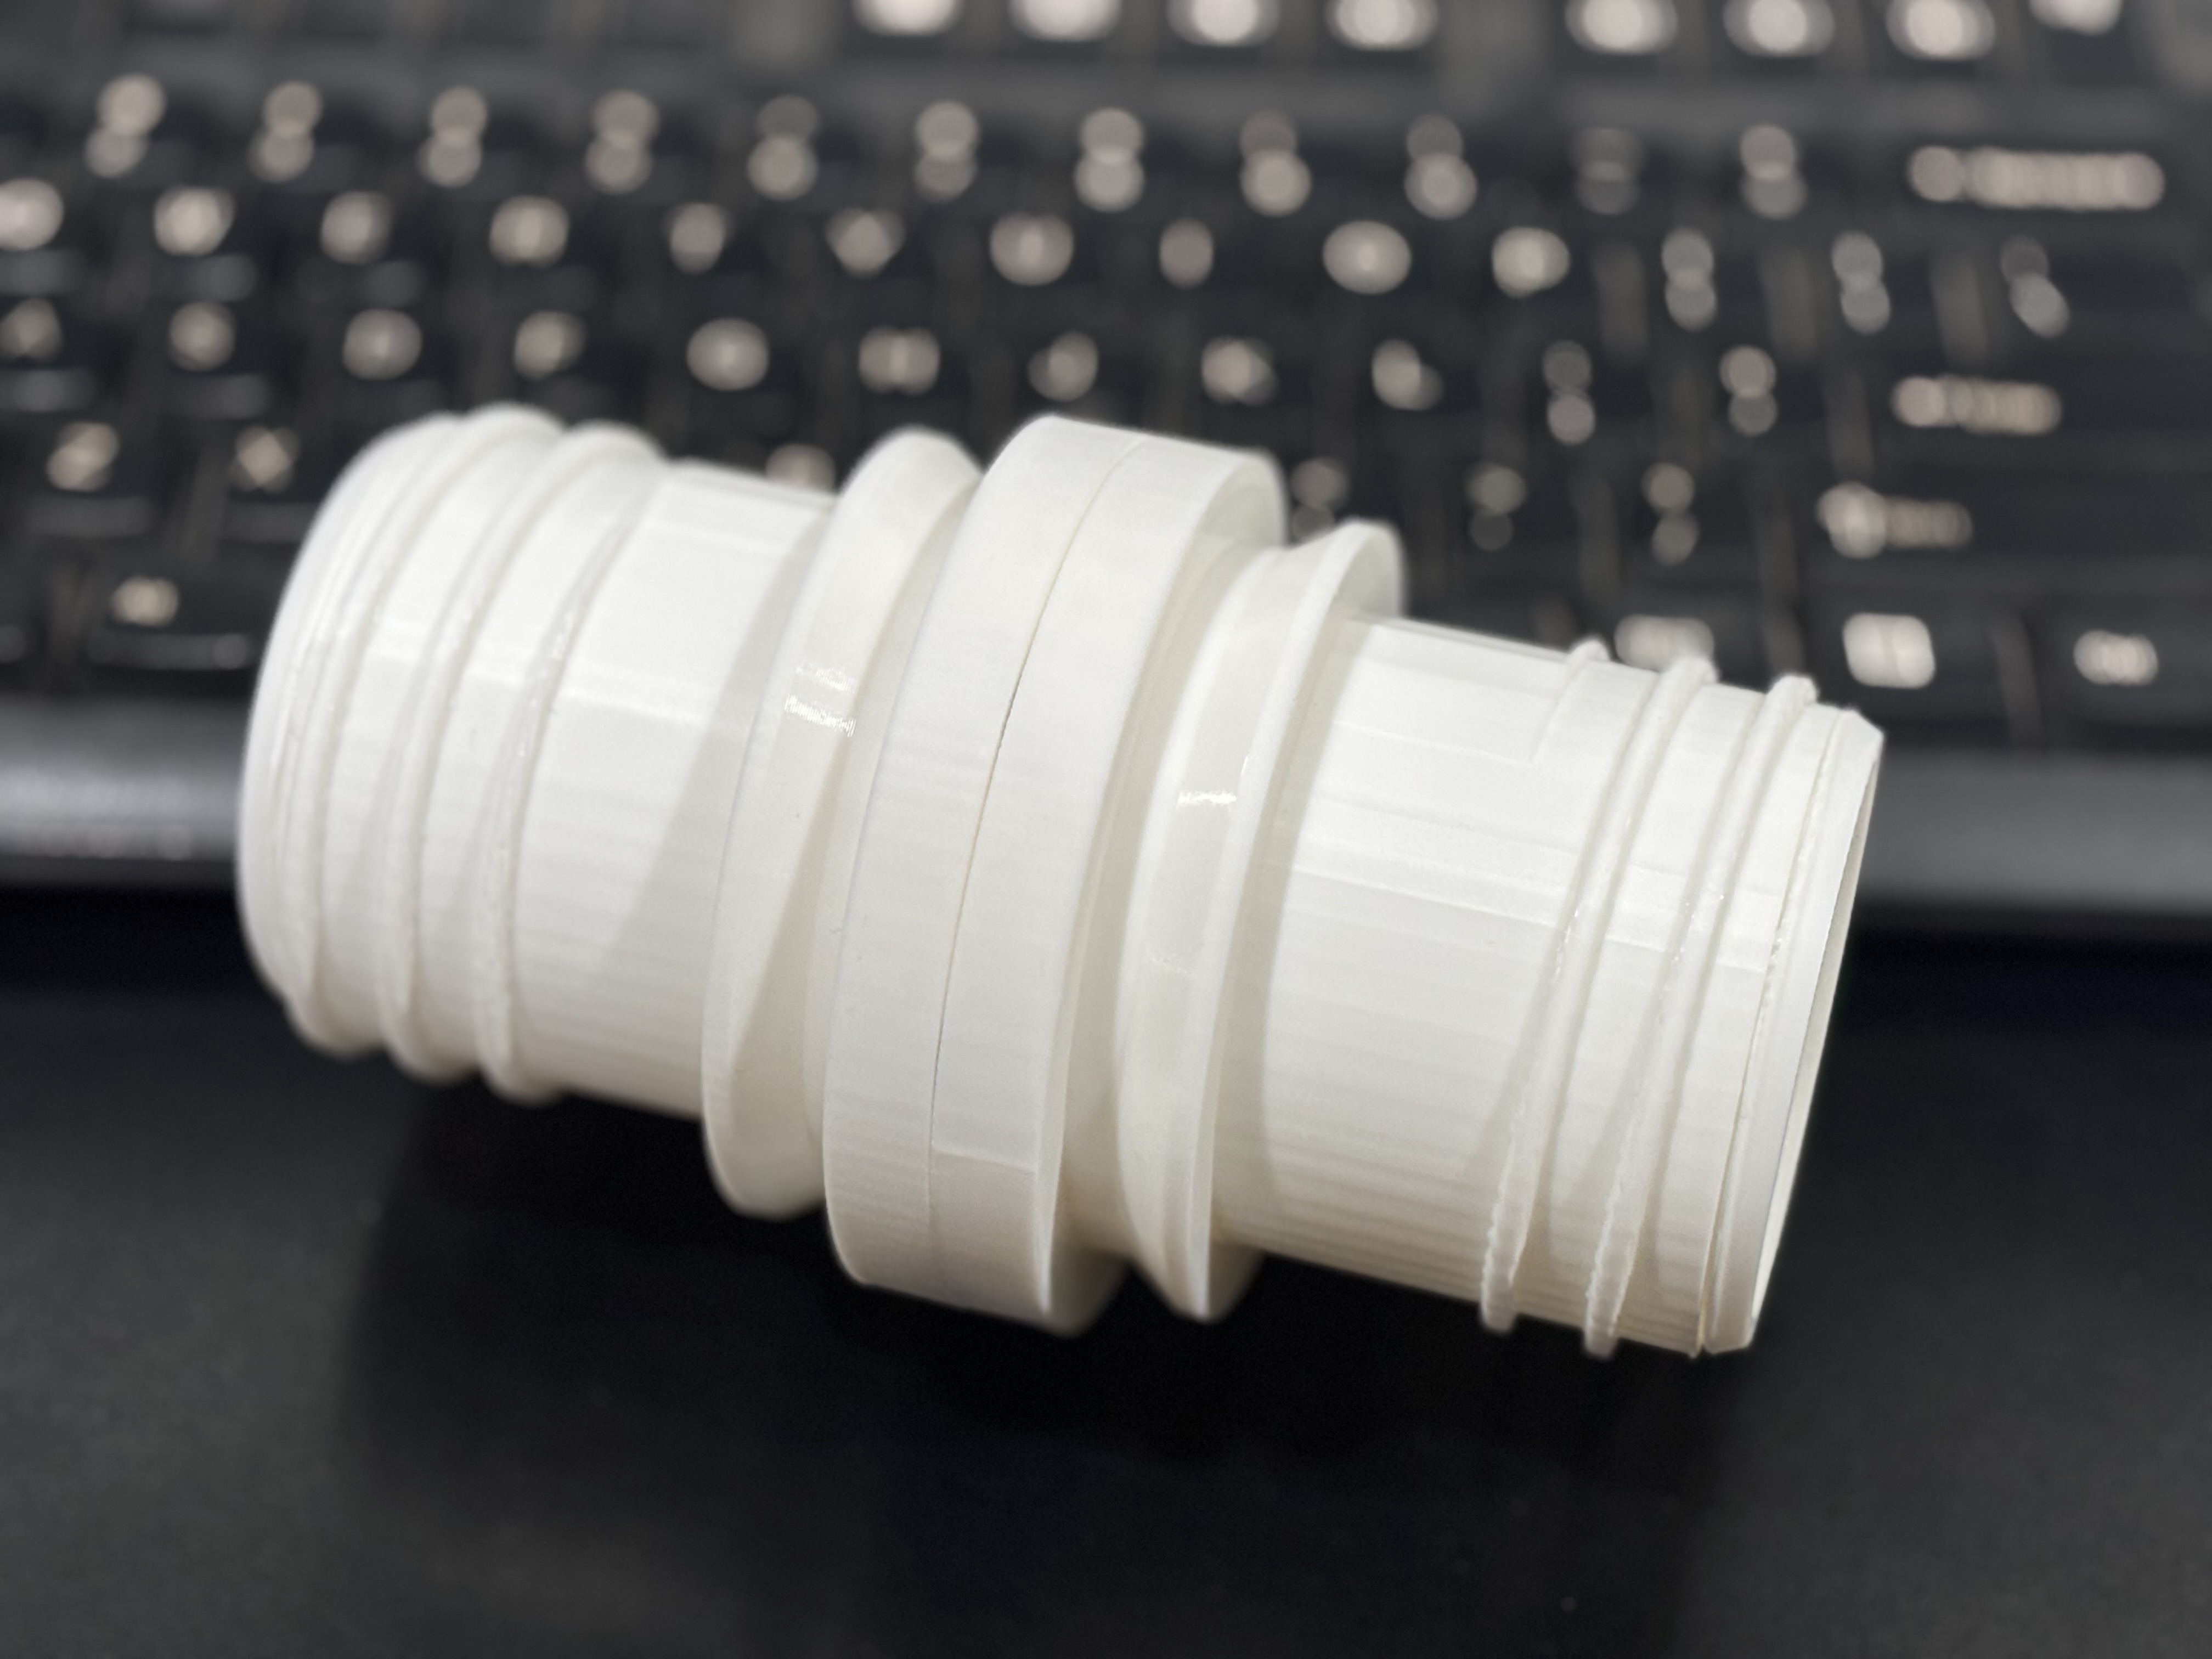
Because mine will be a gantry that I will store off the table I wanted a quick disconnect for the 2 1/2 inch dust collection hose. Didn’t care for what I saw available so I designed my own from scratch.
After a couple tries, I think I hit upon a pretty good design. It uses 16 rare Earth magnets And a sleeve in the Center. After shaking the hose by the one coupler and, it held, which is more forced than it will ever see.
I am really liking fusion 360 and my X1 carbon 3-D printer because as I think of things I would like while I’m finishing up the LR4 build, I’ll take a break go design it print it while I go back to working on the LR4.
Cool! Remember that you will also want to ground your vac hose, so might need to add a wire connector of some sort. (Or maybe not, I’m not sure how commercial connectors like MagFitt do this)
In order to ground that wire running through the collection hose, I think I will have to do that maybe with a separate wire attached to the hose wire running to the ground prong on one of the power cords coming in. I do not believe my dust collector hose/system has a grounded hose (still have it in the box).
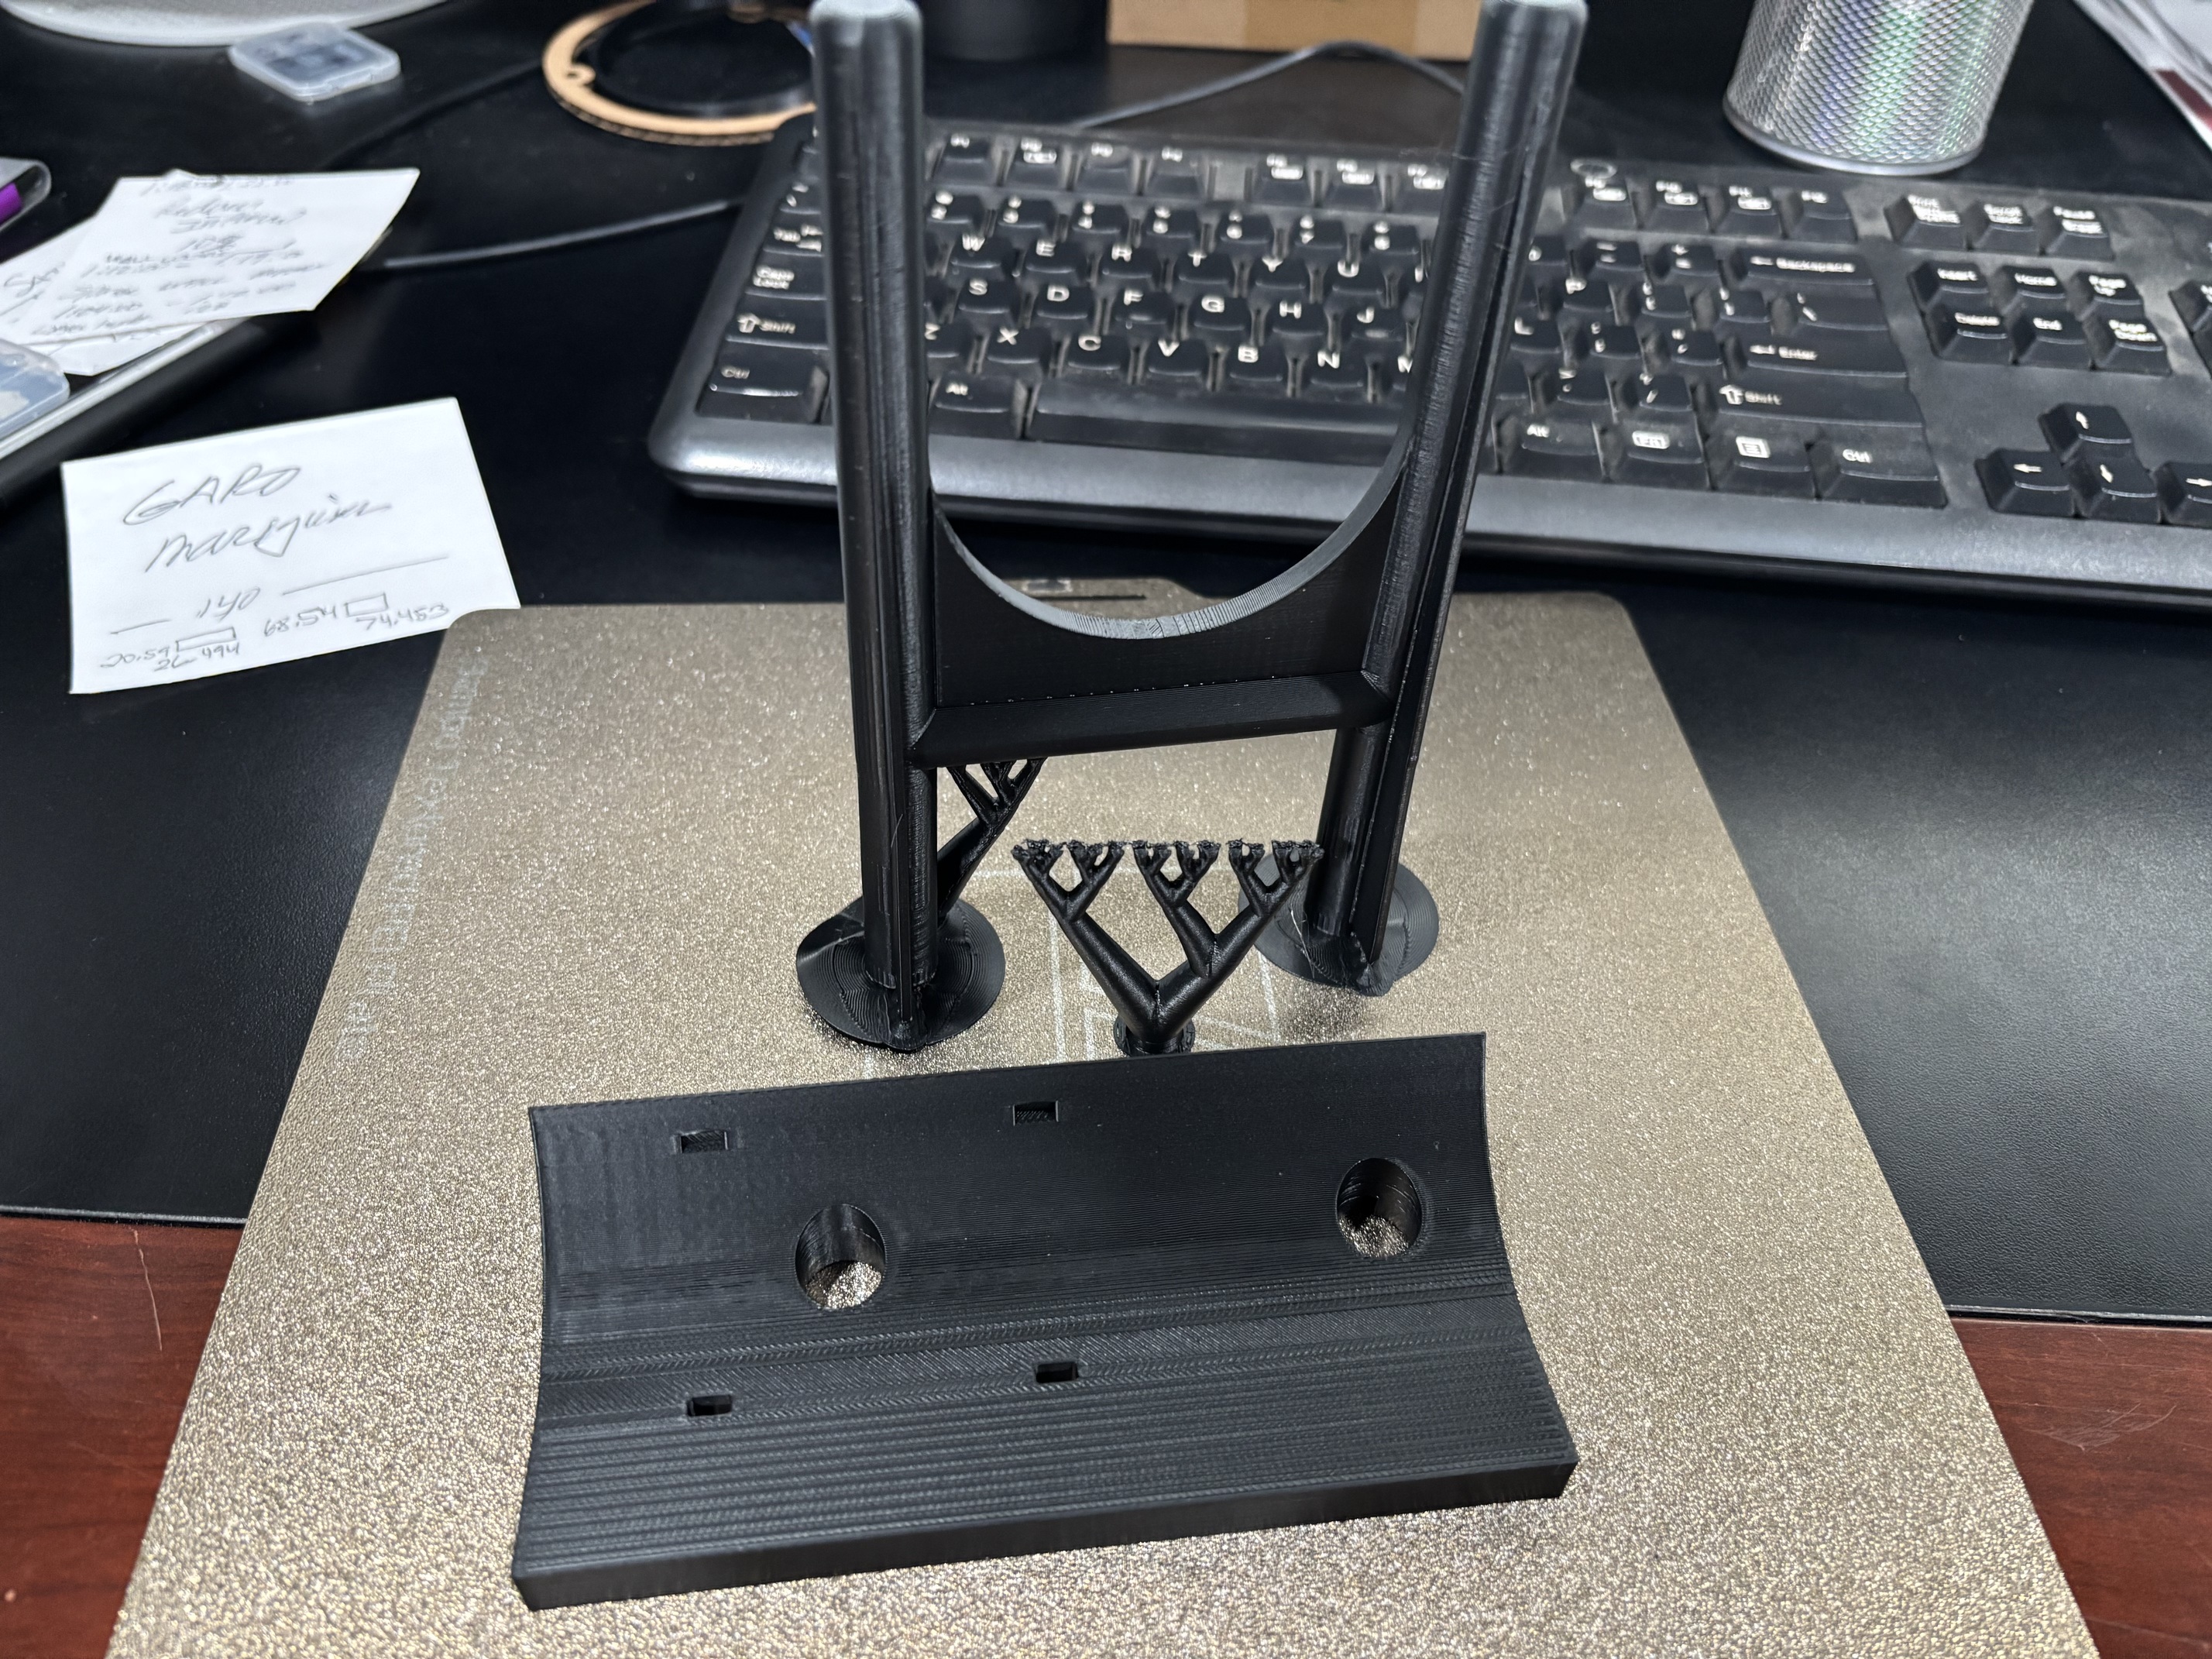
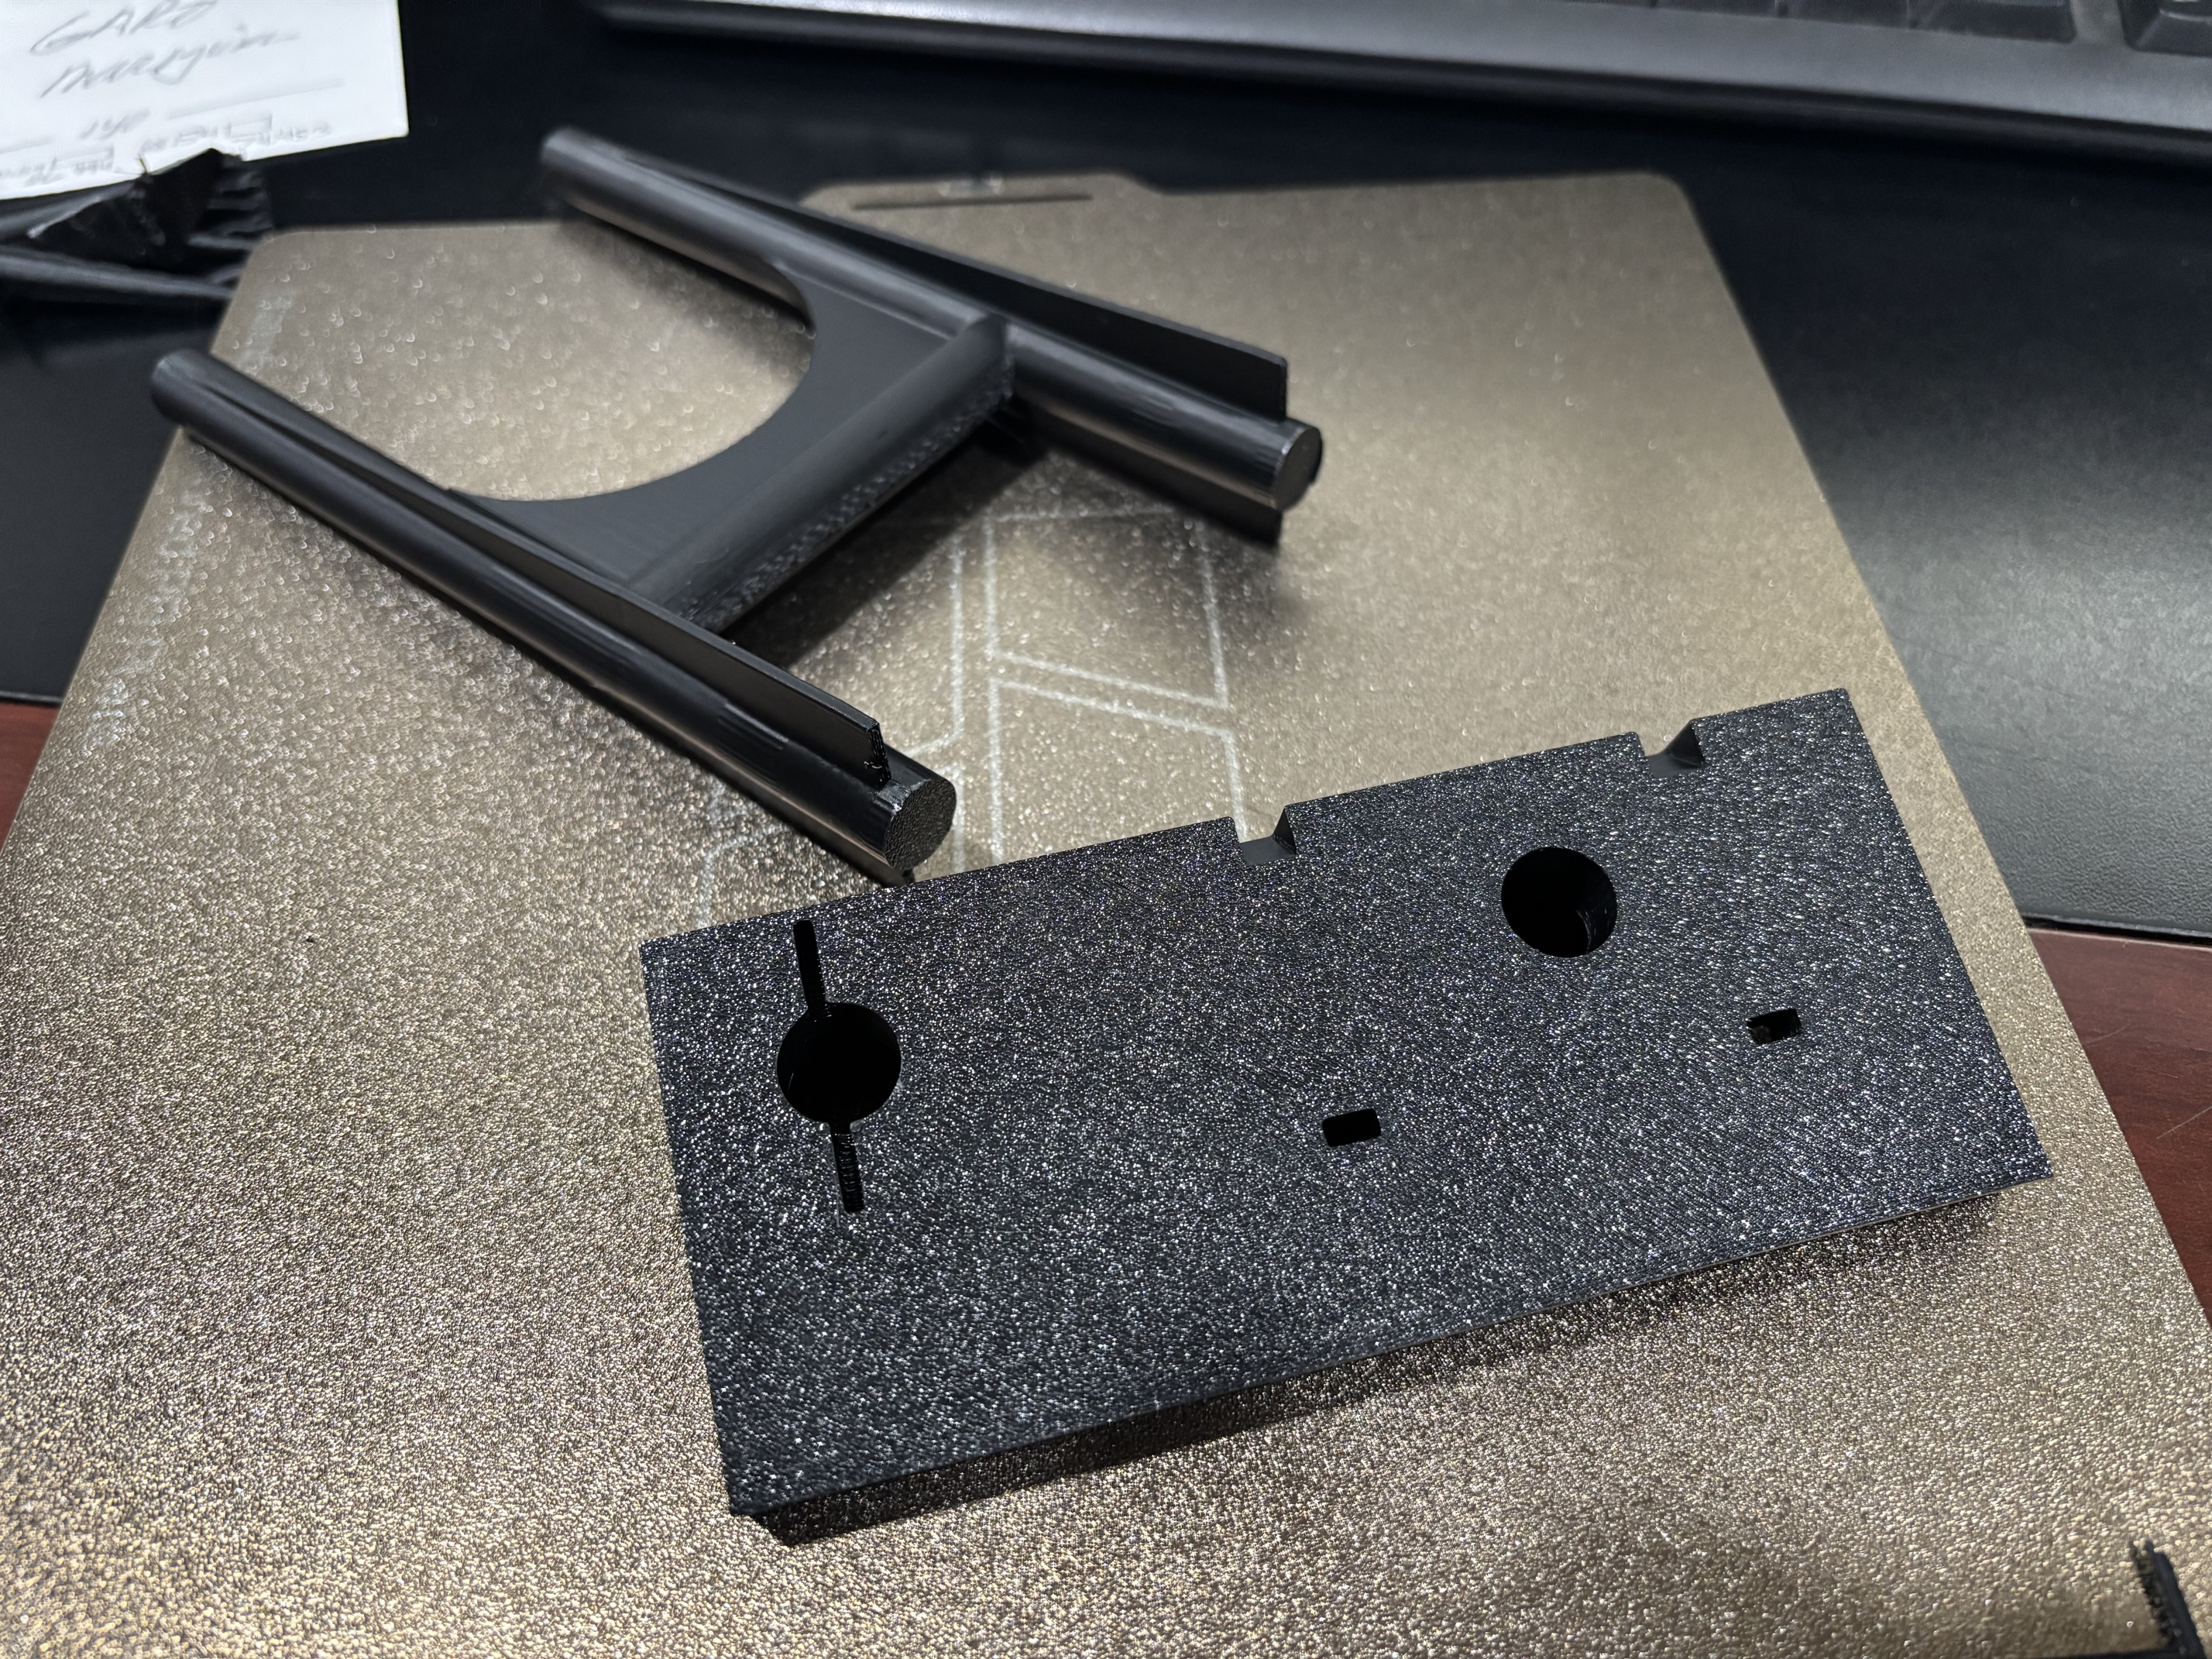
Essentially, the base is printed upside down and gets held onto the gantry with the two zip tie locations, and the goal posts slip into it from the top and it will likely be glued in
well, the design almost worked. Somehow, the slats for the second set of fins got eliminated somewhere in the conversion to an STL, but I’ll still make it work by snipping the fins back and then gluing everything in