I wonder if it it’s the start/finish and there’s deflection. Maybe a light finishing pass would make a difference. Though it adds time obviously.
Yes, that‘s most definitely it. I have had that happen as well, you don‘t see it, but the endmill „bounces“ back after having finished that cut, hard to see with the naked eye, but great to see on camera.
Must be deflection b/c it’s in every star and just on that ‘leg’ of the star. Wouldn’t have noticed w/o picture, which caused me to get my eye 2” from star, then it’s noticeable… doubt anyone’s gonna do that. LOL. But I want perfection, so I will try a finish pass once I figure out how to do that w/o screwing up the star. LOL
I used this bit to surface my (smaller) table and spoilboard on the LR3. It’s a big bit, but with careful tramming it did a great job.
FWIW I turned the router down to about “2” and used a feed rate of 15mm/s with a 50% stepover.
I can see the scallop but can’t feel much. I realized with the shallow passes that the imperfections were irrelevant for any workpiece over 6” or so. I don’t use double sided tape, but when I use the CA glue technique I was worried the low points wouldn’t hold, but they’re so miniscule the hold is fine (or I just use enough glue).
Perfect is the enemy of good.
Finishing passes will get you much closer to perfect, so mastering that will be great for you.
1 Like
In my opinion, finishing passes are a necessity. The load is so very light you get a lot less error stack up. I would not try to solve a tiny issue like this until you add in a finishing pass for sure. This could just be an aggressive plunge.
3 Likes
So I have yet to revisit creating a finishing pass on my stars, but it managed to finish off the front of my table
12 Likes
This is such a problem for me. Over thinking each step and every decision has eaten up more time than i care to think about. Sometimes just picking a path and marching on is the only way to get to the end. My lr3 never got finished because i couldn’t decide on a table set up before life got in the way.
I think you should con the phrase “analysis paralysis”
1 Like
That is one of the reasons I highly encourage the yellow brick road method. Just make it as suggested.
AFTER you have a working build then play and experiment any way you want…and you will have a CNC machine so all mods will be easier.
4 Likes
I’ll vouch for that 100% … .now LOL ![]()
3 Likes
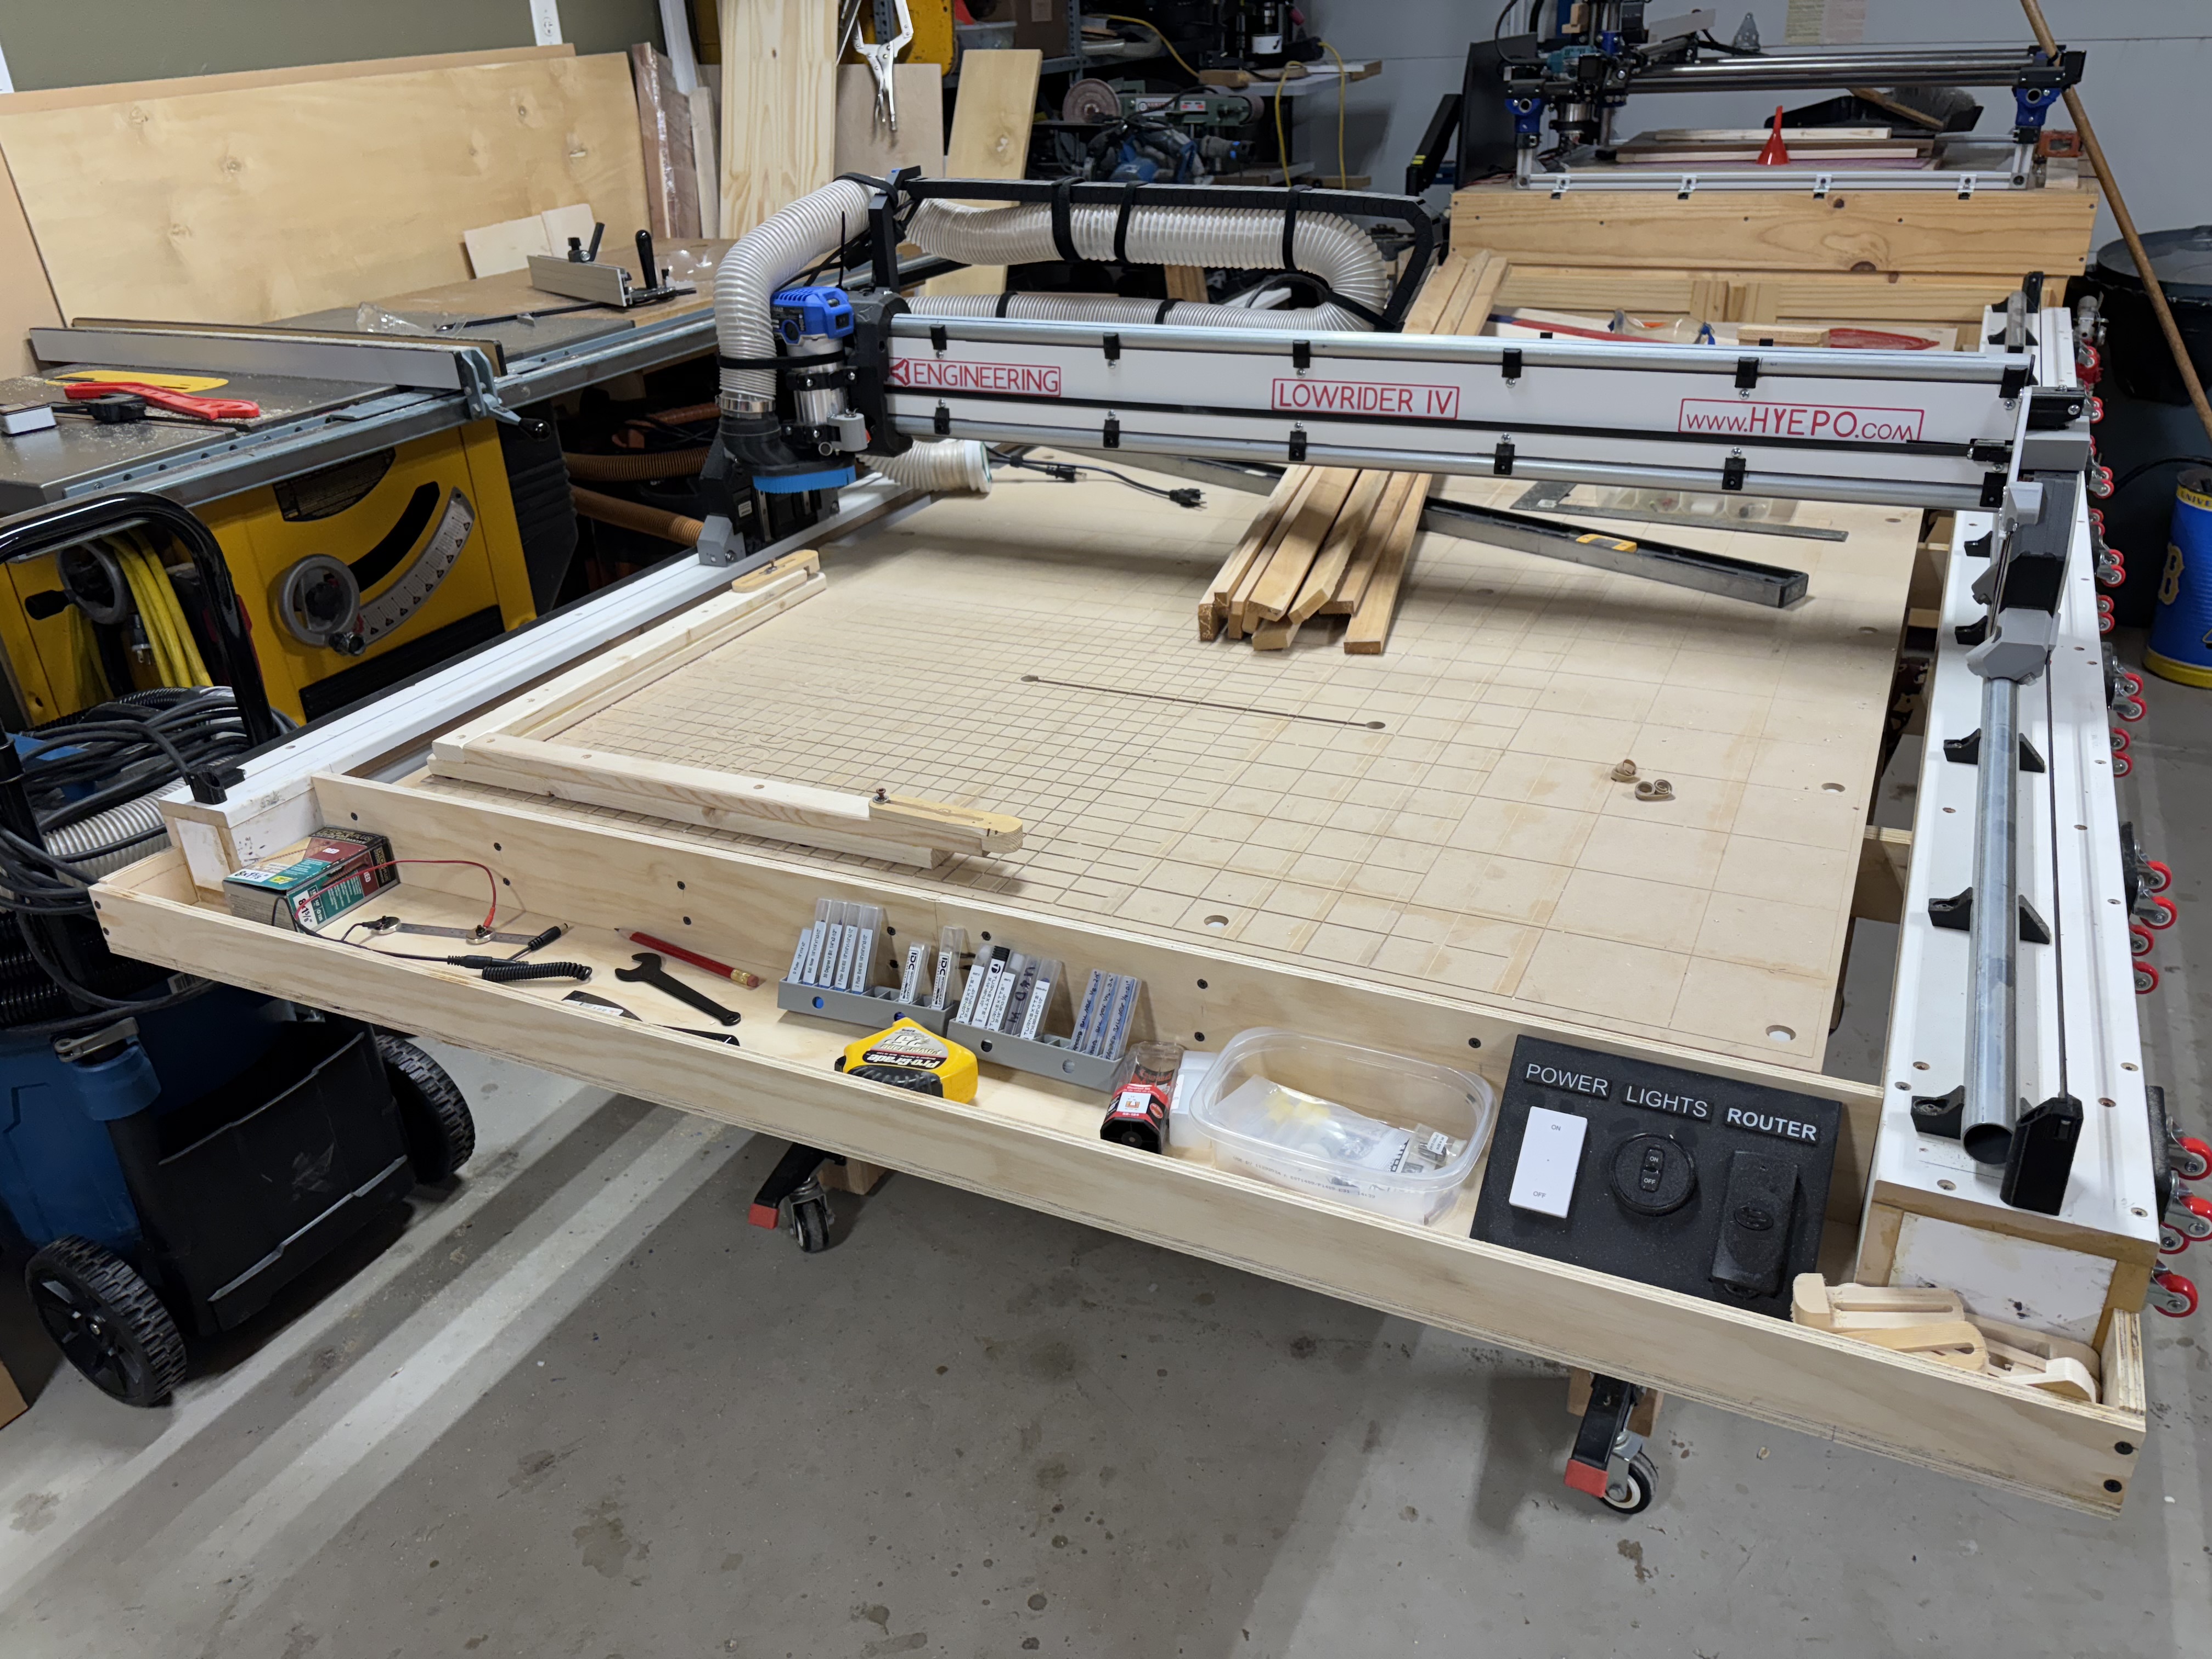
I haven’t posted much lately because I’ve been busy with real work (the market) and I have been having so much fun cutting parts with my LR4. Thank you all for helping me through the process. I cannot stress this enough, but anyone reading my build, just follow the instructions as they are, get the machine built, then worry about all the ‘extras’. I found they are so unnecessary LOL. However, I will say that @DougJoseph light strip under the gantry is probably the one “must have” for me… and my MIN and MAX resting blocks ![]()
now back to cutting
Happy Saturday Y’all
9 Likes
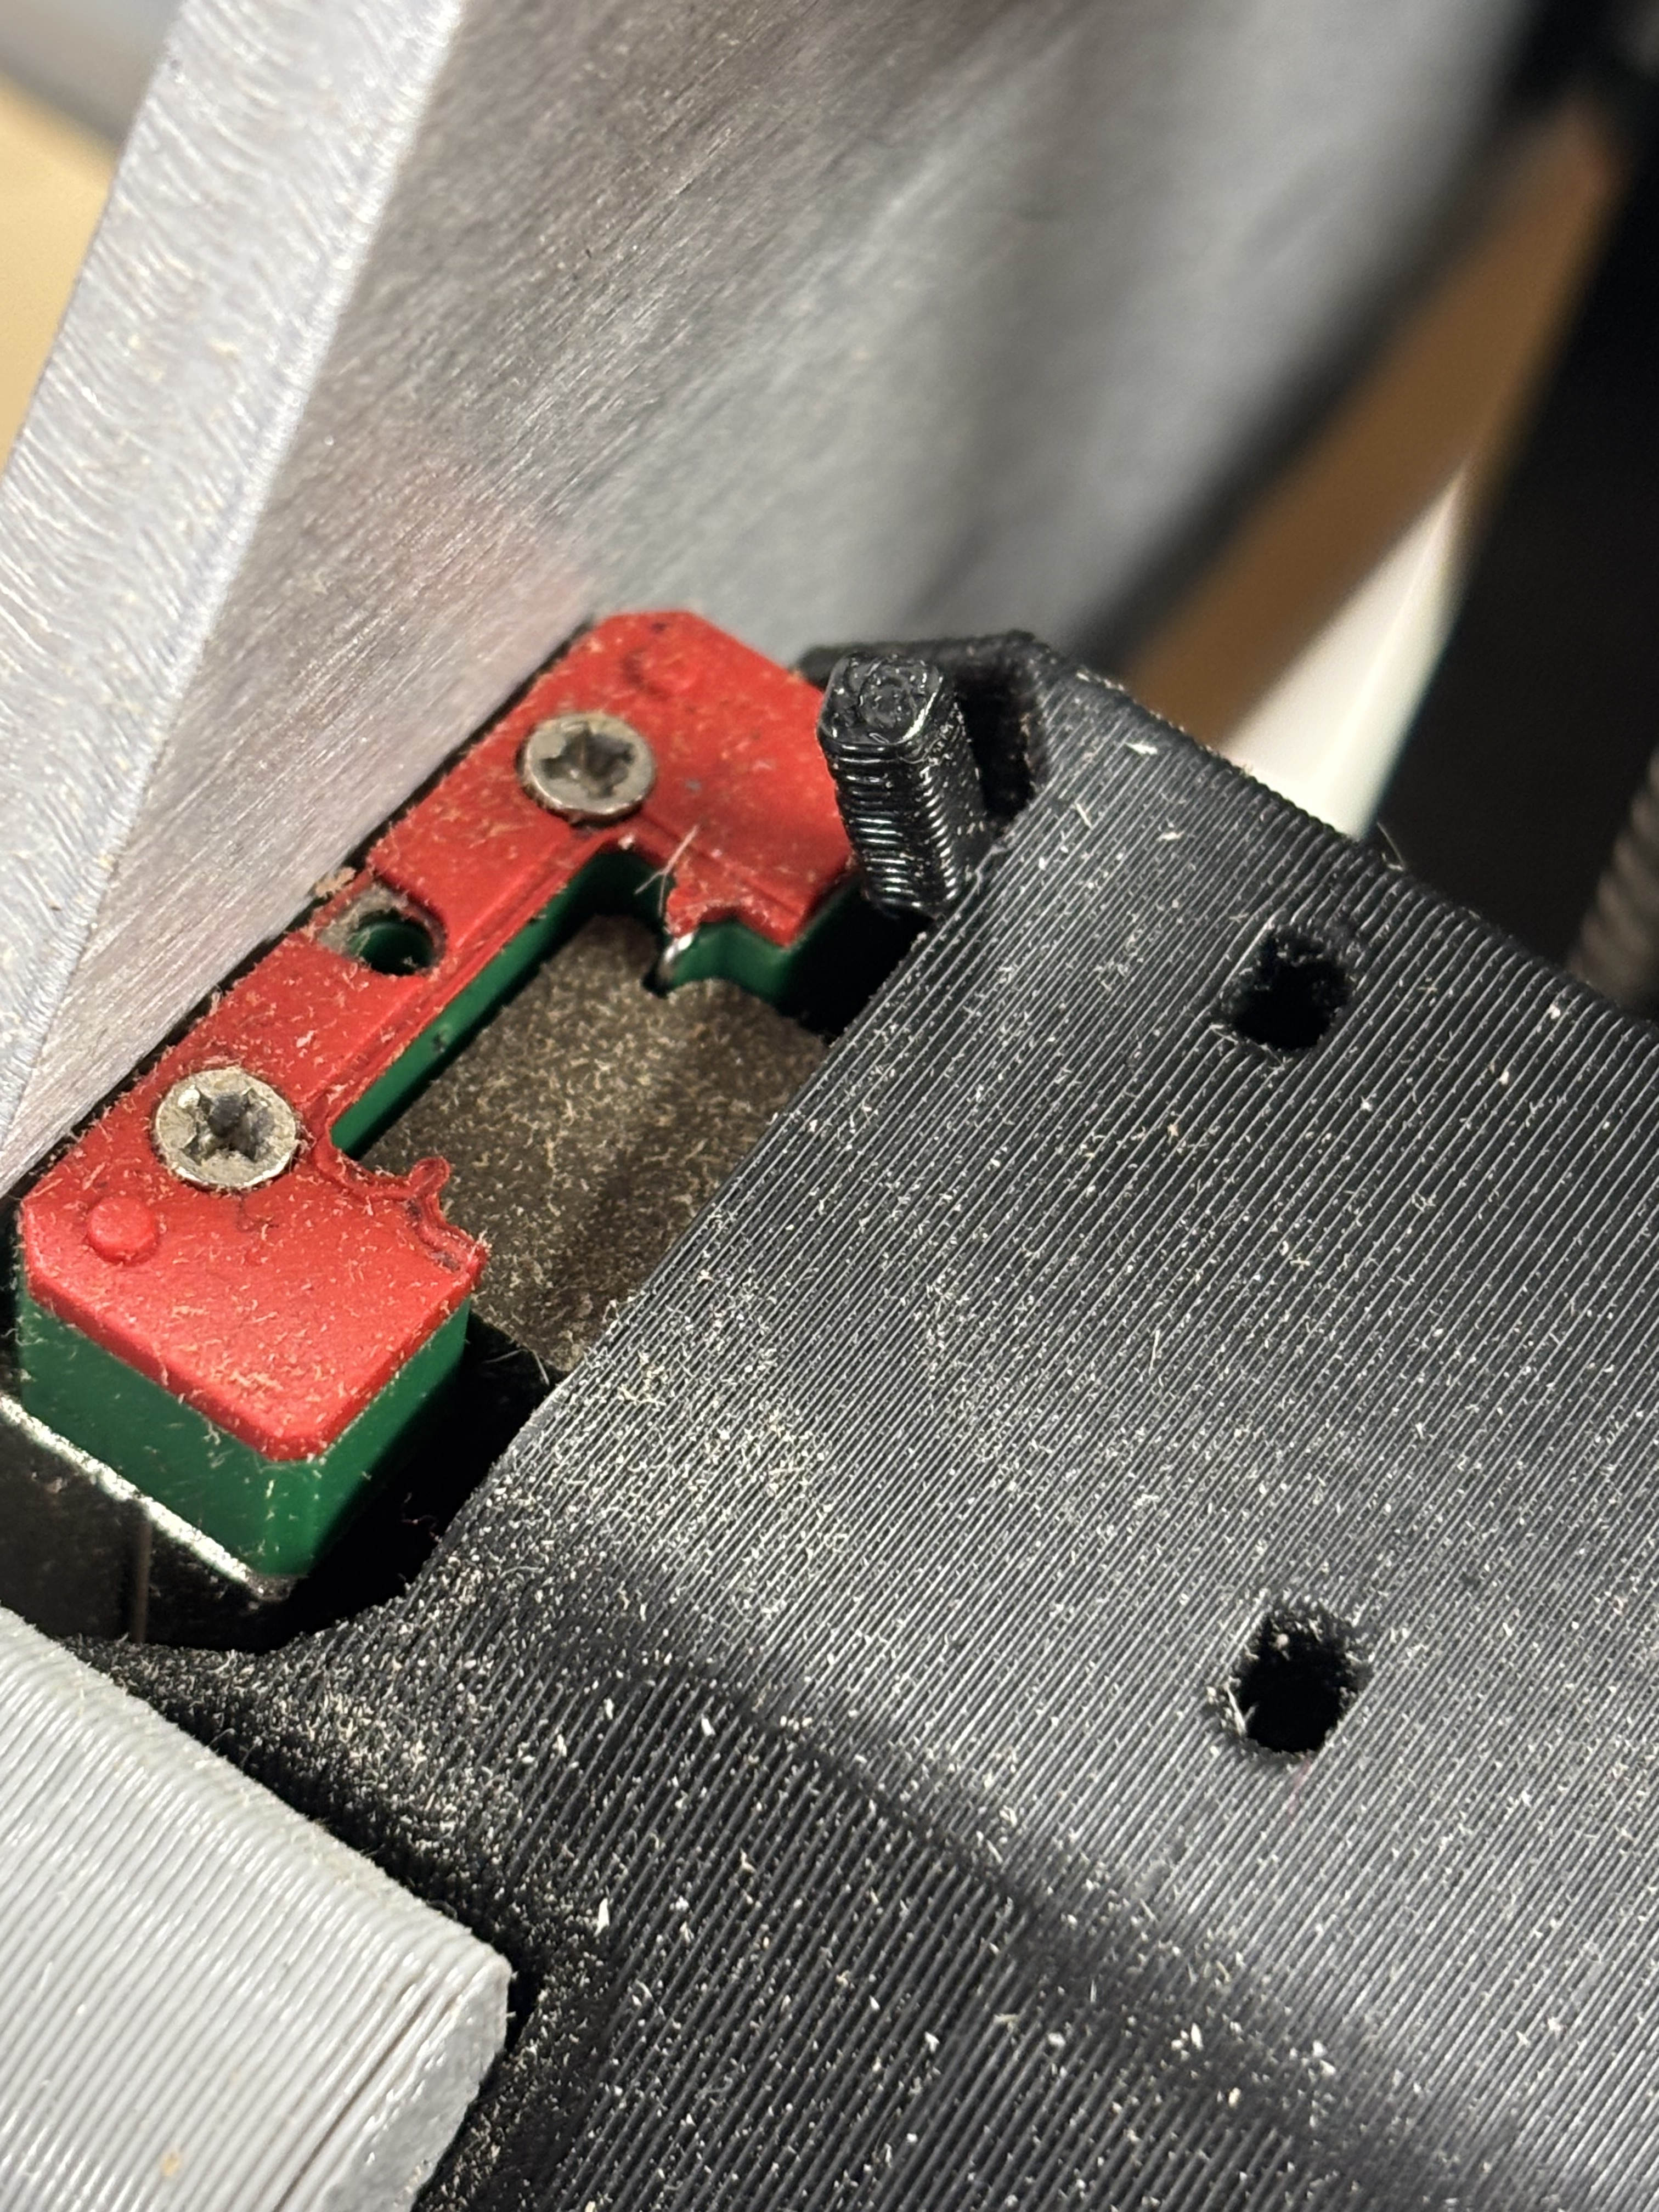
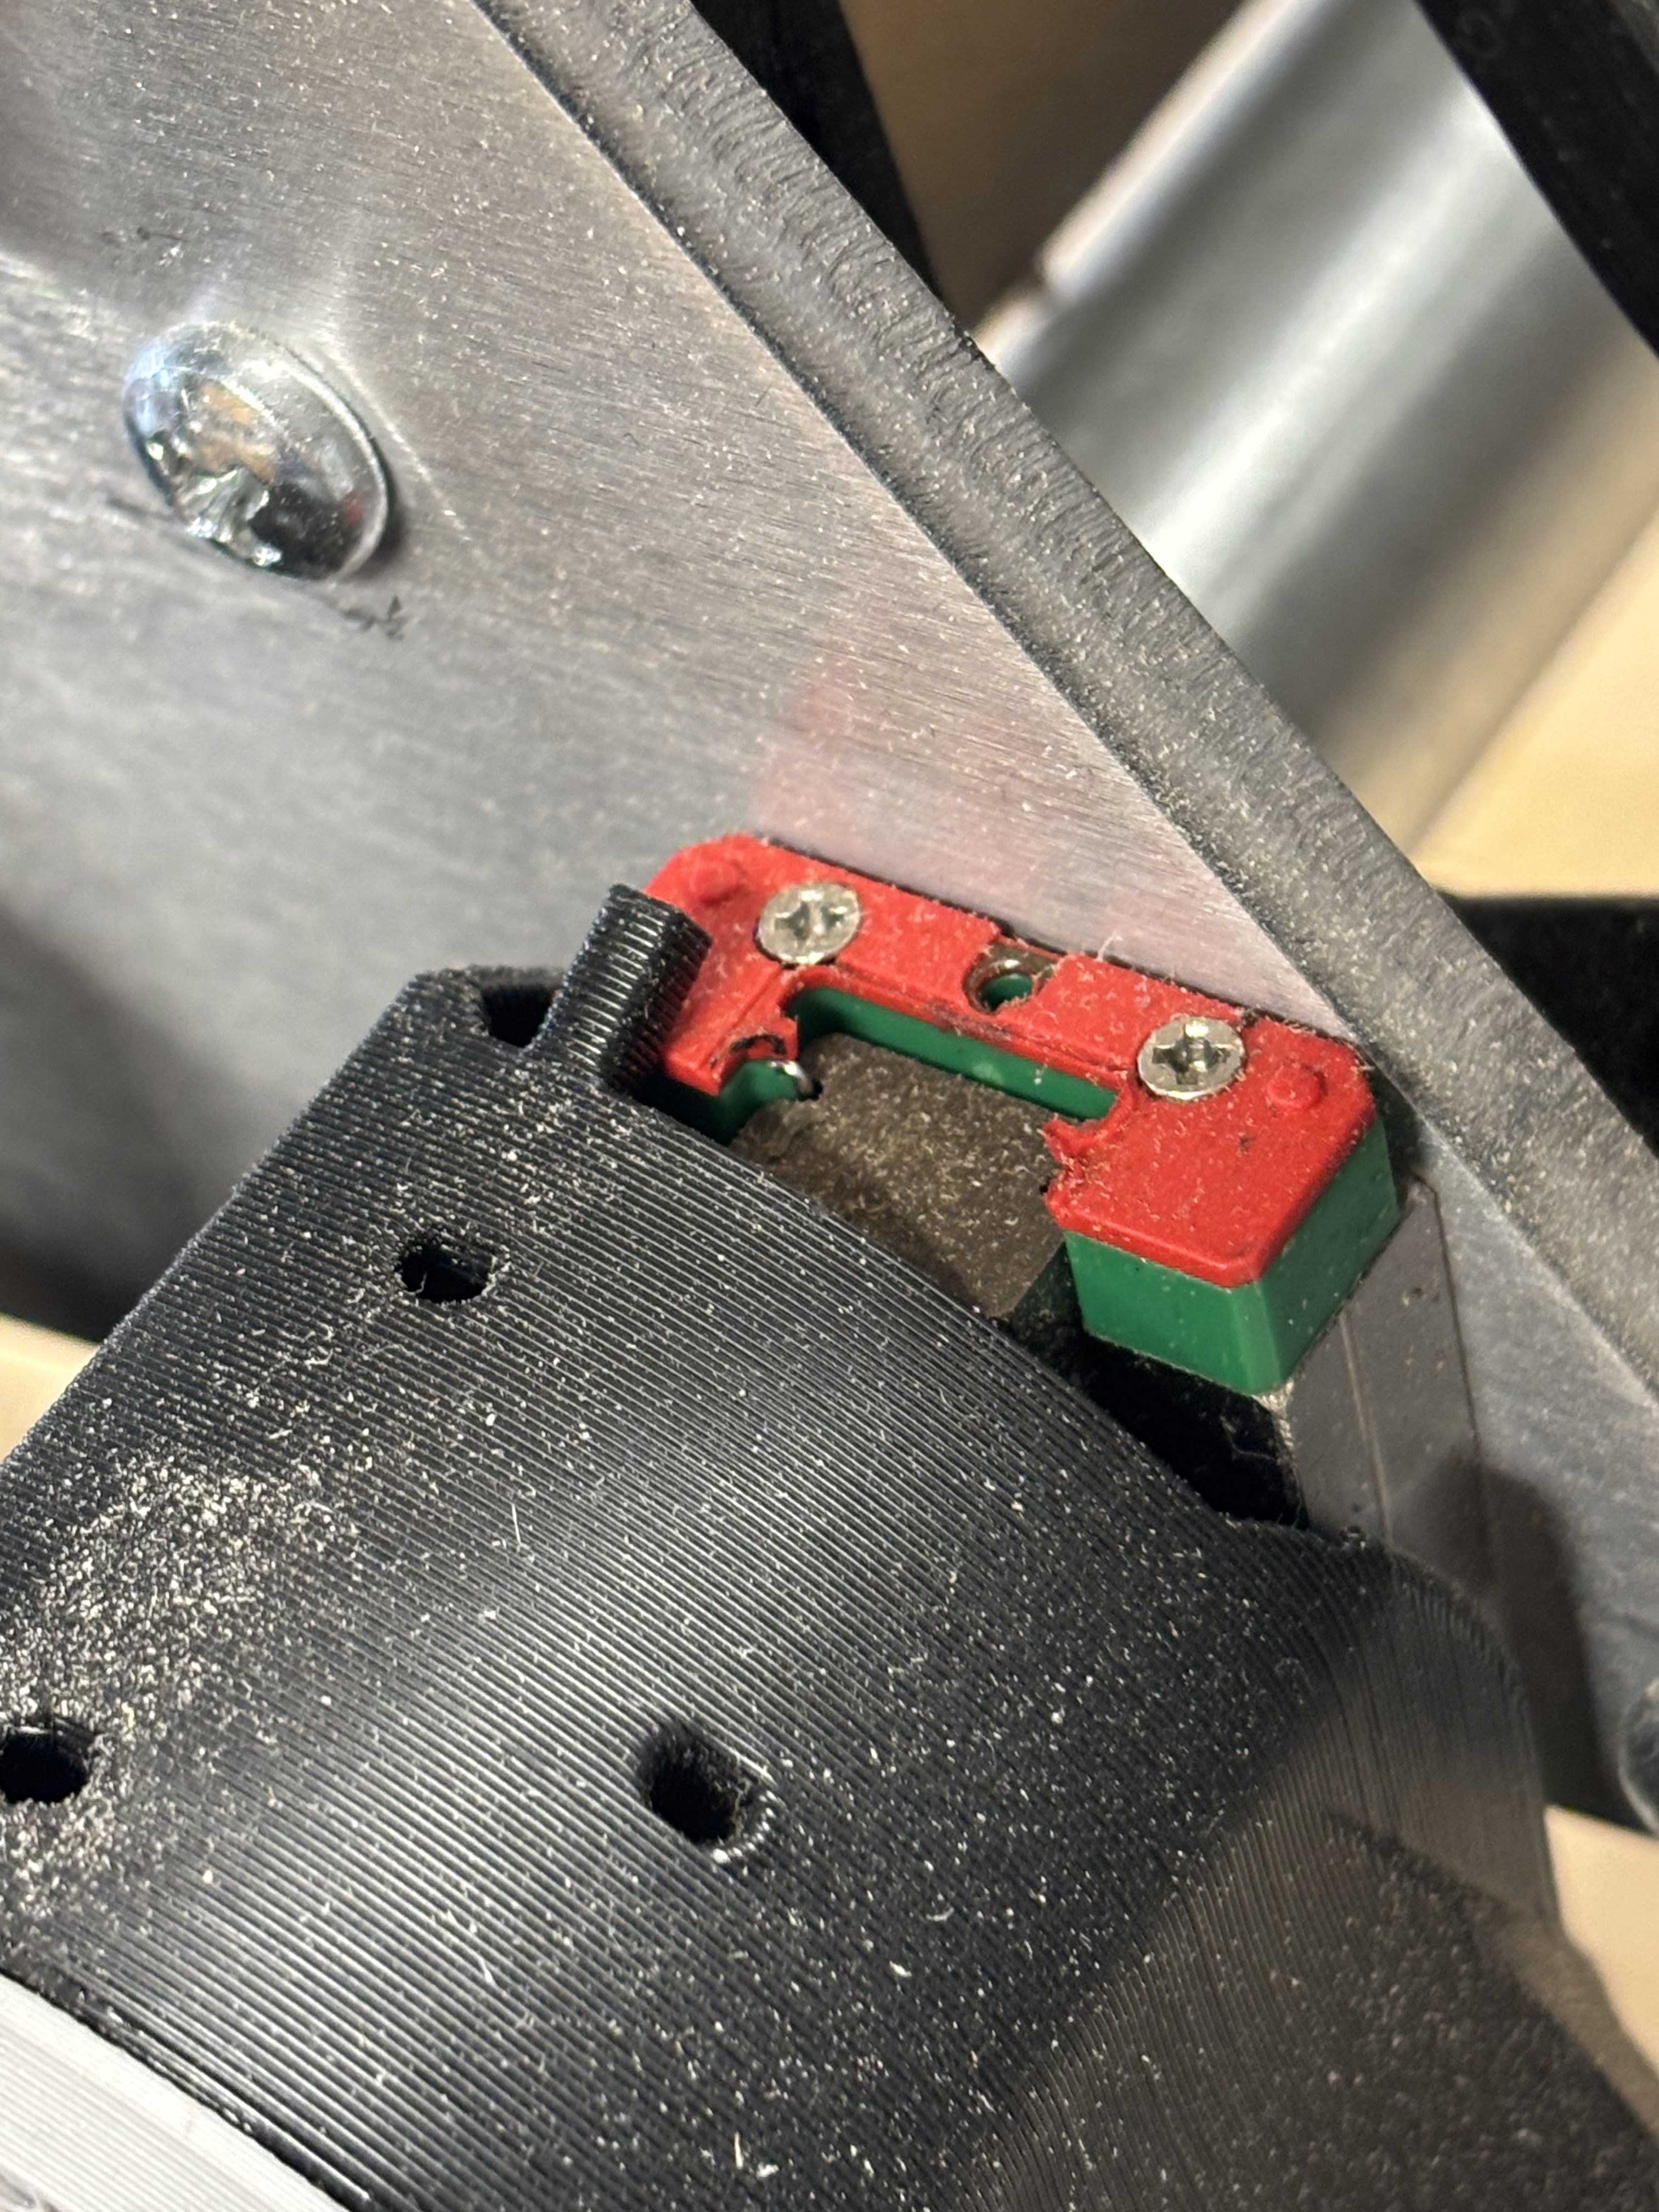
So whilst happily using my LR4 yesterday, i noticed the little stop tabs have broken off. I assume that’s because i have not properly set the max height travel on Z axis? Pondering if it would be best to just leave it as is being mindful of the “top” or maybe screw down some hard tabs (maybe aluminum) to hit against.
Seems to me that although it is broken, it functions just fine as it is so in this case ‘if it is broken, still dont fix it’
![]()
1 Like
Mine are broken as well, but if you overshoot the little balls will come out and you will have a shitty time. You can already see them in your picture. ![]()
2 Likes
Mine also broke off, and I have a memory of gluing them back on with CA glue. I think that’s still the status. It’s been a while so my memory is not sharp, and I’m not downstairs where the machine is.
2 Likes
You should be fine. If you set your z endstops they will hard stop it before it comes all the way out. Those are more for assembly.
4 Likes
WOW… what you can learn by reading the directions (again). So apparently I recently figured out that I can home Z upwards (whereas the primo MPCNC always drove the bit into the spoil board on homing). So that is great for me since I use the Z Blocks I made (3D printed) to keep router up when powered down. LOL. All this time I never knew because I never tried. Using the Z home button for fear it would require the probe, etc. crazy what you can do when you read the directions. ![]()
5 Likes
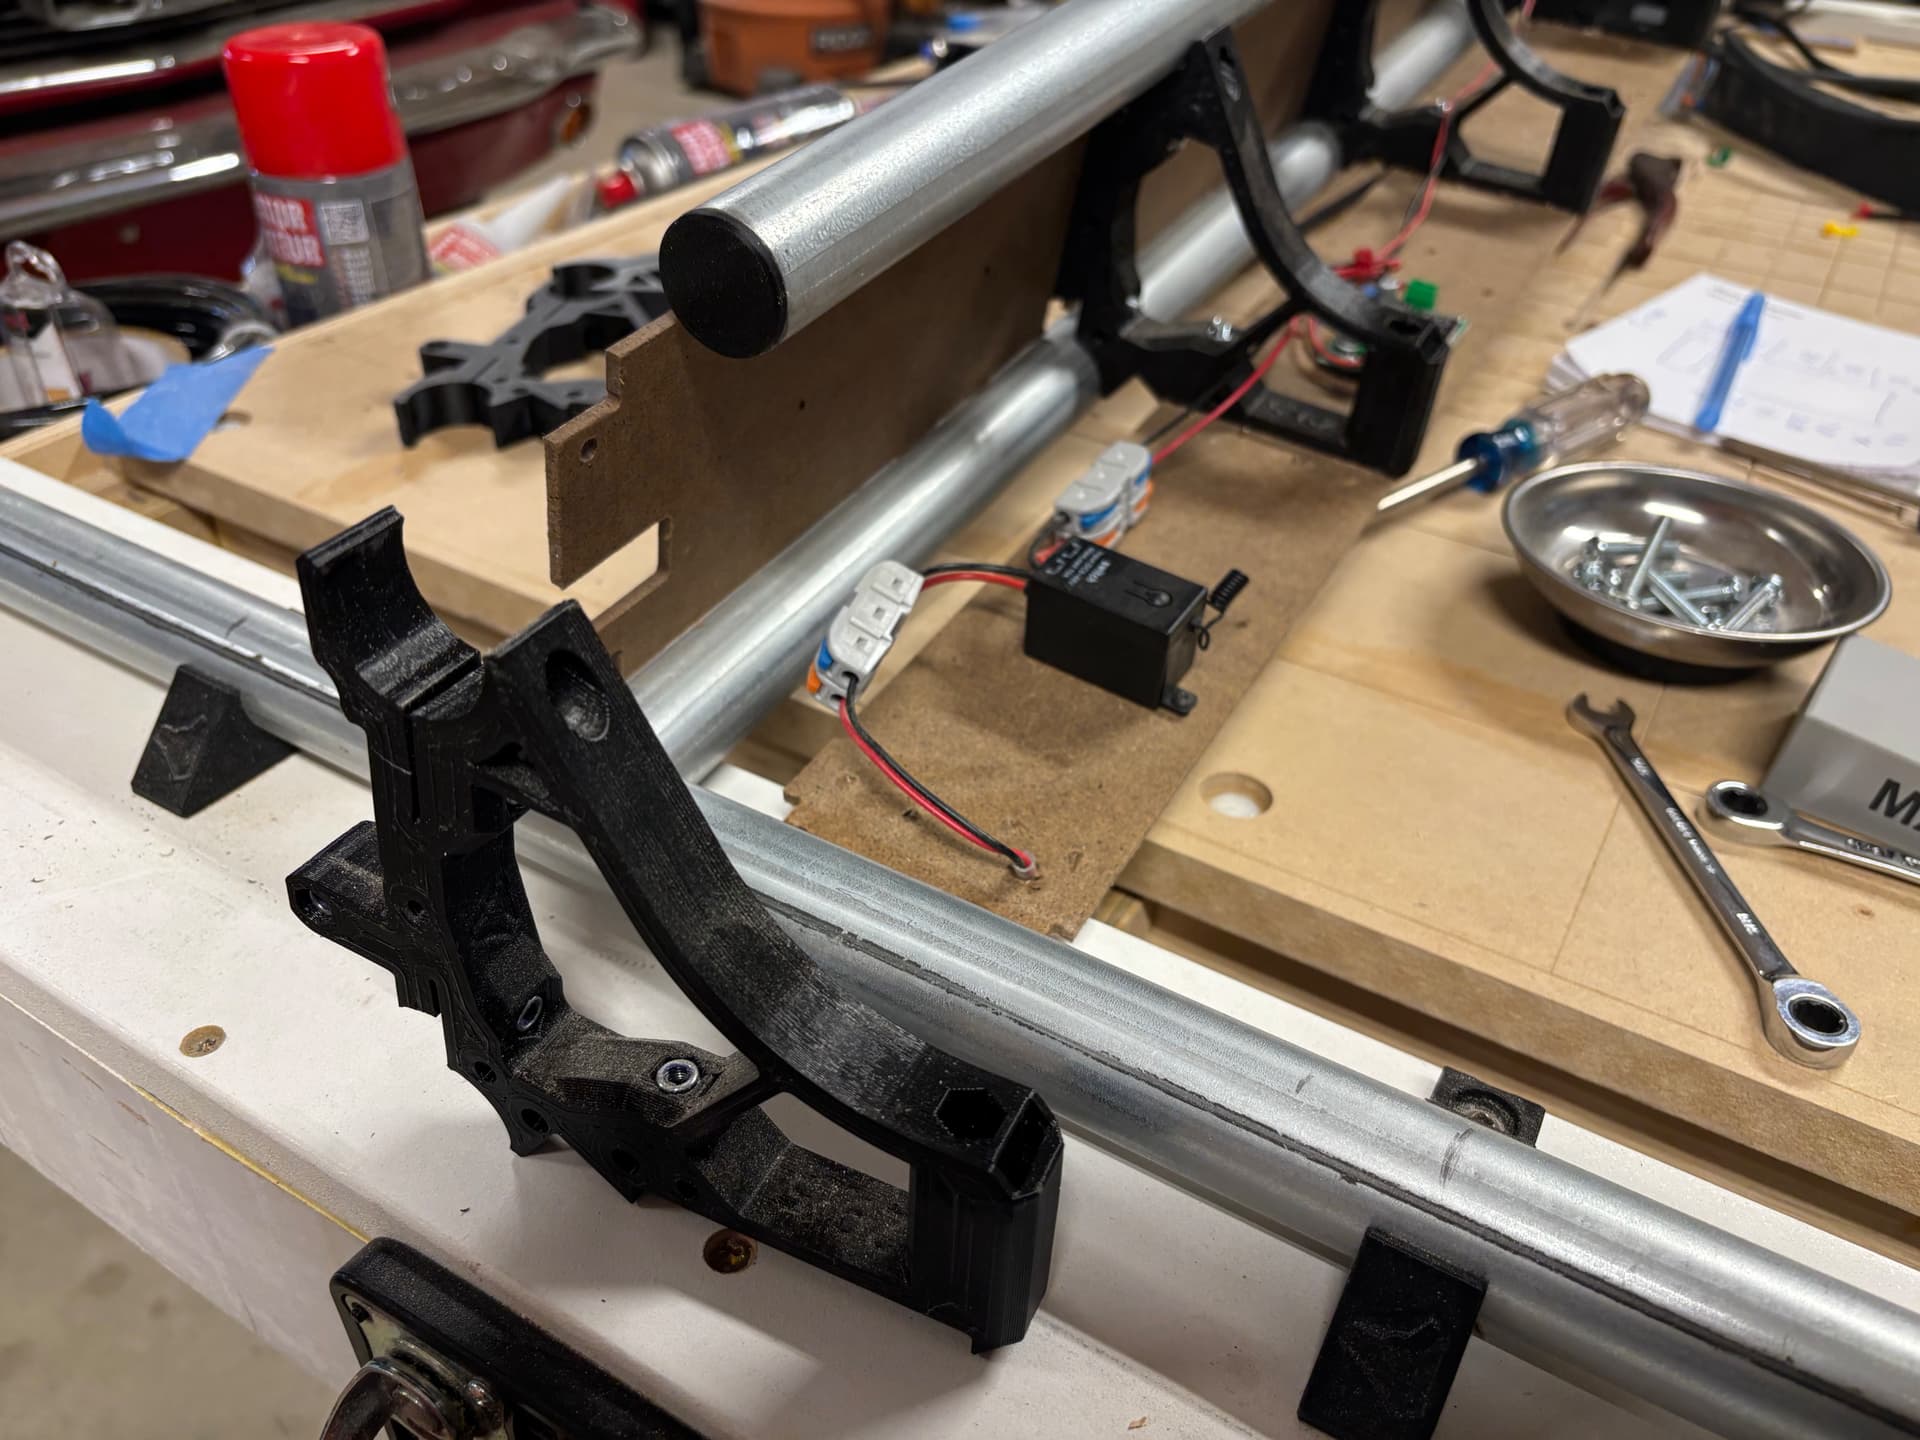
I likely over-tightened the screws on the beam braces causing them to break. Printing new braces and will cut new strut plates since I think they might have been a little off having cut them out in sections on the Primo
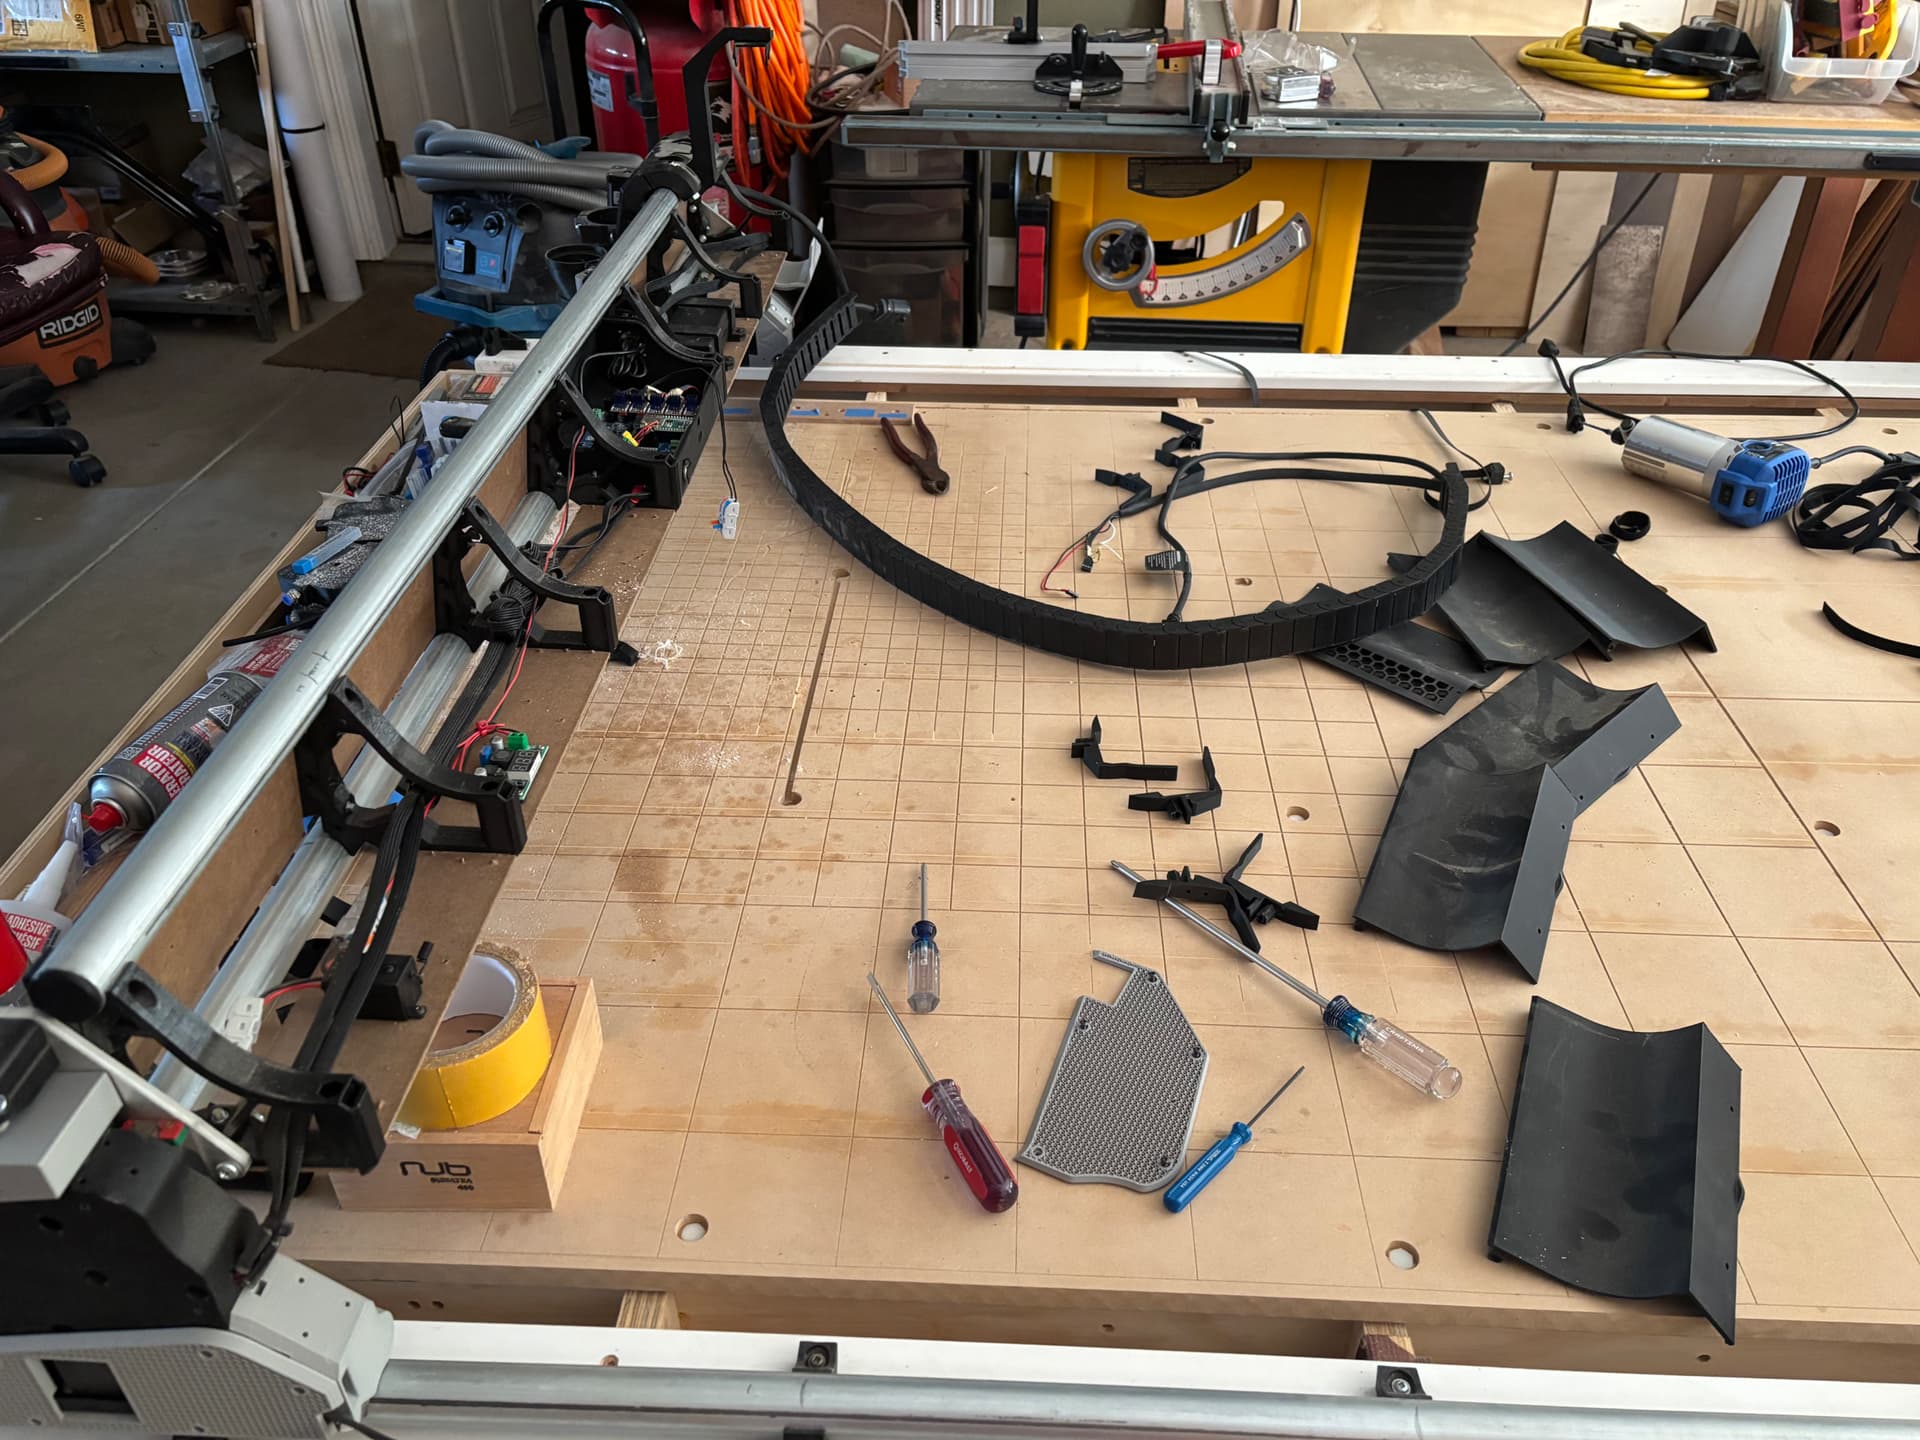
6 Likes
I still have four broken braces but replaced the max side and ran it to finish large project (finally had a reason to use the entire 8’ table). I think I might have only used 2 loops but made sure the min side brace was 60% with 3 loops… also left layer height at 1.6 or whatever was standard on bambu x1c with 60% rec infill. (Obvious I know not what I am doing. ![]() ). But the tree halves cut fine and will be cutting new strut plates just to make sure they are kosher.
). But the tree halves cut fine and will be cutting new strut plates just to make sure they are kosher.
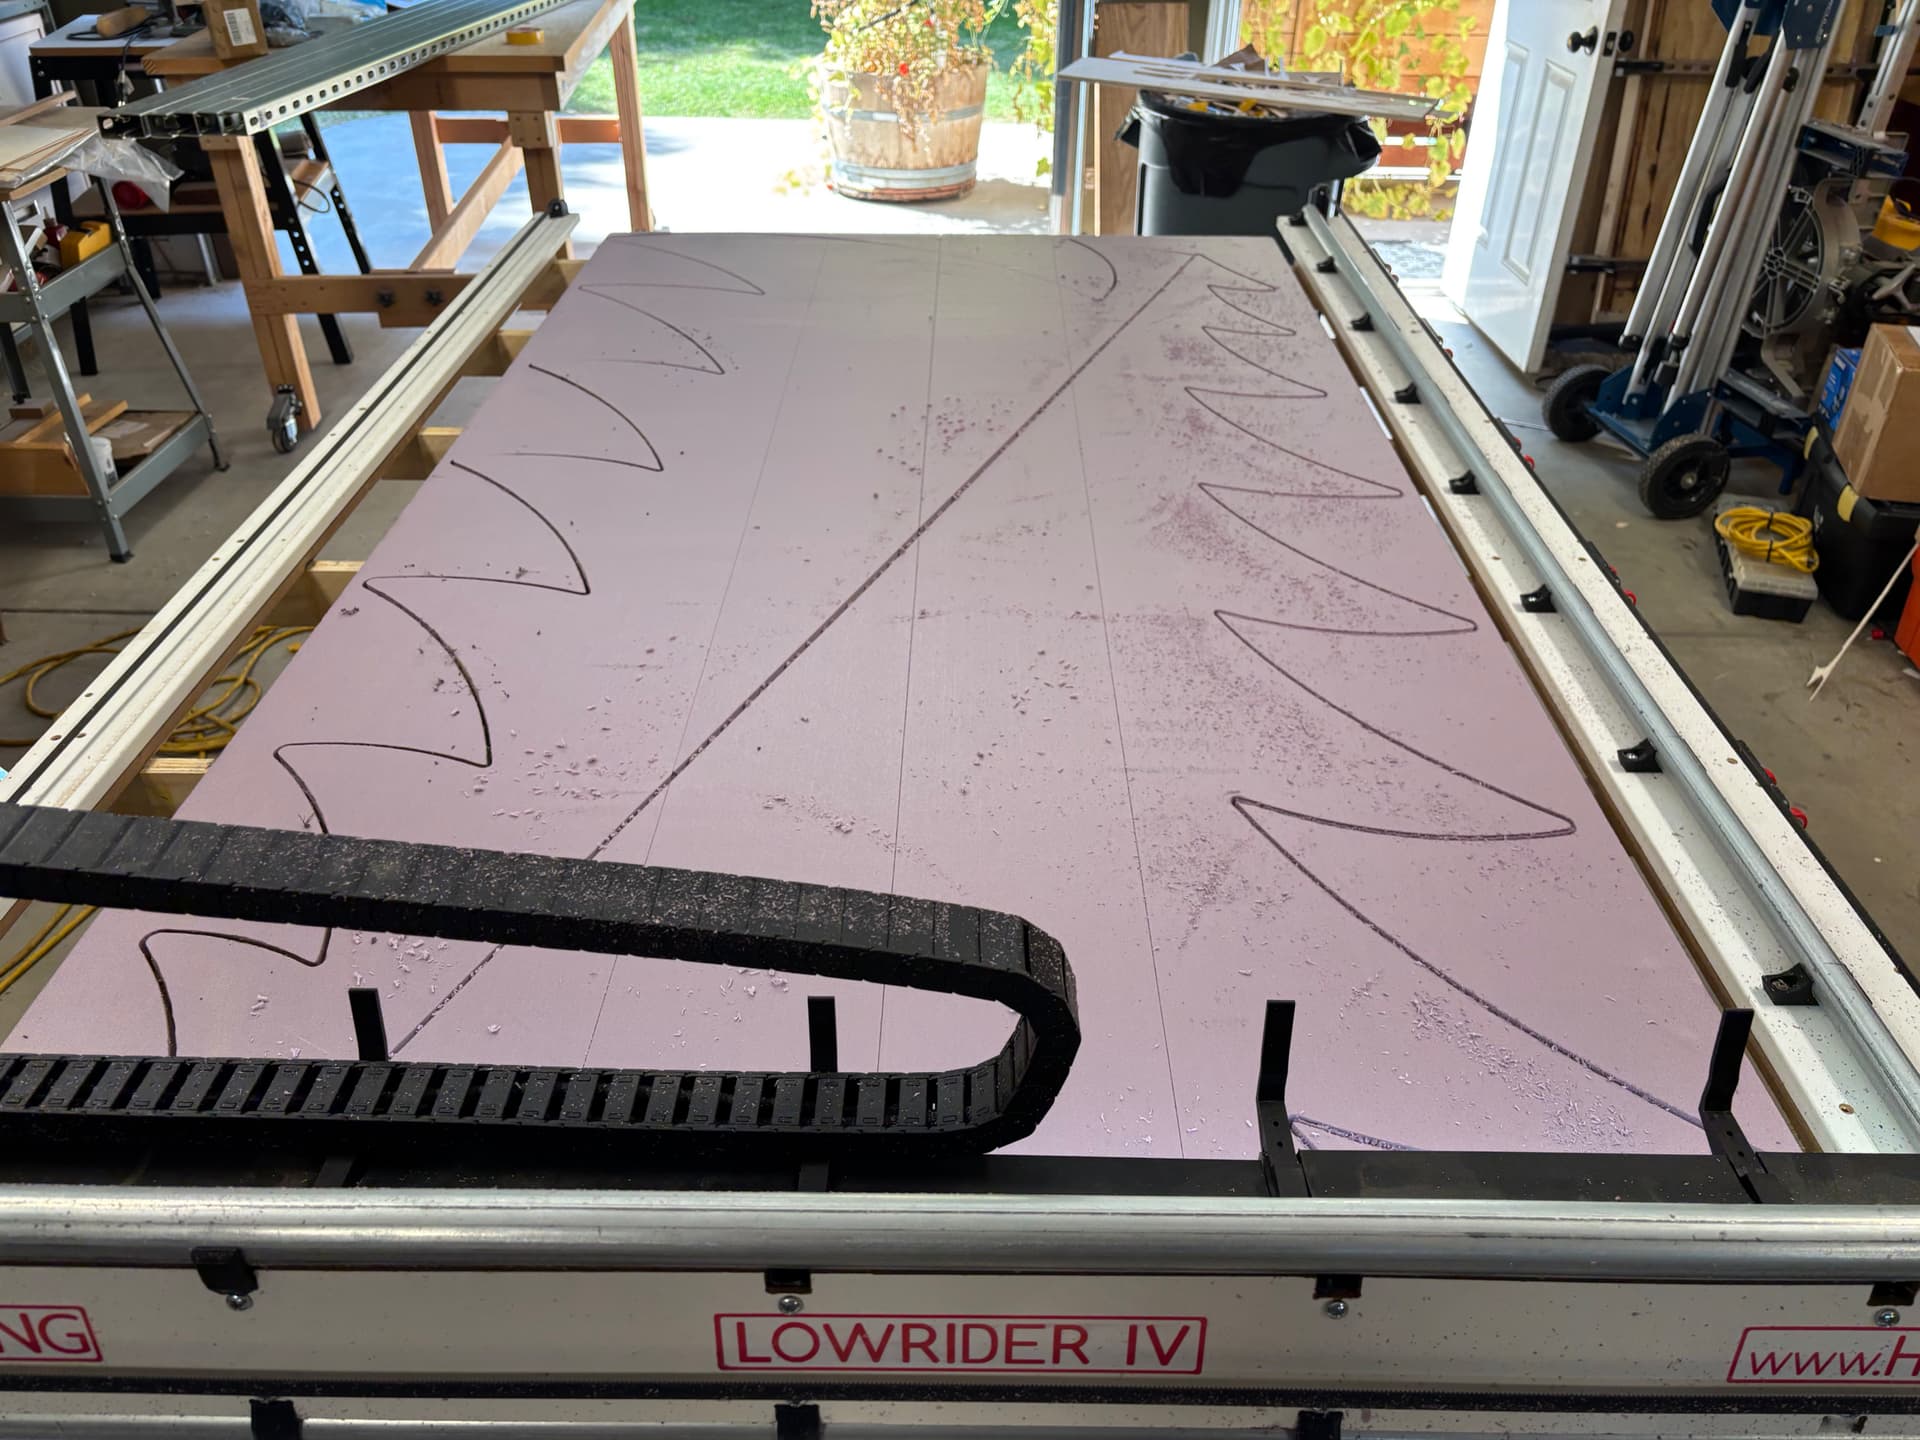
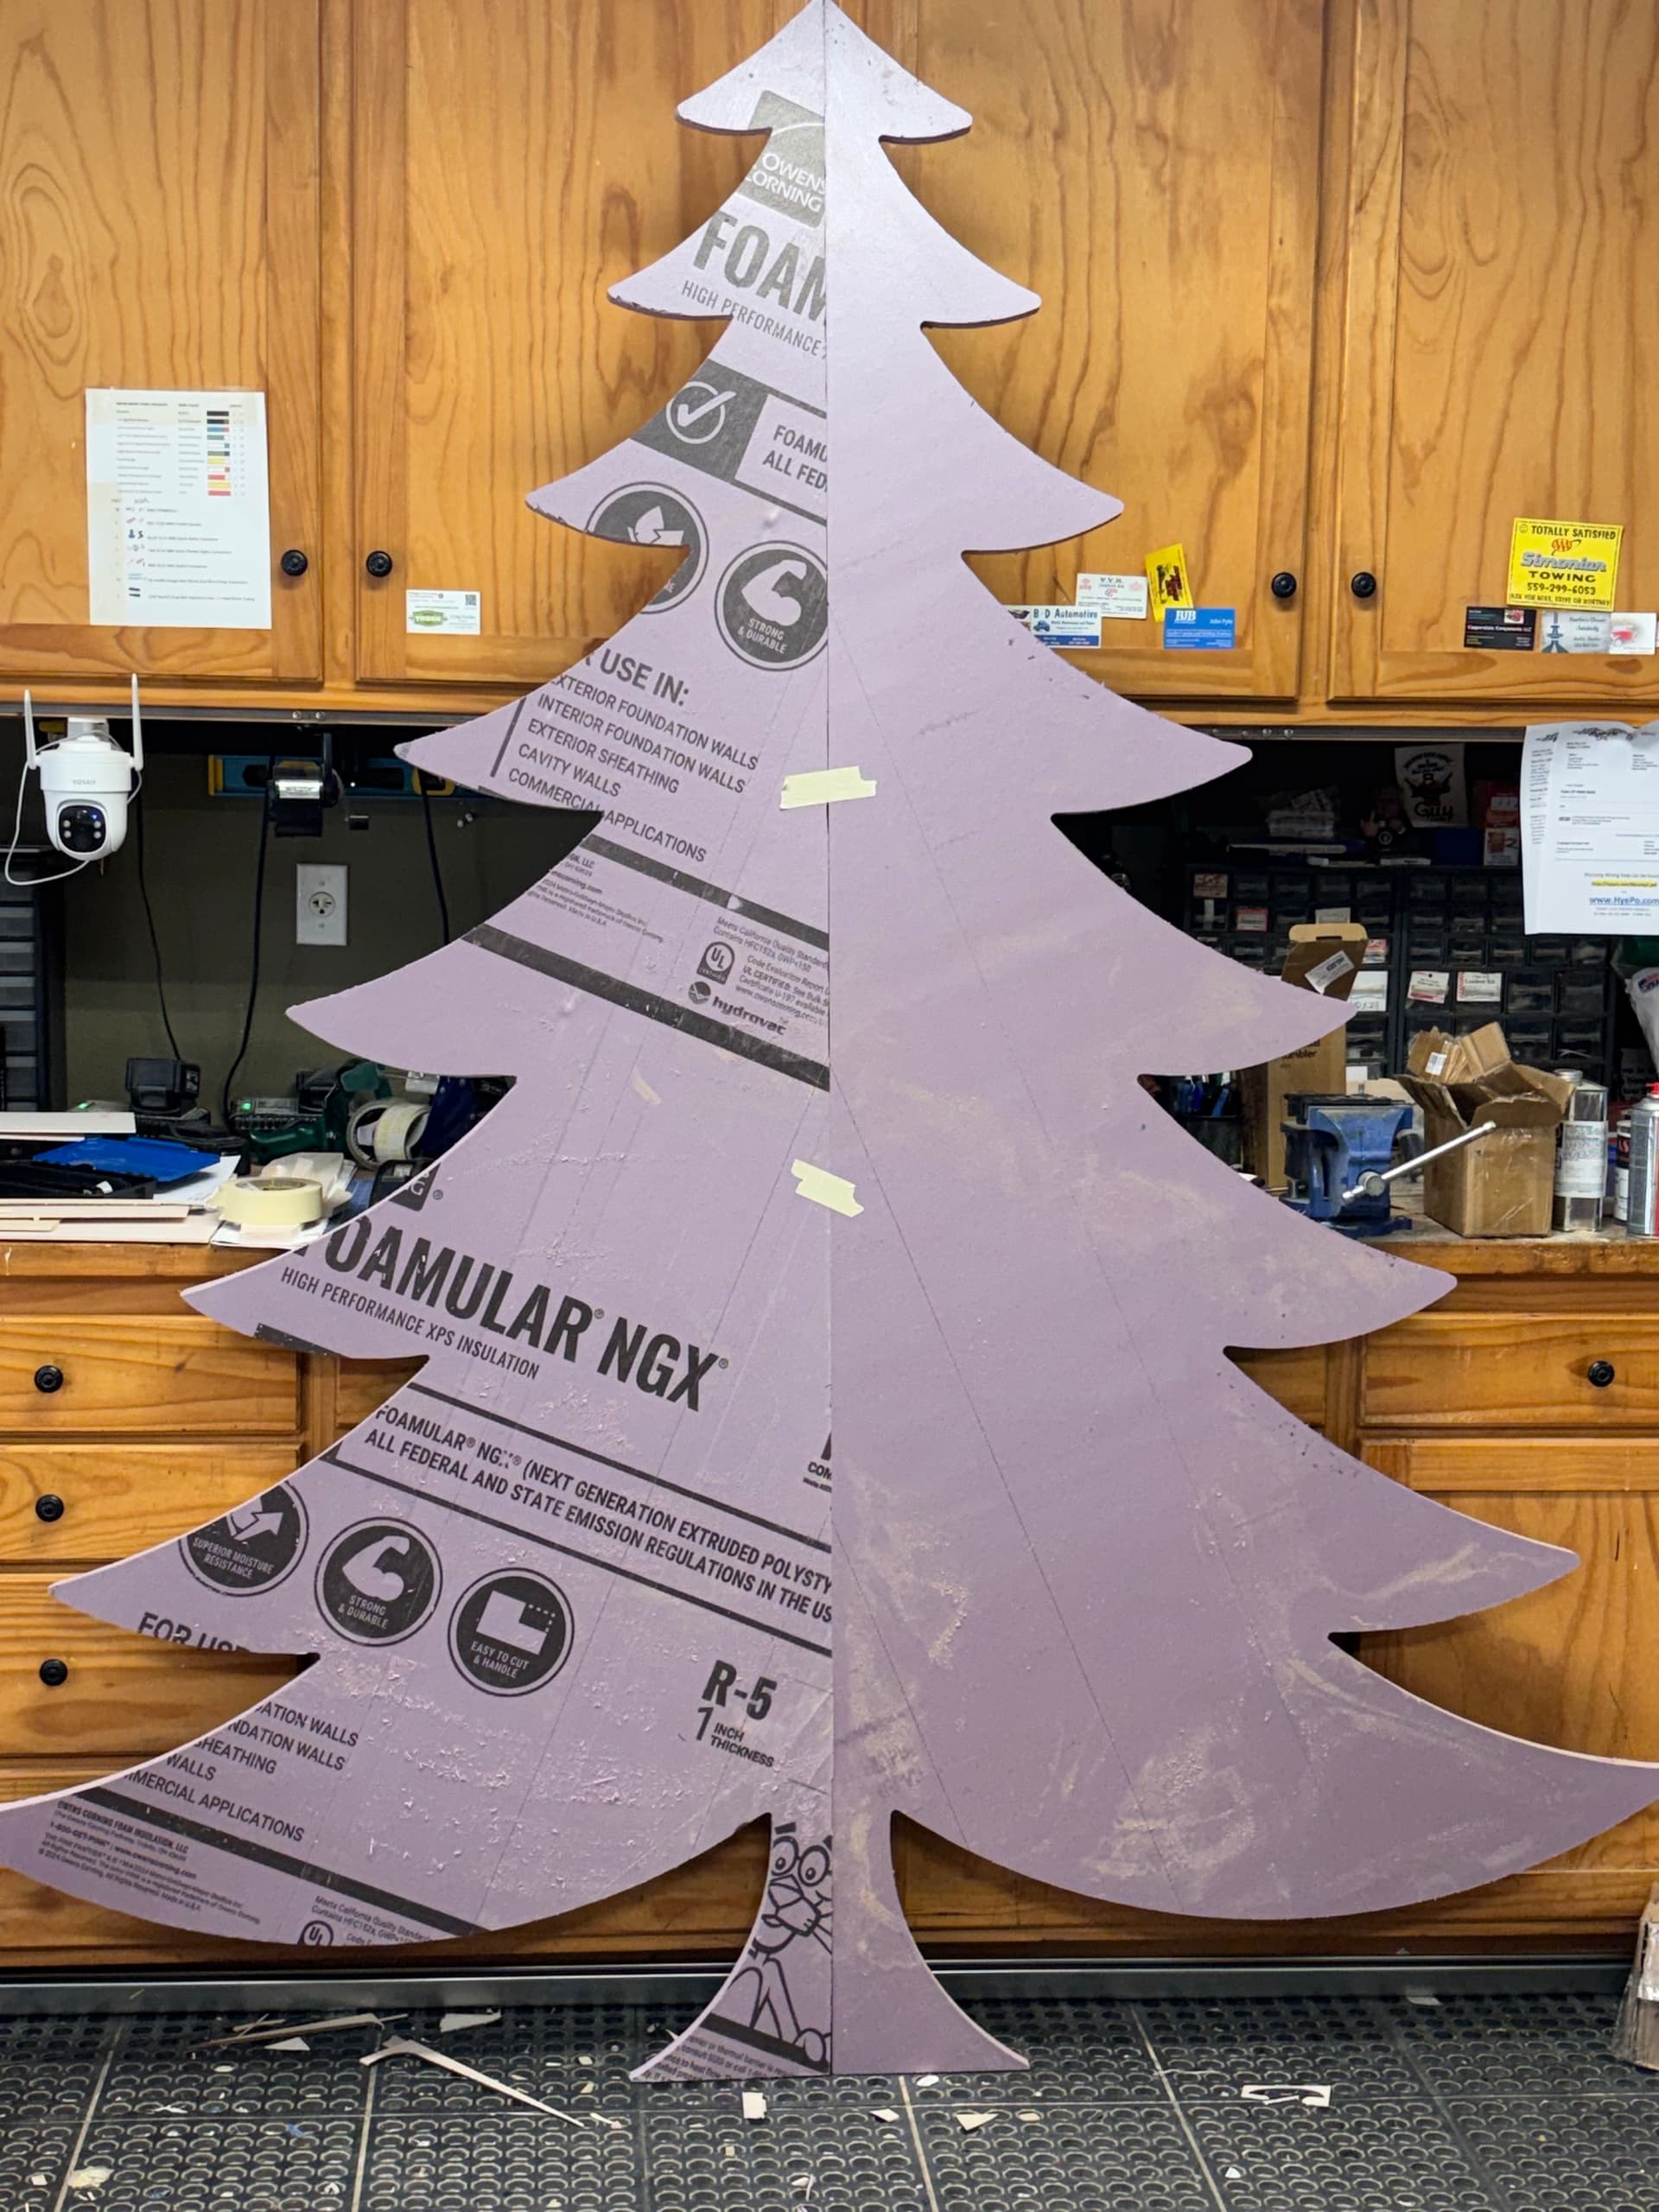
8’ x 5’ Christmas tree prop for fundraiser in December…. Only 18 more to make. Plus two reindeer. Then I will make the smaller strut channel table for everyday use. :)![]()
7 Likes
That tree looks awesome! What thickness foam is that?
1 Like
Those are some expensive Christmas trees! ![]()
1"
1 Like