That explanation makes perfect sense actually.
Thanks guys.
That explanation makes perfect sense actually.
Thanks guys.
Okay, and now I need some help. Let me update you. Yesterday my jackpot board finally arrived. So I wired it in this morning, did the initial squaring, and then cut out my permanent strut plates once I was confident everything seemed fine.
Then I installed those strut plates, which turned out to be a really complicated task for me that required dissasembling the entire gantry - I got worried the board would get damaged as I dealt with all this, so I unplugged all the cables from it and put it safely aside.
After the struts were finally installed, I reinstalled the controller box, and added the board. I wired it exactly as before, taking care to run cables under the board rather than over. Then I switched it on, and this was where I was expecting to do much the same set of tests as before.
After reversing two cables the movement all worked as expected, so that’s good.
But now homing doesn’t work for any axis. If I try to home Z it runs itself up until it hits the max upward travel and just grinds forever, apparently ignore the limit switches.
If i try to home X or Y it makes a tiny movement in the opposite direction - then immediately fails with this error in the console:
ALARM:8 Homing fail. Pull off travel failed to clear limit switch. Try increasing pull-off setting or check wiring.
Note: this happens mid-travel with no switches actually triggered that should require a pull-off.
Here’s what I already tried: looking at the board - all the limit switches except the Z-probe shows their LED’s lit up. This lines up with them being NC and I’m pretty sure I saw the same this morning.
If I manually press one, the light goes off, this is true for all of them (though the Z-probe does NOT come on when I touch it together like it used to, but I will worry about that after the more important homing works).
As far as I can tell, the one that goes off when I hit a switch is the one that the wiring guide says should be mapped to that port.
I have no idea what could be causing this. Can anybody help ? Just let me know if you need any additional information (photos, logs, config files etc.)
Use the $Limits command, tell us what it is reporting.
$limits
Send ! to exit
Homing Axes : xyz
Limit Axes :
PosLimitPins NegLimitPins Probe
: xy P
: xy P
: xy P
: xy P
: xy P
Seems to just do that forever
You appear to have multiple limit switches that aren’t working.
Get them working and you should be back to normal.
I guess unplug them all and slow restore one axis at a time
Found the issue. Somehow when replugging the limit switches I got them all reversed. So X was plugged into the probe port.
Once I moved all to where they belong, it homed just fine.
Its my day to do parenting so no hobbies today, but with a bit of luck, crown test tomorrow. Though I do think I should redo the whole squaring after all this first.
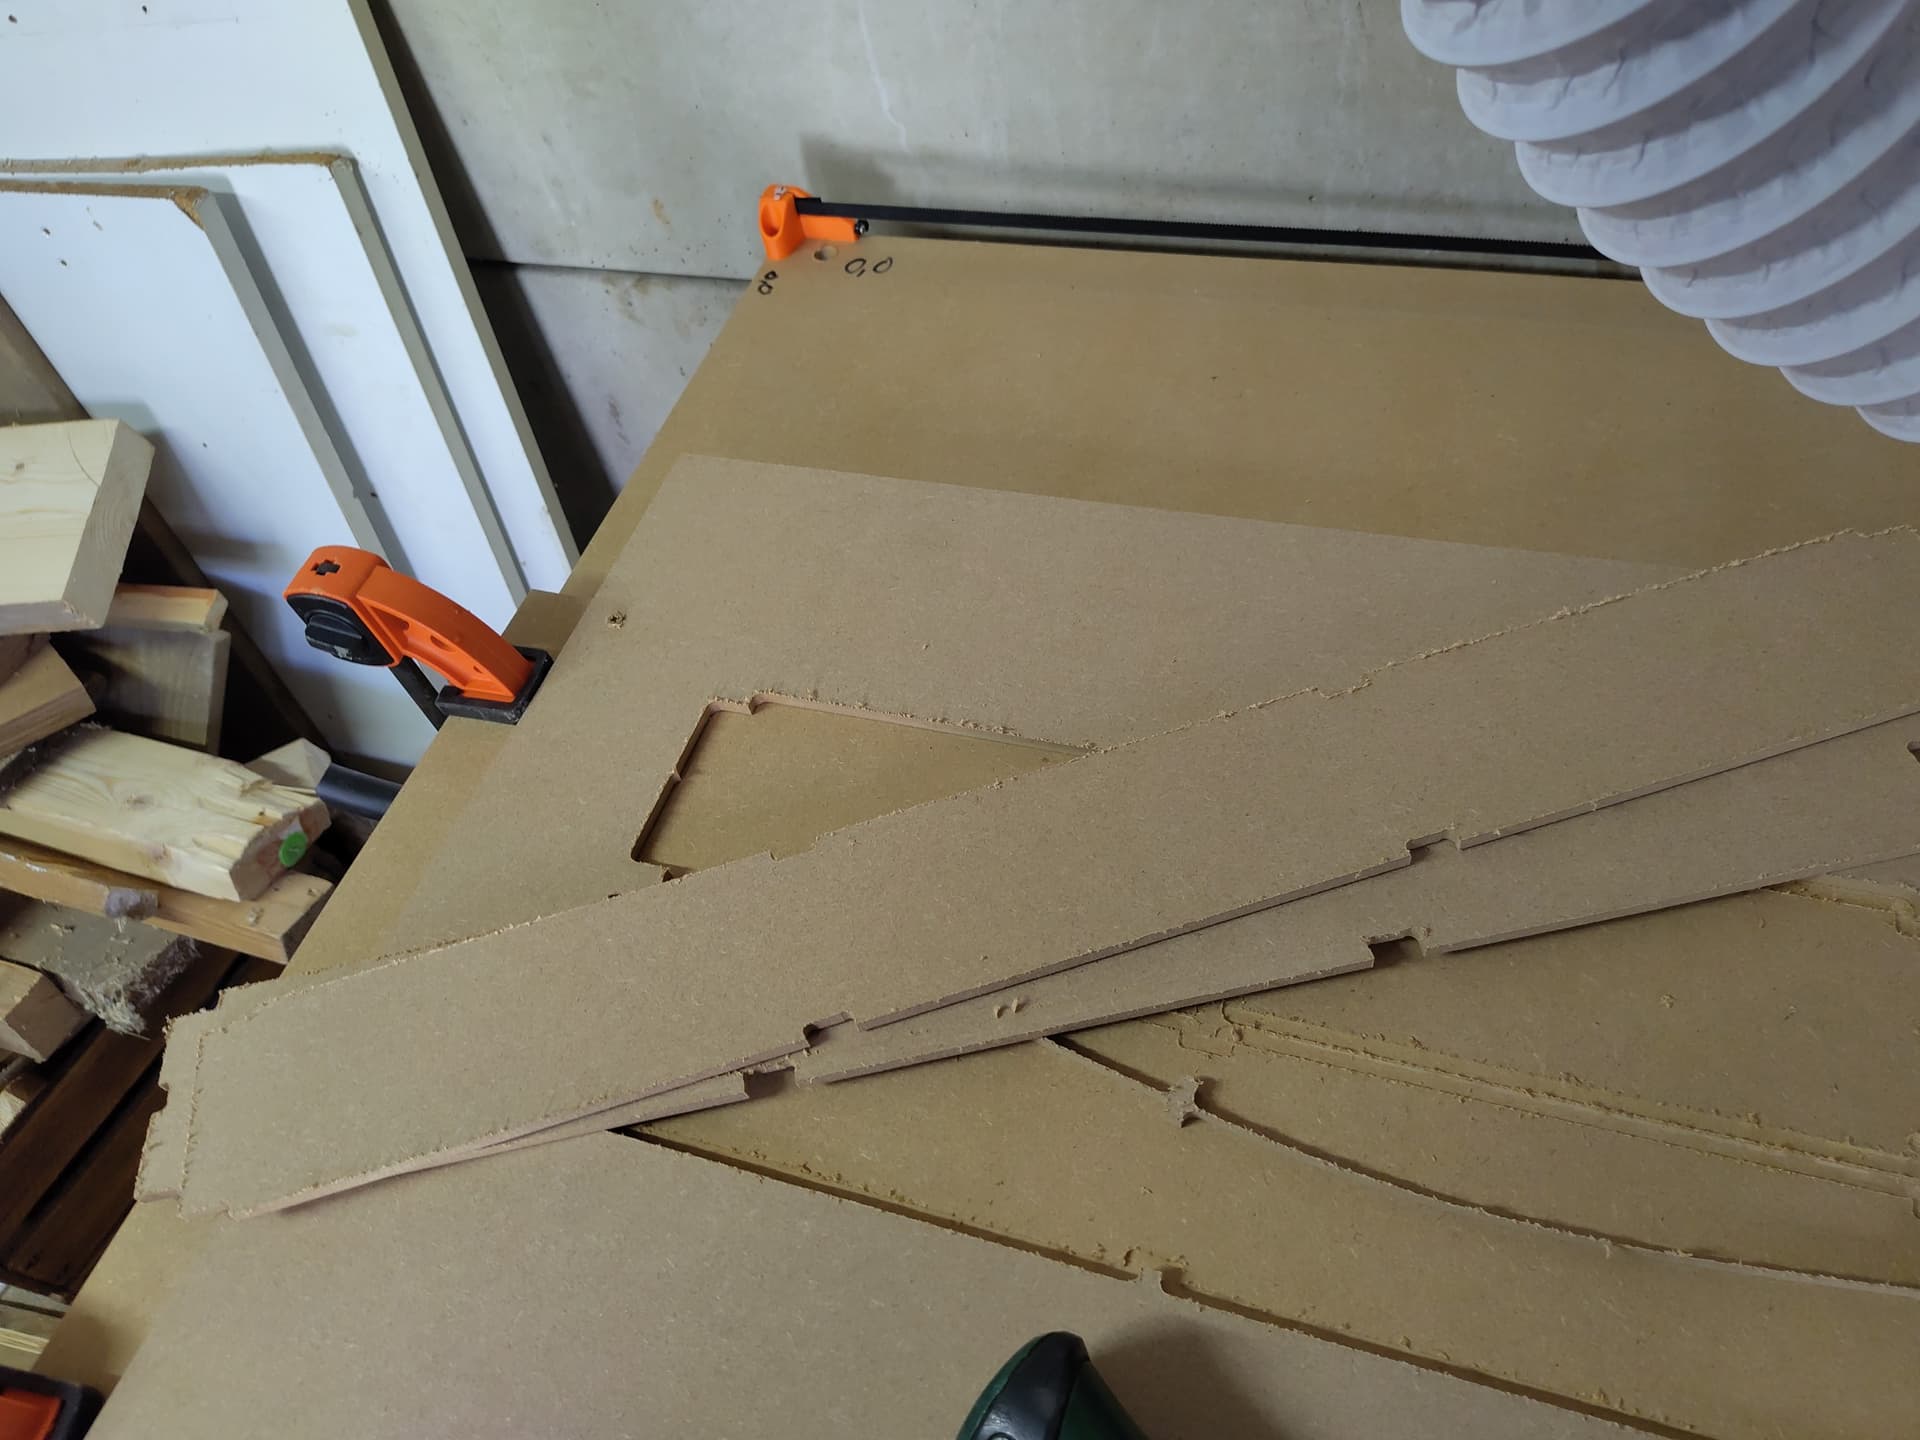
In the meantime, here’s a shot from.yesterday after cutting the struts.
I have a nice big slab of MDF set aside for a spoilboard, so once I have resquared and checked the tram I’ll install that, flatten it and then the build is finished.
Since I’m a Linux user and estlcam doesn’t run natively on Linux I stuck with kiri:moto for now, learning another CAM as well is a bit much during the build, but K:M doesn’t support tapered ball bits so I may switch to something like fabex (formerly blendercam) or freecad (though that can’t do mesh carving well) going forward.
It works pretty much fine under bottles, though I had to disable the help popovers because they were behaving very strangely.
I actually got it running under wine, but the UI wasn’t super intuitive and figuring it out and adding all my bits (which are already in K:M) seemed like too much to handle during the build. This is by far the most complex DIY project I’ve ever done.
But I’ll look at it again once I got the remaining setups done.
There is something that concerns me though. Everything moves apparently smoothly, and X and Y moves almost silently but the Z axis is very noisy, like something is under strain or grinding.
I can’t find anything though, and if I move it manually while unpowered it feels completely smooth with no resistance I can feel. There was some at first but that went away after I loosened the grub screws on the lead screw attachments, let them settle and retightened them.
Is this something to worry about? If so, how do I figure out what to adjust?
@vicious1 - this topic is a reminder we need a clear troubleshooting page in the docs.
How to troubleshoot endstops/probe issues being a key topic.
Also a picture/issue section. Saw another post with bad tramming and likely worn bit or bad feed rate in a different topic.
Lots of questions could get answered with these kinds of pages, and it would make replying easier to point community members to specific troubleshooting sections.
That would be awesome actually!
Also, I think I’ll start my Z axis investigation with adding more lube to the screws, as I since saw in another thread
Update: lube worked.
Today I strapped a piece of scrap construction pine down and then pushed a number of my 6mm bits through it at ever higher speeds (staying below what fswizard suggested as I don’t want to break bits) but even at the highest speeds I felt safe trying it was rock solid. No chatter. Perfectly smooth surfaces.
Heck I pushed a 25mm flattener through it at a 3mm cut depth (a bit I would normally use at 0.5mm) at 8000mm/min and it didn’t break a sweat.
I’m very confident this thing will rock aluminium and other soft metals.
I also received a pack of threaded inserts, so now I have an idea of the speeds - tomorrow I’ll finish my spoilboard. Need to model the holes for the inserts still.
But with a bit of luck tomorrow or Wednesday evening I’ll post the final update in this thread as I move from building to simply using.
Thanks for the assistance along the way, I think I’m going to have a lot of fun with this toy.
Okay, spoilboard went mostly fine, but when I was cutting the holes for the threaded inserts, at one point it seemed to skip to the left, and instead of cutting the existing holes deeper it started cutting new ones beside them.
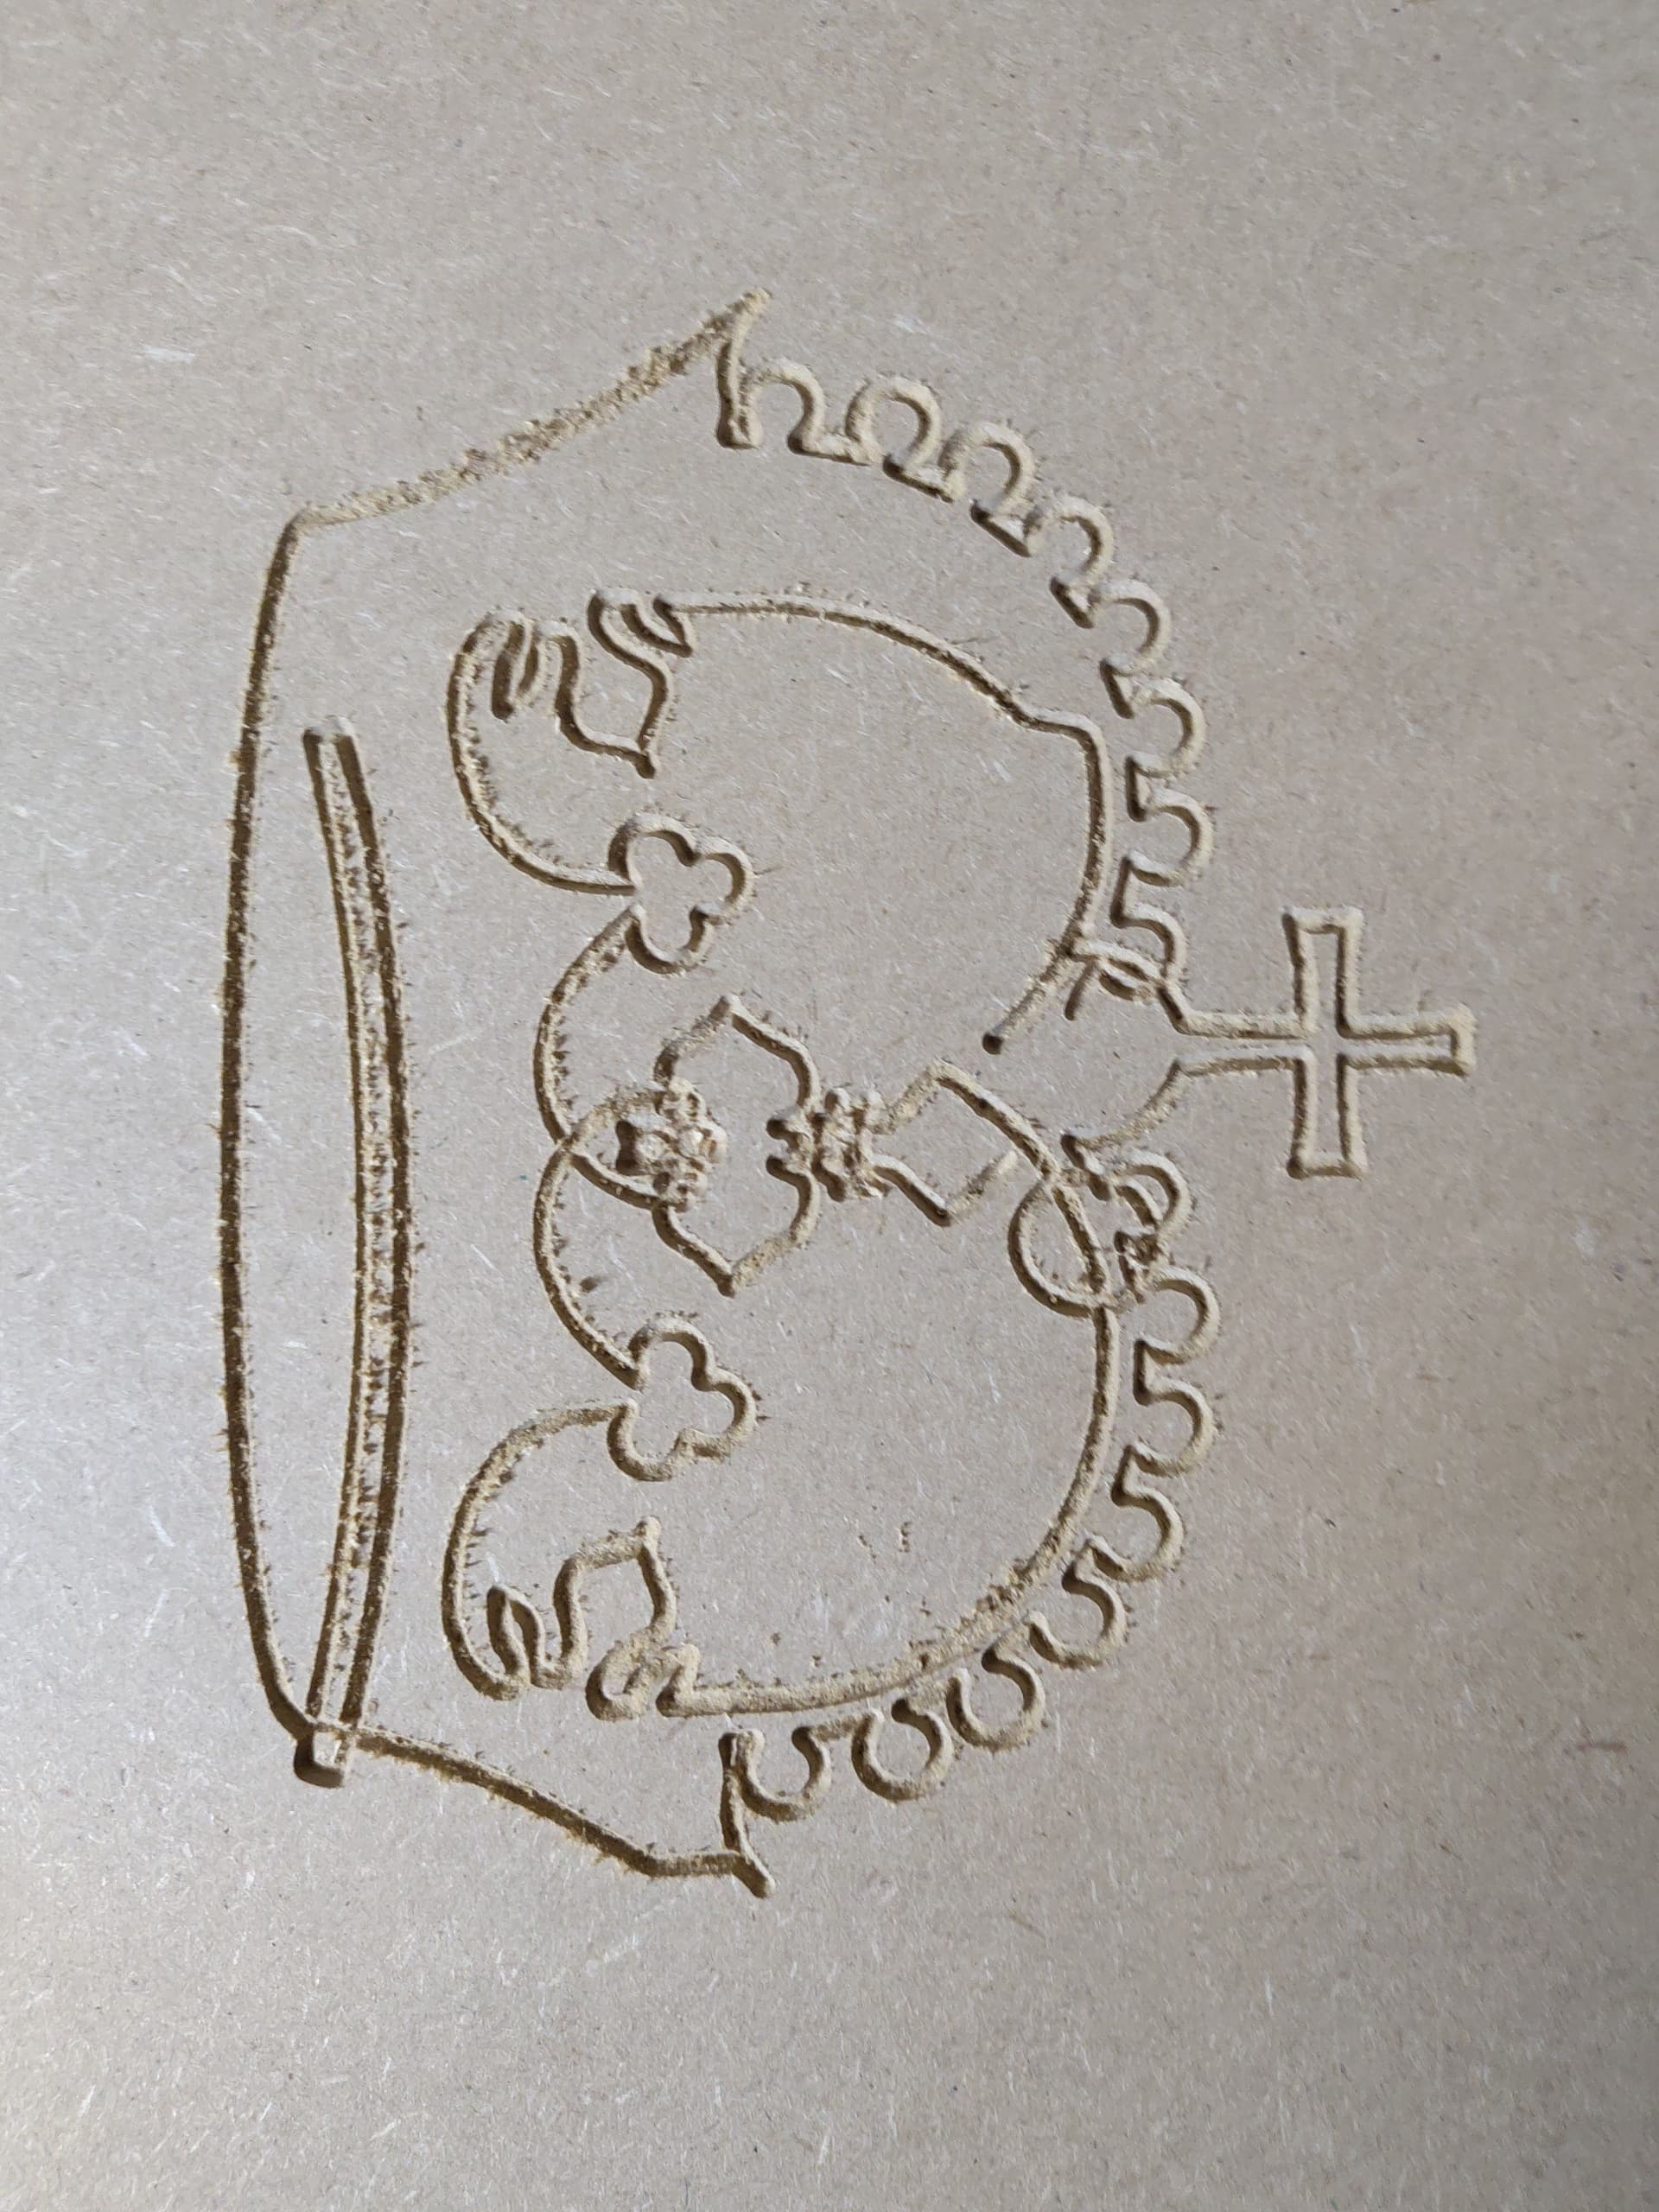
I thought this was probably an issue in my gcode, until I did my crown test. Twice. Both times the different components were not offset correctly from each other.
In both situations its on the X axis that things are misaligned.
When manually moving on the X axis there is a rattly feel as it goes over the braces: my best guess right now is that although it LOOKS like it moves perfectly smooth between positions and in fact does so perfectly accurately at jogging and cutting speeds, during rapid moves that bit of extra resistance sometimes cause it to skip steps on the X travel leading to the next plunge not being in the right place. This stiffness only started after I installed the permanent struts.
I guess something needs adjustment, though all the tension points are pretty loose (per the assembly guide) I think. Any suggestions?
Some more information:
The rattling on X isn’t consistent, it seems to happen on some but not all moves when moving it manually. However, anytime it does happen all the LEDs on the board light up - so the motor is generating power. They are off when it runs quietly.
I also don’t actually know if this is related to the positioning issue, it was just a hunch, but reducing the X axis Max speed doesn’t seem to make any difference.
I am honestly stumped.
I’ll let someone else comment on physical adjustments since I don’t have an LR4.
I wouldn’t expect that to help. What might help is reducing the X motor acceleration and/or bumping up the X motor run amps by 0.1. However, that might mask the root cause.
I think I know the root cause. I did just manage to create a perfect crown but only after dropping the Max speeds to just 500mm/min in both X and Y.
But afterwards I noticed that the bottom rail is touching the plates, which it should not. And I know why.
I ordered a 1/8" collet from Ryan because I could not find one anywhere in Europe. But that hasn’t arrived yet. I also bought a number of new 6mm bits to be my primary work horses since I can’t use my tiny bit collection yet.
But my set of smaller endmills hasn’t arrived yet.
So I cut my permanent strut plates with my 6mm endmill, at the time the only useable bit I had. This had two problems: the gaps for the brackets were very tight because they were cut with two wide a radius: and it didn’t cut screw holes because they were smaller than the bit. So I drilled those manually
And I think this is the root of all my problems. I think those holes were drilled just a bit too close together, pushing the rails onto the plates, with all the issues the manual predicts that would cause.
That also gives me a way forward. If one I don’t like at all.
Once either my collet or my other bit set finally arrives, I need to cut new strut plates using a more suitable bit, with this 500mm/min limit so it can actually cut them, and replace these strut plates.
Its a big job to fix, but I think it will resolve the underlying issue.
I’ll post an update in a few days when I’ve done so and retested.
All of these little trips into the weeds may seem frustrating at first.
What this does, though, is allow you to really learn the ins and outs of building, setting up, and using your machine.
You will end up a much better operator of the machine as a reward for this bit of learning.
I had to turn down accelerations and turn up the current on the x motor to avoid x skipping. I figured it was due to the control software, which isn’t standard. Also if the x pulley is in the motor too far it can rub the motor housing. Sometimes the pulley shaft grub screws slip and so check those too, but it sounds like you got it fixed.
Not fixed per se but I think I know how.
I don’t think it’s the pully in my case, though it can’t hurt to recheck the grub screws.
But I suspect the struts are causing everything. The undersized brace fittings are putting pressure on the pipes tightening them and the manual holes are causing the rails to touch the plates, which the manual says will cause steering issues.
At the very least my software engineering background is yelling: you have to fix this before you try further troubleshooting. Even if there is another issue, it would be almost impossible to find without ruling this out.
Hopefully one of the two orders that will givw me access to a narrow bit will arrive soon so I can make new struts.