I’m overwhelmed with choice at the moment, there are Loctite knock offs galore.

1 Like
I don’t know about any of the knock-offs, including the “LOCTTLF” that you originally posted. I’ve never had a desire to gamble on something holding or being removable and have always used the two mainstream brands… Henkel’s Loctite or Permatex. Usually Permatex. For how little you use, the two brand names are inexpensive.
3 Likes
 Yeah I found the real stuff, Permatex too, just had to wade through pages and pages of LOCTFTT and Titeloc. Typical Asian shopping site experience.
1 Like
This was something that threw me for a loop when I started as well. When you click resume, it plunges down until the Z probe tells it to stop, so without the touch plate and magnet in place, it’ll just keep going -Z forever. This is assuming you’re using EstlCAM and have it set up per the docs.
It is not clear at all from the WebUI that HOLD means you’re supposed to attach the magnet to the collet and place the touch probe under the bit, hit play so it Z levels and stops, and then remove the magnet, start the spindle, and hit play again. The docs may or may not (on mobile hard to verify) say what to do, but when you go to make the thing do some work, the last thing on your mind is the docs. At least my mind was full of excitement and anxiety 
It would (should, I guess) be trivial to change that “HOLD” message text to be more descriptive of what to do? IIRC this is in the text that the docs say to copy/paste into EstlCAM so it’d be changing the text there? Sorry for all the conjecture, at work an on mobile so it’s a little tricky to cross reference everything lol
2 Likes
I think Jason and Mike are actually working on that. It does say in the terminal what you should be doing if you add text to the hold, but those guys are trying to get a popup to add more description, unfortunately it is not an easy fix. The next webui update we do I think will be different, Mike has revamped the entire thing just a few days ago and has it in beta release if you wanna give it a shot. WebUI v3 improvements - #88 by Michael_Melancon
2 Likes
not forever… just to whatever you have in the probe command. Depending on where you started, that could feel like forever, but if it starts from homed Z, it would likely be not that long from when the probe should hit.
HOLD doesn’t mean you are supposed to do anything. HOLD is just the PAUSED state that results from the M0 command that you programmed into your gcode. It’s just an arbitrary pause.. In your gcode, you may also have a MSG that comes across to remind yourself why the PAUSE is there, but that’s all it can do is show you what you told it to.
To me, this is where the mistakes starts. You should not be telling it to do anything until you are completely clear and comfortable the steps you need to take to complete the job safely, even if this means you have to read the docs over and over, make a cheat sheet to check off, whetever it takes so you know exactly how to get where you are going.
These things aren’t toys and mistakes can cause no damage at all, ruin a very expensive piece of wood, or burn your house to ground…
I wouldn’t say “trivial” but there is a plan to make this a little better after the 3.0.7 release goes live. I want to get that out first, then I’ll look into where we can make that status box more helpful.
However, the WebUI is there to help remind you what you programmed… You should be very well versed in what you expect your involvement to be before you ever press Play the first time.
Practice makes perfect better. Even if it means just running only the starter gcode a few times, that probe and tool change procedure is very important to get familiar with.
This was not meant to sound harsh, but I just want to make sure that it’s clear that intent of the WebUI is not to assume any responsibility for making sure that things are done in a correct order. It is just a tool.
6 Likes
^ Solid advice, I’m in no rush to cut anything so I think I’ll play around with gcode and drawing things for a while just to get to grips with how it all works. Breaking a pen is trivial but different story when there’s a router spinning.
I’ve still got lots of small things to do, dust hose, cable management etc so as I work on that I’ll test drawings and cam stuff alongside until it’s all completed then when confident I’ll have a go for real.
On the topic of software and cam stuff, I have Aspire, which I’d like to use over ESTLCam - are there any general guides or docs that I can follow to use it with the LR/FluidNC/GBRL?
2 Likes
Got the crown done finally.
Poor pen rigging caused the wonky left side, I think the table isn’t flat and there was no vertical give or spring in the pen so it sorta dug in and stuttered a little, but other than that, all sweet. I’ll get a perfect one done soon with a better pen mount just so I can tick the box
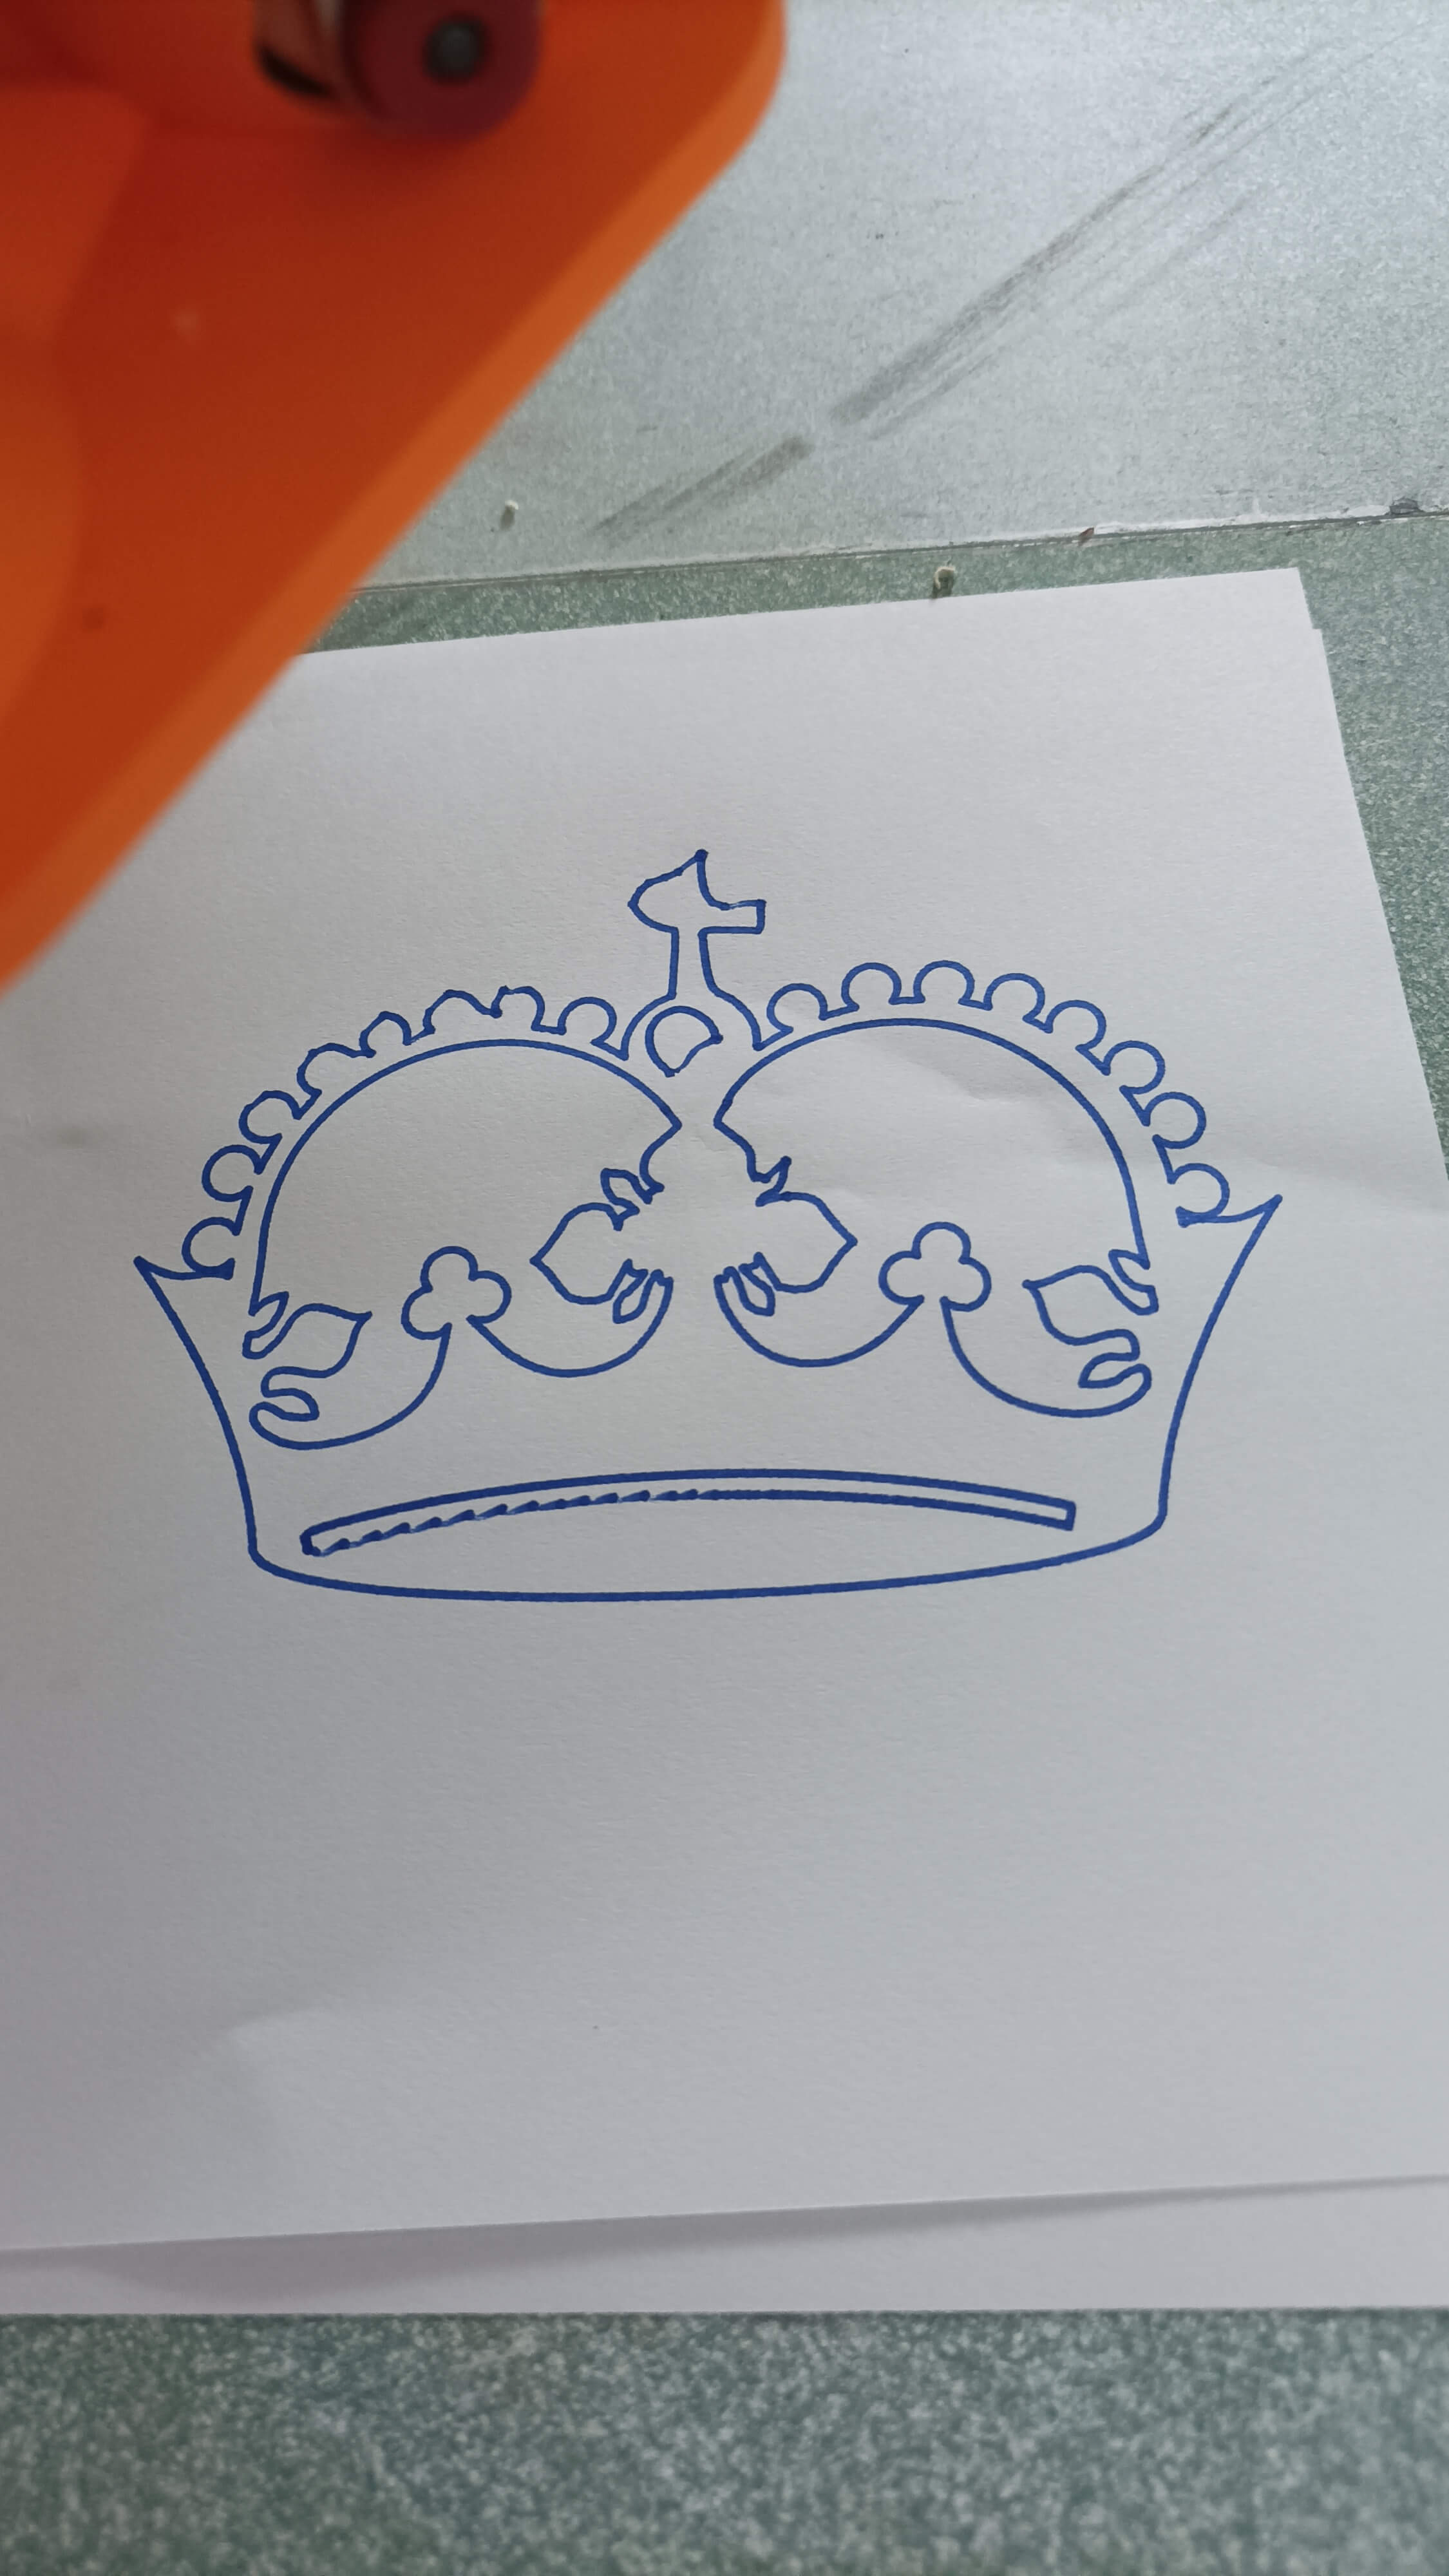
Got a hell of a squeak going on though, Z axis mainly I think - any tips for keeping things lubricated? Recommended lubricant and what parts to do regularly?
Can I use this super lube? I bought some a while back for something else but never got around to using it.

Cheers
5 Likes
This is a stellar post, and I thank you for thoroughly correcting my wrong turns and for making that info available to everyone. My goal here is to simply provide honest feedback as an end user, and as someone who works in software, I know how valuable good user feedback is in strengthening a product. So the following responses are purely for giving end user feedback and to provide an explanation as to where I’m coming from, it is absolutely not an argument or anything negative at all:
Keeping in mind that I am a newbie who did (and still does) put in long hours whenever I can to learn all about CAD, CNC, and CAM. I’m literally the target audience for the “CNC for the people”, so from my perspective:
This is what fluidNC looks like to me when I run a program:
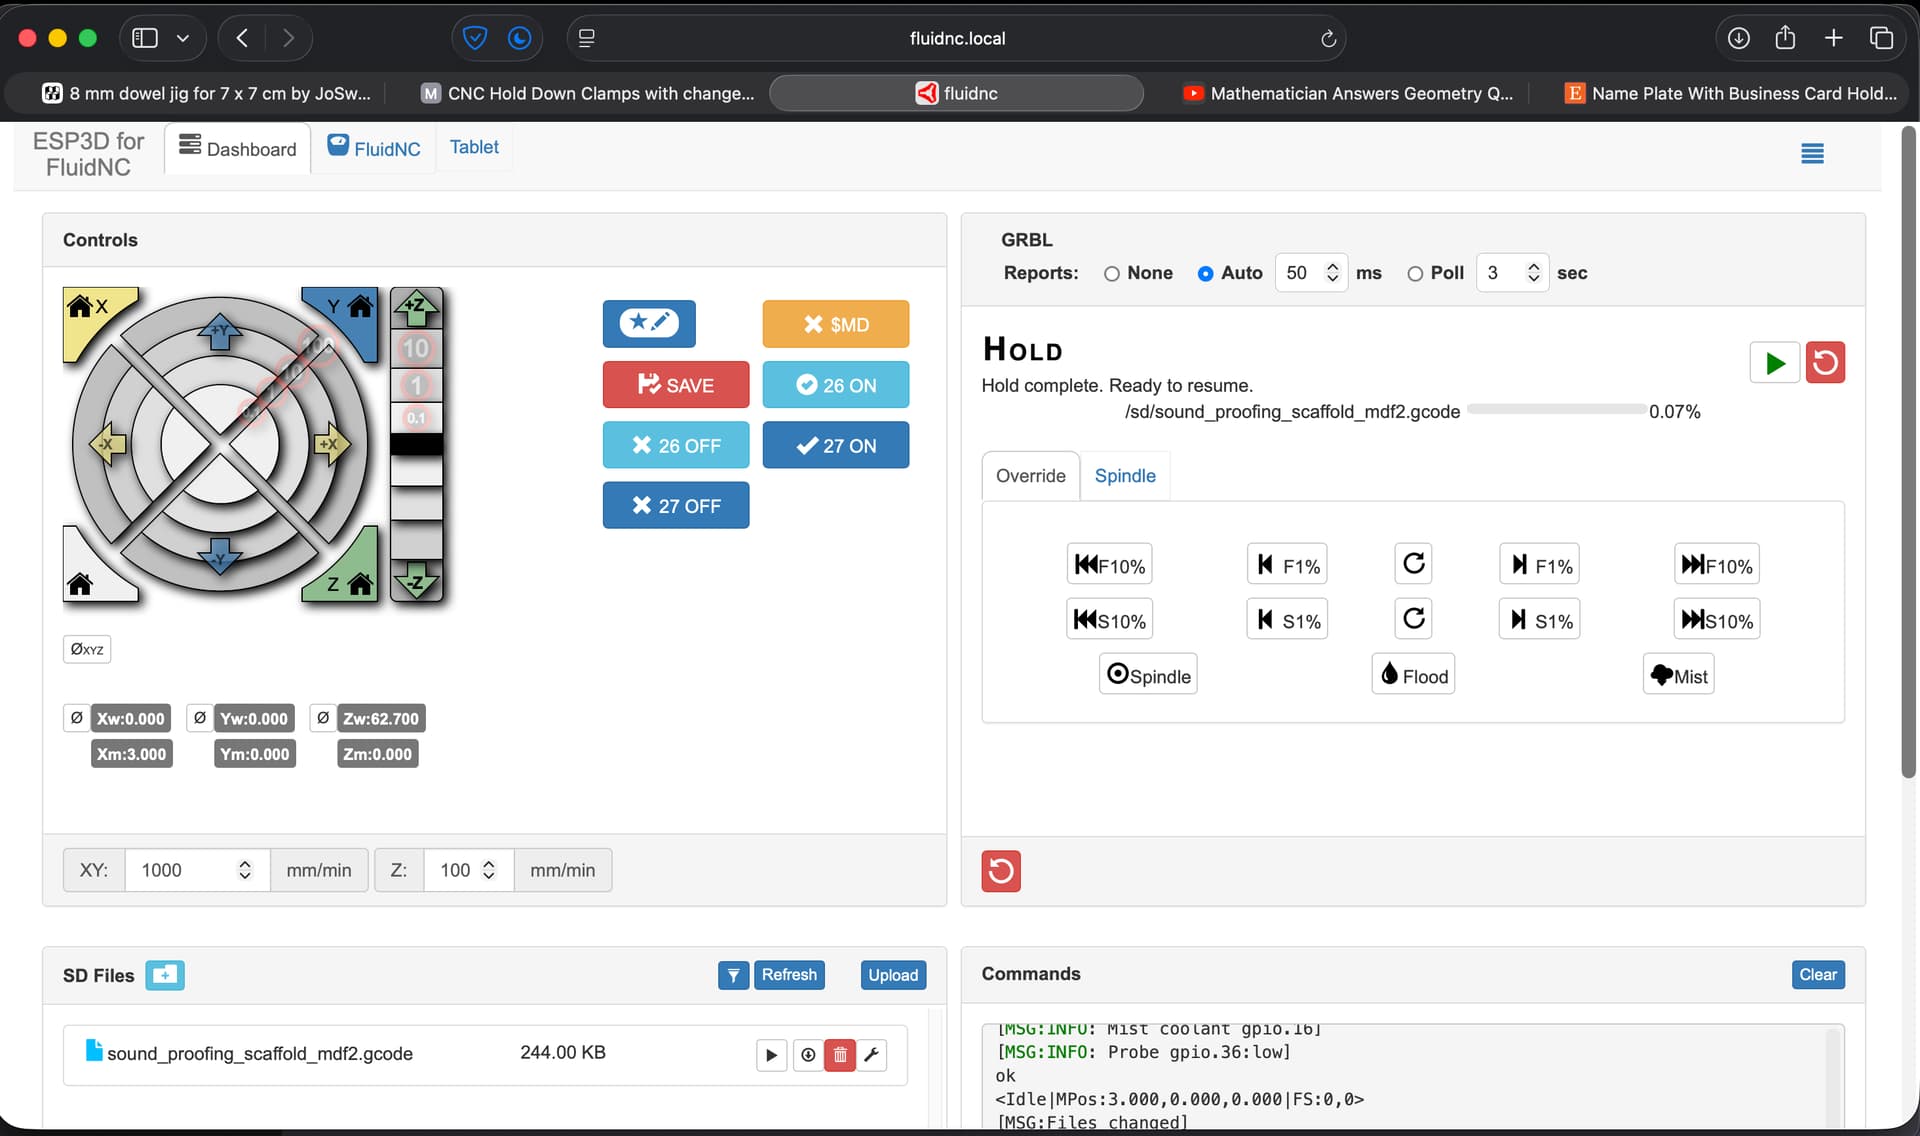
Notice how there’s a big, bold, notification front and center saying:
- HOLD [OK my machine is holding and not moving, cool, nothing crazy there]
- Hold complete. Ready to resume. [Immediate to the right is a play button, it’s telling me to resume, right??] (I know now it isn’t, but to the average Joe end user, yes it is telling them to hit play)
and absolutely nowhere on my screen is a print out saying what to do. Maybe on a different monitor/resolution I would have seen the entire layout of FluidNC? It’s like this on my MBA and MBP at least.
So, I’m supposed to ignore the big bold HOLD text and all the important buttons, and scroll down? Why would I scroll down?? OK I will… I see some computery looking code, there’s something that says to attach a probe, but it’s 4 lines old, so that can’t be the most relevant thing for me to see right?
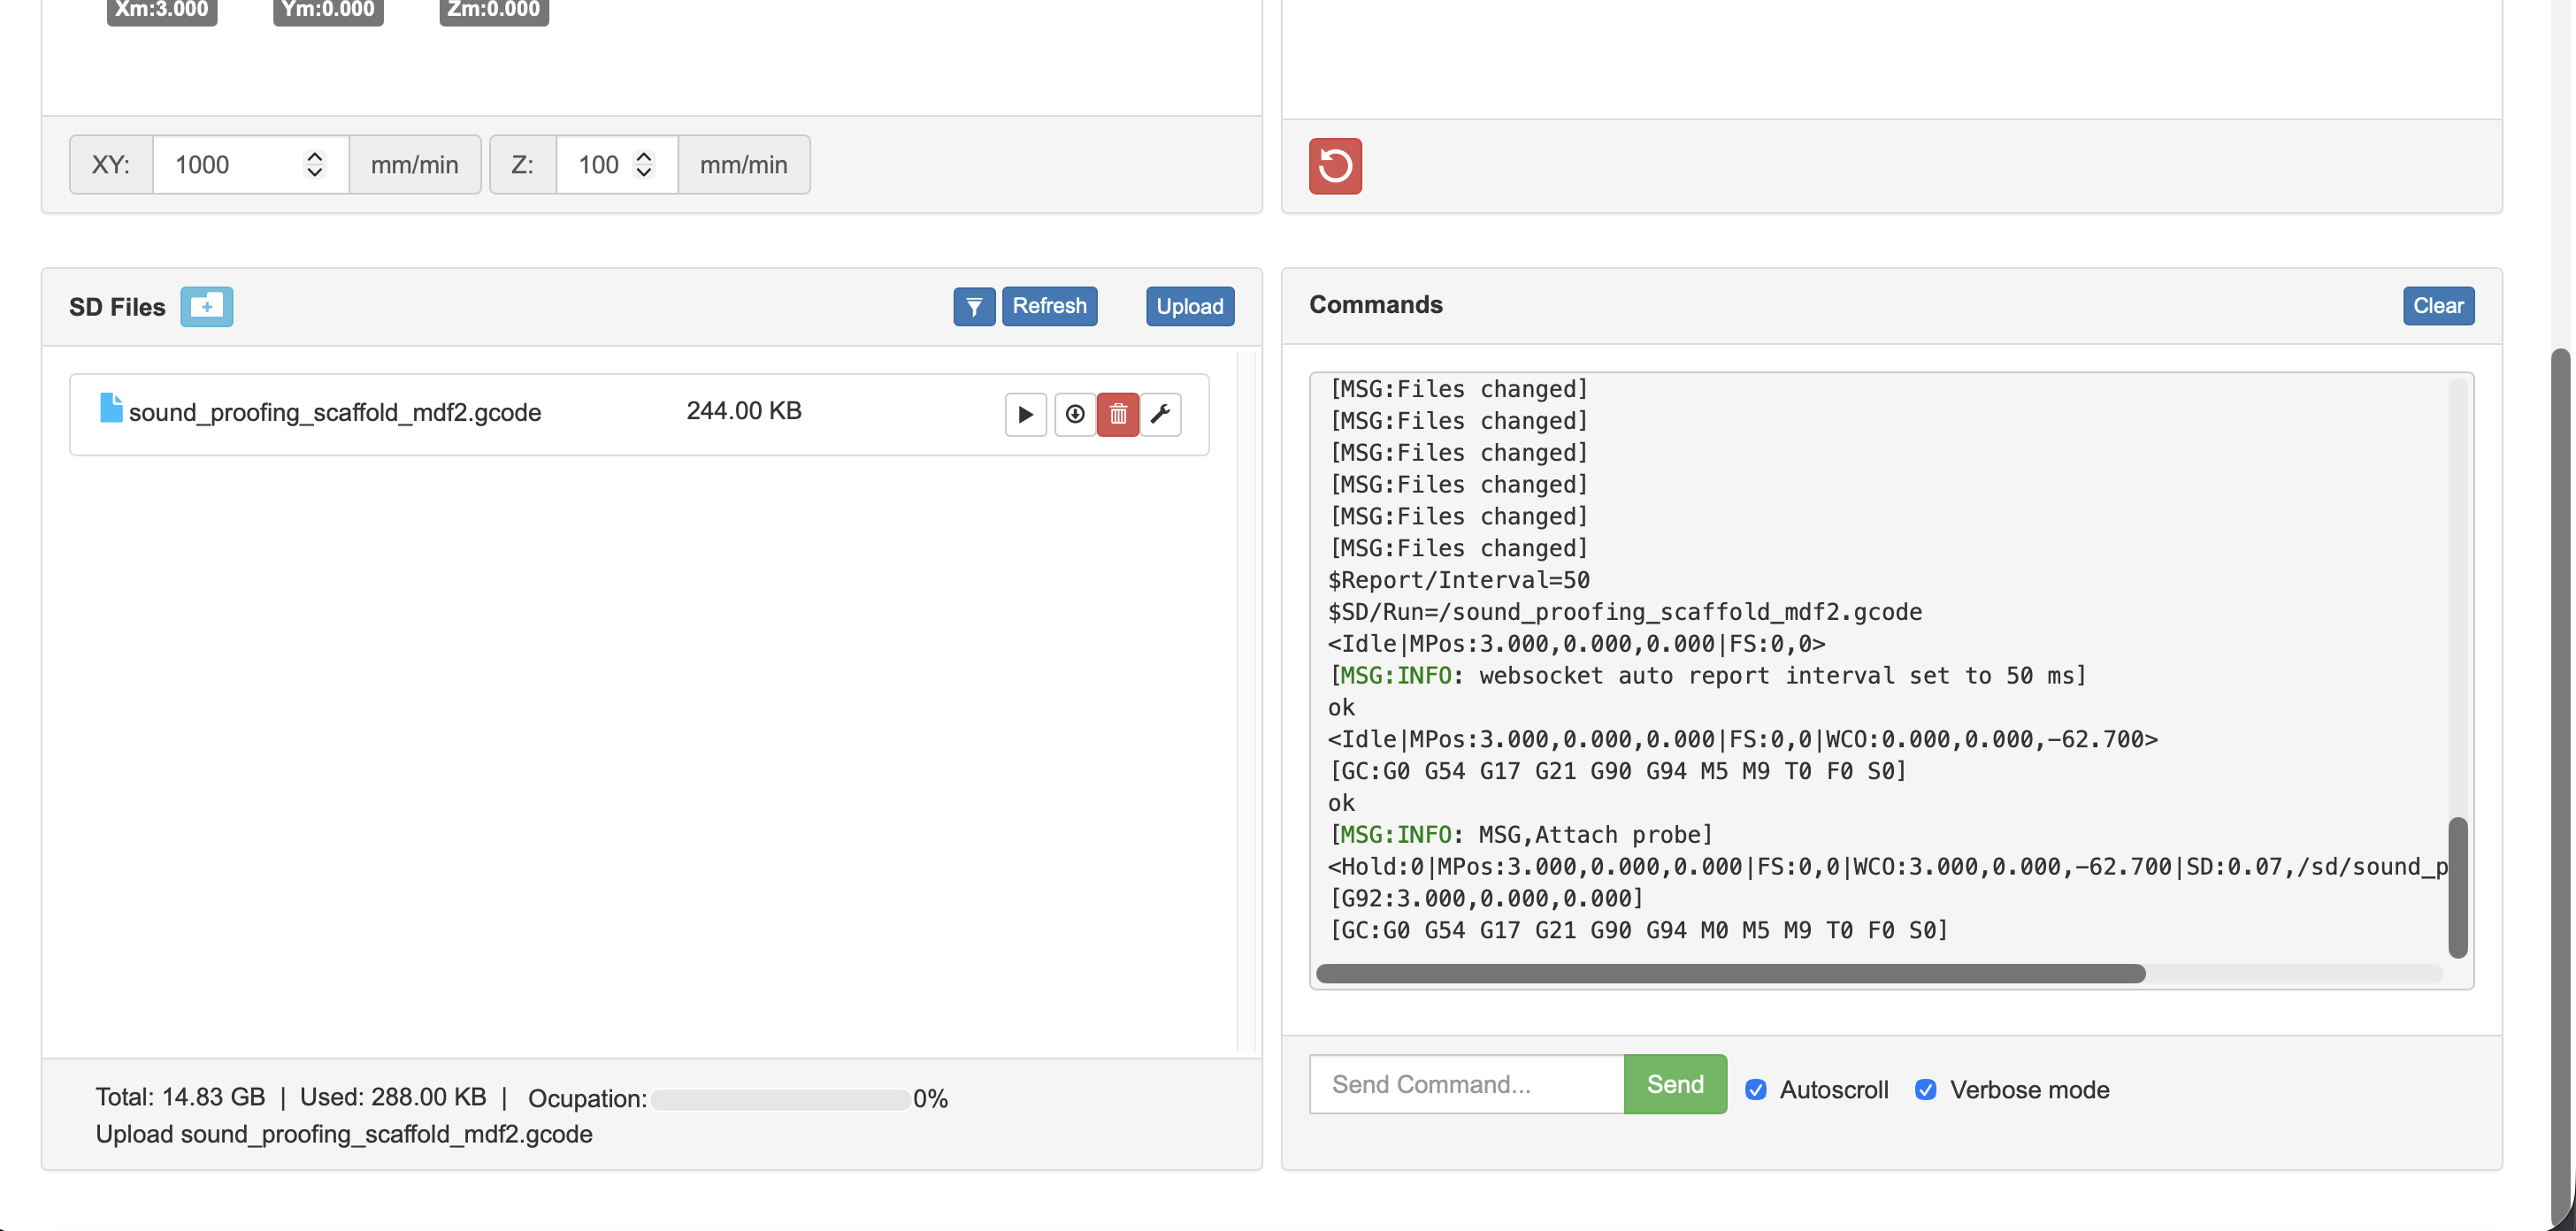
I promise I read the docs multiple times, I printed them out and took notes, I have a whole folder of notes on my iPhone just about doing the build and how to do everything, I have a YouTube playlist of all the educational sources I can find, I even read (most of) the Make book about CNC machining, and I still made the above mess ups and many others, and I will absolutely make more because I’m human  .
.
Absolutely agreed, but V1E is in the business of making these dangerous machines available to anyone with a few hundred dollars and time on their hands. The docs are anything but idiot proof, the milling basics guides use an outdated version of EstlCAM so they reference “inside” and “outside” cuts instead of “part” and “pocket” for one example, and as seen above, the software my control board shipped with does it’s best to hide all the useful information off the bottom of the screen.
Again this is purely me giving feedback, not trying to say what I am doing is right, but I am at least being honest about my wrong turns and attempting to provide constructive feedback WRT the user experience. I am also not trying to be snarky in any of my descriptions above, I am just trying to share the honest thought process that I (and am sure many others) experience when using the recommended hardware and software. I thank you again for your post and obviously for all your hard work and everything you (and everyone else) does!
4 Likes
Ryan goes out of his way to provide the best support you could get. The problem is that the software changes rapidly, it’s impossible to keep all the screenshots etc. up to date. The only thing that Ryan needs to provide as a business (IMO) are the assembly instructions and how to flash the software. Everything else is being documented at the oritinal websites of the software, like the FluidNC pages, Estlcam YouTube channel etc. It’s just a bonus that it’s here as well.
If I had a website and the customers complained (you are not complaining, I know) about the additional information I was giving, I’d just scrap those sections and put up links to the corresponding websites etc.
I made some major mistakes programming toolpaths after five years a week ago because I was so set in my ways (after clearing I need a 1/8 inch endmill…) that I chose the 19mm bowl endmill instead of the 1/8 inch endmill. The holes were a little too big…  It’s like with roads you drive often: you get less careful.
That’s because
- In the GCode program, there is a M0 command.
- M0 tells the controller to PAUSE
- Controller status now shifts to “Hold:0”
That’s all the controller knows and the WebUI updates to reflect that. There is nothing else.
As the person who writes the GCode for the job, you may have also added a MSG to that command, which is displayed in the terminal.
That message could be an instruction if you choose, or it might just be some random comment you, as the program developer, decided to put in the file that means absolutely nothing.
That is WebUI-2. I have no control over that. It is a little better in WebUI-3, and there are things like Jason’s HoldMonitor extension that can also help if you choose to enable it.
WebUI-3 will get that functionality integrated by default at some point.
Yes, you should ignore that button if you were the one that put a PAUSE in there and know that a PAUSE means you have an extra step to take.
My point, as I said in the original post, is not that it can’t be better.
Saying “it can be a better experience” is totally ok.
But before starting real jobs with real materials, you should be well-versed in what all this means to the point you aren’t just clicking buttons without knowing why.
He is, but also has said numerous times to start slow, go through milling basics, read the docs, do the crown first, run test cuts in air and/or foam first, etc. etc.
He’s in the business of making them available at an affordable price. I don’t think he’s advocating that these things are all of a sudden as consumer friendly as a 3D printer where you can just upload a file and click go and not understand what’s going on.
My post is only a warning that if this is the path someone is on, they need to back up and follow the path of learning properly before letting it fly.
And this is my opinion only. I don’t represent V1E or have any official capacity here.
But I’ve seen these things go south very quickly. Even the multi-hundred thousand machines can go from “look how cool” to “oh shit, my building is on fire” pretty quick…
As I said, there are some things we can do to kinda help, and they will be improved some in the future… but even then, my opinion on where that liability for getting it right lies won’t change.
4 Likes
Absolutely. I used to ship the lead screws prelubed with that exact tube. Funny enough, I pulled it out yesterday morning for the first time in probably 3 years.
4 Likes
My daughter’s piano teacher always said “Practice makes permanent.” This means that rote repetition isn’t enough, you need to be sure you’re practicing the right thing the right way to consistently get the right result.
2 Likes
Well… I was just trying to not set expectations too high 
It’s totally possible to practice a ton and still suck at things 
5 Likes
A few small updates - loctite’d one side grub screws and it fixed Z axis issues I had.
Had to take off the side and remove stepper as the coupler dropped and lost the vertical positioning once a grub screw came out to loctite.
I will have to do all eventually. Ideally I should be able to do them without taking the sides off/stepper out - is there a way to remove grub screws, maybe a specific order, to prevent the coupler dropping and losing position? Or just jam something under it so it doesn’t drop?
–
Went with you guys idea re: cables and drag chaining X. I modelled a hose connector for a small diameter hose I have, clipped cables to it, and it functions as a sorta drag chain.
It’s not beautiful but it works.
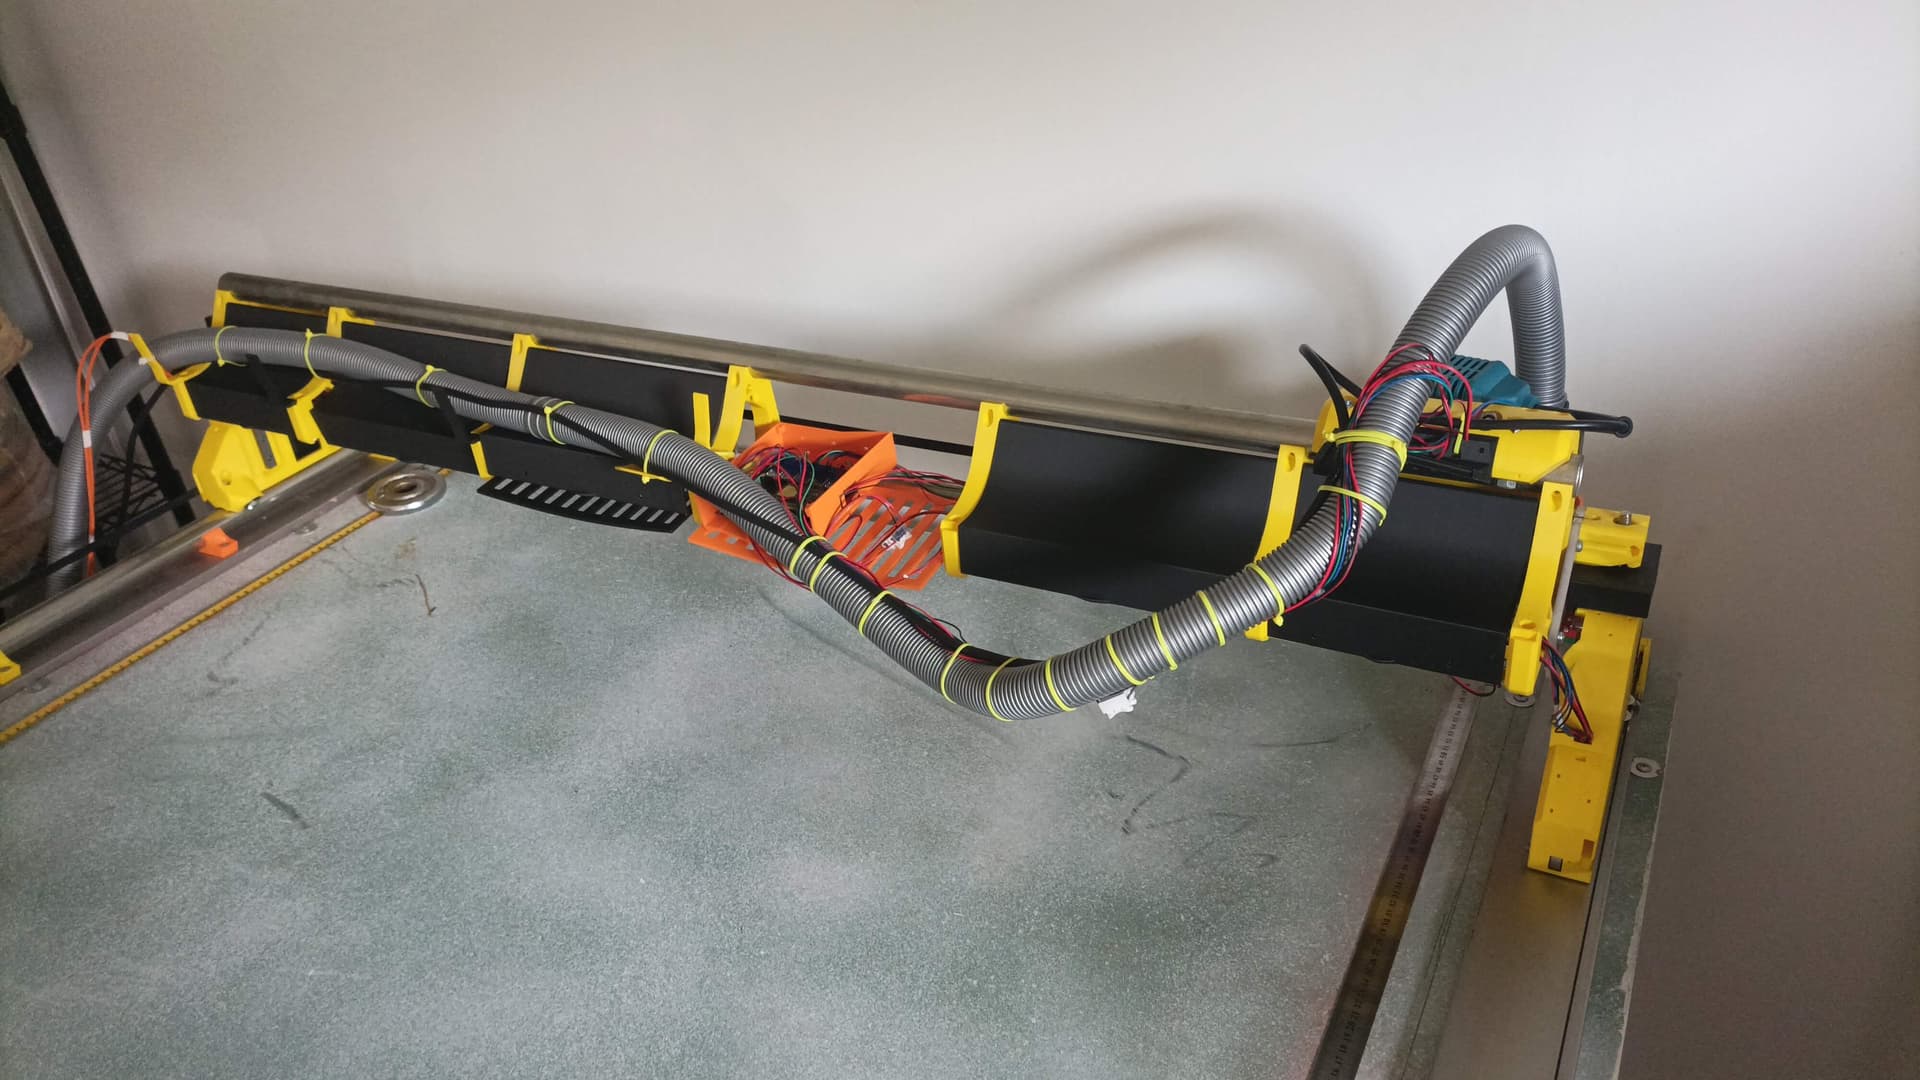
No idea is this hose if too narrow for the job at 1.5” diameter but can always change it out later. I think it depends on what’s providing suction also? It’s ideal as it is now for movements, light, long and modular, so it’s pretty solid, it just depends on how well it sucks up dust.
–
Belt calibration - aimed for 2400 and got 2403. Is the correct calculation to change it to 49.937578?
Lastly, I built my table/LR kinda back to front without really understanding how it would work with homing etc, meaning once homed it’s right up against the wall.
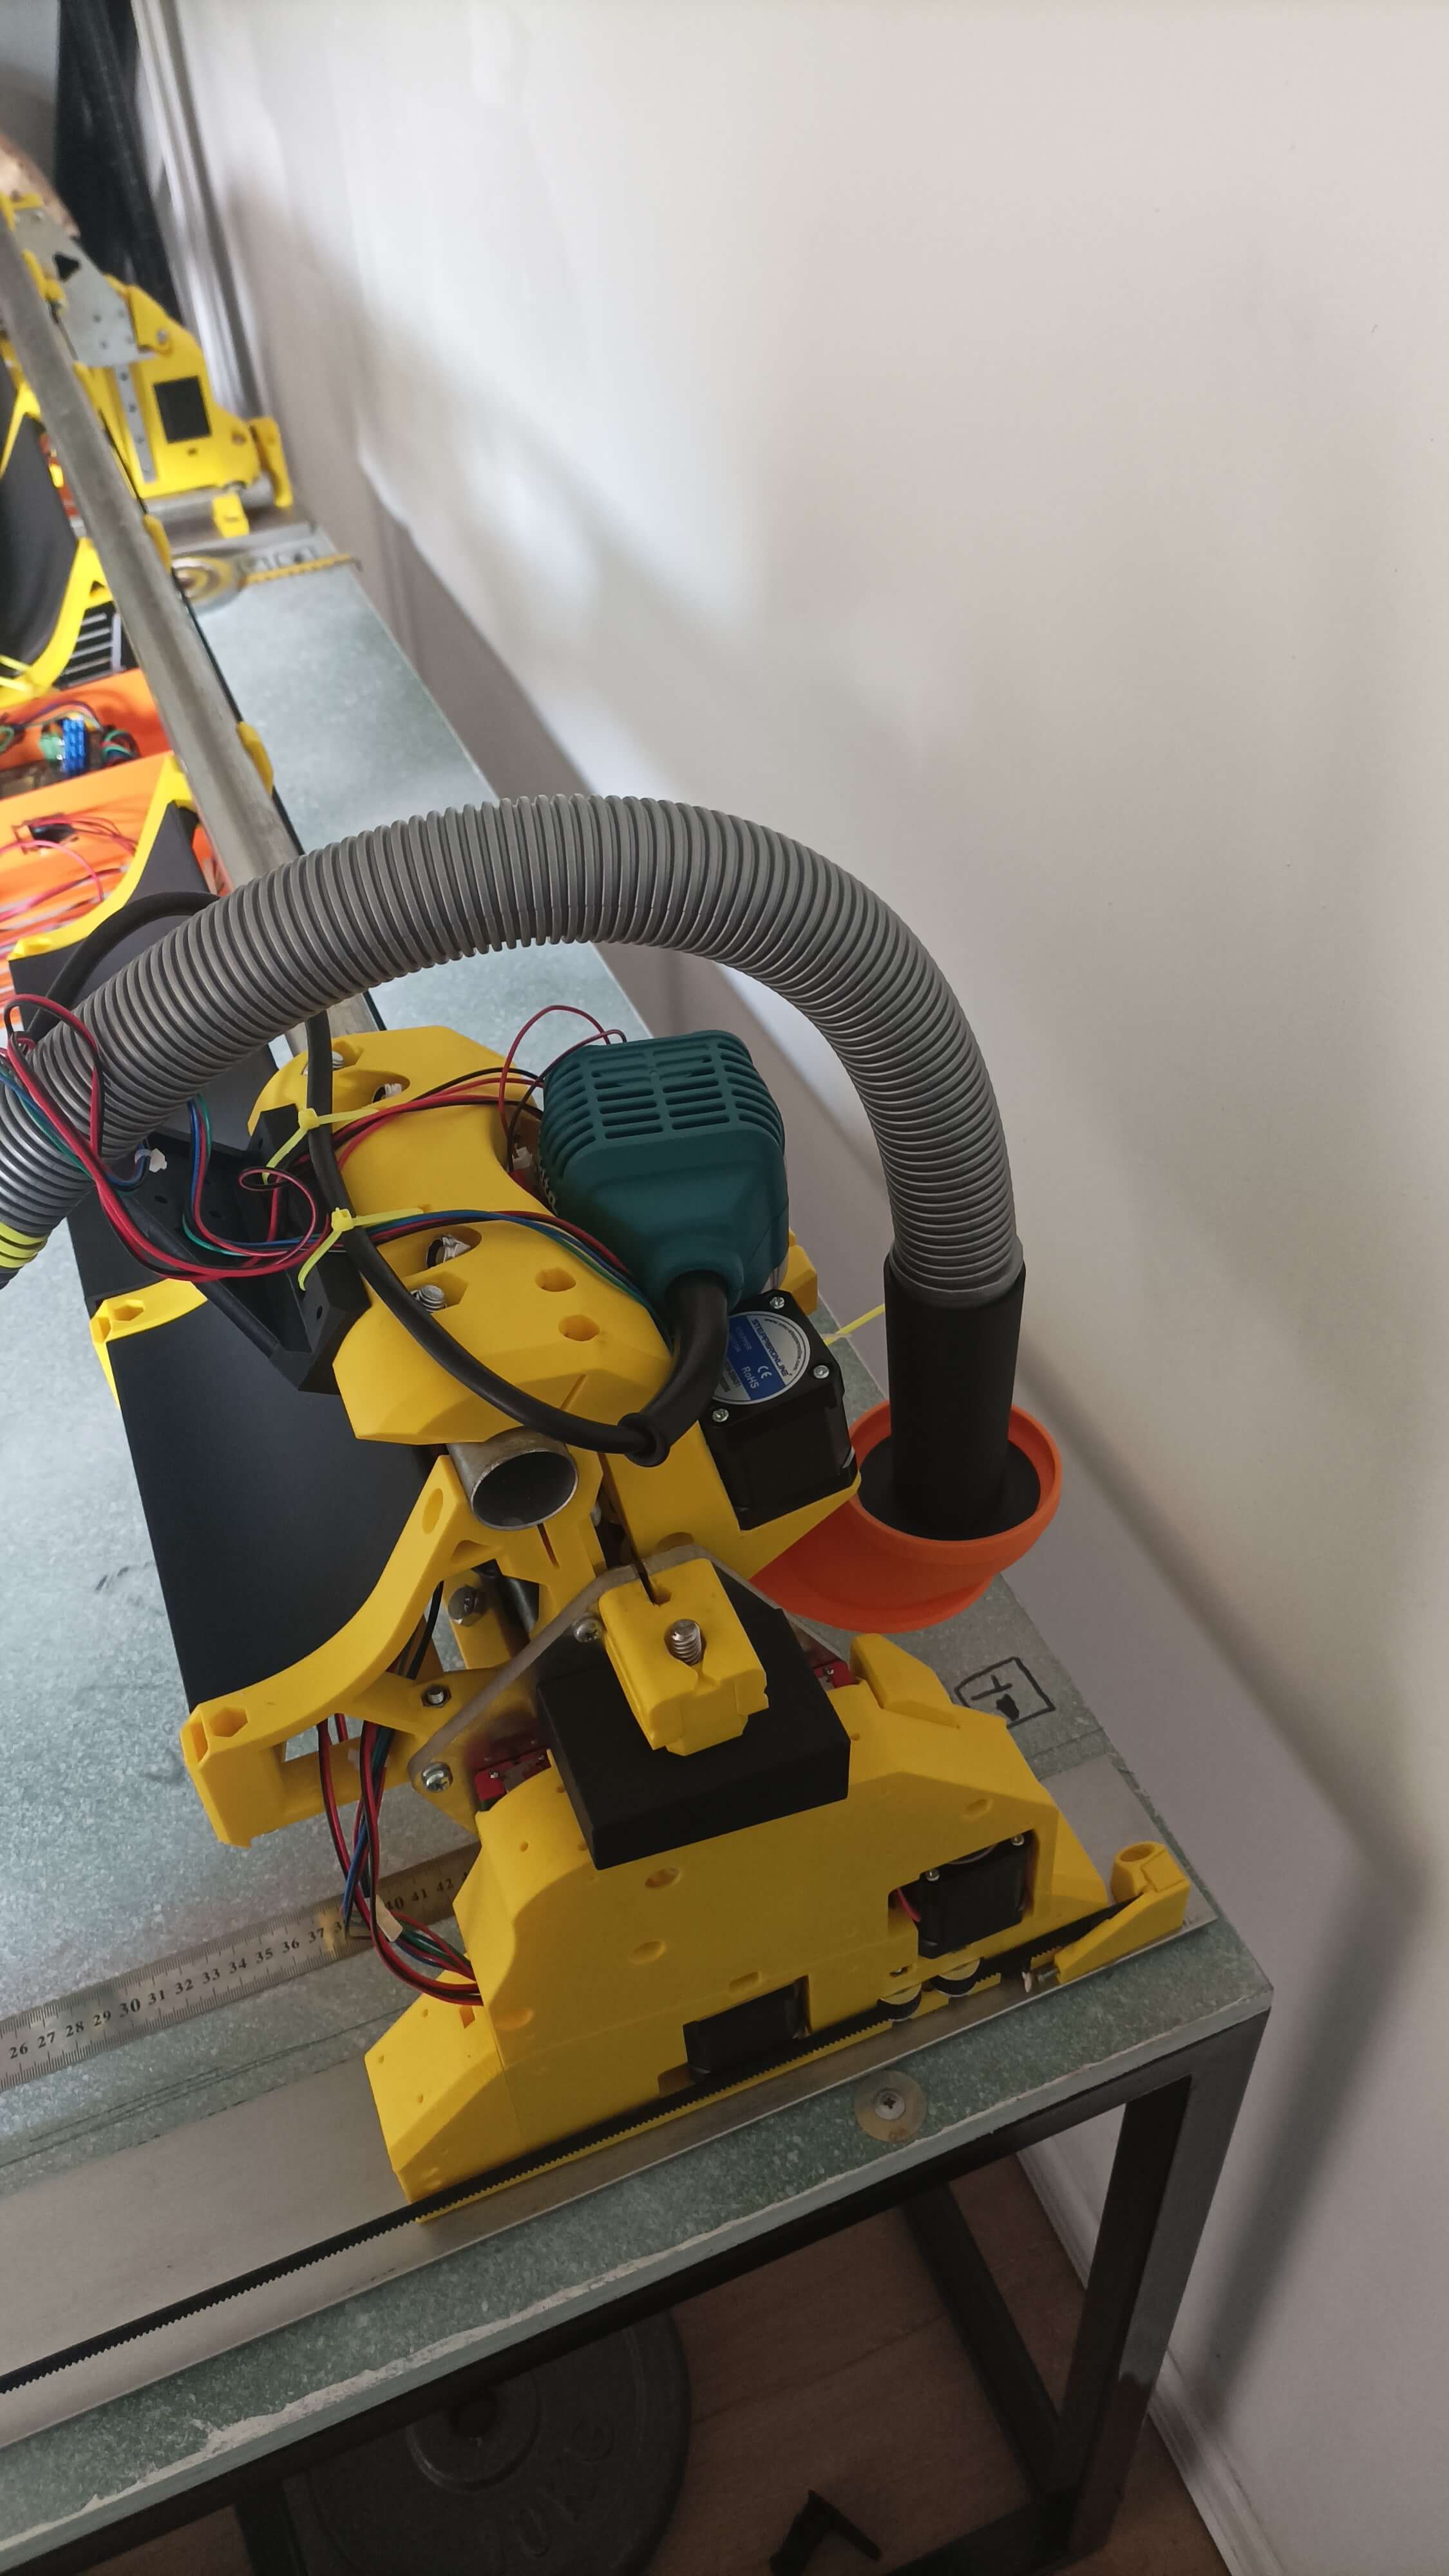
I can reposition the table slightly, but am I good to change the homing step off distance from the default to like 20mm or something also, just for a little more space there? I have the space available on the other end to make up for it.
Cheers
1 Like
Do one screw at a time so the other stays tight and holds the position
2 Likes
One of them actually grips the stepper/leadscrew and the other tightens the coupler itself right?
Maybe the issue I had with the other coupler dropping was that one (or both) were already loose, and so when I took the one out, the other wasn’t tight enough to hold it.
1 Like
They both grip. Make sure one is tight before you take the other one out.
If they are already loose then your position is already lost most likely
2 Likes
To clarify - there are 4 screws in total. Two at the top, two at the bottom. Each pair is one small and one larger. The small one goes into the middle of the coupler and tightens against the stepper (bottom) or leadscrew (top). The larger screw on both top and bottom from what I could tell didn’t go into the middle of the coupler, just seemed to tighten the coupler from the sides. Does it actually grip the stepper/leadscrew? Maybe I overlooked it and didn’t see where it came out.
I was a bit confused about which might be an issue and make the coupler drop if removed.
If they are already loose then your position is already lost most likely
Hopefully shouldn’t be an issue if I’m gonna do the others, they’re nice and tight already, so it’ll just be for peace of mind.
2 Likes
I’d turn the table around. This orientation is really impractical for swapping endmills. You also won’t be able to see what the machine is doing.
2 Likes