Which ones? The stubs should not have the M5 screws in. ![]()
1 Like
I love your setup - looks like you sleep on top of it ![]()
1 Like

Yeah. Out. /Edit: no, wrong screws… Sorry.
If there’s binding it’s mostly because the stub is slightly twisted. ![]()
2 Likes
haha thank you! I’m experimenting with sound reduction! I also have a ton of really high quality furniture foam that I don’t want to throw away but need to put somewhere, so I made a lil structure out of MDF and put the foam up on top and off the floor #winning
It also has curtains (stitched together with safety pins to be like big pillows) filled with rock wool, draped over the sides. That was also another thing I had to get up off the garage floor lol. It’s far from perfect, but seeing it as a shelf for those giant items, that just so happens to take the edge off the sound? hell yeah brother ![]()
3 Likes
Those for sure need to be there!!!
The ones that go though the other end of that part and through the Z Nut are the ones you should leave out
3 Likes
Oh, I thought he was showing the ones that hold the nut… Sorry. Those are the screws that can cause binding if the stub is a little skewed…
3 Likes
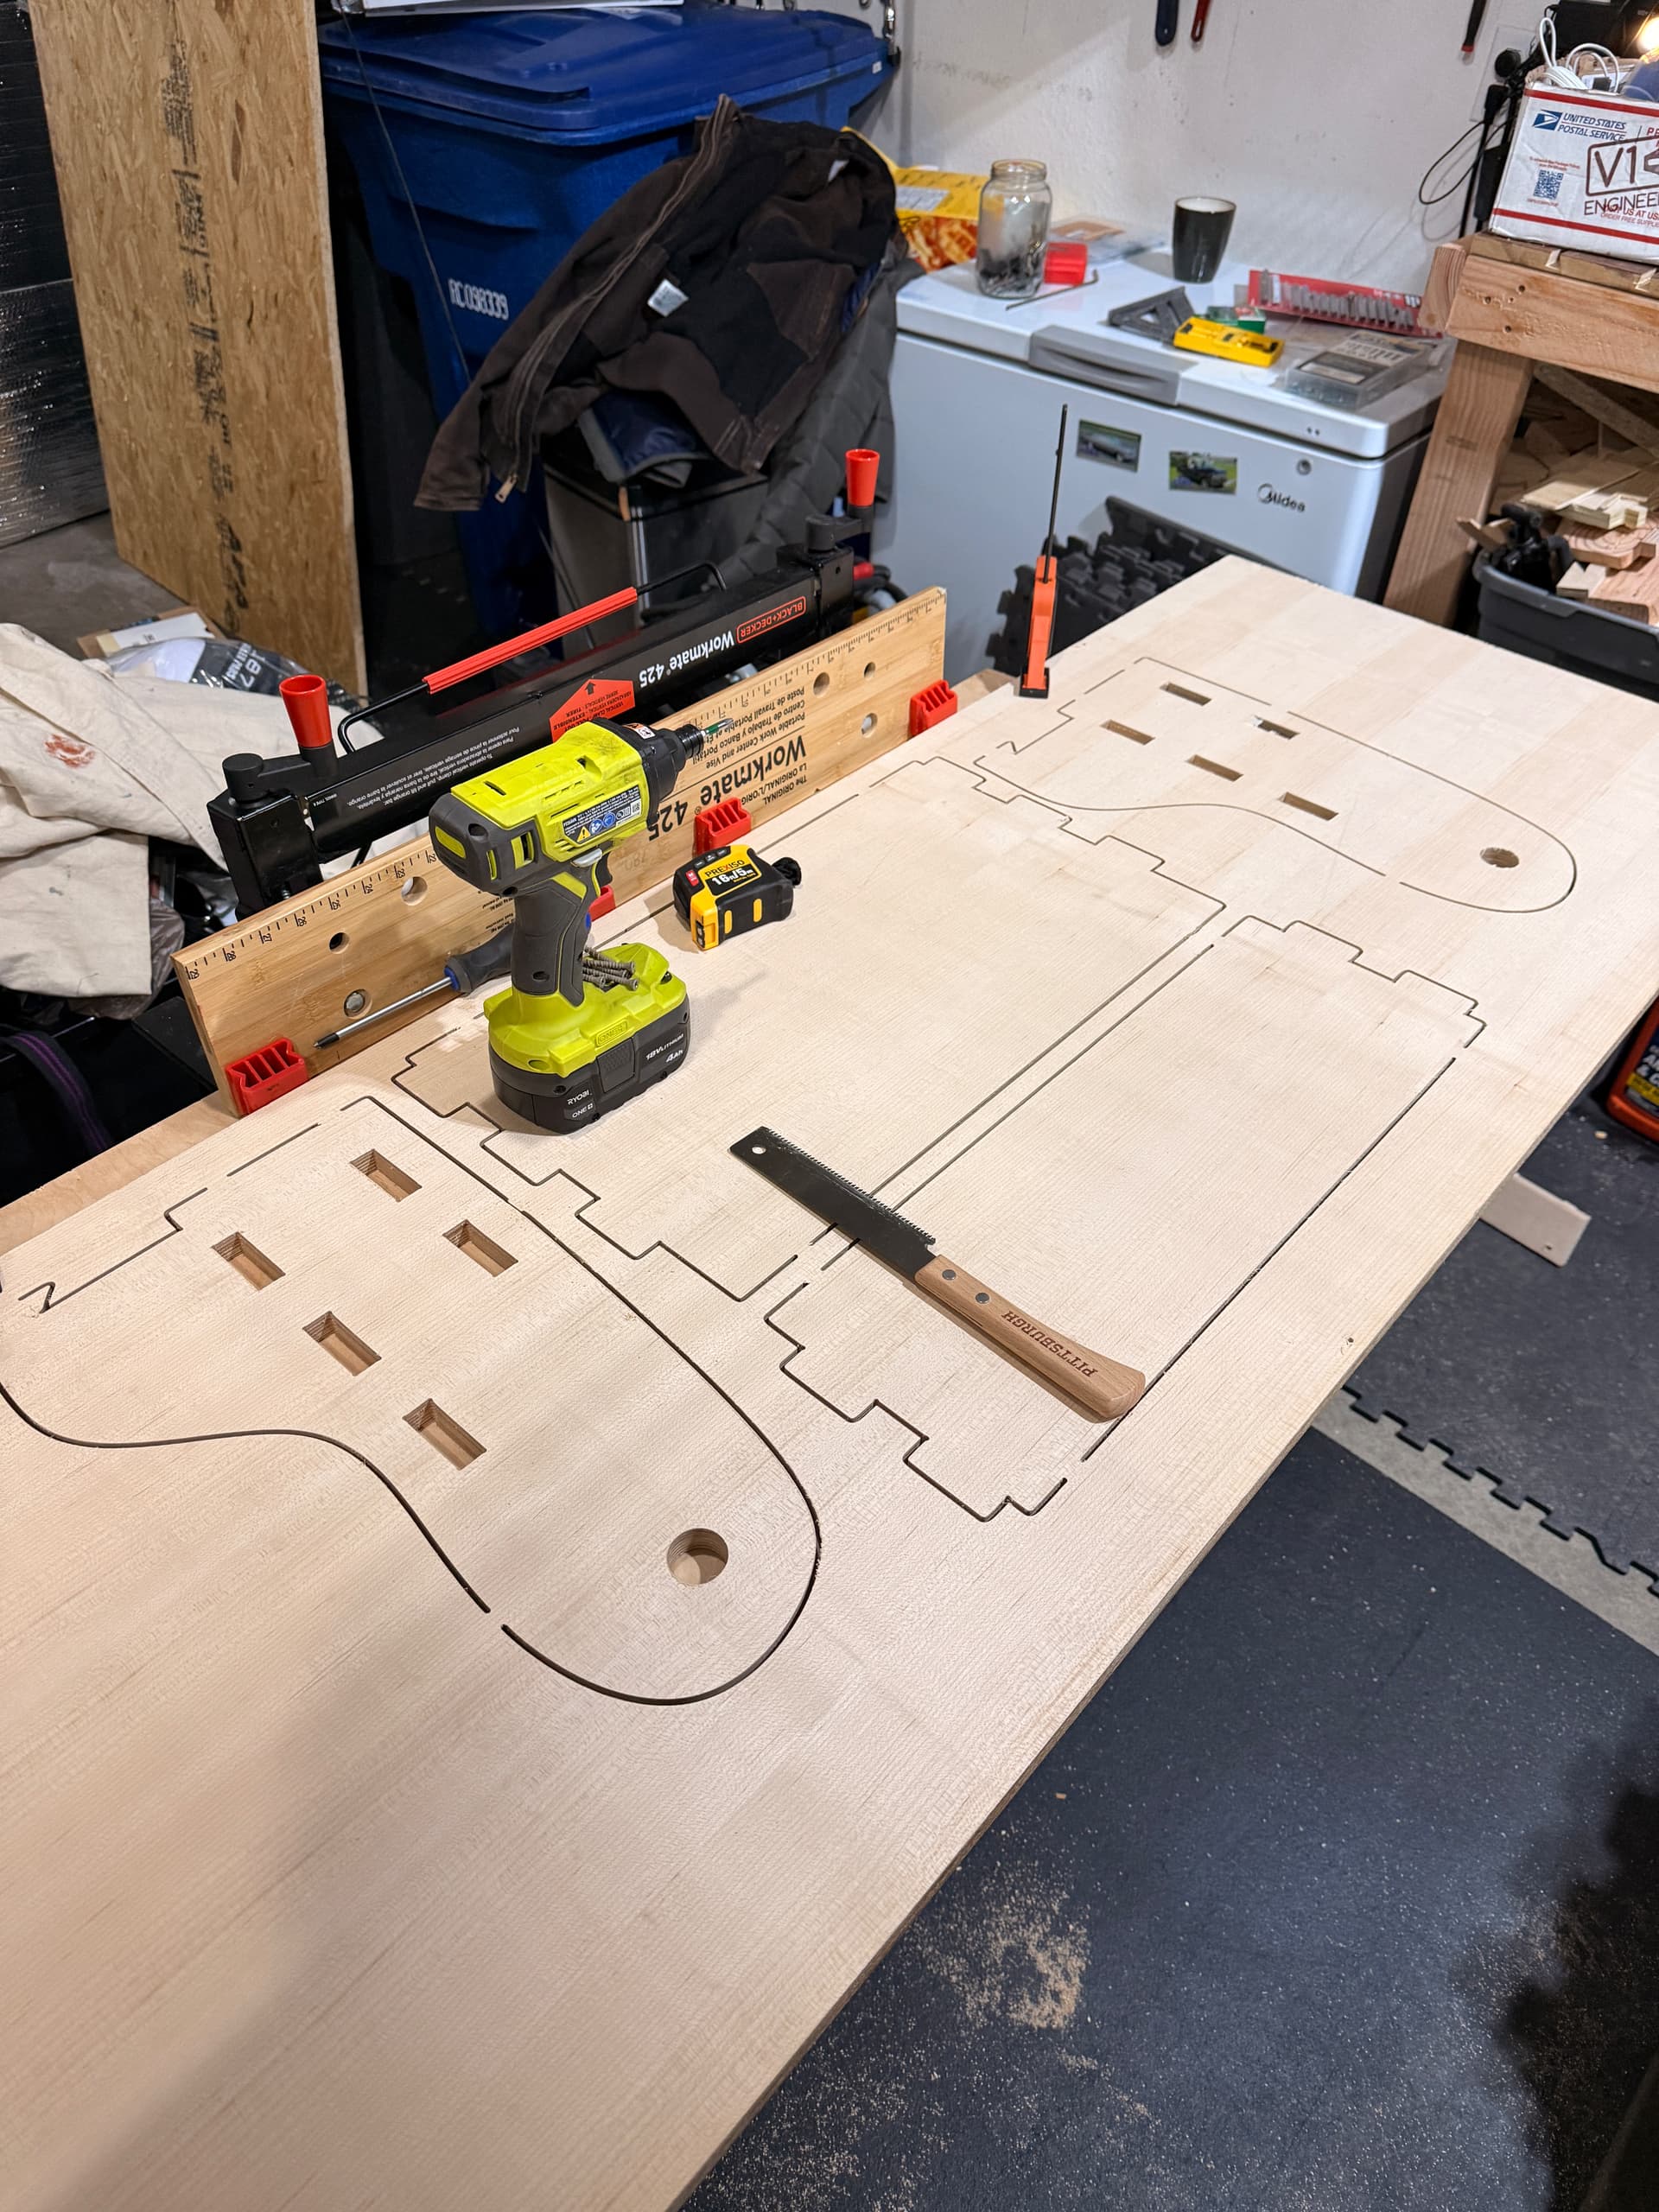
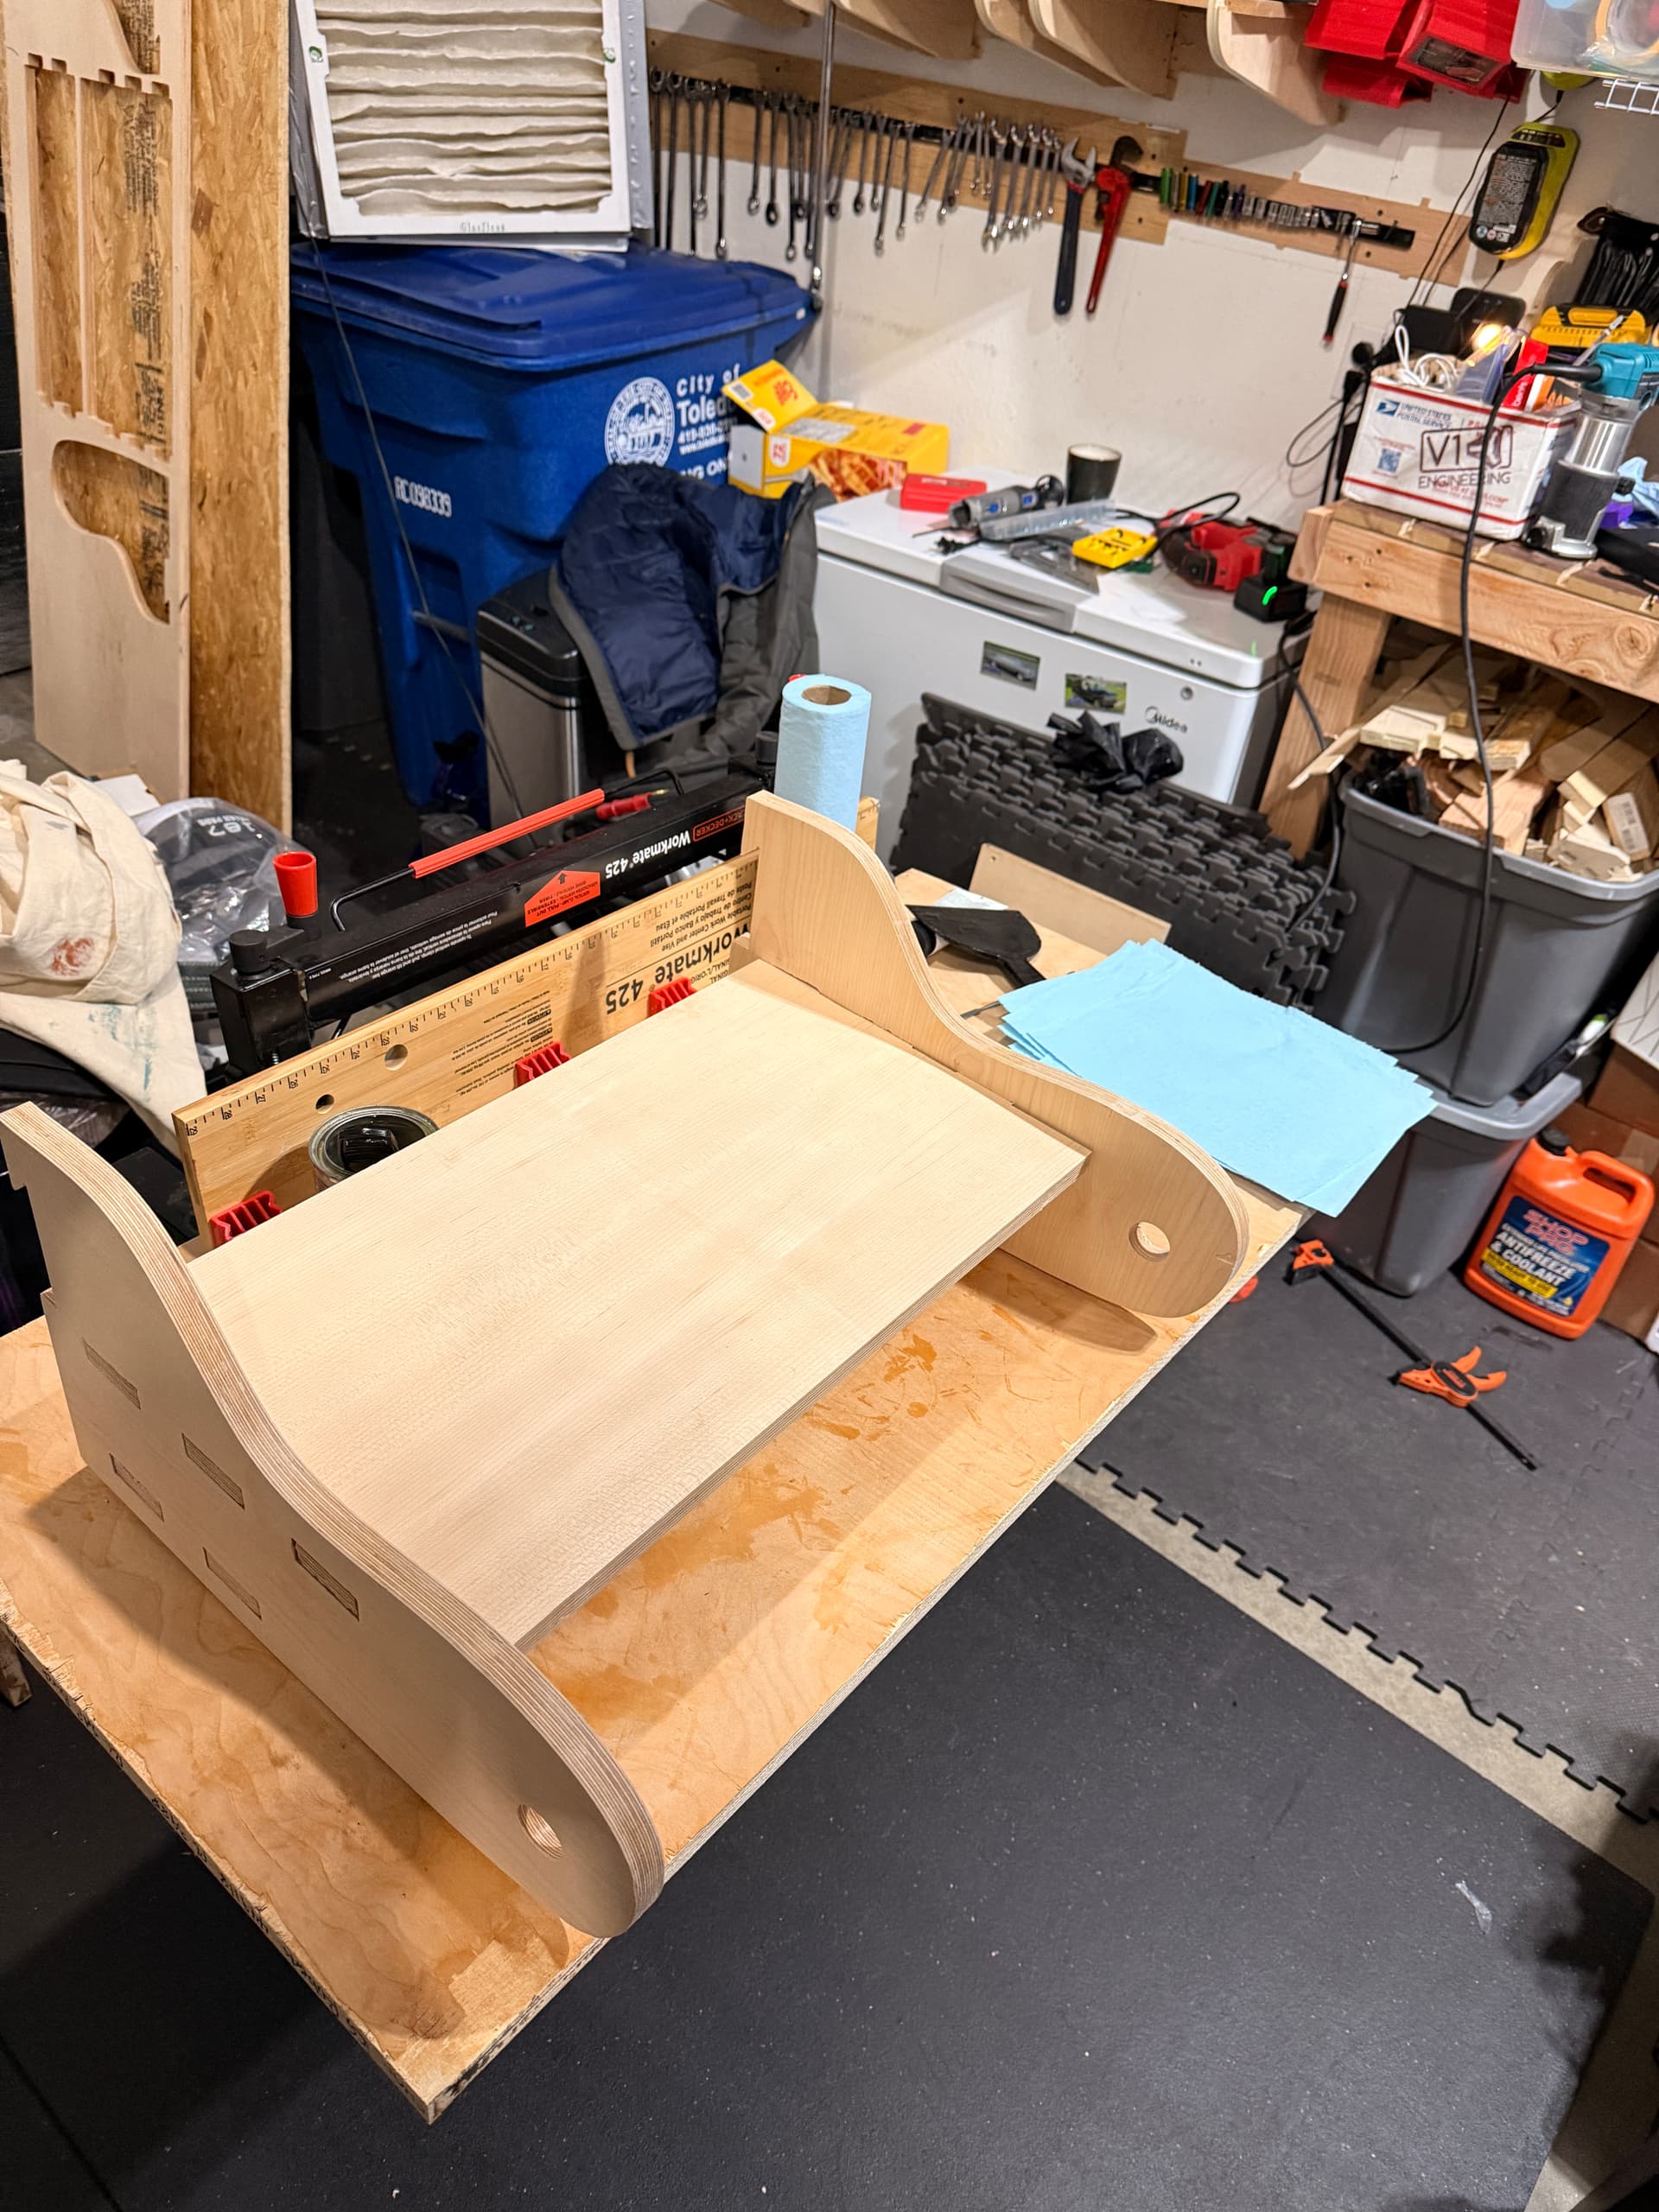
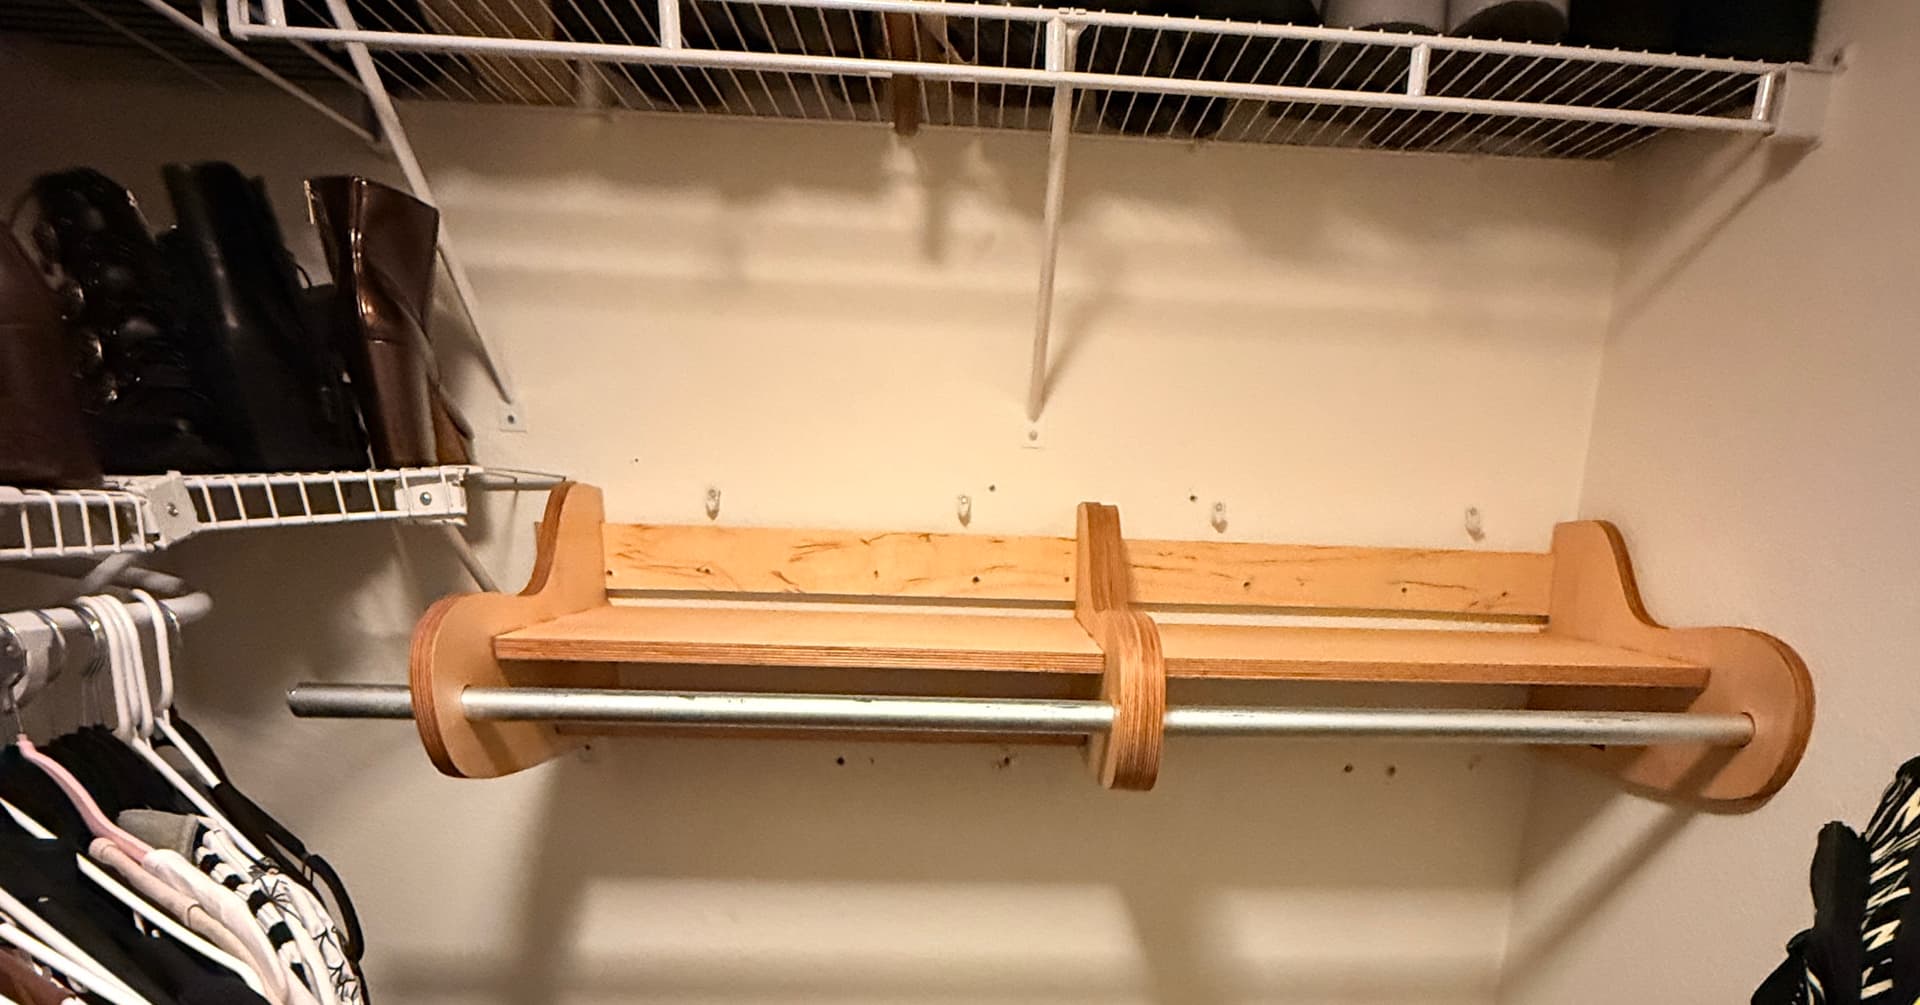
I spent my long weekend making a set of closet shelves for my wife. We have those white wire shelves which are fine, but this one section had too much hanging from it and ripped out of the wall. Those wire shelves are only held in with drywall anchors and nails, not even screws lol.
New shelves are 3/4” BB and French cleated to a plywood cleat, drilled into 3 studs with 3”(I think?) long construction screws. Clothes hanging pole is leftover EMT from the LR4 build. Pics at the end!
I did notice a lot of chatter during machining, and the dimensions of the mortise/tenons were off, despite my using a finishing pass. I “fixed” it by trimming down the tenons with a router by hand. Upon further review, I saw my lower tool mount is cracked.. when I went to print a new one, I noticed the print profile available on Maker World is set to 2 walls and 15% infill for everything. So I’m pretty sure I printed everything with those settings, since the LR4 was my first foray into 3DP ![]() also the plate for the core is even named something like “infill is set per the docs” so I assumed that meant it was already set up, as other print profiles typically are on MW.
also the plate for the core is even named something like “infill is set per the docs” so I assumed that meant it was already set up, as other print profiles typically are on MW.
I printed a new core over night with 3 walls, 30% cubic infill, and it feels way heavier than the core I’m using now.. the lack of infill would certainly explain why I keep stripping the nut holders despite my absolute best efforts not to. I’ve been meaning to do a rebuild as a full sheet machine, so if I have to do a complete rebuild with everything re-printed, then so be it ![]() I’ll probably start up a separate build thread when the time comes, but I am excited to see how much more enjoyable the process is now that I know enough to be dangerous lol.
I’ll probably start up a separate build thread when the time comes, but I am excited to see how much more enjoyable the process is now that I know enough to be dangerous lol.
Anyways pics of the closet shelves!
10 Likes
Looks really nice. I have never tired the French Cleat for over 40 years but that was for a Walnut Wall mounted cabinet made old school method.
I am especially interested in the desk which was posted for the grandkids.
3 Likes
Great job!
2 Likes
Thanks for the reminder on the desk, I need to make a post with the details! I should be able to get it done this week, I got it on my list now ![]()
2 Likes
Just checked via Bambu slicer, previous core was 326 g, current core at proper settings is 500 g (65% heavier)! I finally got the new core and tool mounts (also printed correctly this time), my god it’s a whole new machine haha. I ordered a new roll of purple (Inland PLA) so I can print the rest of this thing and do it all the right way. Going purple for main stuff and bone white for accents ![]()
@CABix I got the build thread for the desk here: Floating desk and shelves
3 Likes