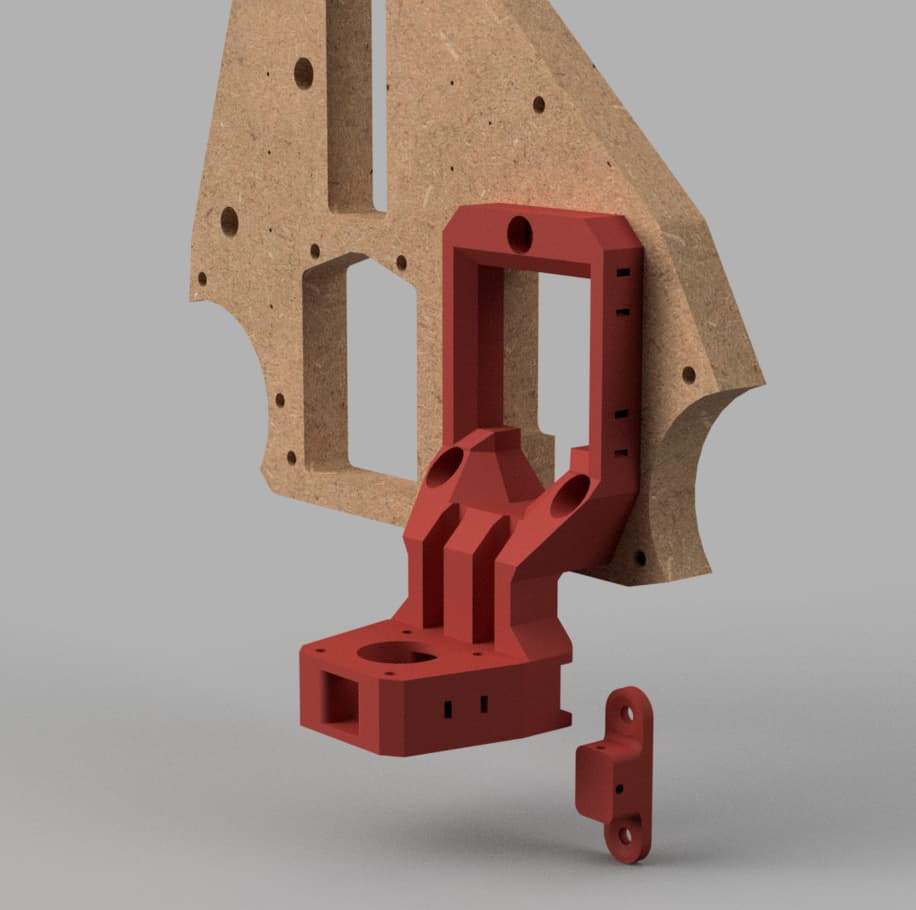
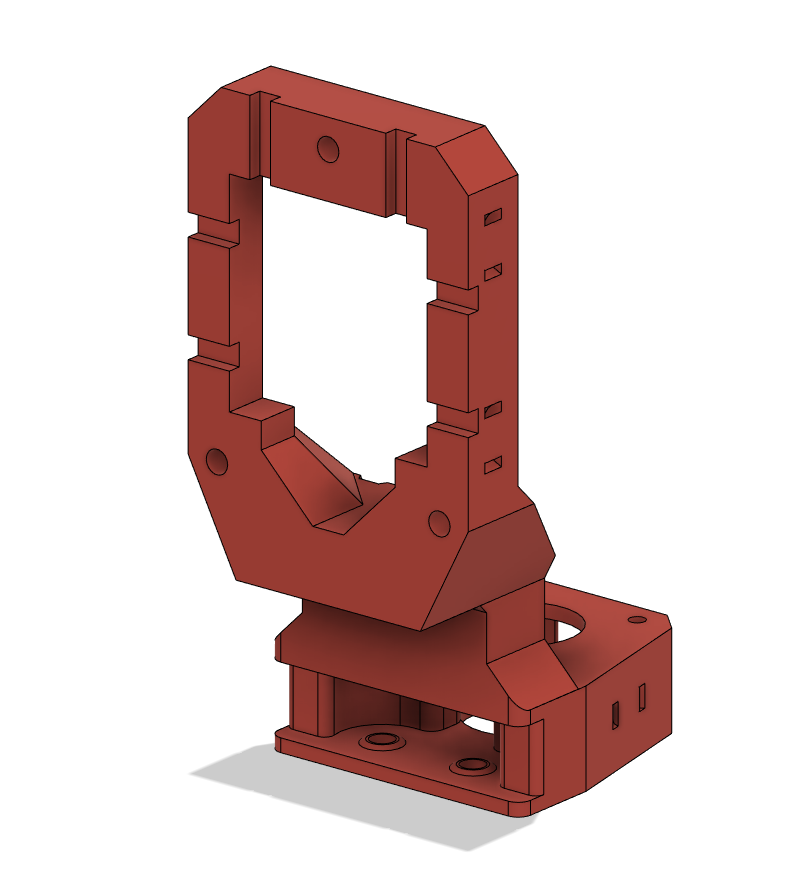
The motor mount has been in use for the past 2-3 monthes on my LR3 though, so it’s been tested, and works well
It’s still missing the belt retainer blocks, though (hence the WIP) I have something in mind but it’s not designed/tested yet
In the meantime, you can use the blocks from the v1 (Printables)
I’m following this thread with great anticipation. I have a couple of questions:
Can this be used on the YMax (rail) side of the build as well? (At first glance it seems like it might be possible)
Is it possible for you to make a minor mod to include a set of channels near the top of the vertical columns for the Z Endstop wiring to pass between the mount and the YZ Plate? (Similar to the grooves in Ryan’s original motor mounts, but on the sides, rather than the top) I want to route the wires against the YZ Plate rather than going over the outside of the motor mount, and I don’t have the skills to attempt this mod myself. (Edit - I see that you have simply drilled anothr hole in your YZ Plate for the endstop wiring. I’m using a printed plate, but will be changing it out for aluminum in the future, so I can probably live with messy wiring until then)
What is the nature of the changes on the belt retainer, and is it near completion? (I’m wondering if it is worth waiting a bit or whether to just go with those from v1)
Do you see any advantages or disadvantages to eliminate the large hole in the YZ Plate where the original motor mount used to sit? I was thinking to make my future aluminum plate without that hole.
This should work, but I never tested it, and the height below the side plate for the belt might not be low enough
Also, this would require hat your table is exactly the same width along the whole length, and that your rail is perfectly parrallel to the edge. Adding spacers or making a thicker version might be a good idea to give you a bit of slack…
I Can share the f3d file for those tweaks
I didn’t even start on it yet… lots of things get in the way lately…
The way I see it, obdtructing the hole will prevent dust from getting on your Y motor but it’s not necessary
Keeping the hole in the YZ plate though will let you revert to original configuration if need be, once again, costs nothing, keeps the OG build possible…
You can use Doug’s version, it has an obstruction plate and this should work just fine
Yes please. I don’t currently have Fusion 360, and FreeCAD doesn’t import f3d files, but I’ll try out the free version of F360 to make some minor tweaks.
Thanks! Can you please post it (and the f3d file above) on Printables (or send it to me via email attachment? - I can PM you the address)
I was wondering if perhaps the YZ plate might be considerably stiffer (which is a good thing, as I understand it) by eliminating this hole.