I set mine up on an angle - cut the blanks a little oversized, then cut a shallow outline to lactate them
3 Likes
Uhhhhhh, spelling.
Usually I am not one to point out spelling errors but that one’s too funny.
4 Likes
I am using VirtualBox to run Windows 10 on my 2012 MacBook and Mac mini. This allows me to run ESTLCam on my Macs.
2 Likes
I didn’t even think of that. I will try an angle.
I threw estlcam in a VM last night. I am also using parallels but with Windows 11.
Thanks everyone for all the helpful tips!
1 Like
I will check it out.
1 Like
Why I hate using mobile and spell check!! ![]()
![]()
2 Likes
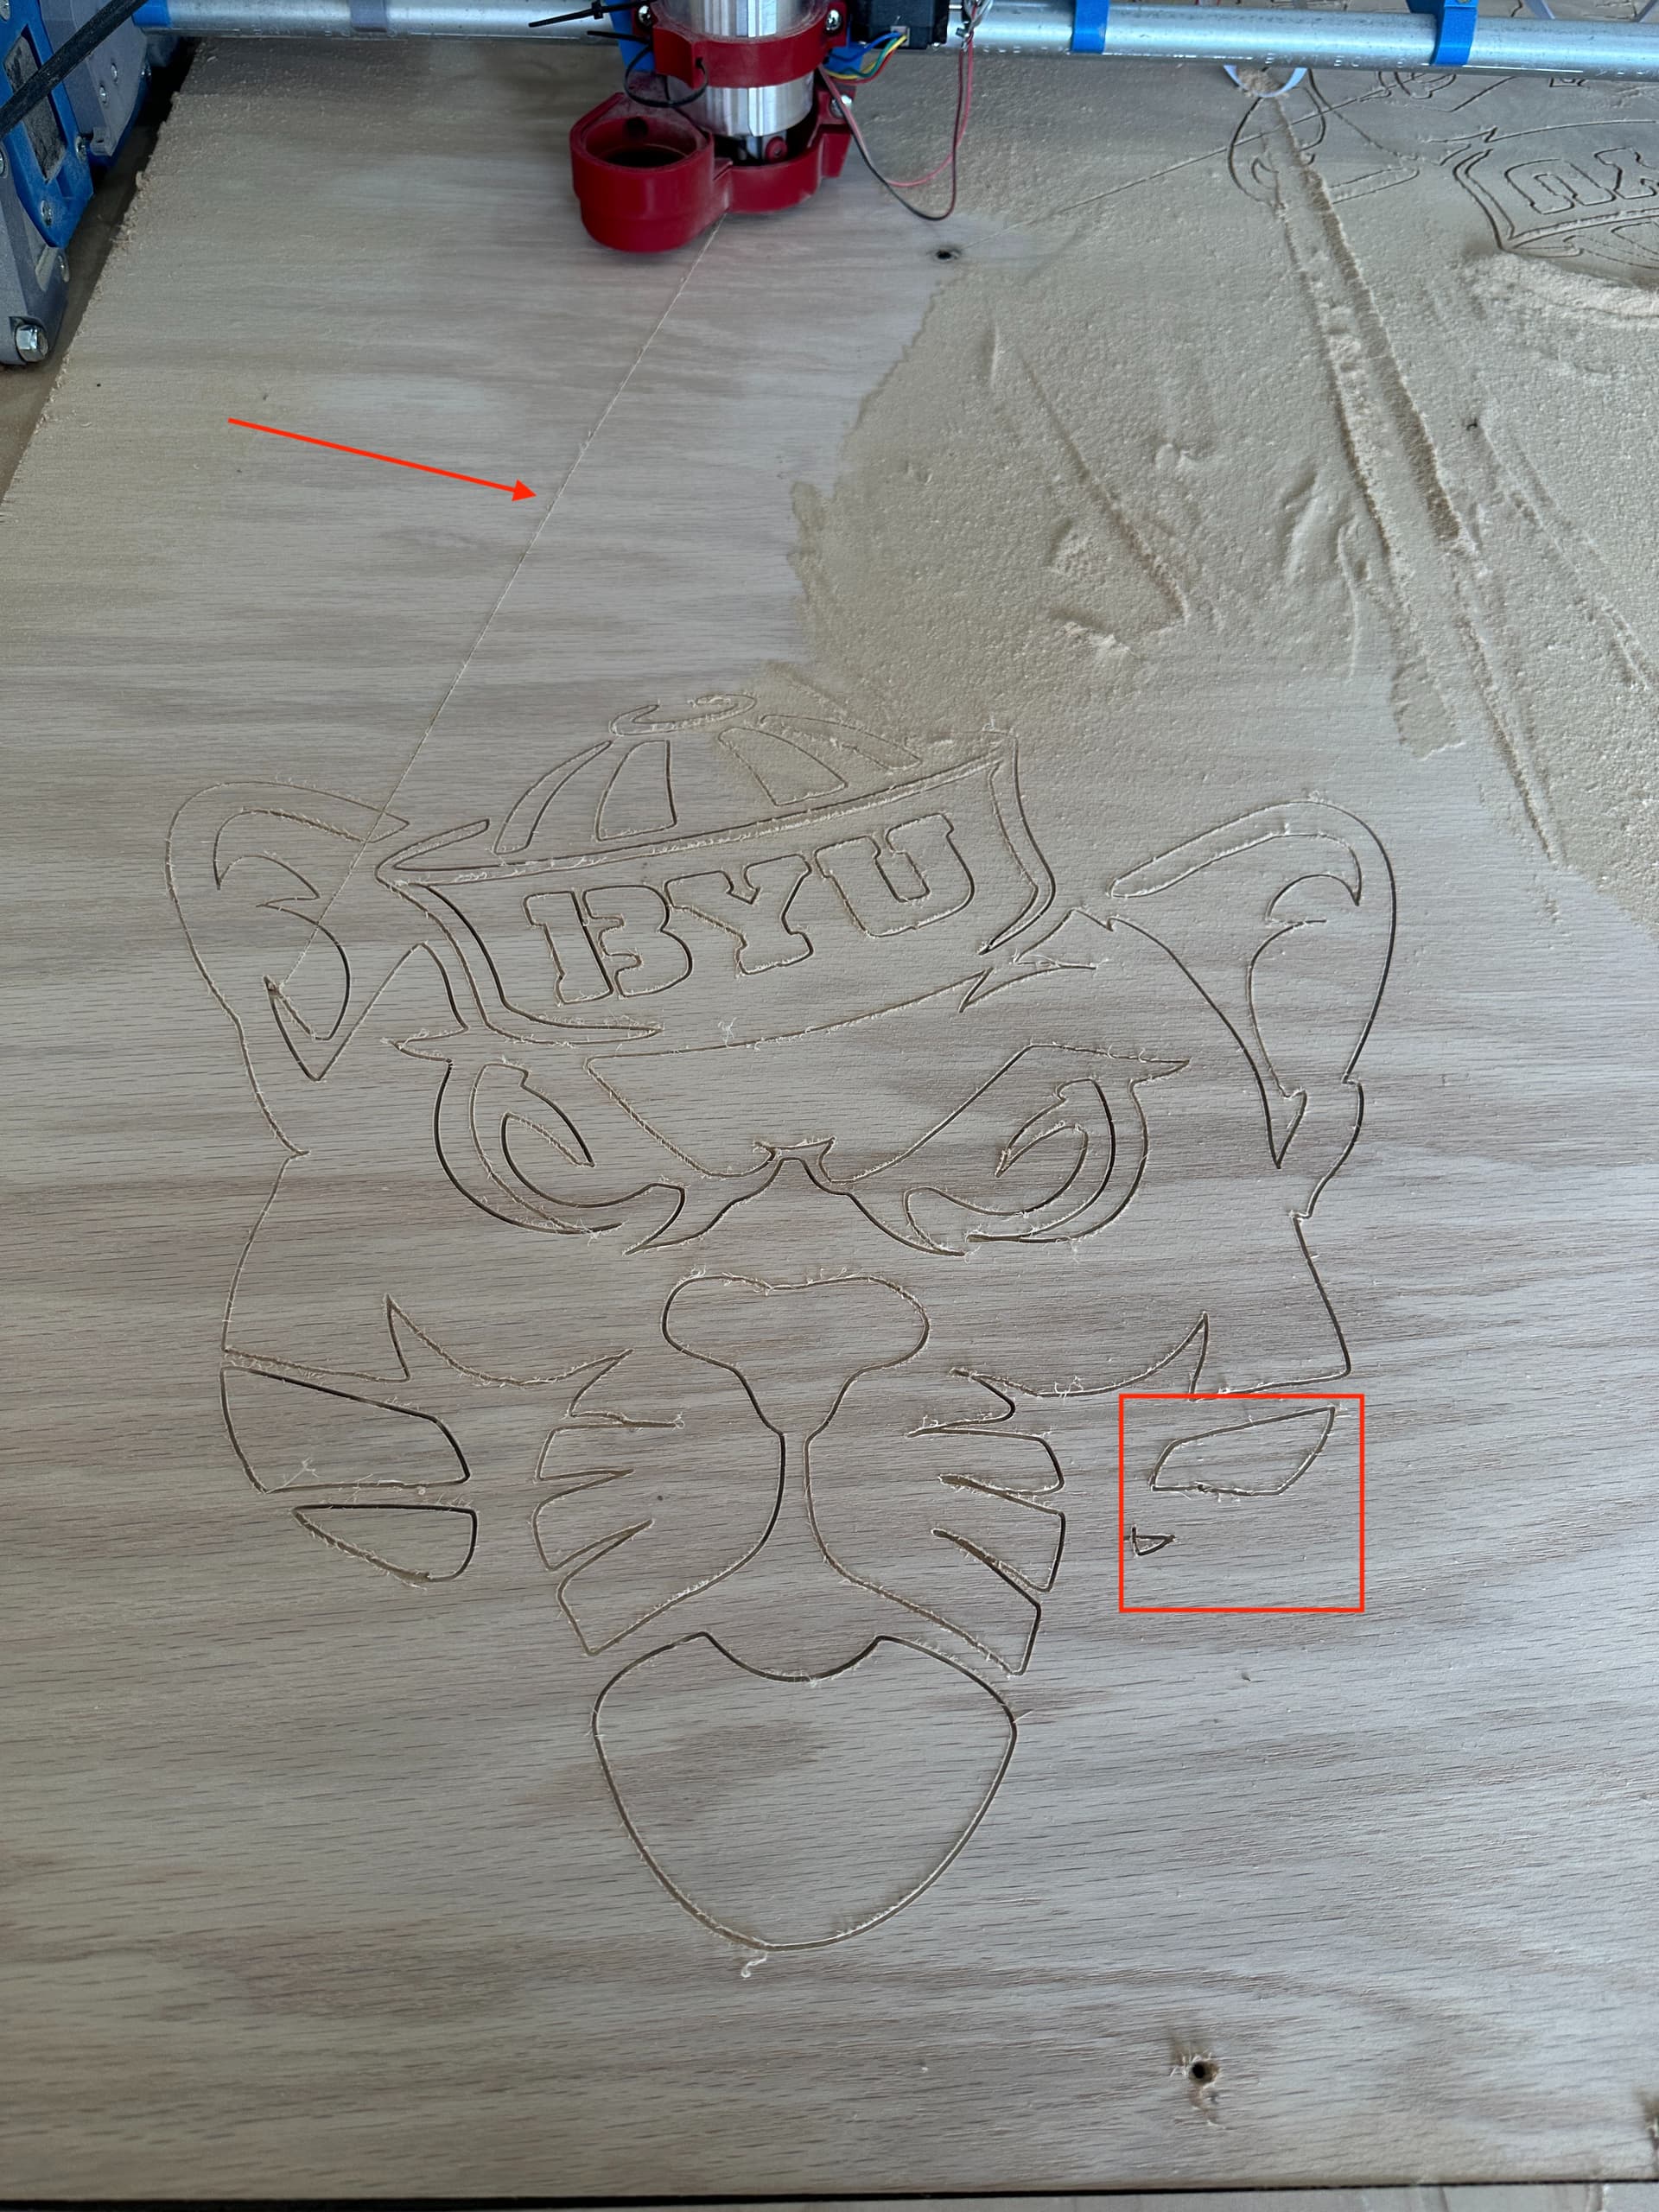
So I tried my first project. I still need to cut out the struts, but I am running into a couple of issues. See the picture…
I have also attached the gcode, estlcam files, and svg file if that helps.
Could it be I don’t have the struts yet? I am using a 20 degree v carve bit for the detail work.
I am using a pi with v1pi and octoprint for the controller with the USB cable that came with the kit.
I am also using a makita router with the speed at 6, and the feeds and speeds are 1mm per pass and 8mm/s for the red oak plywood that is 3/4 inch thick.
Thanks in advance!
LR3BYUCougar.zip (214.4 KB)
1 Like
I would assume struts, they do a majority of the stiffening. V bits actually take a very large slotting bite so that is a fairly heavy cut, at it’s deepest.
1 Like
I am only going 1.5mm deep on the detail.
Any ideas why it started veering off like it did on the top right. It didn’t raise the z axis and start cutting through the piece. Would this be the USB cable or something like that? I know it is hot in the garage, and maybe an esp32 is better than a cable? Not sure how I connect the pi to it via esp32 if I went this route. I have one in my prusa mini that I could repurpose.
1 Like
Maybe see if it has the same problem with a University of Utah logo?
All jokes aside, regarding the gouge on the top left, maybe increase the clearance plane in EstlCam to give you a little more wiggle room if the problem is the table or workpiece not being perfectly flat.
4 Likes
Thanks, I will adjust and try again
1 Like
Here is time lapse of the project Nate's Woodworking Adventures on Instagram: "Got my #v1engineering #LR3 going! It is a DIY mostly 3D printed CNC! Can’t wait to see what else it can do! #woodworking #diy #makersgonnamake #maker #byu #cosmothecougar”"
Any other tags I should be adding @vicious1 ?
3 Likes
That is pretty good. I use #V1LR3 as well. I should probably change that to V1LR…I’m still learning this stuff.
1 Like
Oh wow, nice! So what was the right cheek problem? Looks like you got it taken care of.
1 Like
I added that #V1LR3 to my video of milling aluminum. Not sure if it changed anything or not.
1 Like
Yep, that got figured out. Just finishing up painting it then I will post how it turned out. LR3 really does some amazing stuff!
Next I will cut my struts then square everything again.
2 Likes
Nice!! Like it!
Can’t believe it is almost three years ago. Anyone have any projects that they have done to re-use the hardware? Just recently been learning more Arduino stuff.
close older topics to help with spambots, and faster new user questions.