LR3 build, Colorado front range

For what its’ worth, I posted makes of this and the FluidDial pendant over on printables.

I’ve resolved to do better with posting makes of things, because of a discussion I had with an attendee at RMRRF. They asked me if I’d posted a make of the pendant design over on printables. When I said I hadn’t, they were visibly bummed out by that. They noted that if there isn’t a make, they often assume it isn’t any good or doesn’t work.

I start more projects than I finish- and I’ve also resolved to complete more.
Part of the completion, I now realize, is properly acknowledging the creators that took the time to share their designs with the world.

1 Like

Much appreciated. I think most all makers appreciate seeing the makes.

1 Like

One other input, Doug. The mounting holes for the Jackpot in your case are well sized and positioned, but one thing that could make them better is if they were fully through holes. Then I could’ve used any size M3 that I had around. (My collection of M3s seems to have way more larger sizes than smaller ones :slight_smile: )

I will bear this in mind while working on a remix!

Welcome to the NOCO LR3 club… I am SO looking forward to visiting Longmont and seeing this new machine. I’m certain that your high tech assembly experience is going make my own LR3 look like chewing gum and baling wire, so I’ll have a lot to learn by watching your progress.

Always a risk to put your email address on a public forum (there are bots that troll for that type of thing, and spam may be the least of your worries).

A Private Message (PM) is safer. Just click on the person’s name or picture/icon, the select “Message”.

1 Like

Thanks, but I’m not yet in the club. Have to get mine built first.

I’ve seen your skills with the carving exhibited at RMRRF. Those are mad skills.
I’ll just try to do a decent build of an LR3 so I can get on with the bunch of projects I want to use it for.

You can use the private messaging system (It’s under your user icon in the top right corner of the forum, where you usually see an indicator of how may reactions and replies you have)

Sage advice.
I’d edit your post and remove your email, @dwkisker . I’ve sent a PM, and I’ll follow up with an email tomorrow.

1 Like

Once you either send a private message or you know he has your email, you can edit your post and remove the email address. I join with others in suggesting that.

2 Likes

Done, although that address is actually one that is specifically used for this sort of thing.

But thanks for the info about private messaging.

1 Like

OK, I’ve “moved” my discussion of this over to here:

Jackpot now on the new,new version of the mount.
Keystone Cat5 jack fits nicely.

Will be moving on to start thinking about a table and building my X axis up.

I still have a bit of trimming of the brim I used to keep it stuck down to the glass bed on my FFCP.
But the Keystone jack printed nicely and fits perfectly.

4 Likes

That looks great. I like the idea of keystone jacks. You can get quite a few different types. But I bet the ethernet will be the most useful.

1 Like

They are also pretty easy to crimp once you have the tool.

2 Likes

OK, so a question for everyone about US EMT.

I was mocking up a tiny section of EMT and checking the fit of the printed braces, and comparing the nut arrangement between stock and Doug’s captive nut version.

I realized that there was a significant weight difference in the two random off-cuts that I grabbed for that activity… see below.

The EMT on the left came from a batch bought at the local blue big box home improvement store. The EMT on the right came from the local orange big box home improvement store.

The tubing on the left has a notably thicker wall.
Who’d have thought?

Has anyone else noticed this difference?

1 Like

I have not seen that before. Put the thicker one on the bottom rail.

If you follow the sequence for putting on the strut plates, the nuts are very easy to get to, then the last ones are captive.

2 Likes

Both Lowes and HD here (in lakewood/golden) sold the same brand last time I checked. I assumed it was some sort of regional/commodity thing.

1 Like

OK, well it’s time to get a core printed.

The core is too big for the FFCPs.

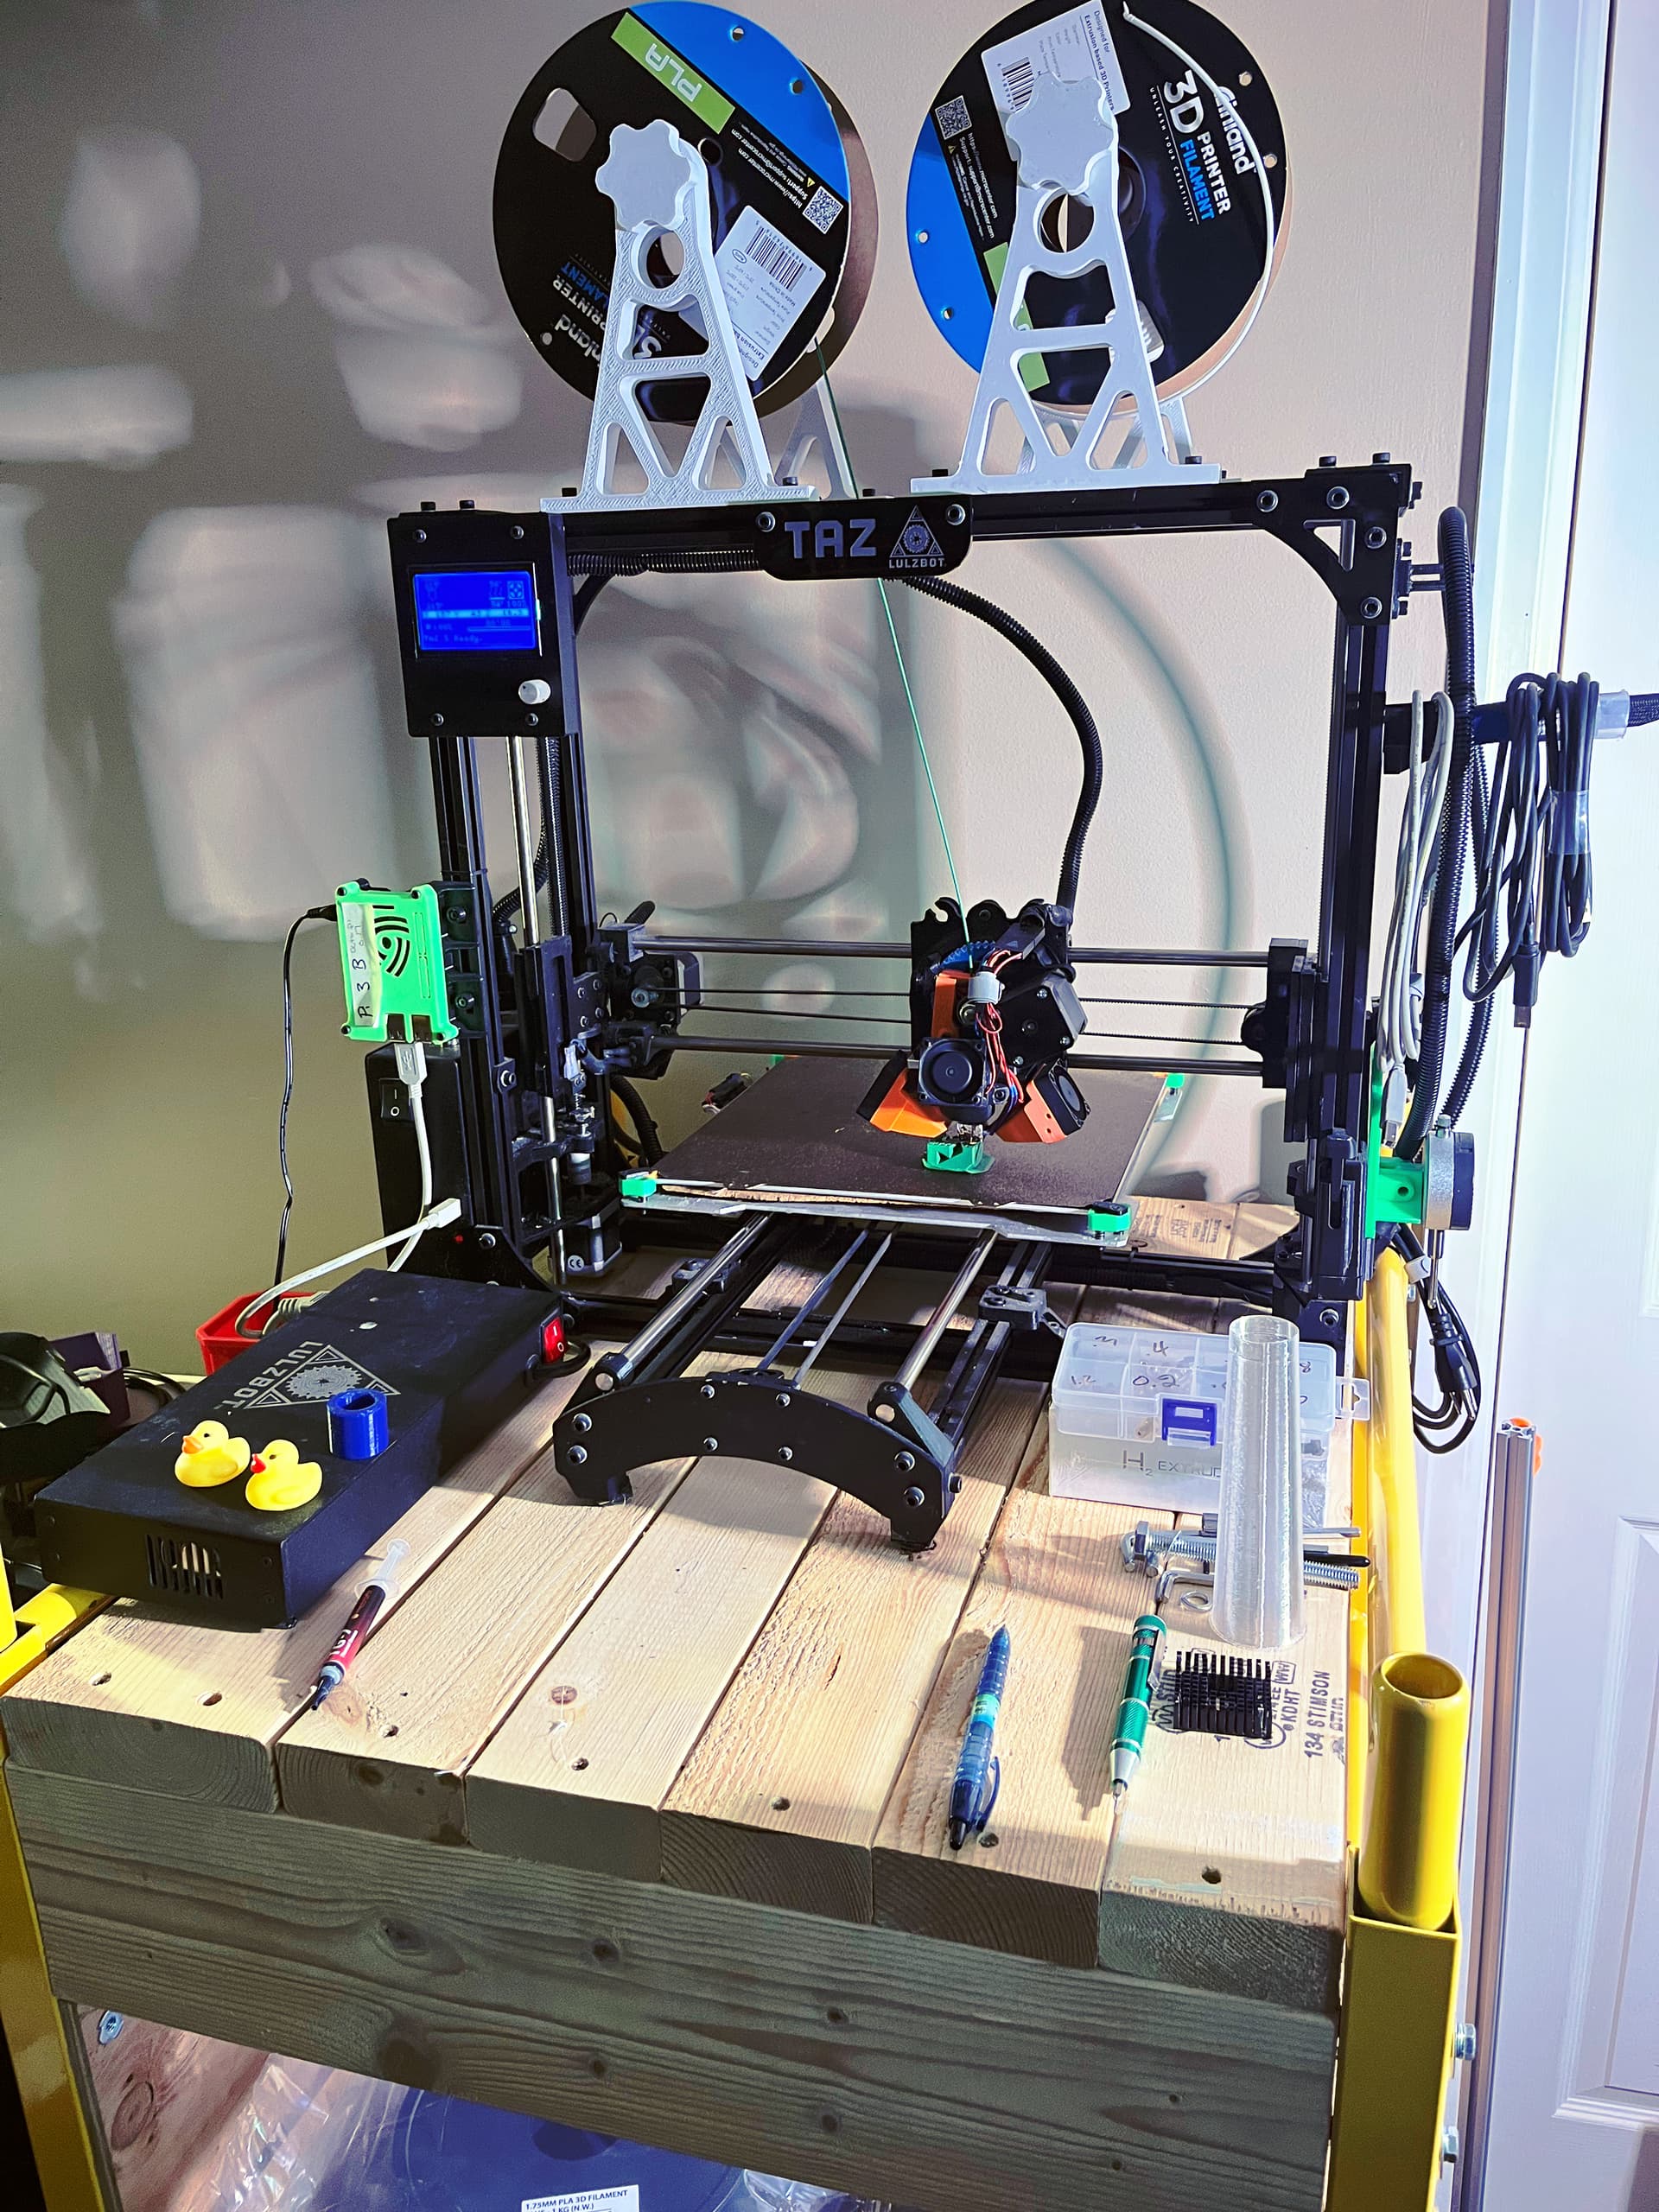
So, time to dust off the TAZ5.

I had put a giant 1.2mm nozzle on the Taz because I was printing some special conical tree starting tubes for a local nursery. Interesting story if anyone wants to hear it.

You can kinda see one that failed sitting on the table.

Single wall, ,vase mode print 1.4mm thick tglase material. I printed a hundred of these, saved them an immense amount of money for their little science project.

At any rate, had to swap back to a .6 nozzle, do some bed leveling, and a little tuning.
You can see over on the right I have a tool head that has a digital dial indicator. Incredibly useful for leveling an old dinosaur that only has a single bed level microswitch and 4-point heated bed mount.
It’s really easy to swap tool heads out on the TAZ. One thing I’ve always liked about this printer.

I’ve been using PrusaSlicer and CURA with the TAZ and streaming with one of my OctoPrint Pi 3s.
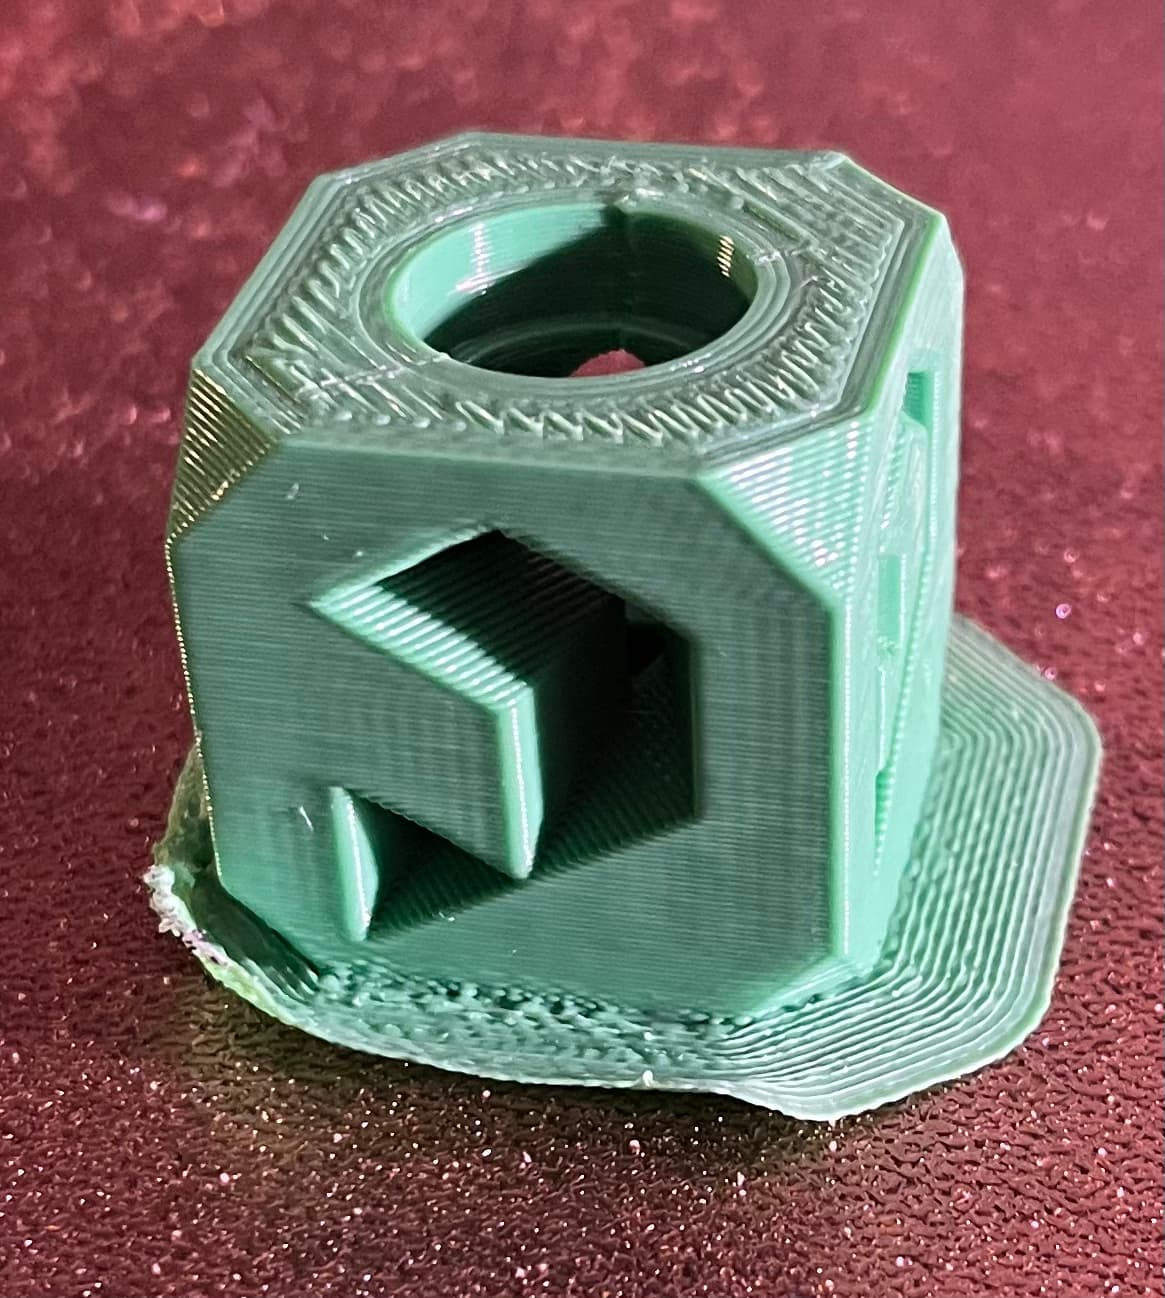
I updated PrusaSlicer on my Linux box and poof- no more profle. So Cura it is for now. .3mm layer height.

That kludge table is made using parts of baker scaffolding- more about that later when I talk table.

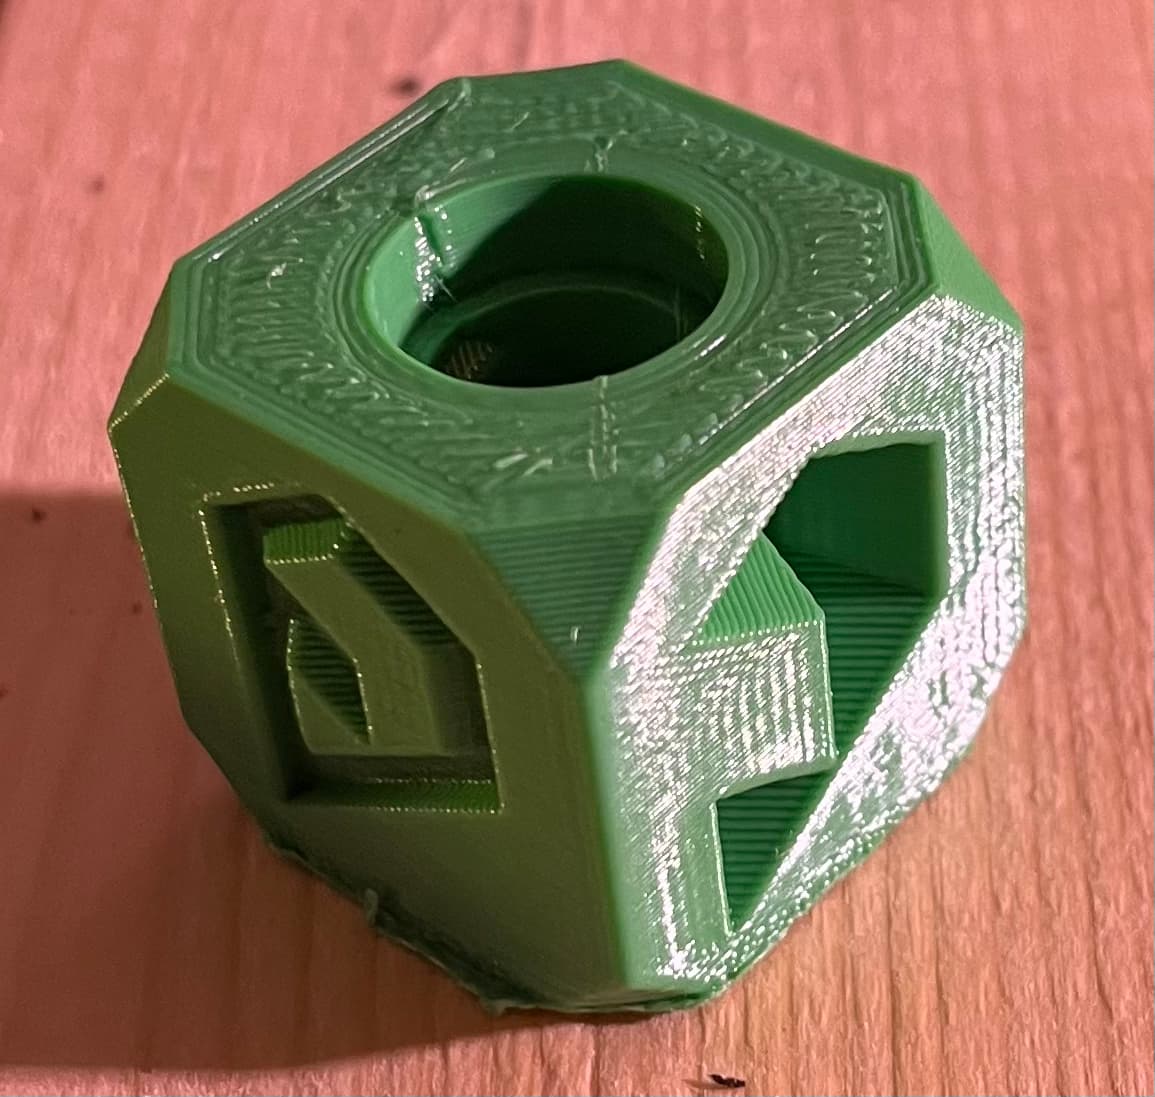
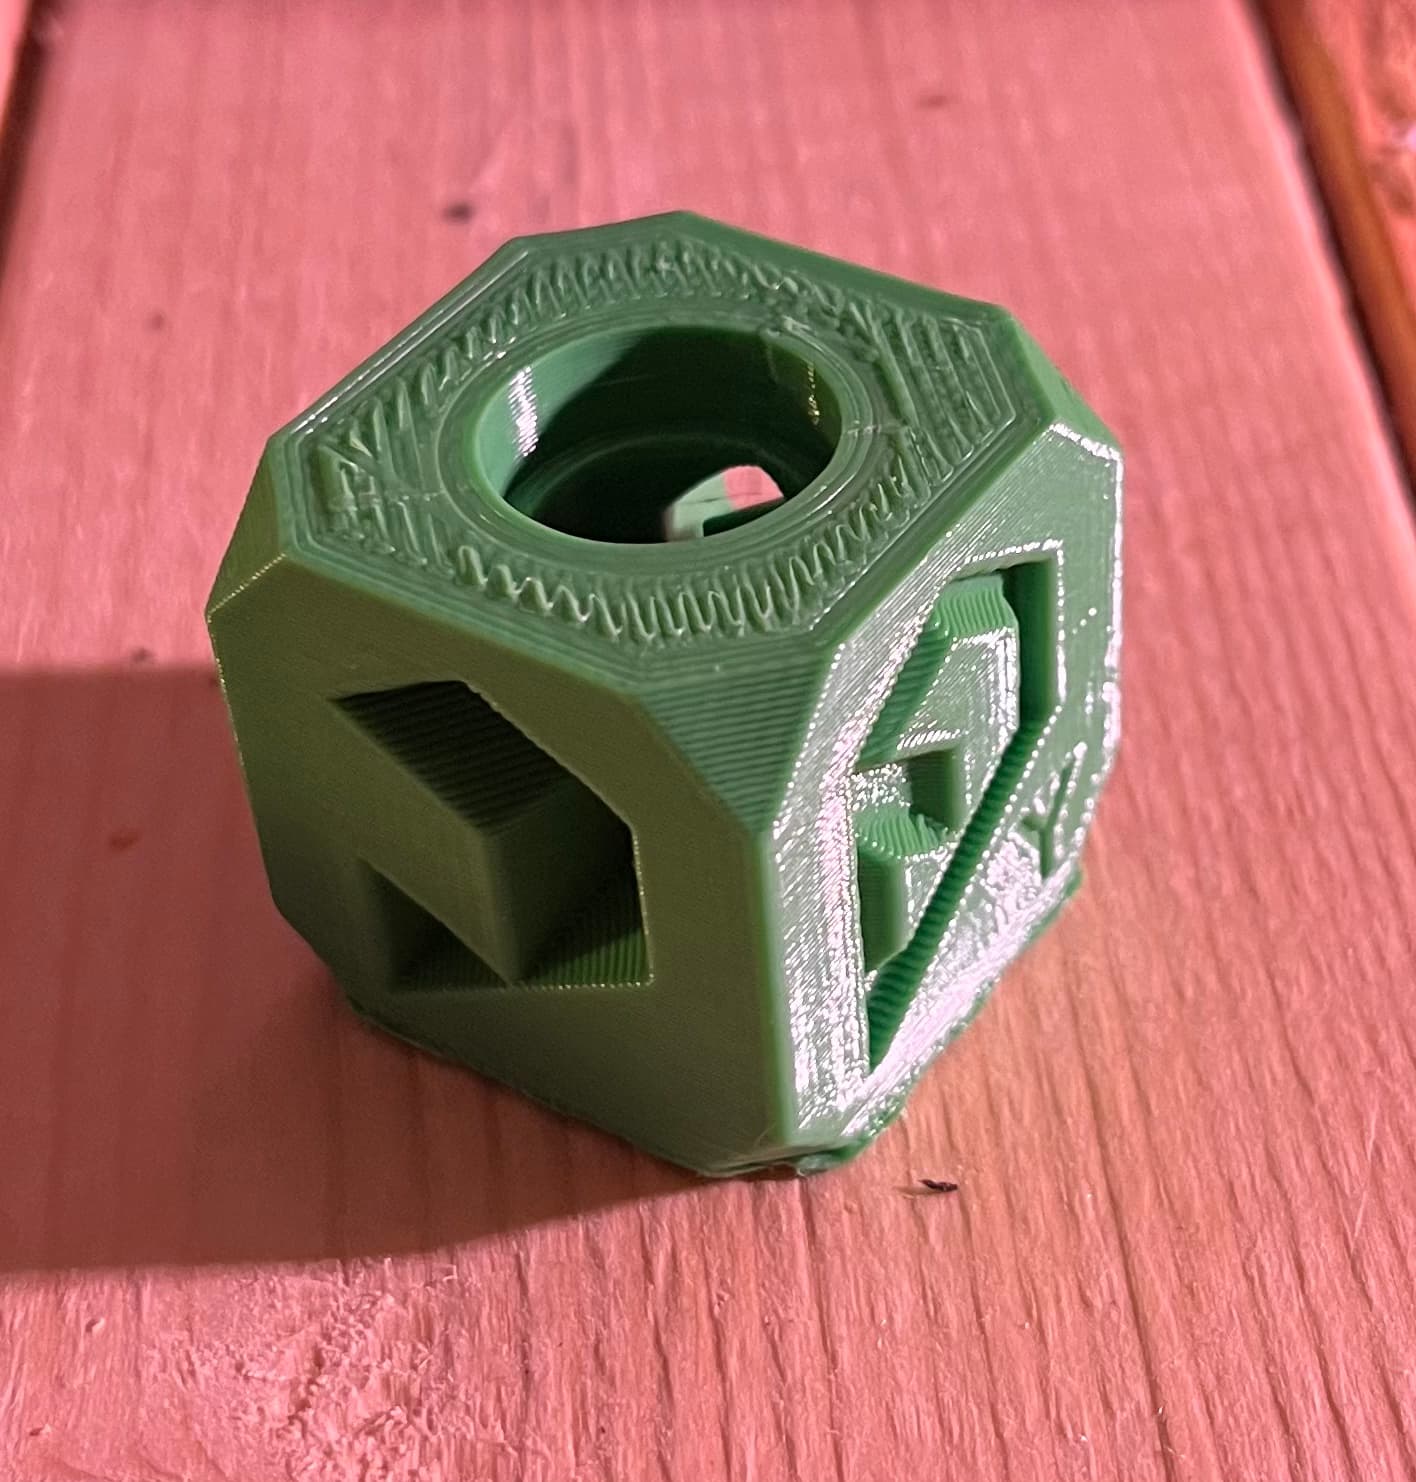
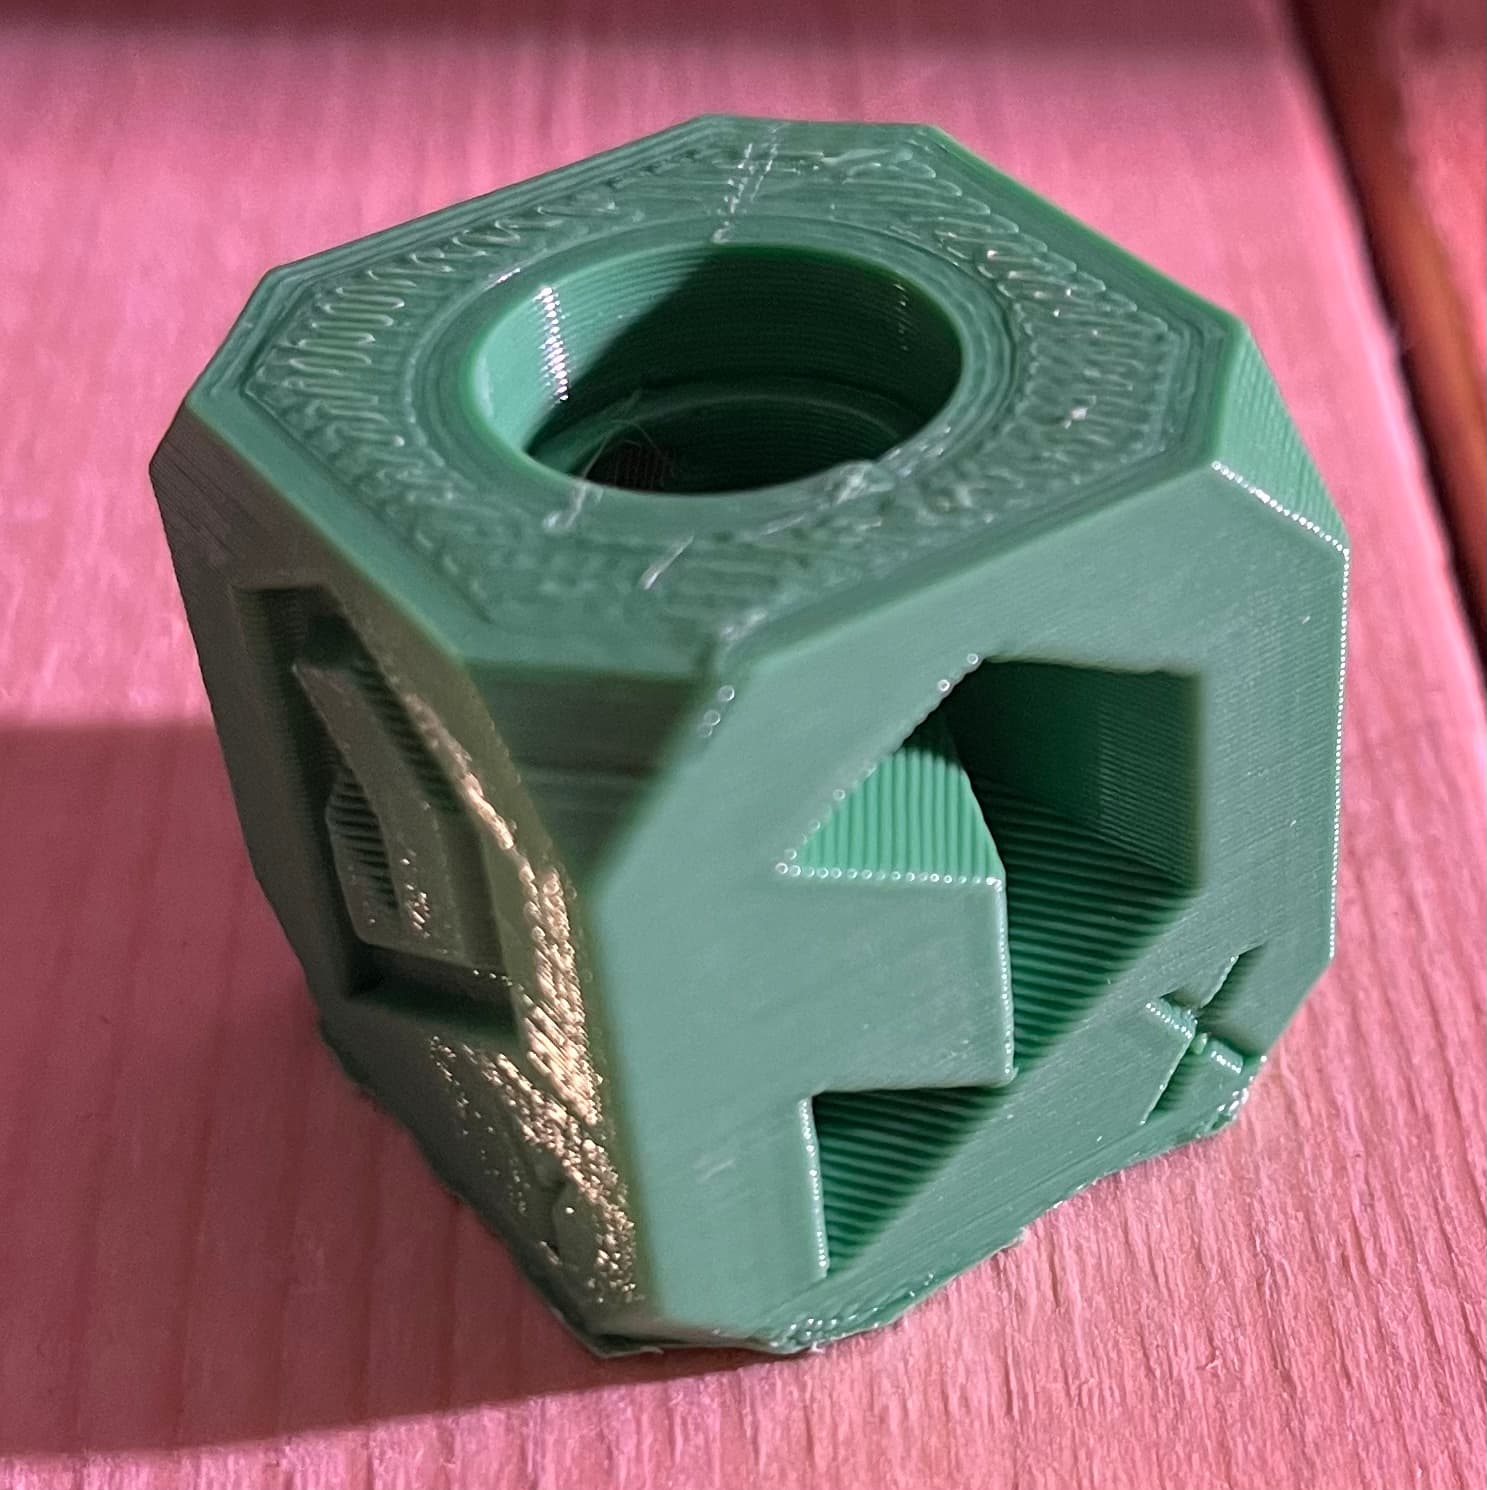
First test calibration cube- bad first layer height, slightly overextruding. First layer and first layer brim speeds way faster than my textured PEI likes it. So the brim curled up. The test cube turned out OK, overhangs and all but the internal heavy bridge test- which was not great.
(The bridge wasn’t terrible, just not great)

Honestly, not bad for a 9 year old printer with many thousands of hours on it.
Rambo board, Latest marlin (DrunkenOctopus), my own hack job of a tool head and a PEI magnetic bed.

If the re-print of the calibration cube looks a bit better I’m going to go for the core.
Cura is projecting an 11 hour print to knock out a core. Octoprint usually runs just a bit longer.
ArcWelder makes Octoprint only slightly slower at runtime compared to the Cura prediction.

3 Likes

Cool!

Actually the left one looks like it hasn’t been deburred and has been cut with a tubing cutter. I think if you deburr it you may find them closer to the same size.

Mike

That’s a great observation, and it is true that the left one is cut and not deburred. That does make it look even thicker by comparison.

The weight of the left hand EMT is easily double that of the right. I’ll eventually deburr it and get a measurment to share. There’s no doubt that it is thicker wall, and not just a little bit thicker.

I’ve already decided that I’m going to figure out how to get another like it to be the bottom tube on my X axis.

1 Like