LR3 80mm Water Cooled Spindle

Moved models with edits to printables, will update photos here in the future.

https://www.printables.com/model/364258-lr-v3-80mm-spindle-mount

https://www.printables.com/social/372132-jrs/about

1 Like

Looks great!

Do you have limit switches for homing the gantry? It appears that the connection point for the dust collection hose is to the left of the spindle. This could be a problem for homing the X axis.

I have TMC2209(s) and use sensorless homing.

I will take a look at the geometry and see how it interferes.

Have you tested the accuracy of that? The only reason I bother with extra wires, endstops, and screws is that is posted as pretty poor accuracy. It is fine for getting a 3D printer near home, but we rely on more accuracy doing things like tool changes, squaring and leveling.

@Ryan, I have limit switches for the Z Axis, but not for X or Y. In my previous build I had a lot of trouble with the limit switches and “mechanical” failures, it was one of the reasons I moved to sensor-less homing.

I did spend some time adjusting the bump sensitivity, and homing speed, and I have not noticed any issues with accuracy.

To be fair, I have only used my CNC to cutout individual wood shapes, where accuracy / repeatability is not required. Think 40 little Christmas tree ornaments…where they do not have to be perfectly the same.

Part of the reason for the spindle upgrade was to attempt more difficult projects where this might be a factor.

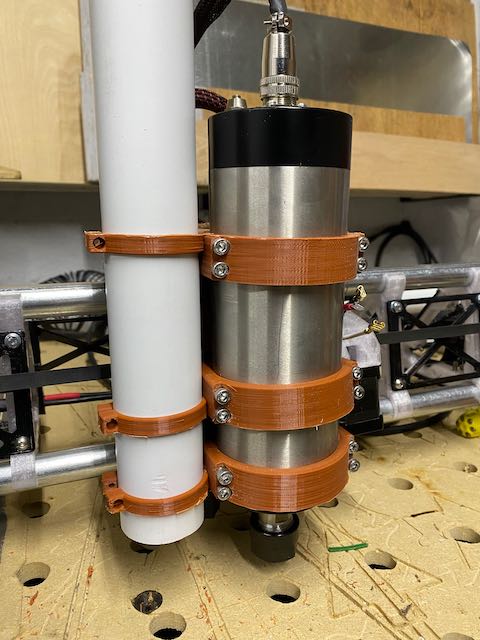
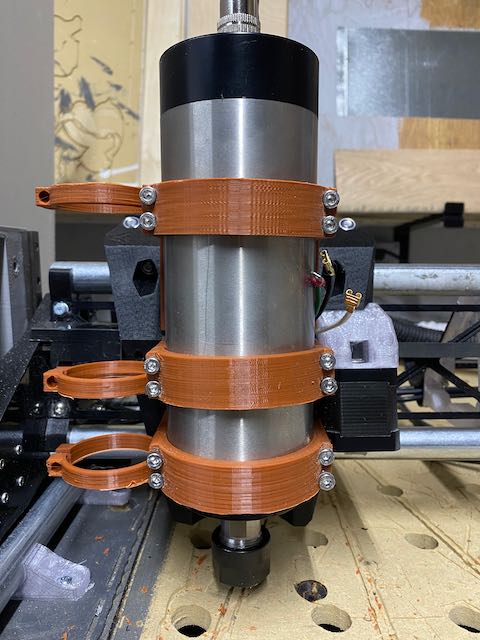
The vacuum mount definitely interferes with the endstop. I will see if I can rework the mid vacuum mount to possibly integrate the endstop, Using that extra hole to help support everything can’t hurt, and I think it would be better even for the sensorless homing to bump a more solid part rather than the flimsy vacuum clip.

I have the spindle mounting hardware installed now, and I hope to be able to spin up on the weekend. So far I am happy with the solution, but I may have to resort to leveraging the upper bearing bolts as studs to lock the top mount down.


Just be sure to cut that white pipe all the way down to just above the second clamp. Do not clamp it to the top of your router. That is begging for issues. The biggest weakness is torsion and you are adding a breaker bar to it that way.

1 Like

Just be sure to cut that white pipe all the way down to just above the second clamp.

@vicious1, I just want to be sure I understand, the vacuum pipe could be a big lever, so don’t tie it to the top bracket. Do you think it would it be OK to zip-tie it to the core after the bend?

I think he means to cut here and then attach the hose because it is flexible and does not act as a lever:

7a9e46f6bdbbbb673d7375eafe903844ce8c36aa_2_375x500

1 Like

Exactly!

1 Like

@Tokoloshe, @vicious1, Thank you so much for the help. In the end, I ended up using Philipp’s first suggestion as the solution. Vacuum hose / clamps also adjusted.

Looks like this, maybe today I will finish wiring the spindle up!

3 Likes

Perfection! Much more ideal that way. If you can anchor it to the top of the Core it will assure there are minimal forces on the cutter. What size hose it that and do you know where you got it?

1 Like

Wooo, a solution. :tada: Hope it works. :sweat_smile:

@vicious1, bought it off Amazon, so far back in my history I can’t find the actual description. Try searching for;

2.25 inch Diameter by 10 foot Long PVC Dust / Debris Collection Hose

The lightweight/ thin wall PVC is standard 2” central vac piping. Almost free for a five foot section. Add a couple 90’ elbows at Home Depot. I have fixed (Velcro) another tube at the 50% point on the backside with an upward facing 90 and out the left side of the table with a downward facing 90. Just use white vinyl tape to hold everything together as with my dust collection system so is is easily repositioned.

I will share some pictures in a new thread.

BTW was using this with the Makita mount and some spacers with the previous spindle and your brackets for that worked great.

Following this one. I have a spindle in a box for another project that I’m not sure I’ll ever get to. Can’t wait to see how it works for you.

1 Like

Coolant and VFD connected to AC power. All wires and plumbing routed in the gantry.

Uploading: ECB376BA-CD07-477F-9F35-8F5ED1D9577E.jpeg…]()

Need to figure out a way to post my spin-up video. Spindle is working but it is so heavy that even with anti backlash hardware on the Z axis the whole gantry “crashes” when there is no power to the drivers.

Water cooled spindle is quieter than the heater in my garage.

I thought I would include an image of the old DC spindle for comparison.

Apple Watch measures 79-80dB noise at 1Meter.

1 Like

The gantry coming down should be pretty normal, also happens with the Primo and the Makita.

1 Like

Yup. See my ending gcode. I pause at the top of the last cut. Resume when I get my hands on it, it stays powered and I then runs a park gcode to move it home and set itself down. Have a look at the video I put up this morning to see exactly how I do it.

So after spending the day with the spindle yesterday, there were a couple minor things that needed to be updated before I reprint with the original secondary colour.

Revised and simplified mounting parts

Today I will spend my time back on the electronics, I have just about given up on the SKR2…and might swap back SKR PRO 1.2 from the Primo build. (I was hoping to use it for a VORON 2.4 Project).

2 Likes