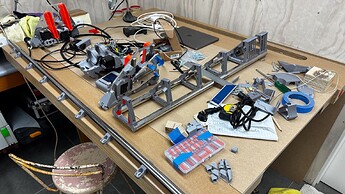
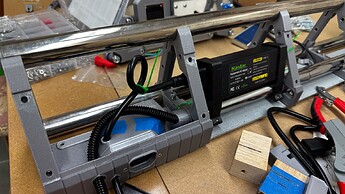
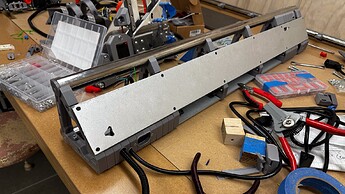
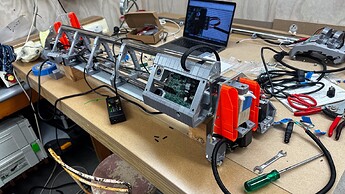
Wow, that loosk AWESOME!
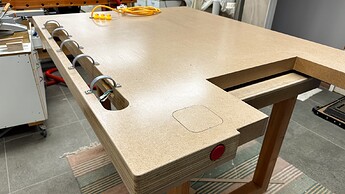
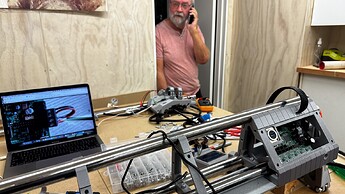
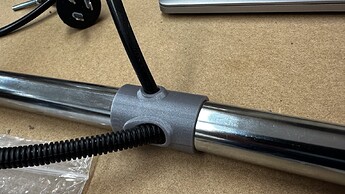
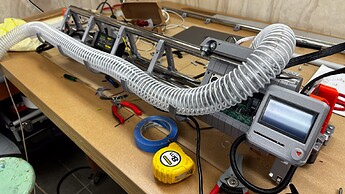
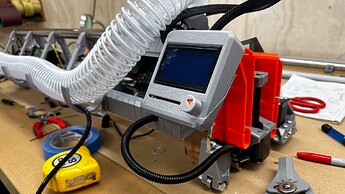
I did manage to sneak away every couple of hours yesterday, and the bottom of the table is done, and it looks quite nice fora an underside. The wiring is now complete, although we have an electrician mate popping in tomorrow to check the 240v stuff (it’s illegal to touch in Aus without a licence) so that’s why the plug is still hanging out of its recess. I have no idea what I was thinking when I made that access panel so small, but it only took a few choice words to get the E-Stop Switch in.
There’s a lot of detail here that most won’t need, but think of it as my 47% scale aeroplane model just a lot simpler!
Whatever, I’m going to turn it over shortly and unless I’m mistaken that’s one more duck in the row.
Then I shall go and repeat some of those words that worked with the E-Stop and hope they scare the drawer into some sort of submission.
I continue to be in awe of your artistry, your attention to detail, and your superb workmanship.
Kudos, well done sir!
Thank-you, let’s see how the next week or so pans out!!
Perhaps it’s appropriate after words like “artistry” have been used, to bring everyone down to earth here! ![]()
Reasons for building a CNC machine - #1001
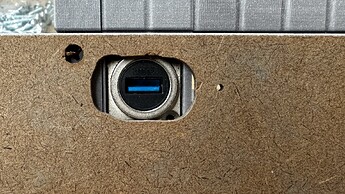
This is how far out 0.7 mm is when you hand drill the end holes in the strut plates in exactly the wrong place! It’s nothing a slightly oversized hole and a teeny bit of file work hasn’t already fixed, but still…
Reasons for building a CNC machine - #1002
This is what happens when you have a nice printed template, you are using a trim router, holding it carefully aligned with your right hand and switch it on at the top with your left, not realising that your stupid, non-thinking little finger has curled itself inside the safety cover and jams itself against the collet nut. Undeterred, you figure “it’s just a flesh wound” and carry on, oblivious to the fact that you’ve ruined your template.
Reasons for building a CNC machine - #1003
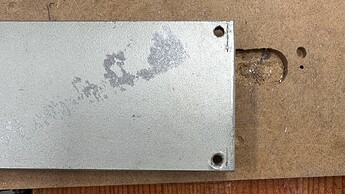
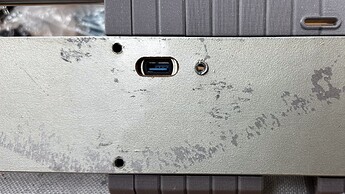
It’s only a “proof of concept” of course, but the best you can do with the template is an 8mm slot and you want it to be six so that it will like up with the end stop Plug and make a little sideways “!” . It will look better in a 3mm plate with a much smaller slot of course.
By now you will have noticed the other elephant in the room - this is the finish you get when you mix an undercoat, silver coat and clear coat, none of which are compatible with each other. I’ll strip the faces, give them a quick squirt of silver and call them done for the short term.
Surprisingly little progress today. Well it was surprising to me, but everything is happening in its own time. Getting the table to its final location was a task in itself, but it’s there, the top is not screwed to the base yet in case it needs to be inverted for electrical inspection. All the bits are ready to assemble though.
My electrician mate is coming for lunch tomorrow so we should be good to go after he’s ticked the 240 box. The 240V stuff is in place, although I am going to shorten the length of the power pack cable to take that loop out of it. All these bits will be visible when the trussed strut turns up in the distant future
Speaking of distant future, I did get the paint scraped off then the hardboard sanded bare and a couple of seal coats of silver to get me by till then.
Today’s news is that some cupboards I ordered as a flat pack will arrive on Wednesday. No biggie, but they are the first time I’ve ever spent money on a fixture for the workshop and they’ll replace some that have served me wall, scrounged over thirty years ago, and I just couldn’t muster the energy to rebuild them. Now I’m going to have to muster the energy to fit everything in the new cupboards I guess, so that will no doubt be my delay for this week!
I dismantled most of the 240v stuff today because that was the only way we could get access to check it thoroughly, and while we know each other very well, my electrician mate and I, I was glad to have a second set of eyes to check the terminal crimping and junctions one by one, and was very reassured when there wasn’t a problem.
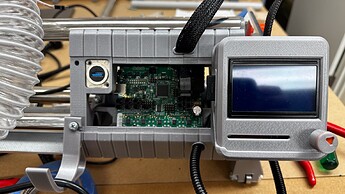
Finally things are going in for the second-last time. It would be nice if it was the last, but that decision to mount the board in the beam is biting me big time in terms of fiddliness as I knew it would, and it will have to be semi-dismantled to make the final connections but it does look as though it was meant to be there thus far, and I am starting to think I may pull it off.
Tomorrow - it’s assemble cupboards day, followed by “empty old cupboards and fit out new ones” so unless I wake entirely energised, this could be the state of play till week’s end.
The internet has evidence that a licensed electrician was in the same room at least!
I knew that cardboard cutout would come in handy, carpool lanes, someone always watching your back, and “proof” of electricians.
Cracked me up. ![]()
Oh dear, I don’t know if it’s because I’ve got one ear listening for a truck delivering a couple of hundred kilos of cupboard parts, or if I’m so close to the finish I can smell it and I don’t want the journey to end, but I’ve spent the morning seemingly avoiding ways to make progress, by designing obscure parts to conceal things that won’t even be seen when it’s all bolted together.
Perhaps it’s time to call some sort of help line! ![]()
See what I mean?
I got tired of knocking the thing off it’s chocks, so swapped out the z-screws for a bit of conduit.
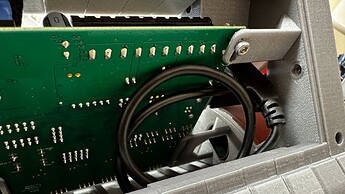
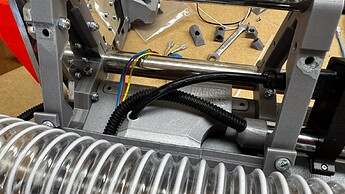
This is just about as tight as I can make stuff - the usb cord has a paper width between each end! Man this is squeezy, but very satisfying.
Checking everything goes where it’s supposed to and my cable runs are long enough (they aren’t).
Glad I didn’t run with the board in it’s usual spot!
A slight revision needed at the 240v end to fit all of the cables into the conduit cap.
Can anyone tell me how to power up an led from the Rambo board to light it up? Asking for a friend who might want to put a window in there eventually - no prizes for guessing where that idea came from…
If you recompile the Marlin firmware there is a section at the end of the config file to use “neo pixels” = rgb leds. That is pretty easy or you can just plug then onto a fan port and trigger a relay of some sort for single color leds.
Well there are some deal breakers right there - my friend will get back to you in due course! ![]()
Not so fast. I was scared to death of it when I started my printer build. Now I’m in here making all kinds of changes like its nothing. And I actually understand about 1/4 of it now LOL. Just dip your toes in the water… it wont hurt!
I think I understand about 1/4 of it too… but I really want to get this thing working before I break it.
Yes, I will take a bit of a dive into all of that, but my head is spinning at the moment as I think about how many times I have to pull it all apart and put it together again before that happens!
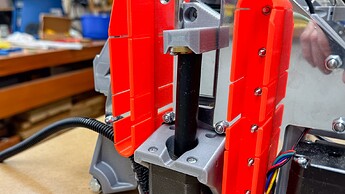
Right now, the cupboard delivery has been delayed till tomorrow so I’m taking it apart to glue the tool mount screws into the back of the core to make changing out the tool and vac mount easier!
Despite all that you’ve seen above, I’m loathe to make changes to operational things (vac collection) until I have the original version to use as a base line - I don’t actually like to fix things that aren’t broken (but I’ll make 'em fancy! ![]() )
)
I get that completely. I have 2 LR3s in the garage right now torn apart LOL. One a lot more than the other thankfully. Took by full sheet one down because I couldn’t keep the core tight/correct and thought it was a bad print on the core/braces. Then the same thing happened to my smaller one. Took just the core off of it today to find a HUGE crack. Went over and looked at the full sheet core…yep. Crack in the same spot just not as bad. Learn from me kids… Don’t over tighten your tool mount! LOL
I don’t know if it’s just because I’m a bit pedantic but with nothing tight, everything is currently perfectly square and parallel.
Even more surprising, given some of the teething problems I’ve seen, with no tightening at all on the core there doesn’t seem to be any play at all in the bearings.
Touch wood - one tight bolt in any location can change all that!
Ahh, I’m sorry, all this business about recompiling and configs and triggering relays reminded me of an advertisement that happened after I’d been using my Mac for eleven years, and while there was a lot of confirmation bias happening at the time my mind has been unmoved after all these years.
It still pretty much sums up quite holistically, my approach to things tech. I’m not phobic, and I think I have a broad understanding of what happens in those bits stuck on those little green squares but still…
Don’t take this as preaching in any way, please take it as a huge thank-you and confirmation of my appreciation to every one of you who gets his (or her) rocks off playing with firmware and code and sys stuff so that when I turn something on (even my LR3 if I don’t touch anything) or follow some instructions, I can happily know it will just work.
Well there have been better days at the workbench! I thought I might have it all back together and tested today, after all I was barely two dozen tiny crimps away from having the wiring installed.
Not everyone likes crimping but I find it vaguely therapeutic, but after today I need some other kind of therapy.
The first half-dozen attempts were done blind, and I couldn’t figure out why I couldn’t see a thing. Turns out in the course of the last couple of days I haven’t been getting progressively more blind, which on balance is a good thing, but the transition lenses on my specs have gone all ripply and not focusable.
A trip to the optometrist later and another dozen failed crimps later I thought I’d take a bit of time out and print a bookmark for our eight year old grandson who is having a birthday shortly and I have to say that cheered me up immensely.
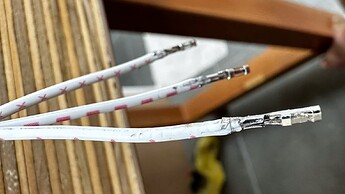
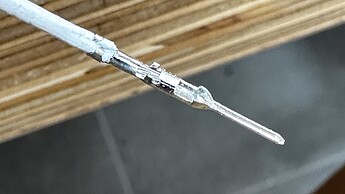
Back on the job all cheered up, it turns out my problems were many fold. Firstly I was using the wrong crimping tool so there was that.
Then I discovered that the new wires have heavier insulation than the old style, which made very gnarly crimps and worse, the final product would not fit properly inside my el-cheapo dupont housings.
Undeterred, I ignored the setting sun and shaved a bit off the insulation, then sanded them down for good measure, and finally set about crimping.
Twelve successful crimps later I went to plug 'em in, only to discover I had made female ends when I was actually supposed to be making male ones.
I know, I know… tomorrow I’ll be assembling cabinets with any luck, then off for a few days.
UGH!!
POST SCRIPT.
By sanding the insulation ends to a smaller diameter I discovered I could pull them through the wire strippers “one size up” and end up with a nice rounded insulation of exactly the correct diameter.
Now I’m a much happier person and will stay that way until the intermittent fault turns up on one I’ve crimped earlier!

Lol.
An earlier ad for the Mac (“It only has one button, so you never have to worry about pressing the wrong one”) was --to me-- offensive enough that I swore I’d never own one. Basically insinuating that I was too dumb or phobic to be able to competently use a computer with “too many buttons.”
Apple also had a big thing with the Free Software Foundation. I think at one point, part of what became the GPL had as a condition: “Do not port this software for Mac.” I think it had to do with Apple not wanting to release the dev kits for OS9, or wanting extortionist sums of money for one.
OSX almost changed my mind, but by then other considerations had come into play. The decline of the Motorola 680x0 processors, the fading away of SCSI architecture, and the freely available BSD Unix OS for x86 architecture machines, combined with the higher cost/performance ratio of the Apple products kept it as a hard sell for me.
I have recommended to people that a Mac would be a great home PC for them. I have helped people get them set up, including setting up stuff that the Apple store guys said wasn’t possible. (It isn’t using the GUI tools, but from the underlying Unix tools…) They’re good machines and generally just work, but they like things to look one certain way and are still (IMO) just a little too overbearing on their software control policies. Of course that also helps their stuff “just work” so, maybe that’s not all bad.
Anyway, side rant over…
